When you click on links to various merchants on this site and make a purchase, this can result in this site earning a commission. Affiliate programs and affiliations include, but are not limited to, the eBay Partner Network.
I have the tools, and searched and it seems like something fairly easy to do but mine won't budge, even after squeezing my hands in the back and pushing.
Tools go in fine. I think I am feeling the CCU spring getting pushed in, at least on the right side.
Pulling with the tools, the tools just slide out.
With the tools inserted ccu doesn't budge when pushed from the back.
Seems to be enough slack in the cabling for it to move at least an inch or two so that isn't the problem.
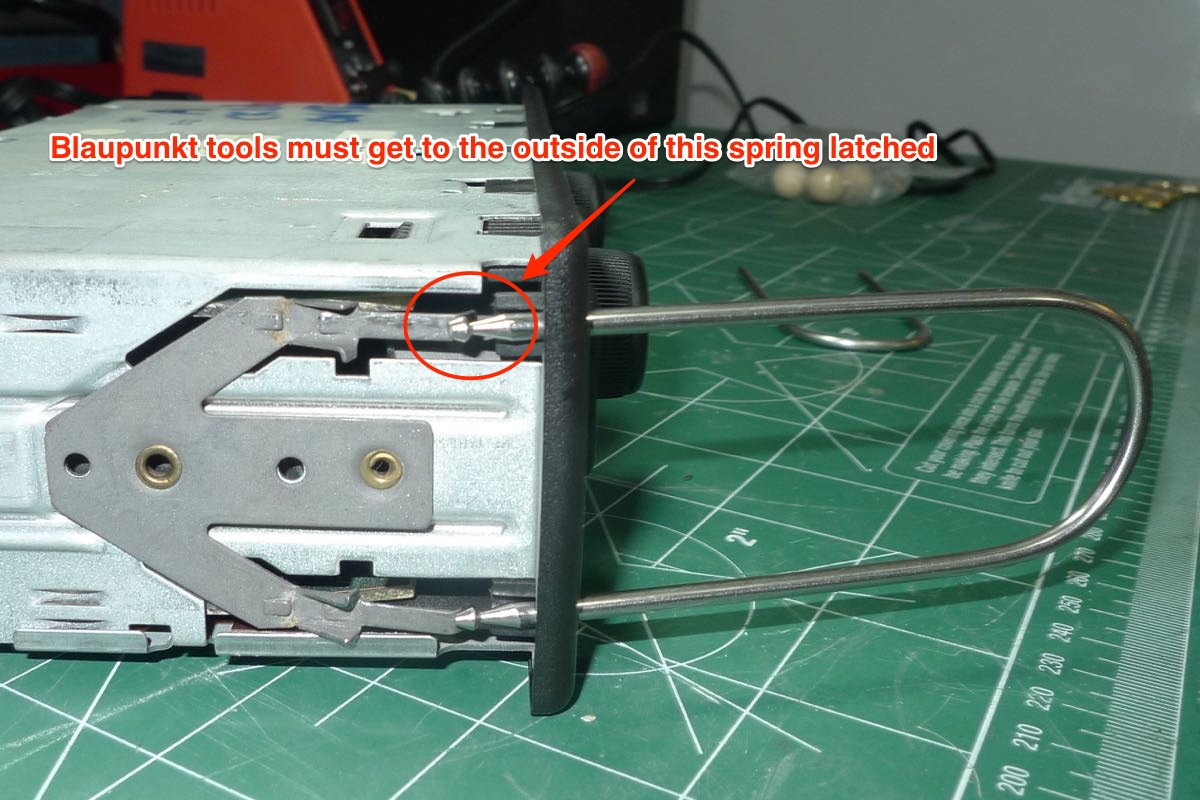
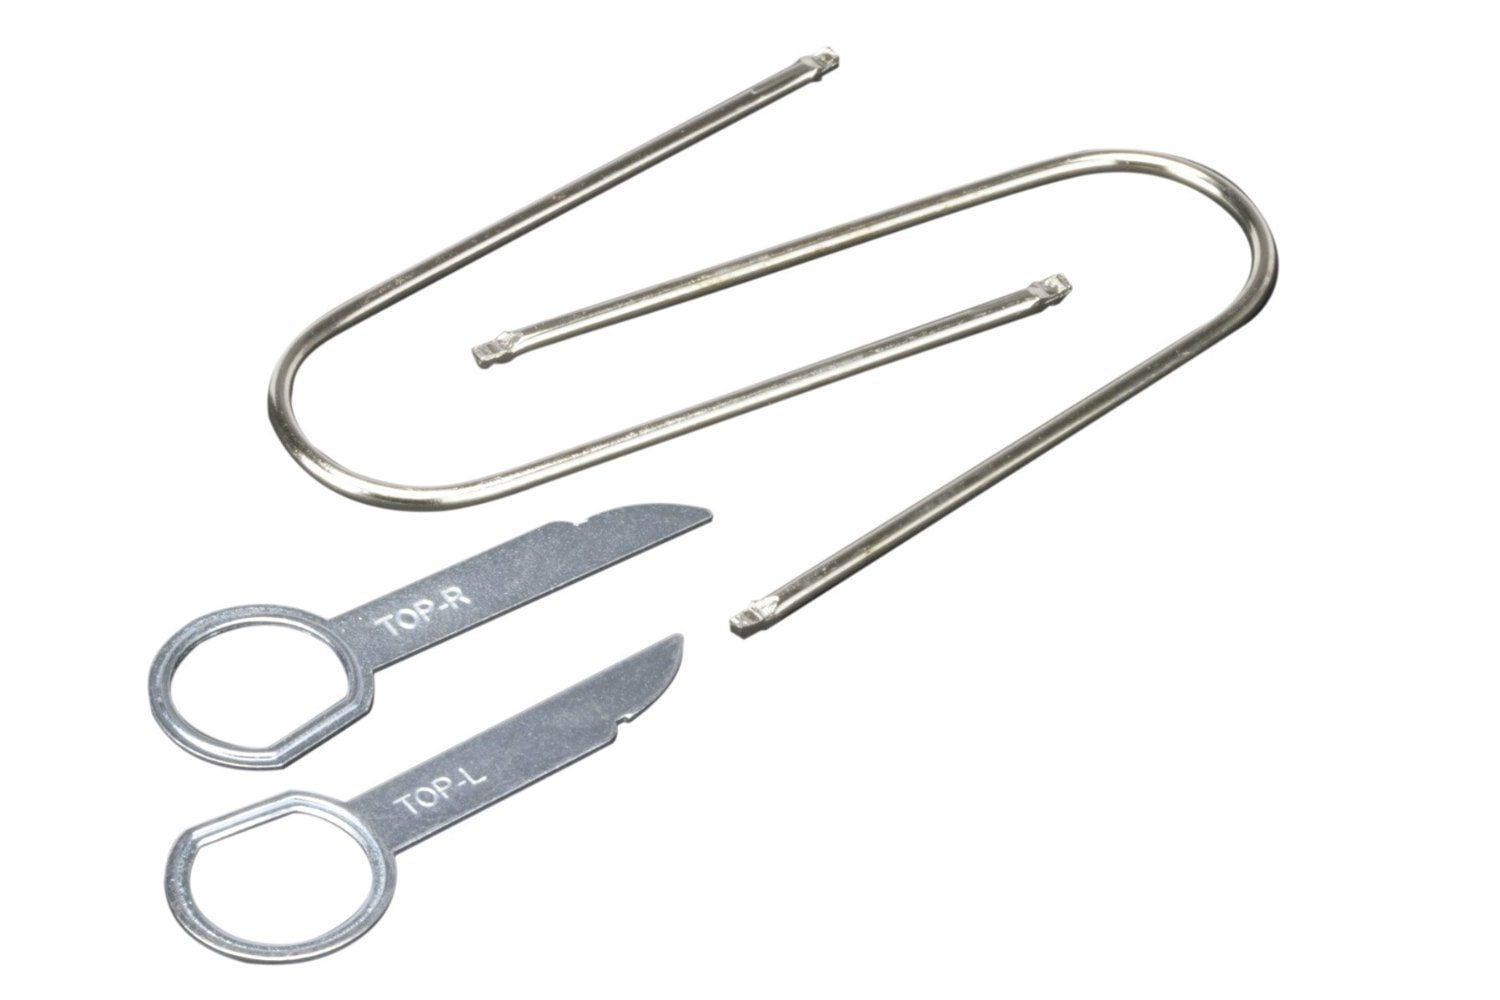
1) The tools you ahve look different than the ones I have. Mine have one large cut, not a cut all around. The "wedge" needs to be large enough to depress the retention tabs all the way. I'm guessing you are still not depressing the tabs enough with your tools.
2) The wiring harness for the CCU is doubled over itself and has a ziptie. I had to cut this to get my CCU to come all the way out. But either way you should still be able to pull the CCU at least partially out.
If you havent, try to angle your tools away from the CCU after engagement to see if you can push those tabs enough to begin sliding out your CCU.
Its a bit of a pain, but it will come. Look at the photos you posted and you'll see how long those tabs are that keep the CCU in the lower dash.
Thanks phoneyman.
Just got back from the car with my son. Tried putting the tools in at an angle. We wiggled and jiggled the tools and pushed the ccu from the back but still no-go.
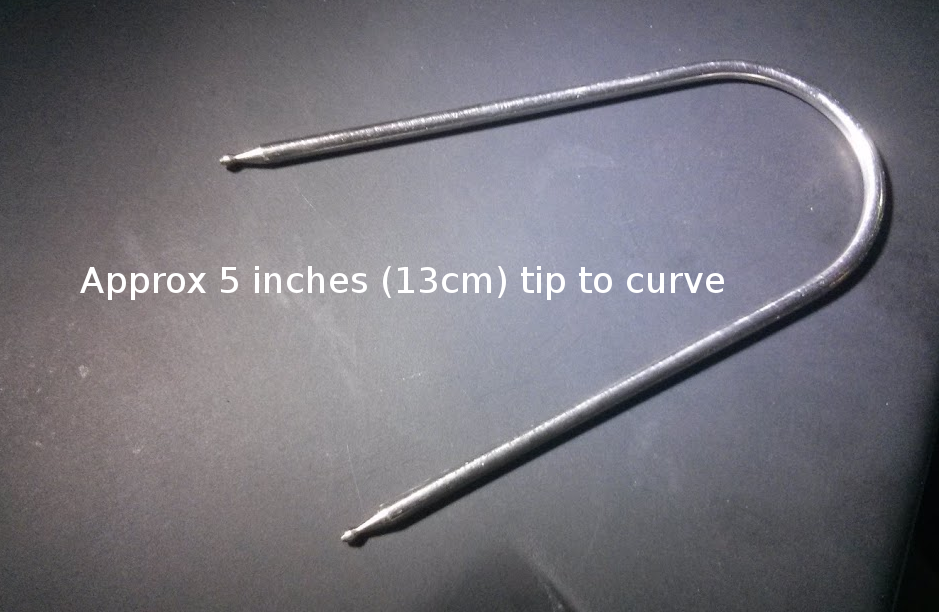
The tool you linked to looks like the tool that I used to have with my old Saab 900 with the removable anti-theft radio. Those were what I was looking for at my local auto parts supplier and I think would lock in better than the Ford/Blaupunkt tools I have.
I just cut a coat hanger, formed 2 u pieces and was able to extract the ccu. I've done this several times throughout the years with units in cars that have the same 4 hole removal design as the ccu. If I remember right for the ccu, I inserted the u pieces to unlock and unit and reached under the dash and pushed from behind.
I just cut a coat hanger, formed 2 u pieces and was able to extract the ccu. I've done this several times throughout the years with units in cars that have the same 4 hole removal design as the ccu. If I remember right for the ccu, I inserted the u pieces to unlock and unit and reached under the dash and pushed from behind.
Yes, seems so simple. I wonder what is hanging up on mine because inserting the tool and pushing from behind doesn't do anything.
I even removed the radio to see if I can get a better view/access but no better. I guess I could remove the radio bracket but that seems like it could be a pain to get it back in securely.
Were your coat hangers straight or did you bend the ends a little bit to make a hook?
I use four large finishing nails to release the CCU retaining latches. I don't know the size, but the diameter is the largest that fits easily into the holes. Once the nails are inserted fully straight in to the four holes, the latches are released and the CCU can be pushed out from its rear by reaching up under the dash. Once the CCU is pushed out a half inch or so, you know the latches are released, and you can work it out the rest of the way. Be careful of pulling on the CCU front panel--it may come off.
As phoneyman pointed out, if the cable tie is still present around the CCU cables, it will need to be cut to allow enough slack to fully withdraw the CCU to the point the wiring harness can be disconnected. Note that the two large connectors each have a release at one end and a hook at the other, so the release has to be released, and then the connector swung away from the rear of the CCU to unhook and remove it. The two large connectors are in opposite positions, so one gets undone from one end, and the other from the opposite end.
When you reinstall the CCU, make sure the wiring harness isn't trapped. Otherwise it will be difficult to get the CCU fully seated again.
Hi Bobby, I have the exact tools you have. They worked fine for me.
Just a thought: Be sure to slightly bend the tips inward until they are the exact distance of the holes in the CCU. Then they should go straight in and connect with the tabs on the unit. Otherwise they may tend to flare out and miss the tabs. See your third pic. The tool legs need to go straight in to connect the CCU release tab.
Yes, seems so simple. I wonder what is hanging up on mine because inserting the tool and pushing from behind doesn't do anything.
I even removed the radio to see if I can get a better view/access but no better. I guess I could remove the radio bracket but that seems like it could be a pain to get it back in securely.
Were your coat hangers straight or did you bend the ends a little bit to make a hook?
They were straight, no hook. Also at one time I did have the radio removed as well, but another time I did not.
Used the finishing nail trick. Got four of the largest diameter finishing nails that would fit into the access holes (16d), inserted each about an inch or an inch and a half into the hole, heard a light click each time, then pushed moderately from the back and it came out a half inch or so. Now just need to loosen up the wires and I should be good.
I think that the diameter of the commercial tool left a little too much wiggle room to hit all of the locks.
 06-30-2016, 08:28 PM