When you click on links to various merchants on this site and make a purchase, this can result in this site earning a commission. Affiliate programs and affiliations include, but are not limited to, the eBay Partner Network.
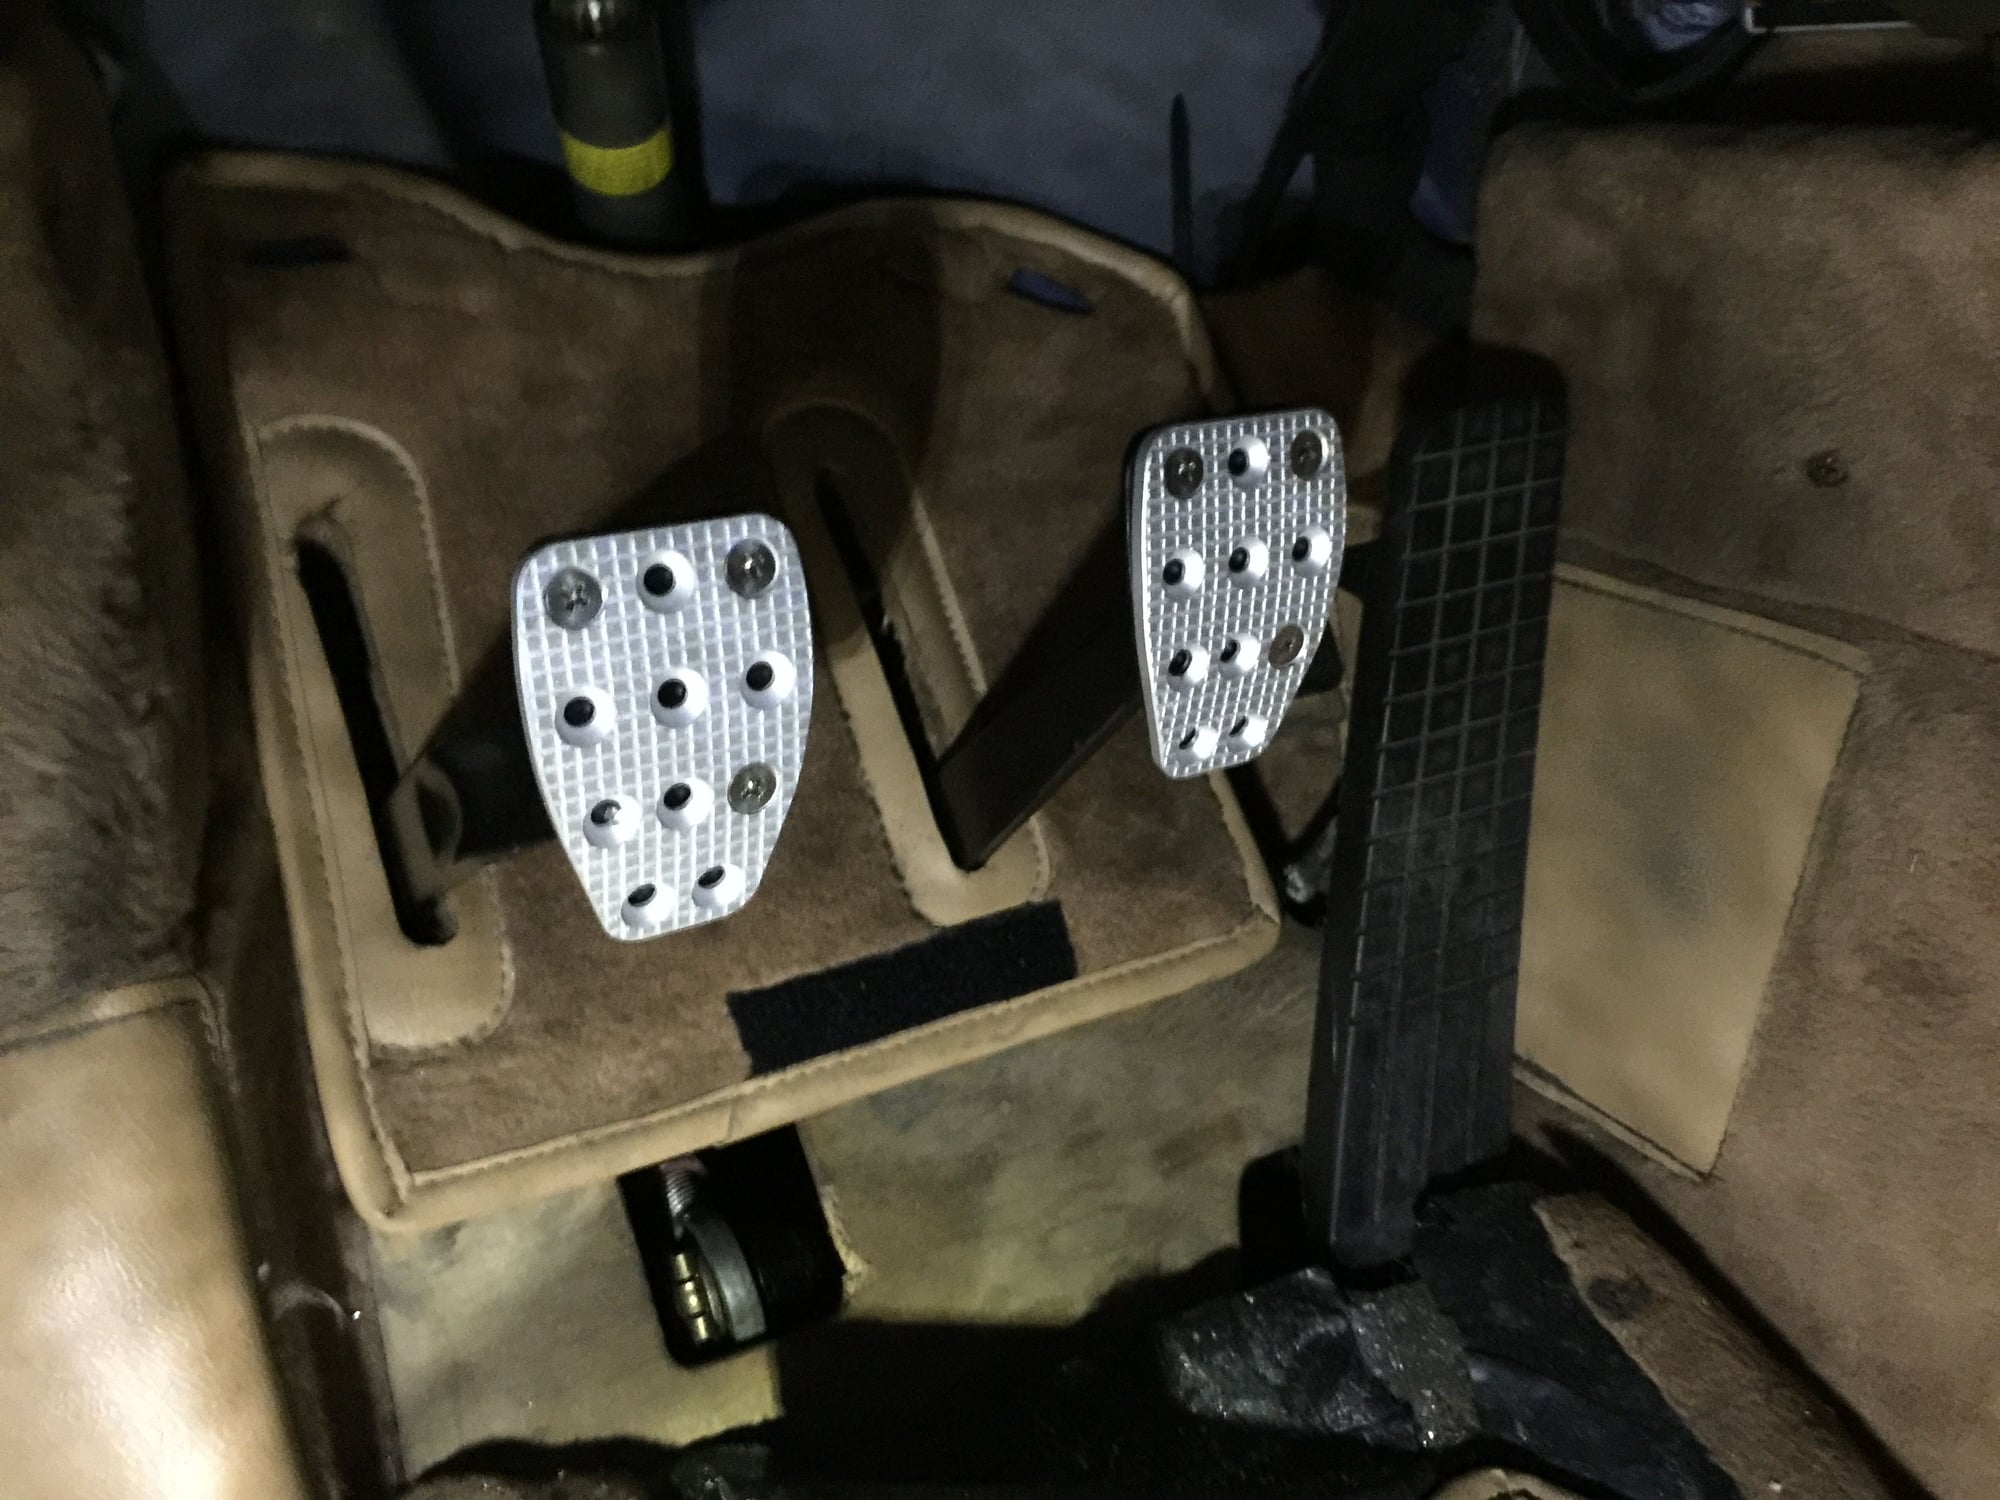
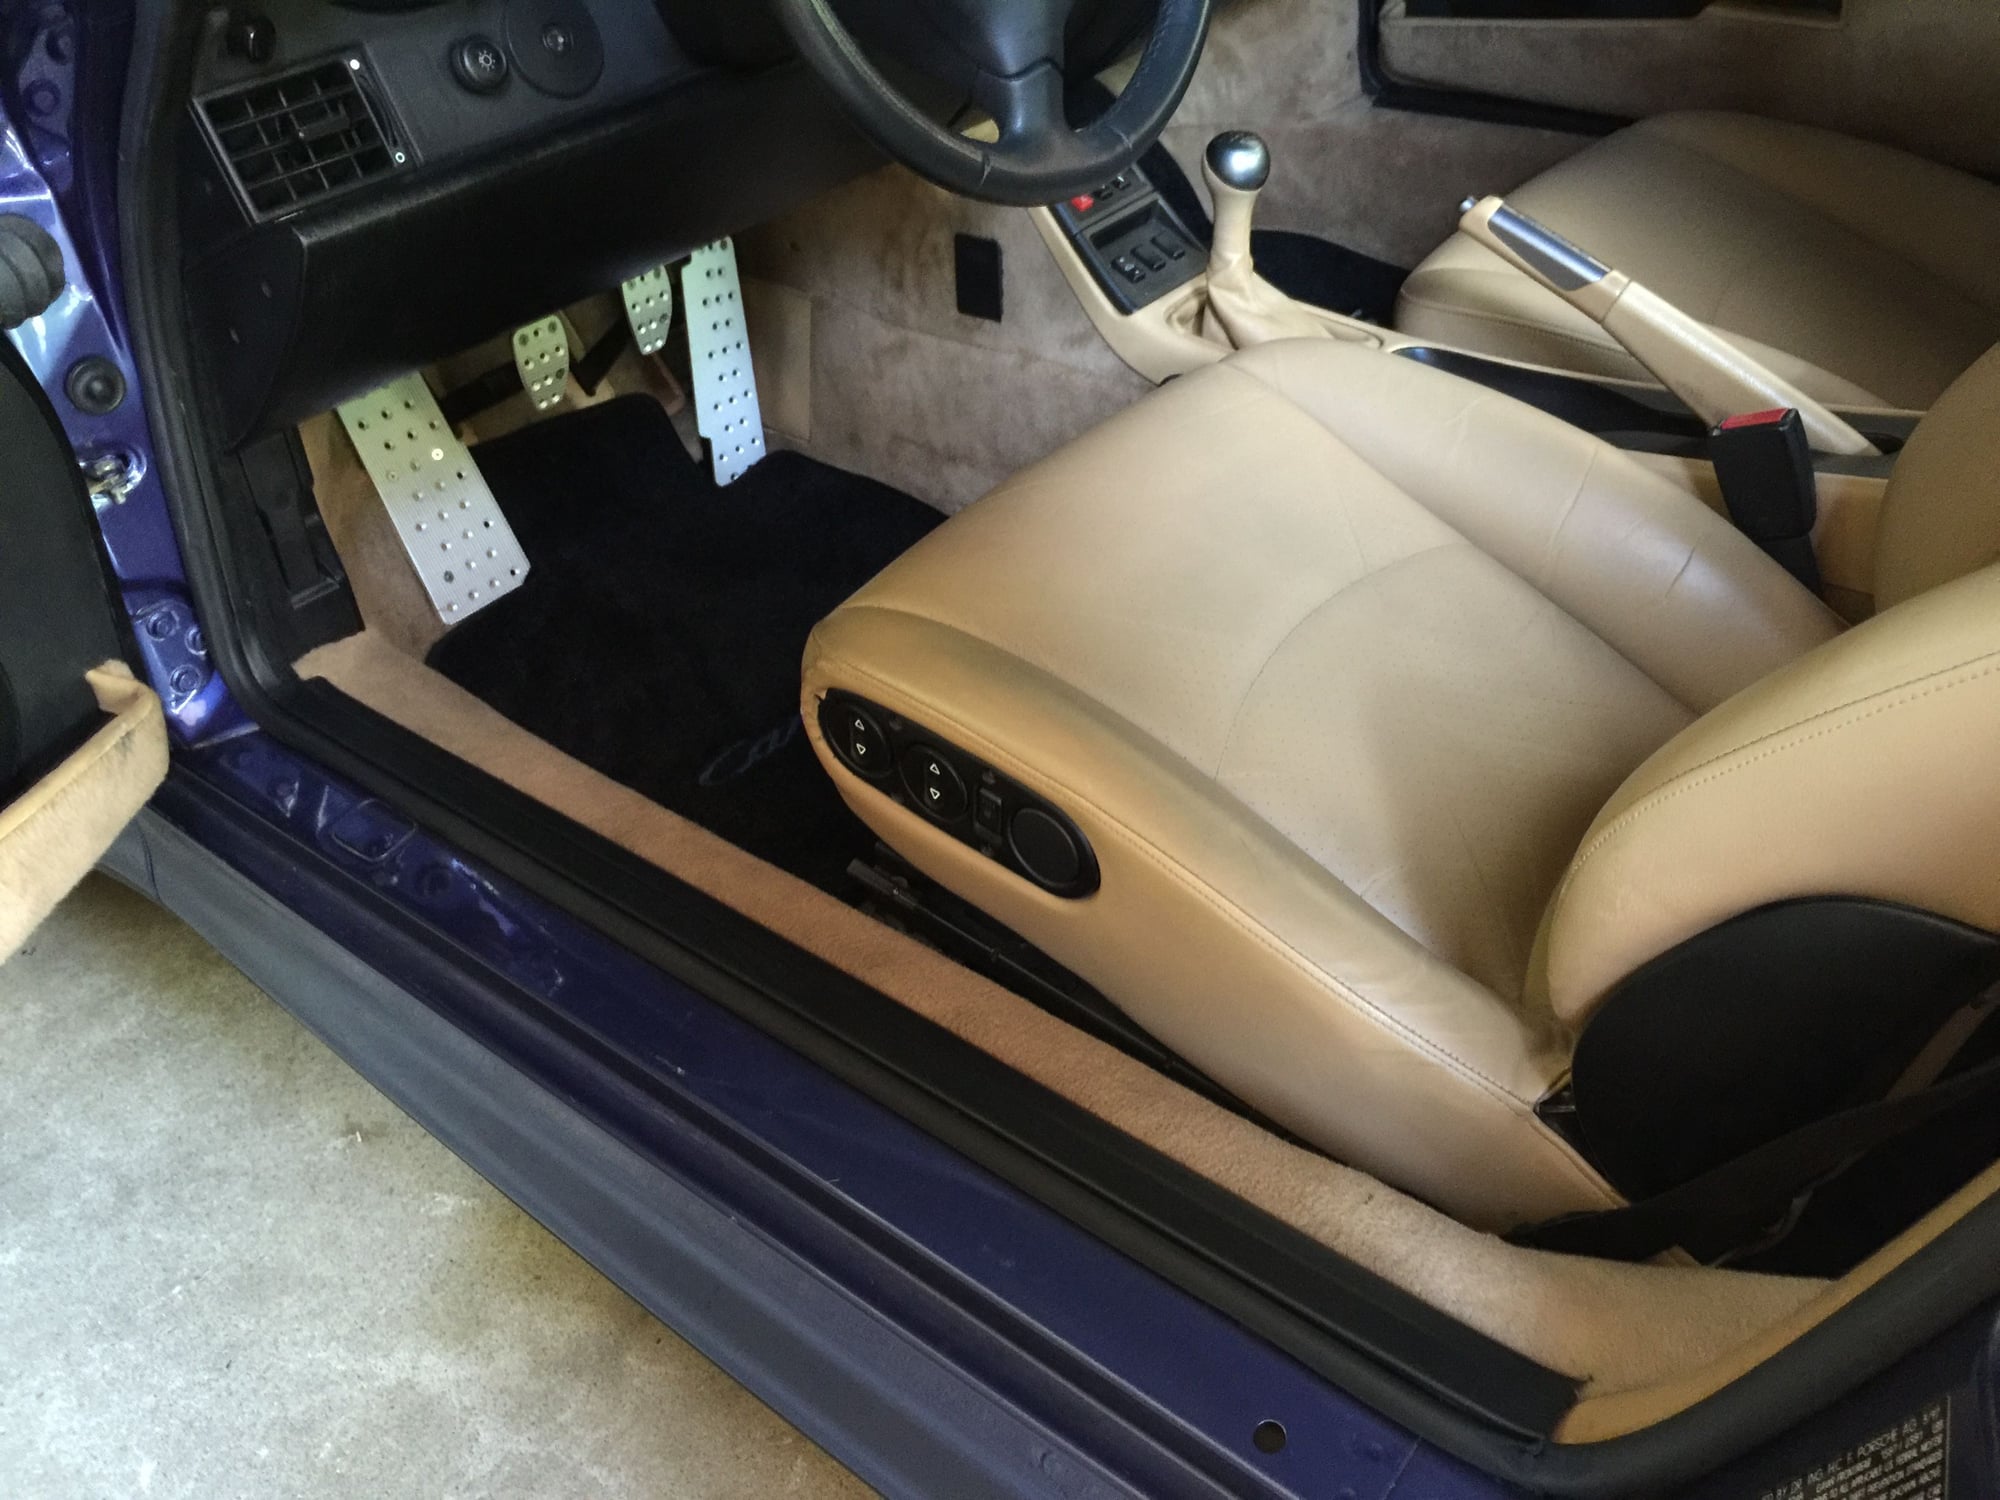
I always took for granted the aluminum racing pedals that the PO installed in my silver 993. The stock pedals in my Zenith C2S, in contrast, felt vague and slippery. The twenty year old rubber pads offered no grip, and were downright dangerous when wet. So after doing some research here on RL, I opted to buy a set of racing pedals from Ultimate Pedals. http://www.ultimatepedals.com/ The aluminum pedals are made to order right here in the US in about two weeks. They enhance feel and grip (and consequently, safety), and they also look great IMHO.
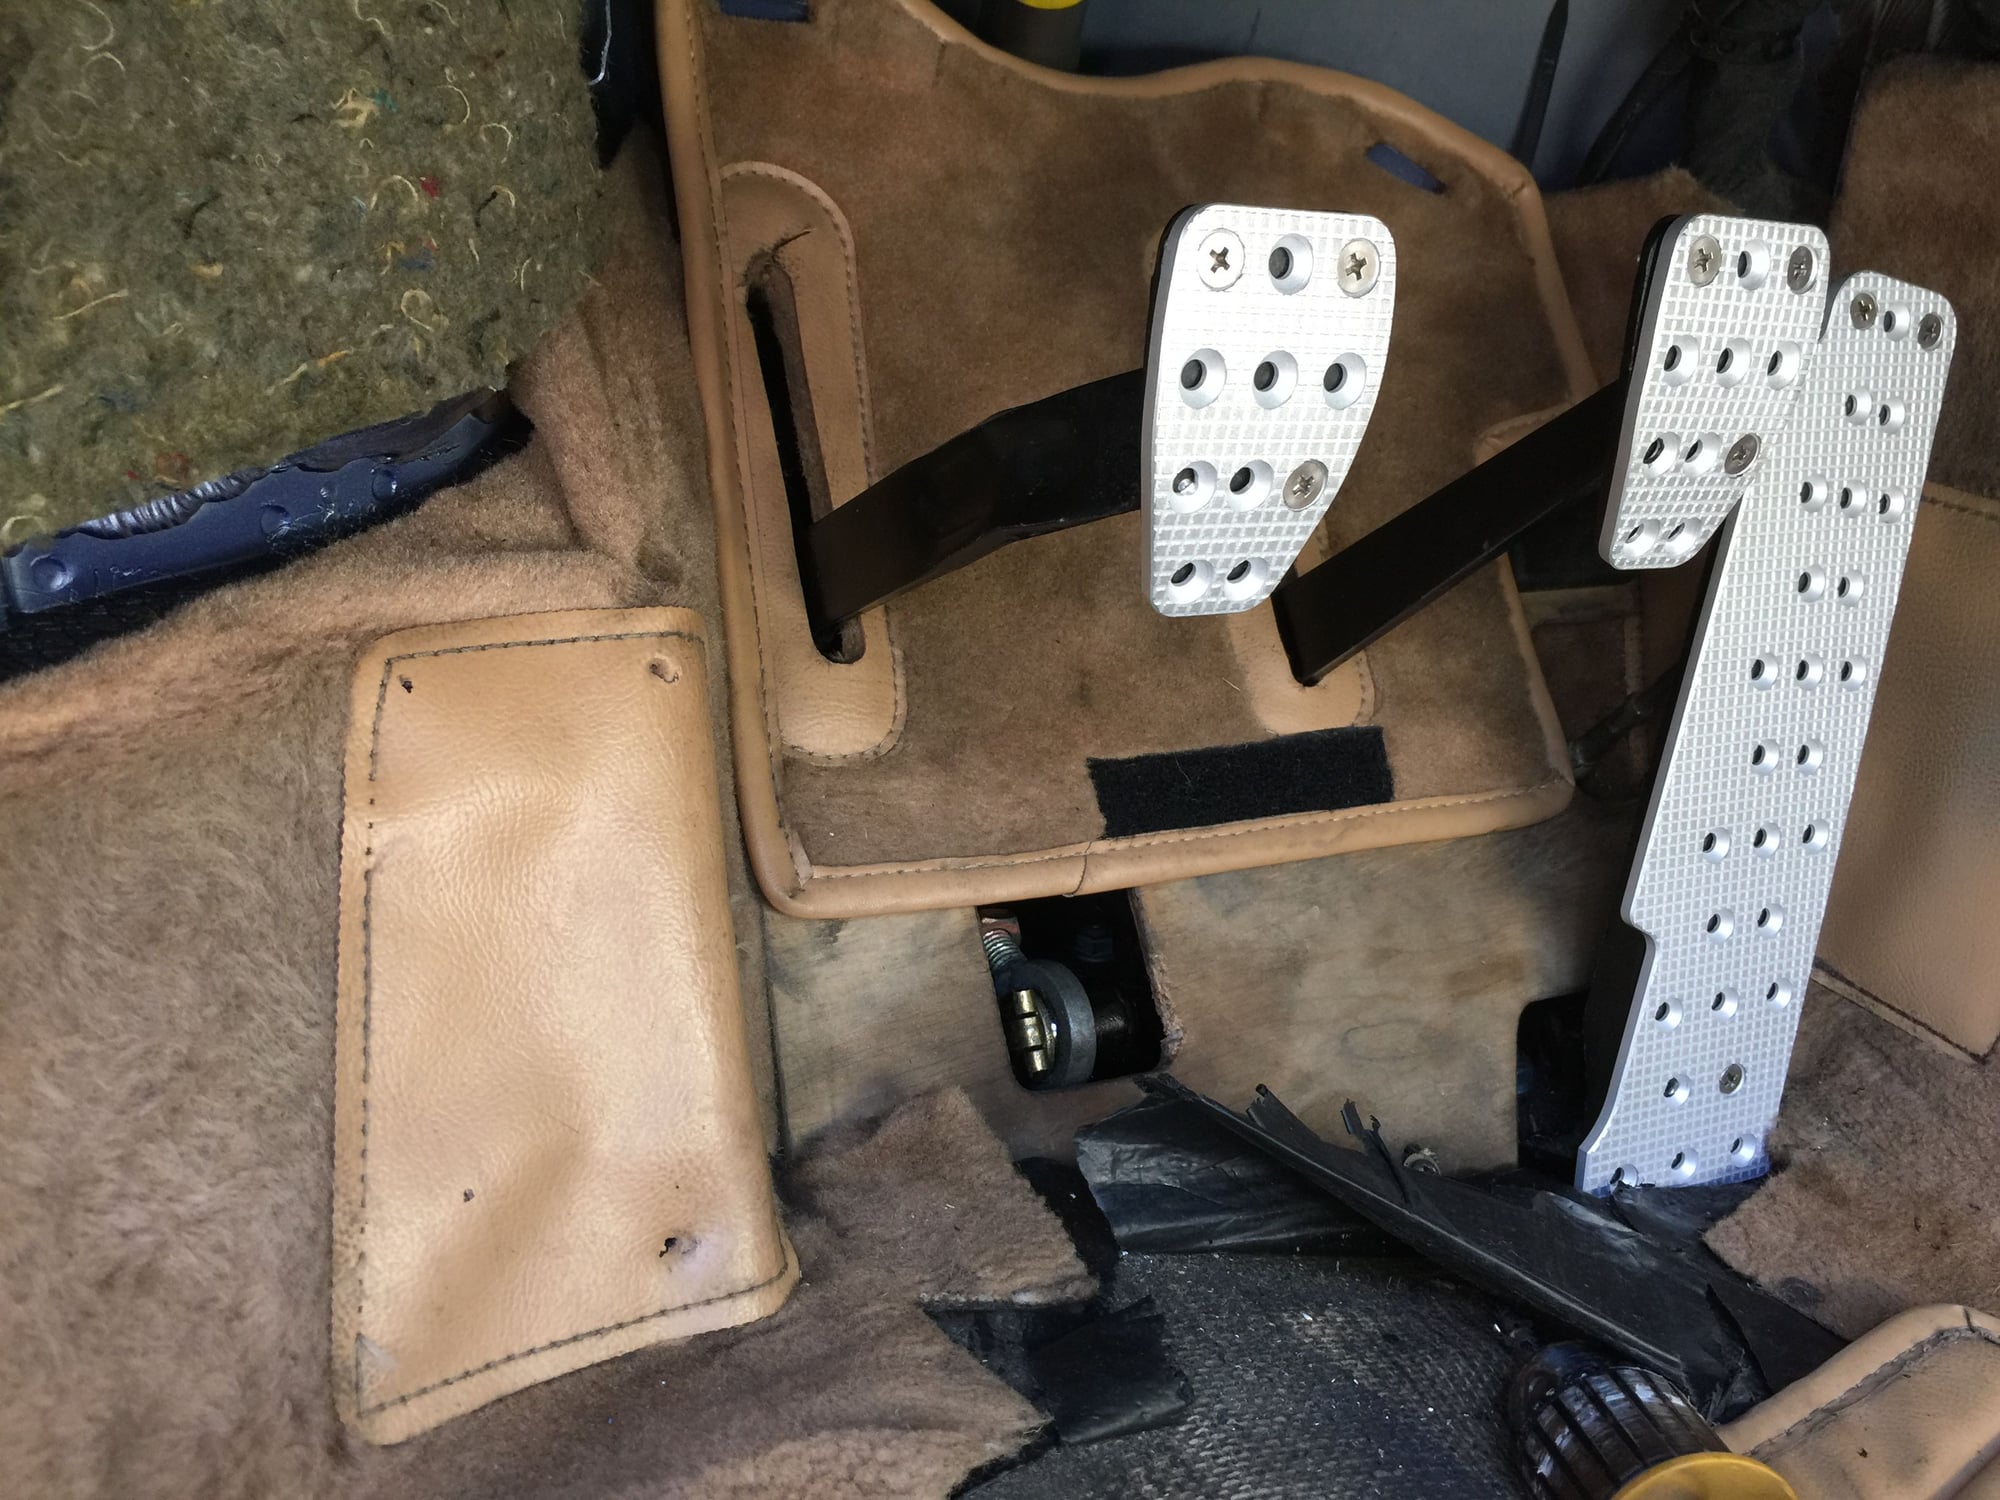
Ultimate Pedals offer basic and deluxe packages in manual and automatic. http://www.ultimatepedals.com/catalo...?cPath=135_382 I opted for the deluxe pedal set which includes the dead pedal. I went with the frosted satin (anti-slip) without grip inserts, and added a half inch left side heel/toe extension on the throttle. http://www.ultimatepedals.com/pedal.htm The guys at UP were very helpful during the selection process, and sent me a few full scale diagrams of the pedals for sizing. While my other 993 has racing pedals, it does not have a dead pedal. I do not like the vagaries of the 993 foot rest with leather pad. What an incredible difference Ultimate Pedal's dead pedal makes! I am definitely going to install one on my other car. These pedals make a noticeable improvement.
Now for a few do's and don'ts. Do install these pedals, they're awesome! The instructions are pretty straightforward http://www.ultimatepedals.com/install.htm, but a few observations when installing on our 993's:
1. It's not so easy drilling into the steel pedals and its's easy for the drill bit to slip. I did not use a center punch, but I did find it helpful to use a nail punch to create a dimple to keep the drill bit from slipping. Start with a 1/8" drill bit, and then finish with a 7/32" bit
2. Do use masking tape to mark your holes, and do make sure to mark and drill one hole at a time. After you drill the first hole, secure the pedal firmly with one of the supplied flat head crews and nylock insert lock nuts. Then with the pedal firmly in place, mark your second hole. If you try marking all the holes at once and the drill slips, you won't be a happy camper. So follow the protocol, and go one at a time.
3. If you're searching for balance and want to install screws in all four corners of the pedals, bad news... You'll find that the lever on the pedals connects right behind the lower left corner of each pedal. I opted for three screws. Two in adjacent corners (top left, lower right) will suffice.
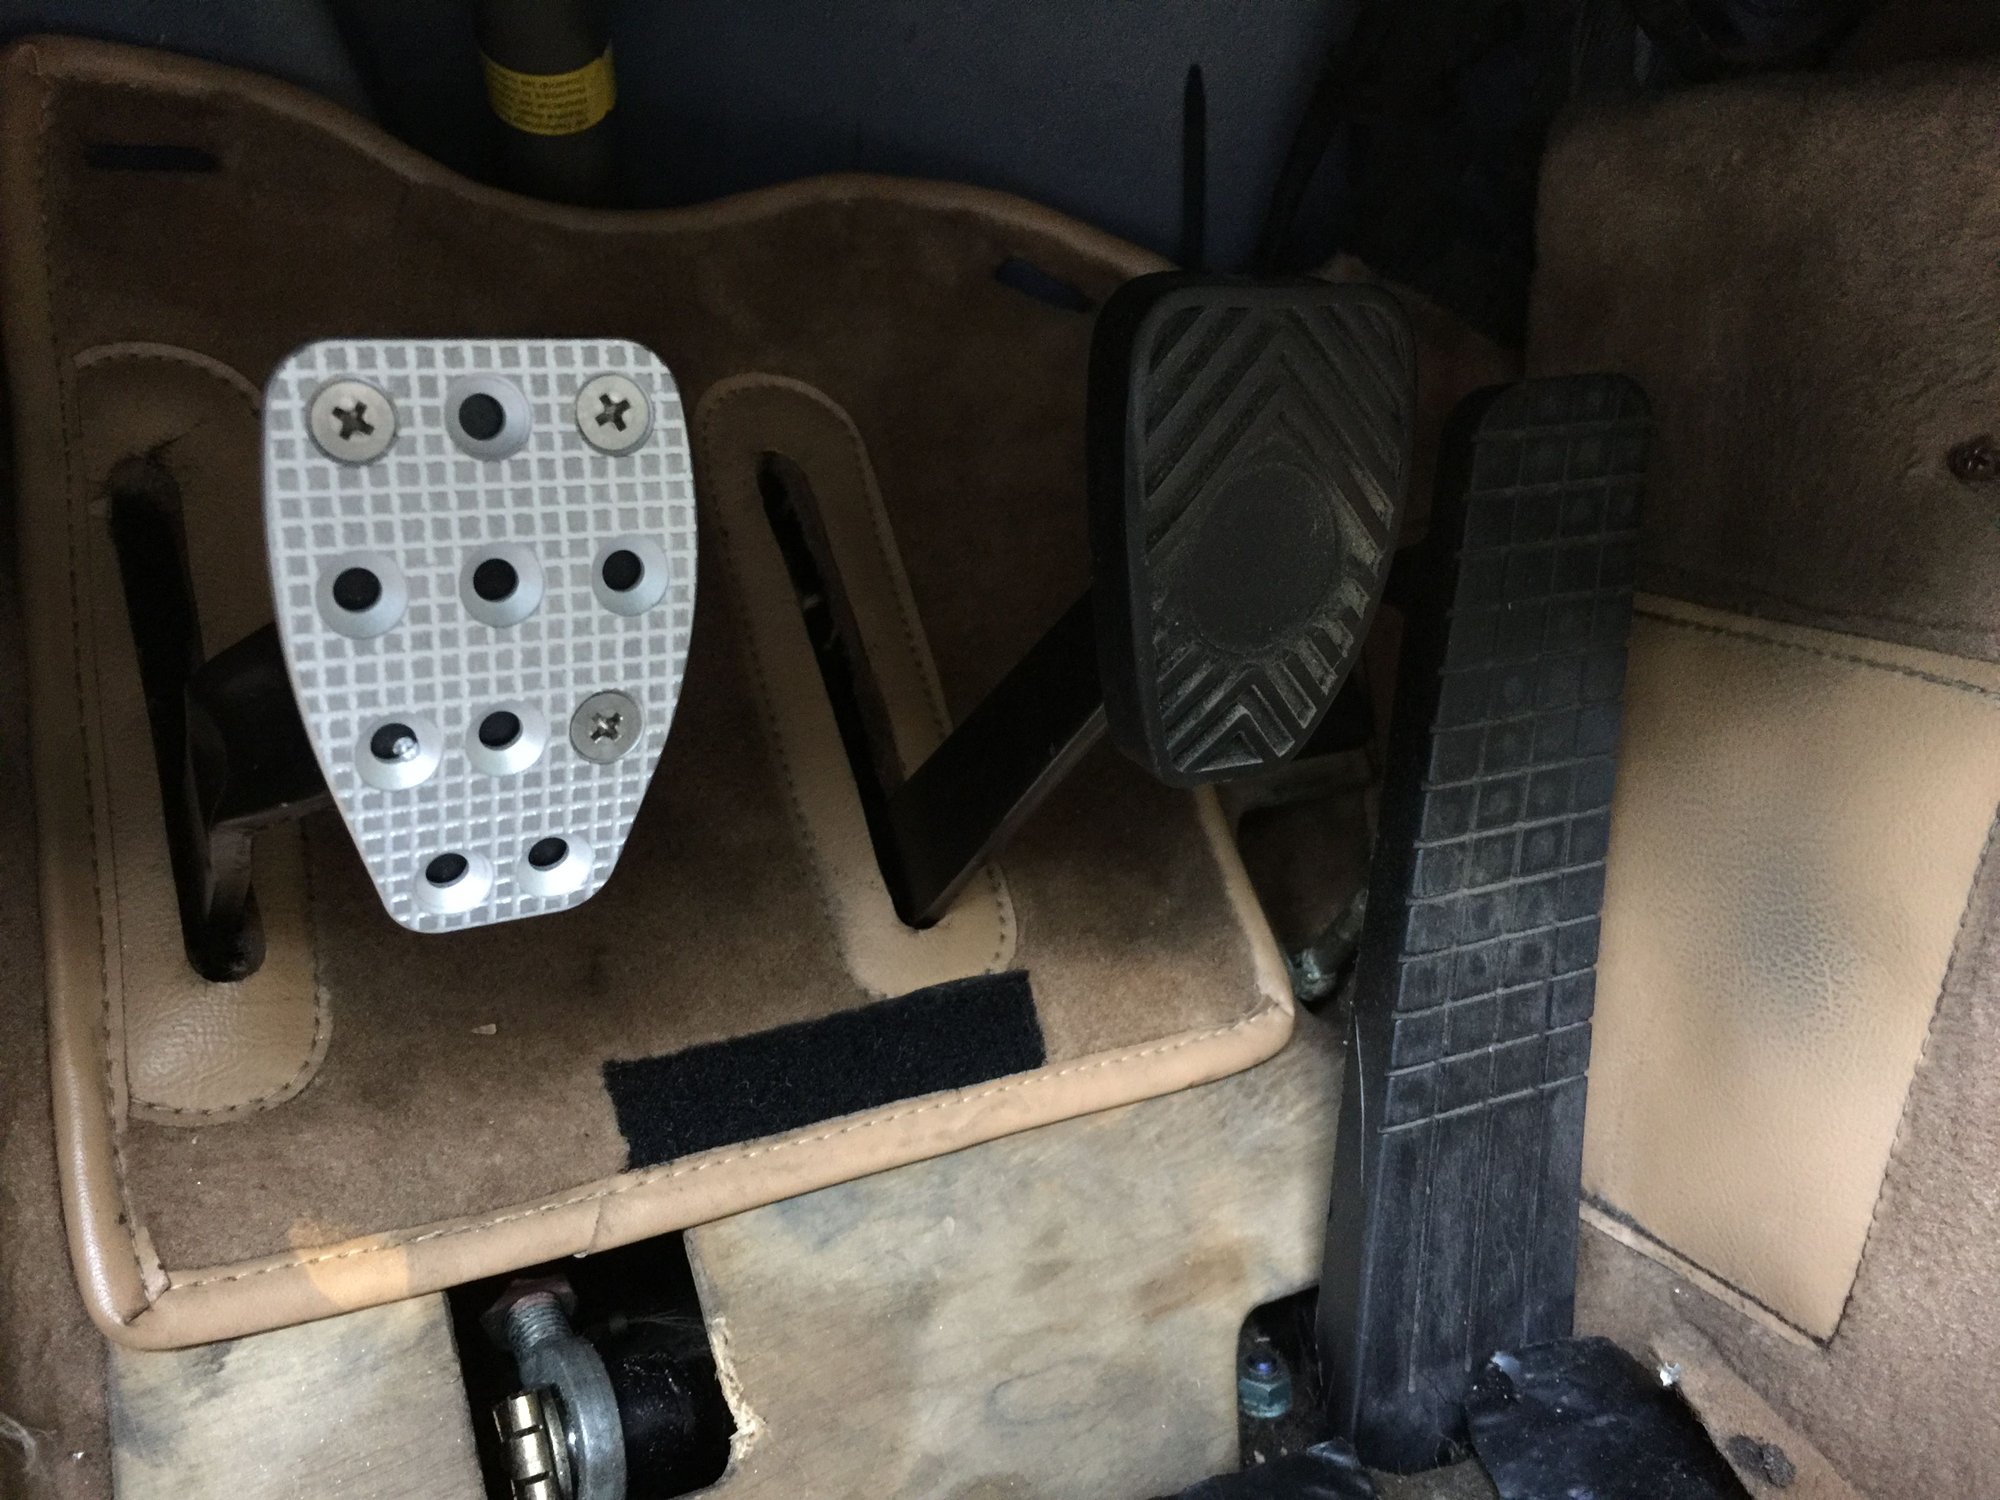
4. When installing the throttle pedal, use the top end as a guide and be sure NOT to use the bottom row to secure the lower portion of the throttle. The racing pedal extend a bit beyond the hinge which is fine, but you don't want to secure the bottom below that hinge. The throttle is plastic and makes for easy drilling - just use a 1/8" bit and the self-tapping screws provided.
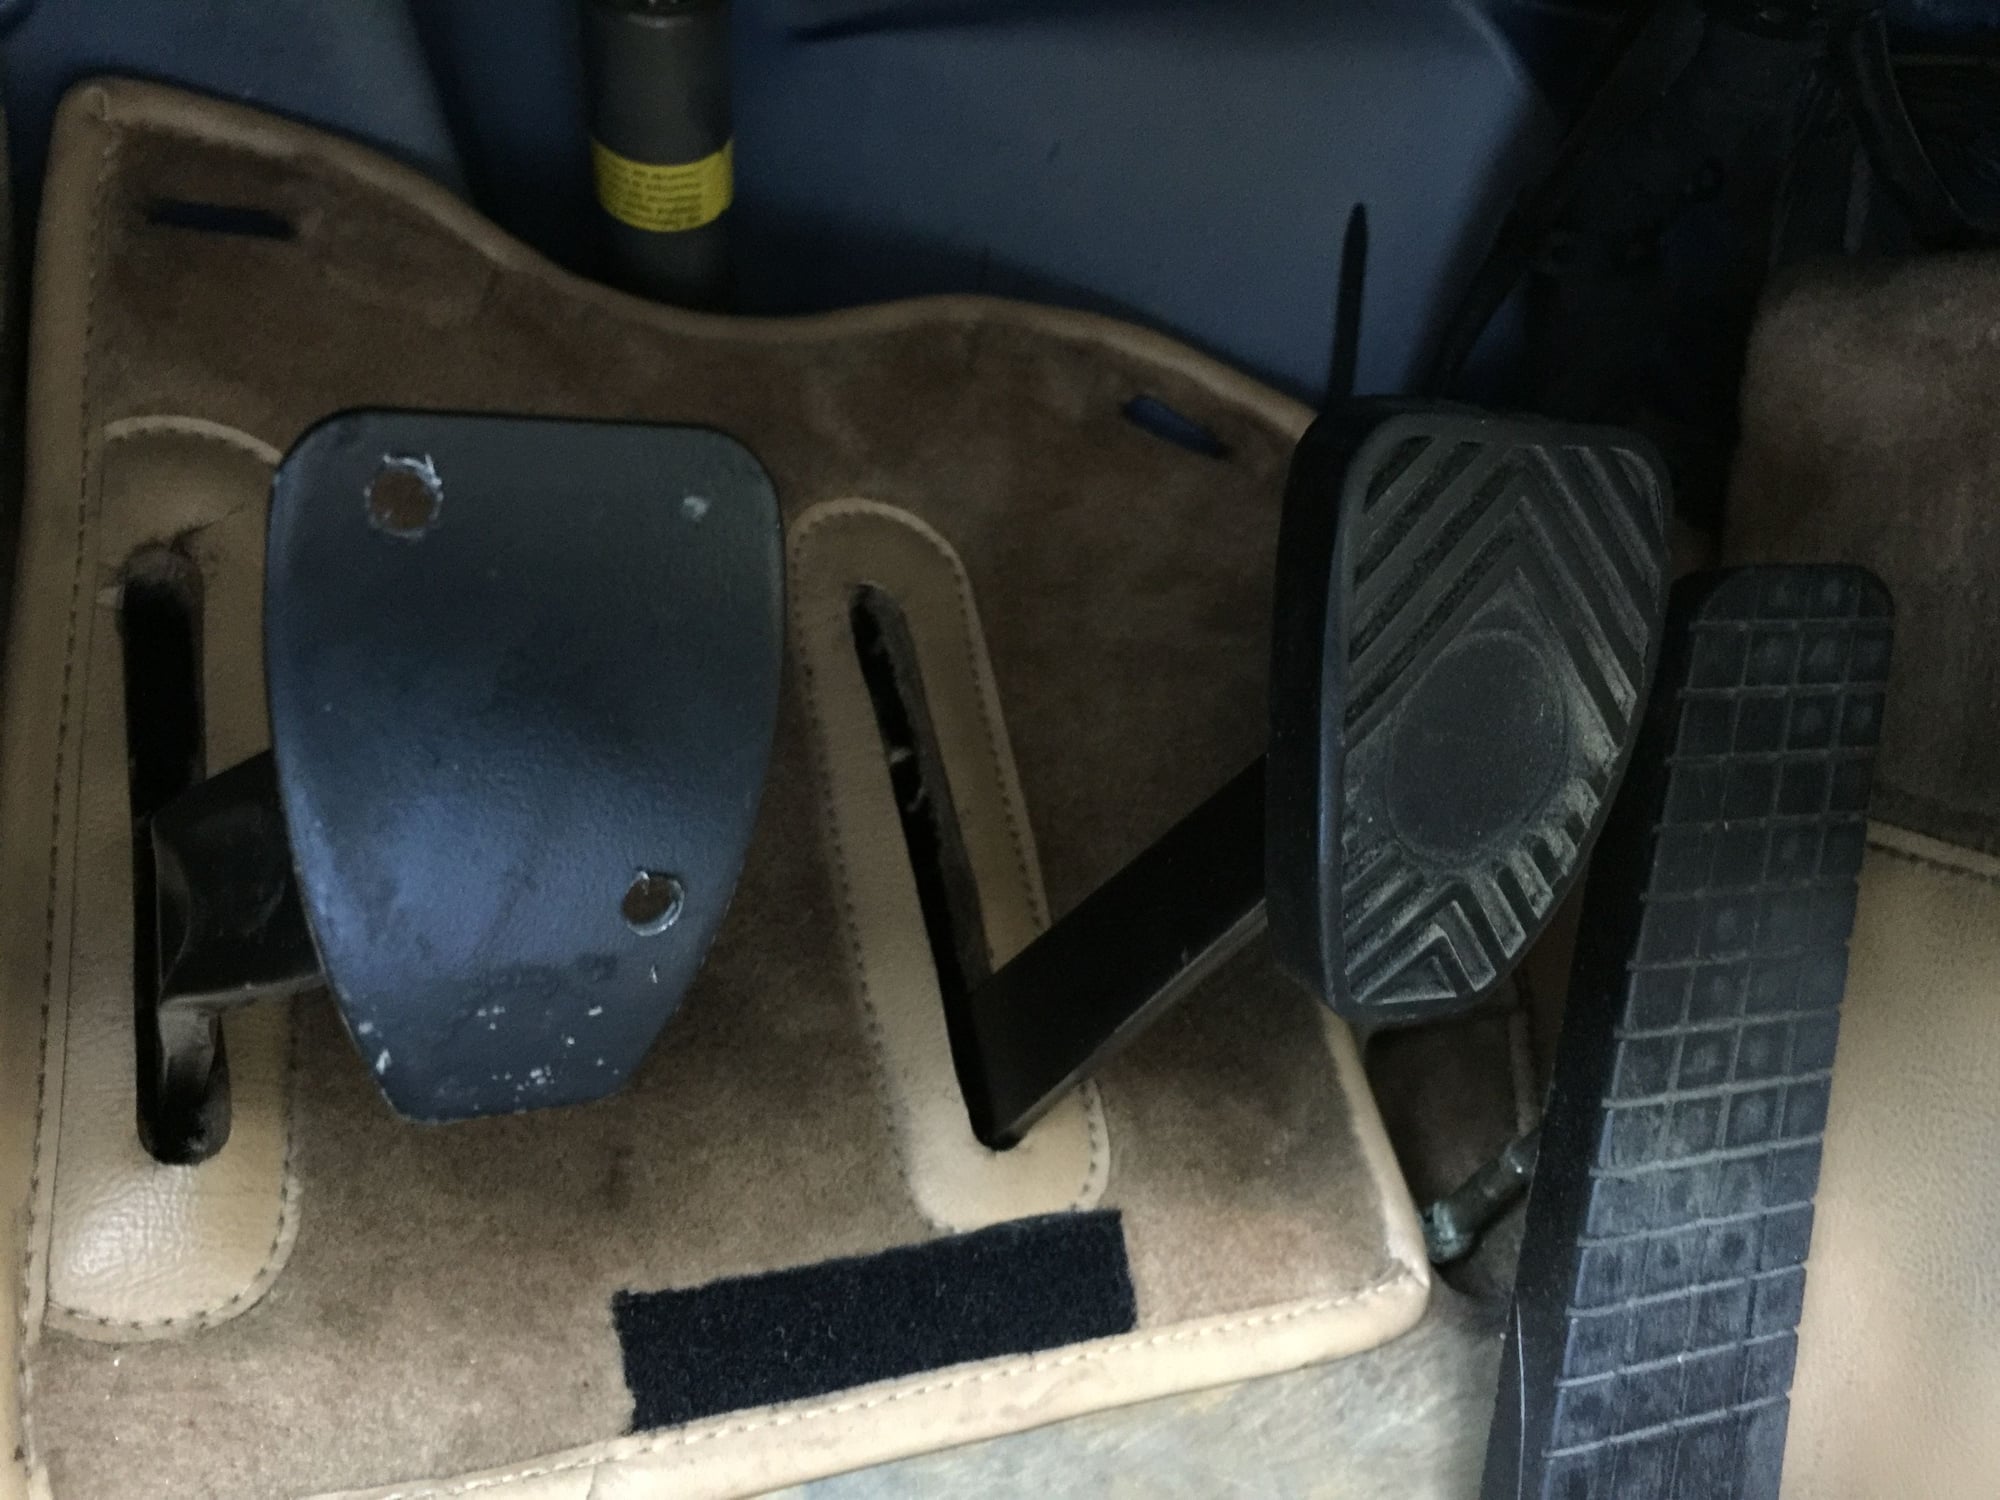
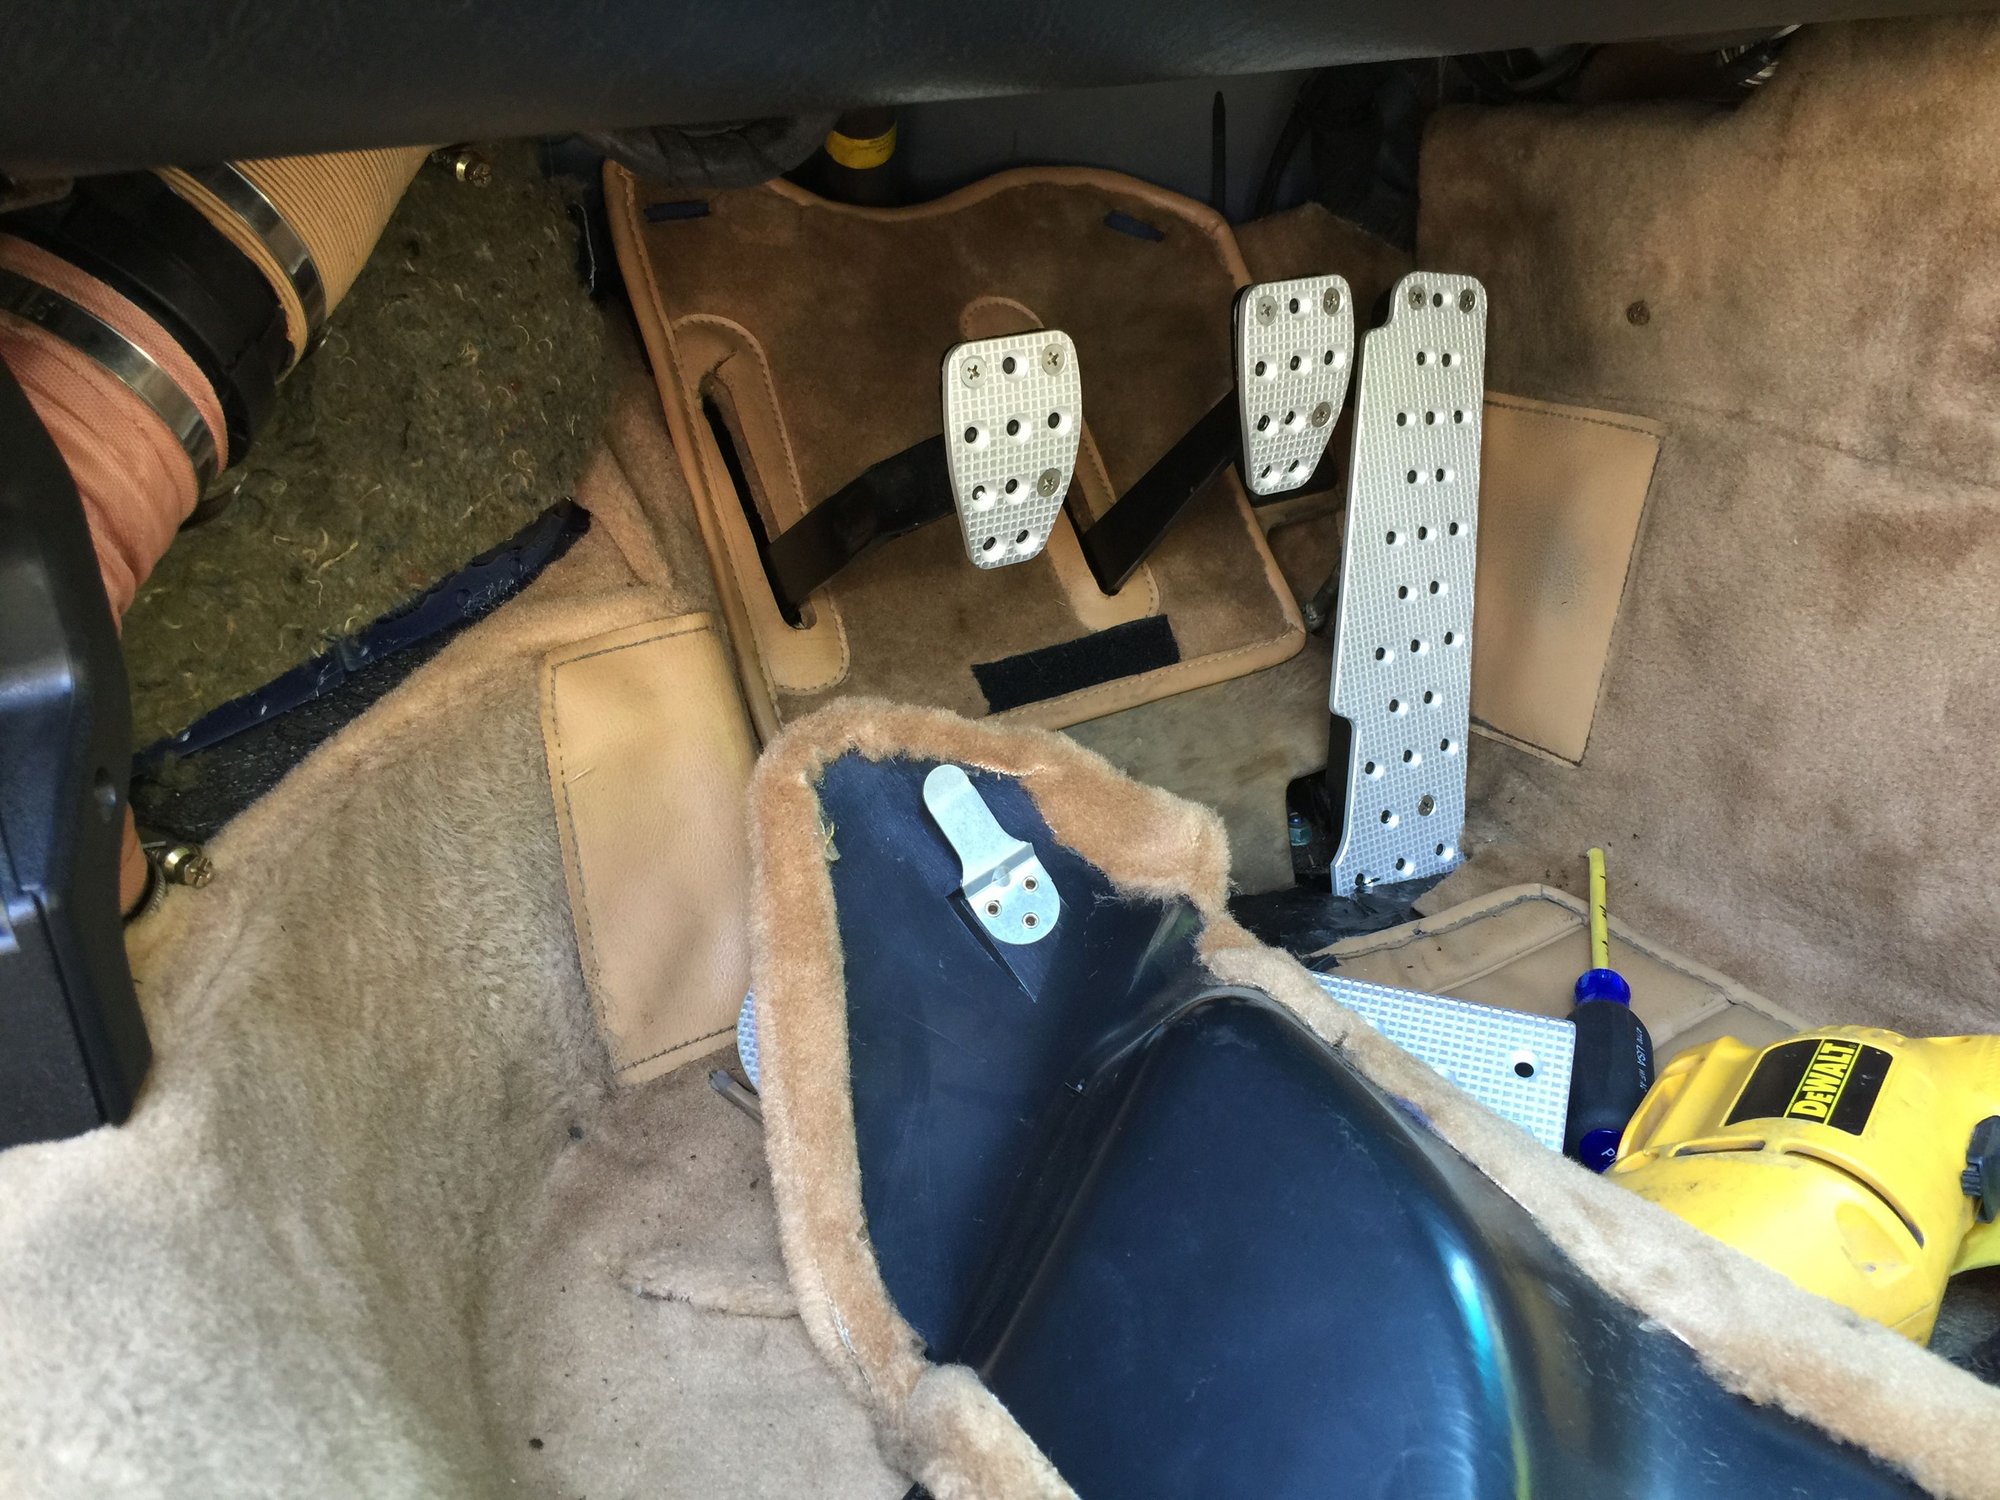
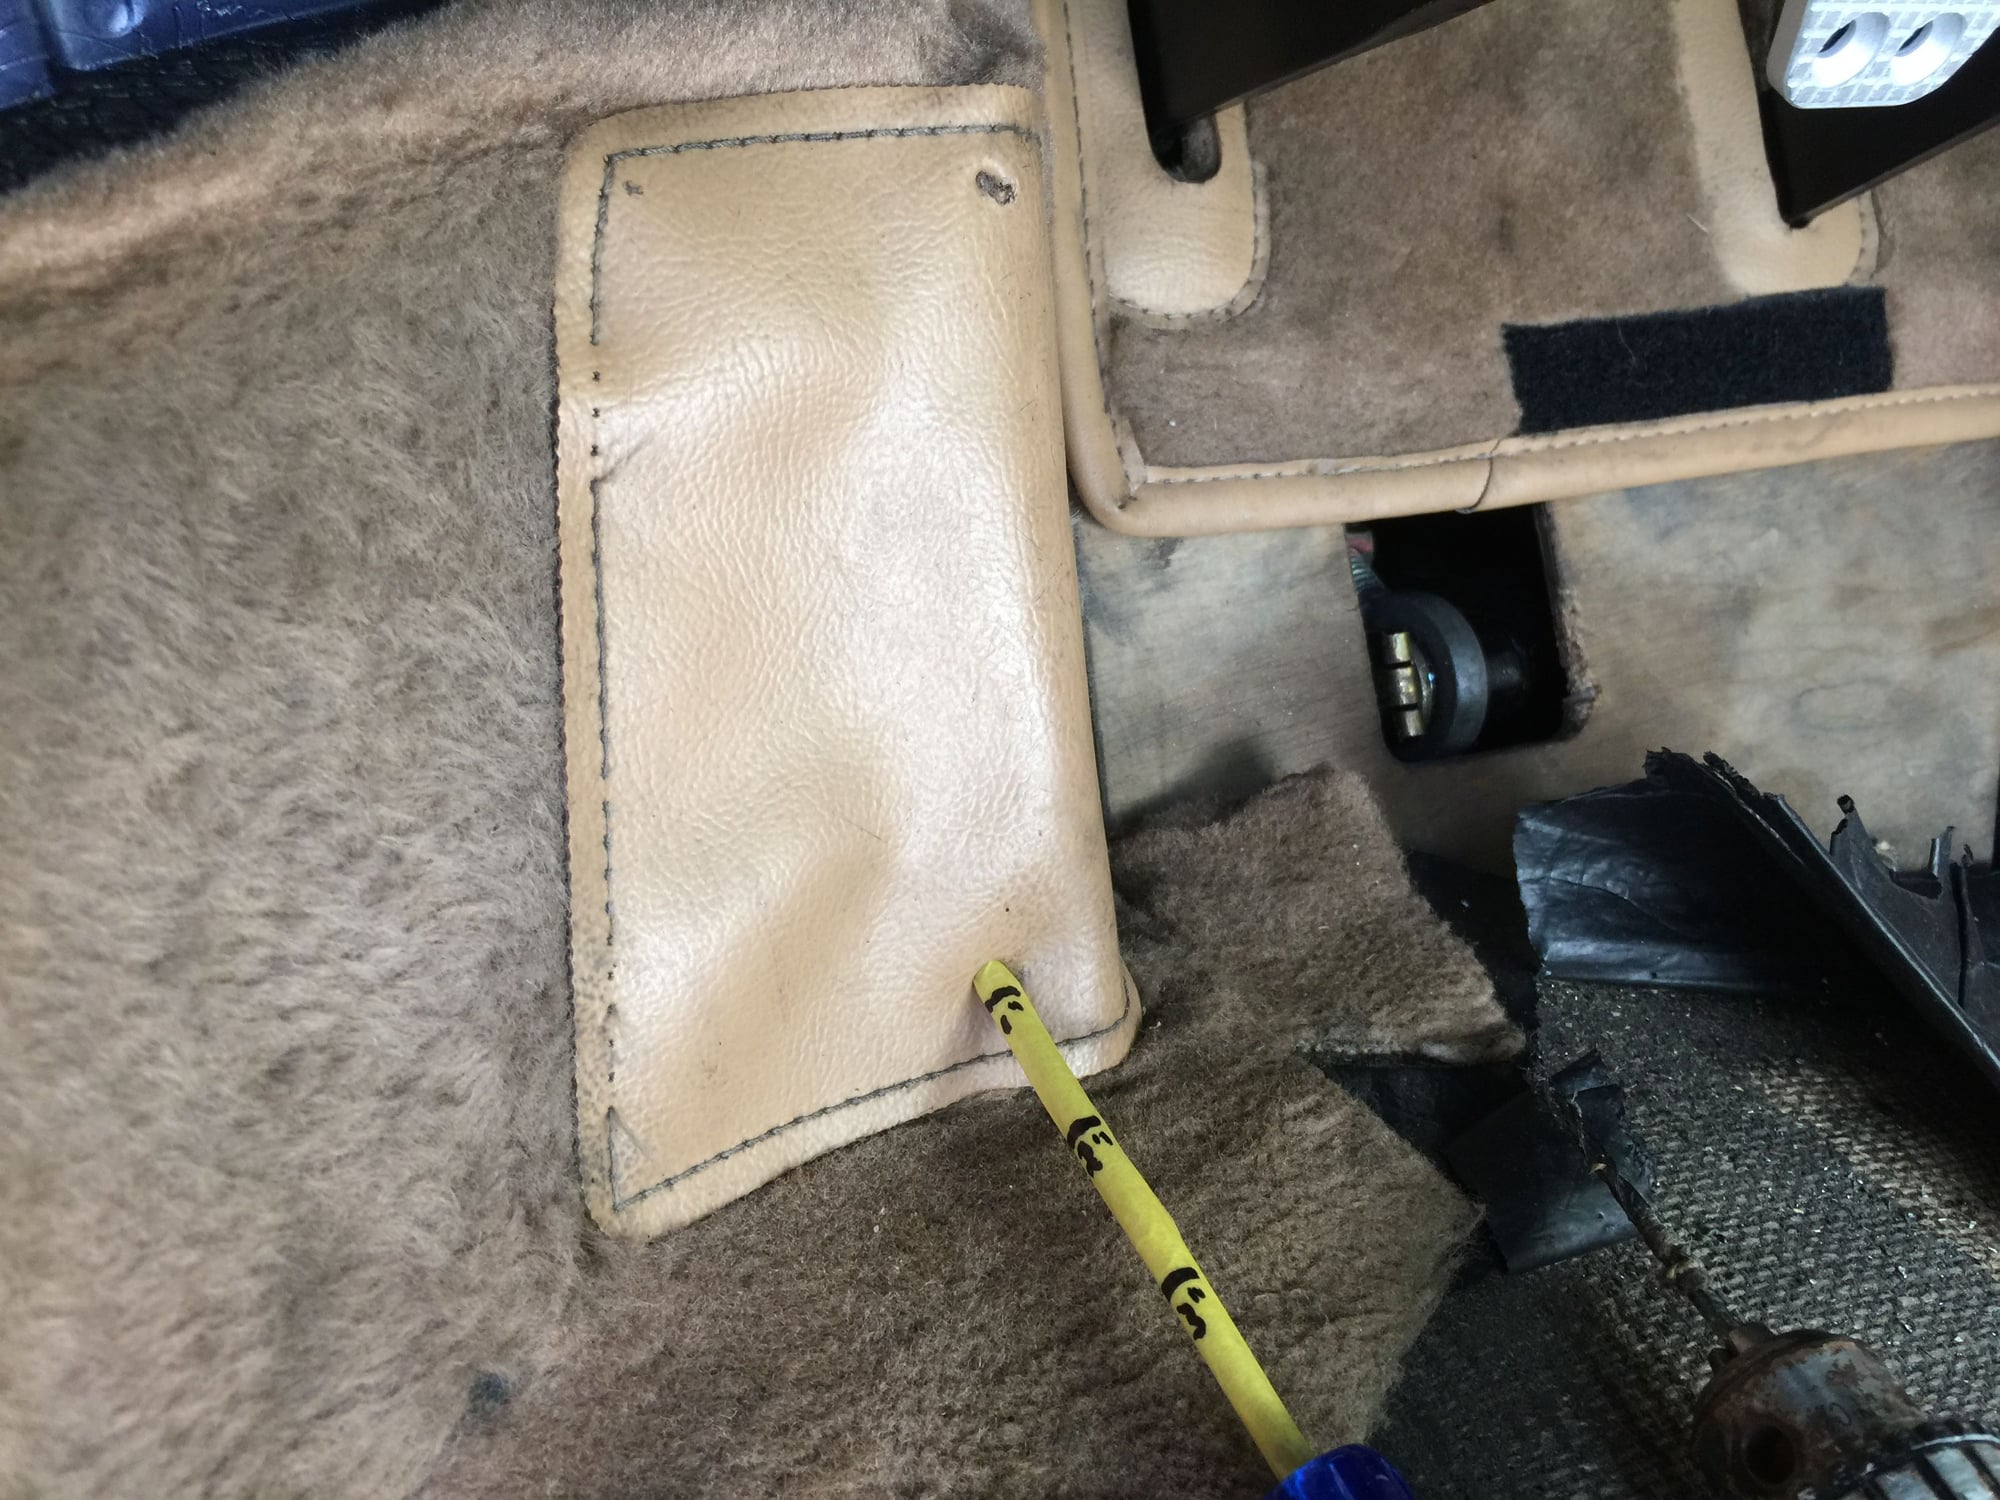
5. If you're opting for the dead pedal which I highly recommend, choose your drill points carefully. After a quick late night web-search, I was fairly certain that the entire foot rest was steel. I discovered later I was actually reading a post in the 964 Forum The leather foot rest serves as a good guide. Anything above that foot rest is hollow and out of bounds. Ask me how I know. You can see photos below of the trim piece that snaps in above - mine looked like a dead beaver pelt. And even the leather foot rest has a few hollow spots. Stick with the left upper and lower left sides, and upper right side. There's a big depression in the lower right hand side, and you can't screw in there. See the photo below where my screw driver is going right through at that spot. Again, just use a 1/8" drill bit, and the self-tapping screws provided.
Cheers!
Before
Don't use bottom row to secure throttle
Note dead space above leather foot rest
Secure dead pedal around the leather pad, but not in lower right corner
Those look great! Its really fun trying to drill through those steel pedals...not.
I installed the Rennline pedal kit last year and generally really like it. Except the pedal box is so cramped that the heel/toe extenders almost become a burden for me wearing normal shoes. The best part for me was setting the gas pedal on the same plane as the brake so braking foot doesnt catch on brake pedal.
Yours look like what I'd get if I ever do the project again.
Thanks Phoneyman. I like that Ultimate Pedal lets you choose between 1/4" and 1/2" on the heel toe extension. It is a tight pedal box, and it helps to make sure the brake pedal is set as far to the left as possible.
Did you install a dead pedal? That has got to be one of my favorite changes from the stock foot rest.
The PO installed a Rennline dead pedal and pedal back plate. Thats most of the reason I bought their pedal kit. The dead plate is basically a requirement for me now. My previous Audis had plastic dead plates and I feel strange driving cars long distances without one.
Does the throttle pedal screw on top of the plastic pedal? One of the benefits of the rennline version is that they are adjustable height wise which helps with heel and toeing. That's what I'm leaning towards.
Does the throttle pedal screw on top of the plastic pedal? One of the benefits of the rennline version is that they are adjustable height wise which helps with heel and toeing. That's what I'm leaning towards.
The throttle pedal screws on wherever you want it to. The throttle is plastic so you can pick just about whatever hole on the pedal you choose (but not below the hinge). You can go higher, or more left or right. I simply found that if you seat the pedal flush with the top of the plastic peddle, you get a perfect fit right down to the bottom extending just slightly below the hinge.
I'm a big fan of Rennline, and considered their pedals. I love the fact that they're located in VT and shipping takes just one day to Boston. I just preferred the look of the Ultimate Pedals a bit more. Also pretty cool that they will work with you to tailor the right heel toe pedal.
Thanks. Just to confirm though. These can't be adjusted closer to you to line up the level of the brake and throttle pedals. That's what I meant by higher.
Thanks. Just to confirm though. These can't be adjusted closer to you to line up the level of the brake and throttle pedals. That's what I meant by higher.
Sorry, I understand now. No, there's no adjustment that allows you to bring the pedal closer to the driver. My guess is that UP could fashion something for this easily enough. You could also simply cut a piece of plastic 1/2" or 3/4" thick to act as a shim and raise the pedal up a bit. Or if you don't mind spending a few extra dollars you could stack two of the accelerator pedals together and get some longer screws.
Guys: I am not recommending my approach as many will think it sorta weird. But with more than 10 years on each of a couple of pedal sets, and with it currently on q half-dozen SRP sets, and after having transferred a set from car to car easily, I can attest that it works. Easy to locate and easy to "shim" up with plastic backing:
I am trying to remove the POs dead pedal and replace with something else. However, one of the mounting screws just spins and won't pull out. Is it possible there is a bolt on the other side of the footrest sheetmetal holding it there? If so, how would I access it?
I am trying to remove the POs dead pedal and replace with something else. However, one of the mounting screws just spins and won't pull out. Is it possible there is a bolt on the other side of the footrest sheetmetal holding it there? If so, how would I access it?
Unlikely that it�s bolted from behind. It�s very common for the tapping screws to strip, as the sheet metal is pretty thick at that location. If you can�t pull and twist the screw out, you may need to drill the screw out.
Unlikely that it�s bolted from behind. It�s very common for the tapping screws to strip, as the sheet metal is pretty thick at that location. If you can�t pull and twist the screw out, you may need to drill the screw out.
Or find a way to place a lever/pry bar behind the footrest while turning the screw.
 06-26-2016, 04:01 PM
 The leather foot rest serves as a good guide. Anything above that foot rest is hollow and out of bounds. Ask me how I know. You can see photos below of the trim piece that snaps in above - mine looked like a dead beaver pelt. And even the leather foot rest has a few hollow spots. Stick with the left upper and lower left sides, and upper right side. There's a big depression in the lower right hand side, and you can't screw in there. See the photo below where my screw driver is going right through at that spot. Again, just use a 1/8" drill bit, and the self-tapping screws provided.