When you click on links to various merchants on this site and make a purchase, this can result in this site earning a commission. Affiliate programs and affiliations include, but are not limited to, the eBay Partner Network.
This is where the fun begins.... All the new parts that were put in to the engine. I don't have alot of photo's of the cleaning process as I was cleaning and the thought of grabbing the camera with my filthy hands was far out of my mind.
The following are the comparisons of the different parts put in against the original bits and pieces in the engine. This was a good exercise to see just how things can change or what upgrades look like.
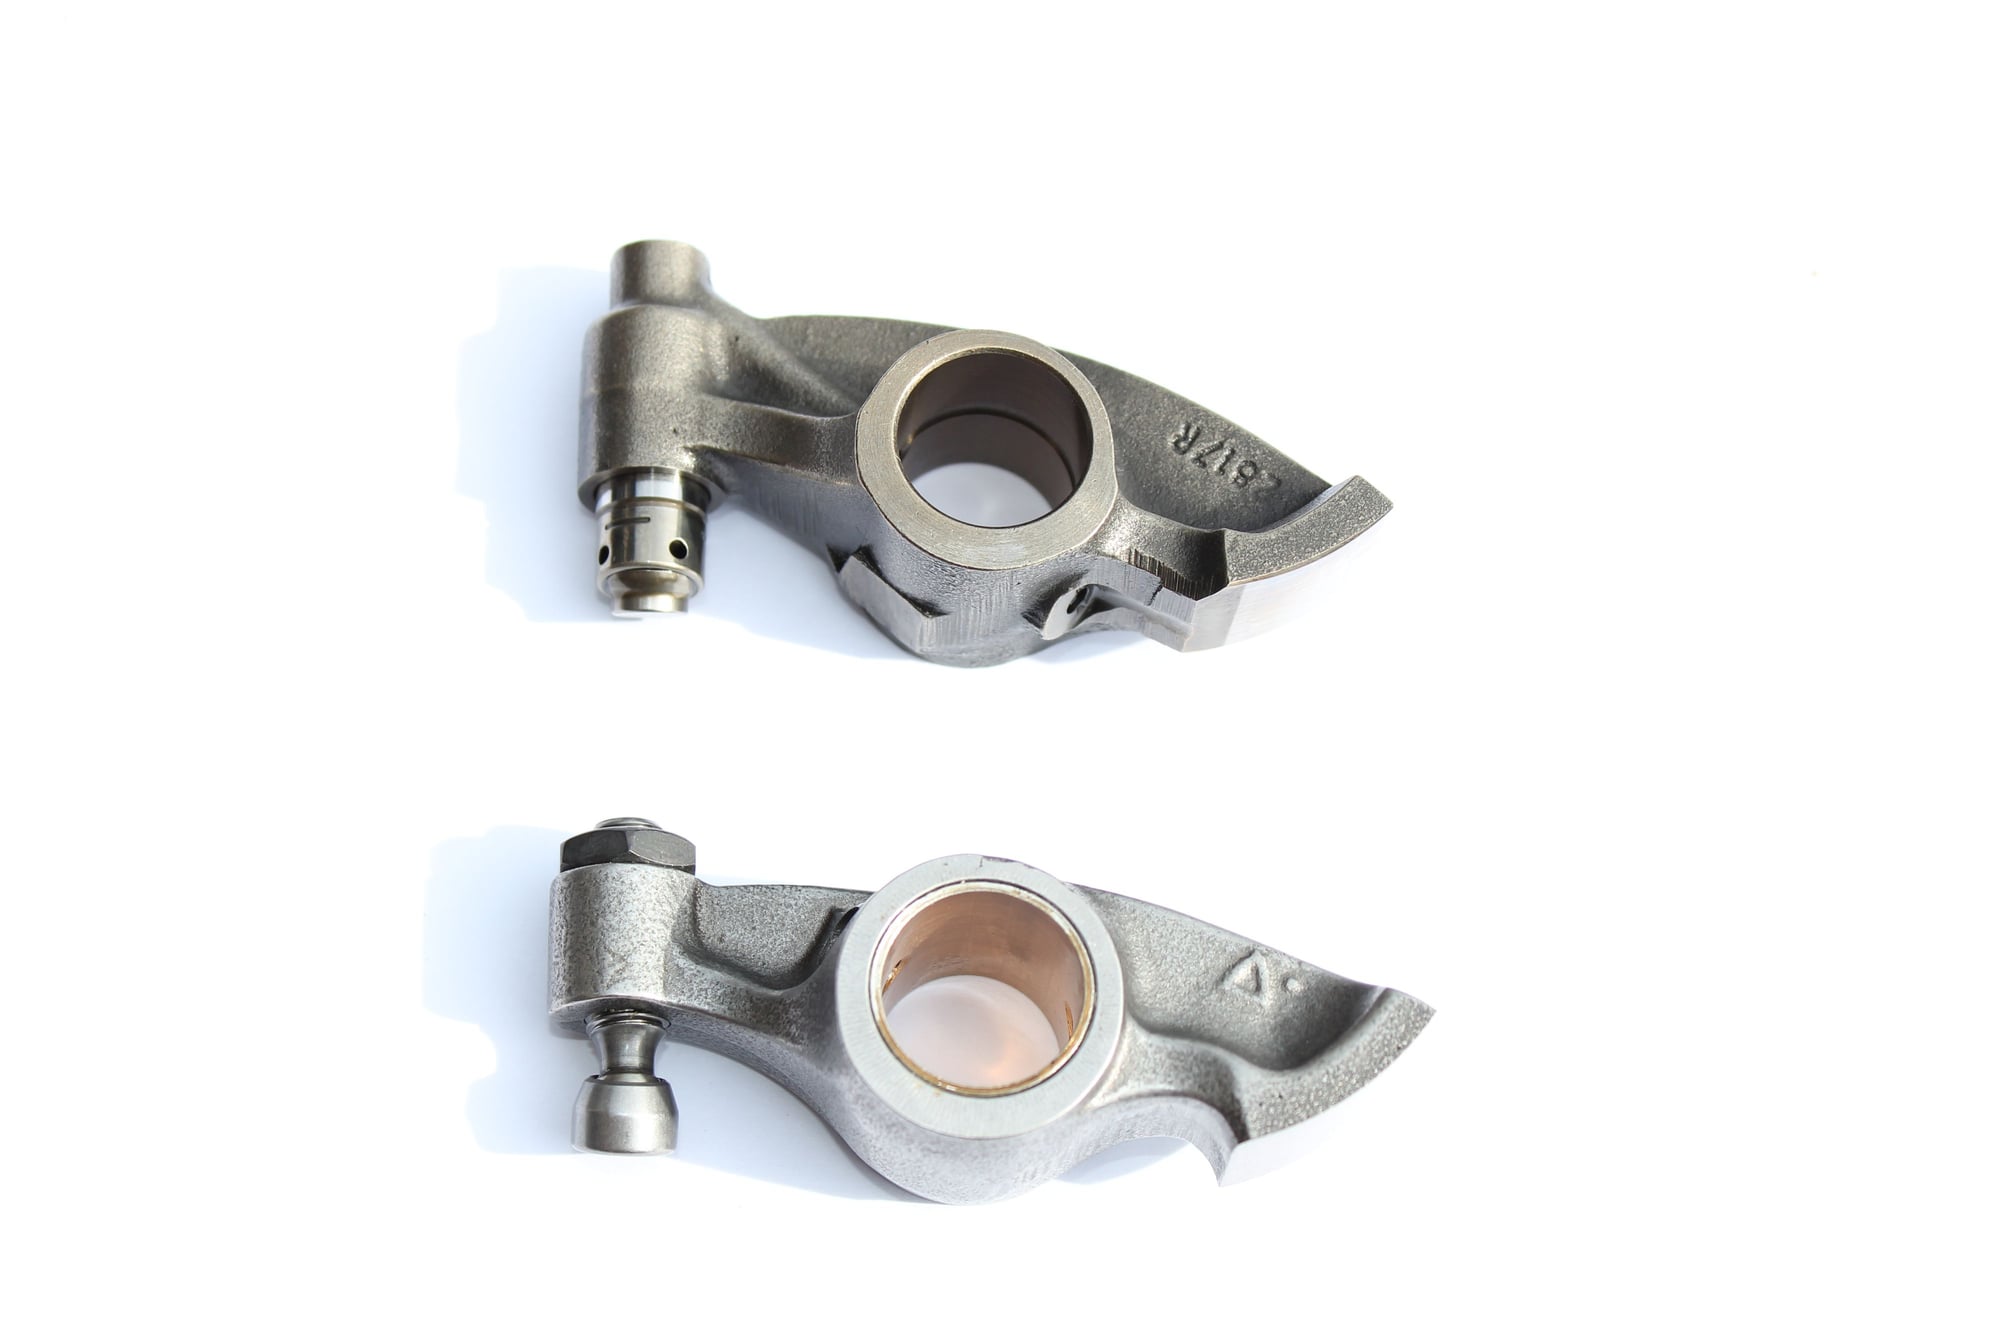
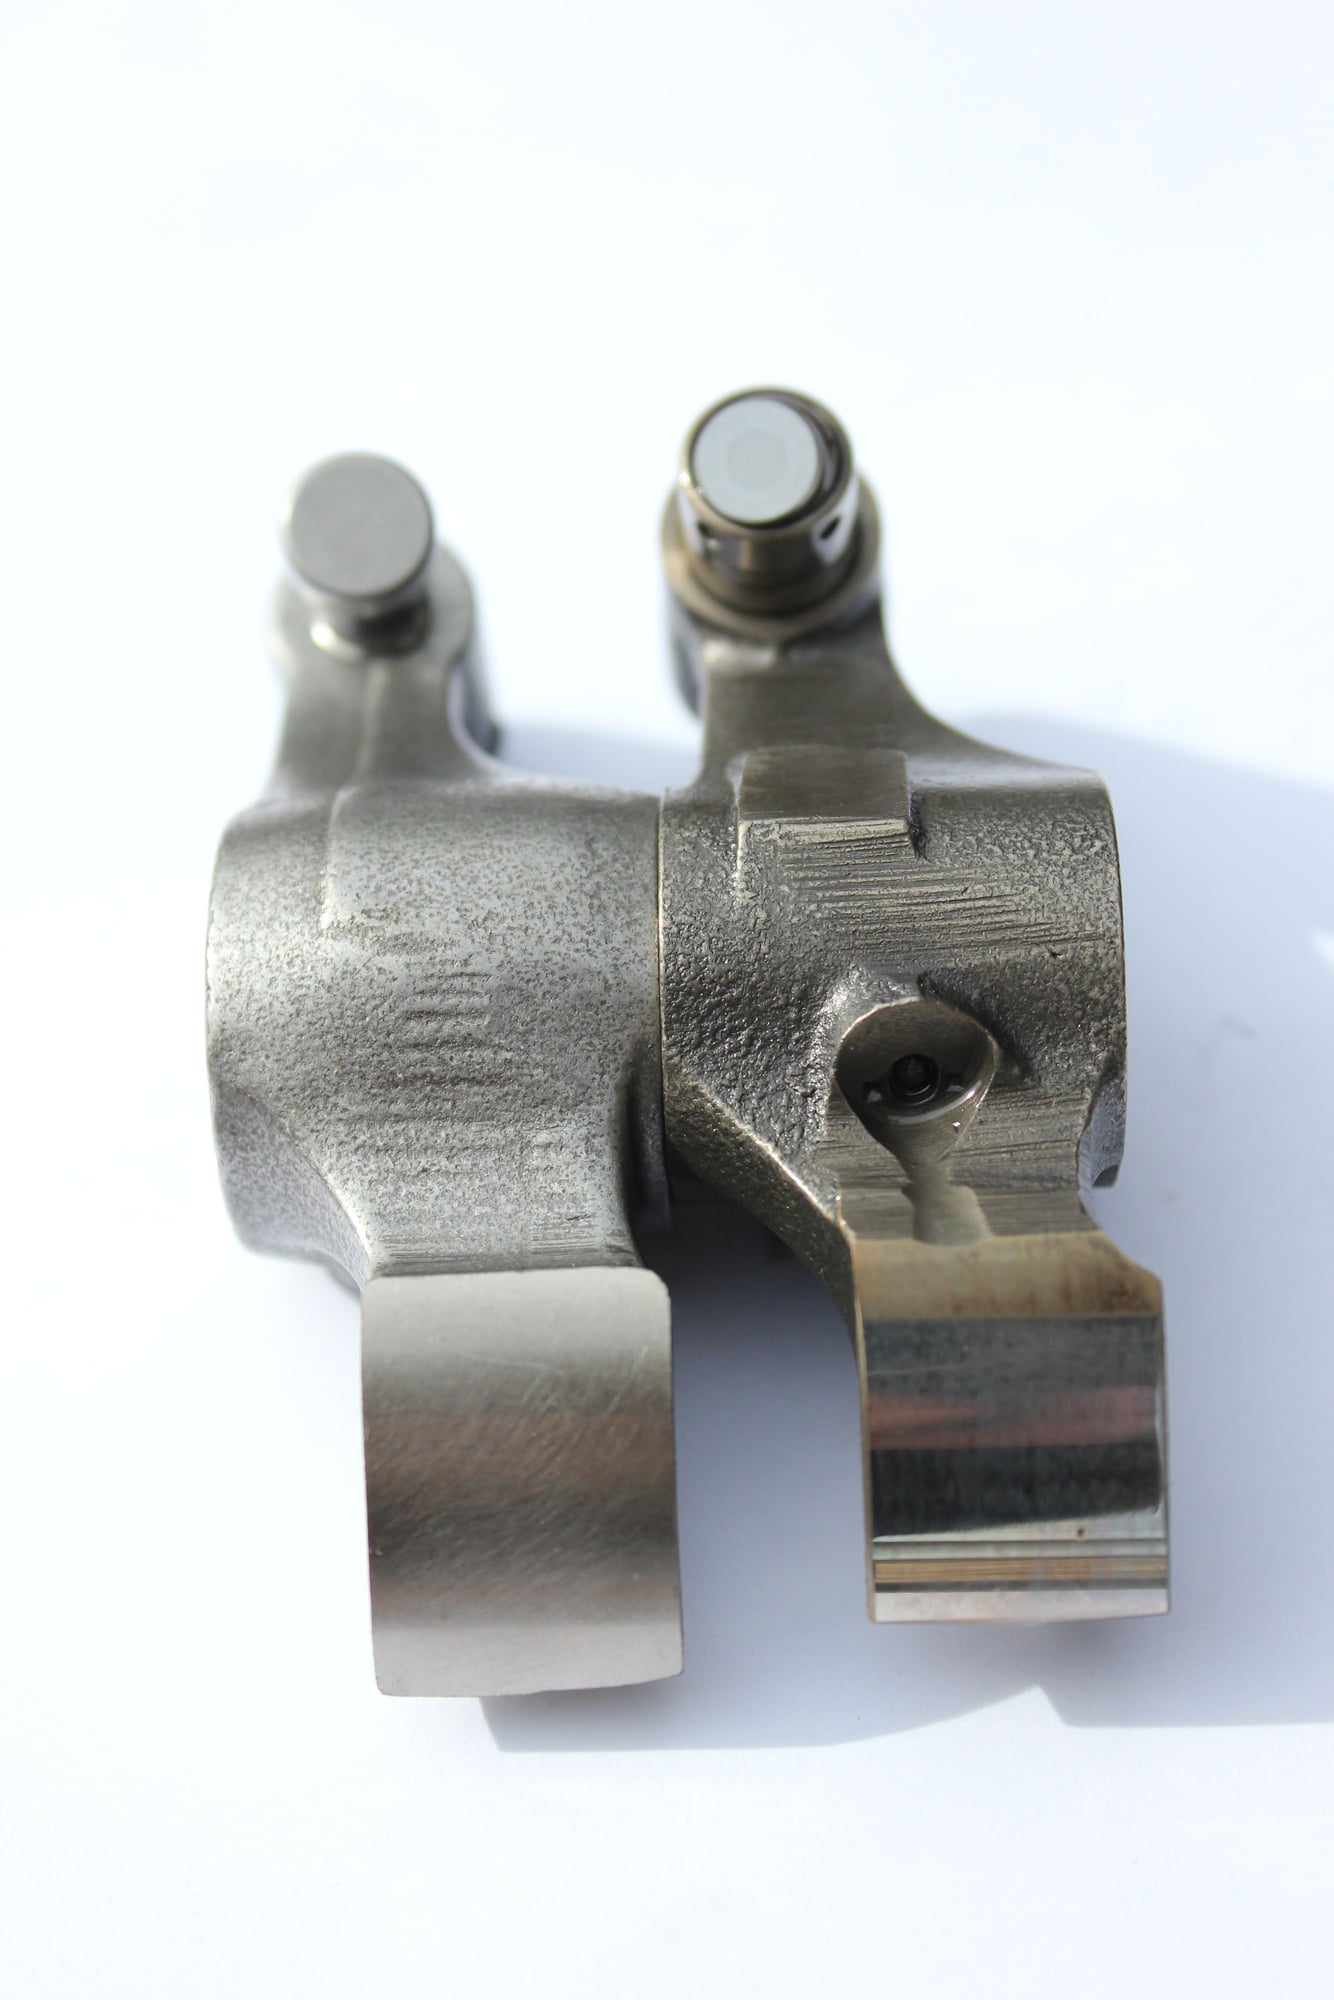
Hydraulic (top) vs Mechanical rockers. These were exchanged to allow the use of very aggressive cams in the new engine
Mechanical rockers vs Hydraulic (right). Side by side showing the difference in pad size as well the extra oiling hole in the hydraulic rocker.
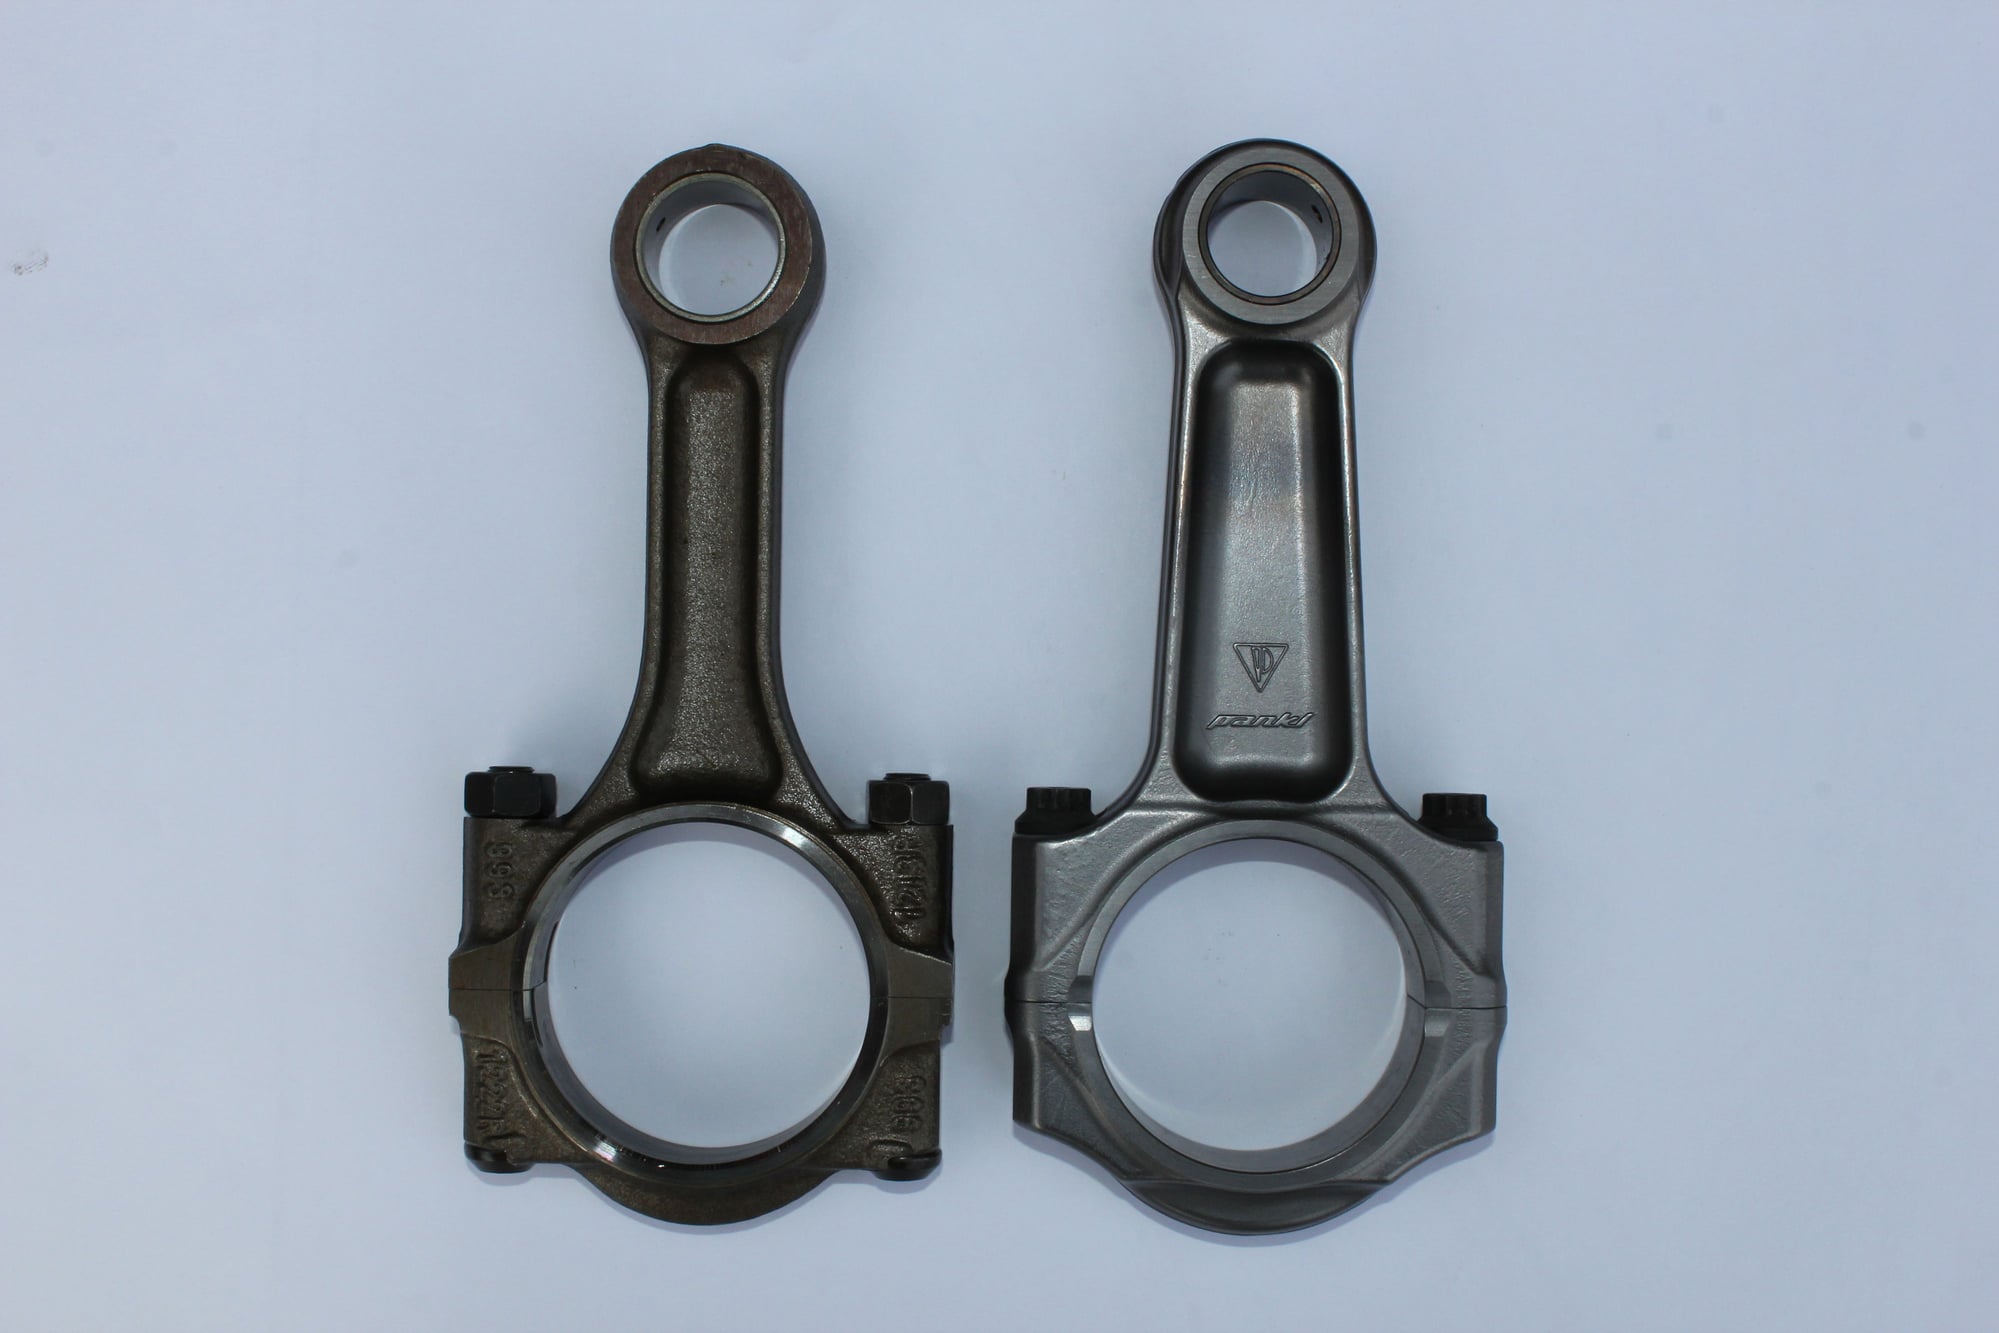
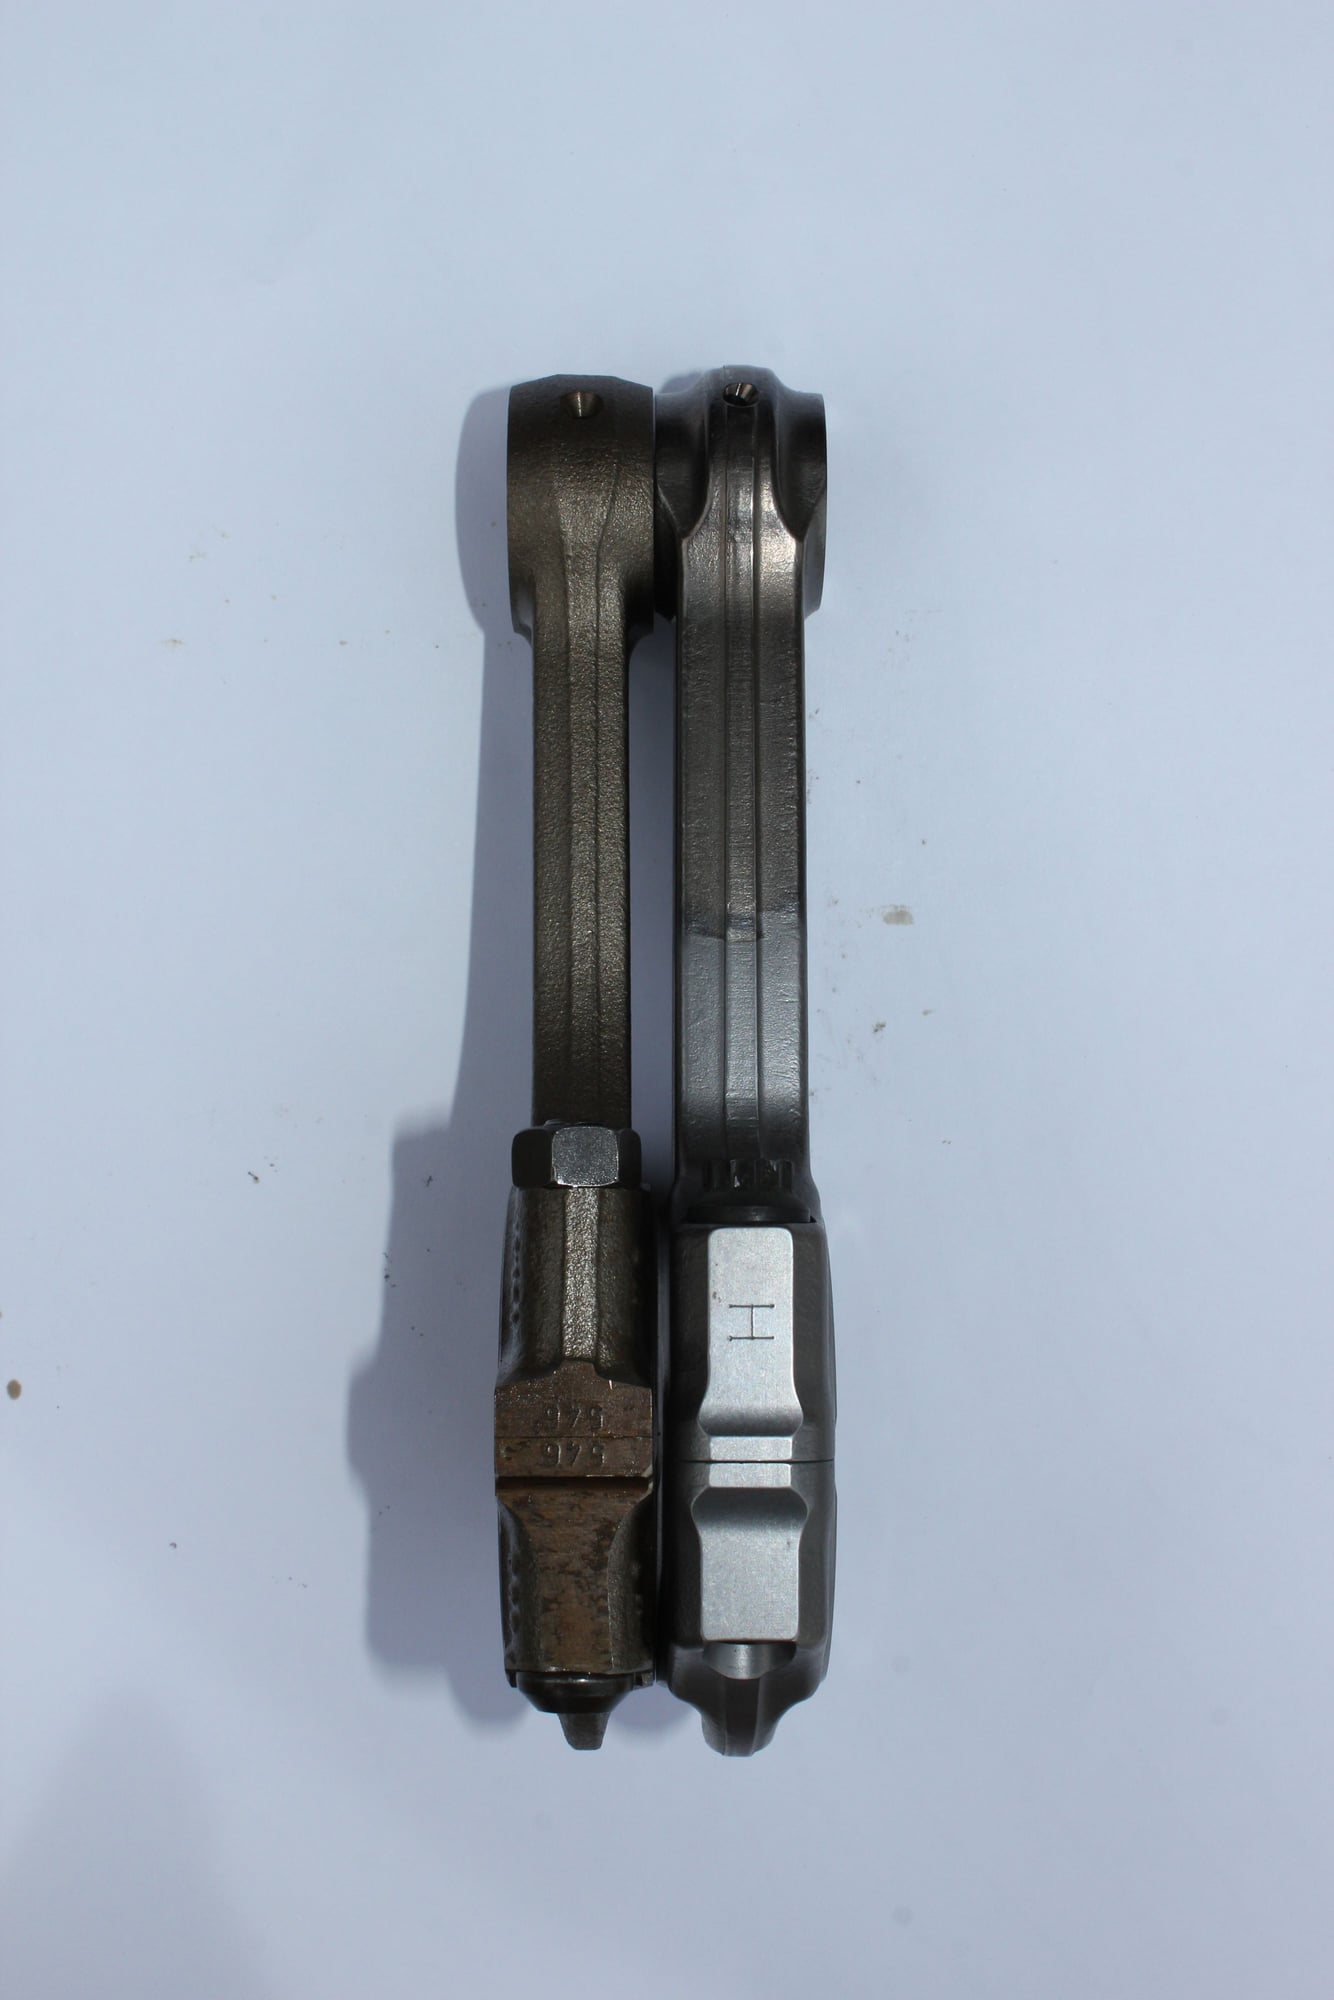
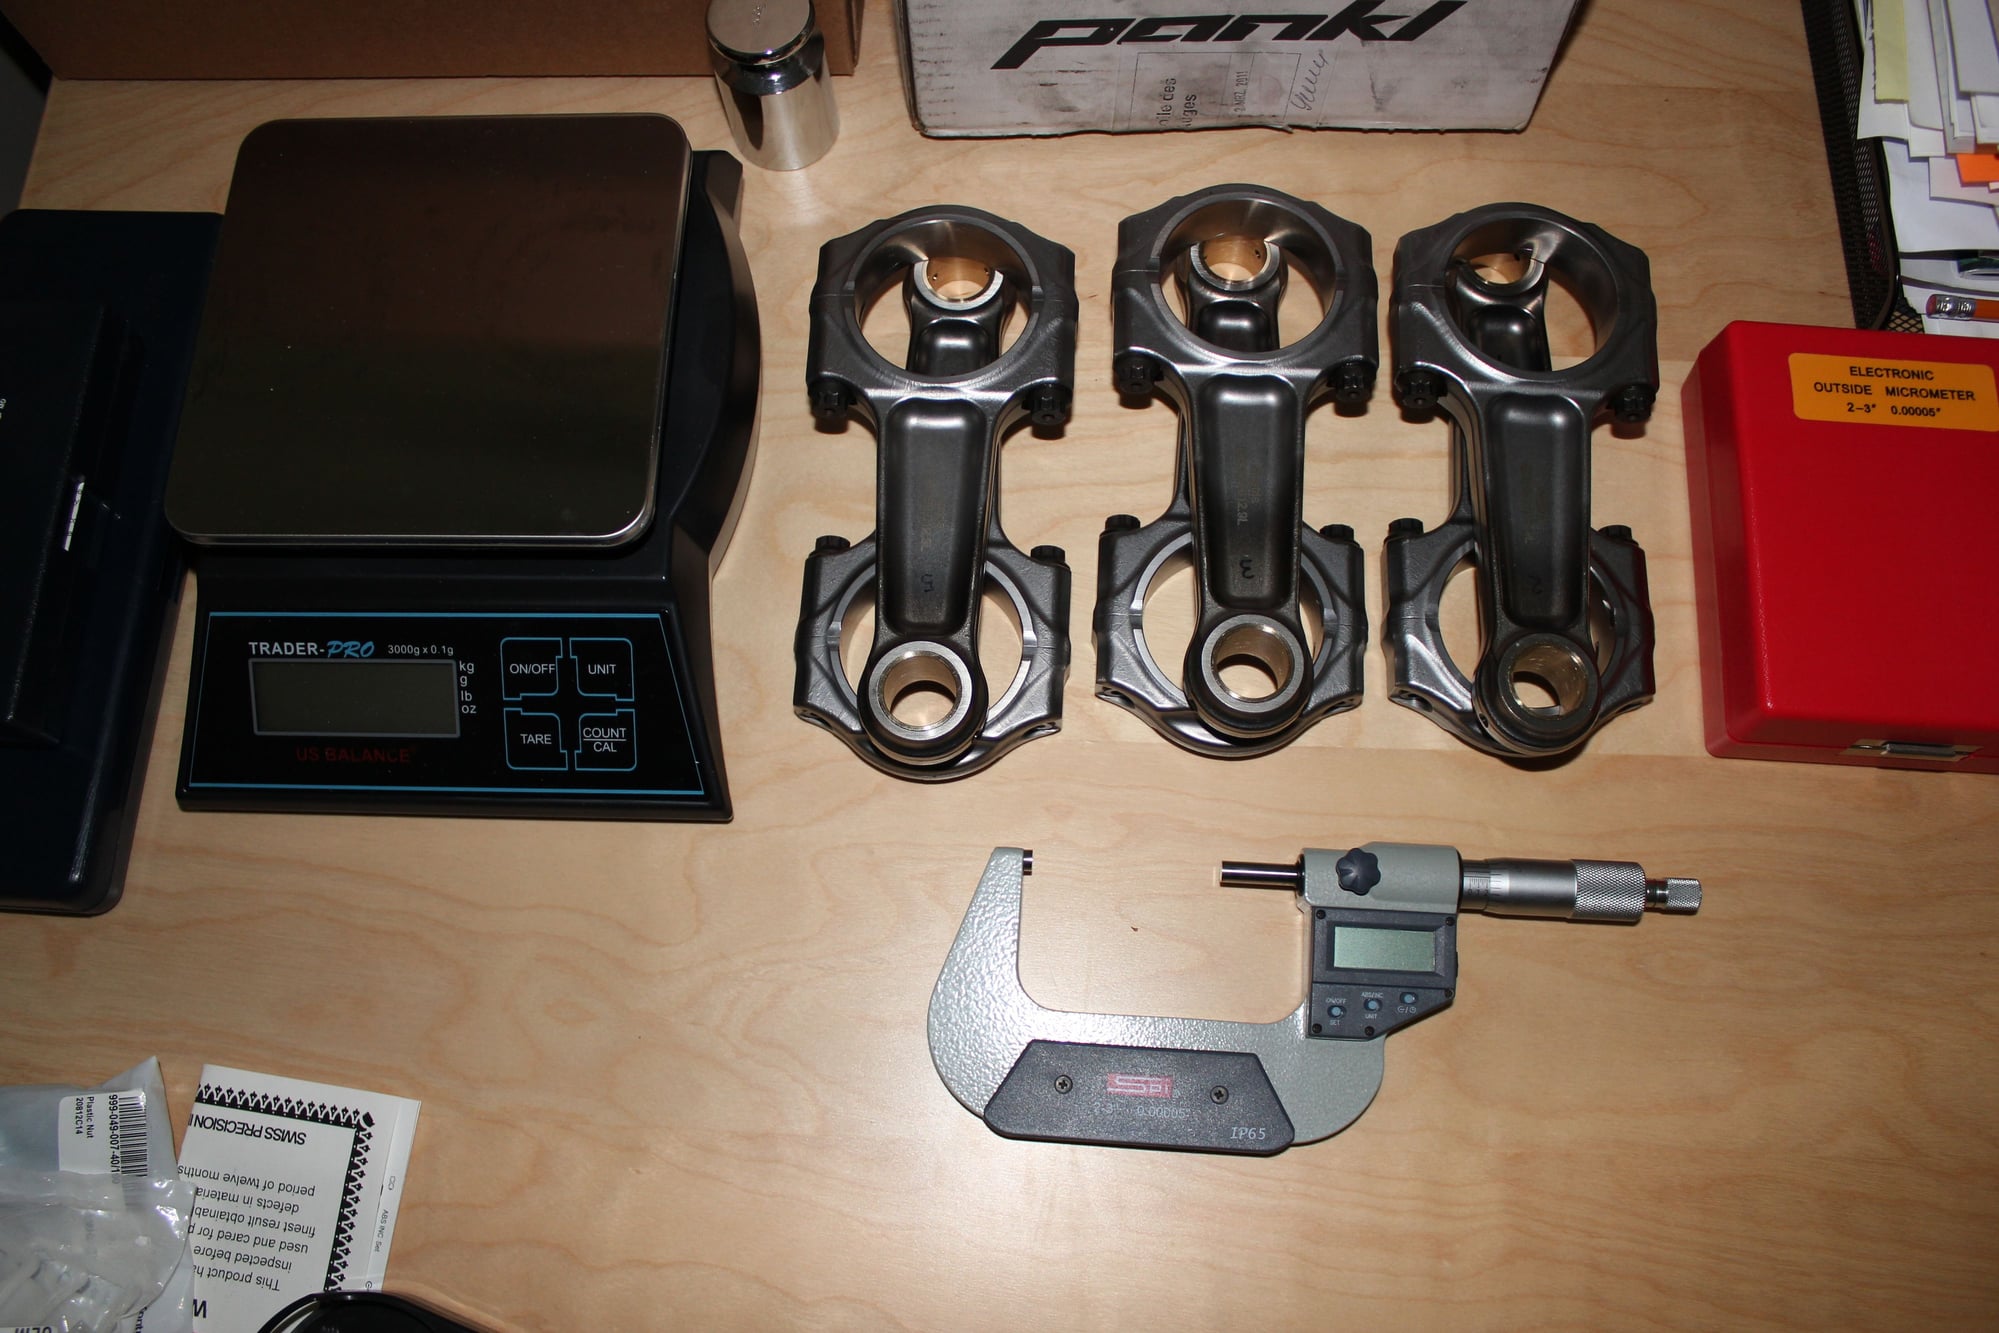
Mmmmm Titanium... Here is the stock rod (Left) Compared to the 997 GT3 Titanium rocker. Weight difference:- Stock 565 gm vs GT3 436gm (both Including rod bolts). Also the Bigend is larger on the GT3 by 5mm. This slows the bearing speed down for longevity at higher RPM
GT3 (Right) has wider journals for both big end bearing as well as small end bushing. The wider bushings plus the bigger big end equate to better high RPM performance.
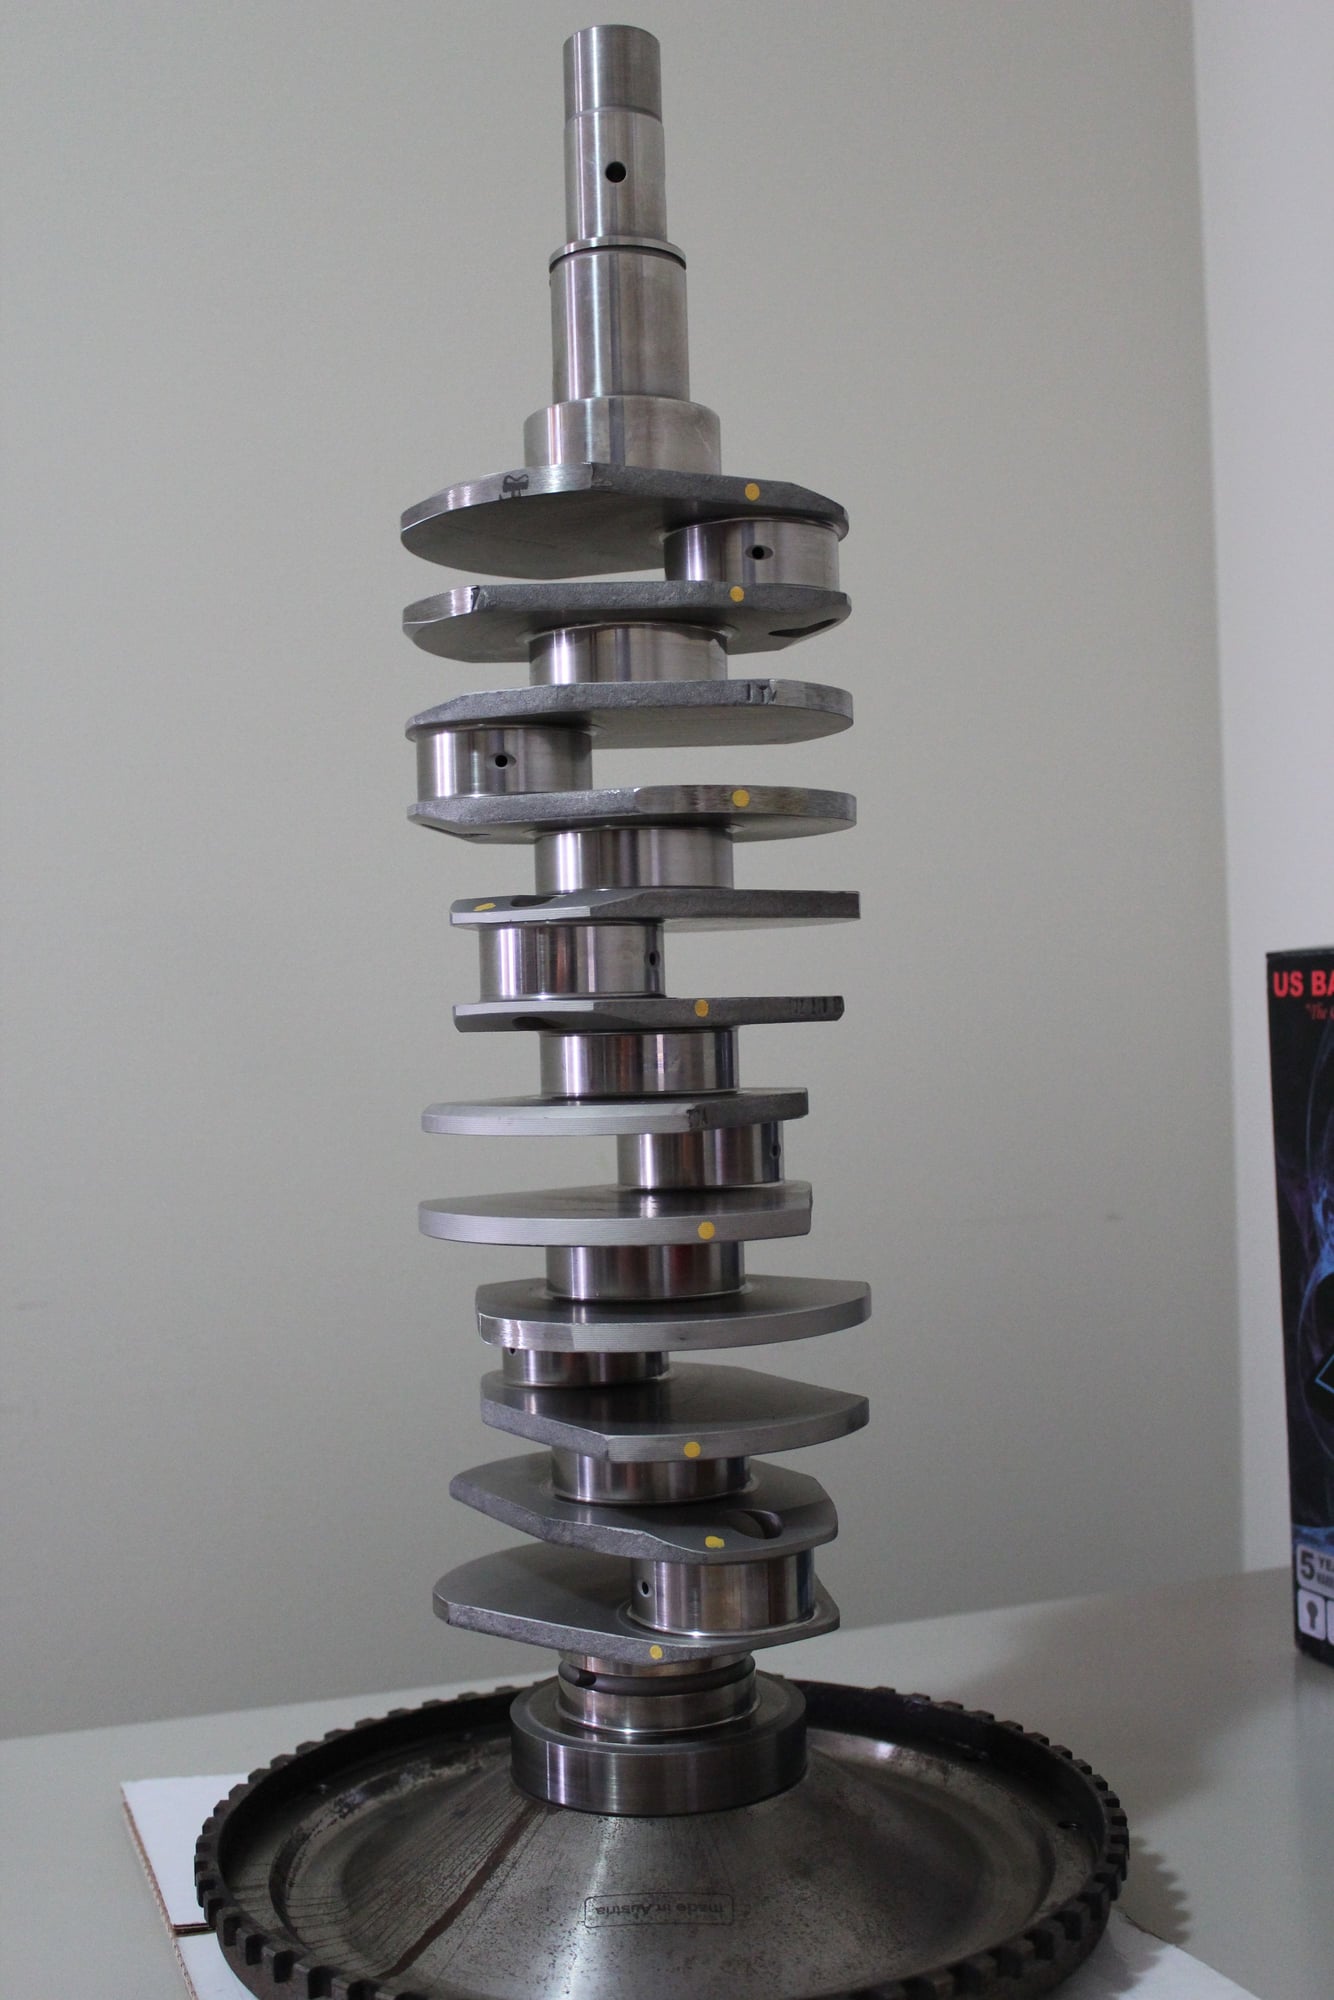
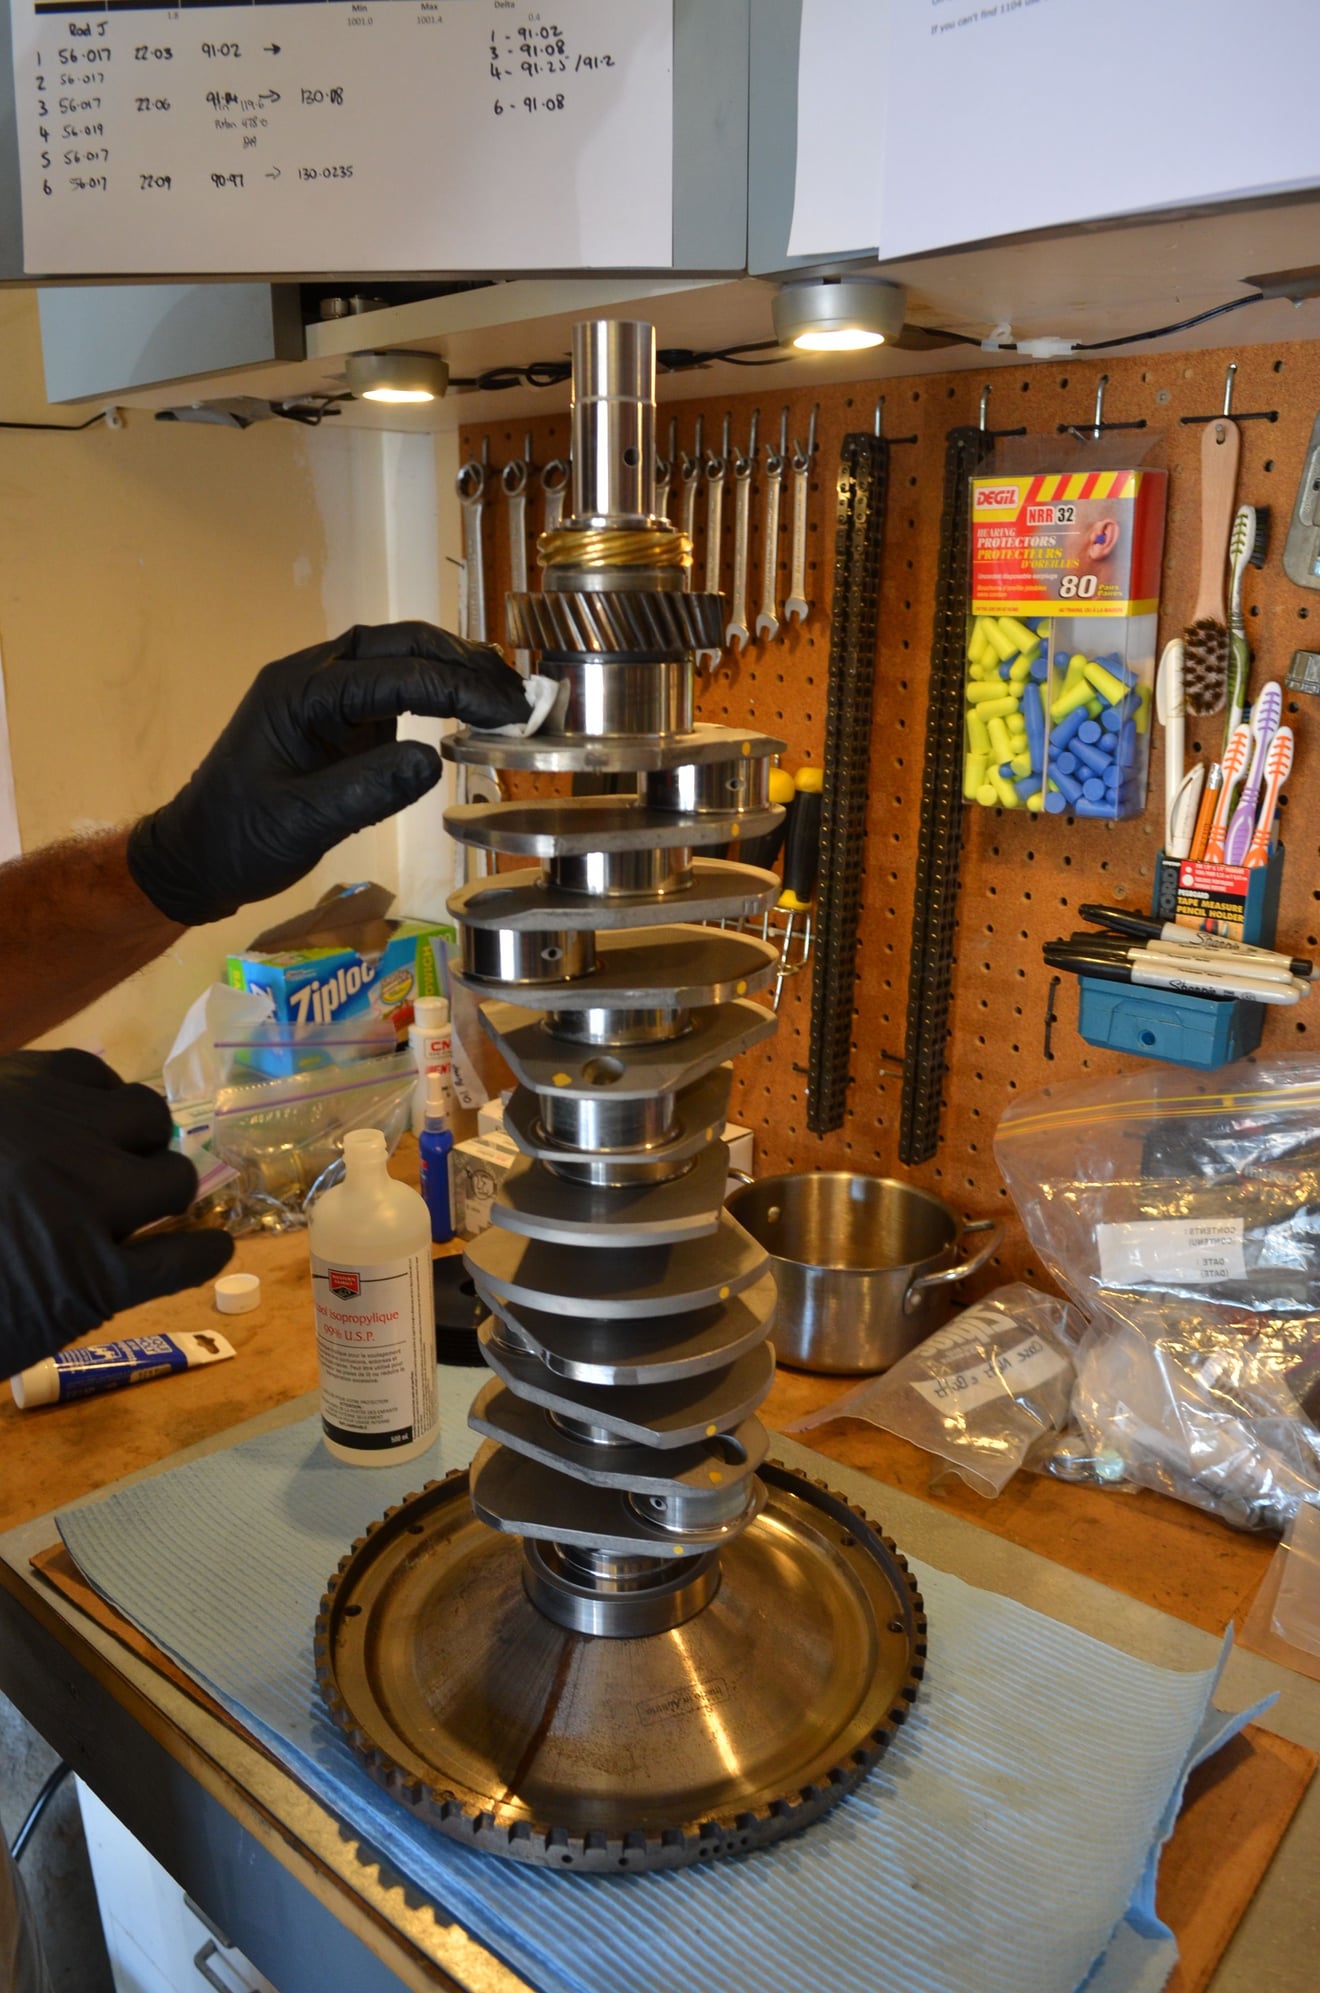
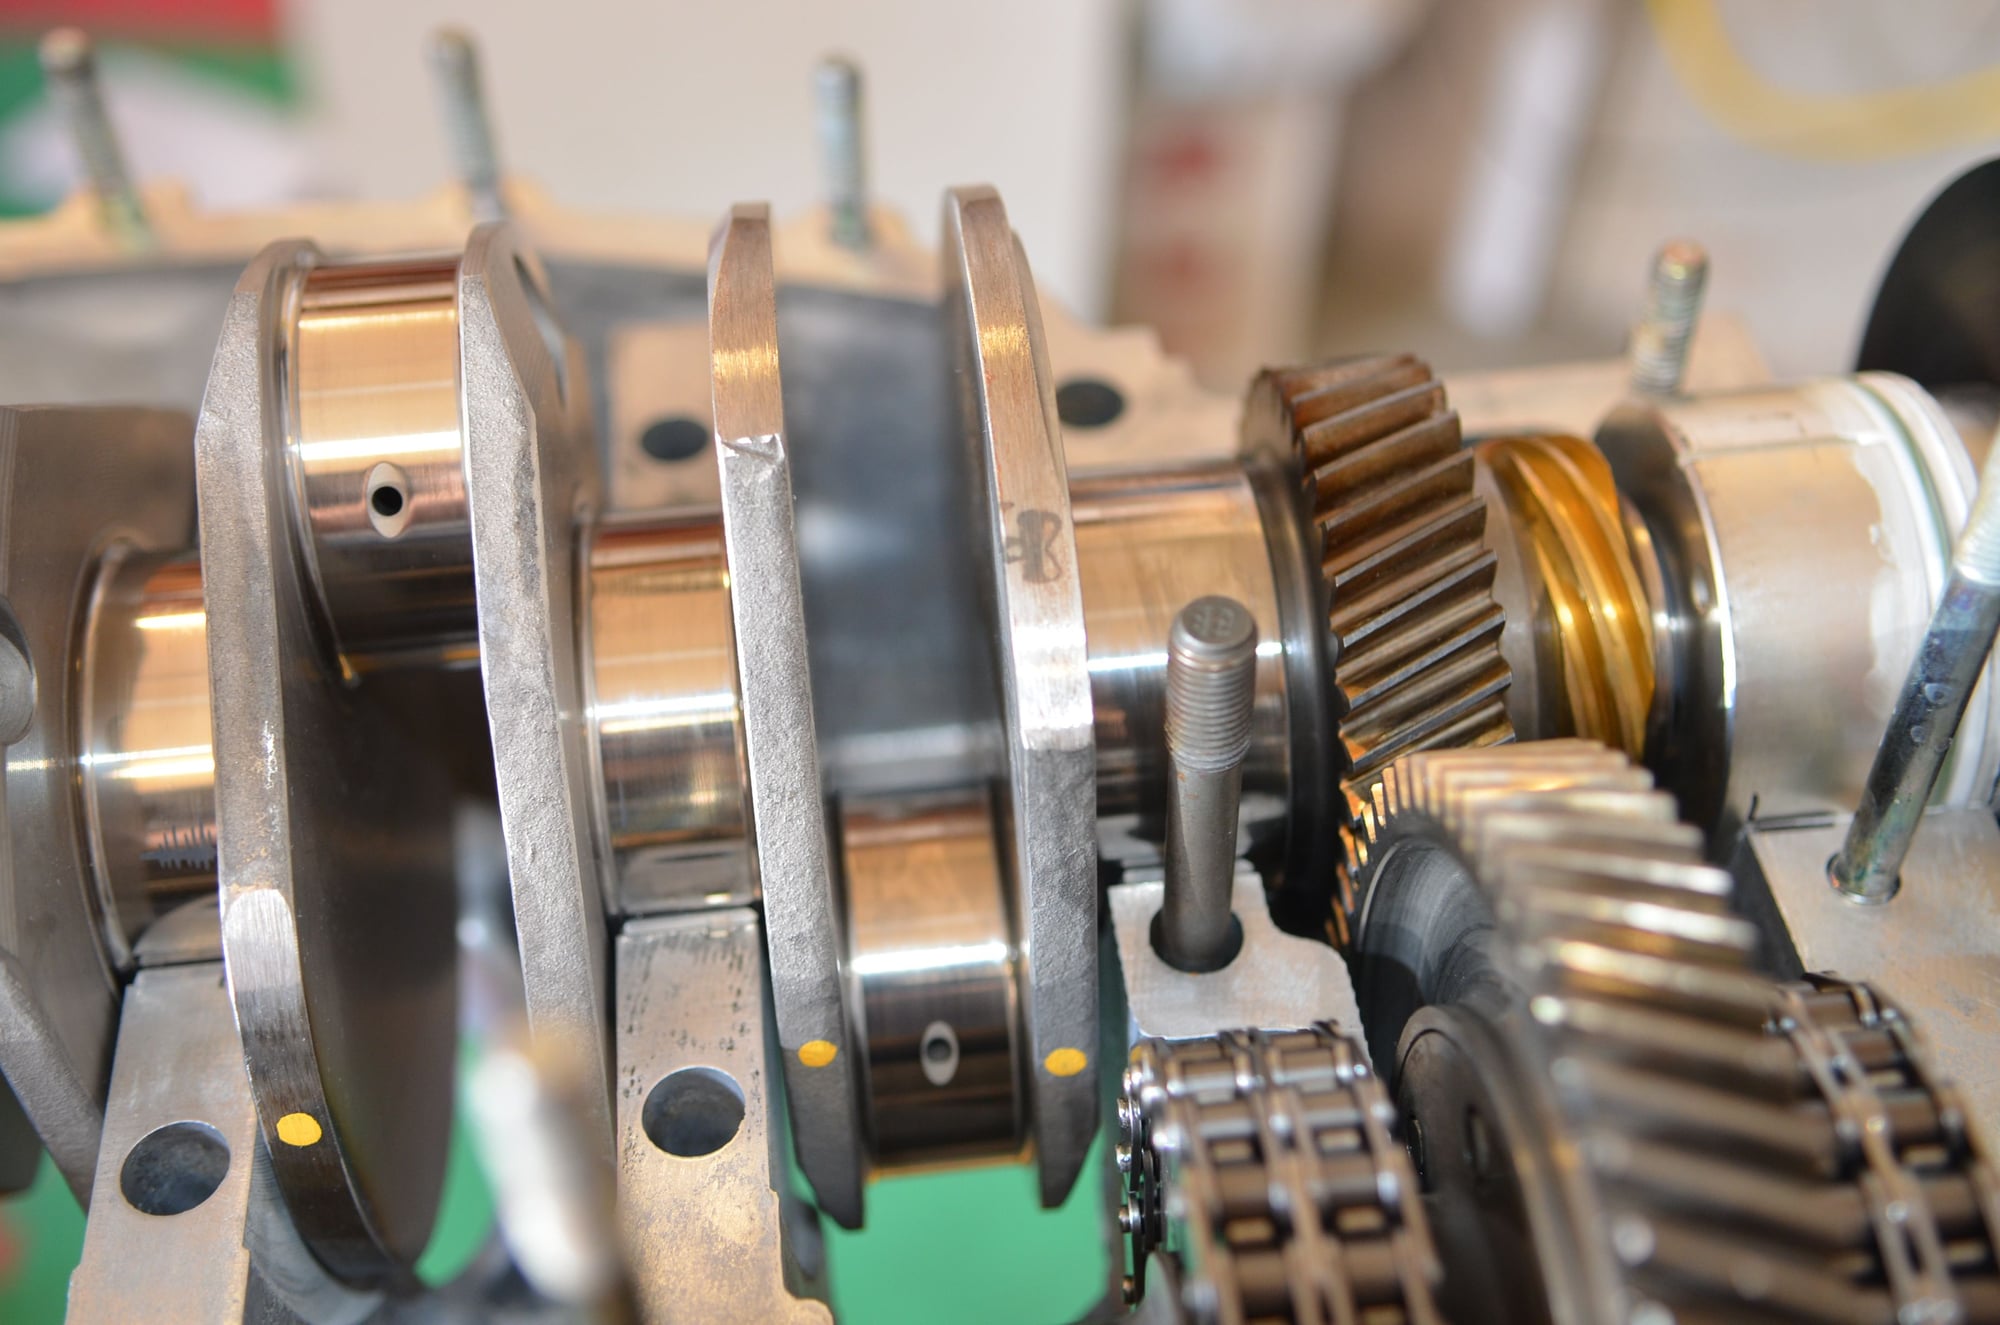
GT3 Crankshaft.. There are alot of differences between this and the stock crank: The main one being this is a fully counterweighted crank, which actually increases the weight over the stock unit by approx 2.5lbs.
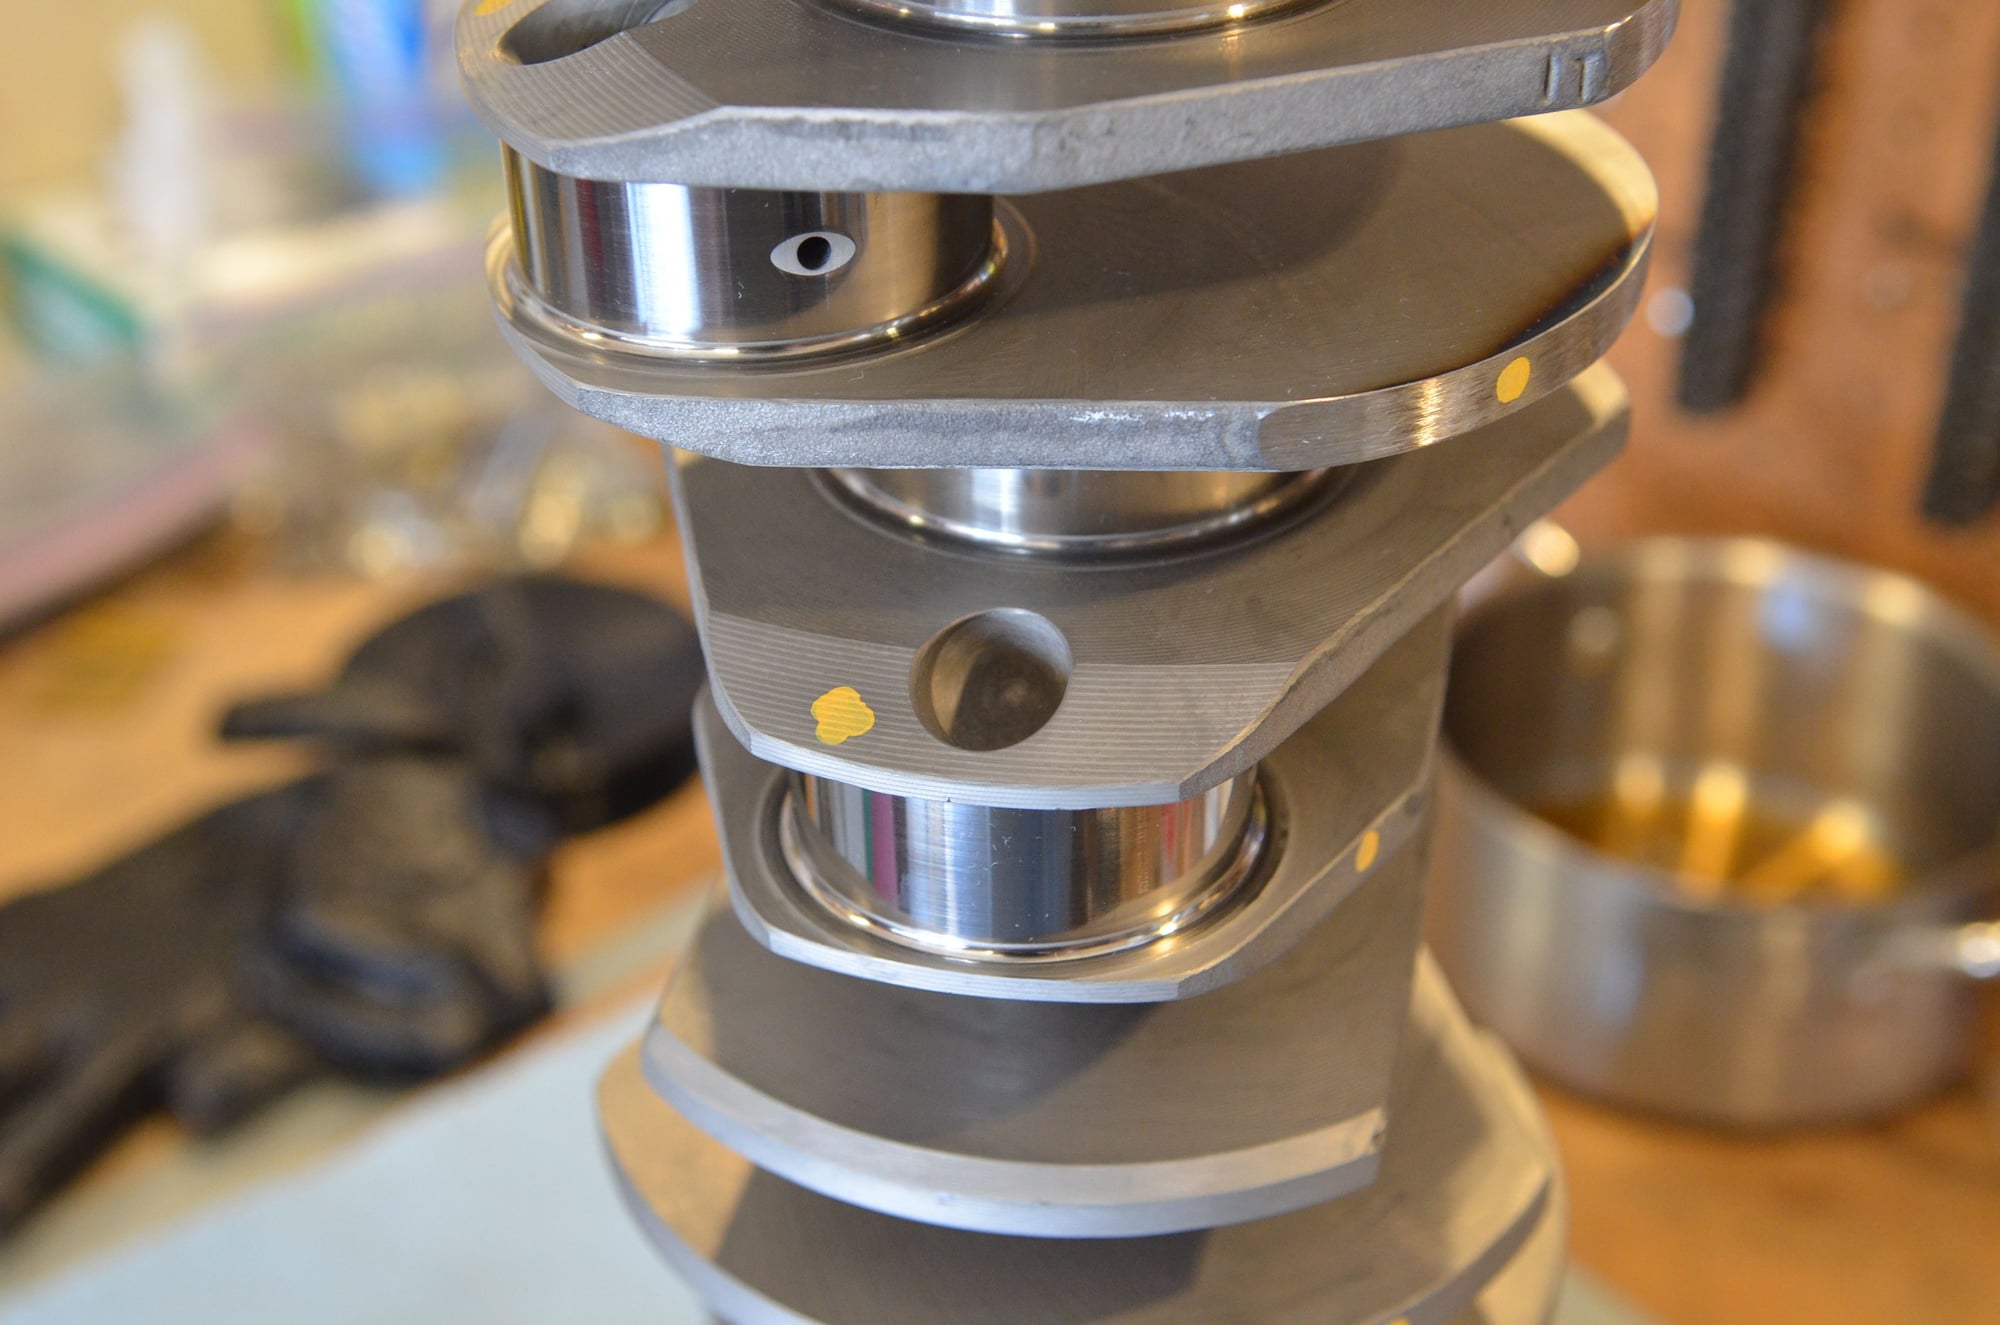
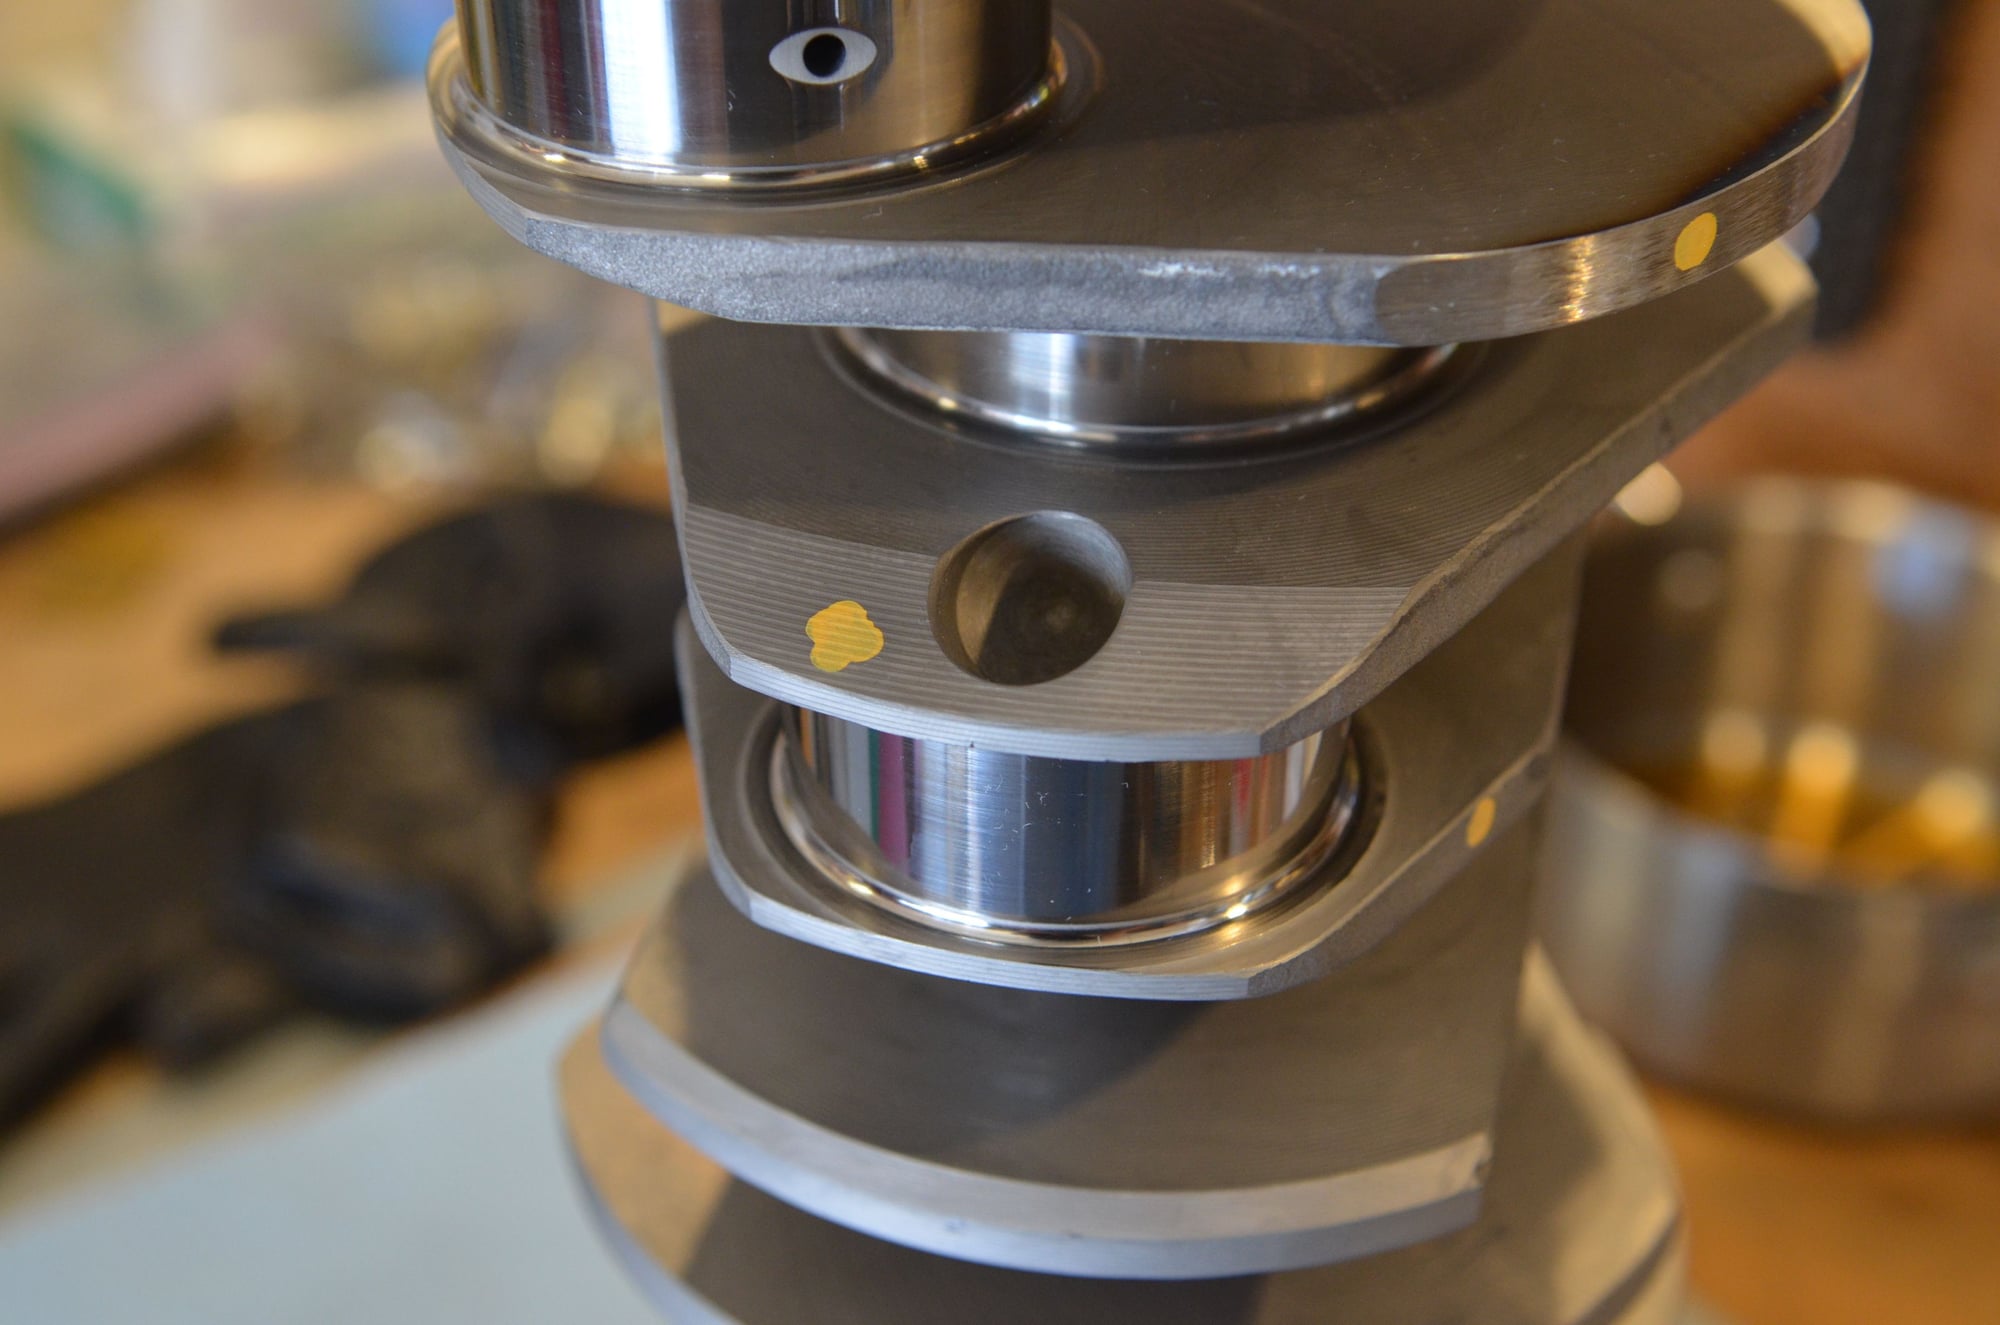
This is a great shot of the 'fan shapped counterweight' of the GT3 Crank. Also here you see the balance hole, on the other side of the journal is a counter sunk hole with an oiling hole. perfect balance. The yellow dot is the indicator for the bearing set needed to match this crank.
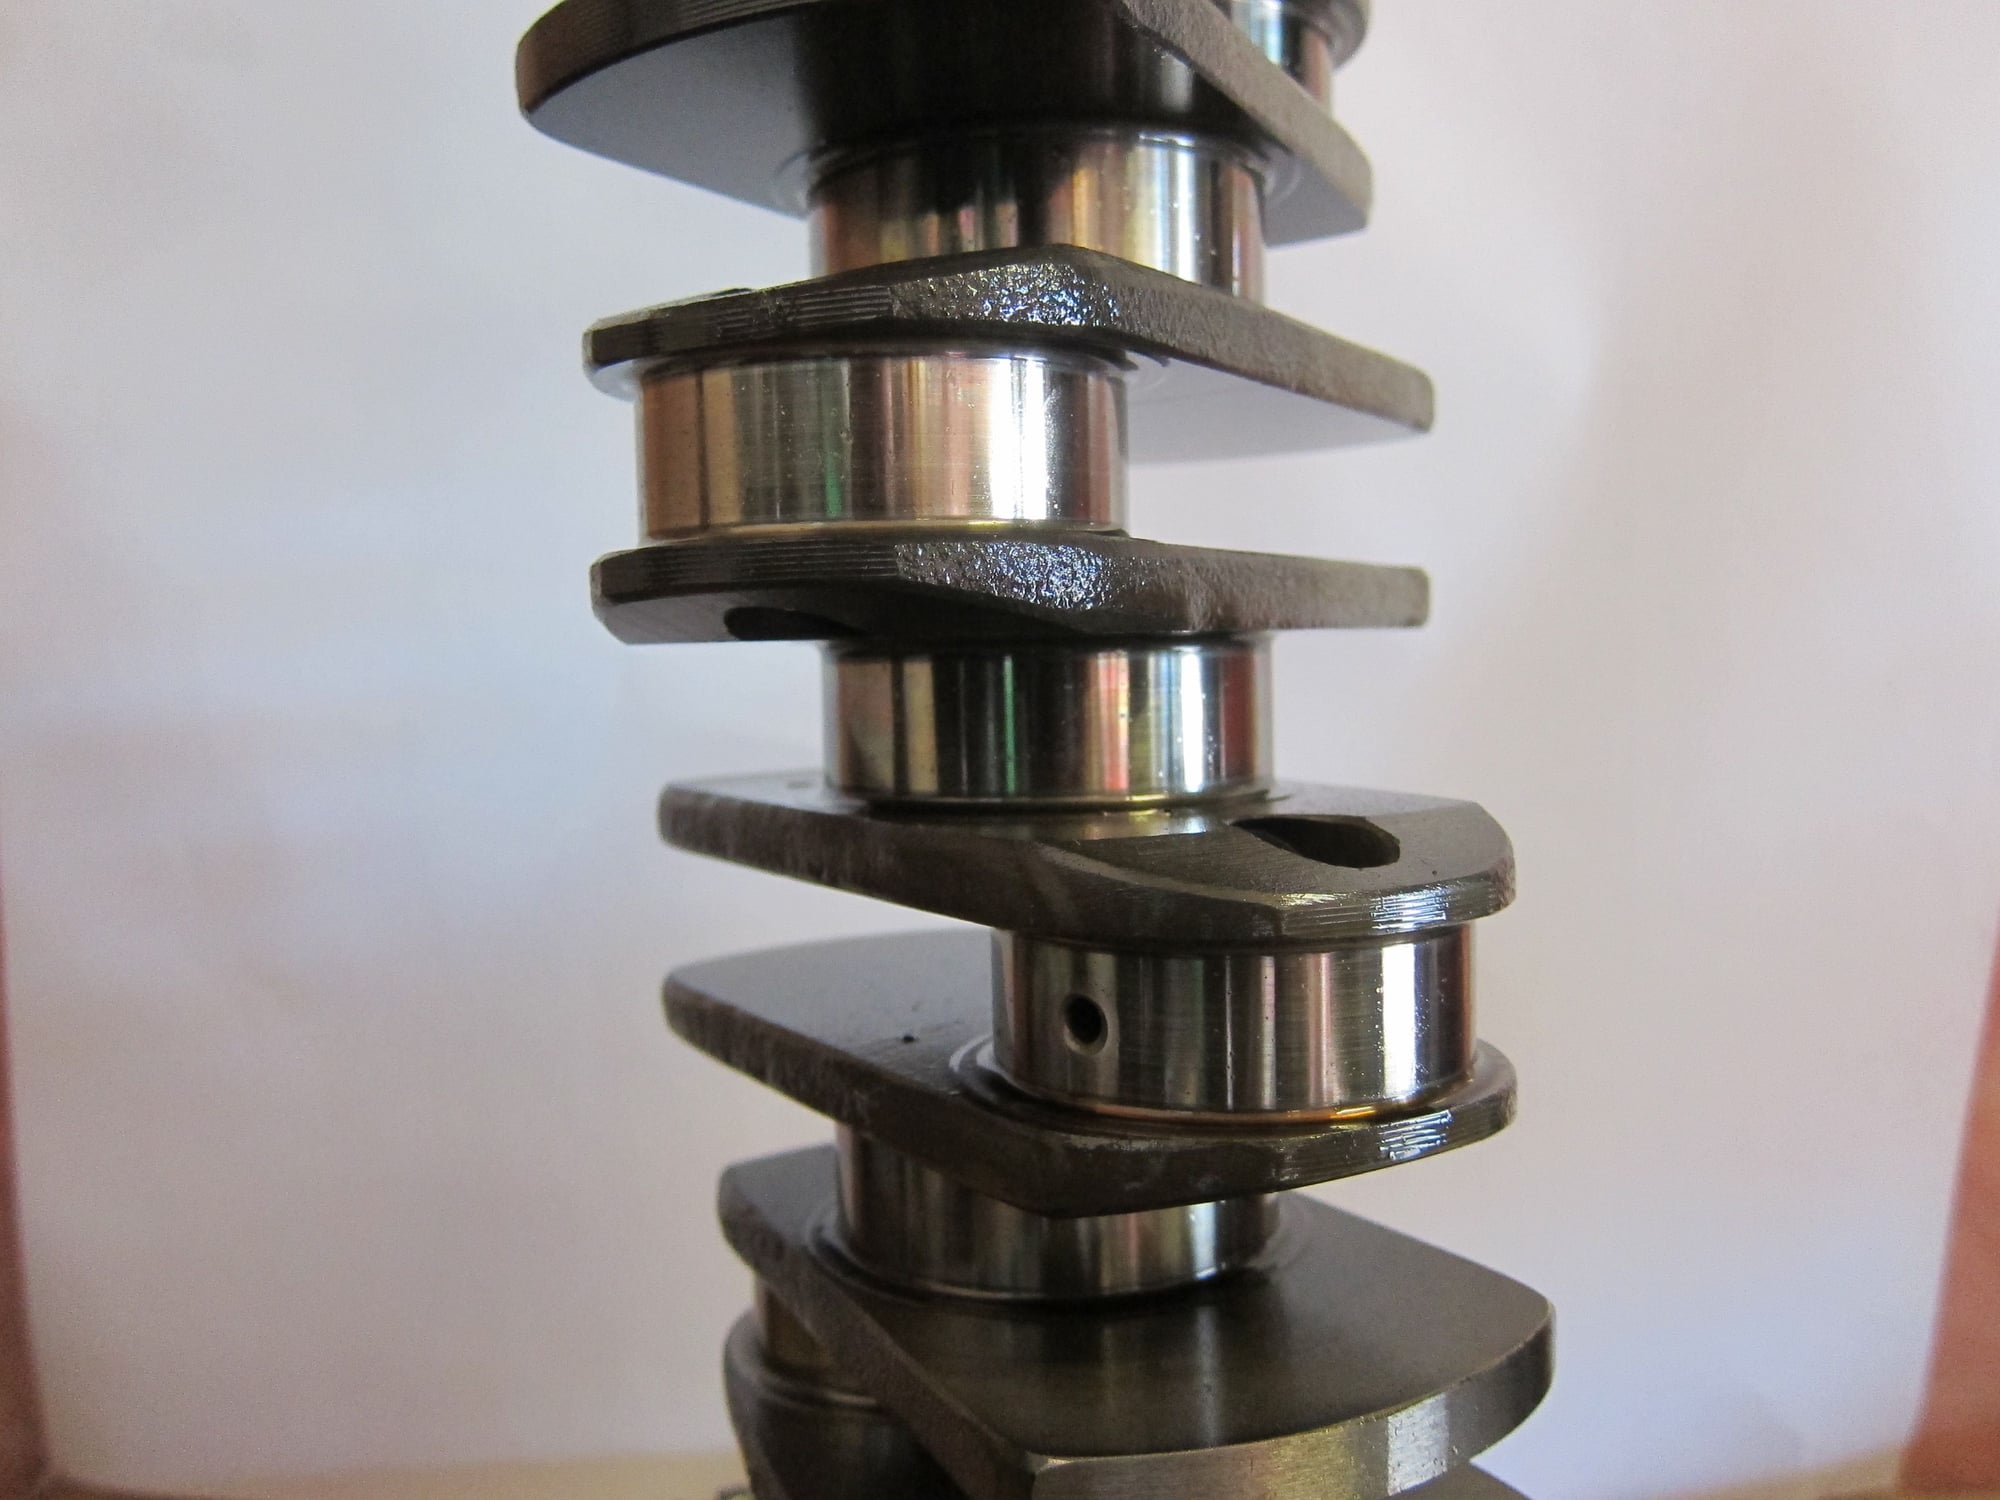
Here is a closeup of the Stock crank, note the difference in shape and size of the counter weights.
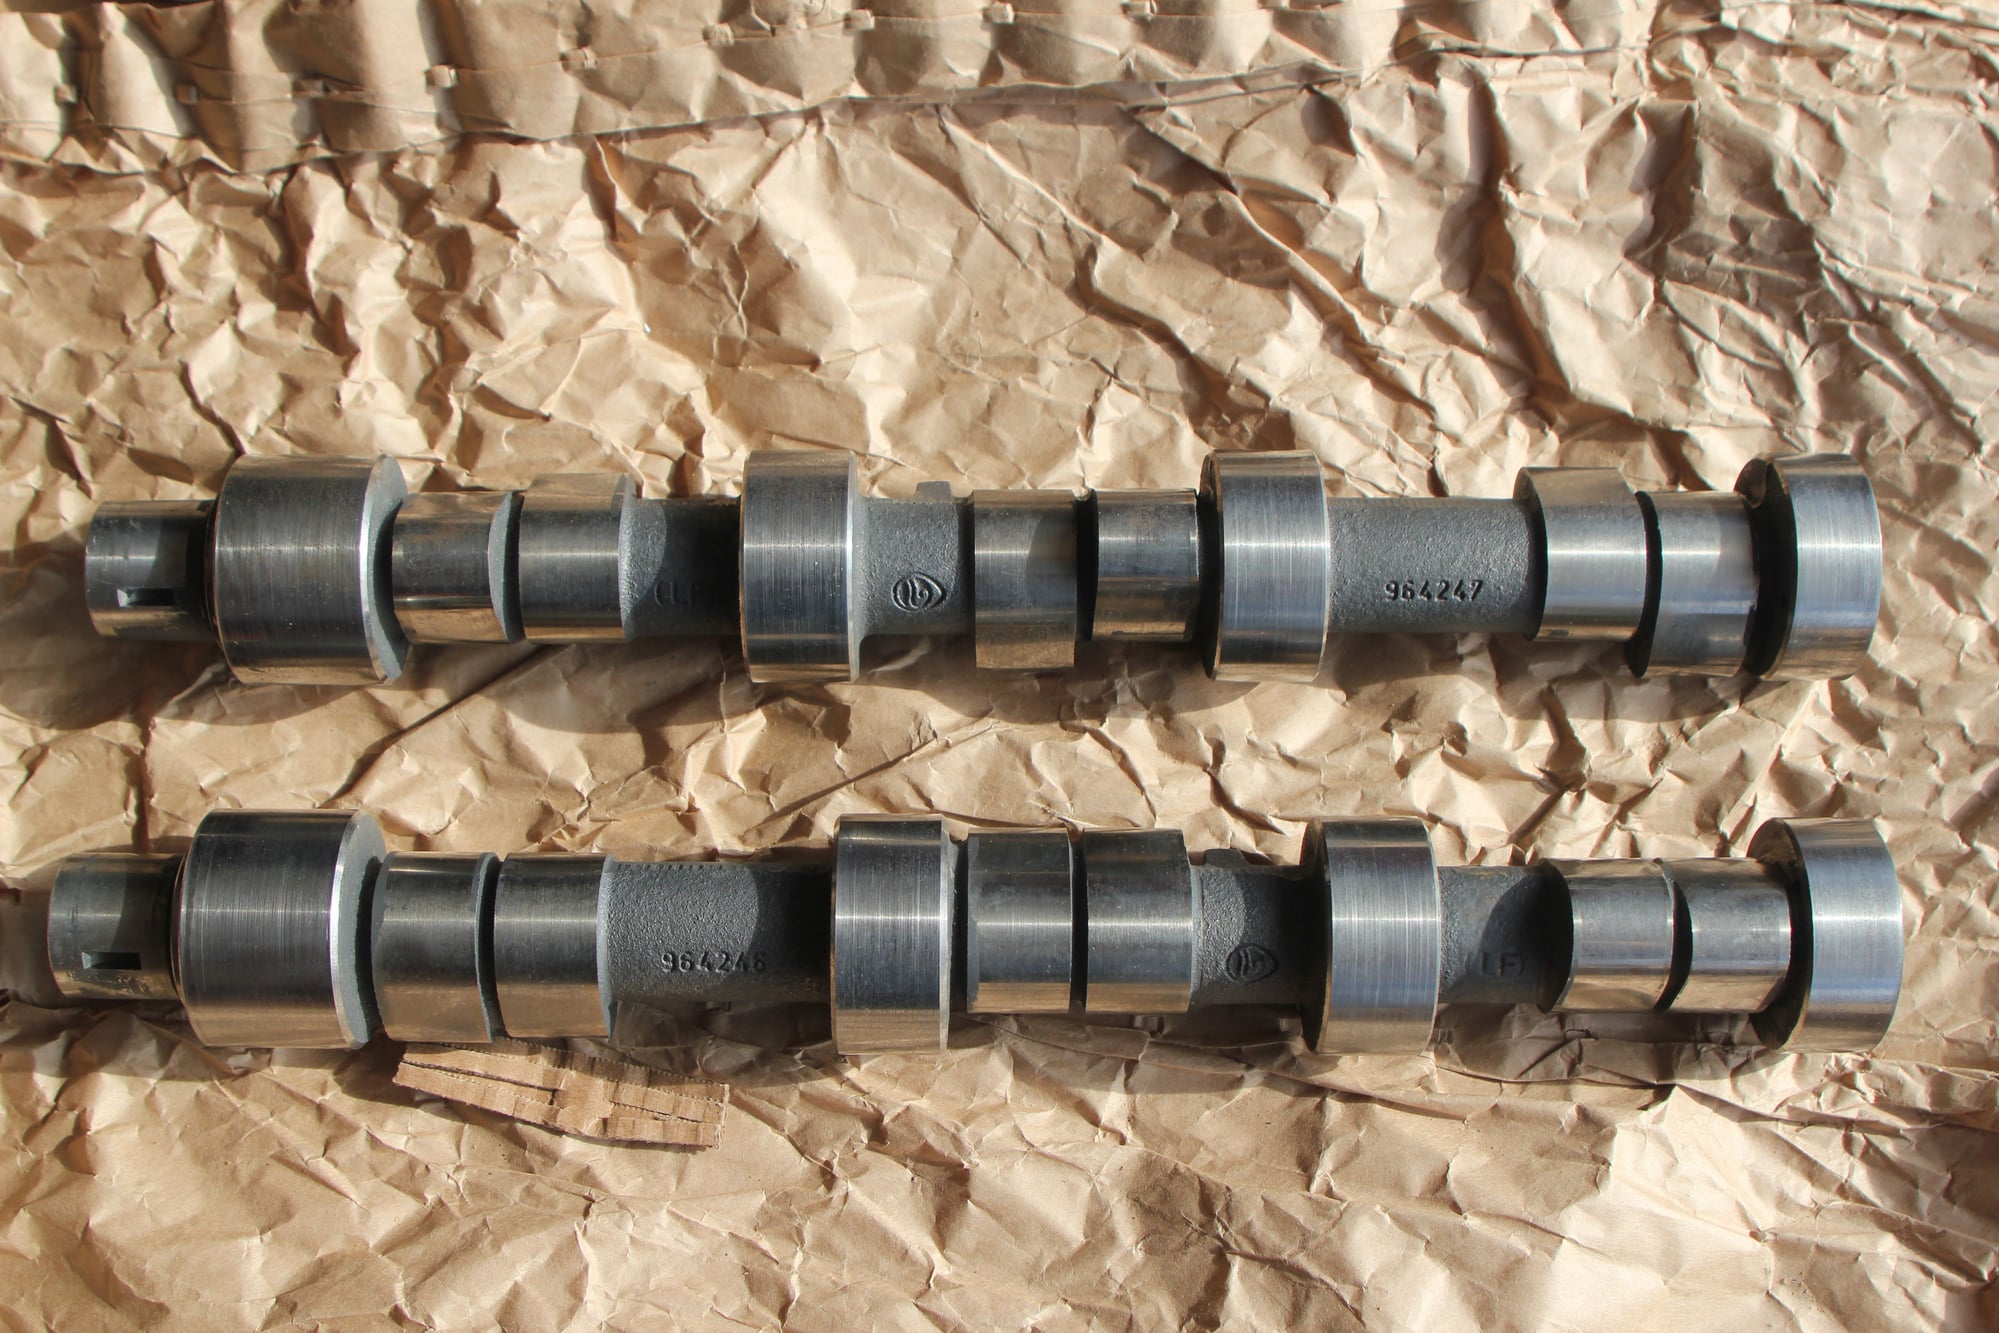
DC/80/RSR Cams, you can see the size of the cam lobes compared to the stock cams. These are a little more agressive that the 993 RSR cams. Duration @ 1mm Intake 283 vs 280, Exhaust 264 vs 264. The lift is also a little higher on the Intake side 0.505 vs 0.490. Exhaust being the same. Another difference between my cams and the RSR;s is the lobe center separation. Mine being 108 Degrees vs 109 for RSR. Last difference is the lift at over lap (how you setup the cam timing) 5.1mm vs 4.6 for the RSR. Also, you will notice there is no drive nose on the cams for the power steering pump
It's been a long time since I have updated this thread, going through some of the photo's I had got me re-inspired.... Doug, who wrote the articles for Excellence Magazine also has a couple of thousand photo's on his camera as well that I will try and integrate here as well...
Hope you enjoy, If you have any question's fire away!!!
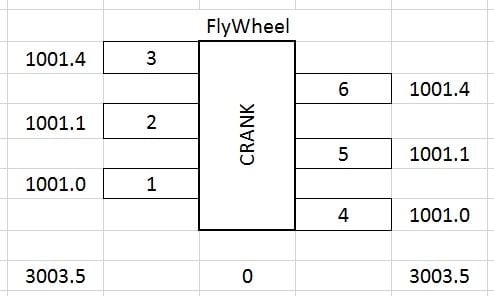
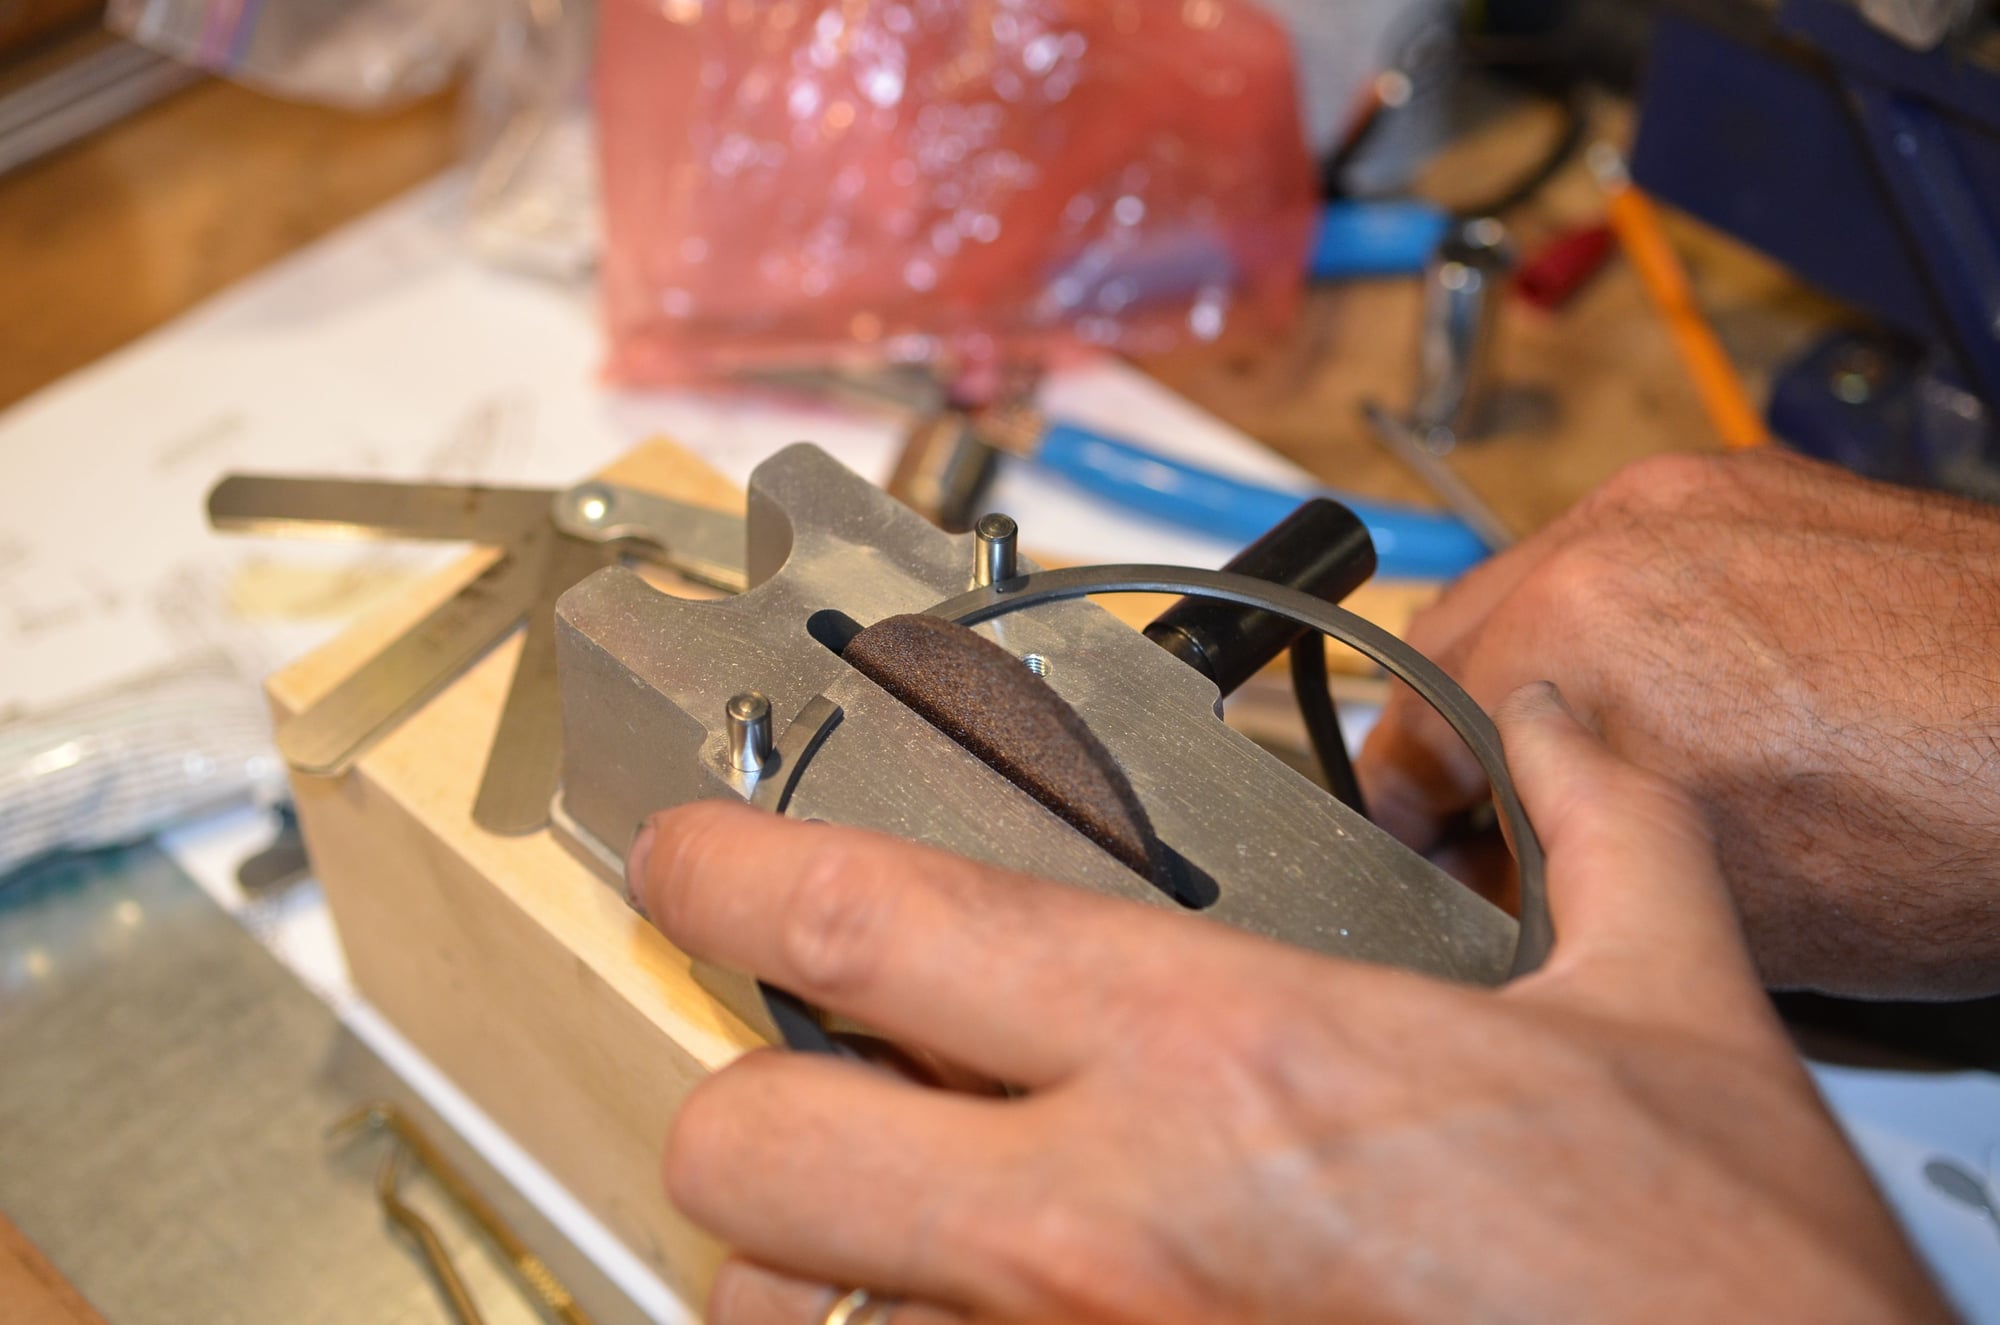
PArt of the build process was the blueprinting.. Every part was measured and weighed. right down to the rings. Once everything was weighed the parts we marked and the data was put into a spreadsheet to start the mix and match process. This is the work that costs alot when paying someone....
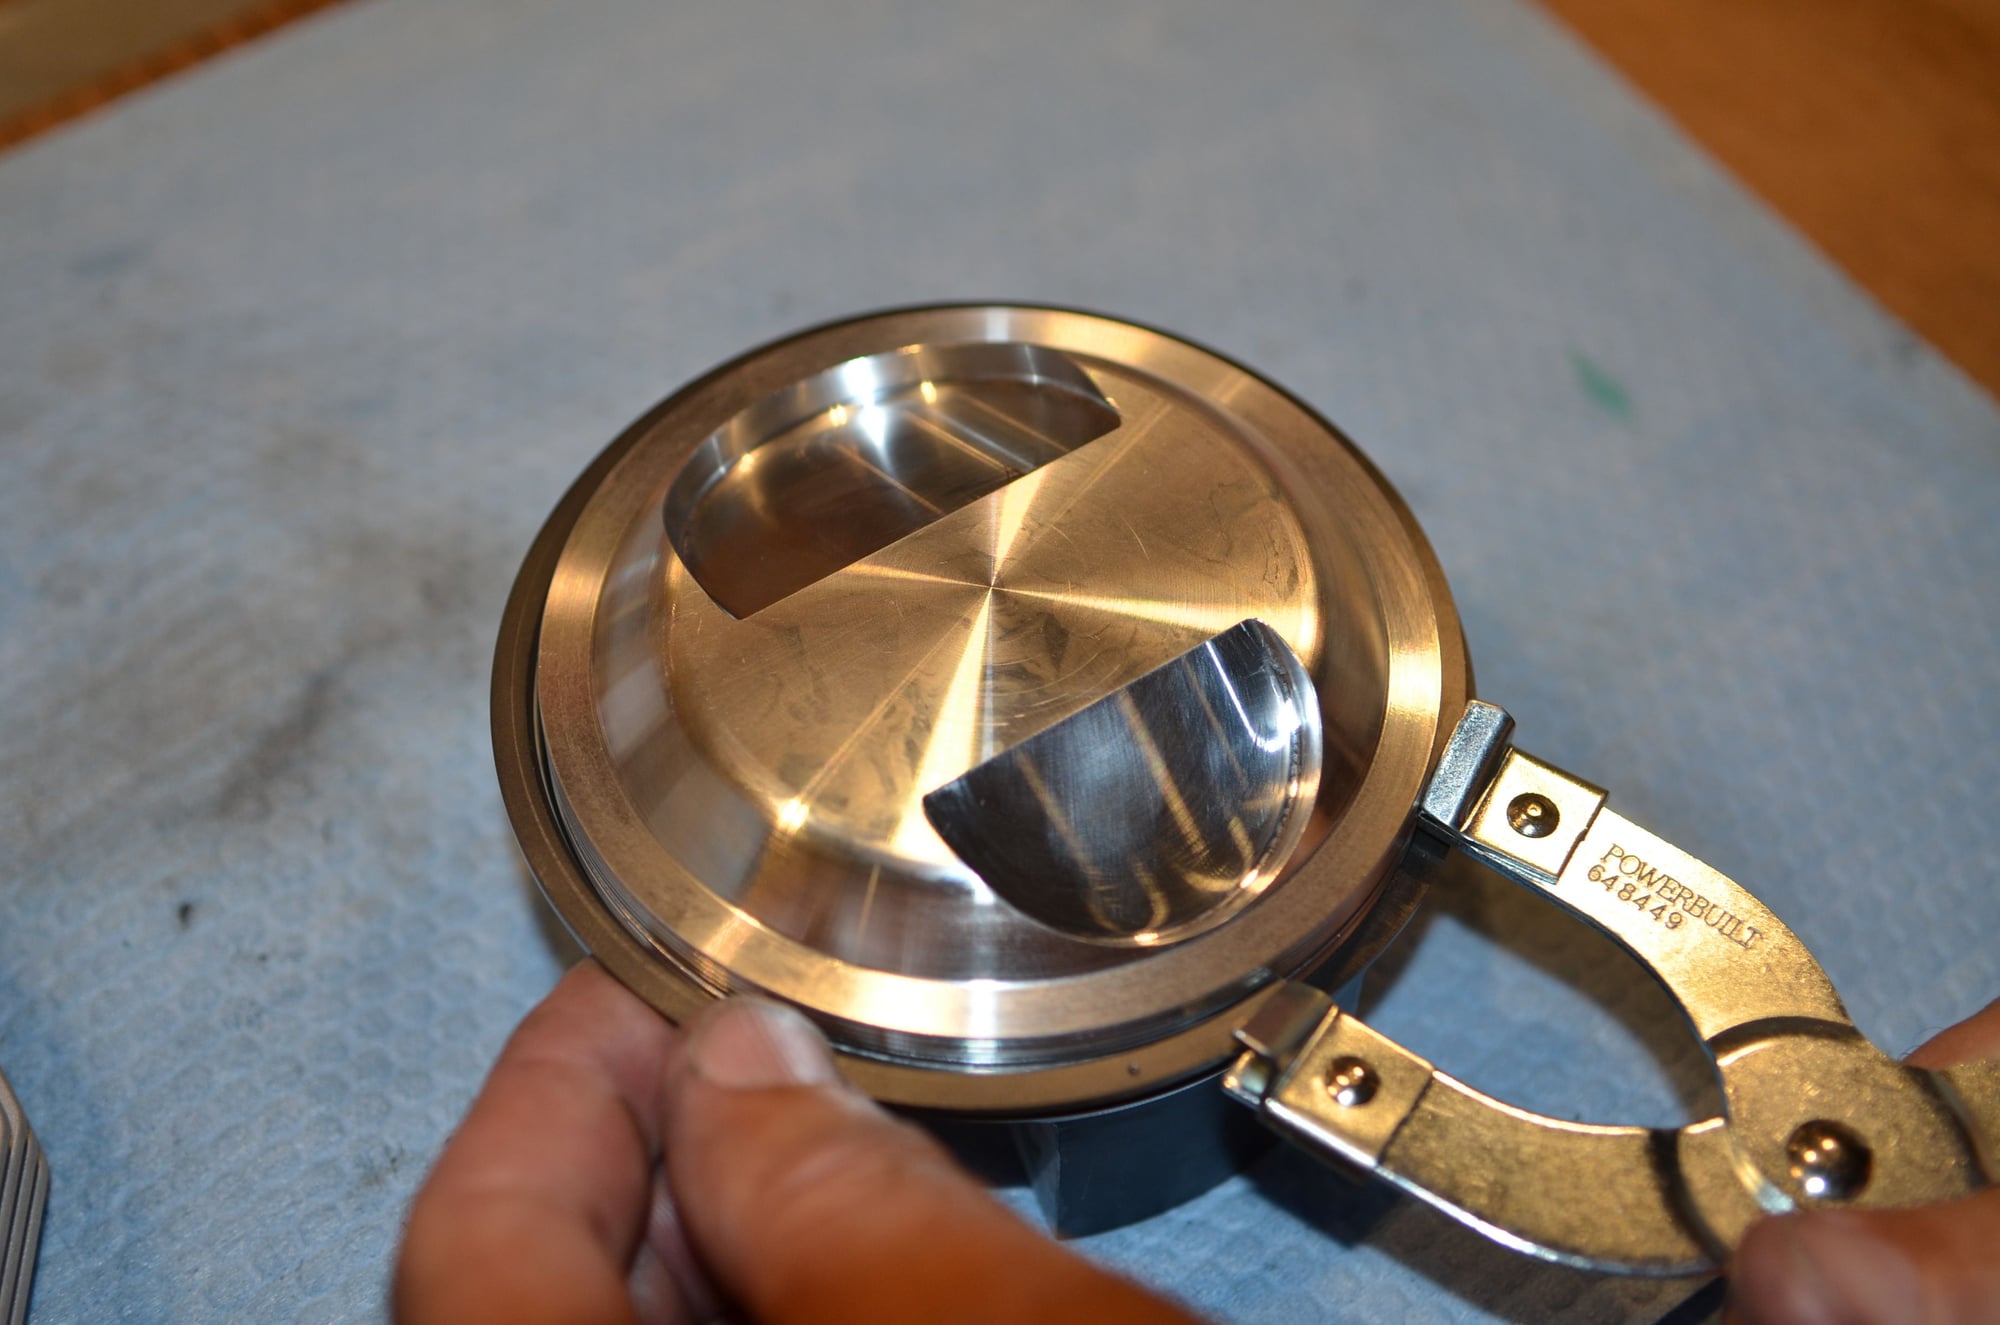
This was how the engine finally balanced out. Left to right identical (to 0.1g) and the heaviest to lightest only 0.4g difference. As a reference the stock Piston(100mm)/Rod/Pin/Ring assembly weighed 1147 grams, the new Ti GT# Rod/105mm Piston, Pin and rings weighed 1001 g. A total reciprocating saving of 876 grams.
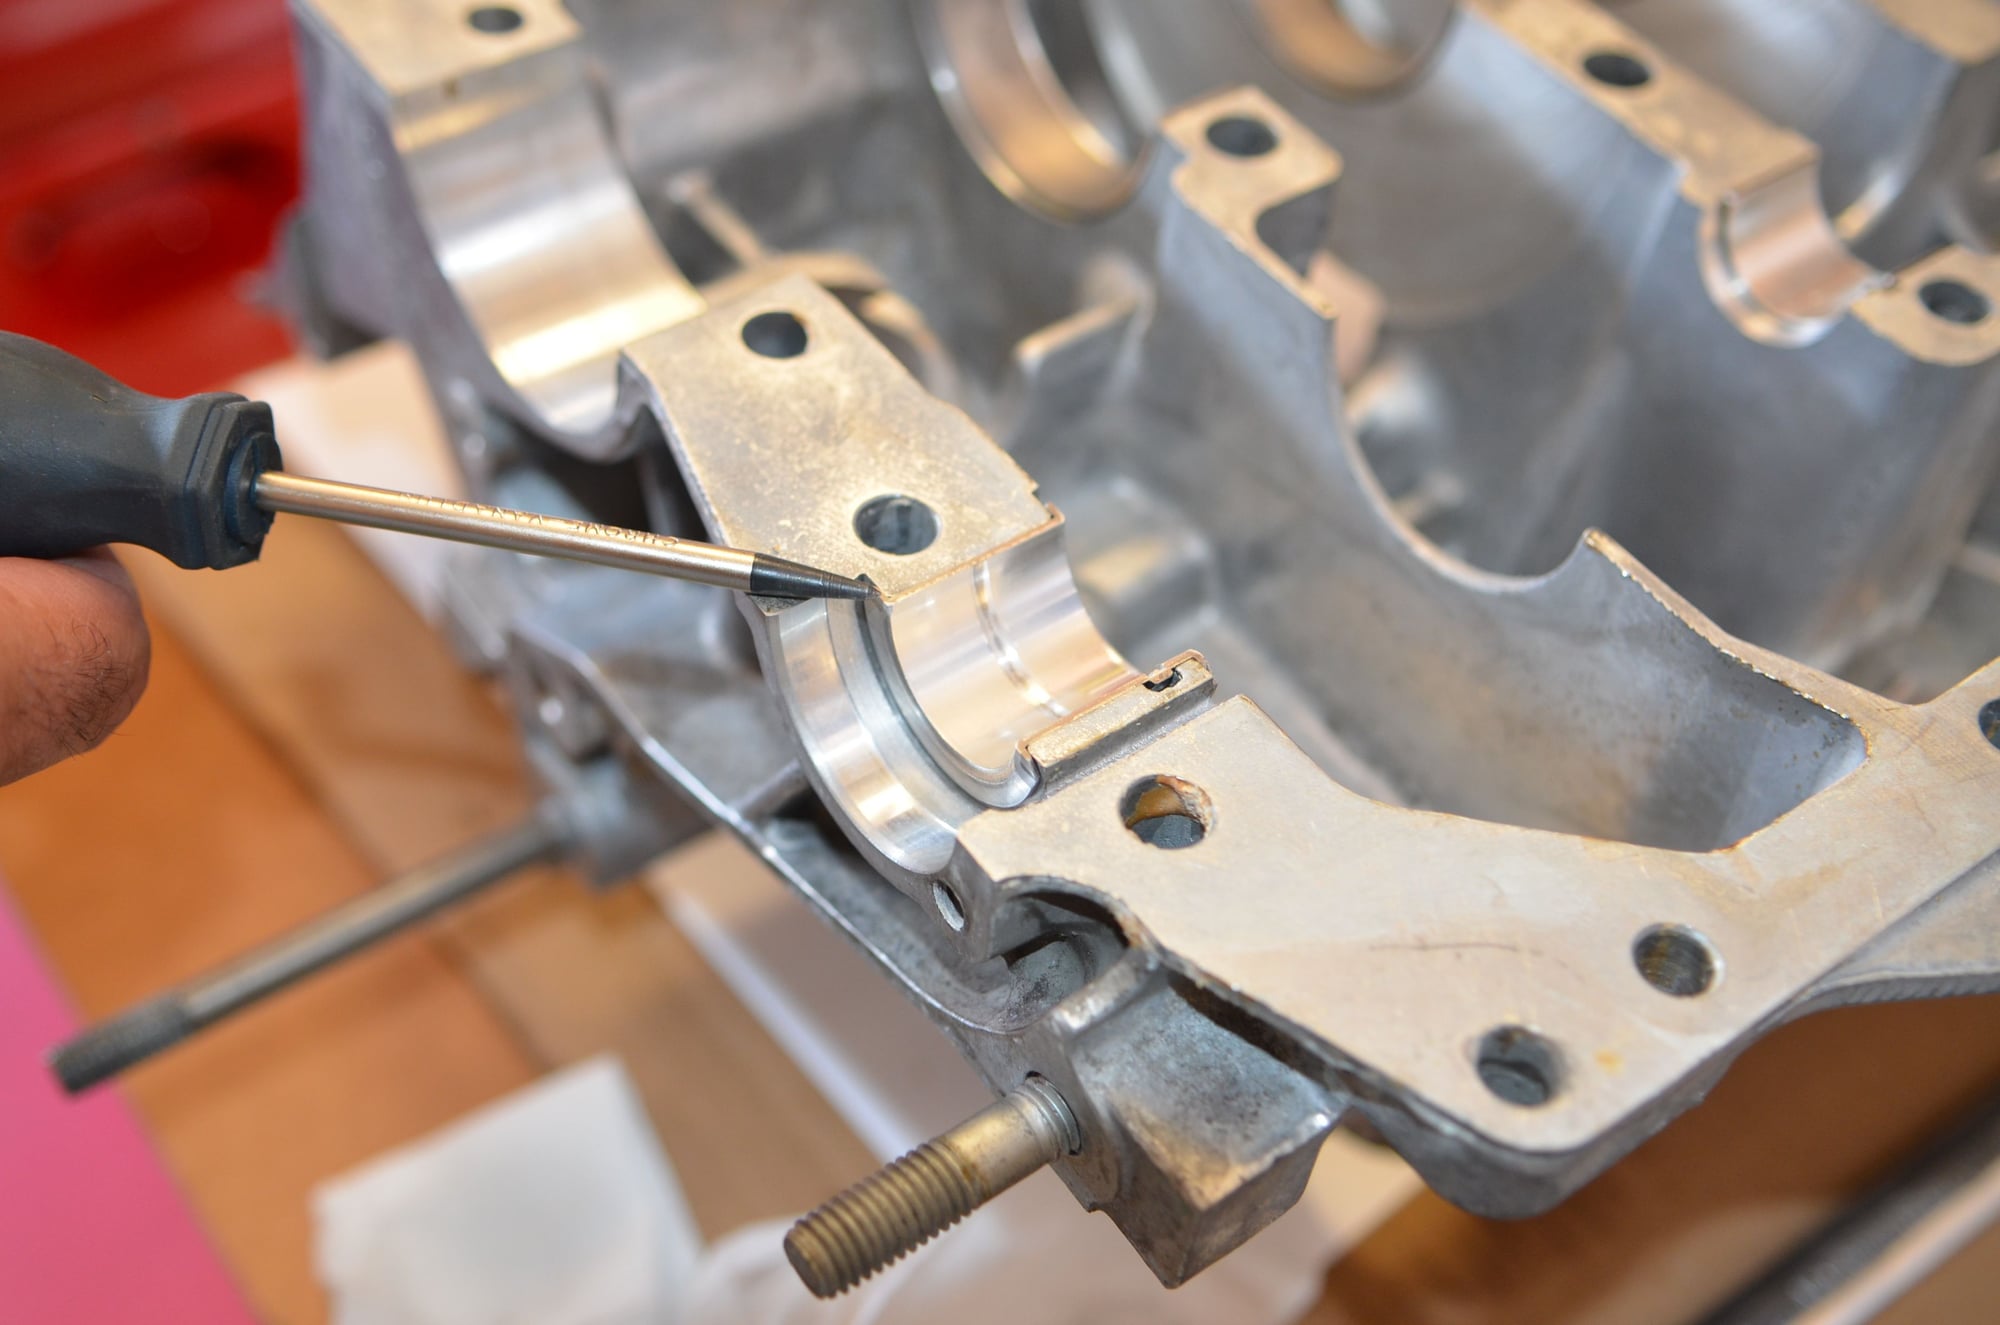
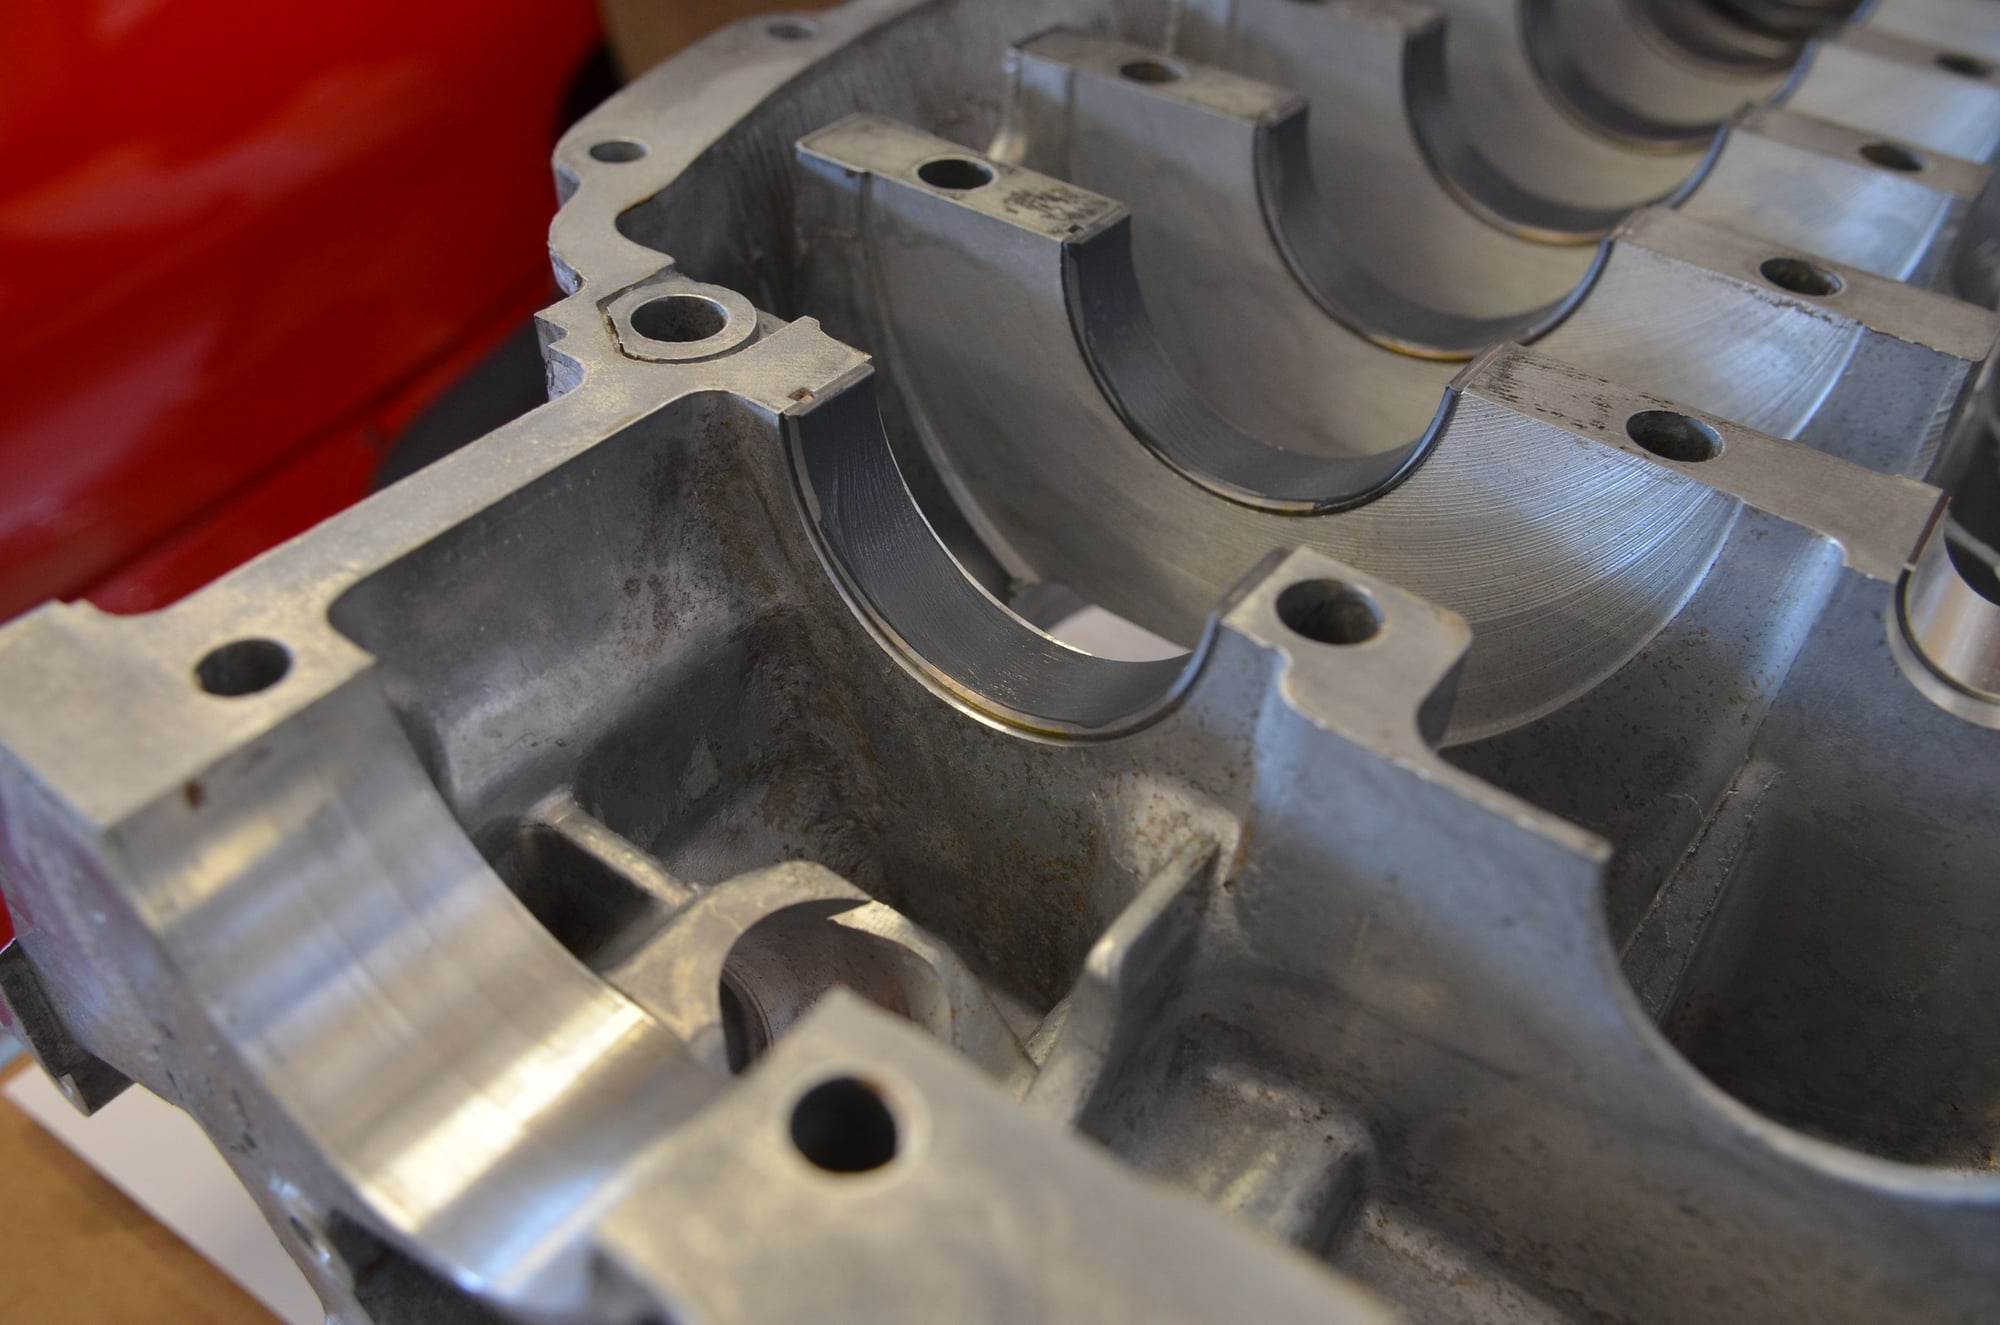
Each bearing shell, crank journal, case bore and rod big end was measured. This data was also put into the spreadsheet so I could match the clearances to ensure they were 1. In spec and 2. as close to the same as possible.
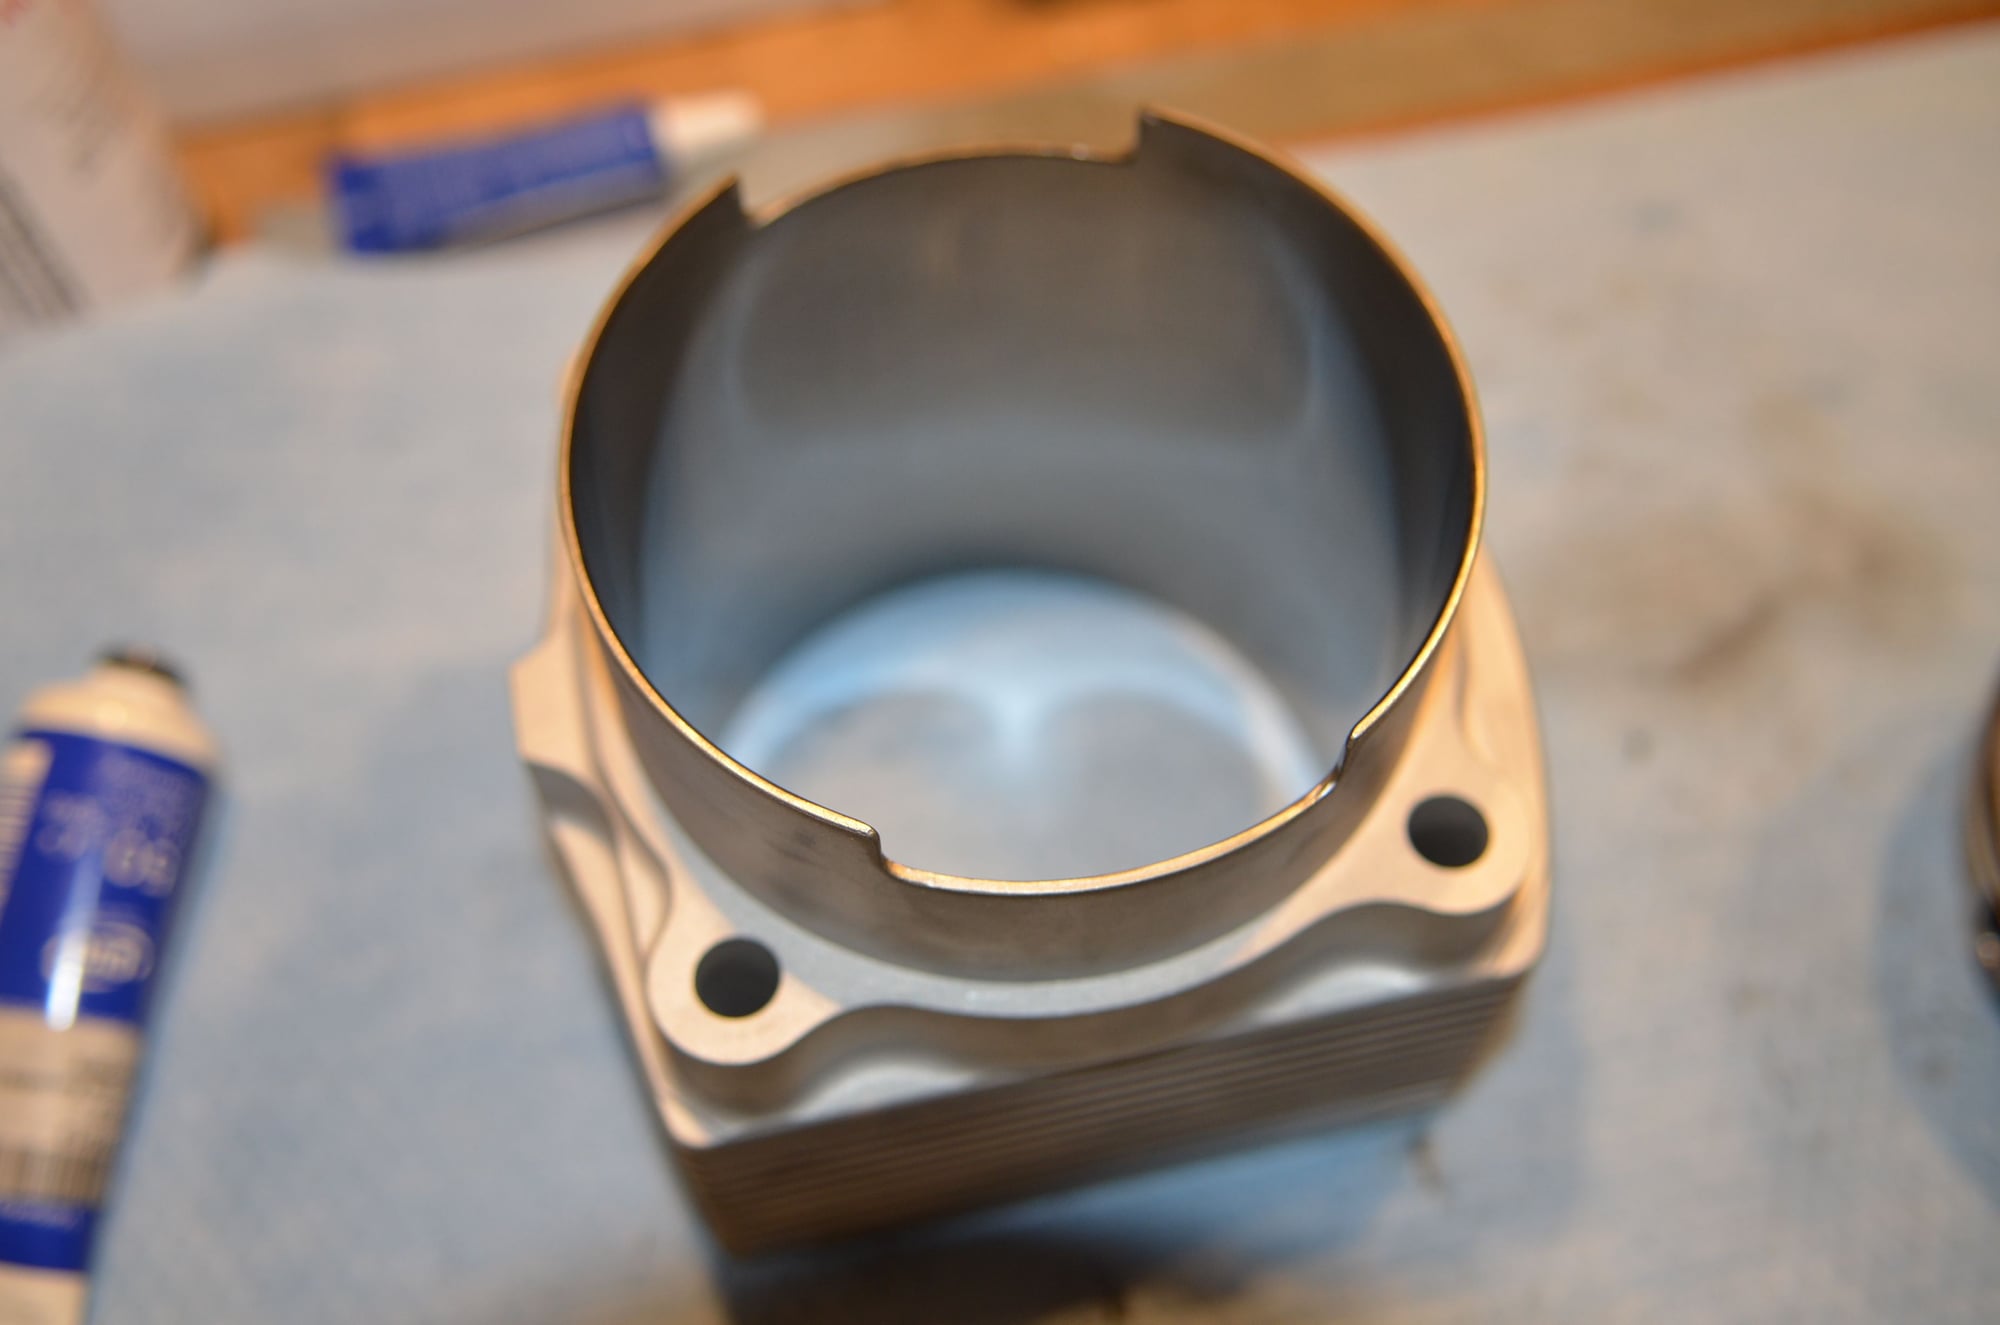
Then came the first round of cleaning...every journal, every bearing shell. This is a long process..
Plenty of this was used in the cleaning.
So pretty, almost too goo to go into the engine...
got to love new parts...
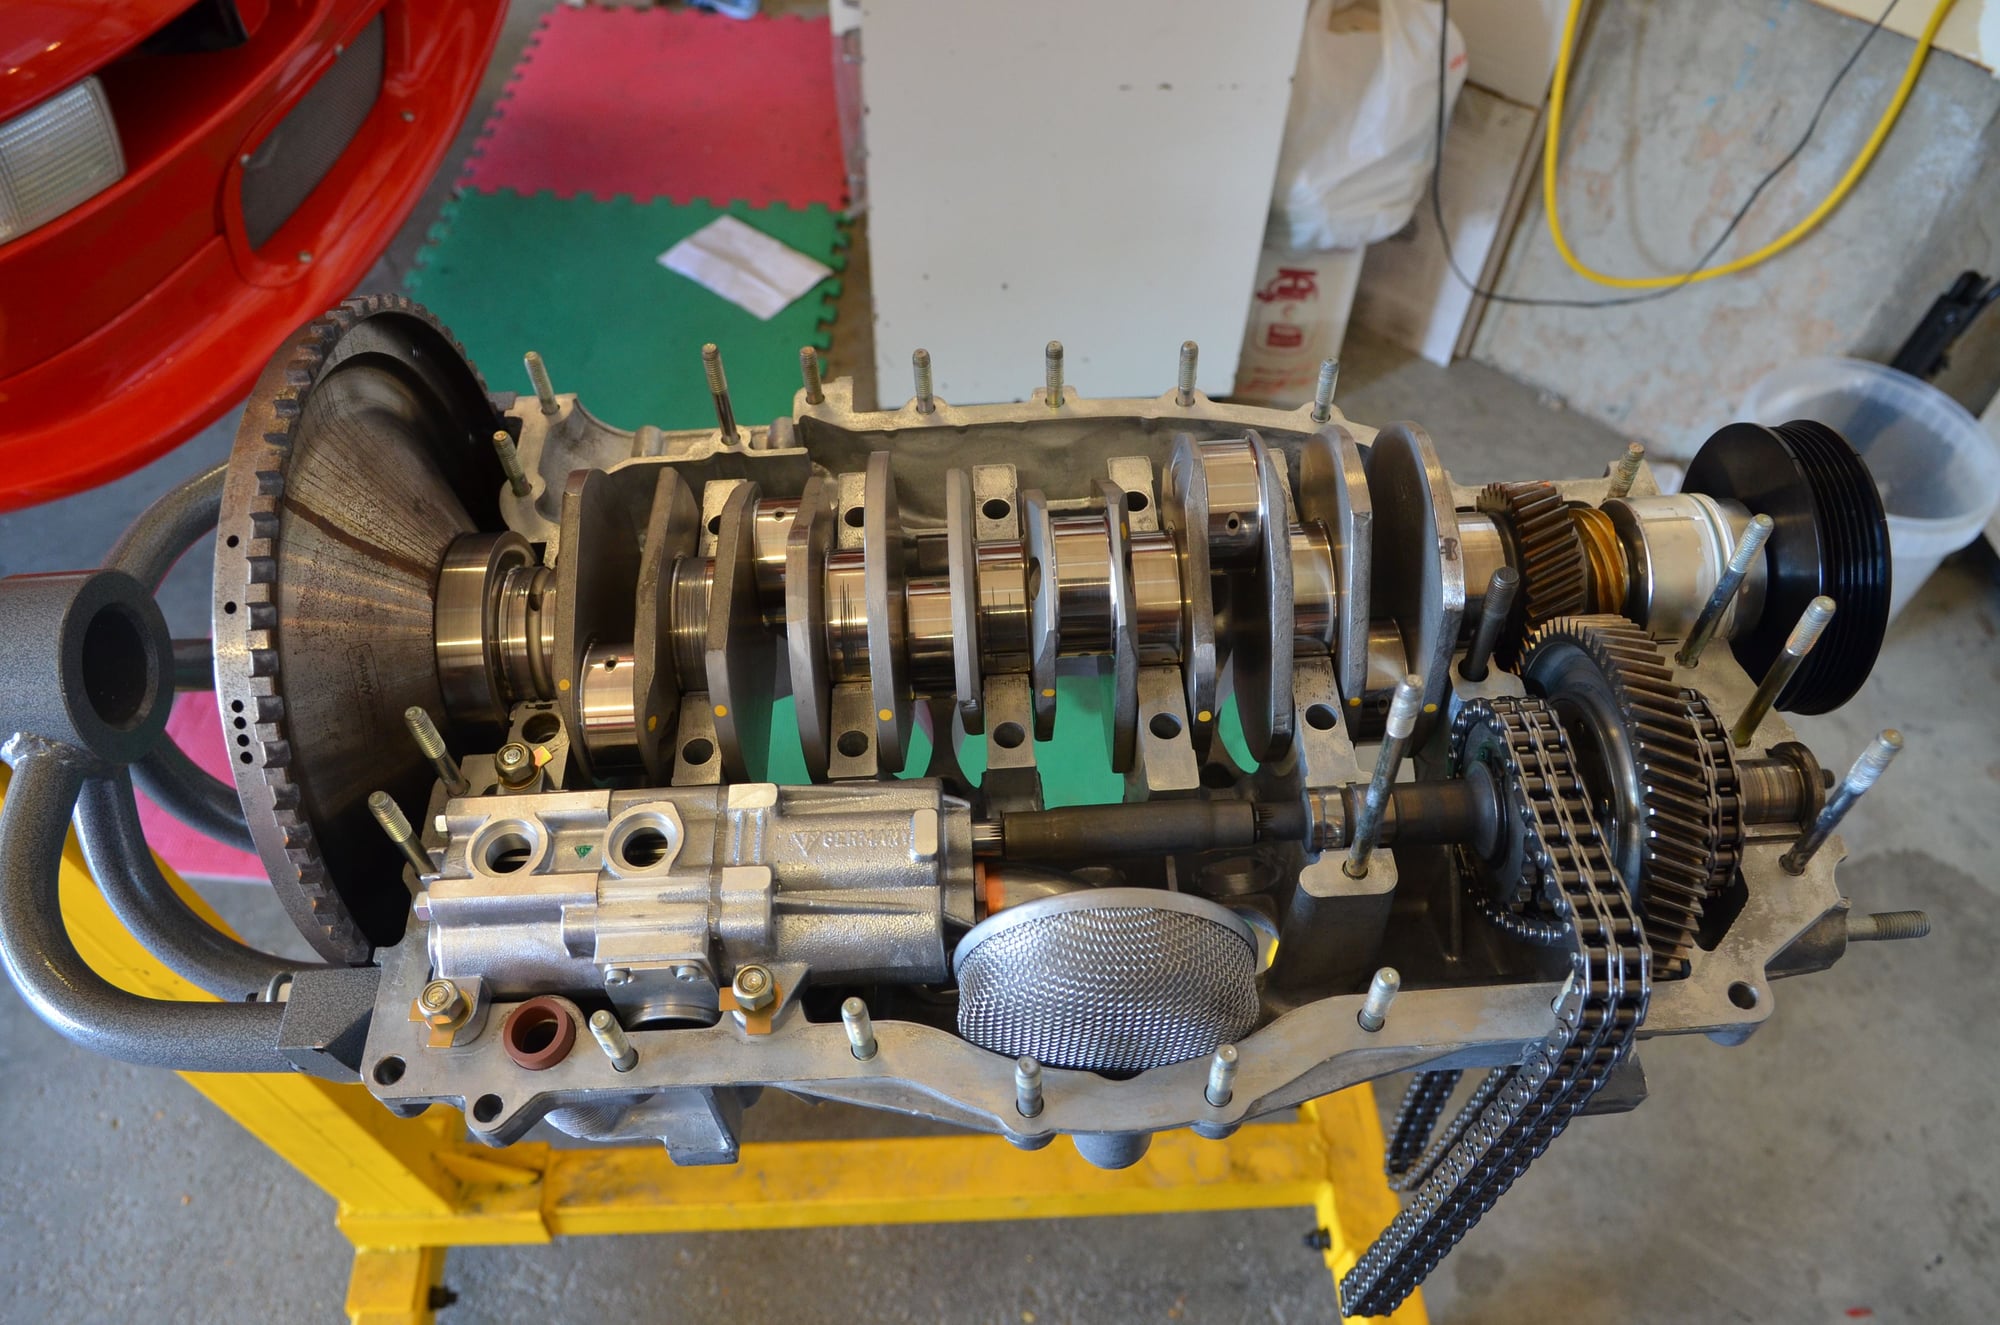
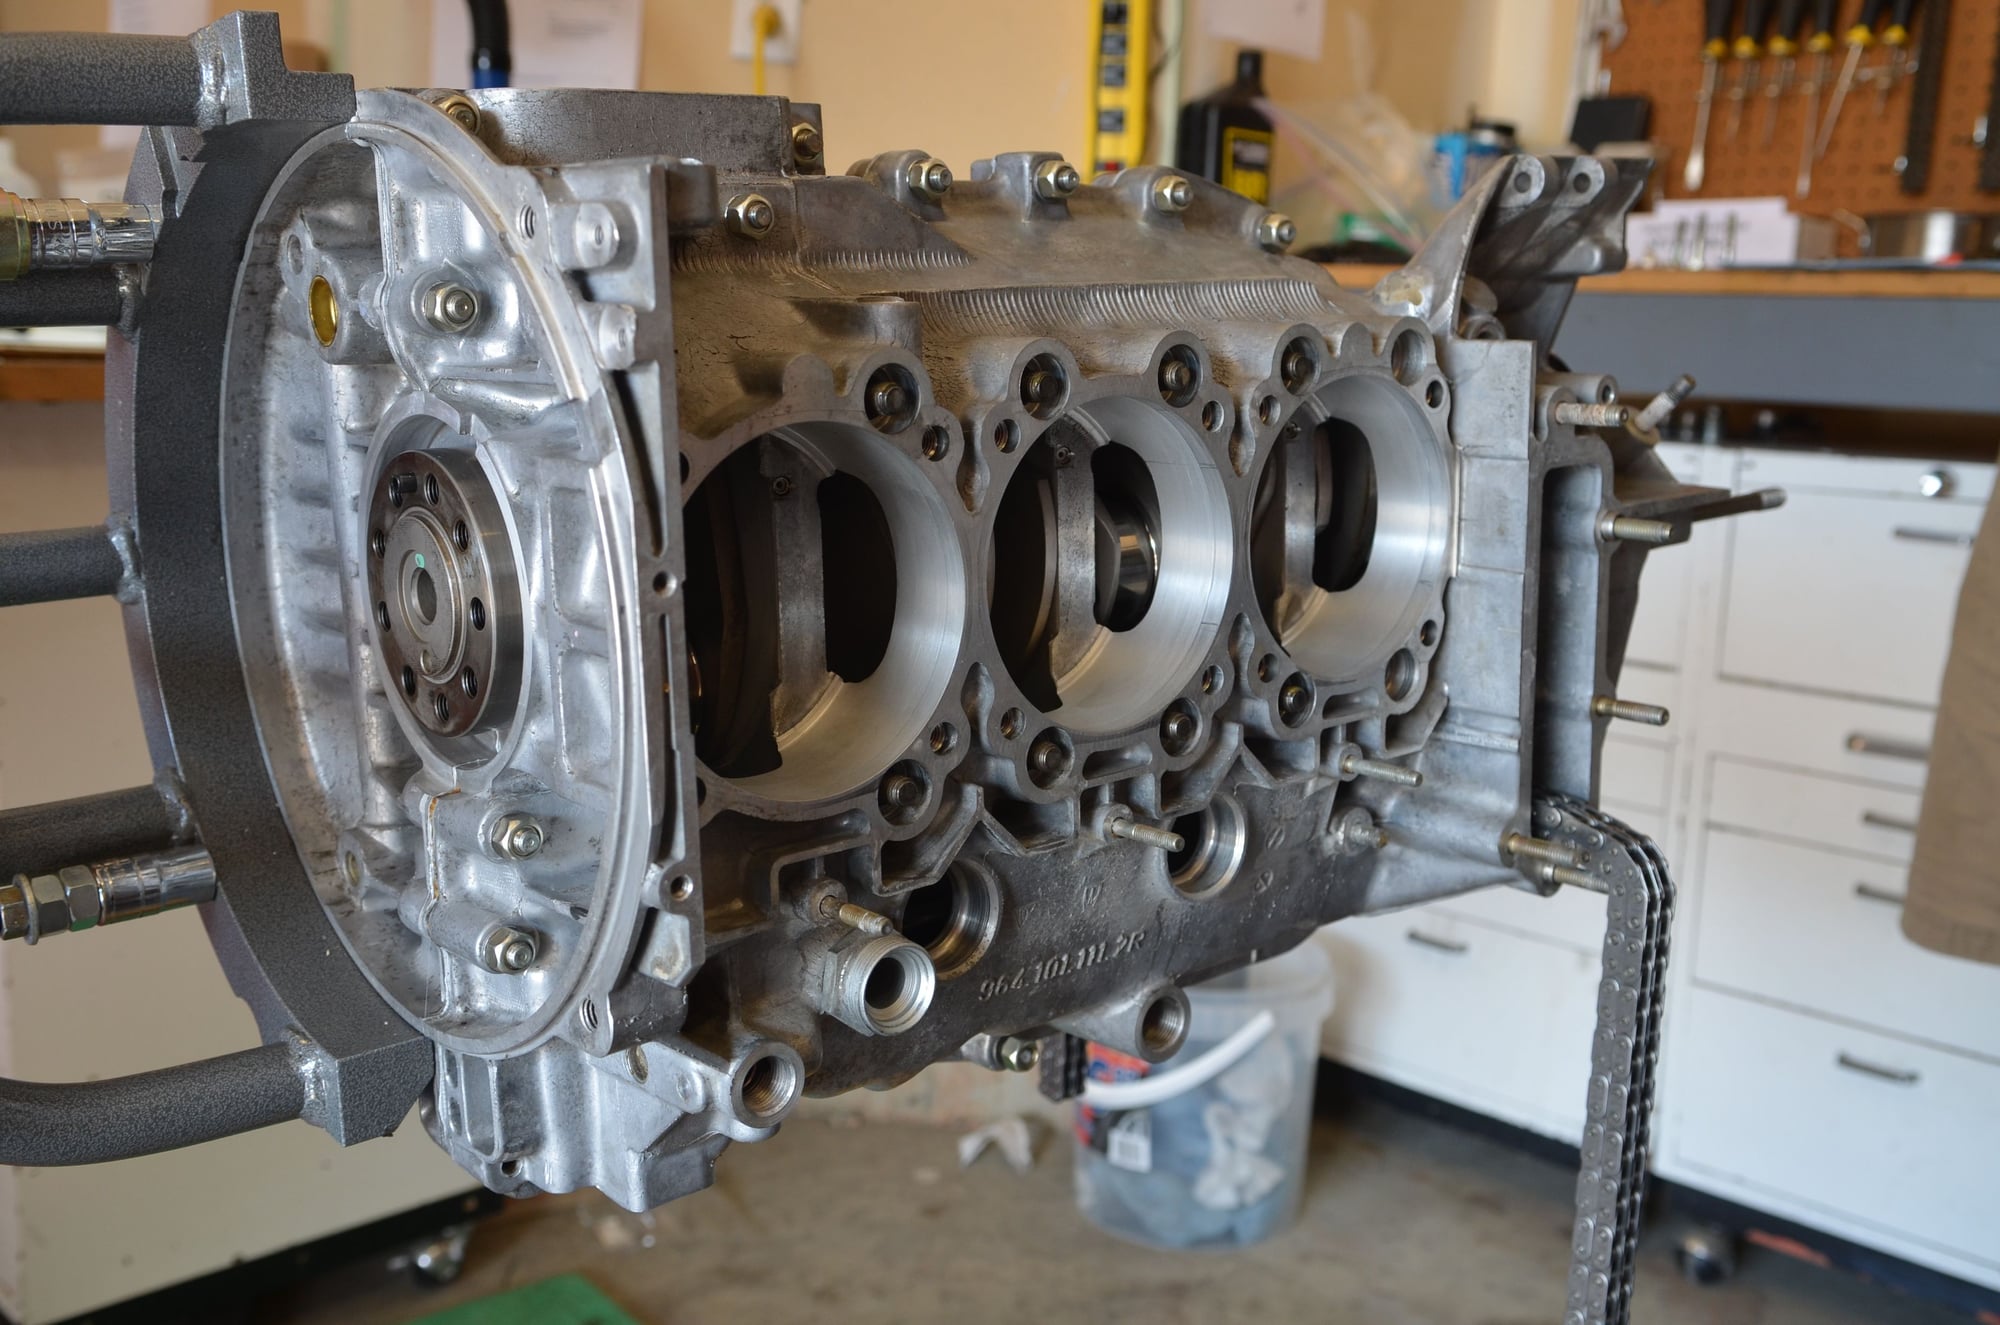
Everything was then put together DRY (well a little oil to protect), this is the test fit to make sure everything is where it should be, the lash for the intermediate shaft is checked etc.
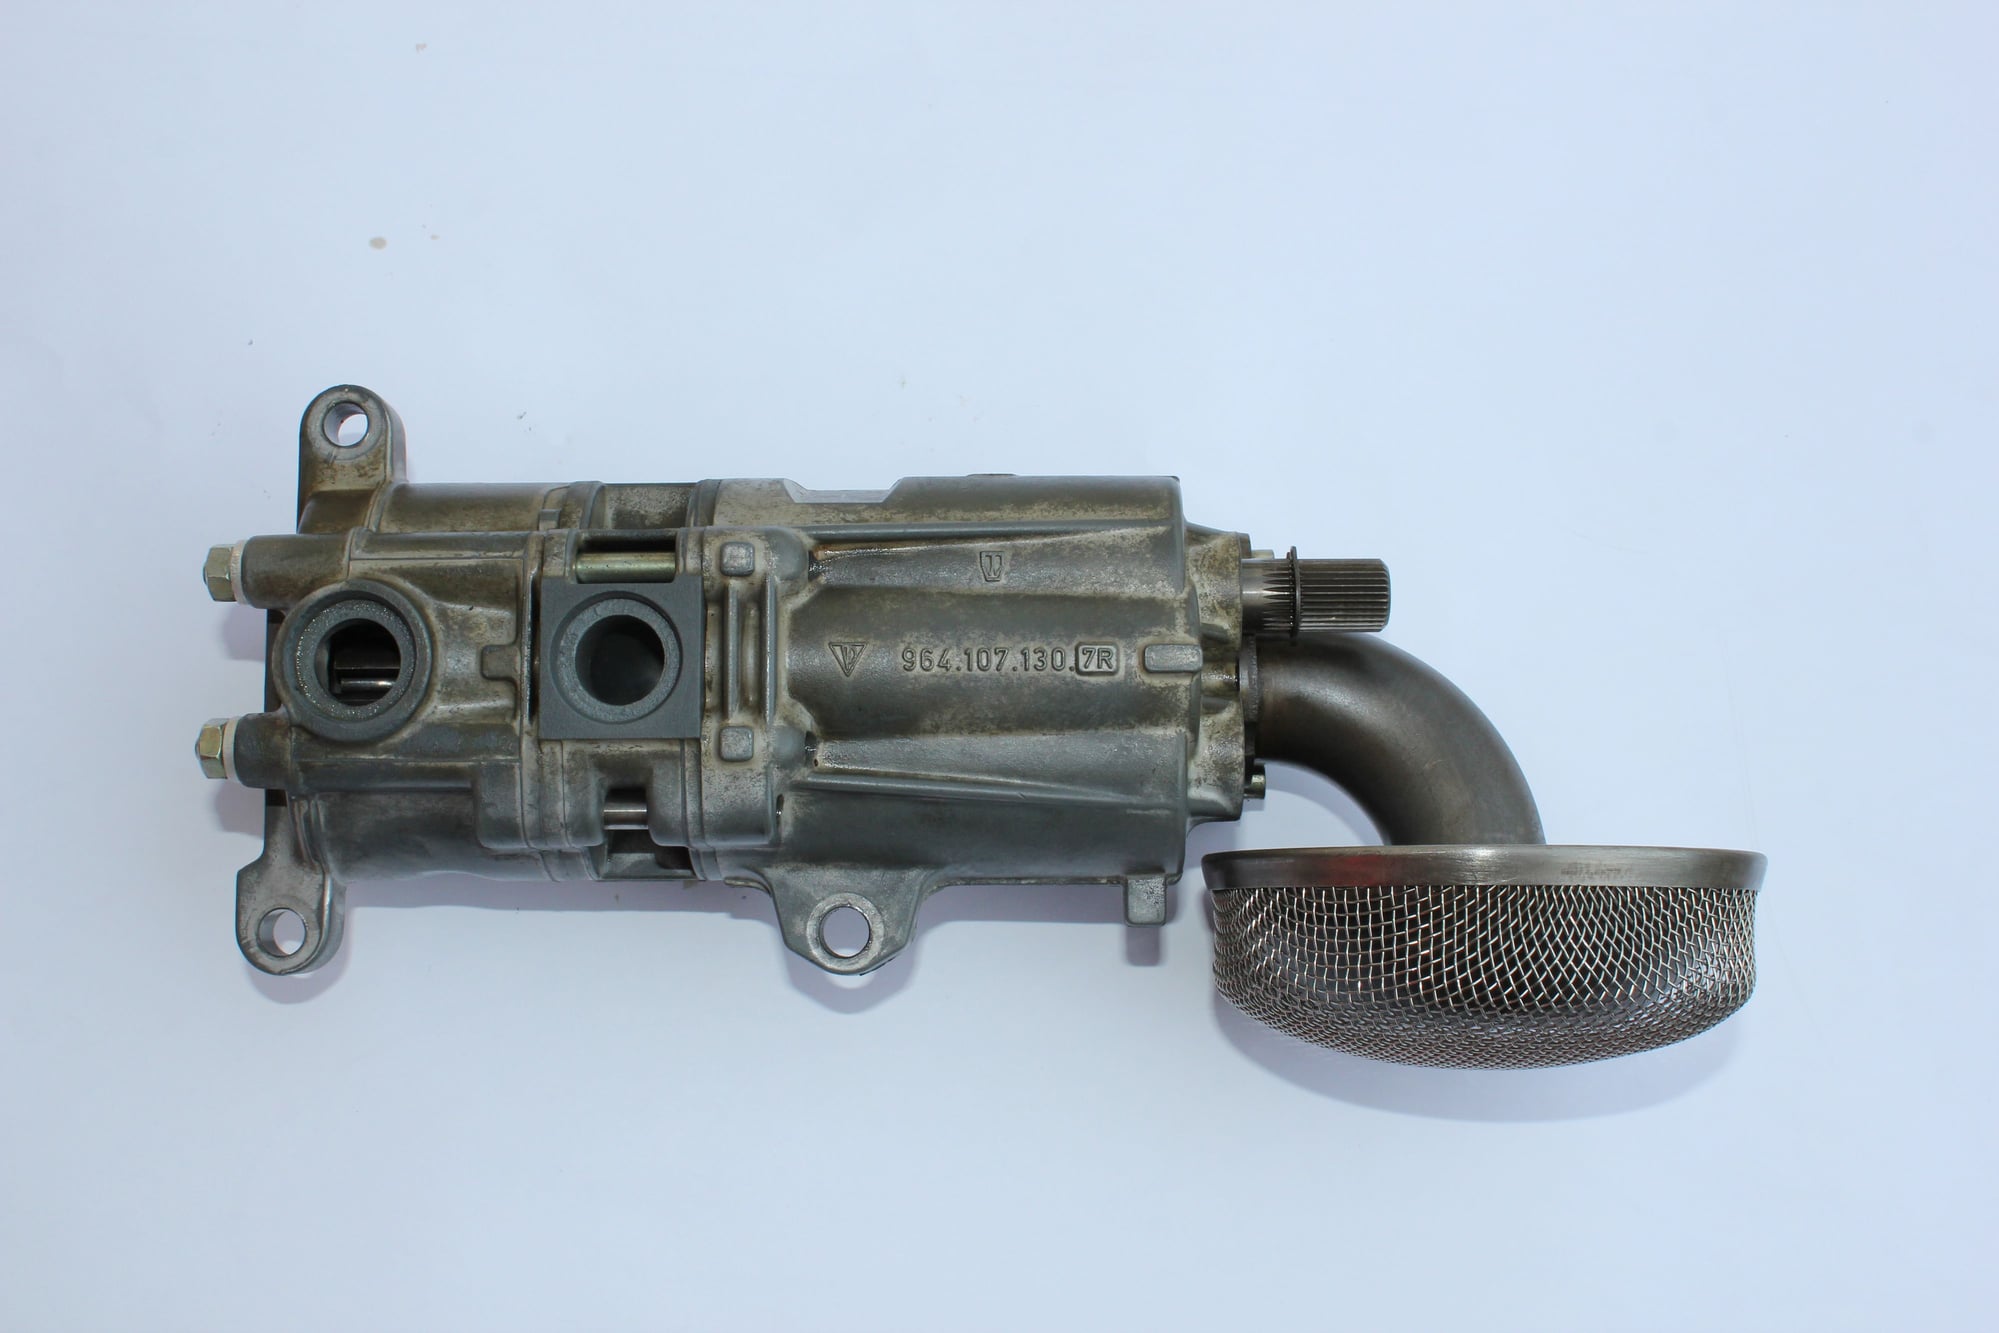
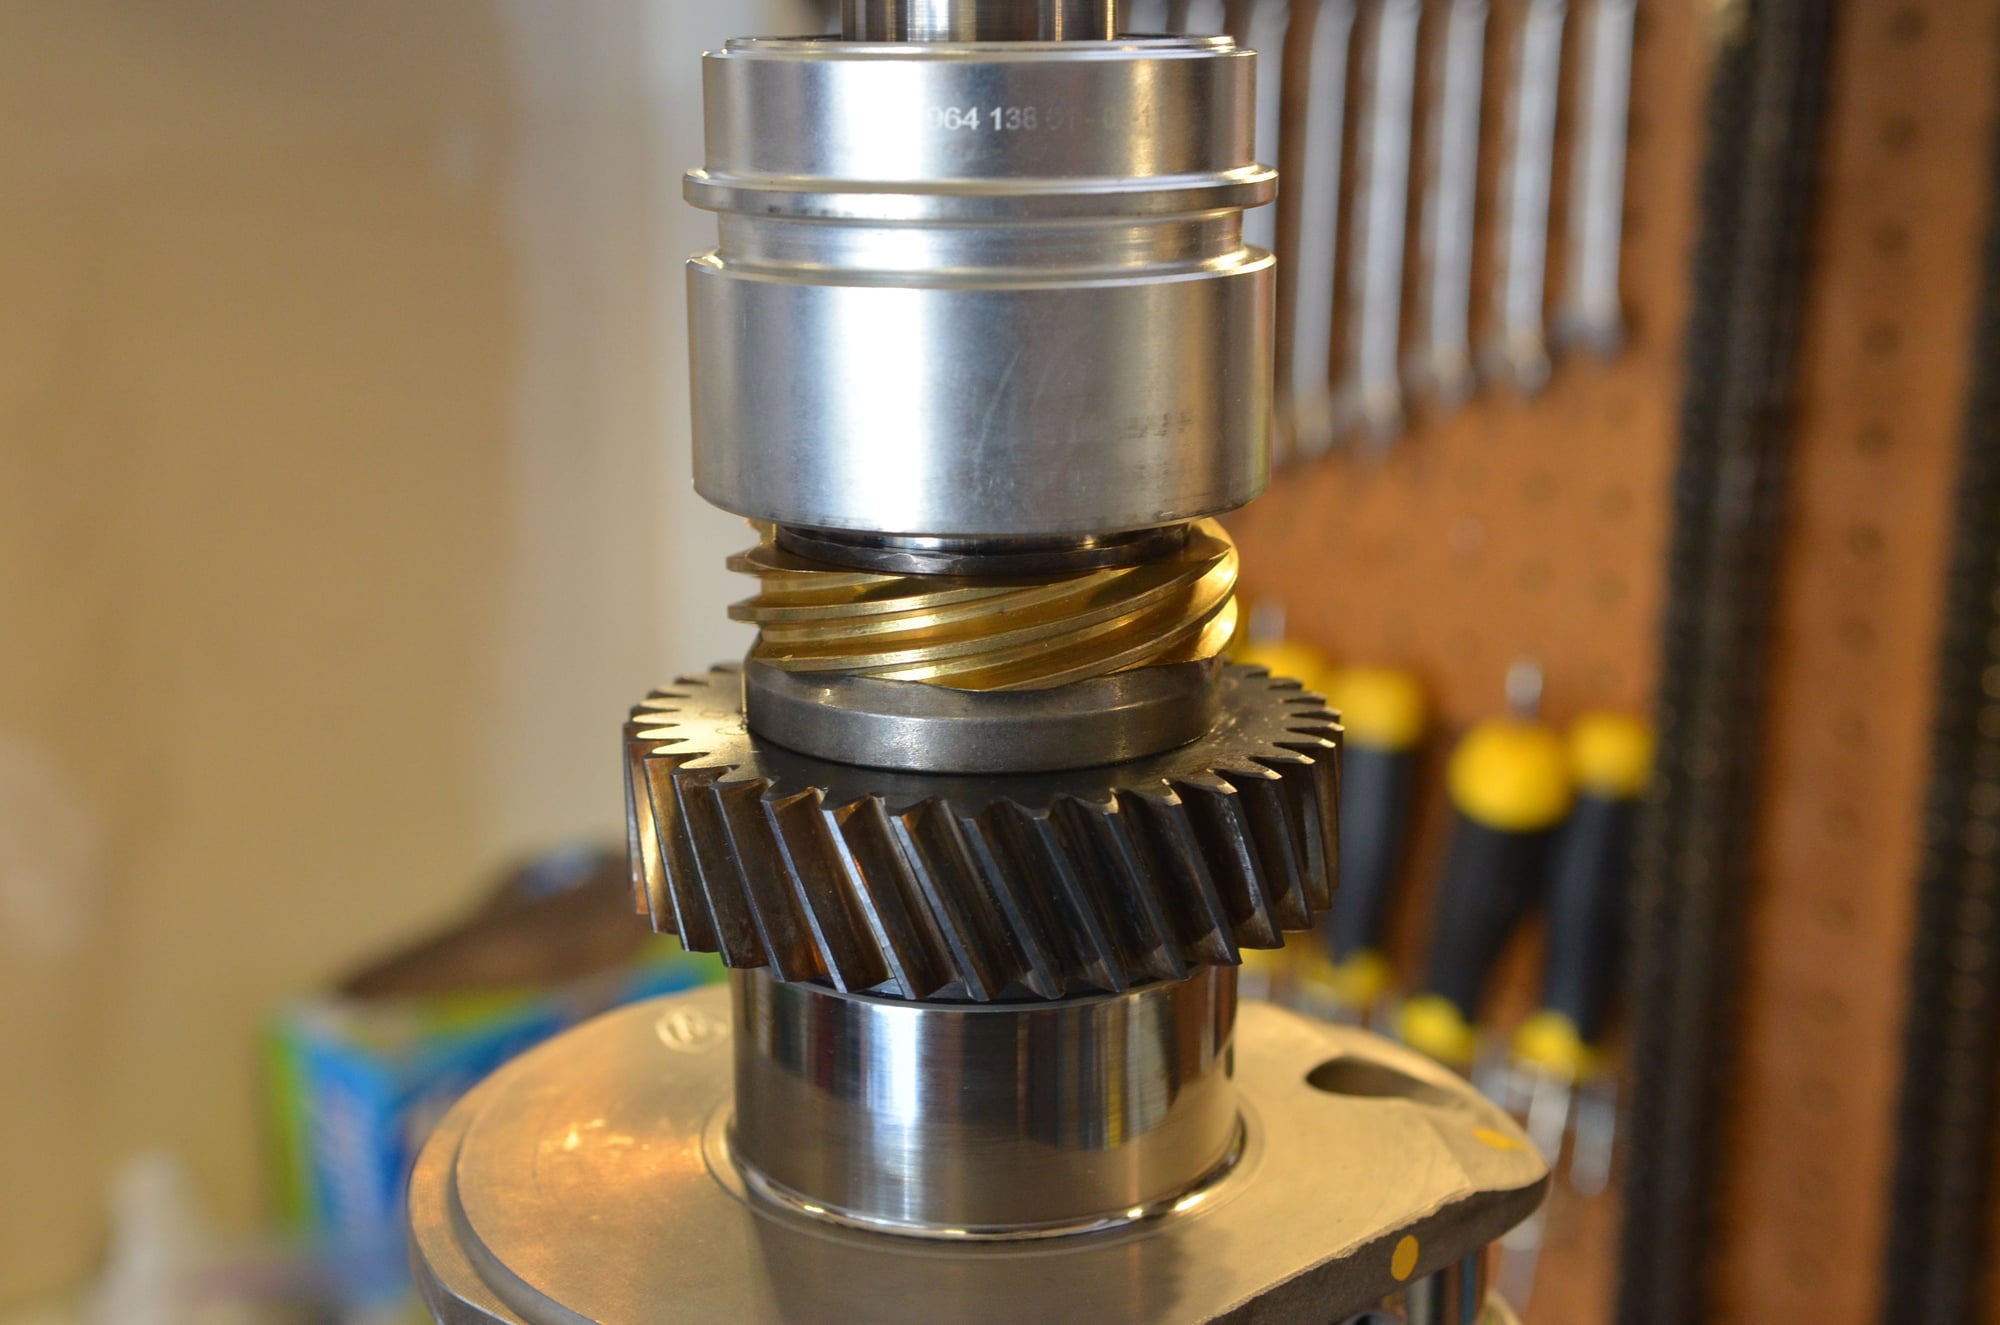
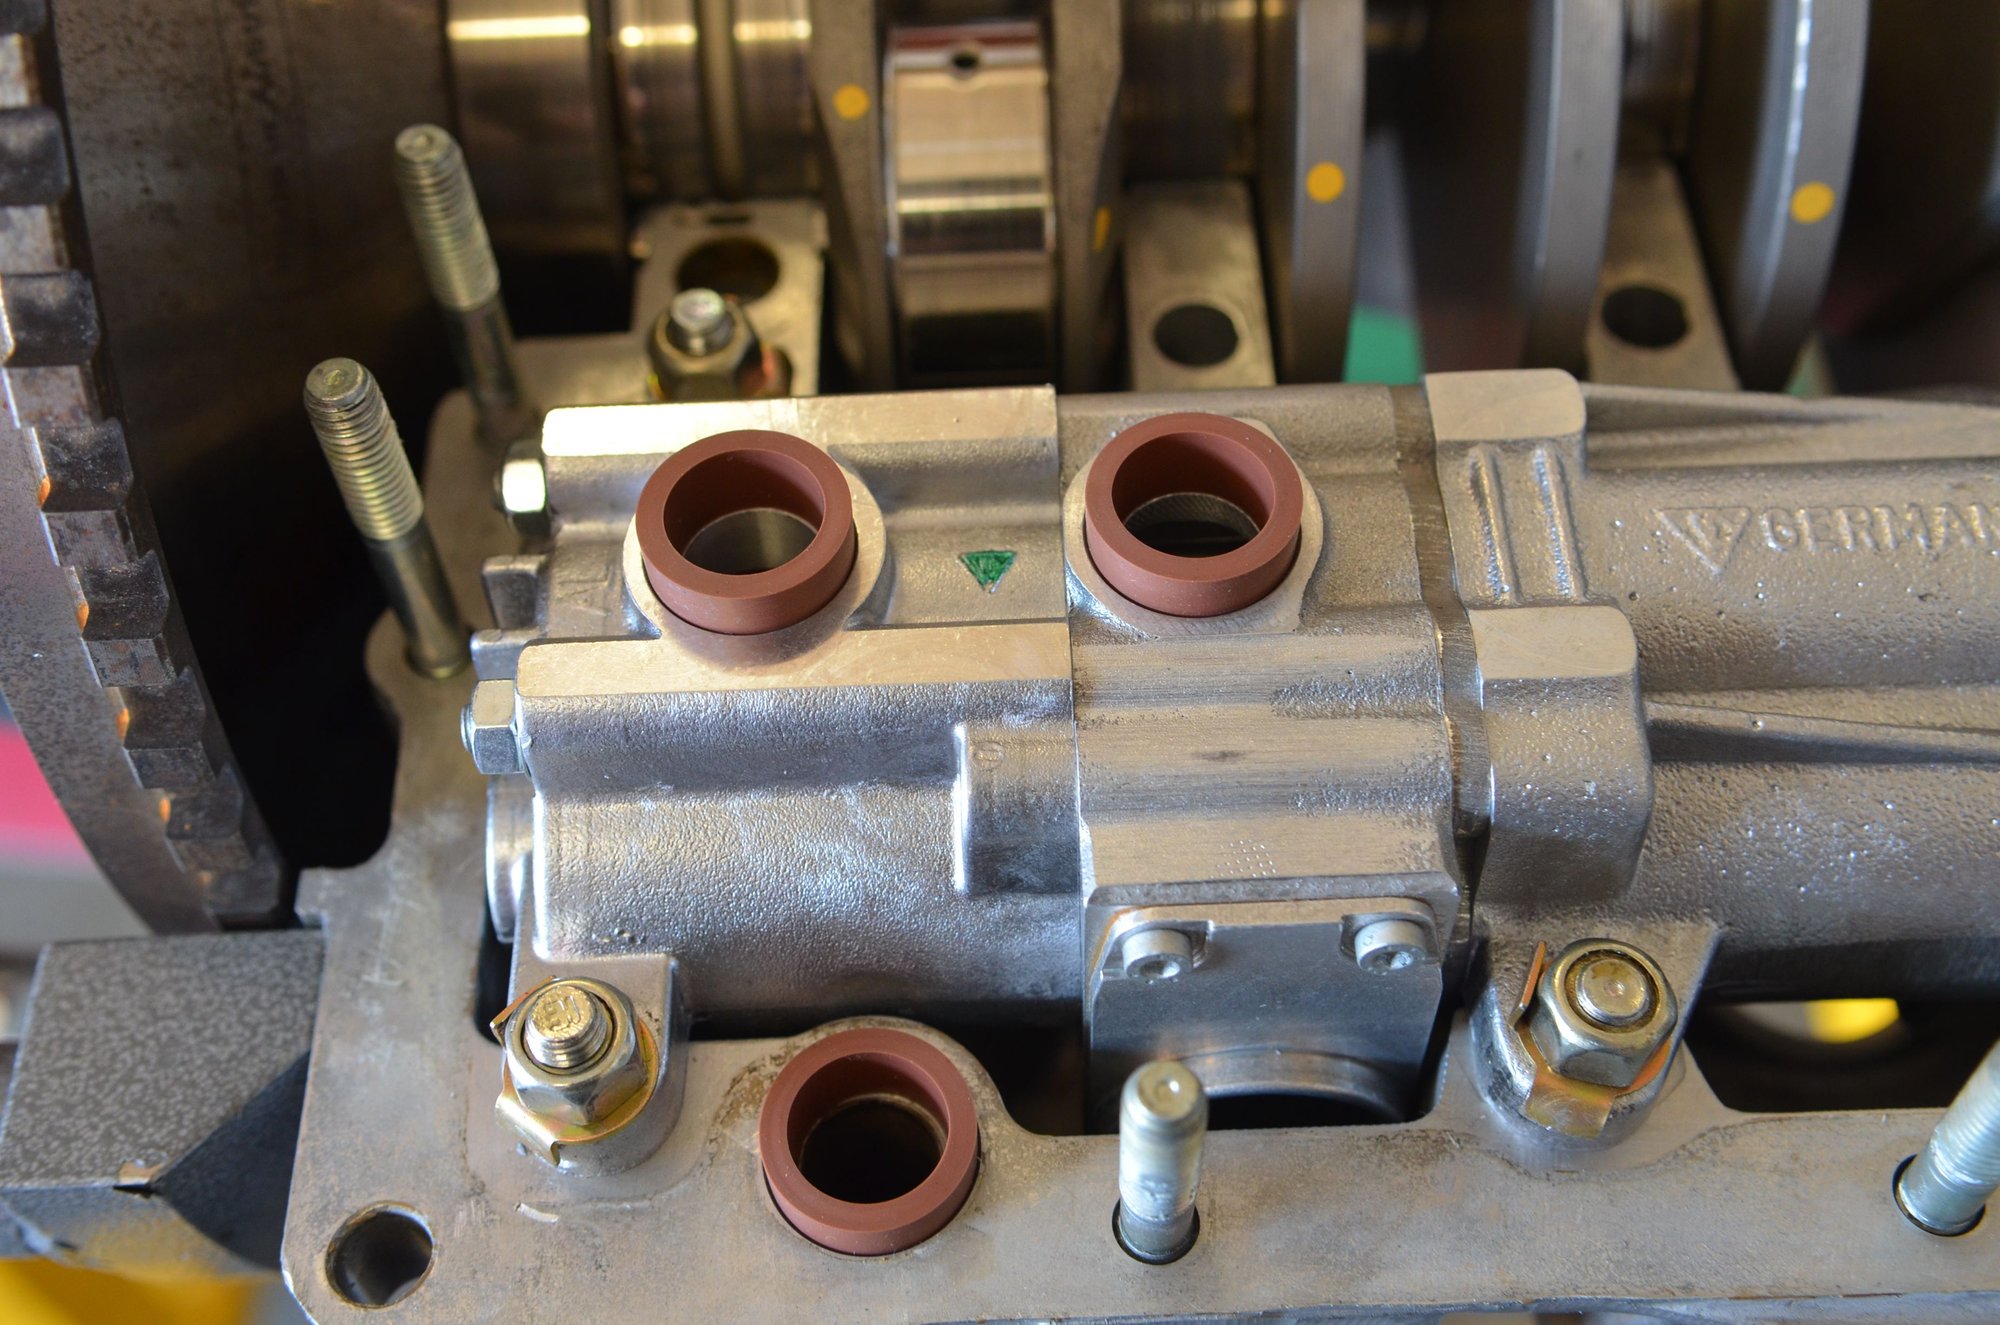
GT3 Oil pump and intermediate shaft being put into place.
Once everything measured out correctly the whole thing was pulled apart and then Cleaned again..... This final cleaning was painstaking it had to be perfect...
Just because this looked so good.....
All the pretty bits inside...
The new intermediate shaft bearing, in place. The old one was the original catalyst for the rebuild...
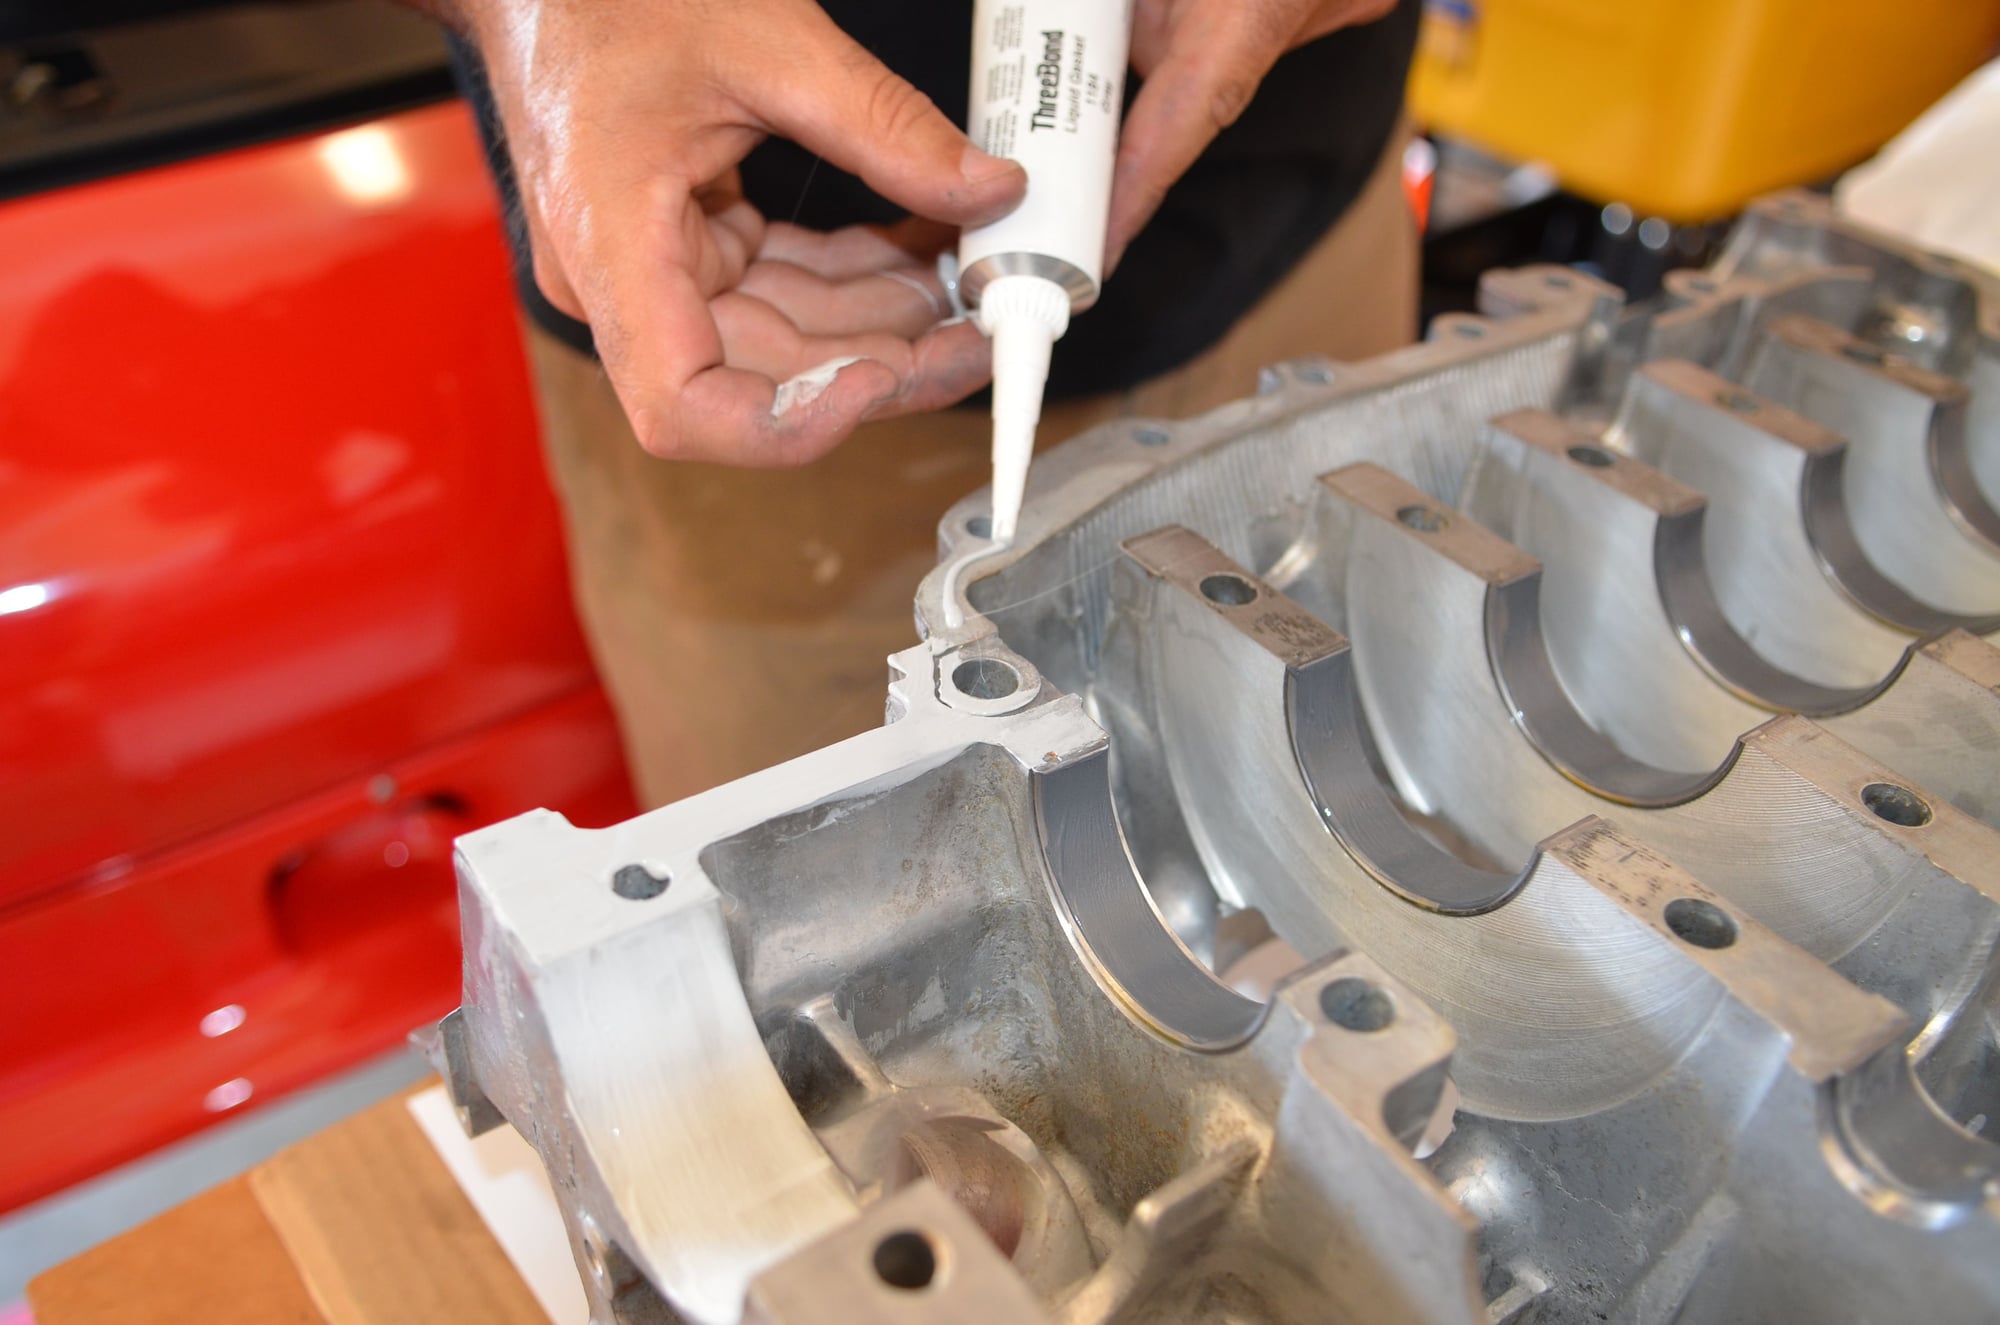
Some of the sealants used for the rebuild, the pic below was my diagram to show what was used where... The sealant process was as recommended on Pelican via the Ultimate engine sealant thread!!
I know, this was a little ****
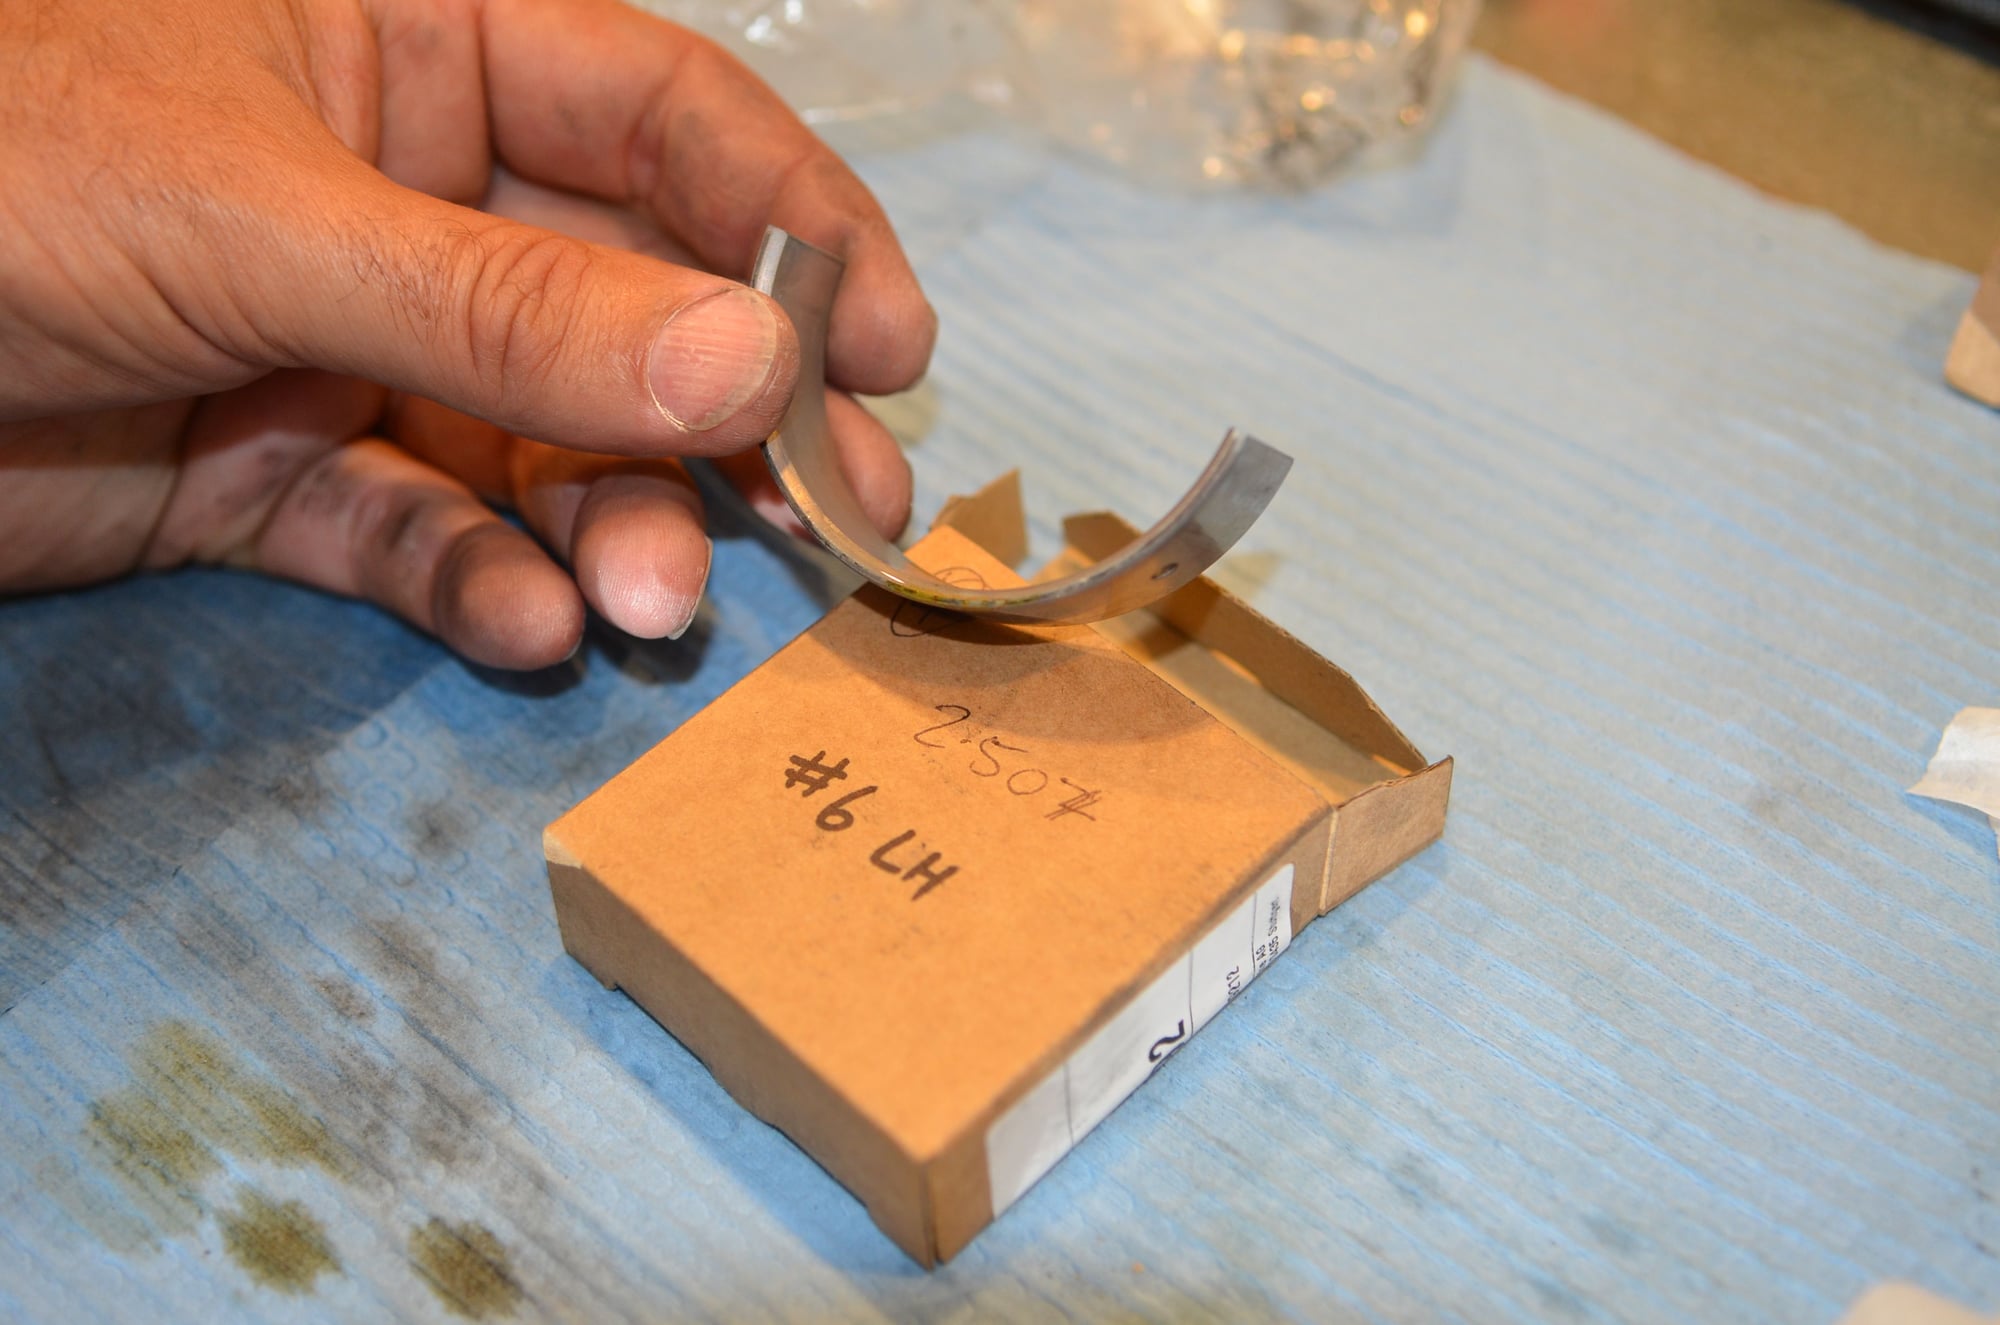
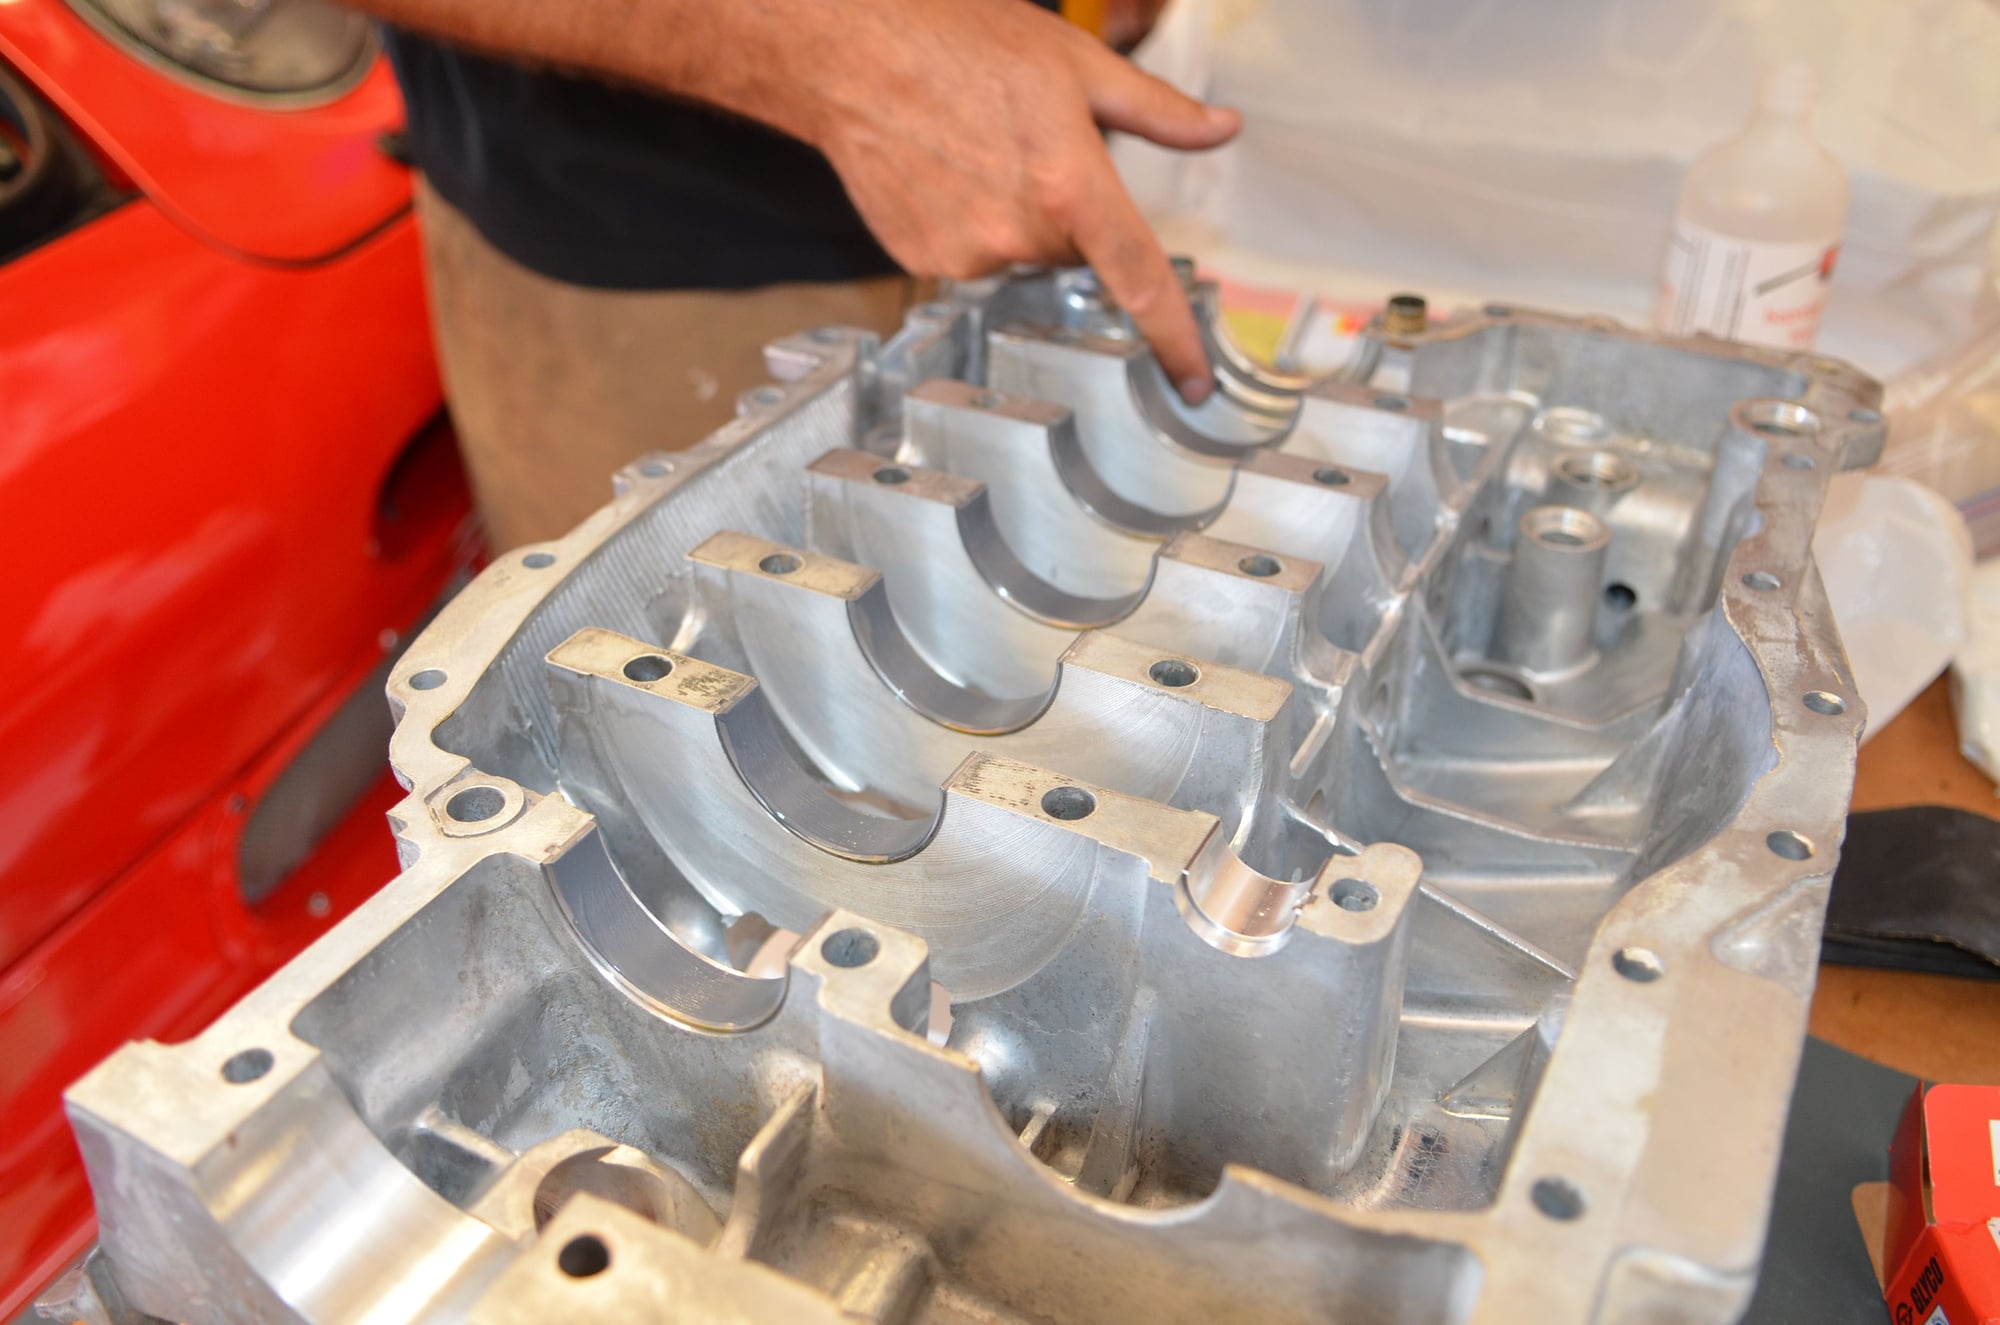
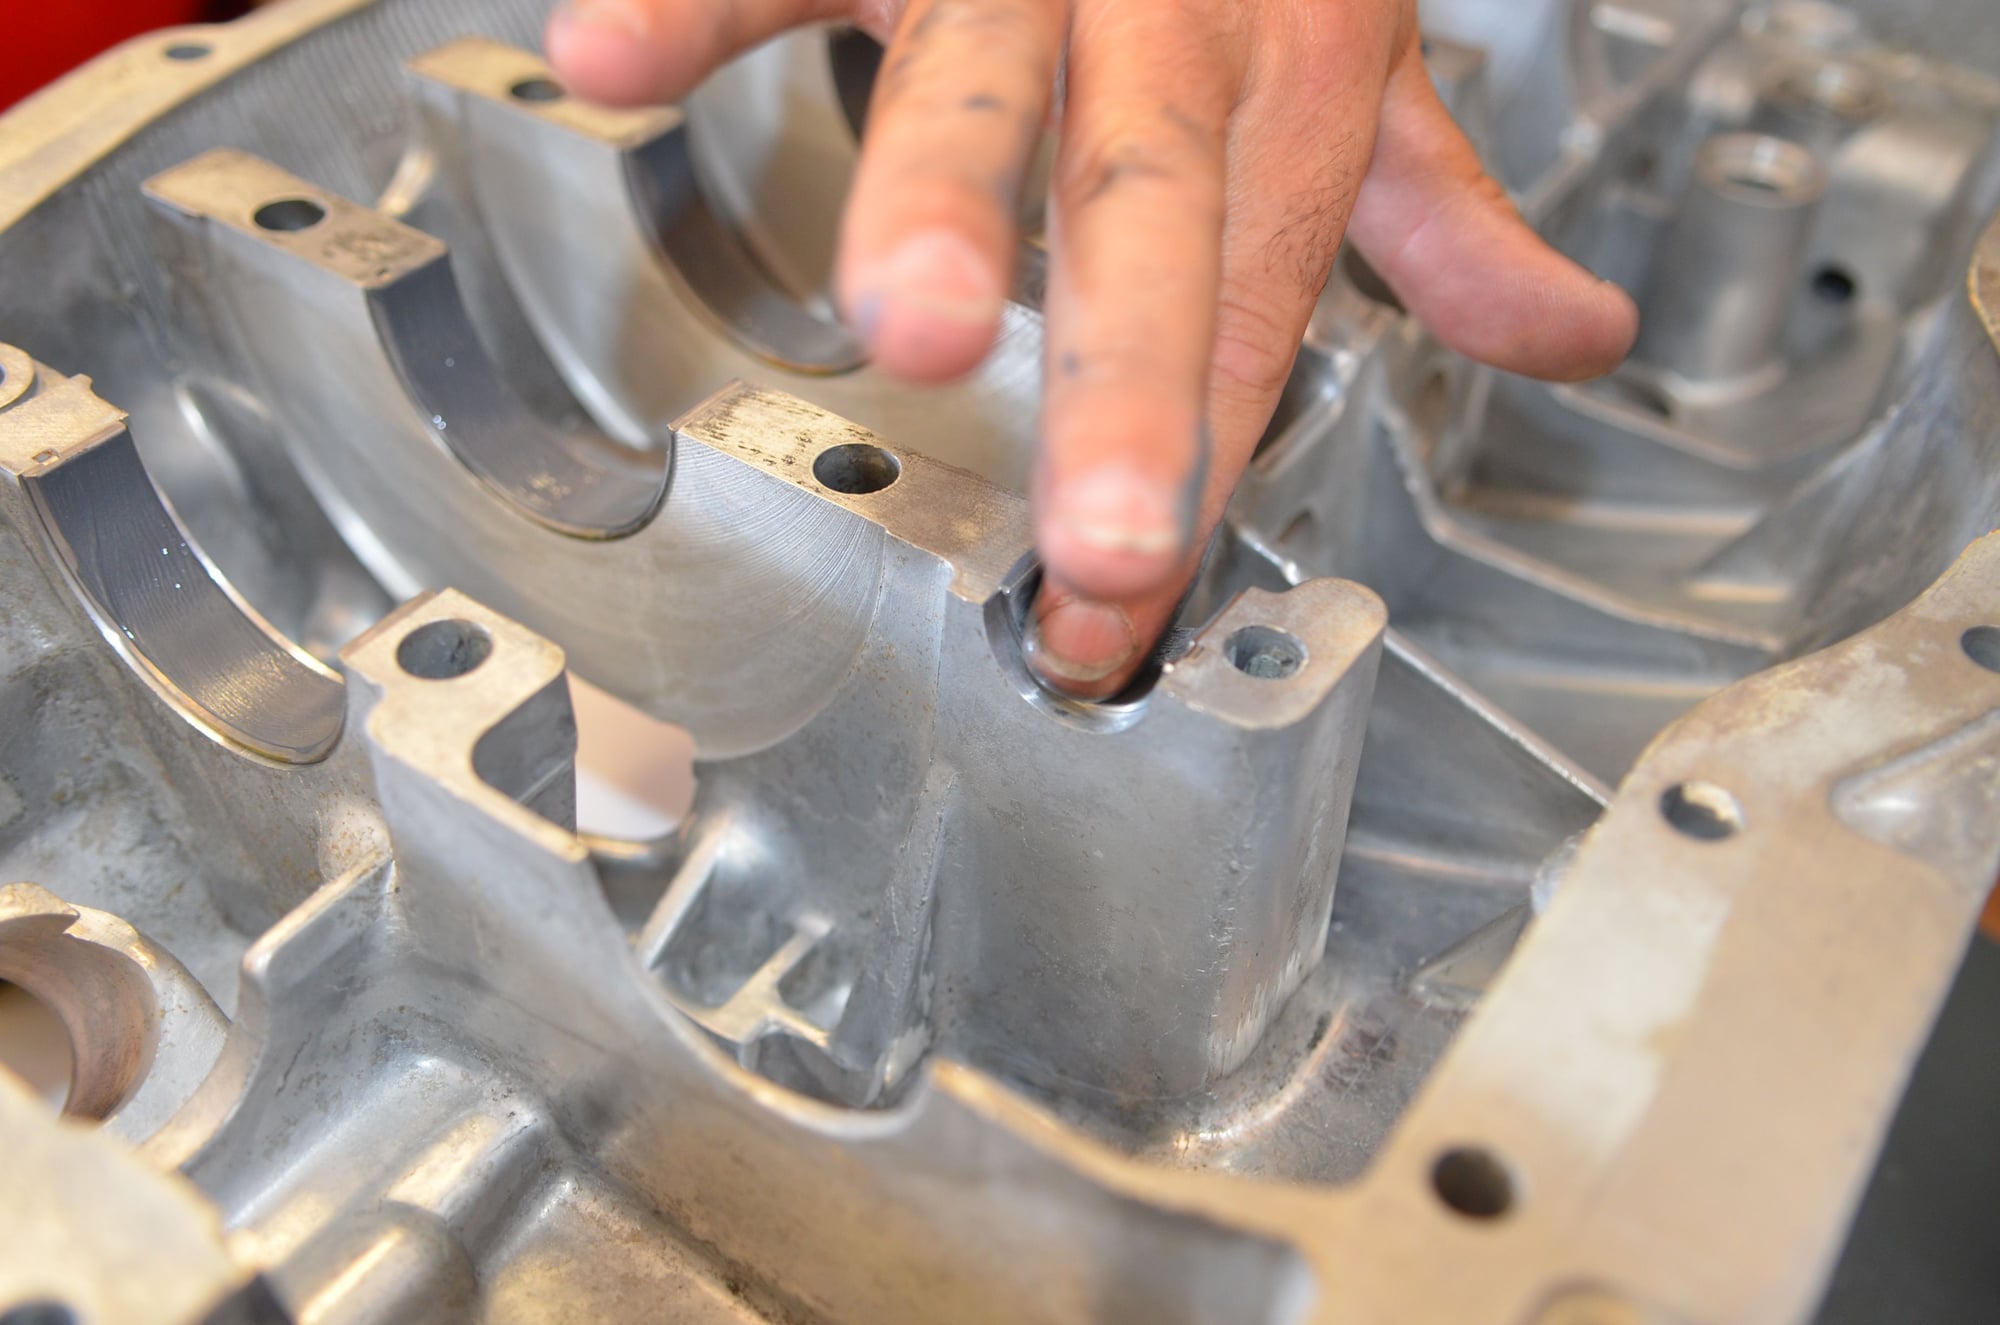
Bearing shells in place with engine assembly lube...
Yes, I know, bare fingers.... Best way to go
Engine case sealant going on... No photo's of between this and putting the case halves together, that was a 2 person job Following the Pelican thread, my engine has been perfectly dry!!!
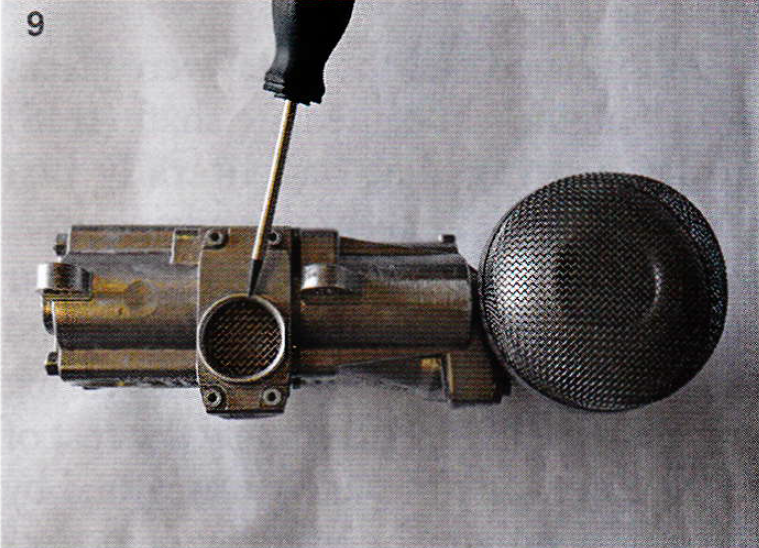
Closeup of the GT3 Oil pump... The tabs were not fully in place around the nuts in this photo
 02-06-2015, 04:36 PM