When you click on links to various merchants on this site and make a purchase, this can result in this site earning a commission. Affiliate programs and affiliations include, but are not limited to, the eBay Partner Network.
To those that have PMed me asking about having a set of Beru ignition wires made up for them, I am now back from my six-week vacation and would be willing to do so.
Once again, the cable set is at cost plus $30 for the use of the Beru crimper, plus shipping.
I purchased a set from Alex and can confirm that everything from the workmanship to the documentation to the shipping was absolutely first rate.
Thanks for the compliment, Dan. Excellence was expected.
And if you have any questions when you get around to installing them, send me a PM or e-mail.
My install went as expected...perfectly and how could it not if they are 100% identical to the OEM Porsche/Beru wire harness.
I took digital pics of the plug wires where they attach to the distributor caps. That proved to be very helpful (wire routing and connector orientation) when installing the new ignition wires. These pics have been added to my Beru Ignition Cable page.
My 993 went out for its first drive this year, yesterday evening. I know, late, but I recently got back from a 6 week vacation motorcycling in the Alps.
Some helpful details for those considering making up their own Beru ignition cable set.
I took my time not taking any shortcuts; that would go against my grain.
What is important is cutting the insulation square to the cable and not nicking any of the wire strands. The latter will/might cause failure of that strand in time; not the end of the world, but we do expect excellence...in a Porsche.
I made my own jig to do so. Using a tool such as a wire stripper would not provide those results.
The advantage to cutting the insulation square is that it makes full contact with the end of the M3 terminal when it is slipped on. This provides a bit of extra friction against rotation of the M3 terminal on the cable. Although the crimp does that extremely well, why not take it that extra step.
The next step involves cutting the stranded wire to the correct length; 6.8 mm according to the indication on the Beru crimper.
Start off with a slightly longer section of stranded wire and cut it down a few thou at a time (you need good cutters to do this; your local hardware store will not carry those). If the stranded wire is too long, the M3 terminal will bottom out and spin on the end of the stranded wire and therefore, the end of the insulation will not make contact with the end of the M3 terminal. You want full contact of the insulation with the M3 terminal while also having the full length of the stranded wired within the M3 terminal for crimping purposes. When this condition has been met, you can crimp the M3 terminal; first the end to crimp the stranded wire and then the barrel.
By the way, I've tried a pull-out test of the M3 terminal by threading a rod onto the end. I couldn't pull it off with all my strength. Out of curiosity, I will be taking a section of cable with M3 terminal ends to work to have the lab perform a test to see how many pounds it takes to do so.
2011-08-16 - Results of the pull-out test:
A 6" section of Beru Silicone Copper Cable with an M3 terminal crimped on each end was tested in one of our labs. The stranded wire did not pull out of either M3 terminal; instead the stranded wire tore with a force of 58 pounds at a location just outside of the M3 terminal area. The cable consists of 19 tin plated copper strands, each with a gauge of 32 or M2.0 (0.008" or 0.20 mm).
Last edited by IXLR8; 08-16-2011 at 10:21 PM.
Reason: Added results of pull-out test.
One vendor sells two different replacement ignition cable sets for the normally aspirated 993; one set for the 1995 model and another set for the 1996 to 1998 models. Porsche only sells one set for the 1995 to 1998 models, so that had me wondering what the differences are...if any.
Thanks to a Porsche owner who mailed me the instruction sheet of the cable set he bought, I was able to see the differences in lengths.
Looking at that list, it was interesting to note that most of the lengths were in a whole number of inches. I highly doubt that Beru in Europe manufactures their cables to a whole number of inches...more likely in centimeters.
My measurements that I took of each of my cables was taken in millimeters; taken three times and then converted to decimal inches in that chart posted earlier in this thread.
For example, from that list, the #3 Bottom cable should be 28 inches for a '95 and 29 inches for a '96 to '98. The measurement of that same cable on my '95 was 28.90 inches; much closer to the length of the '96 to '98 cable set dimension on that list.
I have to wonder how accurately those measurements on that list were taken.
As far as I am concerned, there is only on cable set for the normally aspirated 993, from 1995 through 1998. Porsche also seems to think so.
Just a note to avoid any issues. Another member who bought a set from the "other source" PMed me stating that two of the M3 terminals in his wire set came off (the wires were promptly replaced by that source).
Having crimped a slew of these and having done pull tests, both between my arms and using one of our labs (see post #49 above for results), I find it hard to believe that they can just fall/come off unless, 1) they weren't crimped well or at all, and 2) maybe the member had trouble threading them on and used too much rotational force (which I doubt).
Use lube in the opening of the cap boots as mentioned in my directions. They should not have to be twisted very much or at all.
Should anyone consider buying the crimping tool and making Beru cables for themselves and others, they should know it takes a good 2 to 2.5 hours to make up all 14 cables in a set. If you make two sets of these back to back, trust me, you are wiped for the day because it does take a bit of concentration to get it right.
Follow these simple steps, don't rush the job and you'll have cables as good as or better than the ones you can buy.
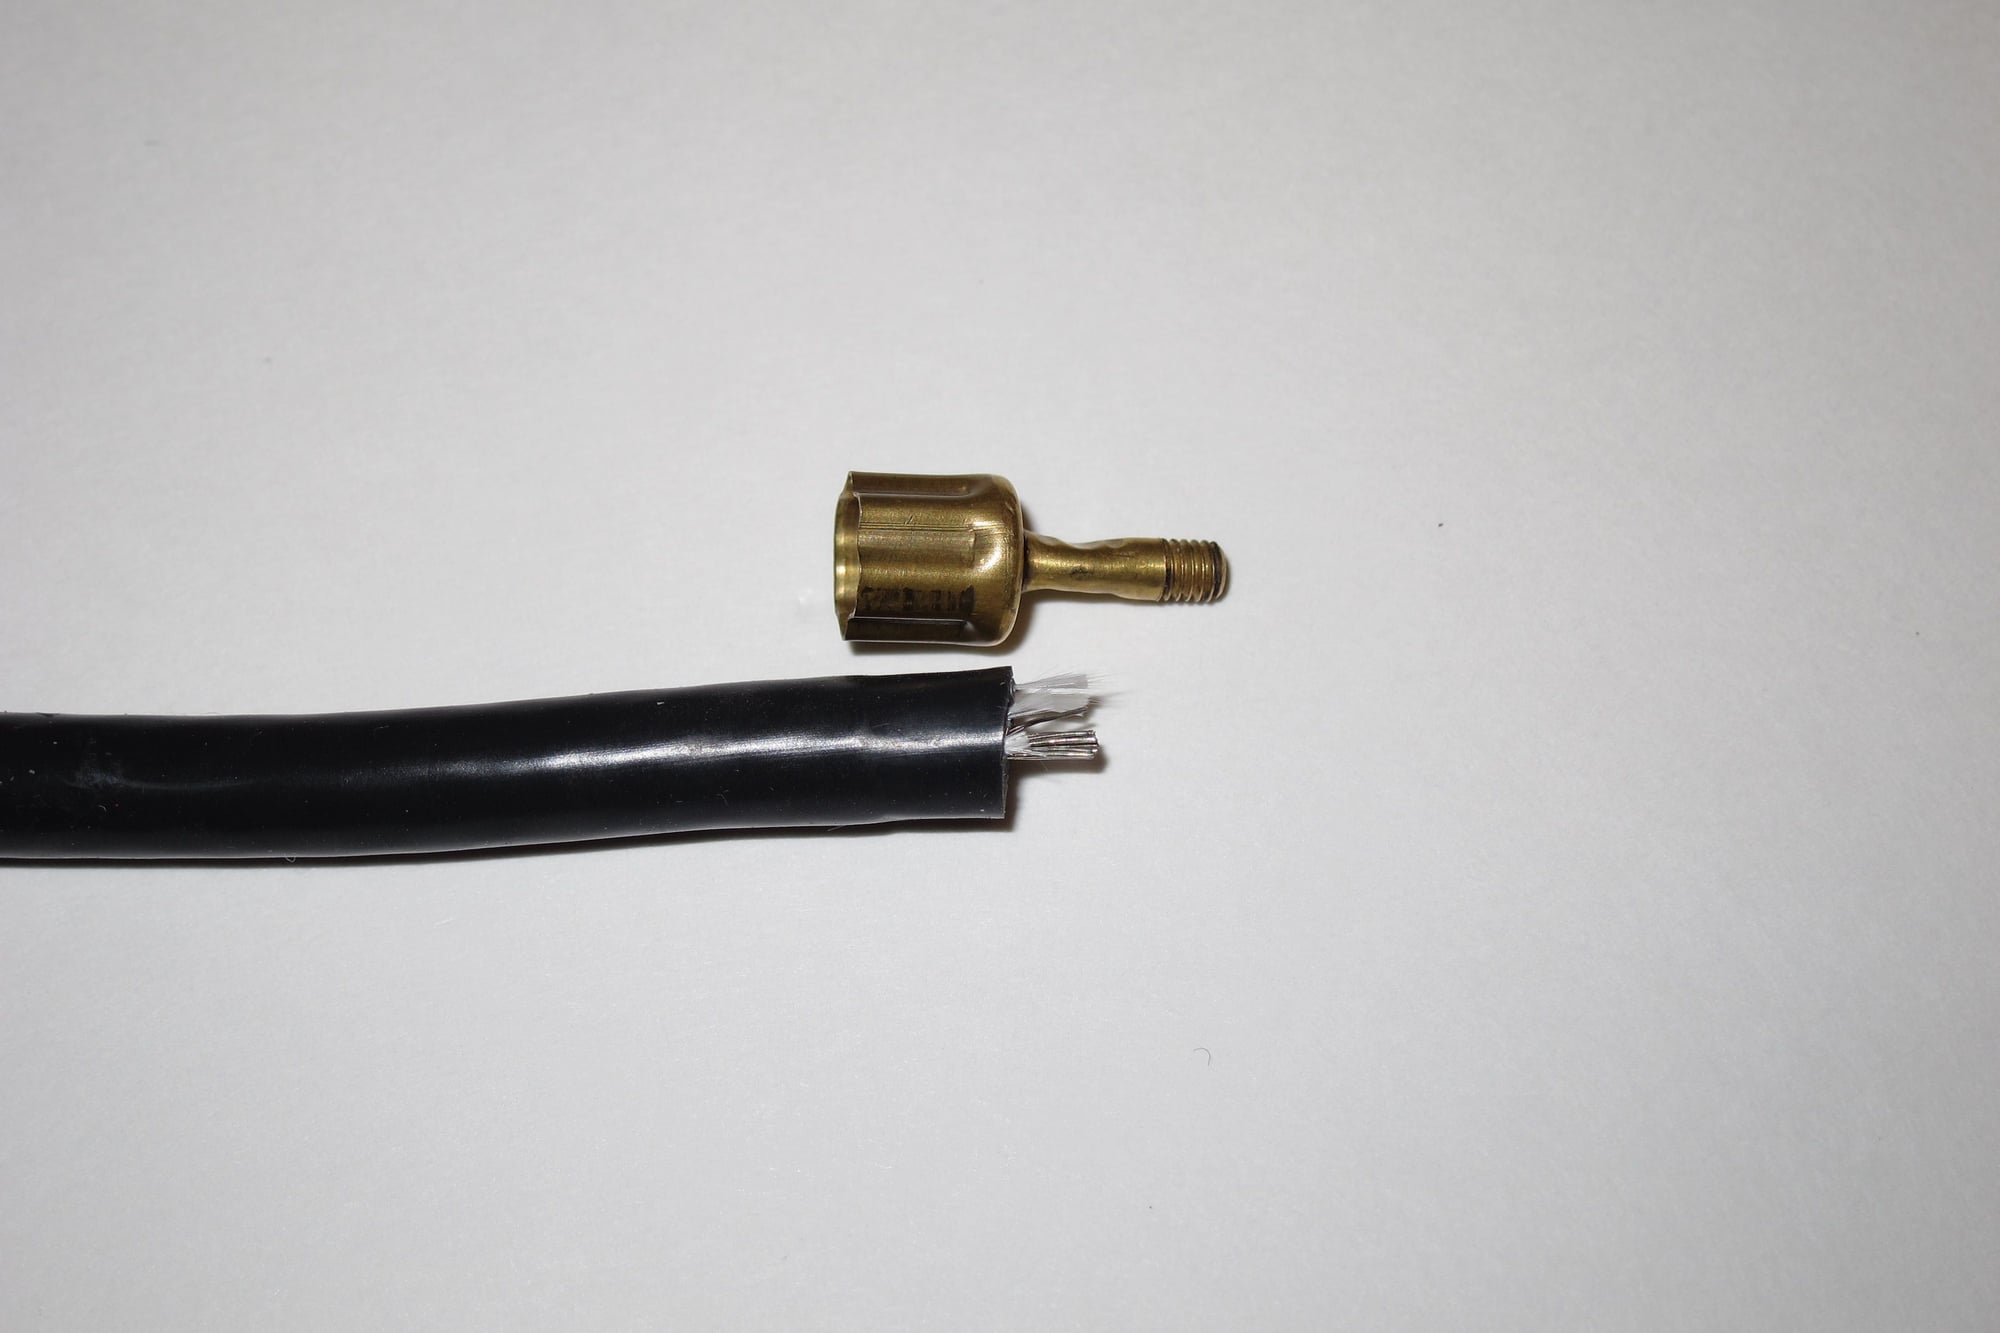
Here is an example of an aftermarket cable that was given to me by a local Porsche owner for repair. Obviously not made correctly and with a couple of short cuts taken.
First of all, the end of the insulation is not cut square as it should be for proper contact with the insides of the M3 terminal. Then the ignition wire protruding should be 6.8 mm in length as per Beru. This one protruded less than 4 mm. Also note the inadequately crimped M3 terminal. Those white cable strengthening strands should also have been cut. No wonder the M3 terminal pulled off this cable.
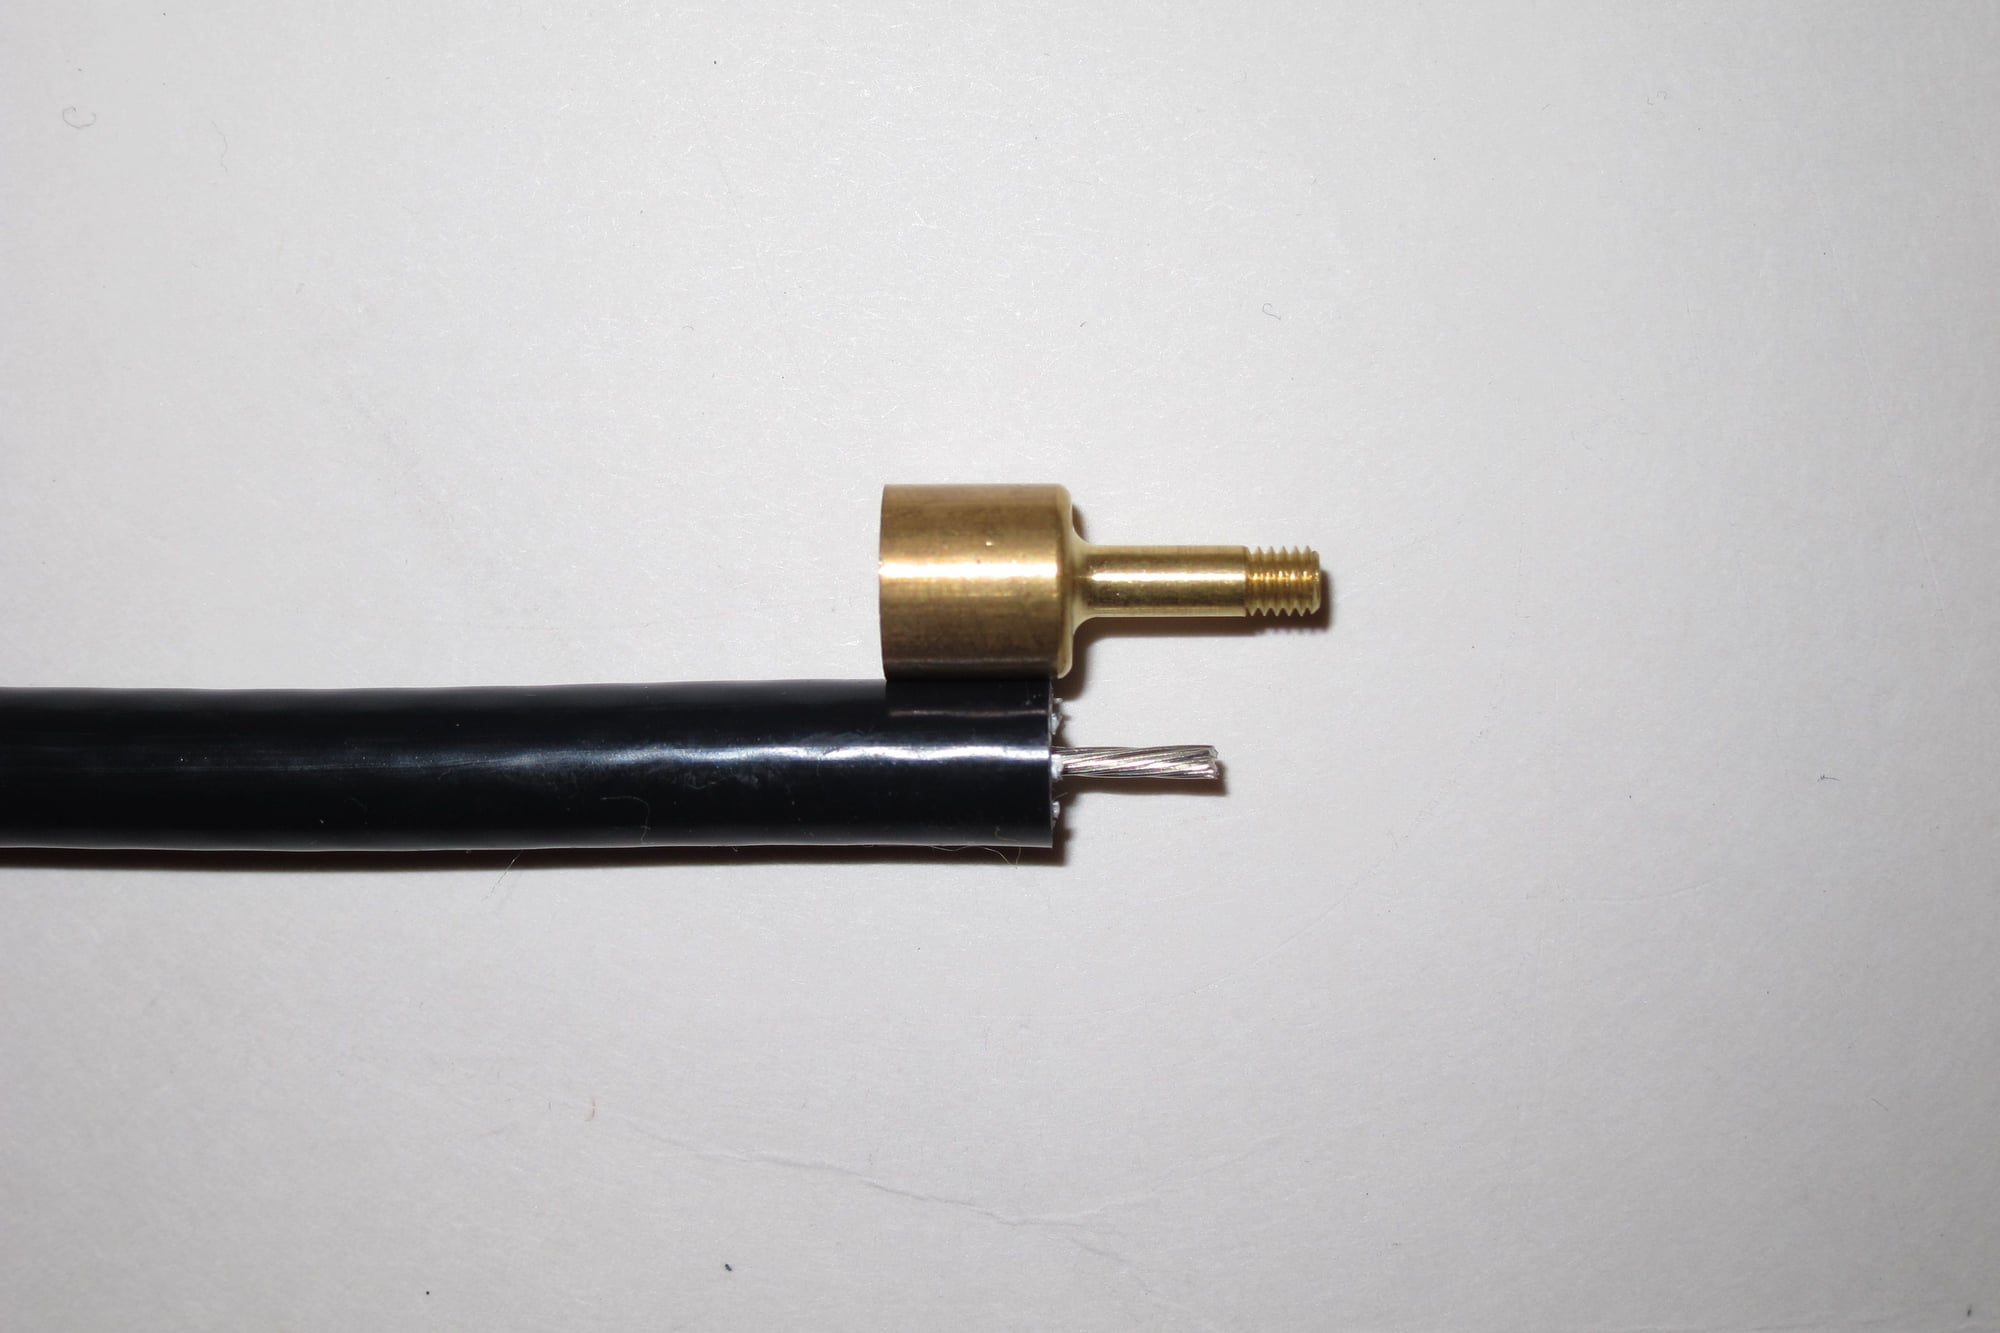
This is what a properly cut ignition cable should look like cut square without any white cable strengthening strands sticking out and getting in the way. I made a jig to ensure square cuts every time...no wire stripper is used. The ignition cable is the correct 6.8 mm long.
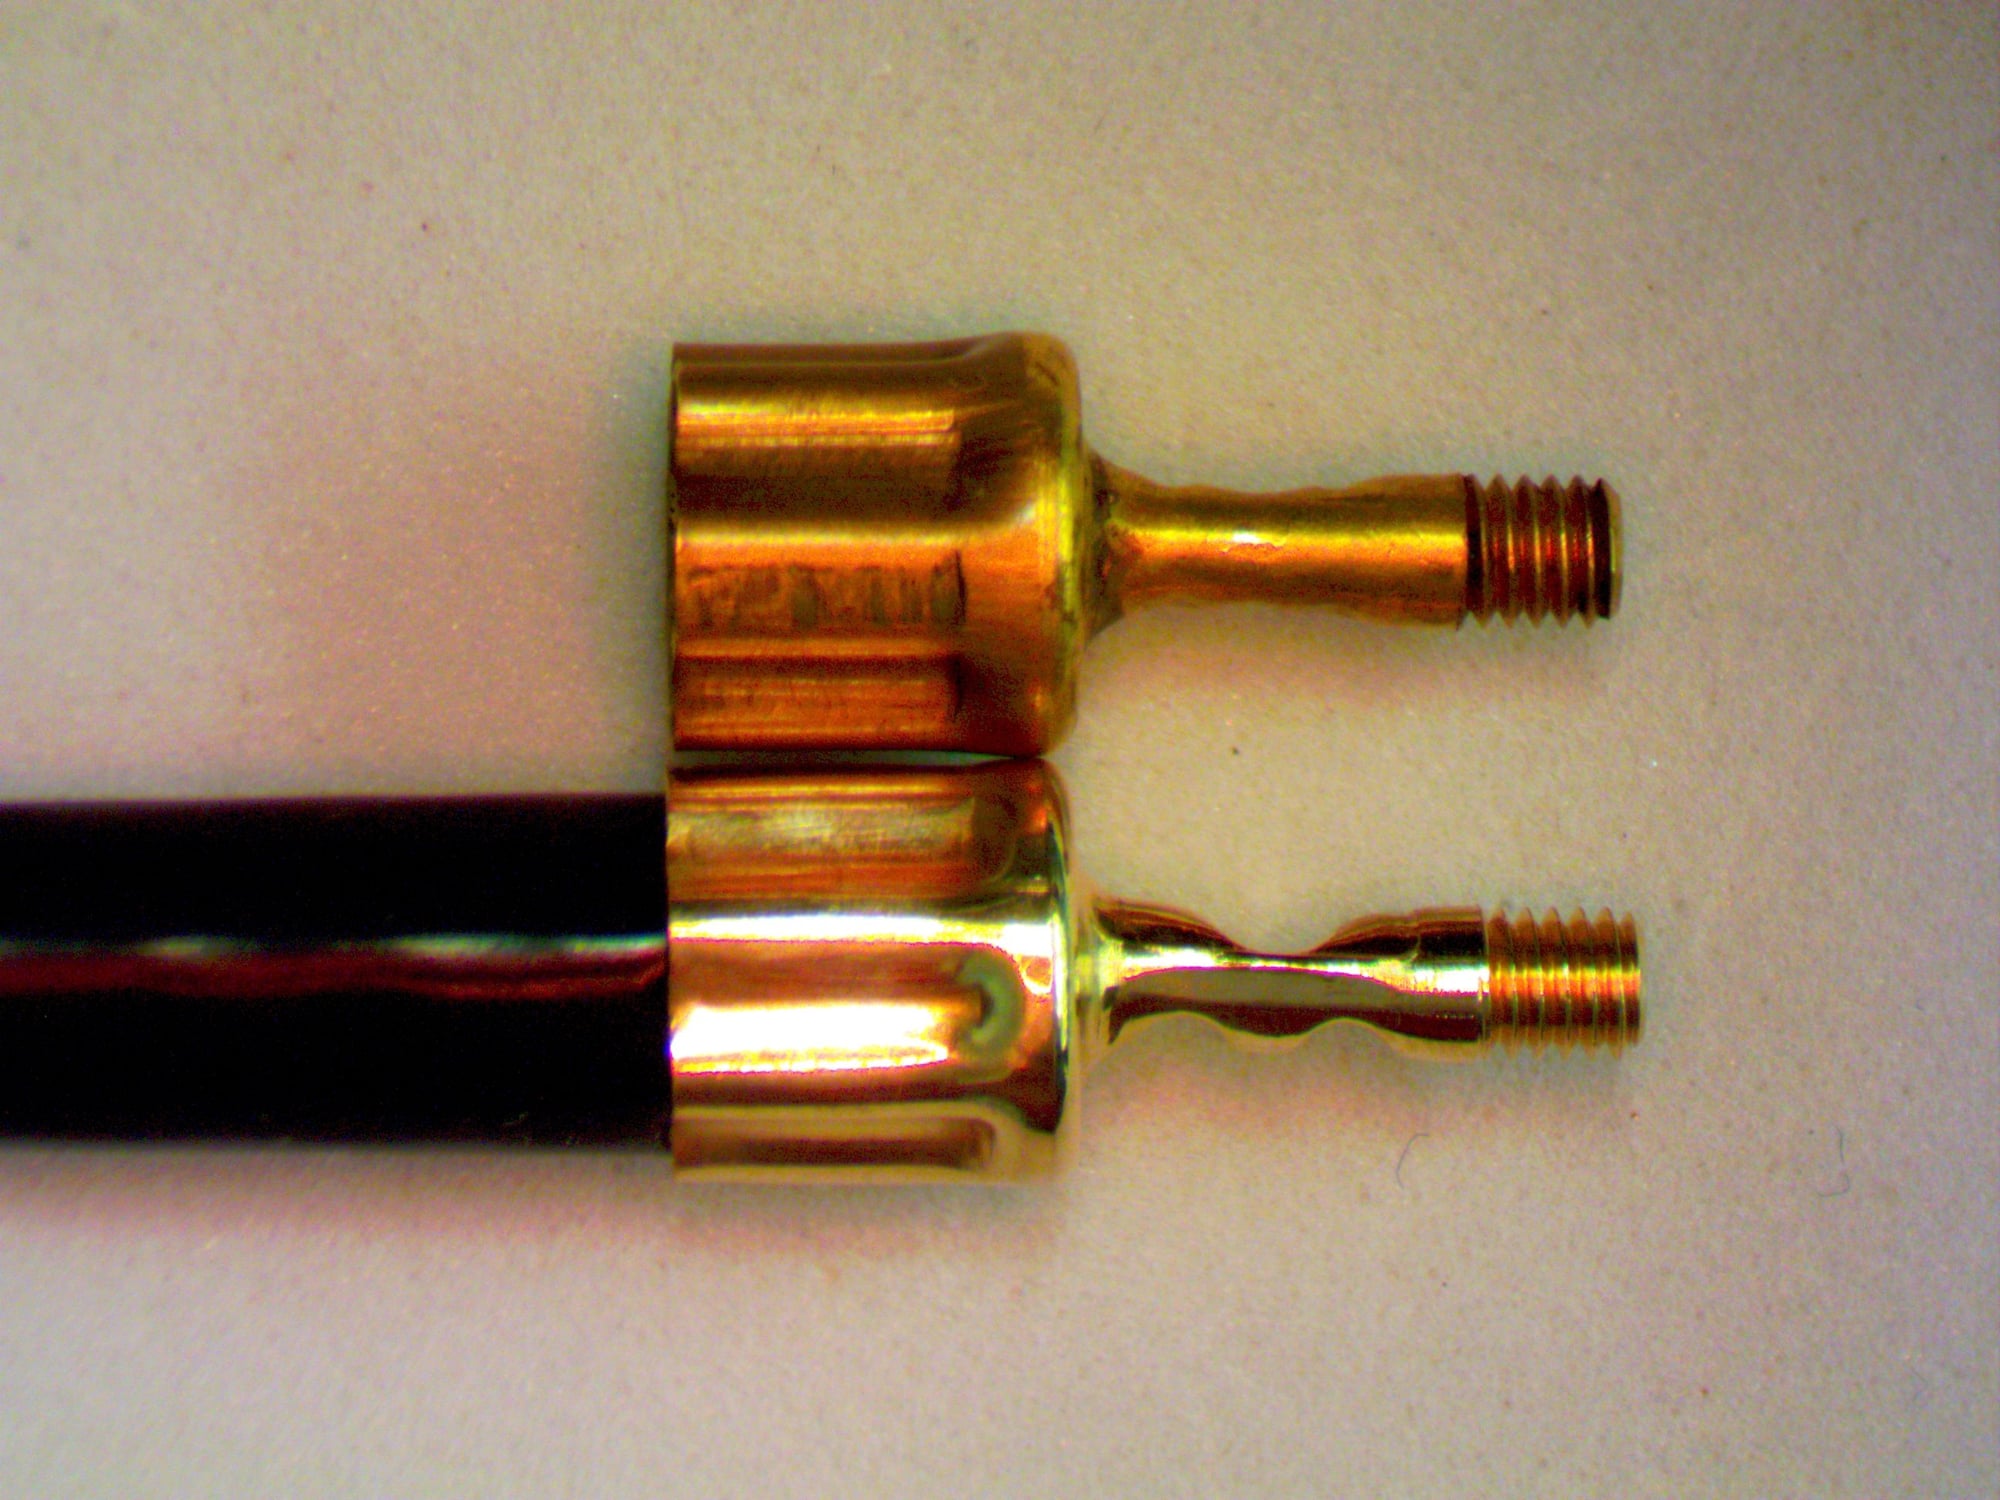
The upper M3 terminal hardly has any crimp indentations. This from an unknown supplier, the one in the first photo above.
My lower M3 terminal has crimps that are quite pronounced when using the Beru crimping tool.
 07-20-2011, 12:56 PM