DIY Color/Wet Sanding SPORT SEATBACKS - Rivi Blue Cab
 04-22-2009, 07:00 PM
#1
Race Car
Thread Starter
Here are my Sport Seat backs that I am having color keyed to the car. They are done in Riviera Blue using a 2 stage painting process (basecoat/clearcoat). This DIY is from the start to the finish on how to colorsand. If you have never done this do a beater first to get the process down. You can BURN the paint if not careful. Here you go.
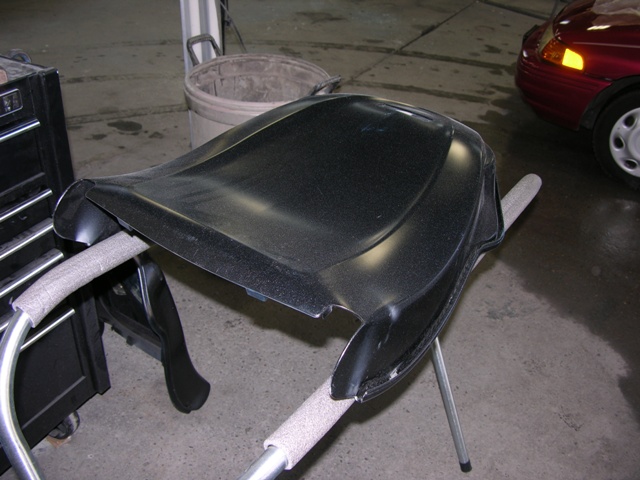
In this image the seat back is on the stand and I am getting ready to scuff it down with a red Scotch Brite pad. Nothing hard about this step as you just want to get the surface "roughed up" for the paint to adhere.
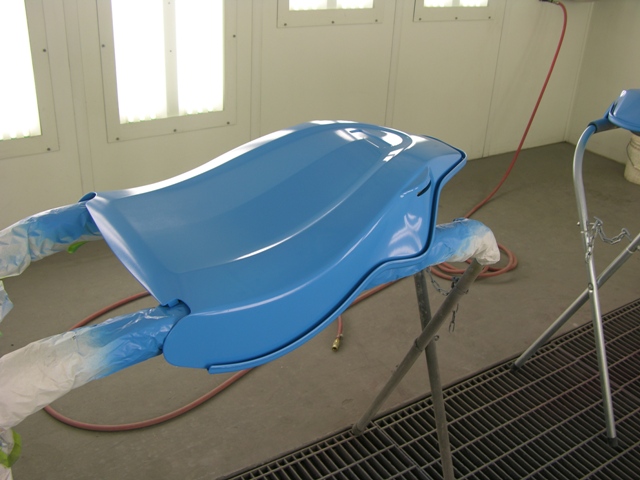
In this picture we have applied stage 1 of the 2 stage process. This is known as the basecoat. The basecoat is just the color layer and it lays out dull (though the seat back looks shiny it's not).
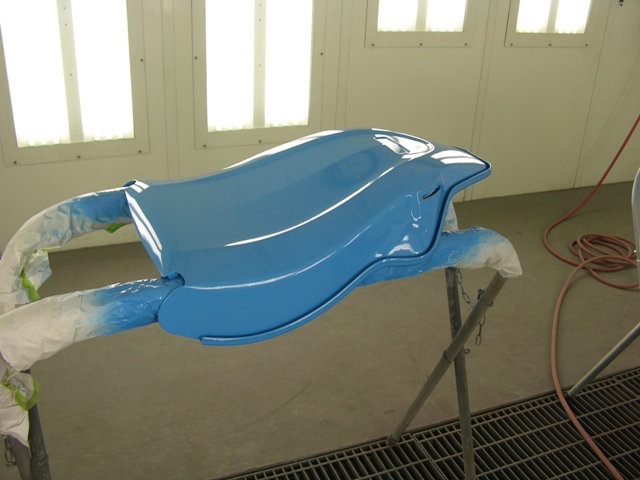
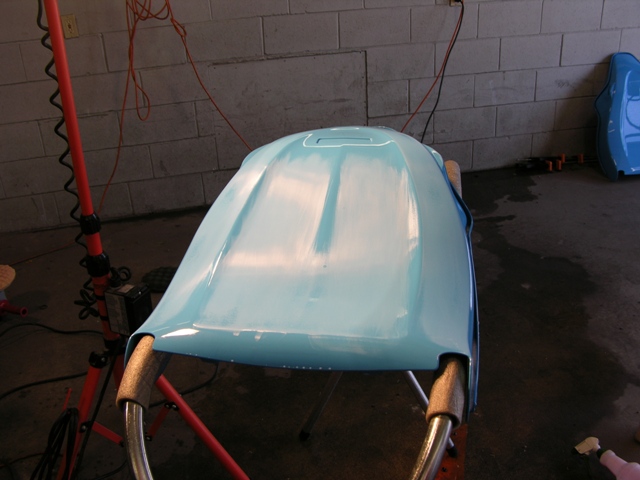
In this picture we have applied stage 2 of the 2 stage process. This is known as the clearcoat. Clear is paint that is , for lack of better terminology, clear with no color. You can see the difference from the previous picture that the seatback has more of a shine. The finish was baked on overnight in the booth
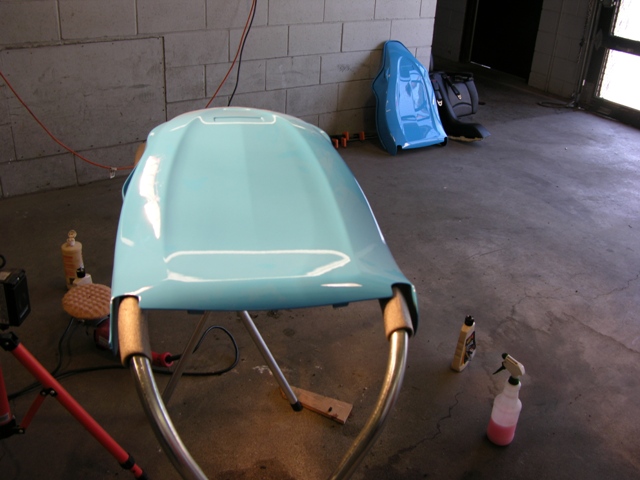
After a week I brought the seatbacks back to my shop for the colorsand process. In this picture the seatback is washed, dried and run over with a tack cloth. It is important that the surface is dirt free. Dirt will scratch the surface as you sand.
In this picture I am getting ready to sand for the 1st time. The surface was in great shape. That is the reason for a booth and a HVLP paint gun (High Velocity Low Pressure) The finished product from the booth is very smooth. I am using 3M 2000 grit wet/dry paper. I am using it wet with a sponge pad. The key to the sponge pad is that it gives you an even pressure over the surfaces. If you used your hand gouges could occur where your fingers push on the paper. Also the sponge pad can go over edges easier. NOTE: Stay away from edges as much as possible. Edges are the 1st place that burn.

This is what you get after sanding with the 2000 grit. The idea here is to smooth out the clearcoat surface. The dull areas are where I sanded. the shiny areas are where I didn't. Again STAY AWAY FROM EDGES. You will see later on how this all comes together.
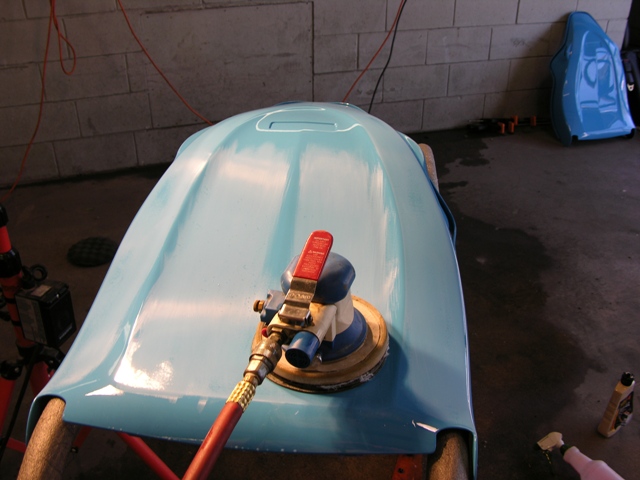
Here is where it all comes together. This is the Trizact system developed by 3M. In this stage I am sanding the car with 3000 grit paper. The best thing about this is that you are using a DA with a sponge pad. This allows you to go over all surfaces even edges. This is such a light sand that it smooths all the 2000 scratches out.
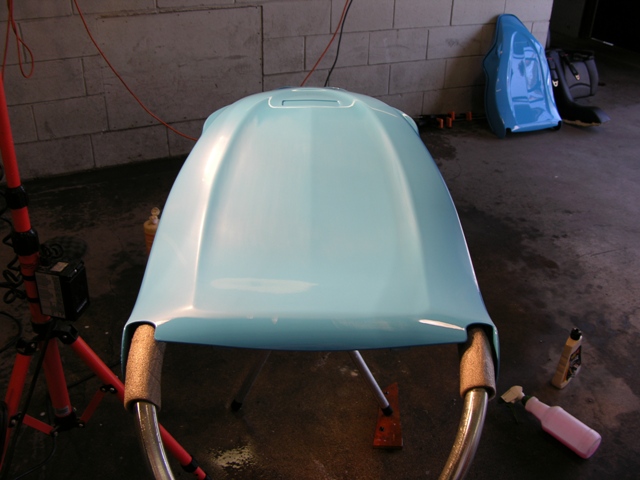
Look at the seatback now, the entire surface is sanded. The seat back is ready to buff. I would still test your skills on a beater before doing a nice car. An edge is still an edge.
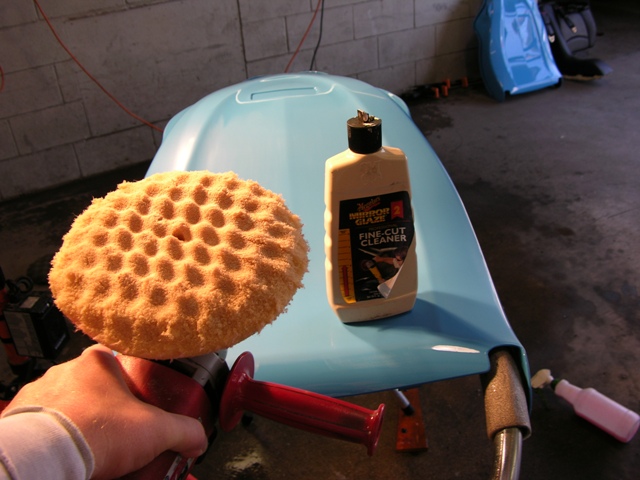
Here is the start of the buffing process. In this stage I am using Megs Fine Cut Cleaner. This is a compound that will remove the scratches we put in earlier. The pad I am using is a 3M waffle cutting pad.
You can see the shine starting to come through after the 1st step. The next step is the Megs Show Car Glaze. This step gets rid of the marks that the Fine Cut Cleaner put in. I am using a 3M soft waffle pad to apply.

The shine is even better after the glaze step. After you apply the glaze the next step is Megs Swirl Free Polish. This step really starts to ramp up the shine and will alleviate any swirls. I am using a very soft sponge pad with the orbital buffer.

How's the shine looking now? In this step I am using Megs Poly Seal. This is better than wax as it seals the paint and holds a shine better than wax. Again the application is with an orbital buffer and a sponge pad.

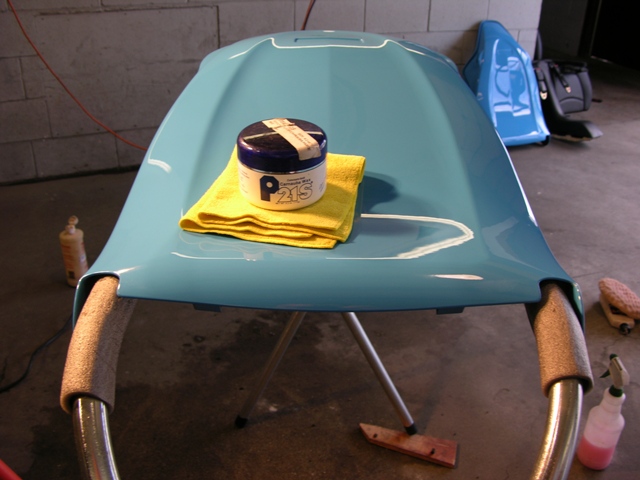
We are at the final step I always layer a coat of P21S on top of the Poly Seal. the P21S gives you a wet shine and dseepens the look of the paint.
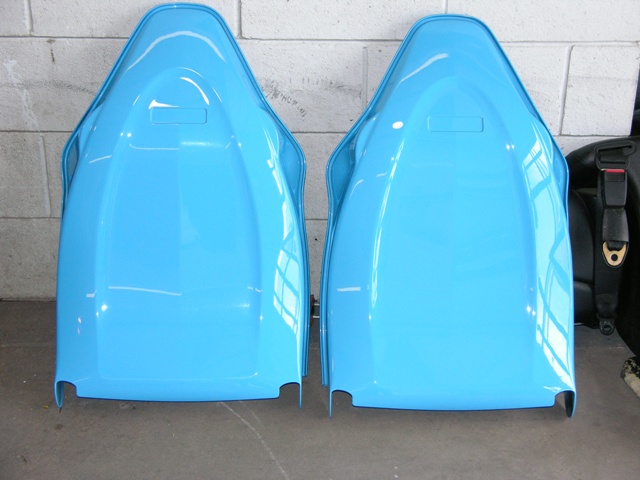
Here are the seatbacks done. Notice the wet look and the crisp shine. Now I am taking them to the upholstrey shop for the new leather covers to be installed. I have to wait until next week to do that
I don't want to scare anyone away from trying this but practice does make perfect. Try it out on a DD or a beater as I said earlier. Once you get the process down move on to something more challenging.
Mike
In this image the seat back is on the stand and I am getting ready to scuff it down with a red Scotch Brite pad. Nothing hard about this step as you just want to get the surface "roughed up" for the paint to adhere.
In this picture we have applied stage 1 of the 2 stage process. This is known as the basecoat. The basecoat is just the color layer and it lays out dull (though the seat back looks shiny it's not).
In this picture we have applied stage 2 of the 2 stage process. This is known as the clearcoat. Clear is paint that is , for lack of better terminology, clear with no color. You can see the difference from the previous picture that the seatback has more of a shine. The finish was baked on overnight in the booth
After a week I brought the seatbacks back to my shop for the colorsand process. In this picture the seatback is washed, dried and run over with a tack cloth. It is important that the surface is dirt free. Dirt will scratch the surface as you sand.
In this picture I am getting ready to sand for the 1st time. The surface was in great shape. That is the reason for a booth and a HVLP paint gun (High Velocity Low Pressure) The finished product from the booth is very smooth. I am using 3M 2000 grit wet/dry paper. I am using it wet with a sponge pad. The key to the sponge pad is that it gives you an even pressure over the surfaces. If you used your hand gouges could occur where your fingers push on the paper. Also the sponge pad can go over edges easier. NOTE: Stay away from edges as much as possible. Edges are the 1st place that burn.
This is what you get after sanding with the 2000 grit. The idea here is to smooth out the clearcoat surface. The dull areas are where I sanded. the shiny areas are where I didn't. Again STAY AWAY FROM EDGES. You will see later on how this all comes together.
Here is where it all comes together. This is the Trizact system developed by 3M. In this stage I am sanding the car with 3000 grit paper. The best thing about this is that you are using a DA with a sponge pad. This allows you to go over all surfaces even edges. This is such a light sand that it smooths all the 2000 scratches out.
Look at the seatback now, the entire surface is sanded. The seat back is ready to buff. I would still test your skills on a beater before doing a nice car. An edge is still an edge.
Here is the start of the buffing process. In this stage I am using Megs Fine Cut Cleaner. This is a compound that will remove the scratches we put in earlier. The pad I am using is a 3M waffle cutting pad.
You can see the shine starting to come through after the 1st step. The next step is the Megs Show Car Glaze. This step gets rid of the marks that the Fine Cut Cleaner put in. I am using a 3M soft waffle pad to apply.
The shine is even better after the glaze step. After you apply the glaze the next step is Megs Swirl Free Polish. This step really starts to ramp up the shine and will alleviate any swirls. I am using a very soft sponge pad with the orbital buffer.
How's the shine looking now? In this step I am using Megs Poly Seal. This is better than wax as it seals the paint and holds a shine better than wax. Again the application is with an orbital buffer and a sponge pad.
We are at the final step I always layer a coat of P21S on top of the Poly Seal. the P21S gives you a wet shine and dseepens the look of the paint.
Here are the seatbacks done. Notice the wet look and the crisp shine. Now I am taking them to the upholstrey shop for the new leather covers to be installed. I have to wait until next week to do that
I don't want to scare anyone away from trying this but practice does make perfect. Try it out on a DD or a beater as I said earlier. Once you get the process down move on to something more challenging.
Mike
 04-22-2009, 07:22 PM
#3
Race Car
Thread Starter


Trending Topics
 04-22-2009, 09:35 PM
#9
Race Car
Thread Starter
That is exactly why I bought it. The color.
Mike
04-22-2009, 09:37 PM
#10
Addict
Lifetime Rennlist
Member
Lifetime Rennlist
Member
 )
04-22-2009, 11:24 PM
)
04-22-2009, 11:24 PM
#12
Three Wheelin'
Hi Mike, I have been follow your 993 project for weeks. Your car and your seat backs look great. Thanks for sharing the write-up and pics.
Can you please explain how to remove the "hard back" off the seats? Is this difficult?
TYIA
Bob-
Can you please explain how to remove the "hard back" off the seats? Is this difficult?
TYIA
Bob-

 04-23-2009, 12:54 AM
#14
Burning Brakes
Join Date: Aug 2007
Posts: 955
Likes: 0
Received 0 Likes
on
0 Posts
Looks awsome. Lots of paint work going on around here... I had to start with a much higher grit on my race car because I had trouble laying down the clear wtih out a lot of orange peel. Nothing sanding did not take care of. Everything else was easy for the most part.