Auxilary Oil Cooler (not Turbo S or Cargraphic) DIY finished (Long & lots of pics)!
 02-07-2005, 01:53 PM
#1
King of Cool
Rennlist Member
Rennlist Member
Thread Starter
UPDATED (4/25/2005), now with temperature results after two days at track.
Hello everyone,
Finally I finished the oil cooler DIY and put everything back together.
I've only driven the car for couple of days but I can say it's pretty effective!
I noticed the thermostat opens and closes while I'm driving on the highway, and it has never done that before even when the weather has been cooler.
Real test will be when I go to track next time but already it seems to work well!
Anyway, here's the DIY write-up I did, it will be posted later to www.p-car.com but since so many have shown interest in it, I wanted to post it here also.
Here it is:
993 AUXILARY OIL COOLER DIY:
This DIY is for installing an auxiliary oil cooler but not any of the ready made set-ups by Cargraphics, RUF or Turbo S that you can buy with everything already engineered and fabricated.
This is more involved process since you need to cut the hoses, install the hose ends and also fabricate the bracket for the cooler and locate the spot for the cooler.
Now that I�m the guinea pig and also have spent some time to �engineer & fabricate� this, you should have little easier time and hopefully it isn�t as intimidating as it would be if you were the first one doing this.
Reward for all this DIY� Ing is price of this whole set-up which is about $375 instead of Turbo S� about $900. Or $550 instead of $2000 of Cargraphics.
I�d like to thank �Old Guy� from pushing me doing this and finding the parts and also www.p-car.com & people who�ve done Oil Cooler DIY�s there.
I call the one I did now �Stage I� since this has only one auxilary cooler and little later when I�ll install another same size cooler in front of the other opening, I call it �Stage II�.
�Stage II� should have almost the same amount of cooling than the Cargraphic kit has (same capacity but little less effective cooling due to the fact that other auxilary cooler�s warmed air goes to the original cooler) and you are saving about $1500 for other Porsche modifications! I used that money for RS aero parts and painting them.
Little warning, I�m pretty sure fitting cooler in this location, with oil line fittings on top won�t fit if you have fog lights but using fittings on bottom in my opinion is not good idea because then the cooler might not fill up completely when the oil goes through.
Another word of caution, if you use measures, locations & other details explained here and screw up in some way; cooler or something else doesn�t fit, your motor or something else gets somehow fu*ked up, don�t blame me, you are doing this on your own responsibility. It worked in my car but maybe your car is different�
STAGE I Part List:
� 1 pc. 30mm to AN12 metric thread male to AN adapter male (Earl's (http://www.holley.com/earlsplumbing/) #9919GFR)
� 1 pc. Swivel-Seal 180 deg. Tube hose end (Earl's #818012)
� 1 pc. Swivel-Seal 90 deg. Tube hose end (Earl's #809112)
� 1 pc. Swivel-Seal 45 deg. Low Profile hose end (Earl's #804512)
� 1 pc. Swivel-Seal Straight Hose end (Earl's #800112)
� 10 ft. Premium Racing Hose (Earl's #410012).
� 1 pc. AN12 to 30mm Female adapter. (www.pegasusautoracing.com #1219-12AN)
� 1 pc. MOCAL Oil Cooler with AN 12 fittings (12"X 5"X2", Mocal 235 Matrix, 16 Row Radiator cooler. http://www.batinc.net/coolers.htm)
STAGE II Part List:
� 1 pc. 30mm to AN12 metric thread male to AN adapter male (Earl's (http://www.holley.com/earlsplumbing/) #9919GFR)
� 1 pc. Swivel-Seal 180 deg. Tube hose end (Earl's #818012)
� 3 pc. Swivel-Seal 90 deg. Tube hose end (Earl's #809112)
� 1 pc. Swivel-Seal 45 deg. Low Profile hose end (Earl's #804512)
� 1 pc. Swivel-Seal Straight Hose end (Earl's #800112)
� 10 ft. Premium Racing Hose (Earl's #410012).
� 1 pc. AN12 to 30mm Female adapter. (www.pegasusautoracing.com #1219-12AN)
� 2 pcs. MOCAL Oil Cooler with AN 12 fittings (12"X 5"X2", Mocal 235 Matrix, 16 Row Radiator cooler. http://www.batinc.net/coolers.htm)
In principle, this DIY uses 993TT Auxilary Oil Cooler Installation as a guideline but is little different because this is not ready made kit and you need to do some fabricating.
Even though that DIY gives a lot of information, I�ve repeated some of the procedures here, some purposely, some not.
OK, that�s the �pre information�, now let�s do it!
First, jack front of the car up and put it on jack stands.
Then, start to remove the bumper cover , but at this point, only remove the splitters so that you can �mock-up� the location for the cooler.
Without splitters, it easy to slide in the cooler from underneath and check the position for it. Here is where it will be installed, in the opening where all the air to the a/c goes in so the airflow will be very good. Cooler will pretty much cover this whole opening.
Once you�ve set it up, continue rest of the bumper removal. Then the front looks like this.

Now take the ST/TS sheet and start fabricating the bracket out of it. Measure everything and mark them to the sheet. First drill the holes for the oil line connections. Then drill the holes for the cooler and attaching the bracket to the bumper bar. Drill first the holes to the bumper bar using bracket on top of the bumper bar so you now approximately where to drill.


Holes for attaching the bracket to the bumper bar aren�t that specific regarding where to put them but make at least few of them pretty close to the outer edge. I used five holes, which I think is enough but not overkill. You also need to remove piece from one side of the bracket. This is to avoid the bumper bar bolt.
Once you�ve done all drilling, cot the piece to a right size and smooth all the holes & sides of the bracket. Fit it to its location and check it also with the cooler.
If it fits and looks something like this, have a beer.
Other (easier) way for attaching the cooler is just to use ST/St flat bars instead of this kind of plate. This way is bit of overkill but I wanted to make sure there won�t be any vibrations and the cooler is attached well but now thinking of it, two flat bars (~ 5 mm thick) should work as well.
Hello everyone,
Finally I finished the oil cooler DIY and put everything back together.
I've only driven the car for couple of days but I can say it's pretty effective!
I noticed the thermostat opens and closes while I'm driving on the highway, and it has never done that before even when the weather has been cooler.
Real test will be when I go to track next time but already it seems to work well!
Anyway, here's the DIY write-up I did, it will be posted later to www.p-car.com but since so many have shown interest in it, I wanted to post it here also.
Here it is:
993 AUXILARY OIL COOLER DIY:
This DIY is for installing an auxiliary oil cooler but not any of the ready made set-ups by Cargraphics, RUF or Turbo S that you can buy with everything already engineered and fabricated.
This is more involved process since you need to cut the hoses, install the hose ends and also fabricate the bracket for the cooler and locate the spot for the cooler.
Now that I�m the guinea pig and also have spent some time to �engineer & fabricate� this, you should have little easier time and hopefully it isn�t as intimidating as it would be if you were the first one doing this.
Reward for all this DIY� Ing is price of this whole set-up which is about $375 instead of Turbo S� about $900. Or $550 instead of $2000 of Cargraphics.
I�d like to thank �Old Guy� from pushing me doing this and finding the parts and also www.p-car.com & people who�ve done Oil Cooler DIY�s there.
I call the one I did now �Stage I� since this has only one auxilary cooler and little later when I�ll install another same size cooler in front of the other opening, I call it �Stage II�.
�Stage II� should have almost the same amount of cooling than the Cargraphic kit has (same capacity but little less effective cooling due to the fact that other auxilary cooler�s warmed air goes to the original cooler) and you are saving about $1500 for other Porsche modifications! I used that money for RS aero parts and painting them.
Little warning, I�m pretty sure fitting cooler in this location, with oil line fittings on top won�t fit if you have fog lights but using fittings on bottom in my opinion is not good idea because then the cooler might not fill up completely when the oil goes through.
Another word of caution, if you use measures, locations & other details explained here and screw up in some way; cooler or something else doesn�t fit, your motor or something else gets somehow fu*ked up, don�t blame me, you are doing this on your own responsibility. It worked in my car but maybe your car is different�
STAGE I Part List:
� 1 pc. 30mm to AN12 metric thread male to AN adapter male (Earl's (http://www.holley.com/earlsplumbing/) #9919GFR)
� 1 pc. Swivel-Seal 180 deg. Tube hose end (Earl's #818012)
� 1 pc. Swivel-Seal 90 deg. Tube hose end (Earl's #809112)
� 1 pc. Swivel-Seal 45 deg. Low Profile hose end (Earl's #804512)
� 1 pc. Swivel-Seal Straight Hose end (Earl's #800112)
� 10 ft. Premium Racing Hose (Earl's #410012).
� 1 pc. AN12 to 30mm Female adapter. (www.pegasusautoracing.com #1219-12AN)
� 1 pc. MOCAL Oil Cooler with AN 12 fittings (12"X 5"X2", Mocal 235 Matrix, 16 Row Radiator cooler. http://www.batinc.net/coolers.htm)
STAGE II Part List:
� 1 pc. 30mm to AN12 metric thread male to AN adapter male (Earl's (http://www.holley.com/earlsplumbing/) #9919GFR)
� 1 pc. Swivel-Seal 180 deg. Tube hose end (Earl's #818012)
� 3 pc. Swivel-Seal 90 deg. Tube hose end (Earl's #809112)
� 1 pc. Swivel-Seal 45 deg. Low Profile hose end (Earl's #804512)
� 1 pc. Swivel-Seal Straight Hose end (Earl's #800112)
� 10 ft. Premium Racing Hose (Earl's #410012).
� 1 pc. AN12 to 30mm Female adapter. (www.pegasusautoracing.com #1219-12AN)
� 2 pcs. MOCAL Oil Cooler with AN 12 fittings (12"X 5"X2", Mocal 235 Matrix, 16 Row Radiator cooler. http://www.batinc.net/coolers.htm)
In principle, this DIY uses 993TT Auxilary Oil Cooler Installation as a guideline but is little different because this is not ready made kit and you need to do some fabricating.
Even though that DIY gives a lot of information, I�ve repeated some of the procedures here, some purposely, some not.
OK, that�s the �pre information�, now let�s do it!
First, jack front of the car up and put it on jack stands.
Then, start to remove the bumper cover , but at this point, only remove the splitters so that you can �mock-up� the location for the cooler.
Without splitters, it easy to slide in the cooler from underneath and check the position for it. Here is where it will be installed, in the opening where all the air to the a/c goes in so the airflow will be very good. Cooler will pretty much cover this whole opening.
Once you�ve set it up, continue rest of the bumper removal. Then the front looks like this.
Now take the ST/TS sheet and start fabricating the bracket out of it. Measure everything and mark them to the sheet. First drill the holes for the oil line connections. Then drill the holes for the cooler and attaching the bracket to the bumper bar. Drill first the holes to the bumper bar using bracket on top of the bumper bar so you now approximately where to drill.
Holes for attaching the bracket to the bumper bar aren�t that specific regarding where to put them but make at least few of them pretty close to the outer edge. I used five holes, which I think is enough but not overkill. You also need to remove piece from one side of the bracket. This is to avoid the bumper bar bolt.
Once you�ve done all drilling, cot the piece to a right size and smooth all the holes & sides of the bracket. Fit it to its location and check it also with the cooler.
If it fits and looks something like this, have a beer.
Other (easier) way for attaching the cooler is just to use ST/St flat bars instead of this kind of plate. This way is bit of overkill but I wanted to make sure there won�t be any vibrations and the cooler is attached well but now thinking of it, two flat bars (~ 5 mm thick) should work as well.
Last edited by Flying Finn; 04-25-2005 at 12:14 PM. Reason: Update
 02-07-2005, 01:54 PM
#2
King of Cool
Rennlist Member
Rennlist Member
Thread Starter
At this point, it�s good time to make oval shaped hole to the �vent cover� for oil lines to go through it. I just removed it and made a hole similar to the one shown on 993TT Auxilary Oil Cooler Installation.
Those of you that have brake cooling ducts need also cut some plastic off the bumper cover because otherwise you might get some fitting issues due to the fact that one of the oil lines will block the duct.
Little warning, if you have stock fog light, check that they fit because cooler in this location, with oil line fittings on top you might get some fitting issues with stock fog lights. I didn�t have my stock fog lights so I couldn�t check for sure.

Now, bolt the cooler in its location and make sure it fits. I used some rubber sheet between the bracket and the cooler to help it from vibrating too much.

As you can see, way I made this, it�s a tight fit. Cooler could be little more towards outside of the car and slightly more angled but I wanted it to follow the bumper shape closely and be very close to the opening edge so all the air would have to go through the cooler and not escape on side of it.

Also, close to the center it is, bumper will cover less of it.
If all looks good, sit back, admire and have another cold one!
Now it�s time for the plumbing. Install hose ends to their location so that you can start measuring the hoses. I used one 55� and one 43� long hose but I�d still test fit and make sure the lengths are good for you.
Longer hose is connected with the �U� hose end from the existing cooler and with the 45-degree hose end to the far side of the auxilary cooler (side closer to the outside of the car). Shorter hose is connected with the straight hose end from the existing oil line and with the 90-degree hose end to the closer connection.
I used hacksaw with fine ST/ST blade for cutting the hoses. Wrap duct tape really tight to the location where you cut to minimize shearing the ST/ST �braid�.
After cutting I flushed the lines with water really carefully and let dry them overnight, my thought is it�s better to have couple of drops of water in the oil (which will vaporize) than metal shavings�
Once you�ve cut the hoses it�s time to install the hose ends. It�s little tricky and you need good vice (with those aluminum pieces so that you don�t screw up the hose ends), oil and big wrench.
Oil lines come with the instructions so follow those but one thing I did differently, instead of attaching the hose end to the vice, I attached the red �nut� and while friend of mine was turning the hose end, I pushed the hose so that it wouldn�t come out. It worked fine.
Once hoses are done it�s time for connecting everything!
First, make sure all the connection surfaces are clean.
Remove the bumper bar, or at least driver�s side of it, it�s easy to remove and this makes connection the line to the auxilary cooler possible.
Disconnect the existing oil line (the one close to the aft of the car) from the existing cooler and connect the straight connection to it. Then connect other end of it to the auxilary cooler�s closer connector and make sure connections are tight.
Then connect the �U� connector to the stock cooler and other end to the auxilary cooler. If needed, adjust connections so they are not pushing against others etc.

Once everything is hooked up, it�s time to test the system for leaks. Start up the engine and rev it every now and then. Let it get warm enough to thermostat open so the oil starts flowing to the new cooler. Once flowing, keep revving the engine etc. until you�re sure there are no leaks. If there are, you might need to tighten the connections.
If not, smile and again, have another cold one!
Then finish the installation with clamps where needed and I also used 1� plastic tube from Home Depot to those areas where oil lines can rub against the body.

Here�s how it looks without bumper. I will have another same size cooler on the other side but first I want to test this with one cooler first. After all, this side is the �better� side because other side will effect negatively to the original cooler�s cooling capacity due to the fact that air going to the original cooler will be warmer because by then it has already passed aux. cooler.
Now, double-check everything is tight and start putting body pieces back together.
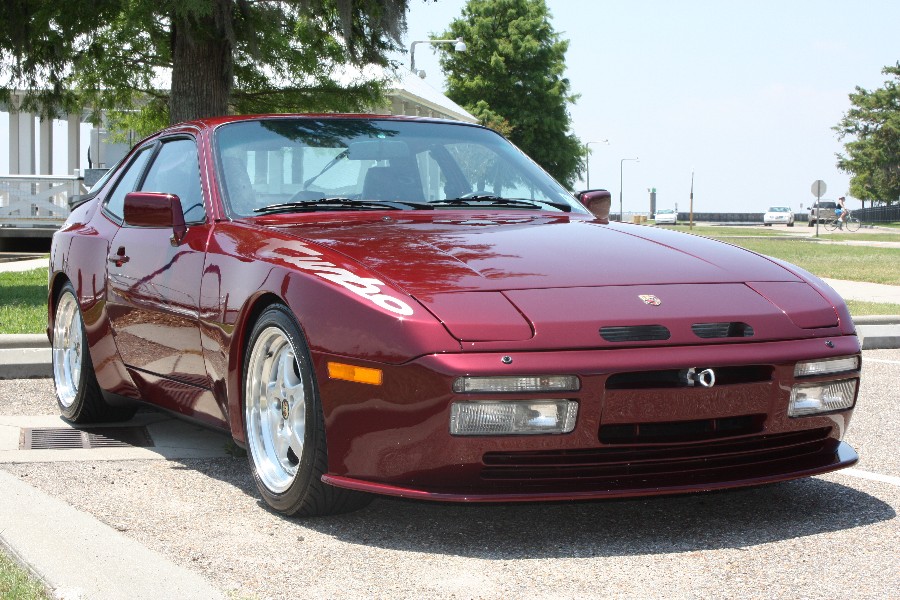
Here�s a shot of the front with the bumper back on, you can see how cooler pretty much fills the whole opening where air goes to the A/C radiator but is not hidden behind the bumper practically at all.
Also, as you might've noticed, I have "Turbo S air scoop / fog lights but without the lights, instead, I used the hole for the light for the brake ducts and the actual hole for getting more air to the original oil cooler (& a/c radiator).
Photo is from �test fitting�, that�s why the duct is �crumbled�.
At the same time when doing this, I added RS splitters and when you do that, you should fill the opening that�s created with the different shape of the splitter, if you don�t air going to the (original) oil cooler has nice way to escape instead of going through oil cooler. I also added some foam to fill all the gaps that are there, this way all the air has to go through oil cooler.

Then, install everything back, double-check everything again and you�re done!
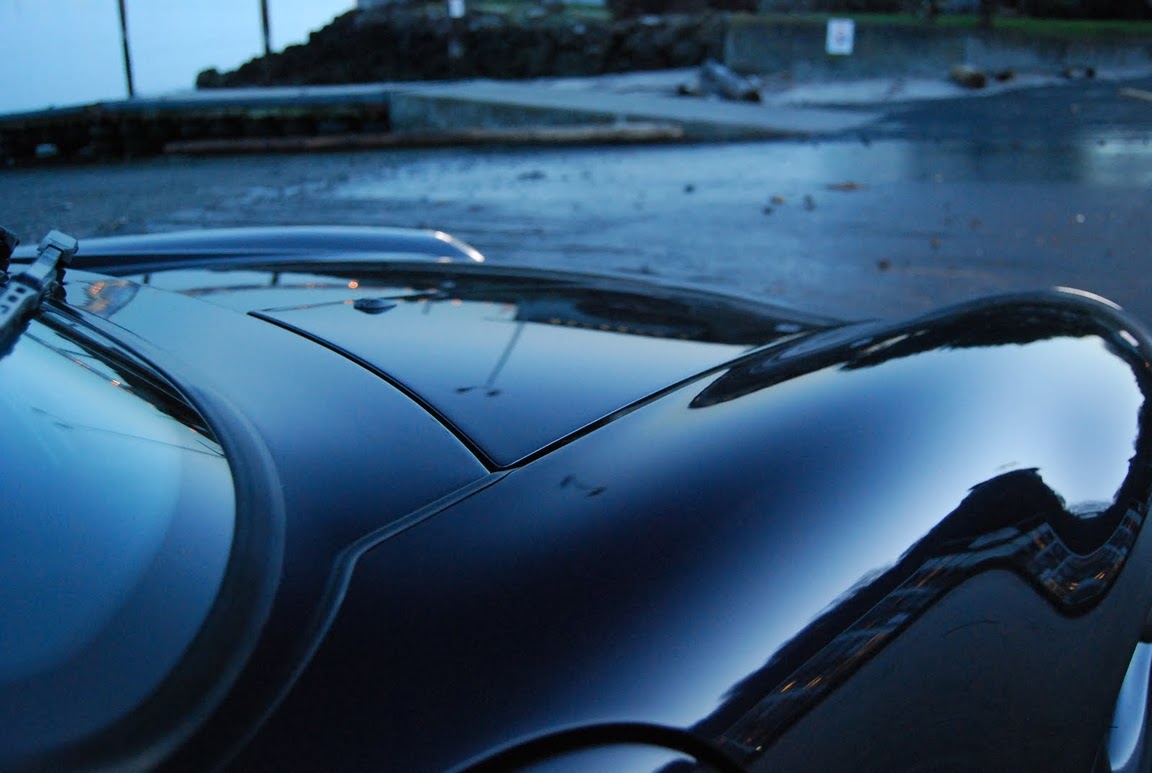
Here�s picture how the cooler looks when everything is back together.

You now have more cooling capacity, which is definitely good during those hot summer track days!
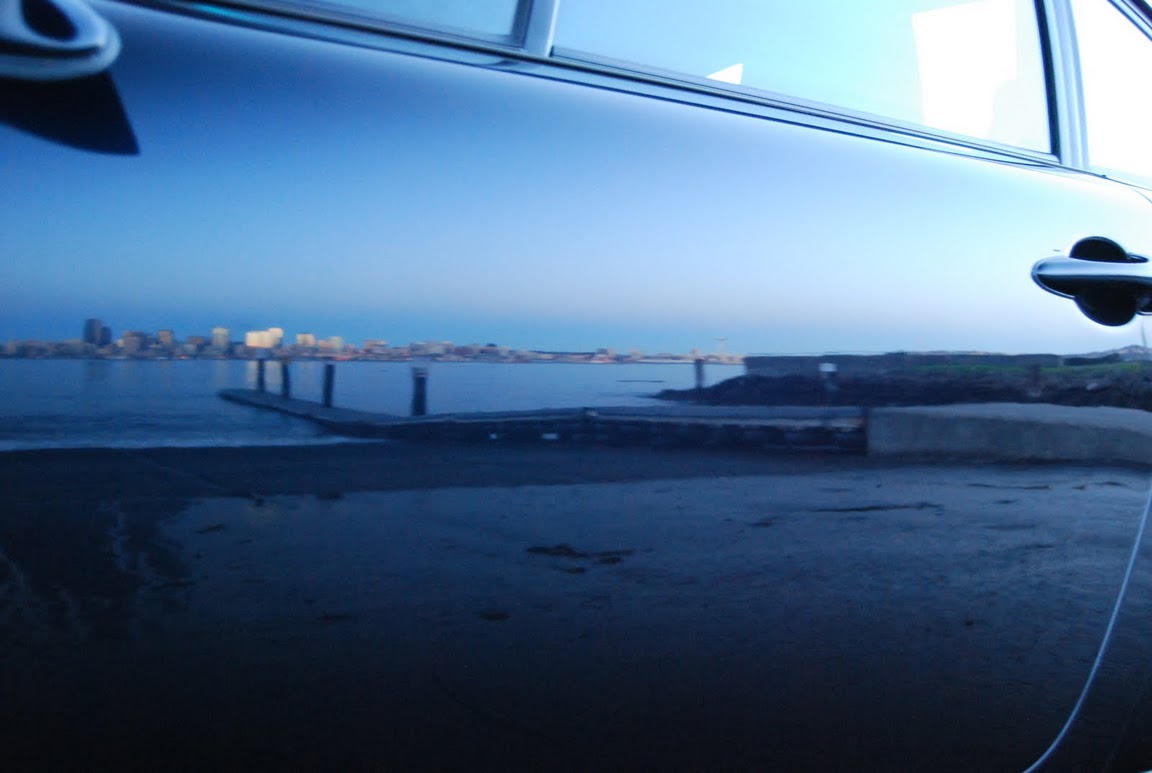
Here are couple more pictures (in track & street "clothes") since at the same time I did this, I also removed the bumperettes and installed RS front & rear spoilers.

UPDATE (4/25/2005):
I now have results how this affects the oil temperatures, below are results after two days of testing Homestead Driver's Education:
Before I installed the cooler, temperature needle would climb close to 10 o�clock position, and always were above 9 o�clock position even when not pushing that hard, that was too much for me and something needed to be done.
Weather here almost always is in 80-90 degrees so hoping for cool track days doesn�t work.
Now, after the oil cooler, temperatures have dropped nicely!
Past Saturday & Sunday down at Homestead were sunny and temperatures about 90 degrees so �test� conditions were optimal.
During hard driving, temperature needle stayed just about exactly on top of 8 o�clock position and when pushing really hard for one 30 min. session (one session I and one GT3 driver drove back to back and in order to keep up with GT3, you can imagine one must push pretty hard with n/a 993) needle raised just a little over 8 o�clock so results are very good in my opinion!
Also, as an comparison, my student on both days had 1995 993 (with chip, flywheel and exhaust) and his temperature reading where constantly quite close to 10 o'clock position even though he drove 10+ seconds slower lap times.
To summarize:
During very similar conditions and driving, maximum temperature dropped from ~240 F (~116 C) to ~200 F (93 C) which I think is within maximum operating temperature recommended (for maximum engine longevity and power) to these air cooled engines and also is not above the point where engine starts losing power, Steve W. maybe can chime in and confirm this.
If you have any questions, or suggestions before putting this to p-car, please let me know.
Those of you that have brake cooling ducts need also cut some plastic off the bumper cover because otherwise you might get some fitting issues due to the fact that one of the oil lines will block the duct.
Little warning, if you have stock fog light, check that they fit because cooler in this location, with oil line fittings on top you might get some fitting issues with stock fog lights. I didn�t have my stock fog lights so I couldn�t check for sure.
Now, bolt the cooler in its location and make sure it fits. I used some rubber sheet between the bracket and the cooler to help it from vibrating too much.
As you can see, way I made this, it�s a tight fit. Cooler could be little more towards outside of the car and slightly more angled but I wanted it to follow the bumper shape closely and be very close to the opening edge so all the air would have to go through the cooler and not escape on side of it.
Also, close to the center it is, bumper will cover less of it.
If all looks good, sit back, admire and have another cold one!
Now it�s time for the plumbing. Install hose ends to their location so that you can start measuring the hoses. I used one 55� and one 43� long hose but I�d still test fit and make sure the lengths are good for you.
Longer hose is connected with the �U� hose end from the existing cooler and with the 45-degree hose end to the far side of the auxilary cooler (side closer to the outside of the car). Shorter hose is connected with the straight hose end from the existing oil line and with the 90-degree hose end to the closer connection.
I used hacksaw with fine ST/ST blade for cutting the hoses. Wrap duct tape really tight to the location where you cut to minimize shearing the ST/ST �braid�.
After cutting I flushed the lines with water really carefully and let dry them overnight, my thought is it�s better to have couple of drops of water in the oil (which will vaporize) than metal shavings�
Once you�ve cut the hoses it�s time to install the hose ends. It�s little tricky and you need good vice (with those aluminum pieces so that you don�t screw up the hose ends), oil and big wrench.
Oil lines come with the instructions so follow those but one thing I did differently, instead of attaching the hose end to the vice, I attached the red �nut� and while friend of mine was turning the hose end, I pushed the hose so that it wouldn�t come out. It worked fine.
Once hoses are done it�s time for connecting everything!
First, make sure all the connection surfaces are clean.
Remove the bumper bar, or at least driver�s side of it, it�s easy to remove and this makes connection the line to the auxilary cooler possible.
Disconnect the existing oil line (the one close to the aft of the car) from the existing cooler and connect the straight connection to it. Then connect other end of it to the auxilary cooler�s closer connector and make sure connections are tight.
Then connect the �U� connector to the stock cooler and other end to the auxilary cooler. If needed, adjust connections so they are not pushing against others etc.
Once everything is hooked up, it�s time to test the system for leaks. Start up the engine and rev it every now and then. Let it get warm enough to thermostat open so the oil starts flowing to the new cooler. Once flowing, keep revving the engine etc. until you�re sure there are no leaks. If there are, you might need to tighten the connections.
If not, smile and again, have another cold one!
Then finish the installation with clamps where needed and I also used 1� plastic tube from Home Depot to those areas where oil lines can rub against the body.
Here�s how it looks without bumper. I will have another same size cooler on the other side but first I want to test this with one cooler first. After all, this side is the �better� side because other side will effect negatively to the original cooler�s cooling capacity due to the fact that air going to the original cooler will be warmer because by then it has already passed aux. cooler.
Now, double-check everything is tight and start putting body pieces back together.
Here�s a shot of the front with the bumper back on, you can see how cooler pretty much fills the whole opening where air goes to the A/C radiator but is not hidden behind the bumper practically at all.
Also, as you might've noticed, I have "Turbo S air scoop / fog lights but without the lights, instead, I used the hole for the light for the brake ducts and the actual hole for getting more air to the original oil cooler (& a/c radiator).
Photo is from �test fitting�, that�s why the duct is �crumbled�.
At the same time when doing this, I added RS splitters and when you do that, you should fill the opening that�s created with the different shape of the splitter, if you don�t air going to the (original) oil cooler has nice way to escape instead of going through oil cooler. I also added some foam to fill all the gaps that are there, this way all the air has to go through oil cooler.
Then, install everything back, double-check everything again and you�re done!
Here�s picture how the cooler looks when everything is back together.
You now have more cooling capacity, which is definitely good during those hot summer track days!
Here are couple more pictures (in track & street "clothes") since at the same time I did this, I also removed the bumperettes and installed RS front & rear spoilers.
UPDATE (4/25/2005):
I now have results how this affects the oil temperatures, below are results after two days of testing Homestead Driver's Education:
Before I installed the cooler, temperature needle would climb close to 10 o�clock position, and always were above 9 o�clock position even when not pushing that hard, that was too much for me and something needed to be done.
Weather here almost always is in 80-90 degrees so hoping for cool track days doesn�t work.
Now, after the oil cooler, temperatures have dropped nicely!
Past Saturday & Sunday down at Homestead were sunny and temperatures about 90 degrees so �test� conditions were optimal.
During hard driving, temperature needle stayed just about exactly on top of 8 o�clock position and when pushing really hard for one 30 min. session (one session I and one GT3 driver drove back to back and in order to keep up with GT3, you can imagine one must push pretty hard with n/a 993) needle raised just a little over 8 o�clock so results are very good in my opinion!
Also, as an comparison, my student on both days had 1995 993 (with chip, flywheel and exhaust) and his temperature reading where constantly quite close to 10 o'clock position even though he drove 10+ seconds slower lap times.
To summarize:
During very similar conditions and driving, maximum temperature dropped from ~240 F (~116 C) to ~200 F (93 C) which I think is within maximum operating temperature recommended (for maximum engine longevity and power) to these air cooled engines and also is not above the point where engine starts losing power, Steve W. maybe can chime in and confirm this.
If you have any questions, or suggestions before putting this to p-car, please let me know.
Last edited by Flying Finn; 04-25-2005 at 12:12 PM.
02-07-2005, 06:06 PM
#4
Addict
Rennlist Member
Rennlist Member
Join Date: Feb 2004
Location: Gemantown, TN
Posts: 1,082
Likes: 0
Received 0 Likes
on
0 Posts
thanks for thr great write-up. I'll be doing this as soon as I get some extra funds. Mine will cost more though because - once the bumper cover is off, it needs to be repainted, and if the bumper is going to the paint shop, I need to have the hood painted also, that would also be a good time to remove the basket handle and have the holes filled and the rear deck repainted, gee, might as well have the front "bumper" holes filled and get the longer clear lenses, and I suppose while the front end is in the air I might as well have the calipers powdercoated, and while they are off the car I might as well replace the lines with s/s lines and of course I'll need to the rears as well.......
02-07-2005, 06:07 PM
#5
Drifting
Join Date: Sep 2002
Location: La Jolla, CA
Posts: 2,166
Likes: 0
Received 0 Likes
on
0 Posts
Finn, very nice write up on this. Looks like you spent a good amount of time working this out.
I will be interested in seeing how efficient this configuratiion (stages) will be. I still worry about enough air flow out the back of the cooler on both sides and worry about the hot air if flowing properly what it will do the the AC (same with Cargraphic) and to the stock cooler performance (not with the Cargraphics). The cooler sandwich idea was very poor because there was too much heat build up without enough air flow through or enough air escape. Hopefully when you move to your later stage you will not have that problem.
Keep us posted, because God knows Cargraphic isn't going to deliver any coolers anytime soon!
02-07-2005, 07:06 PM
#6
Addict
Lifetime Rennlist
Member
Lifetime Rennlist
Member
FINN YOU ARE DA MAN!! Congrats. nice install and great job!! I might of missed it but do you have a cost breakdown of everything on this project? THanks again man what a job!!
02-07-2005, 07:59 PM
#7
King of Cool
Rennlist Member
Rennlist Member
Thread Starter
Thanks guys!
Alex, It ain't that hard, just somewhat time consuming.
Bob, I know what you're talking, didn't do the hood but pretty much everything else!
Kary, I agree, it will be interesteing to see how this does at track and if I do the other, how that does.
Airflow through this cooler shouldn't be a problem at all.
It's the same flow that goes through the a/c (which is the same as original oil cooler has), only difference being that this cooler is right in front so the air that "hits" it, arrives at the face of the cooler directly from the front, not (sort of) fromt the side as is the case with the a/c radiator (or stock oil cooler).
This set-up has half the cooling capacity of the Cargraphic since this is half the size (Cargraphic is also 2" thick, correct?) and airflow is the same, if not little better.
When other cooler is added to the other side, oil capacity will be the same but the overall cooling (doe to the air issue) will be less, let's guess (for the sake of better way) 80% of the Cargraphic.
That means adding the another cooler would only add 30% where as this one already adds 50%.
So far the cooling (on the street) has been pretty promising but like already said, track will tell better.
OG, part of the credit goes to you, no question!
Prices are pretty much the same you showed earlier.
I have the prices somewhere, I will post them later.
Trending Topics
 02-07-2005, 08:47 PM
#9
Addict
Lifetime Rennlist
Member
Lifetime Rennlist
Member
Finn, very clean install. Looks professionally done. Having the cooler facing forward will undoubtedly aid in cooling but doesn't it make it more susceptible to rocks, debris, etc? I'm no engineer so it may a dumb question.
02-07-2005, 09:08 PM
#11
Addict
Lifetime Rennlist
Member
Lifetime Rennlist
Member
Finn,
Looks great. Did you think about putting two small coolers in the opening for the aluminum bumpers?
I think I agree with Addison that a heavier screen on the front of your bumper might be neccessary due to the exposure, also periodic blasts of compressed air to get the dirt and sand out of the cooler.
Do you also have a manual fan switch for the stock cooler? I have mine rigged to run on high all the time, except for really cold days and that helps a bunch during the cool down lap. Temps almost immediately drop to 8 o'clock level.
02-07-2005, 10:09 PM
#12
King of Cool
Rennlist Member
Rennlist Member
Thread Starter
Thanks again for the nice words guys!
adsc4s,
Before going to the university (in Naval Architecture), I went to vocational school for machining & welding, I don't have the proper tools (I wish I did...) but I still always want to make a "clean" job when fabricating stuff. I wasn't perfect but good enough IMO anyway.
Not a dumb question at all, I agree, rocks might become a problem, I actually have aluminum mesh (the same one others have used) but in the end decided not to use it. Might add it in front of the cooler later on though and especially if I see it becomes a problem.
Greg,
You mean where fog lights are (or are supposed to be)?
That could very well be a good place for small coolers but I don't think I will do it, if this isn't enough, I'll add another to the other side and hopefully it's enough, I believe it is but like said before, don't really know. I just wish next DE was closer!
I need to monitor that mesh situation, have it already but will see if I install it. After I saw some shots of some WRC rally cars with thei open radiators in front, I decided maybe this will be ok without, I hope it survies, those WRC cars do sole their radiators every now and then...
Definitely some conpressed air throught the fins will be necessary.
I also have the manual switch, it's on the dash and I've always used it in traffic (besides on the track also & like you said, big help on cool down lap) to keep the temperatures below 8 o'clock mark.
So far with the extra cooler, I haven't had to do that, it stays undes it without which is a good sign.
Also, when the thermostat opens while driving, the tempurature drops really low, it used to drop sittle bit under the 8 o'clock mark, now it goes below the midpoint of that & the one below it.
02-07-2005, 10:13 PM
#13
Drifting
Join Date: Sep 2002
Location: La Jolla, CA
Posts: 2,166
Likes: 0
Received 0 Likes
on
0 Posts
I have noticed with my Cargraphic cooler on cold days that the thermostat has already opened and the oil temp drops too low it seems the thermostat closes and the oil heats up again only to repeat the process. Is this what is happening or am I imagining it?
02-07-2005, 10:28 PM
#14
Three Wheelin'
Finn,
Excellent write up and results. The 'look' will be great when the second cooler is added. I will be planning on doing this DIY to my car. Thanks for putting this together!!!!!
Excellent write up and results. The 'look' will be great when the second cooler is added. I will be planning on doing this DIY to my car. Thanks for putting this together!!!!!
