When you click on links to various merchants on this site and make a purchase, this can result in this site earning a commission. Affiliate programs and affiliations include, but are not limited to, the eBay Partner Network.
Does anyone know if the front windshield seal is a friction fit, or if it's glued in place?
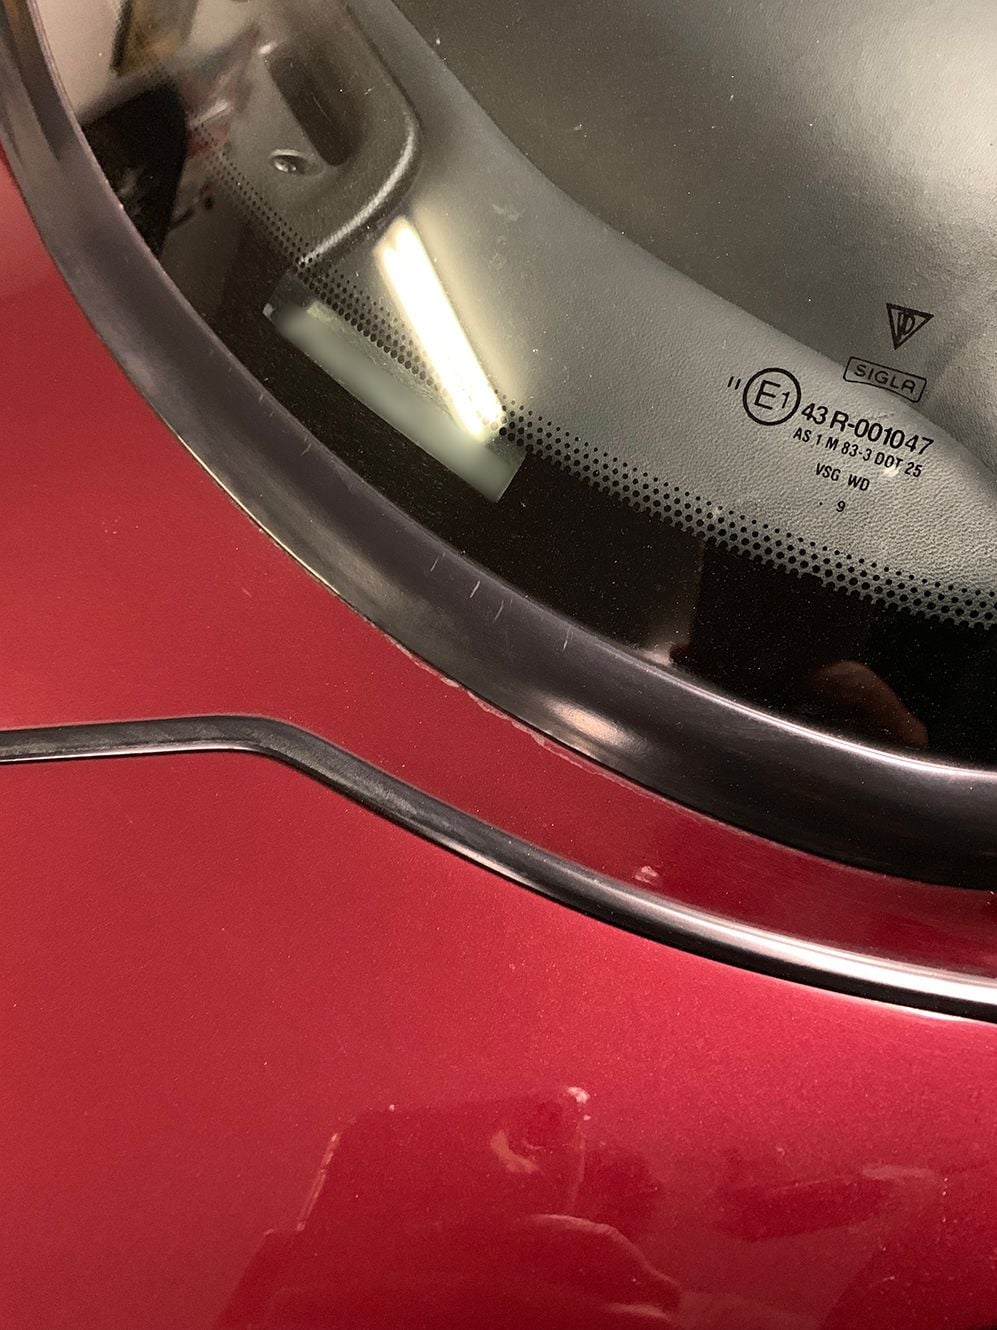
My seal appears to be wearing into the paint at the cowl and I thinking about replacing it with a more pliable new seal.
Not sure that there is anything else to be done? Looks like the clear is worn through at the gasket line. I see no rust or bubbles and the seal is too tight to peak under without removing it altogether.
I'm not at all worried about the looks - you can hardly see the imperfection unless you are right up on it.
I doubt the seal has rubbed into the paint. It would have to move to do that. What you are likely seeing is a buildup of wax and and other stuff along that edge. The outer seal is snapped into place. Just lift up a flap and pull, removes in seconds. They do get hard with age. A new one will be soft and pliable.
I doubt the seal has rubbed into the paint. It would have to move to do that. What you are likely seeing is a buildup of wax and and other stuff along that edge. The outer seal is snapped into place. Just lift up a flap and pull, removes in seconds. They do get hard with age. A new one will be soft and pliable.
I can take a close up, but I can see clear coat flaking at that margin. It's very slight however.
Unlikely the seal did this. If the clearcoat is truly failing is is possible the car was repainted for some reason in the past due to damage or to fix some corrosion under the seal in the window gutter?
If repainted most aftermarket applied paint is rather brittle and usually not as resistant to UV. even if it was not a masked off job.
Windshield has never been replaced and I'm not aware of the car being repainted. Of course anything is possible.
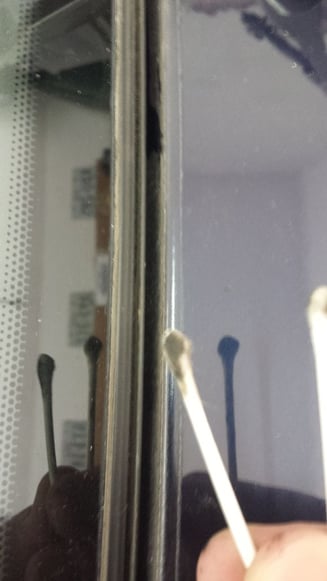
Peered under the edge and no rust was there, so that's good. You can see it's dirty under the seal, but it did clean up with a q-tip. You can see the clear is worn right where the seal sits. The pic looks way worse than real life, of course, since it's a macro type pic.
I ordered a new seal, but I wonder if a wider one would be better. I read a thread where people used a wider 964 seal, but it wasn't clear if that actually worked.
If the damage is just to the clear with the color layer intact I wonder if one could mask it off very closely and just overspray with clear urethane spray and once fully dry use some polishing compound to rub out the masking mark ridge so the new clear is smoothed over and blends into the surface of the old. Or conceivably apply clear with a small touch-up brush and polish it down with polishing compound abrasive. A minimally invasive DIY approach.
Andy
Thanks - I had the same idea. I have some Porsche touch up clear and I was going to apply with an artist brush. Mostly just to stabilize that edge.
The seal is chafing through the clear coat. Over time this will happen due to slight movement and flexing of the seal. The edge of the seal acts like a knife edge.
I would pull the seal and get a new one that would be more pliable. I�d also cut strips of paint protection film and put it at the affected area so the edge of the seal rests on the paint protection film. If you take your time you can make the fix invisible.
Theres a few �chafe� spots on my car where I used pp film to protect painted surfaces.
^ I'm not sure I would do the paint protection film over the clear coat thats peeling. When you go to remove that film one day it will
most likely pull up that clear area and make things worse. Could introduce new problems in other places as well.
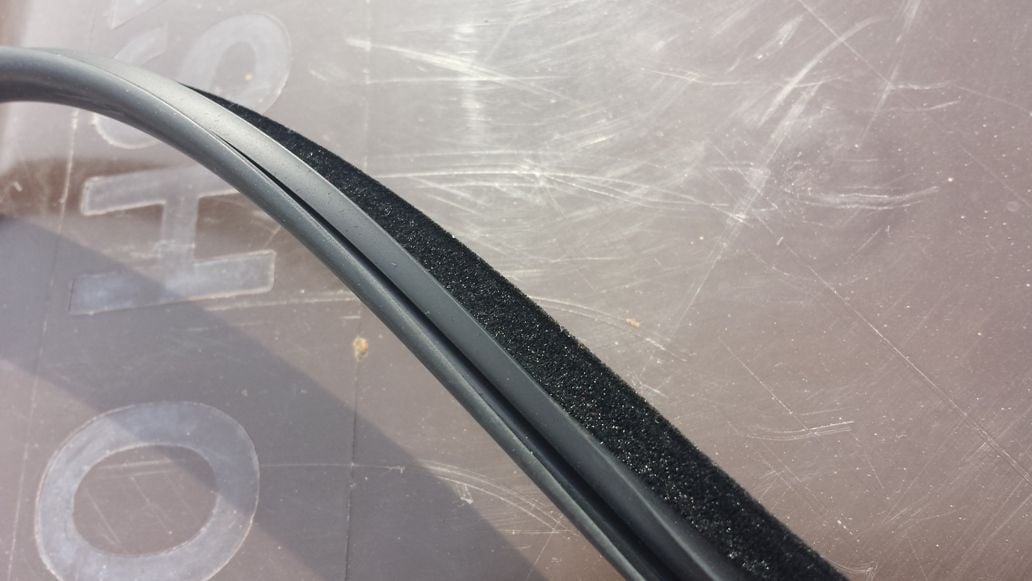
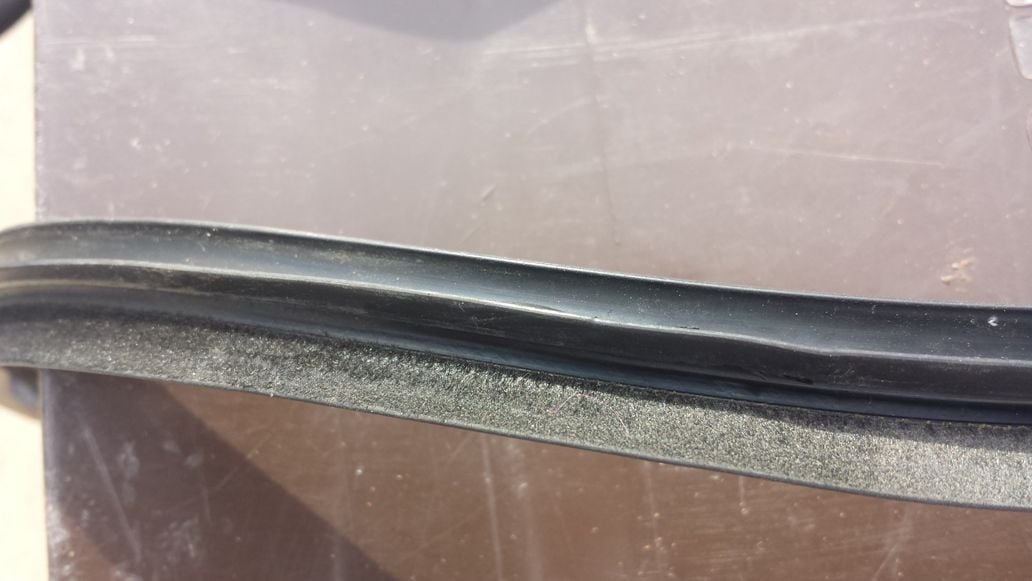
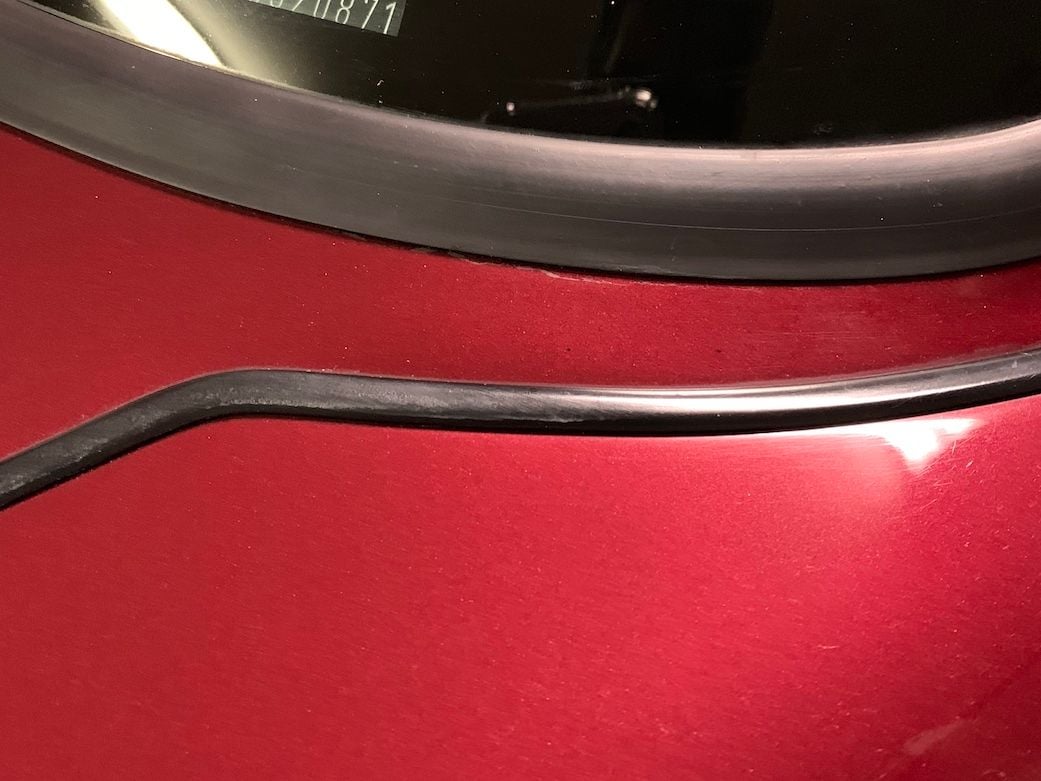
The seal has a thin felt or sponge like material that wears compresses over the years. I think a new seal will help protect the paint in many cases. Its hard to capture in a picture but I've attached a couple. Replacing the seal also gives you the opportunity to clean out the channel well from years of debris. It's an easy afternoon diy. Unless you find rust - then it's going to ruin your day
New seal:
Old seal - note the edge how there's no foam left:
Did this little project tonight. Cleaned out the channels which were filthy. Didn't see any obvious rust, thank goodness. I was honestly almost too afraid to look too closely. This design is very poor, I have to say.
Applied some clearcoat lacquer to the worn spots and it flooded into the edge through capillary action. The old seal had contracted and in some areas, the felt had compressed into a sharp sandpaper like surface that was grinding against the body.
The new seal sits wider. Not surprising to see that the 20 year old seal had shrunk in size. Thumbs are sore, but I'm glad I did it. Thanks all.
 04-03-2019, 09:28 AM