When you click on links to various merchants on this site and make a purchase, this can result in this site earning a commission. Affiliate programs and affiliations include, but are not limited to, the eBay Partner Network.
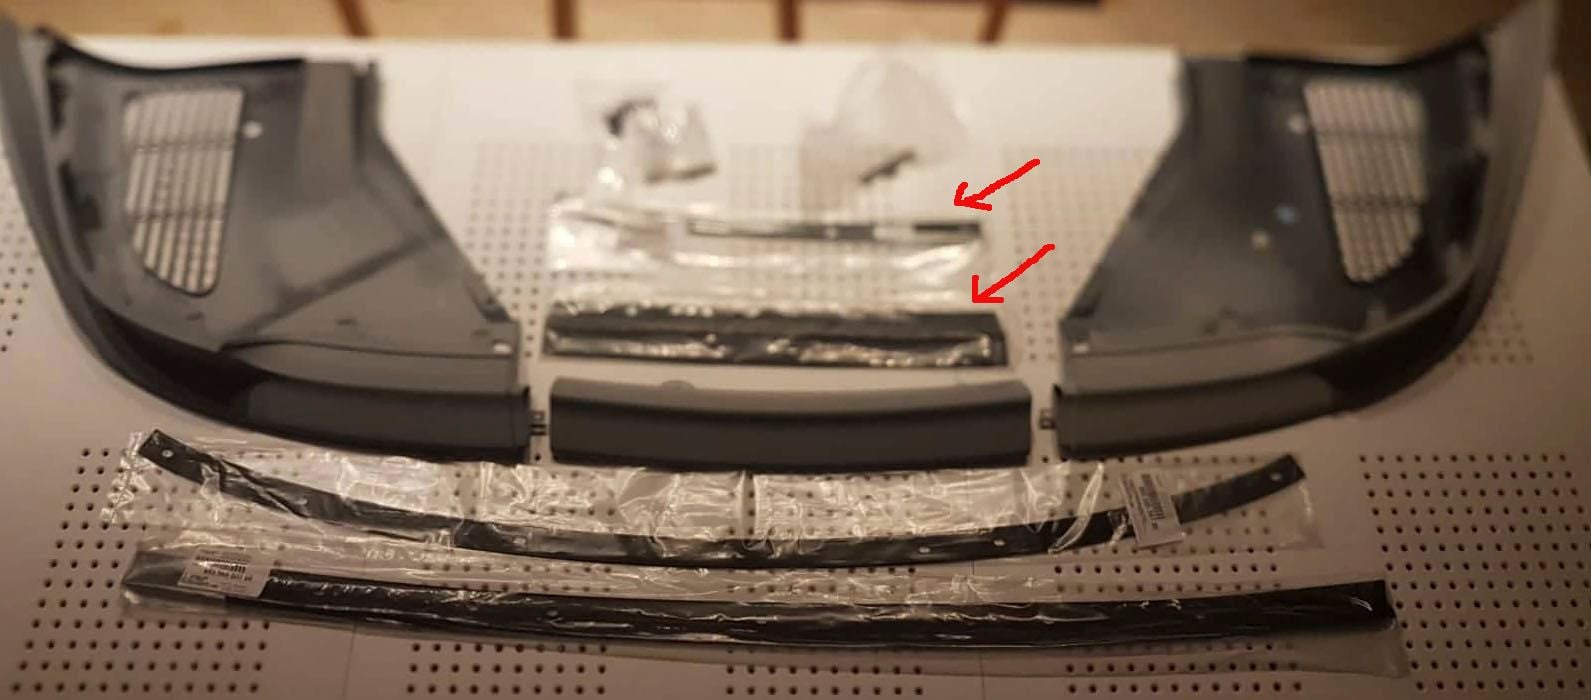
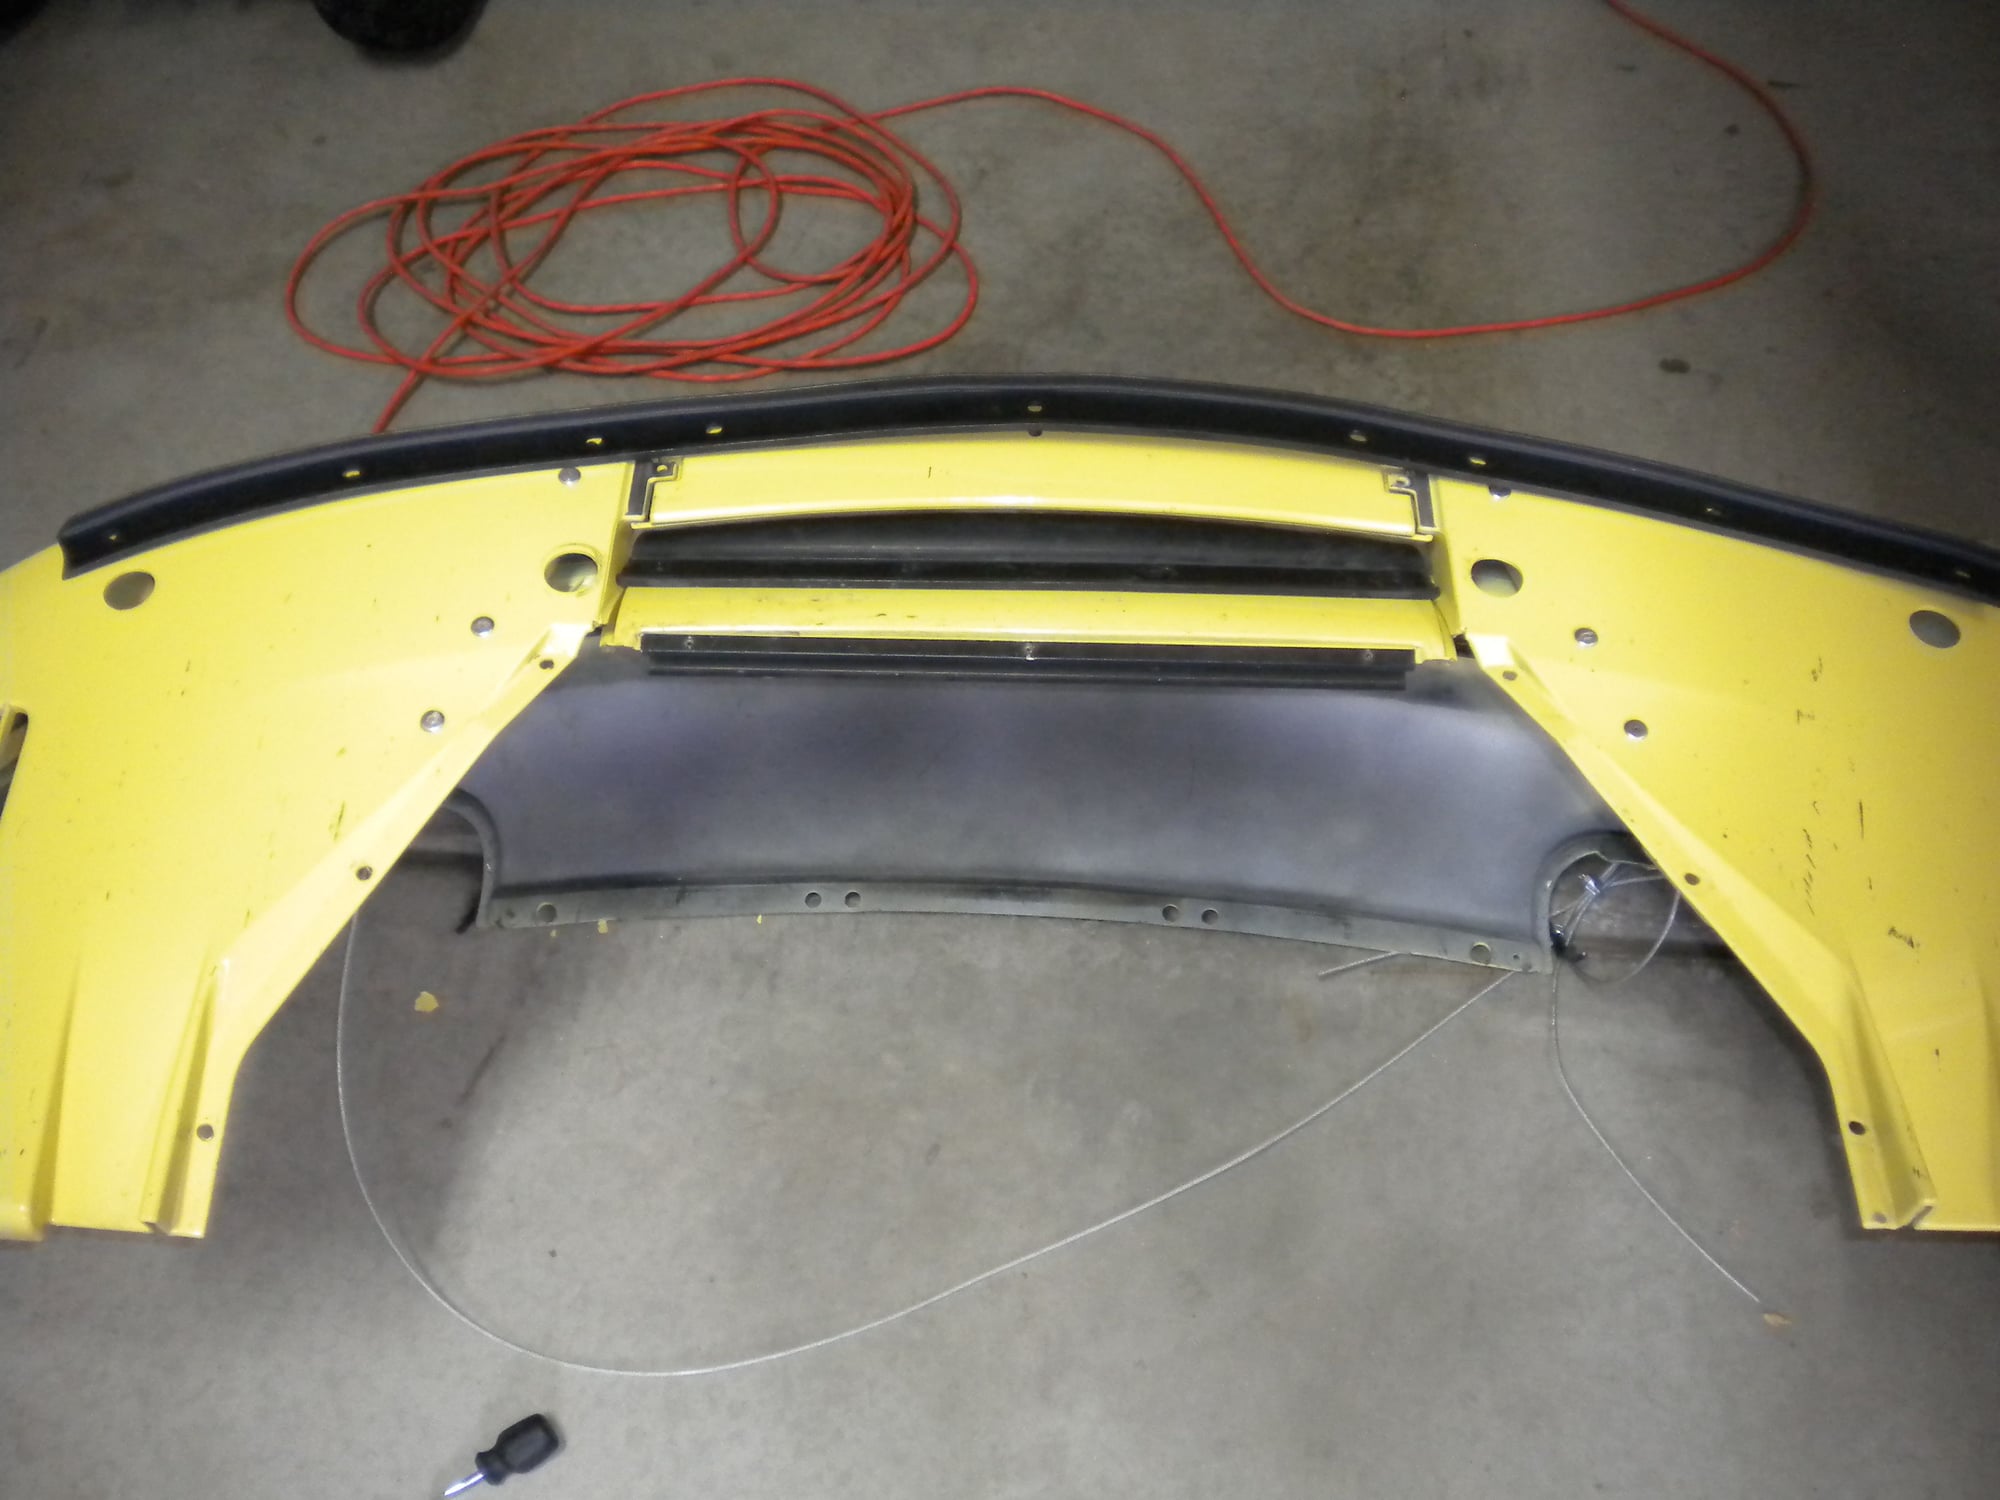
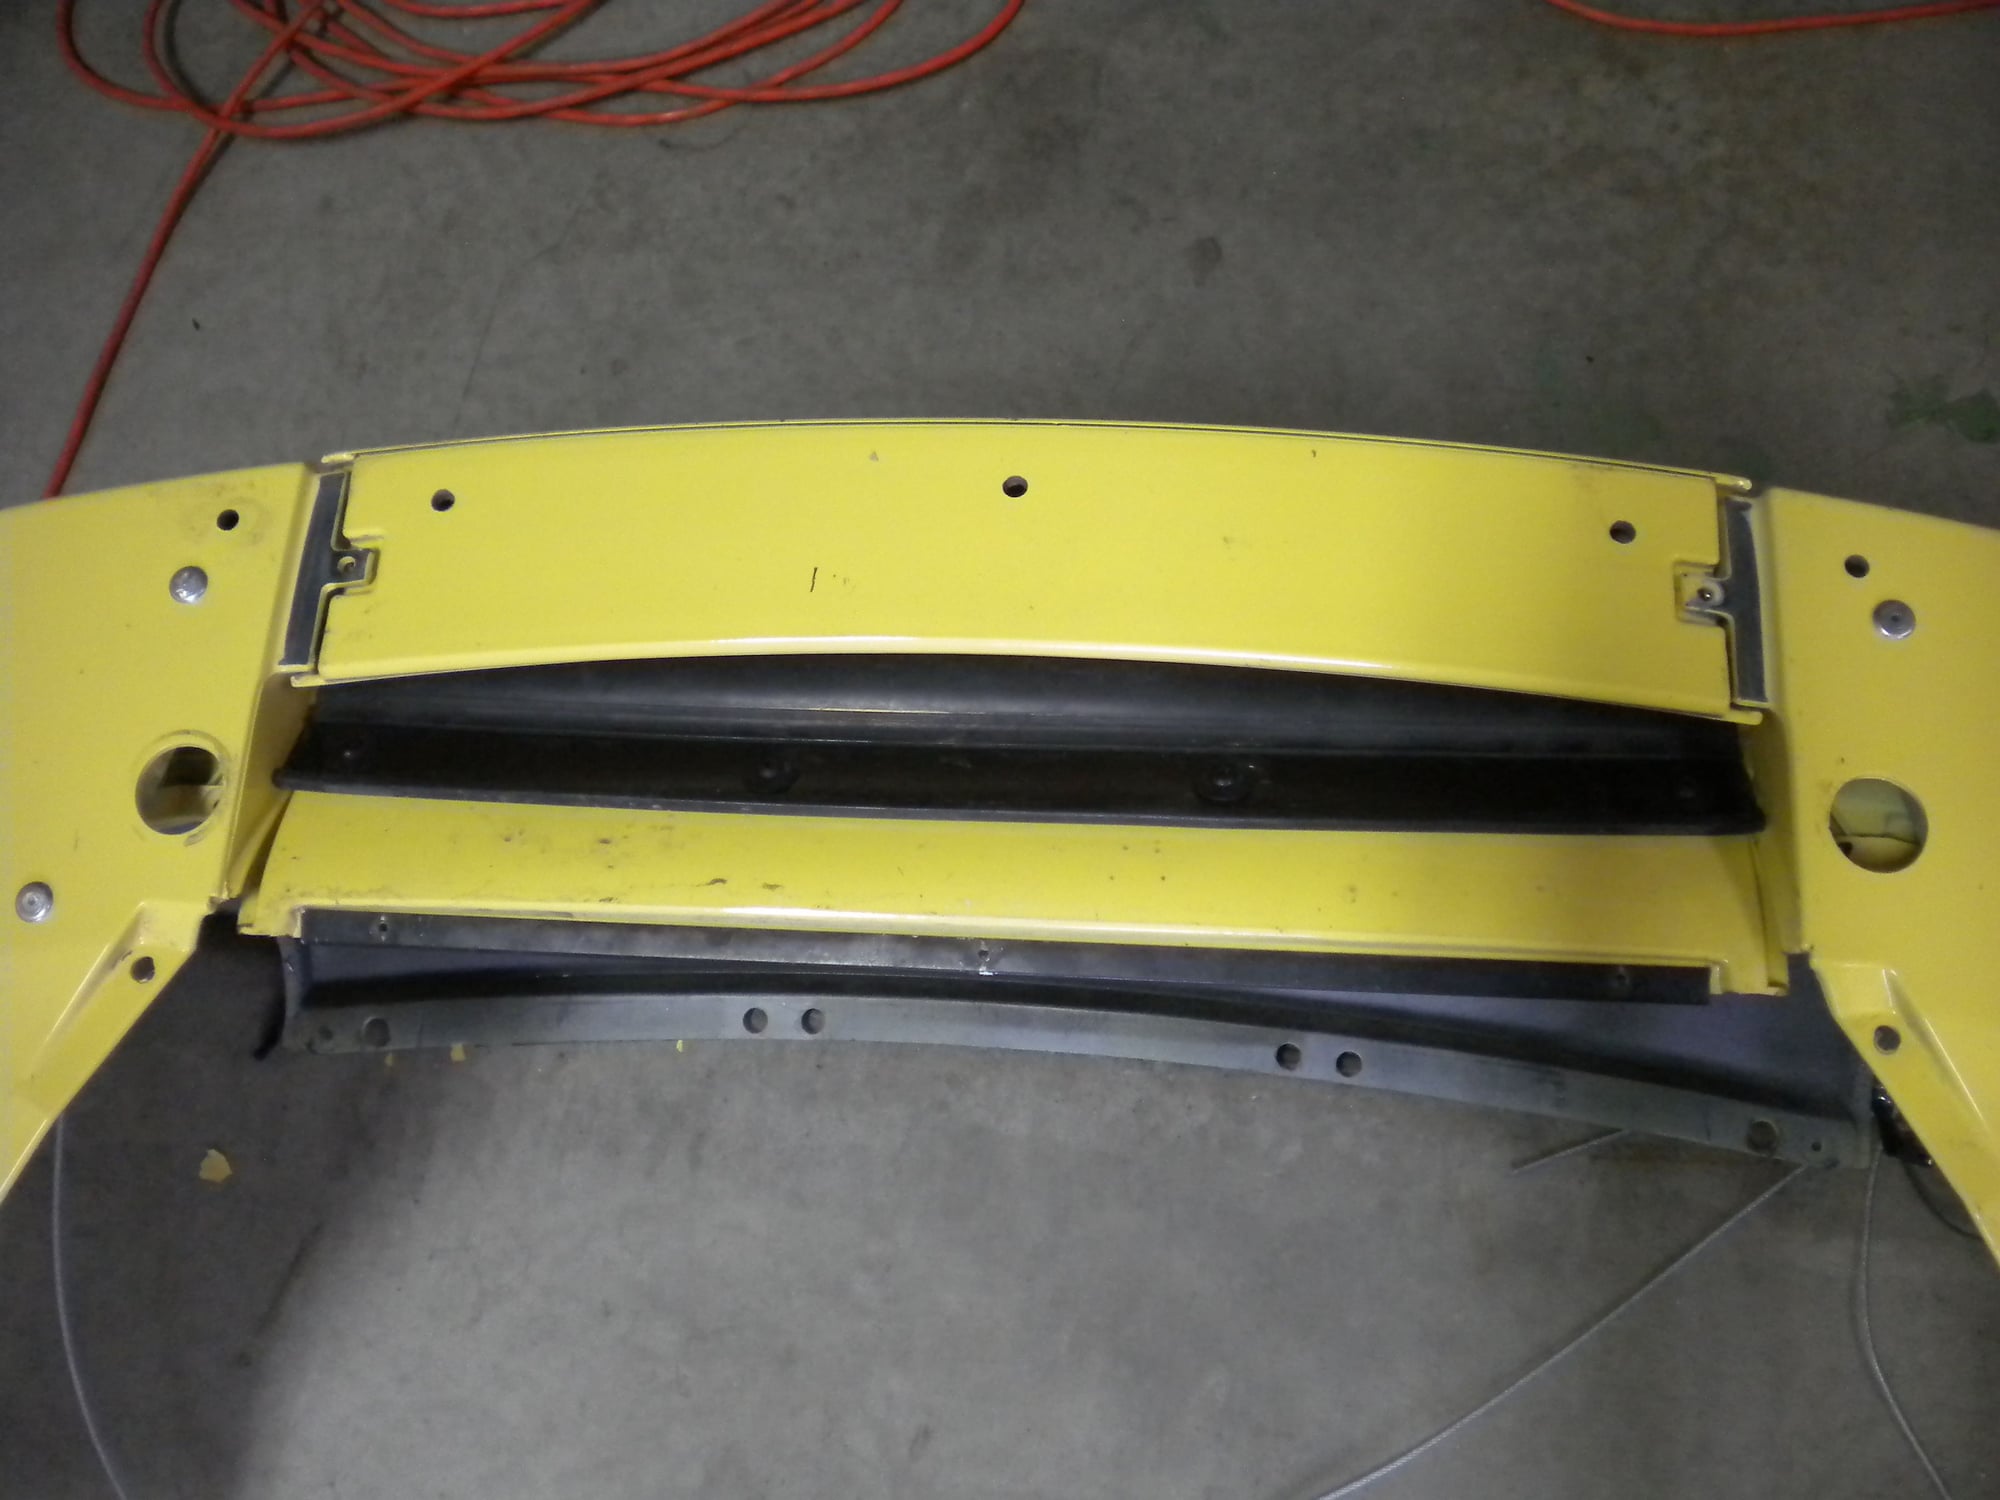
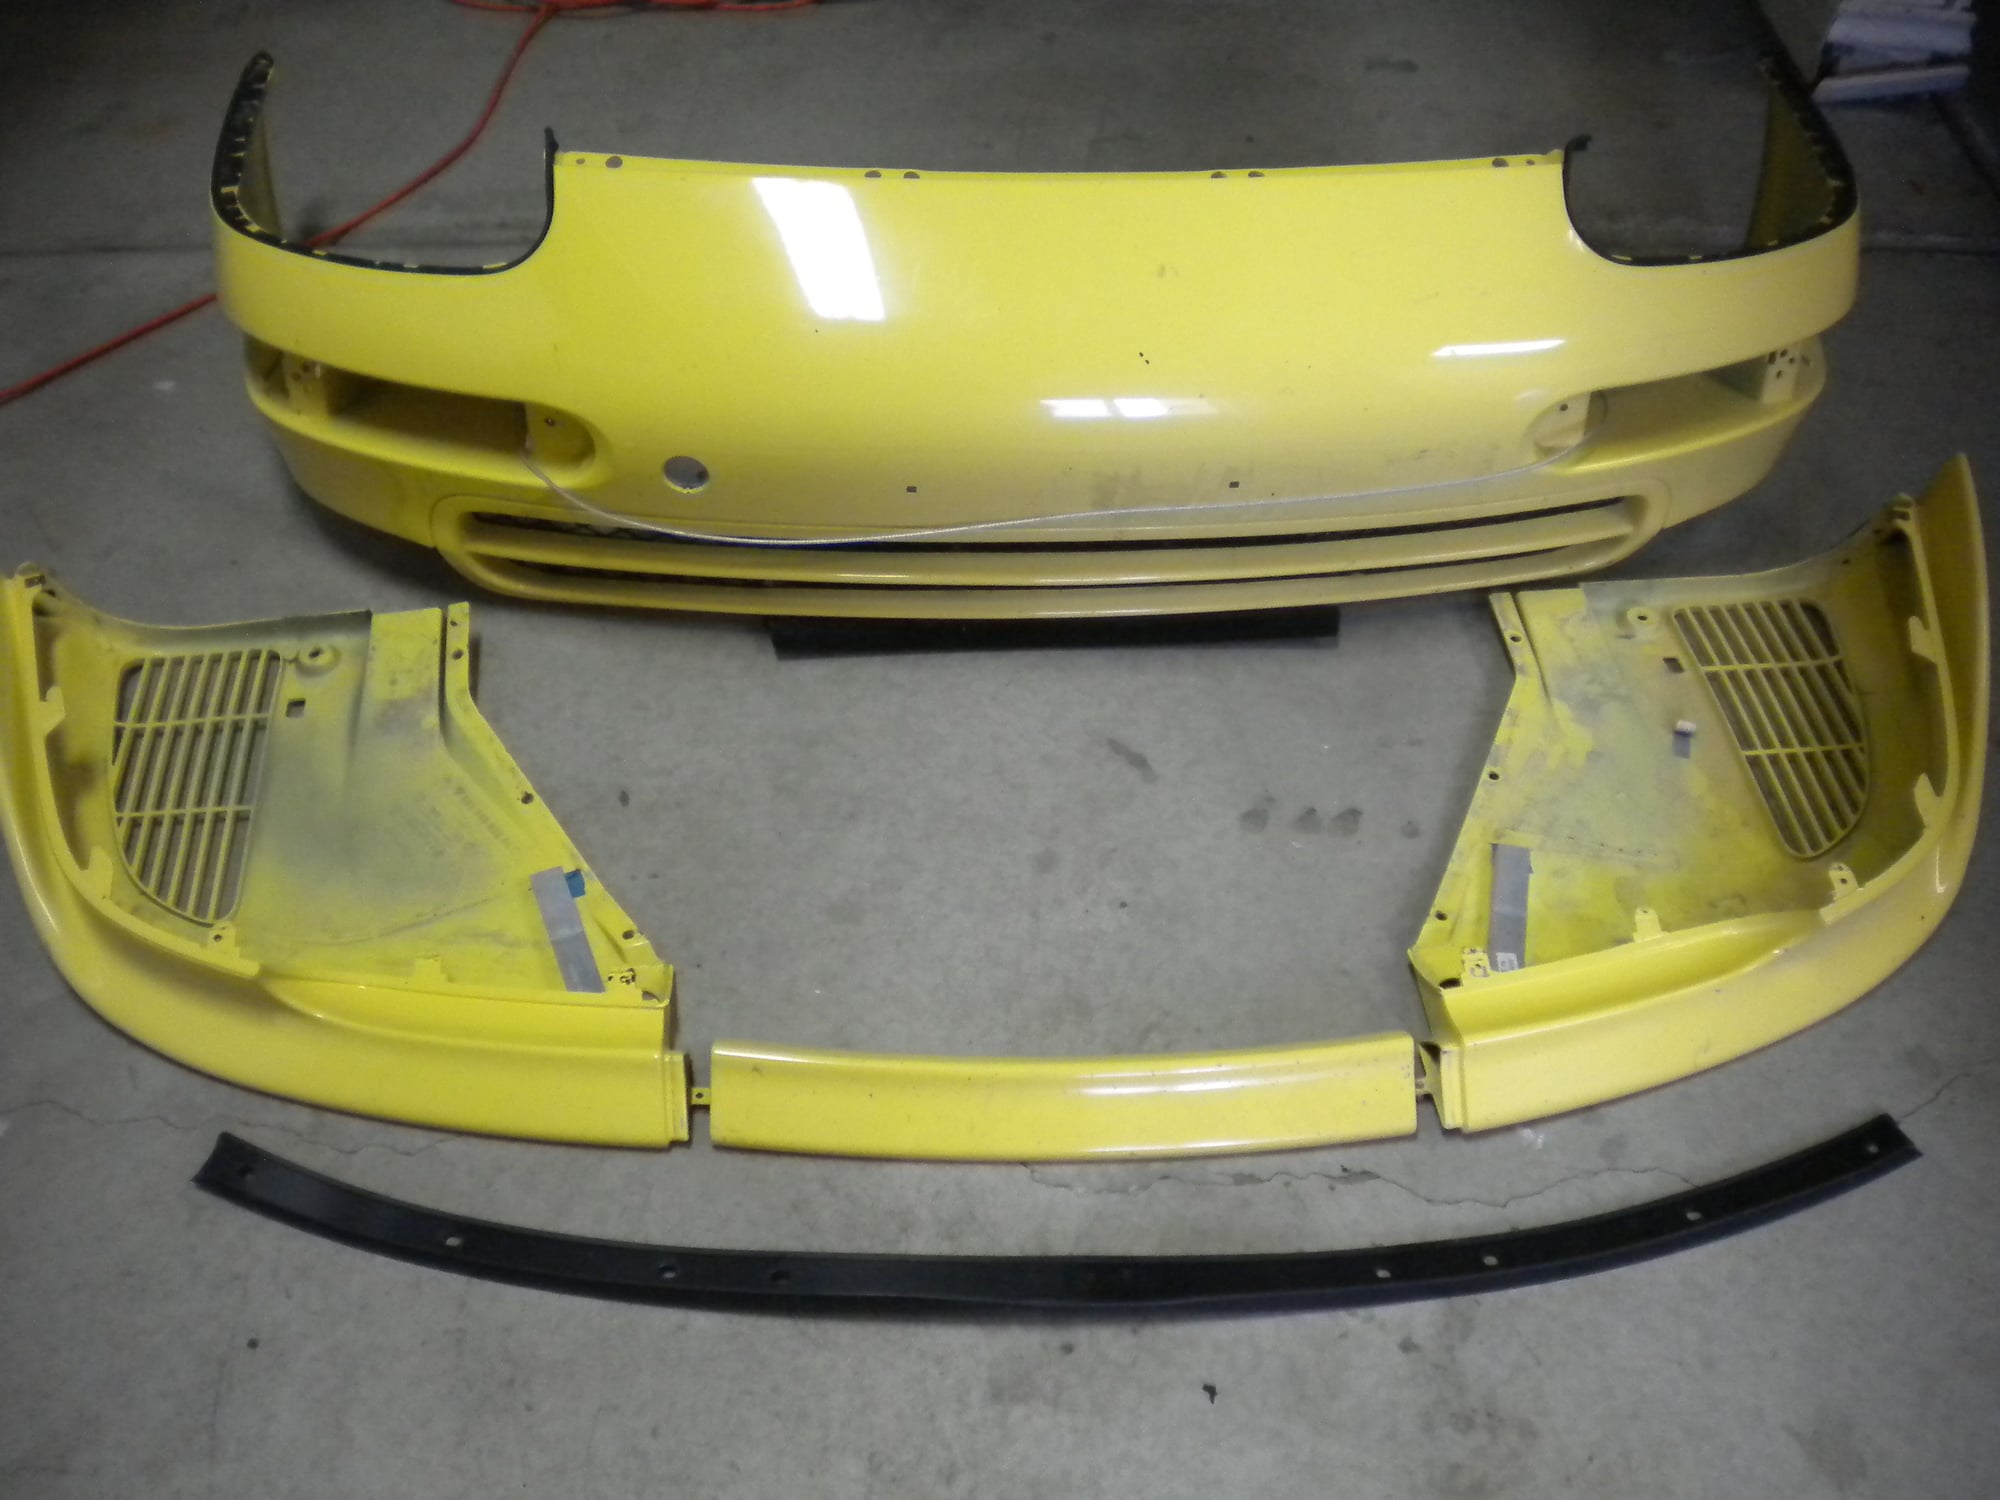
I finally get the parts delievered...put all of them onto the table, but I am frankly speaking unable to figure it out, how the rubber cover that is supposed to stay right behind the center part of the spoiler should beproperly be installed.
I finally get the parts delievered...put all of them onto the table, but I am frankly speaking unable to figure it out, how the rubber cover that is supposed to stay right behind the center part of the spoiler should beproperly be installed.
See the two parts indicated by the red arrows
I didn't use the factory parts, just bought piece of stainless and bolted it behind the rubber piece
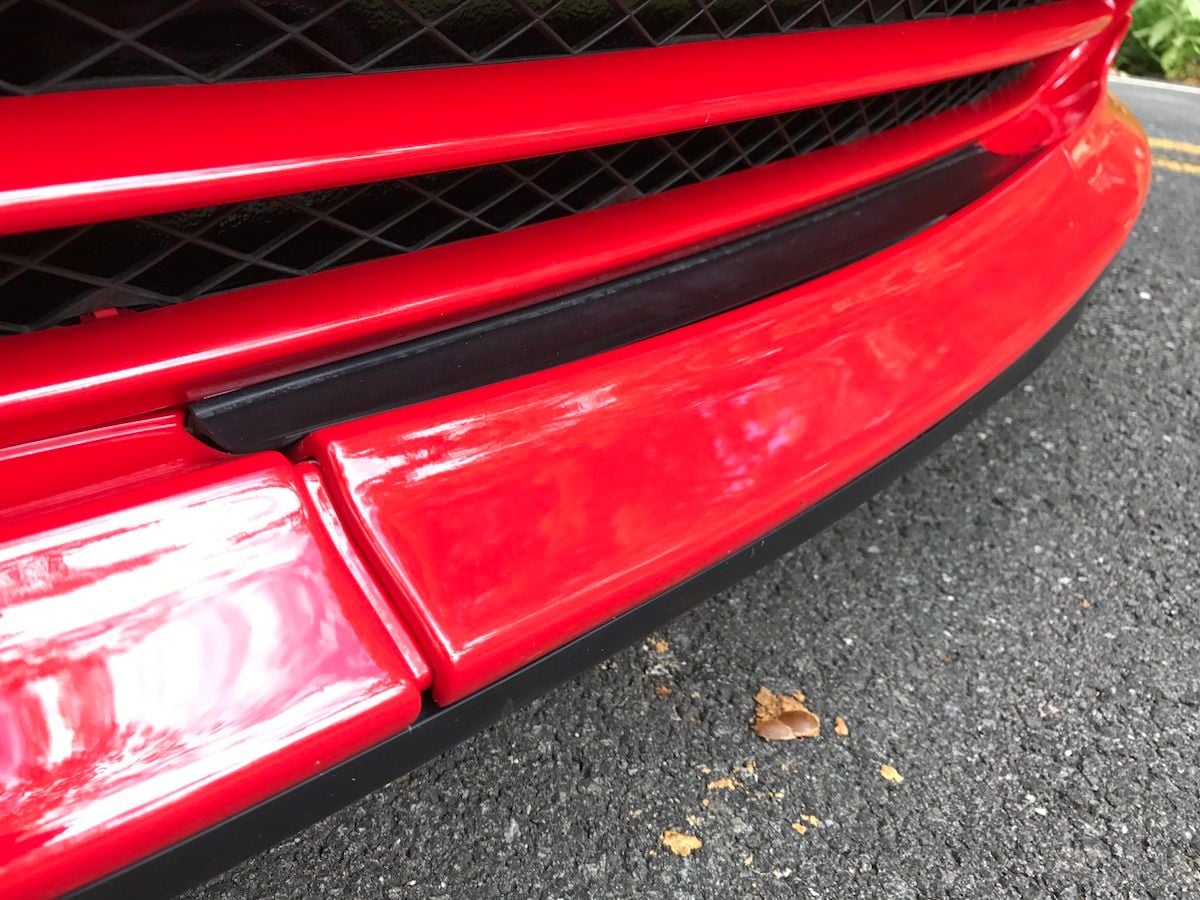
you want that rubber flap to fill the gap between the bumper cover and the center splitter piece.
so fit it all together including the bumper cover, then position the flap so air flow doesn't go down between the bumper cover and splitter.
hard to find a good picture of it, but once you put together the parts it should make sense.
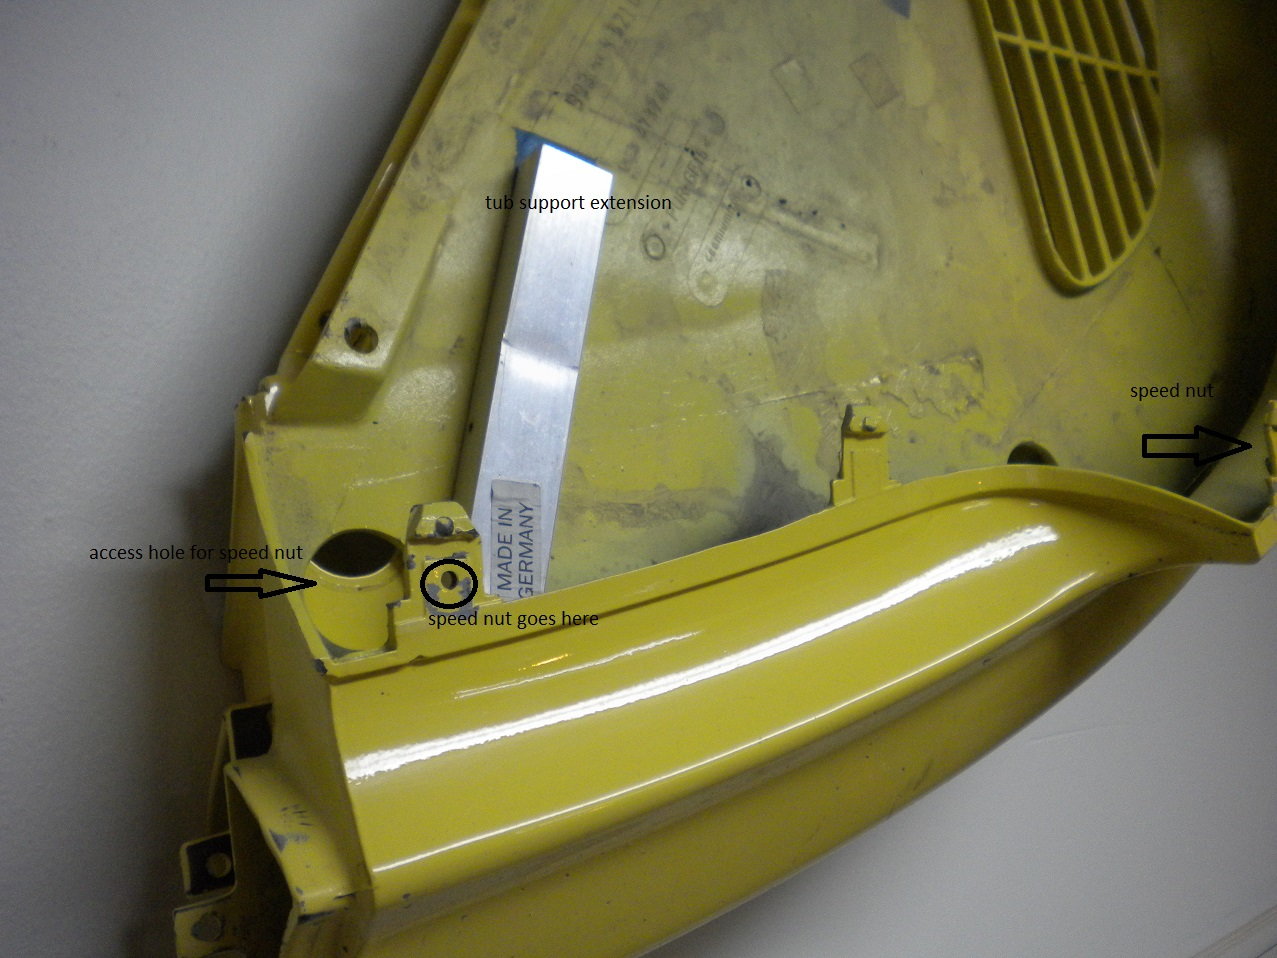
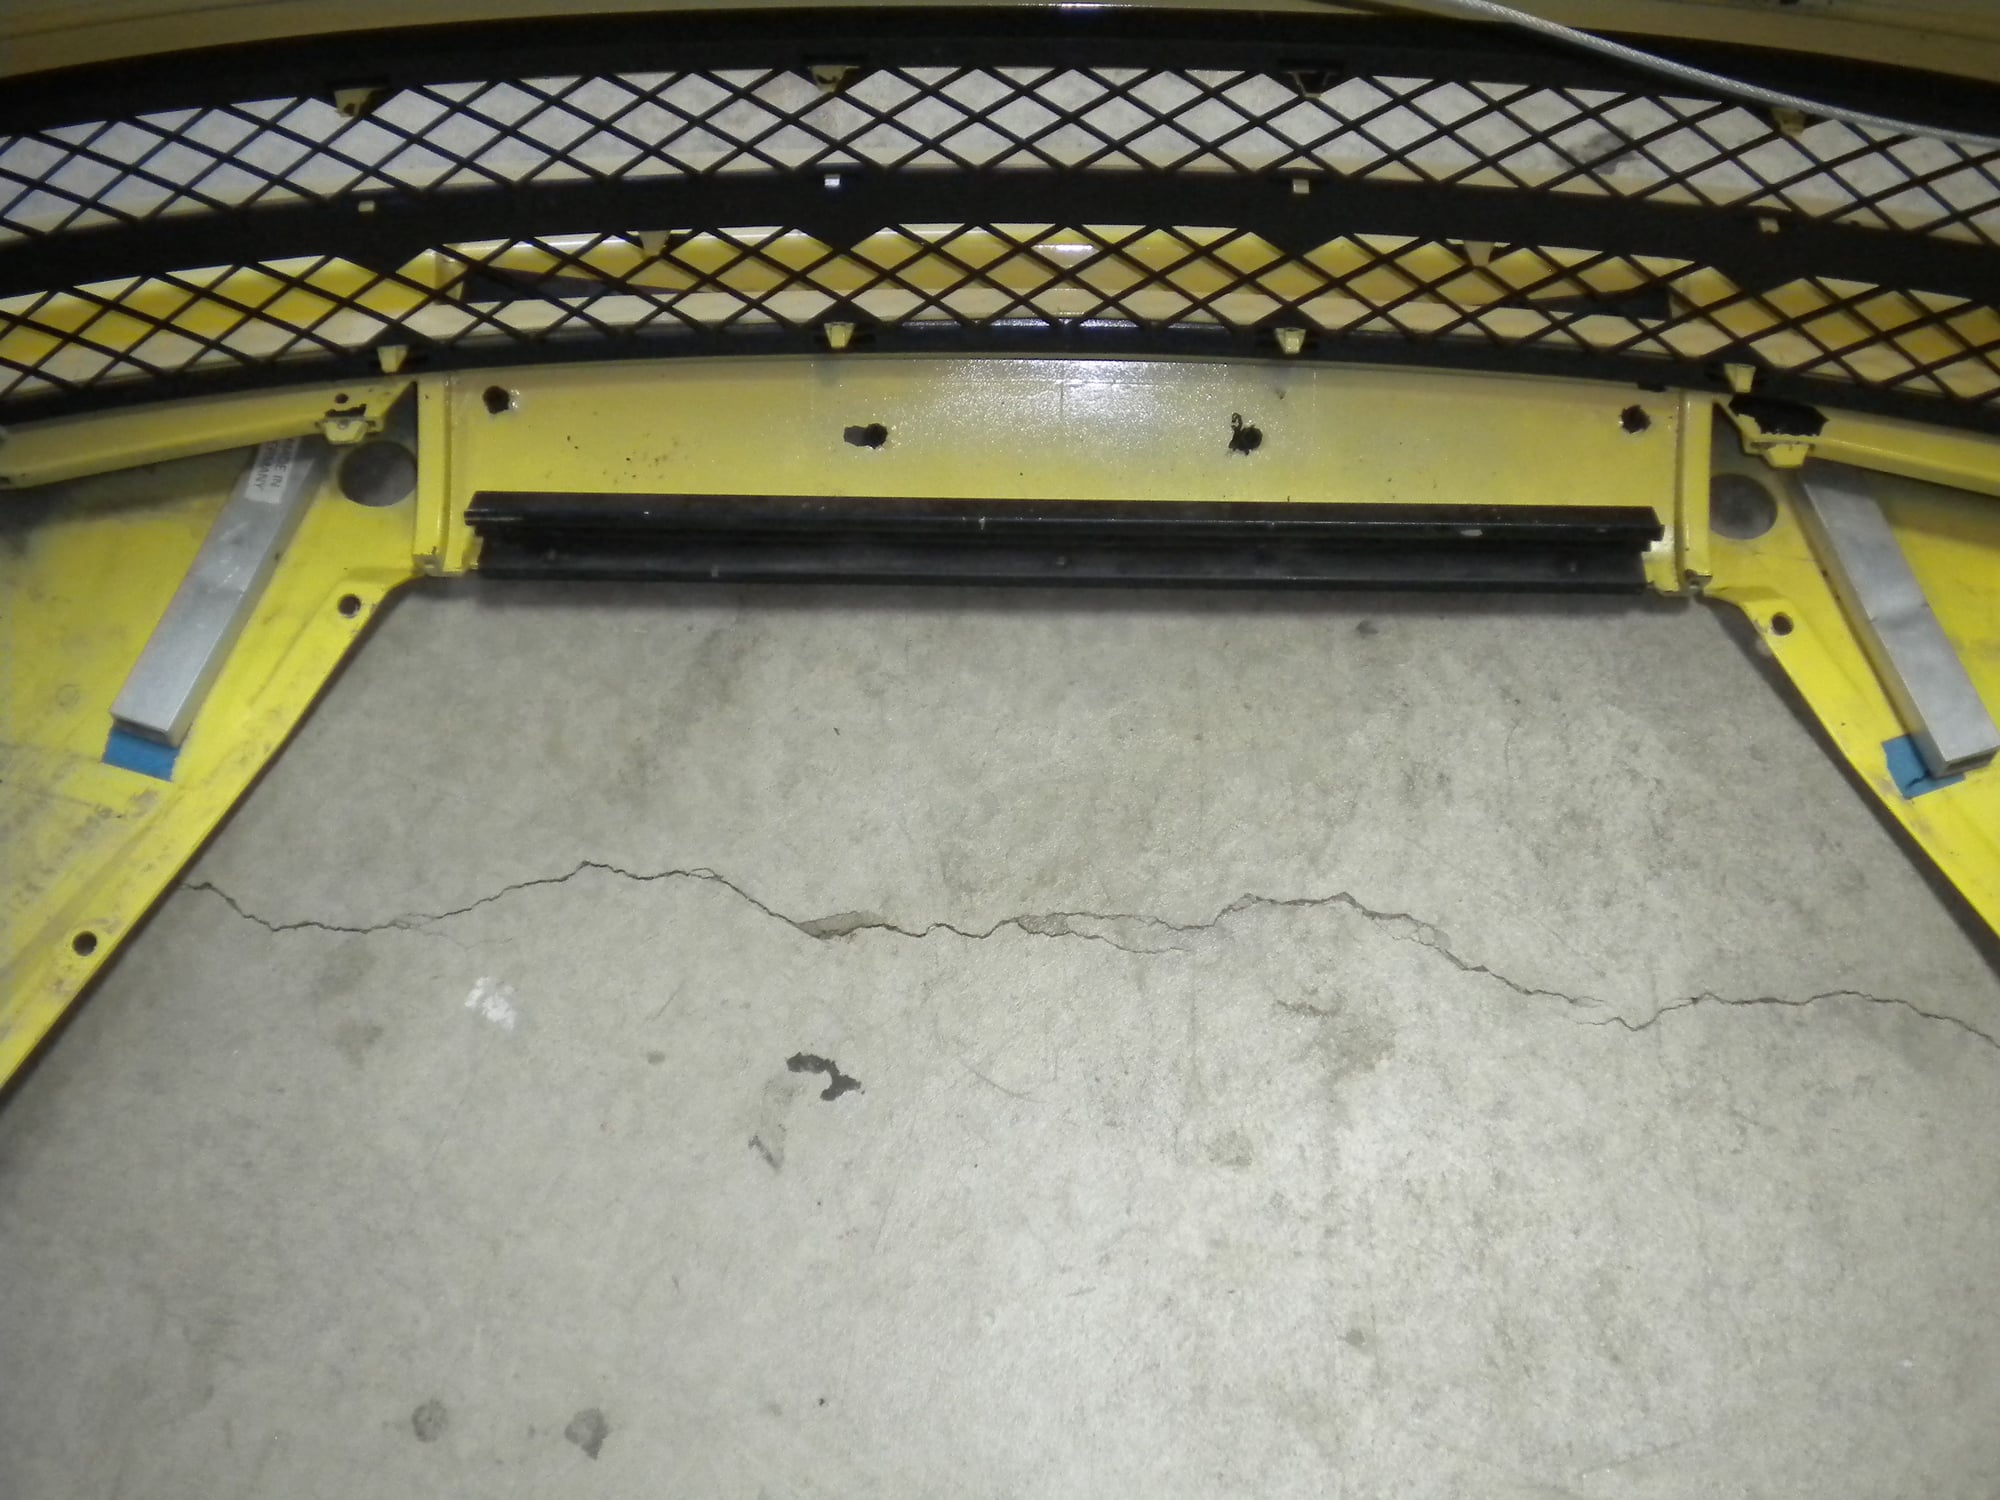
there are a couple support pieces that keep the center section from sagging.
the main part mounts on the bumper cover and grips the tub, should be on your current bumper cover.
then there are two aluminum channels riveted to each splitter extending that center bumper cover tub support.
it is important to get the splitter mounting tabs correct, they provide much of the support.
easiest way is to put it all together off the car so you can see how the speed nuts are positioned.
you want that rubber flap to fill the gap between the bumper cover and the center splitter piece.
so fit it all together including the bumper cover, then position the flap so air flow doesn't go down between the bumper cover and splitter.
hard to find a good picture of it, but once you put together the parts it should make sense.
there are a couple support pieces that keep the center section from sagging.
the main part mounts on the bumper cover and grips the tub, should be on your current bumper cover.
then there are two aluminum channels riveted to each splitter extending that center bumper cover tub support.
it is important to get the splitter mounting tabs correct, they provide much of the support.
easiest way is to put it all together off the car so you can see how the speed nuts are positioned.
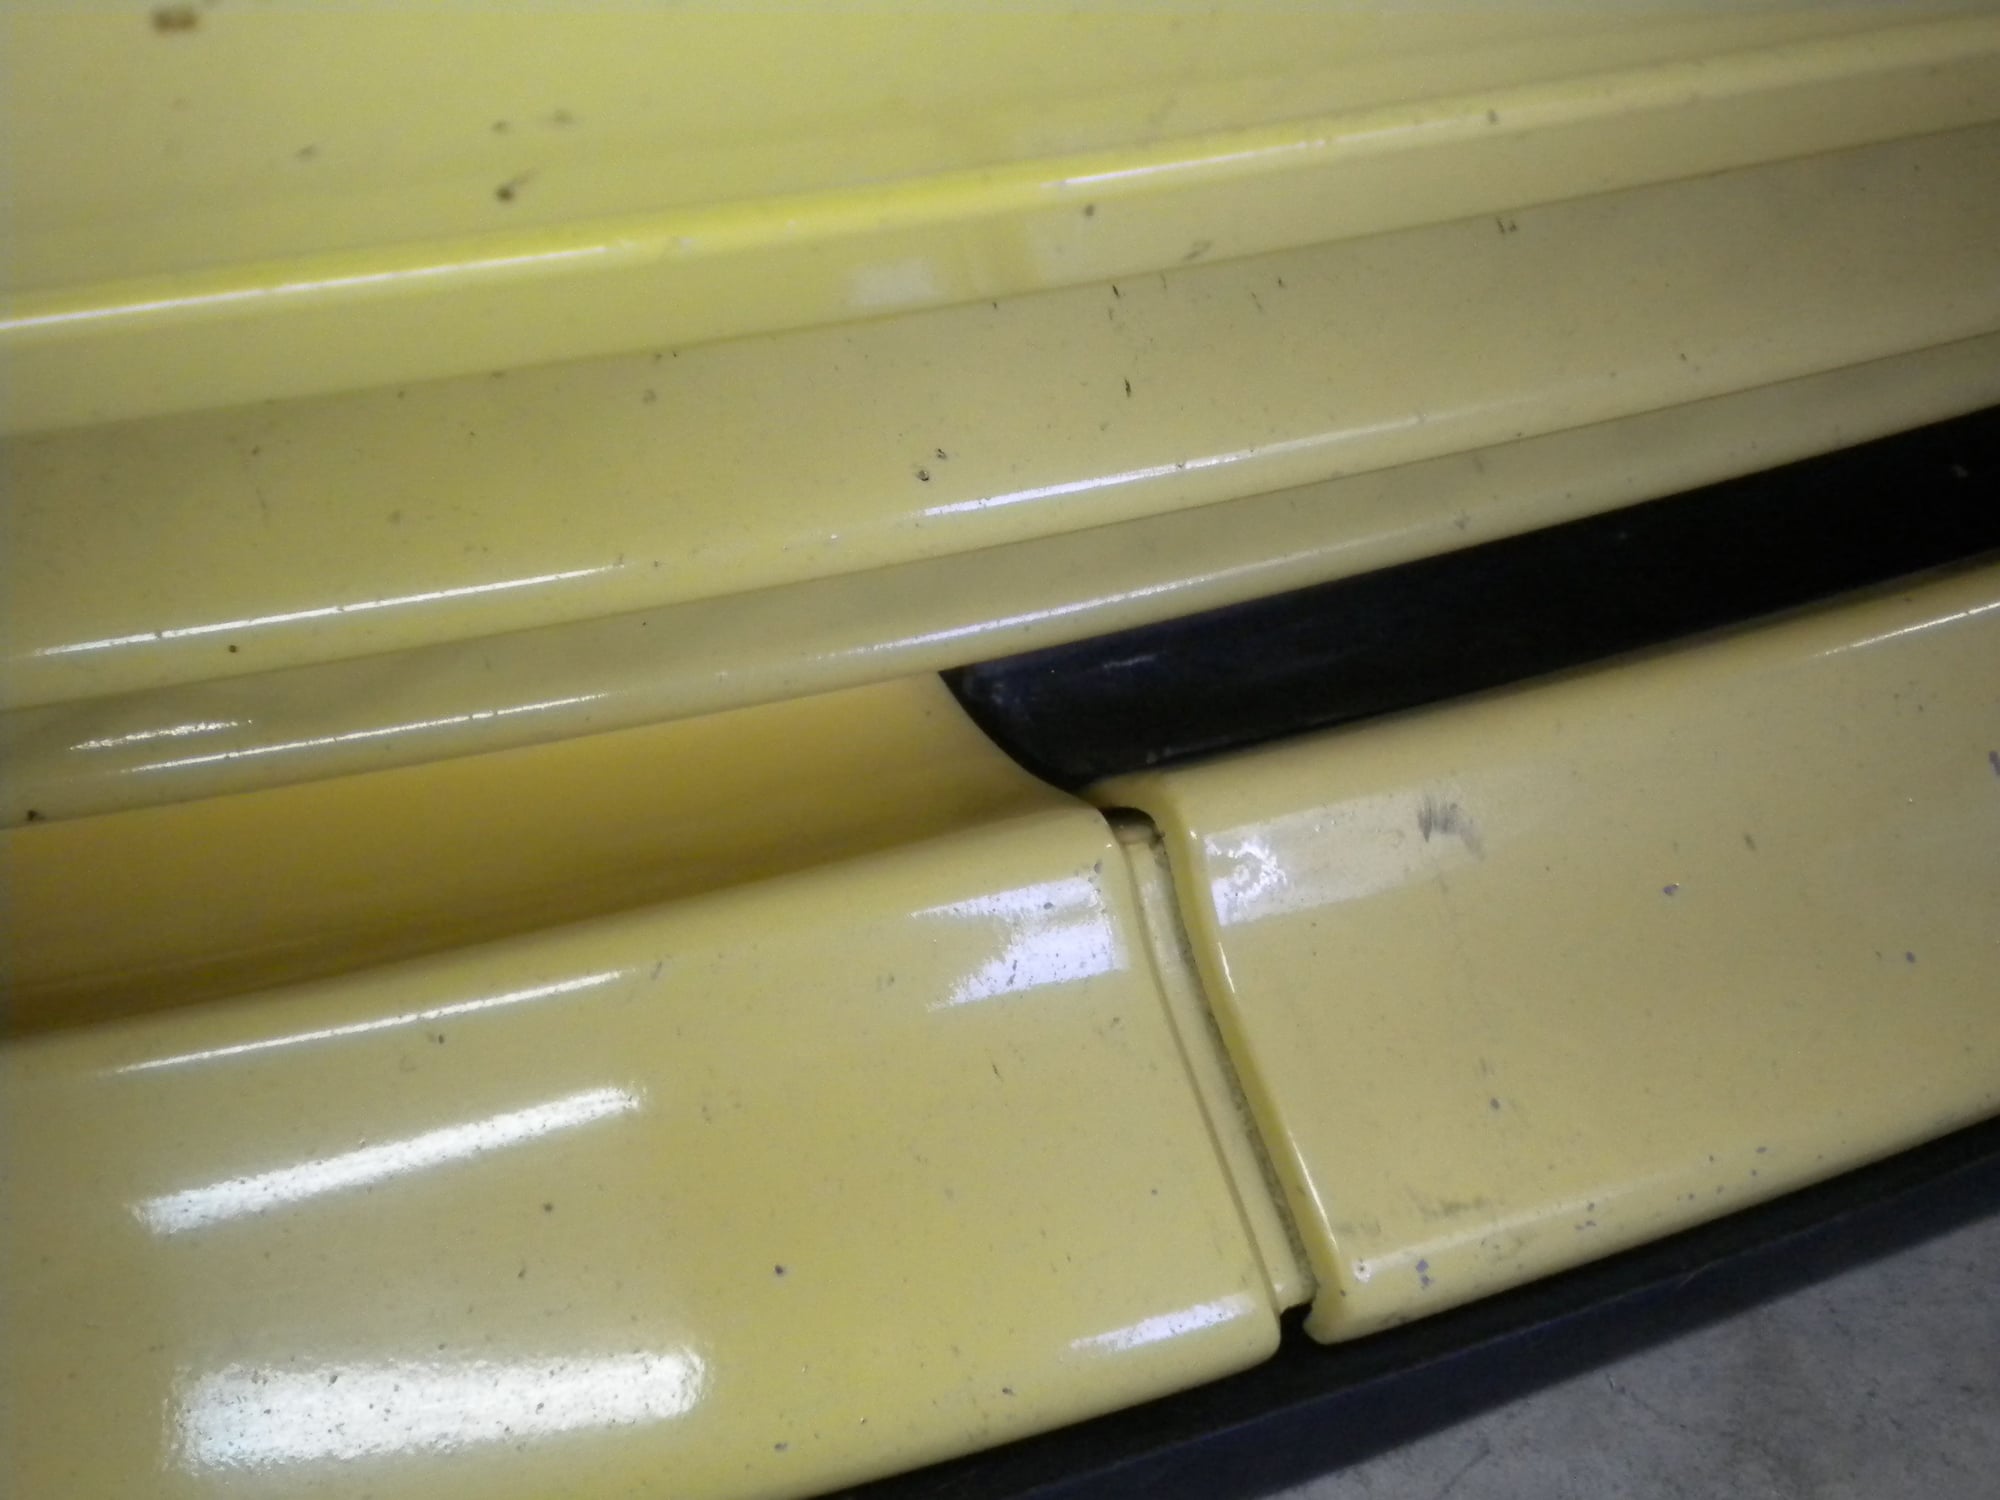
exactly...I am really not sure the rubber part must be installed that way, because the bending of the rubber has the opposite shape than the spoiler has. It doesn't make very much sense to me...but yes, I have to put all the pieces onto a table, together with the bunper, and see what happen.
I live in Italy, the currency is in Euro: I purchased the parts on rosepassion.com
Before purchasing from them I always ask if all the parts in the basket are genuine porsche parts, and they told me just some parts were, but the rest is produced from the OEM producer: however, all the parts, including reinforcements, speed nuts, blind rivets, etc. cost a bit less than 2000 Euro, a 500 Euro less than in the Official Porsche dealer, with a good discount.
Now I am looking for a Matter roll cage, to be welded onto the chassis and for specs/instructions of welding and reinforcements that Porsche prescribed to do before installing it.
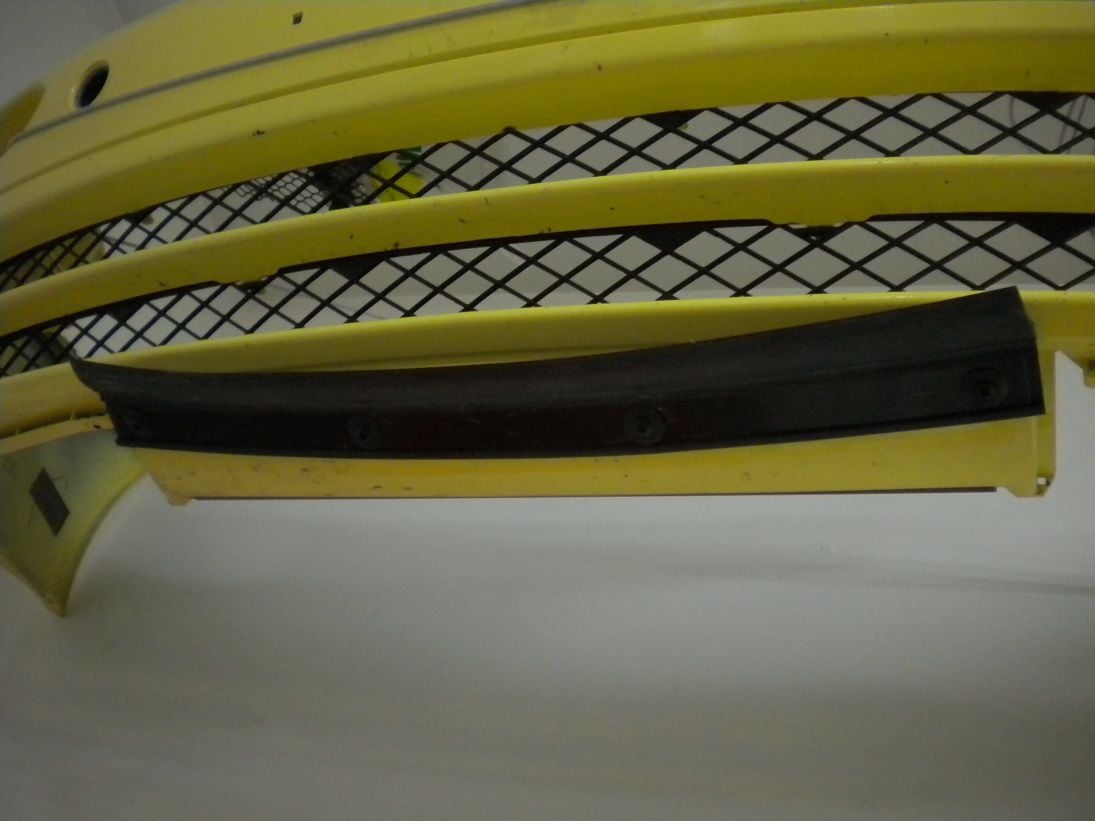
The OEM rubber flap comes with holes in it already. You need to line it up to the front bumper and then drill the bumper and attach it with the same type of plastic speed nuts and bolts as the lower apron. Here's a picture of mine:
I bothered way too many people when trying to figure this out, even colin at 9m sent me a picture.
so here's a couple more pics. looks sloppy because it is all just pressed together, no mounting screws.
the rubber flap looks incorrect, but when mounted as in the picture is matches up with the inside of the splitter shape and fills the gap.
the 5th pic shows the flap flat along the splitter matching up and filling what would be an air gap.
the first pic shows the 3 rivets mounting the aluminum channel and the air dam just laying on top.
the last pic shows the tub mount and the position of the support channels.
everything is laid out on the garage floor so let me know if you want a pic from a different angle or something.
It is exactly the way I want it to look like the 993 I bought few months ago, a pastel yellow 993 carrera fallen down in a river here, stayed there 4 years, invisible under the water surface, and finally come out with her roof.
From few pics inside the river I recognized it was the car owned by the father of some friends, and I thought it must have been a sign (only someone really crazy can see this as an opportunity), since I was thinking one day and also the next one, to change my silver 993 into a clubsport...do the polar silvernow can sleep tranquil in her box
what a better occasion...I thought...I had to strip it all, to recover it, so, let’s do it.
Posting this picture k722070 is the most beautiful gift you could ever (inconsciously) make to me, because the color, the front, and also the rims are exactly the same way I want to do it, to bring her back to life!
Yours must be a 4S or 2S with big reds, but it doesn’t matter, this is the way my Limoncella, ie 1:1 993 CUP will look like
you bought a 993 that had been underwater...4 years?
that needs to be a special thread, starting with pictures of the car being lifted out of the river.
awesome
you bought a 993 that had been underwater...4 years?
that needs to be a special thread, starting with pictures of the car being lifted out of the river.
awesome
Do you think? I am new here, I would rather say to be a very fresh rennlist user, I appreciate very very much the environment here, full of passion, initiative and spirit of sharing!
I don't know very much about the way it works, posting such a thread...ok, let's arrange few decent pic I took so far in a new thread.
Thank you K
yes, I believe everyone would love to see documented a 993 pulled out of a river and restored to running condition.
start a new thread and post lots of pictures.
you want that rubber flap to fill the gap between the bumper cover and the center splitter piece.
so fit it all together including the bumper cover, then position the flap so air flow doesn't go down between the bumper cover and splitter.
hard to find a good picture of it, but once you put together the parts it should make sense.
there are a couple support pieces that keep the center section from sagging.
the main part mounts on the bumper cover and grips the tub, should be on your current bumper cover.
then there are two aluminum channels riveted to each splitter extending that center bumper cover tub support.
it is important to get the splitter mounting tabs correct, they provide much of the support.
easiest way is to put it all together off the car so you can see how the speed nuts are positioned.
Anyone know what exactly the aluminum tube extension pieces attach to on the car? Seems like there should be some sort of rod facing the front for the aluminum channels to slide onto?
Hi Clex,
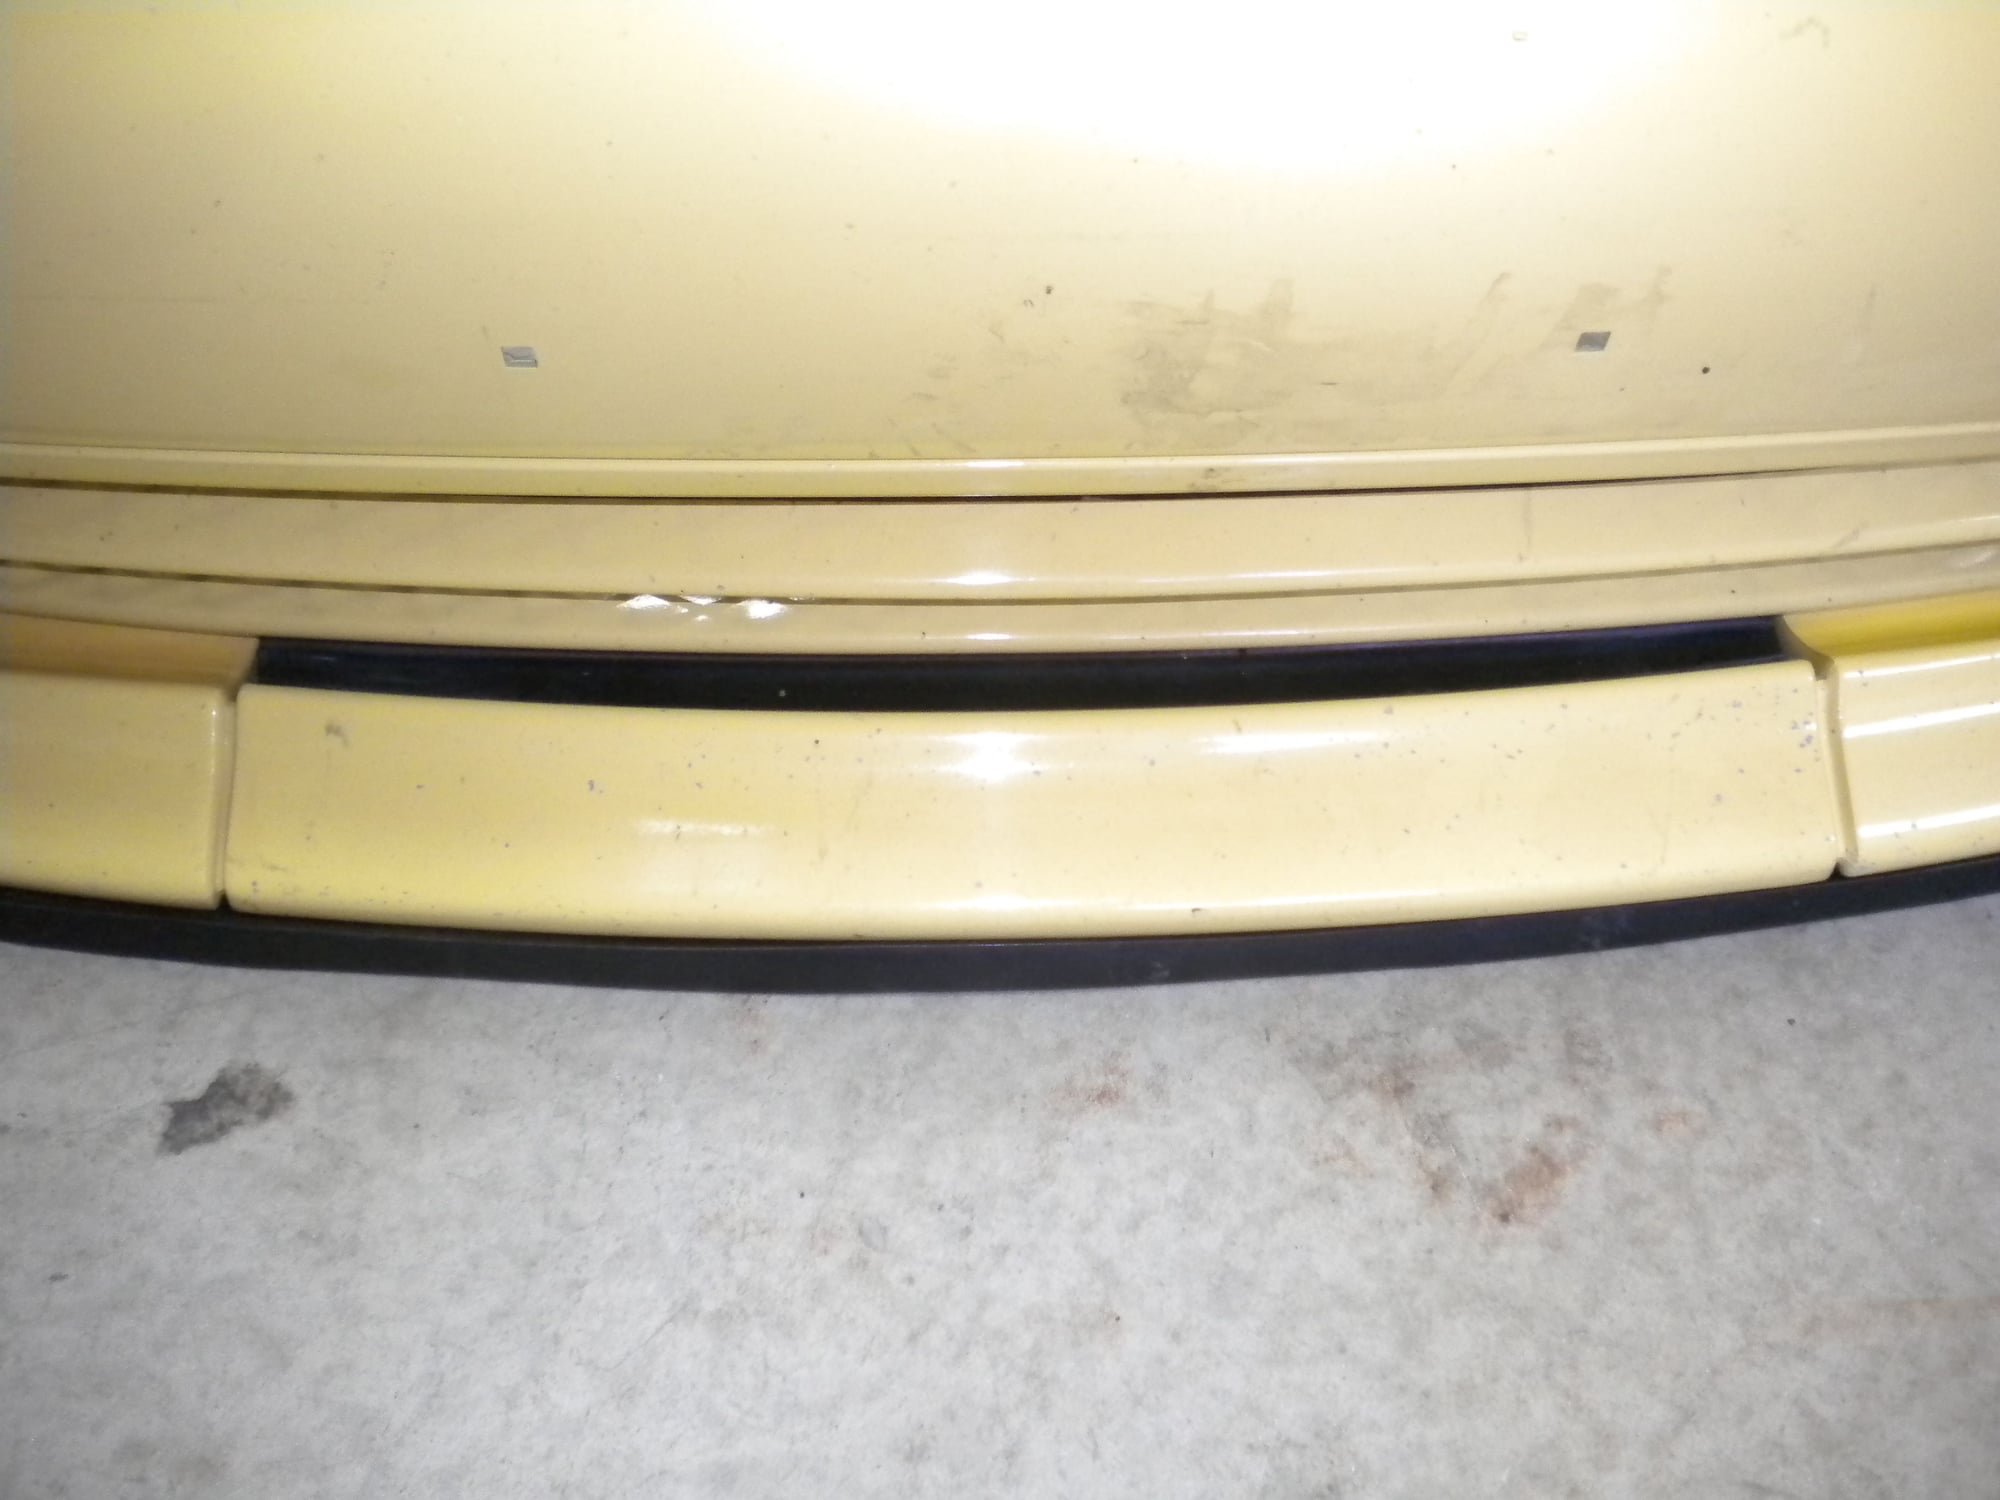
Installing the front spoiler with the professionals at the Bodyshop was easier than expected, allthough the rubber lip in your picture came witht he metal blade placed the other way round: infact the rubber is supposed to be a continuation of the plastic profile of the spoiler, and the way it was placed (precisely same as in your picture) couldn't allow that...it is very probable that who is delivering these two parts (rubber profile and metal reinforcement profile to be coupled) doesn't have a clue how they are supposed to stay in place.
In regards to the aluminum reinforcements, I can send you pictures from underneath, eventually with a scale, since now the front spoiler is in place, but we used as a reference point the same pictures as yours, very useful. From Underneath you can see where both the profiles are supposed to be riveted, we also apply some soft and thin biadhesive to hold the aluminum bars in place before riveting. The assembly of them is supposed to be perfectly symmetric.
 12-13-2018, 09:17 AM