When you click on links to various merchants on this site and make a purchase, this can result in this site earning a commission. Affiliate programs and affiliations include, but are not limited to, the eBay Partner Network.
I changed my spark plug wires a couple years back and was really frustrated with how I needed an extremely stubby bit to get to where the block mounts to the top of the fan housing. I know many people go for the Neiko 03044A but turning the ratchet in that tight area is often difficult when you only have 16 teeth in the ratchet.
Fast forward to now and I needed to swap out the HVAC servos in my Cayenne and faced a similar problem of needing a very short driver bit and not a lot of room to rotate a ratchet around.
I looked at the Snap On Low Profile Flank Drive set but this still had the same issue as the Neiko but with 72 teeth instead of 16. I decided to piece together a few tools to make the right tool for these tight jobs.
The Engineer DR-56 includes a handy 10mm to 1/4in bit sleeve adapter that is extremely low profile (less than 1in of clearance). Snap On offers something similar, the RTMBS8 but it appears to be thicker and does not have the knurled edges to turn with your fingers, additionally it is 11mm and I prefer the 10mm of the Engineer. I also considered purchasing Snap On's stubby bit set SDMS17 but haven't found a need to as the Engineer setup is already low profile enough for all the applications I've needed it for.
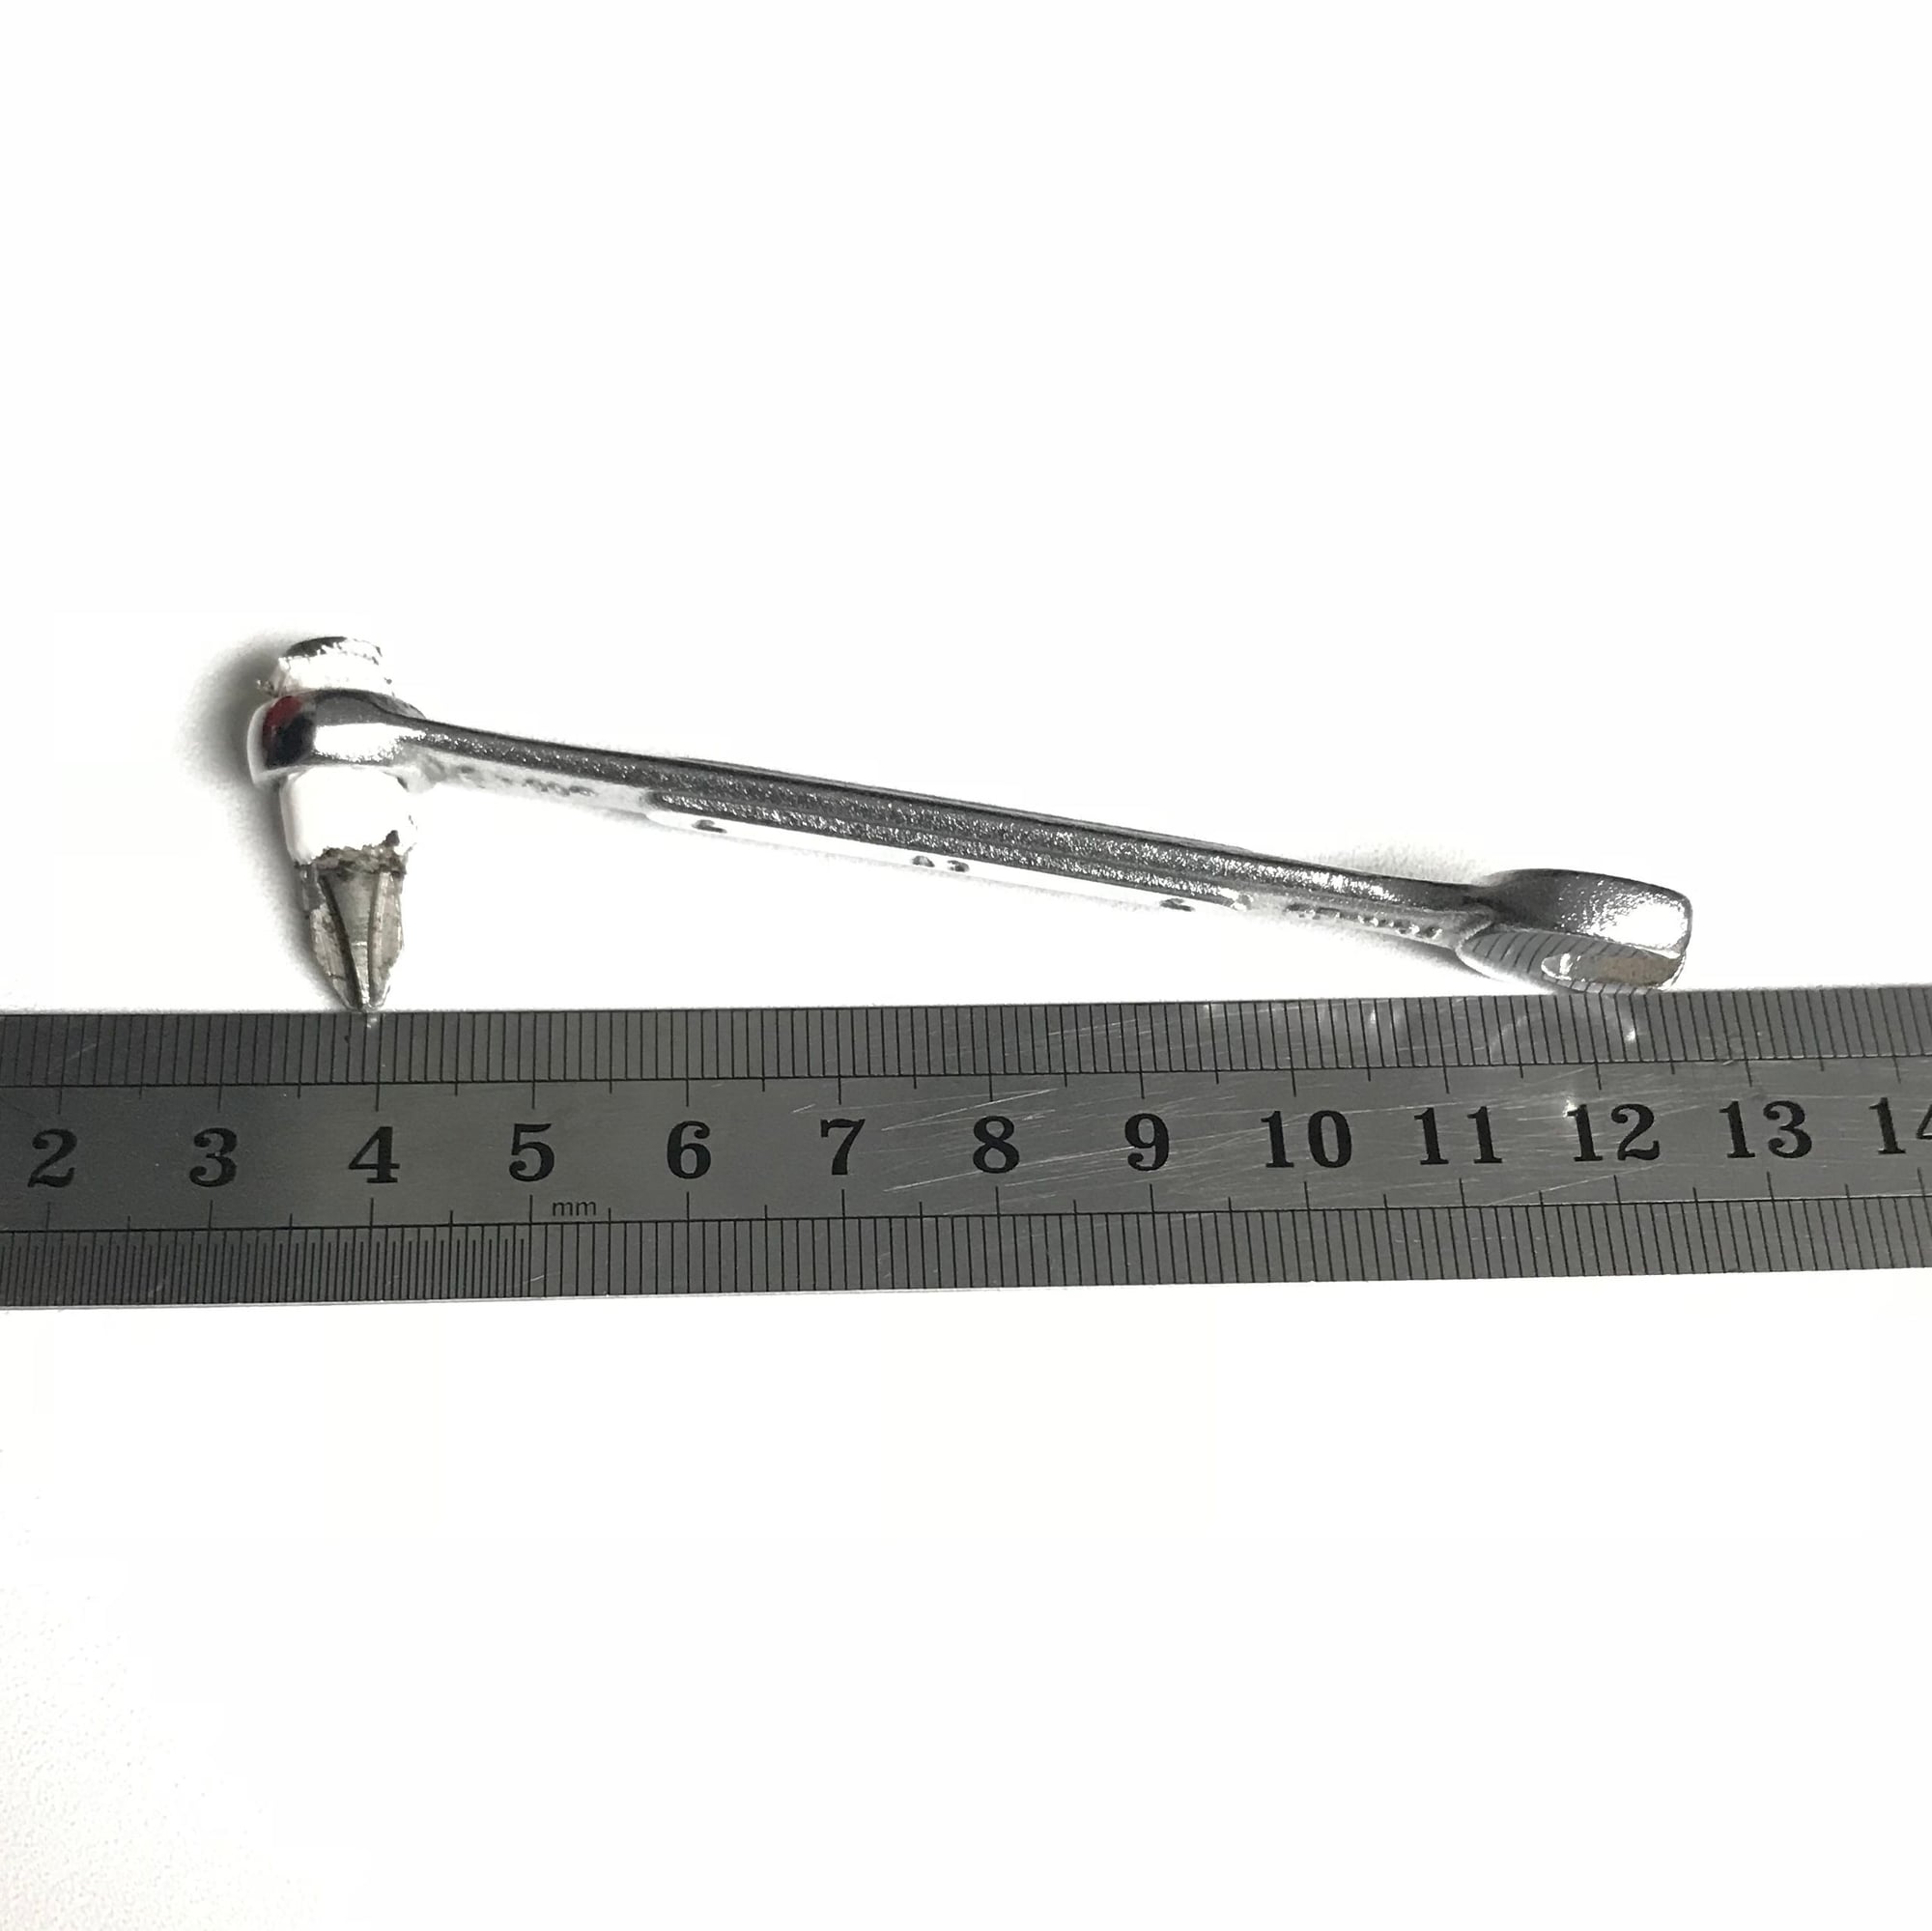
The Craftsman (or Gearwrench or SK) Elbow 10mm Ratcheting Combination Wrench allows you to turn the bit without needing much room. You can do a pumping action or flick side to side to turn the screw.
Thanks so much for sharing this. Can anyone share a pic of this in action or the area in question - I am just trying to picture this so I can justify pulling the trigger on this setup.
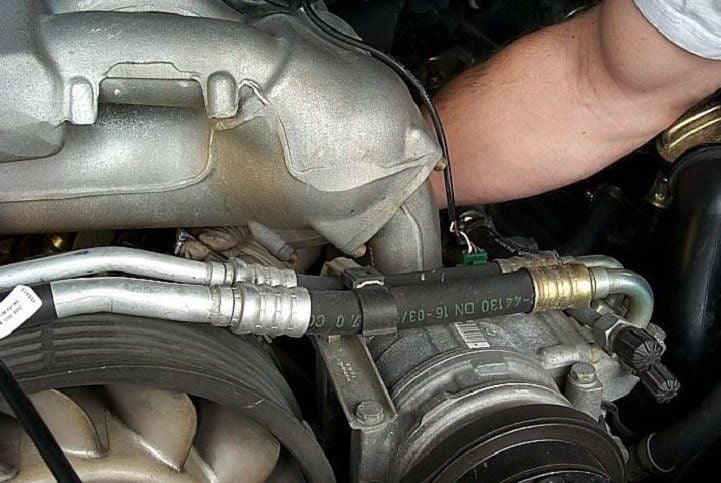
IIRC, theres a block that contains the six wires that go to the right side of the engine. This block looks like part number 928.602.323.00 and if found in the center of the engine below the intake manifold, above the fan shroud, behind the AC lines. Can you see the tool that this guy is holding? He's going for it!
There are only two clamps and four screws that attach the plug wires to the rear of the fan shroud. Use a stubby-handled Phillips head screwdriver to get the plugs behind the number 1 and number 2 intake runners. You will use the ratcheting screwdriver behind the number 5 and number 6 intake runners. Keep all of these plugs together in their harness and remove the entire group so you can see how they are assembled together and the different lengths of each wire. This is why it is important to label them correctly.
I'll freely admit that my tool mashup is expensive and obscure, but it absolutely rocks in tight spaces and frankly I'm really surprised that nothing similar to it exists (that I'm aware of), especially given how tight modern cars can be.
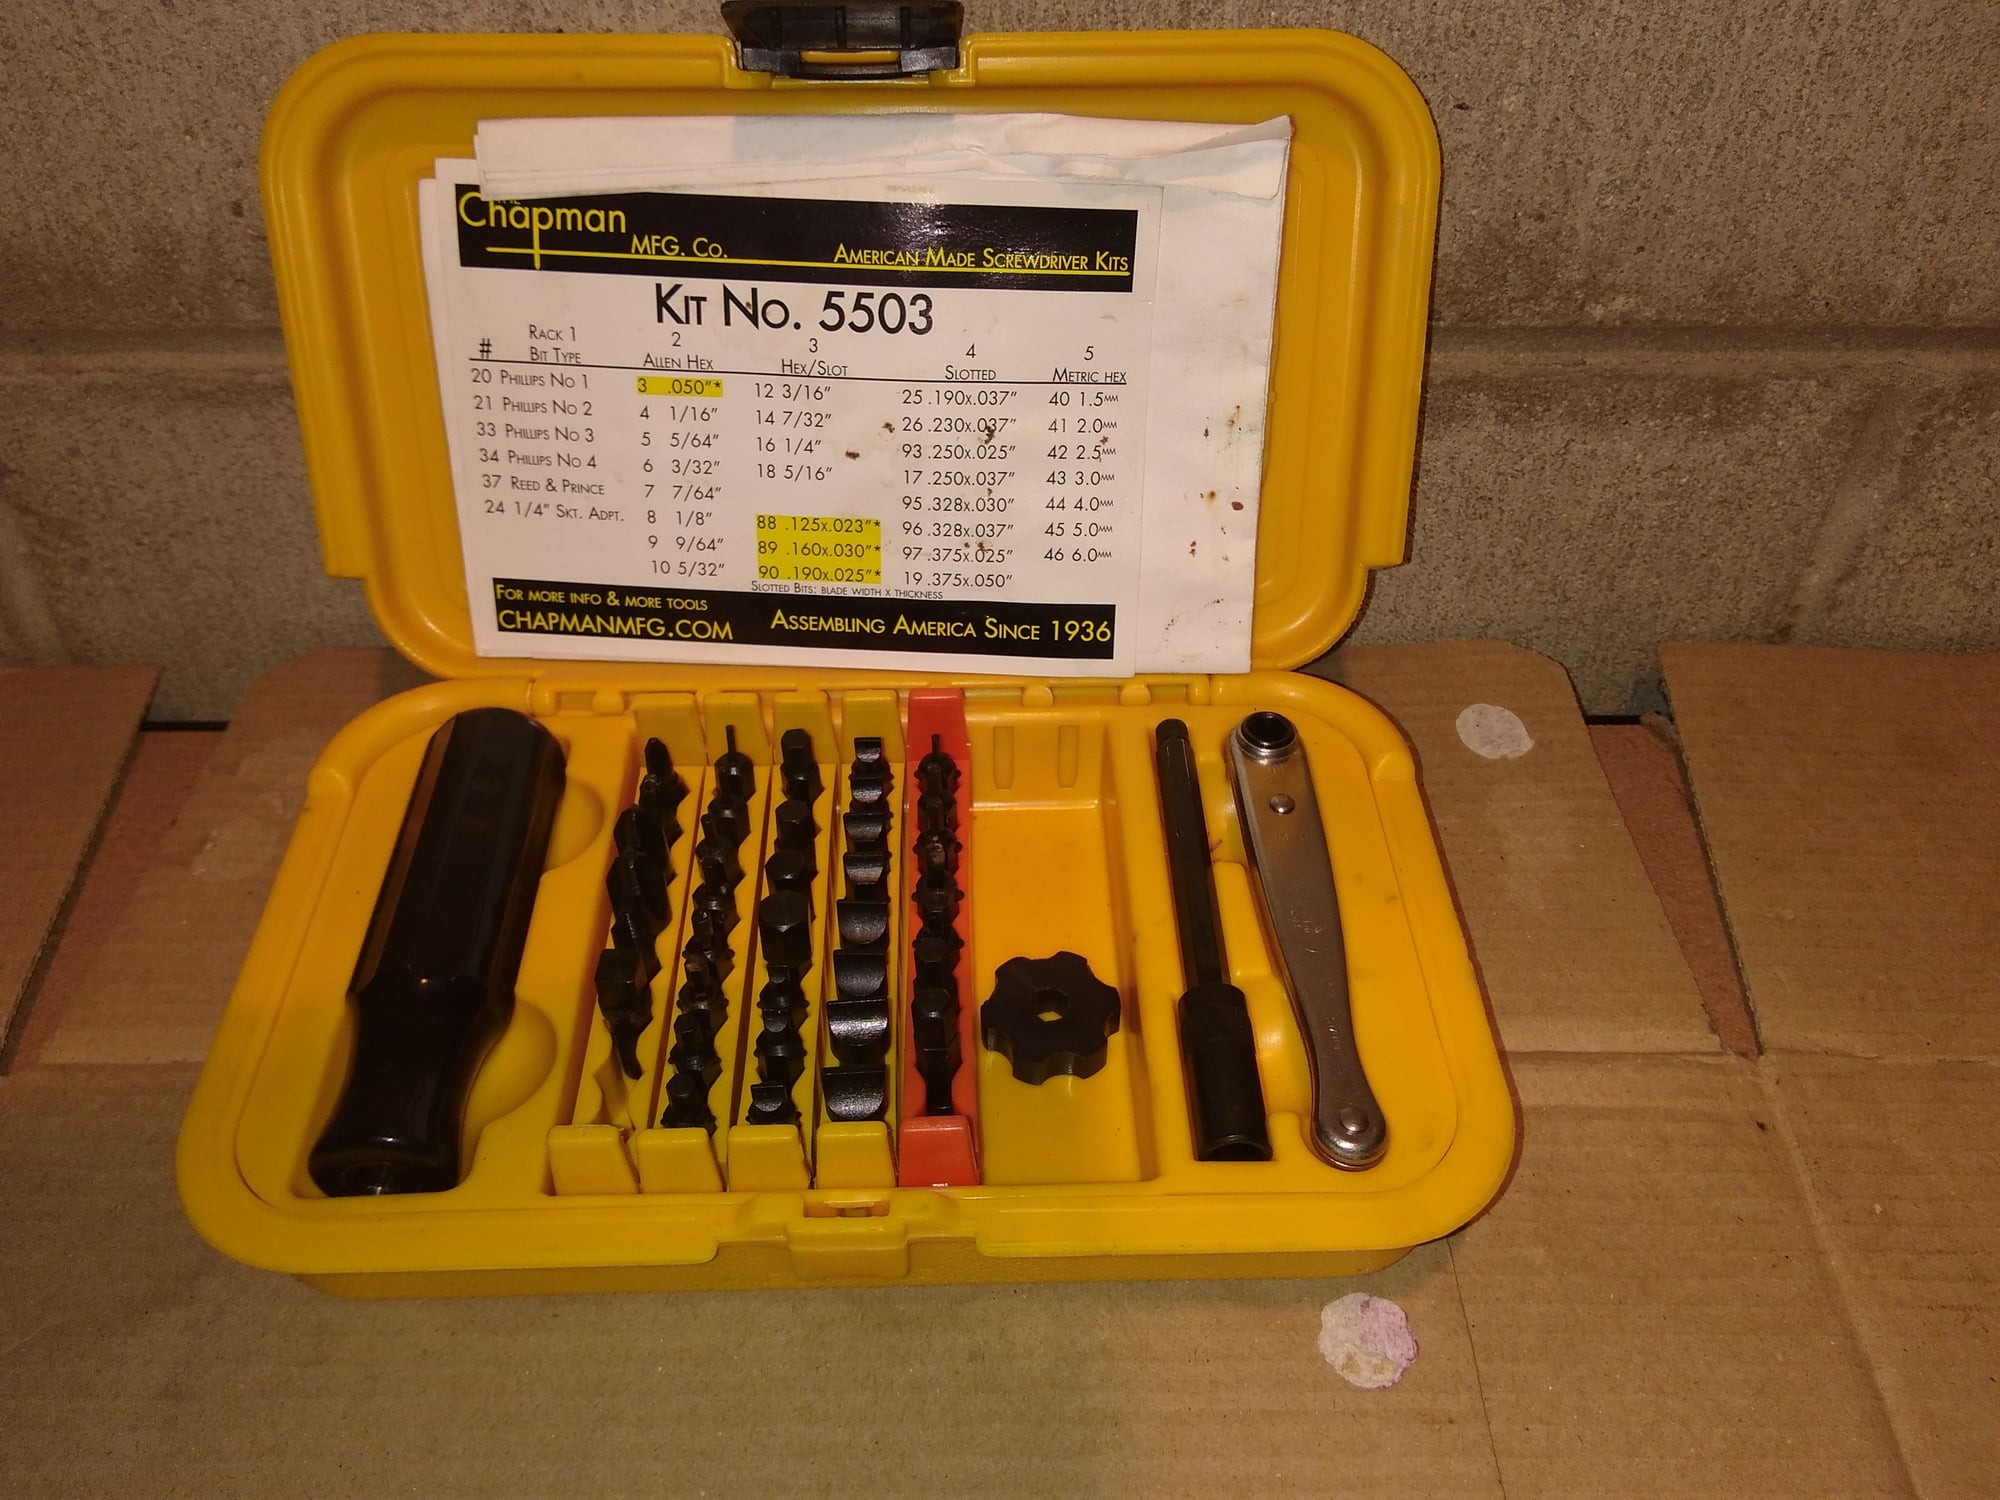
I recently did the plugs, leads, distributer belt and 4 valve covers. I bought the Chapman kit #5503 especially for the job of getting behind and under the varioram. It wasn't expensive and could not have been better. It has a myriad of uses.
Great information for a fiddly job. One other idea when you're using small tools like these in tight spaces: tie a length of dental floss or string to the tool, for easy retrieval when you drop it. It's also good to "drape the patient" before you begin, with a thin towel in place to catch any dropped fasteners or small parts. I learned this one the hard way after dropping a bolt into the space below the crankshaft pulleys--PITA to retrieve.
This specially engineered wrench/doohickey has gotten me through 4 plug wire jobs with no fuss. Yes, space is tight under the intake, but manageable. Cost- minimal
Hi
I also got my wife to fit her hand inside the intake manifold to tighten the screw, lady/girls hands are usually smaller than ours.
You may laugh but it works.
 09-15-2018, 12:32 AM