Build Thread - Project Swine 93 - My Barnfind Outlaw / RS Inspired 993
 09-21-2018, 11:32 AM
#46
I just received the same seats for my RS (clone) and have been on the fence about painting the seat backs. With a newly painted (guards red) roll bar and red harnesses, I was worried about there being too much red inside - since the exterior is also guards red....I think you'll pull it off nicely since its more of an accent color....as opposed to painting everything white...
Your attention to detail and planning is fantastic. I struggle with the desire to pull it all together aesthetically, and the timing and costs associated with having that level of patience!
I'll be following this thread!
Your attention to detail and planning is fantastic. I struggle with the desire to pull it all together aesthetically, and the timing and costs associated with having that level of patience!
I'll be following this thread!
 09-21-2018, 10:54 PM
#47
Basic Sponsor
Rennlist
Site Sponsor
Rennlist
Site Sponsor
Thread Starter
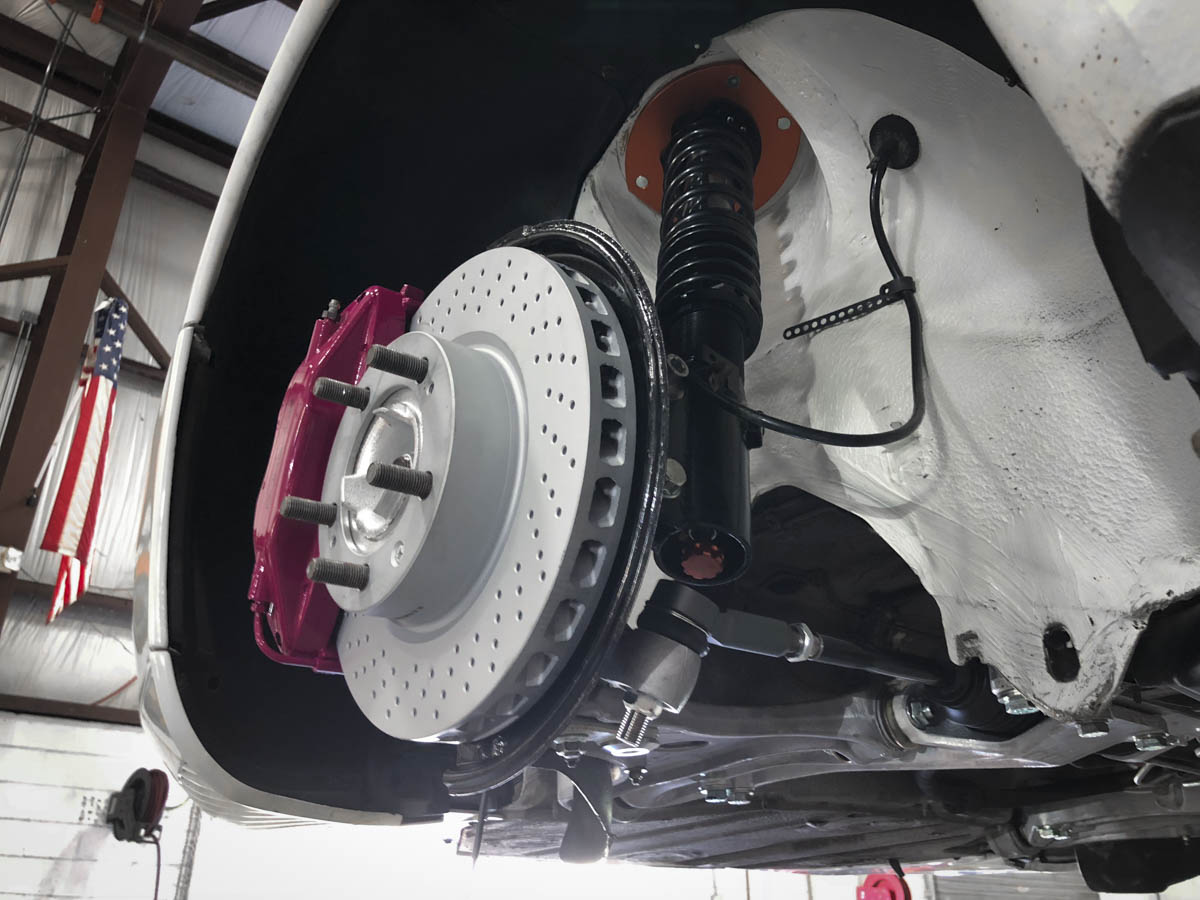
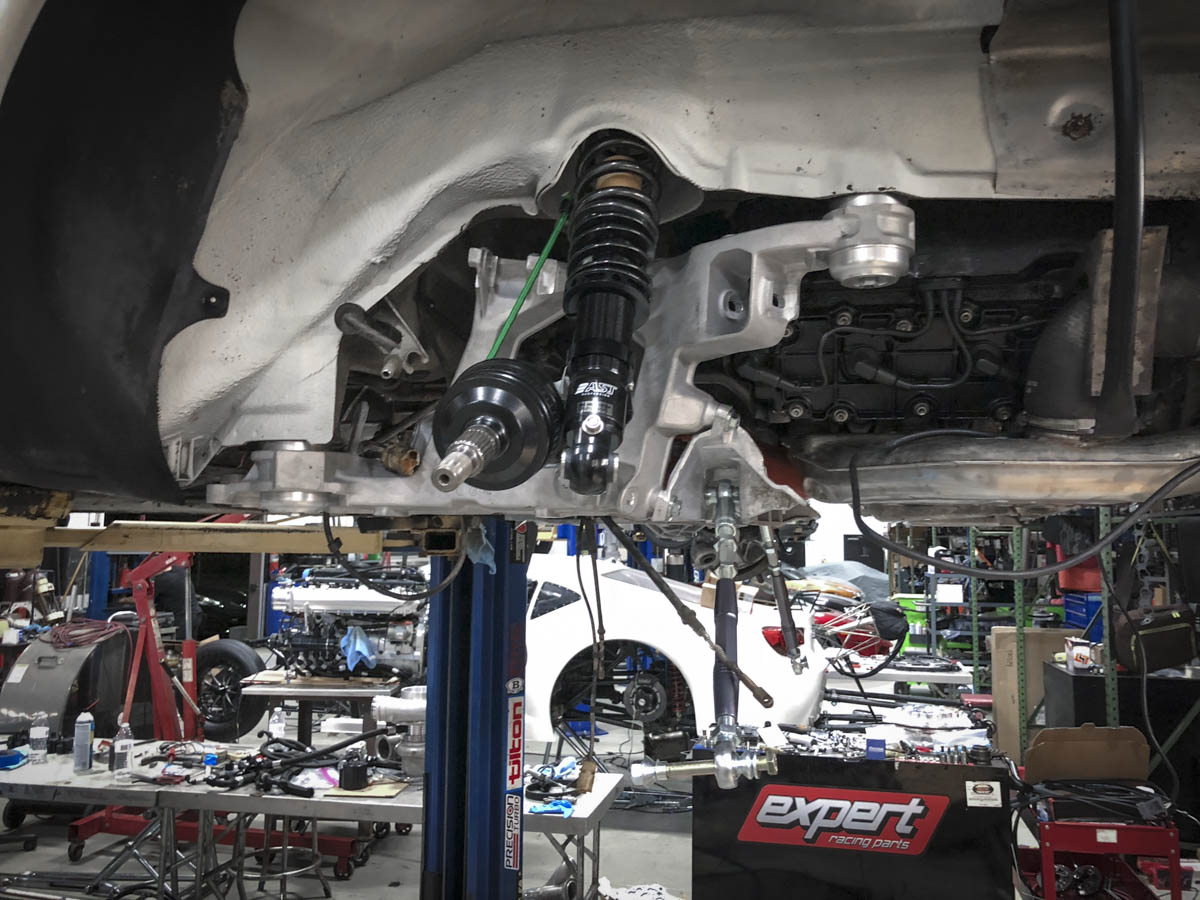
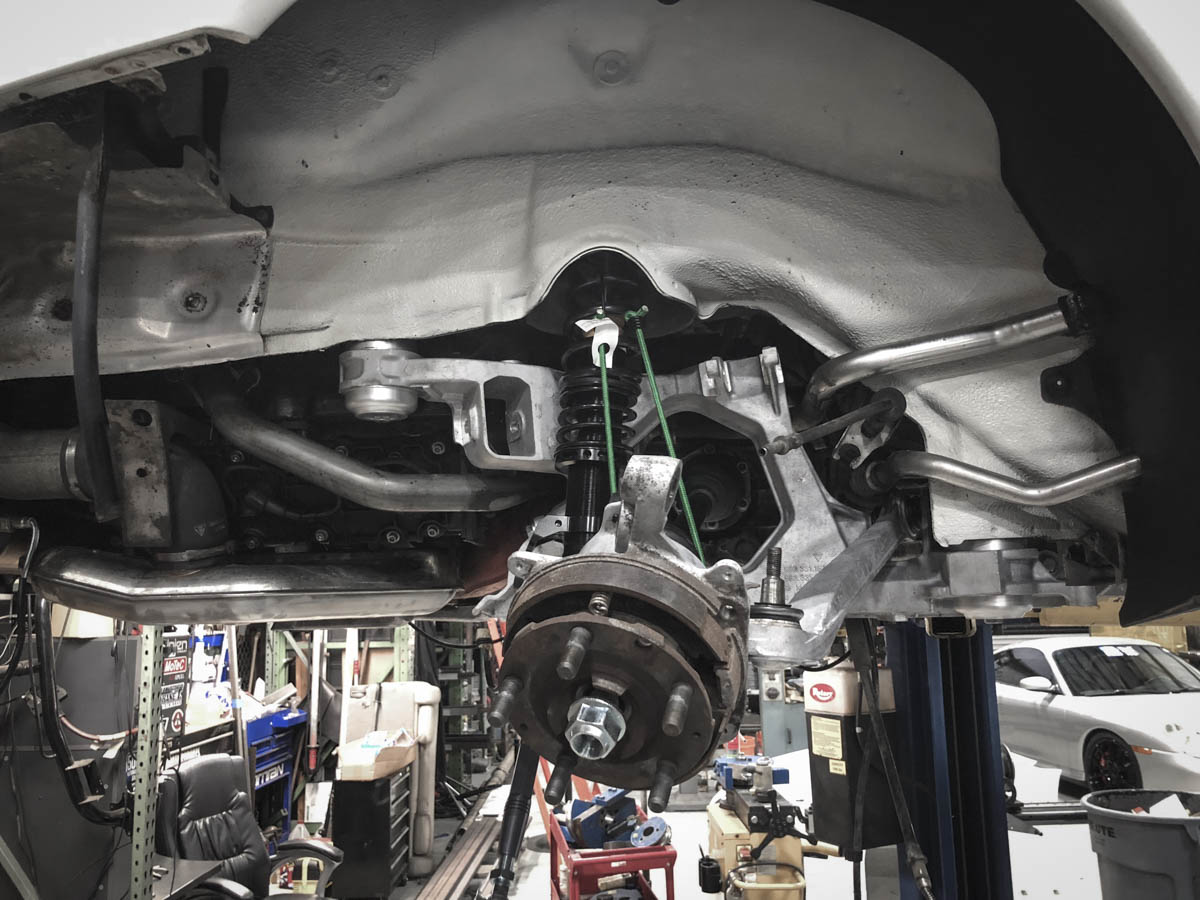
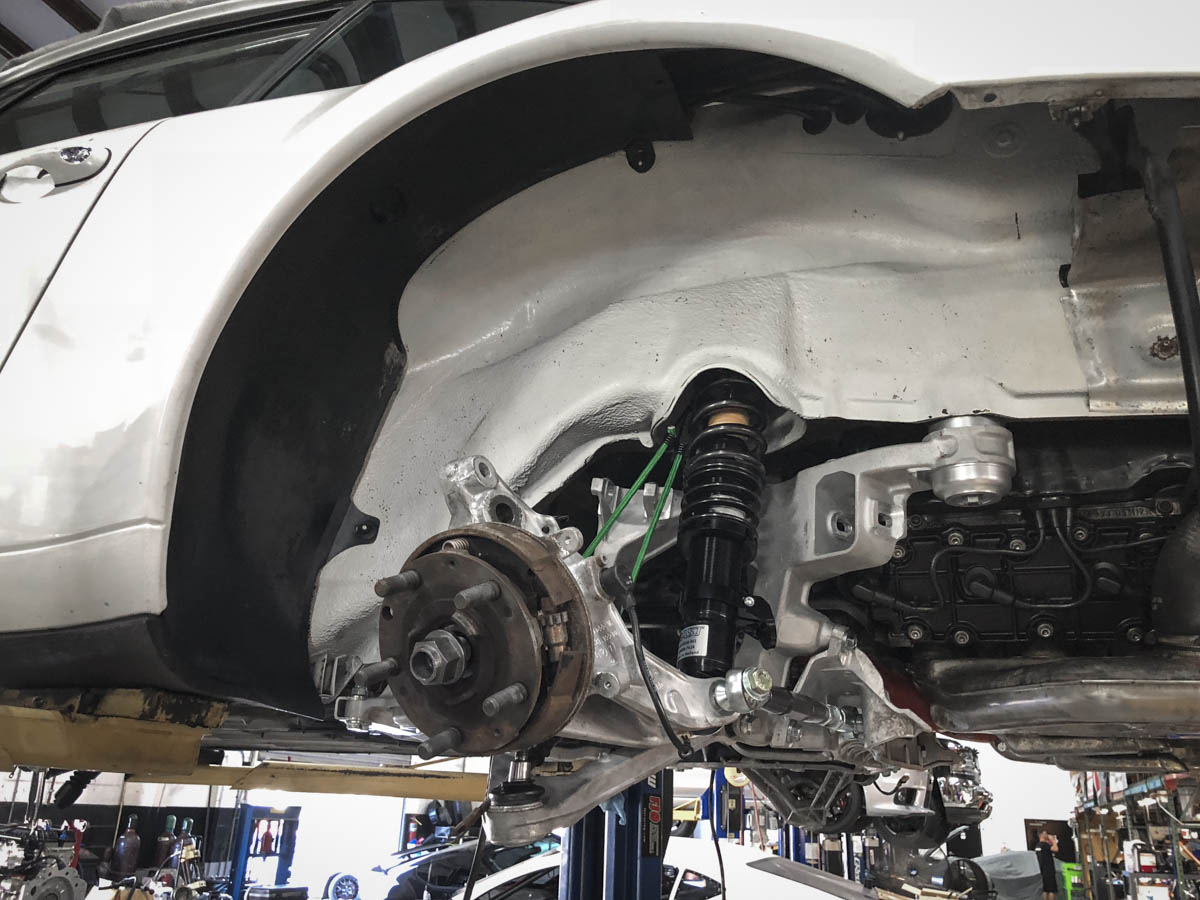
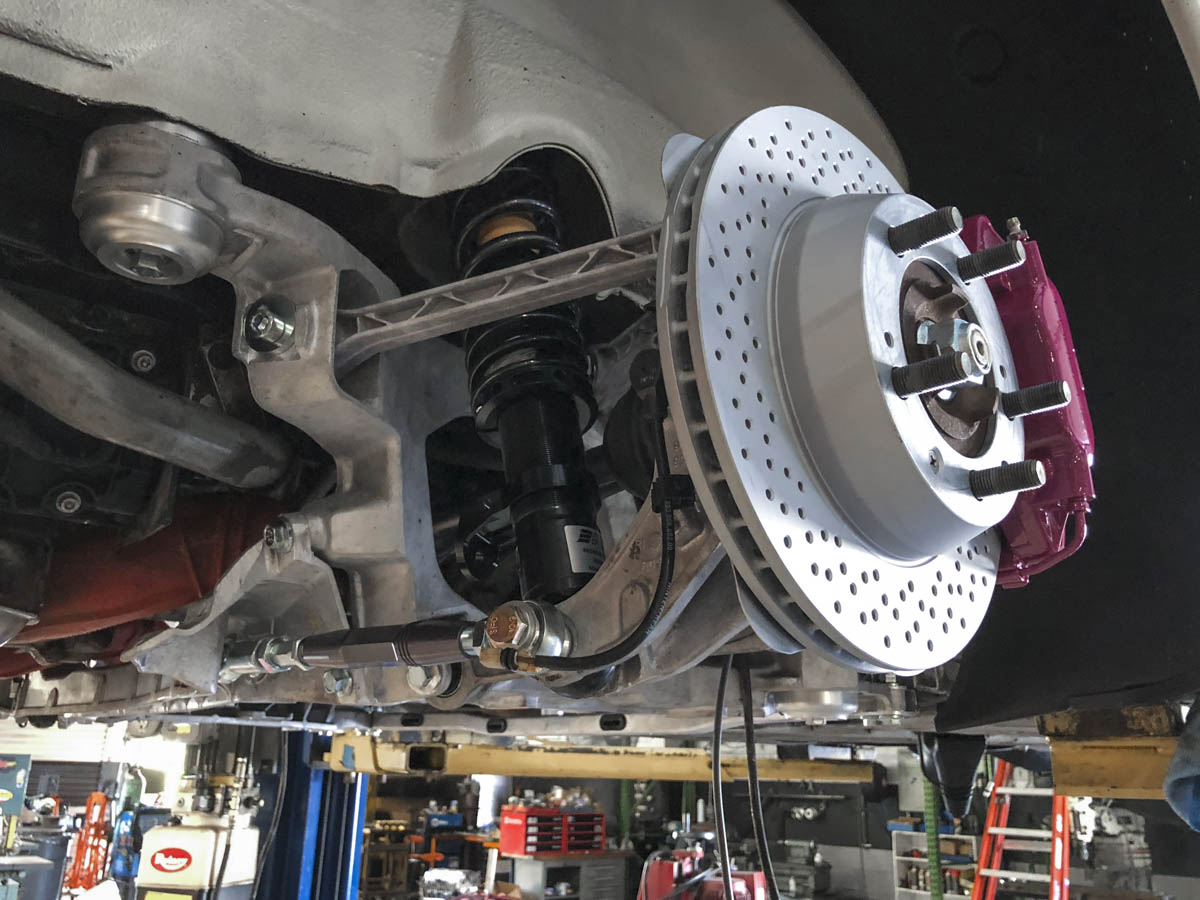
The front suspension came together rather quickly and I'm quite happy with the results to see the least. A recap of the updates upfront; front control arm bushings are Rennline, Ball joints new Lemfoerder units, Elephant Racing Bump Steer kit, ATE brake rotors, Textar Pads, Goodridge Brake lines and Rothsport Steering rack bushings.
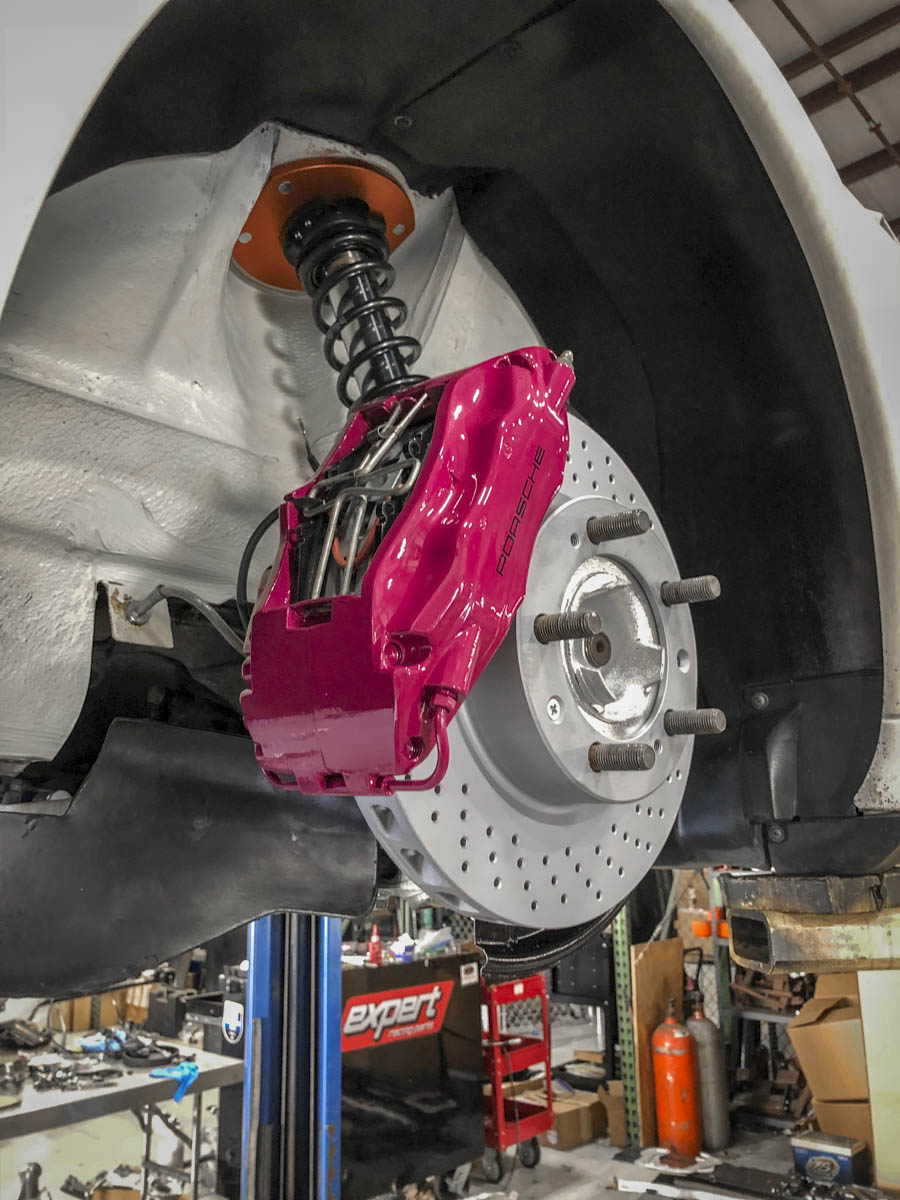
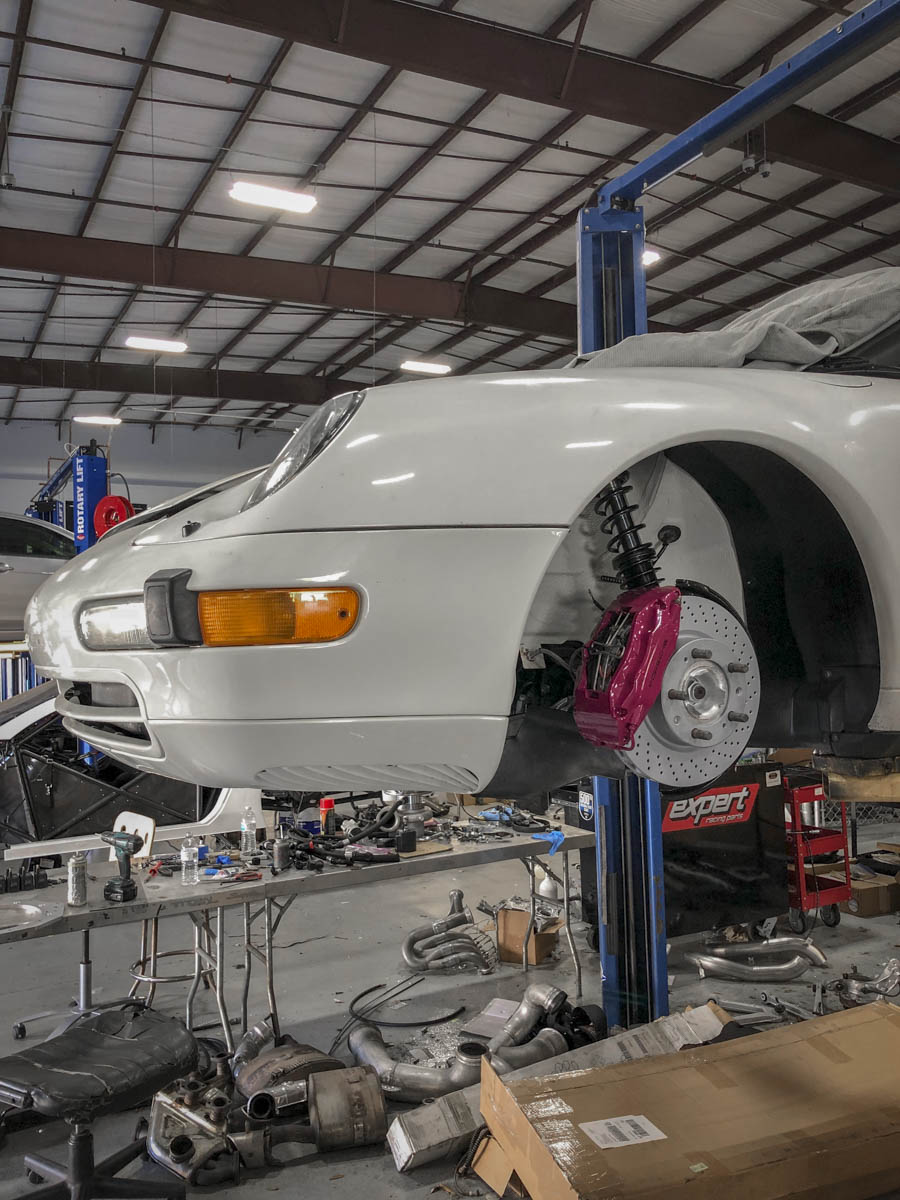
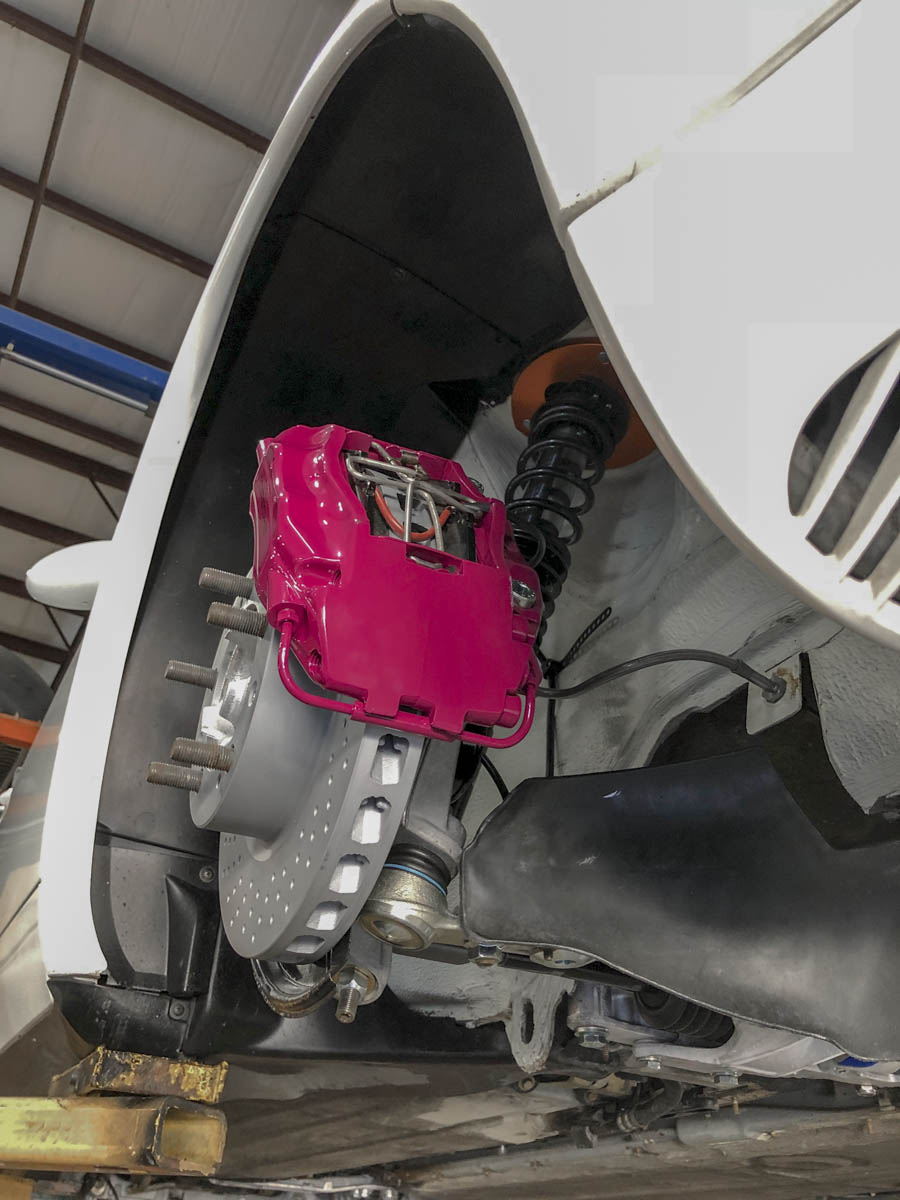
For the coil overs I went with AST 5100s with their top hats front and rear. For those unfamiliar with AST they're a sister brand to Moton and produced in the Netherlands. Here in the states they're marketing more towards the street consumer whereas Moton is their more track focused brand. This car will primarily be a street / summer trip to the mountains car I didn't feel I needed double or triple adjustable suspension, adjustable rebound should be more than enough. I'm quite pleased with the quality of the kit, there are some specific details such as dowel holes with a post for easier adjustment that I think I prefer over the typical wrenches. Anxious to get the car back on the ground and get some seat time to give some some better feedback of how they perform.
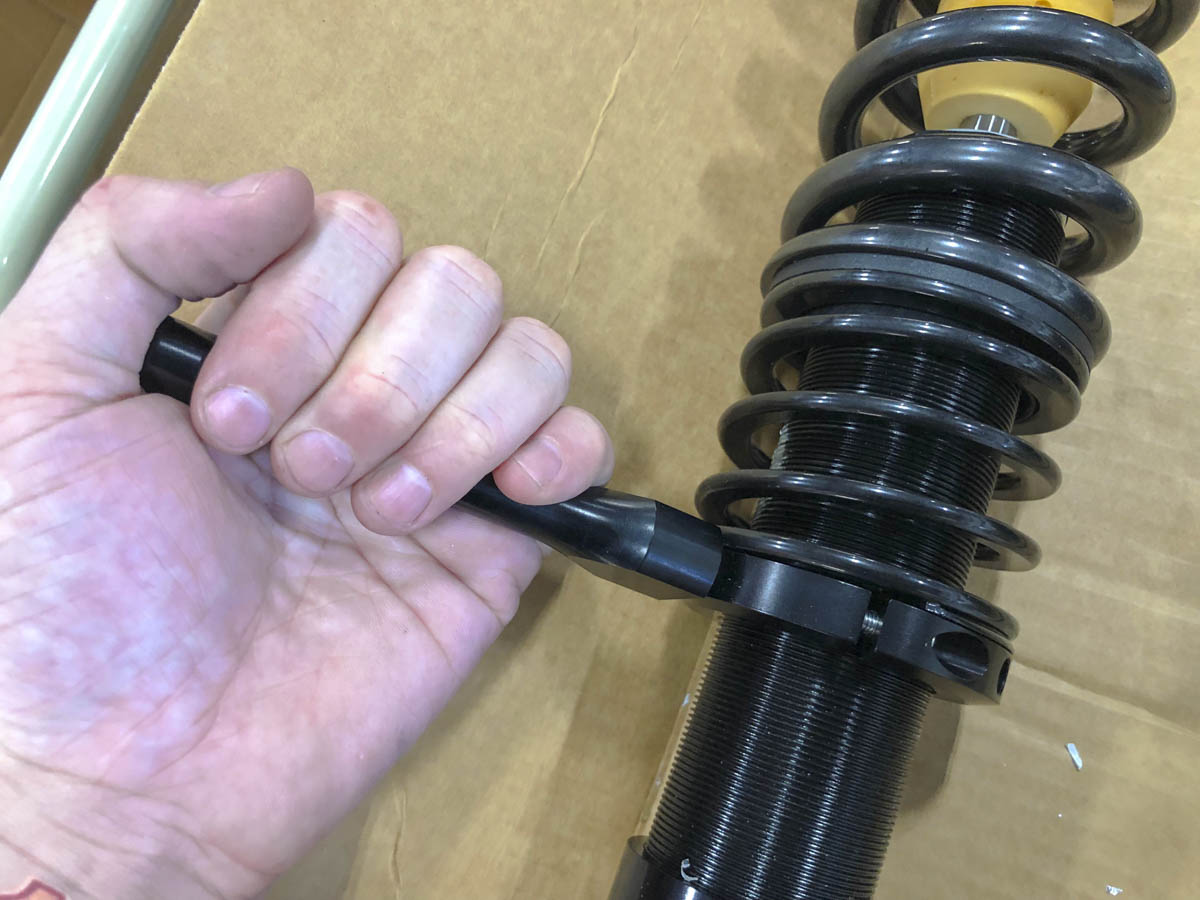
For the coil overs I went with AST 5100s with their top hats front and rear. For those unfamiliar with AST they're a sister brand to Moton and produced in the Netherlands. Here in the states they're marketing more towards the street consumer whereas Moton is their more track focused brand. This car will primarily be a street / summer trip to the mountains car I didn't feel I needed double or triple adjustable suspension, adjustable rebound should be more than enough. I'm quite pleased with the quality of the kit, there are some specific details such as dowel holes with a post for easier adjustment that I think I prefer over the typical wrenches. Anxious to get the car back on the ground and get some seat time to give some some better feedback of how they perform.
__________________
Instagram :Swine11 | TitanMotorsports
Swine11 ReBoot - 964 / 993 Shift Boot Trim Panel
2004 996 GT3 | 1986 Carrera 3.2 (future Keen Project) | 2016 Cayenne Diesel
Instagram :Swine11 | TitanMotorsports
Swine11 ReBoot - 964 / 993 Shift Boot Trim Panel
2004 996 GT3 | 1986 Carrera 3.2 (future Keen Project) | 2016 Cayenne Diesel
09-22-2018, 07:21 AM
#48
Rennlist Member
The front suspension came together rather quickly and I'm quite happy with the results to see the least. A recap of the updates upfront; front control arm bushings are Rennline, Ball joints new Lemfoerder units, Elephant Racing Bump Steer kit, ATE brake rotors, Textar Pads, Goodridge Brake lines and Rothsport Steering rack bushings.
For the coil overs I went with AST 5100s with their top hats front and rear. For those unfamiliar with AST they're a sister brand to Moton and produced in the Netherlands. Here in the states they're marketing more towards the street consumer whereas Moton is their more track focused brand. This car will primarily be a street / summer trip to the mountains car I didn't feel I needed double or triple adjustable suspension, adjustable rebound should be more than enough. I'm quite pleased with the quality of the kit, there are some specific details such as dowel holes with a post for easier adjustment that I think I prefer over the typical wrenches. Anxious to get the car back on the ground and get some seat time to give some some better feedback of how they perform.
For the coil overs I went with AST 5100s with their top hats front and rear. For those unfamiliar with AST they're a sister brand to Moton and produced in the Netherlands. Here in the states they're marketing more towards the street consumer whereas Moton is their more track focused brand. This car will primarily be a street / summer trip to the mountains car I didn't feel I needed double or triple adjustable suspension, adjustable rebound should be more than enough. I'm quite pleased with the quality of the kit, there are some specific details such as dowel holes with a post for easier adjustment that I think I prefer over the typical wrenches. Anxious to get the car back on the ground and get some seat time to give some some better feedback of how they perform.

 09-24-2018, 09:10 PM
#51
The front suspension came together rather quickly and I'm quite happy with the results to see the least. A recap of the updates upfront; front control arm bushings are Rennline, Ball joints new Lemfoerder units, Elephant Racing Bump Steer kit, ATE brake rotors, Textar Pads, Goodridge Brake lines and Rothsport Steering rack bushings.
09-24-2018, 10:30 PM
#52
Basic Sponsor
Rennlist
Site Sponsor
Rennlist
Site Sponsor
Thread Starter
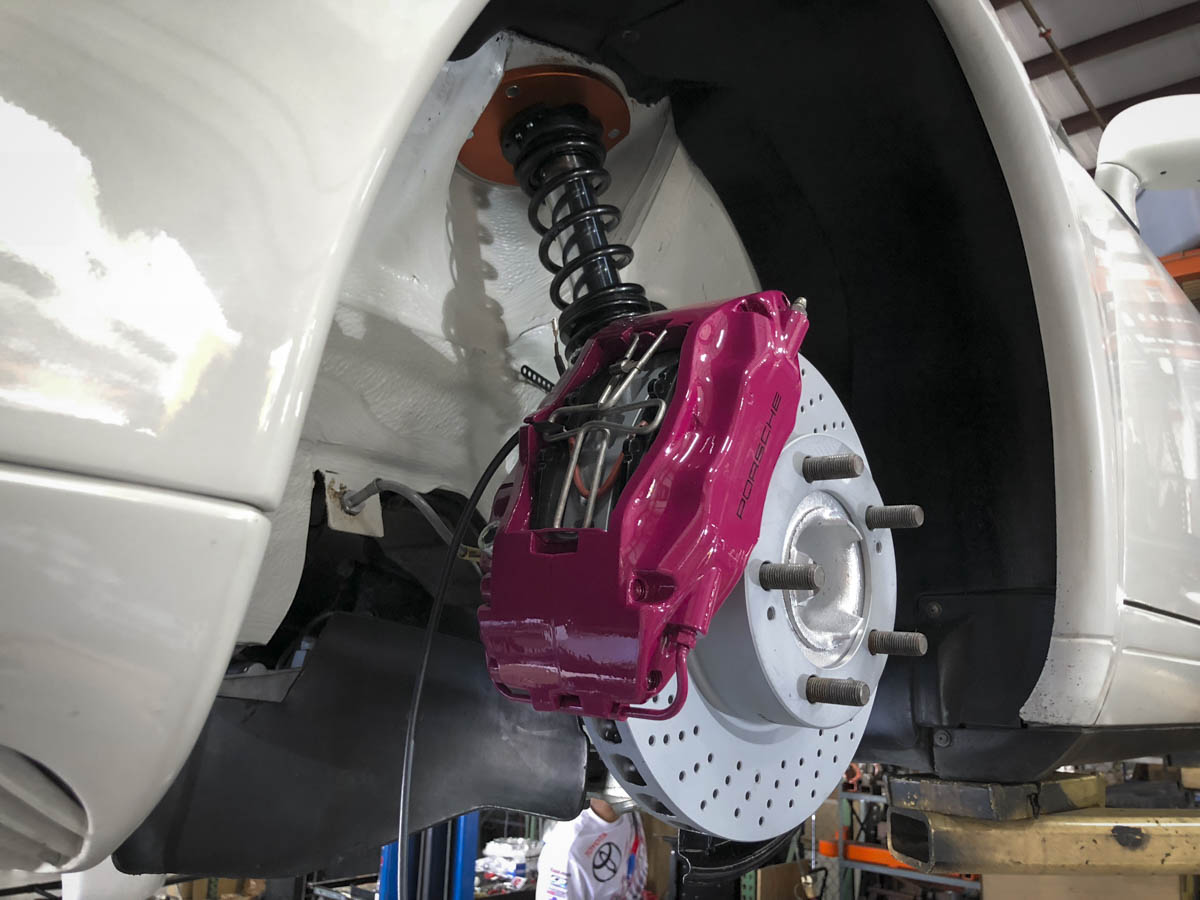
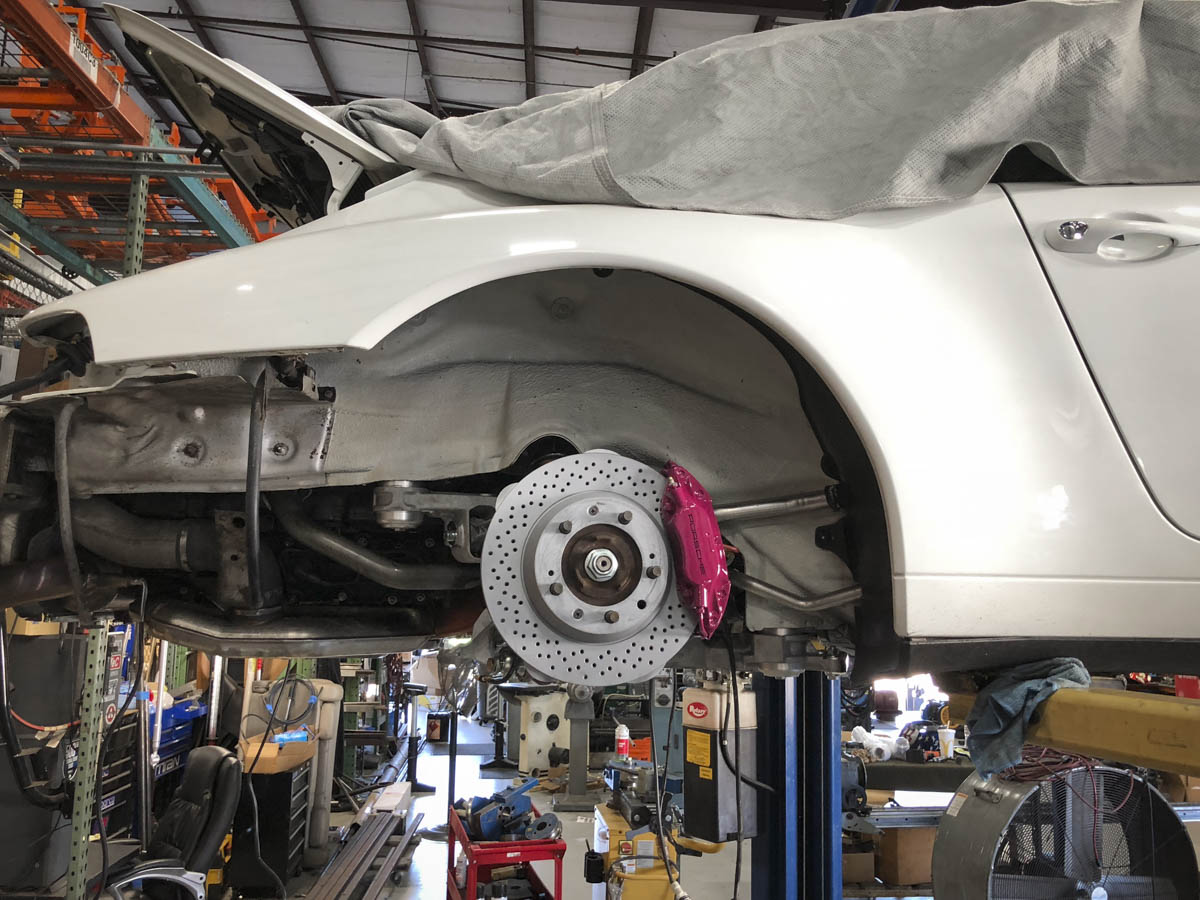
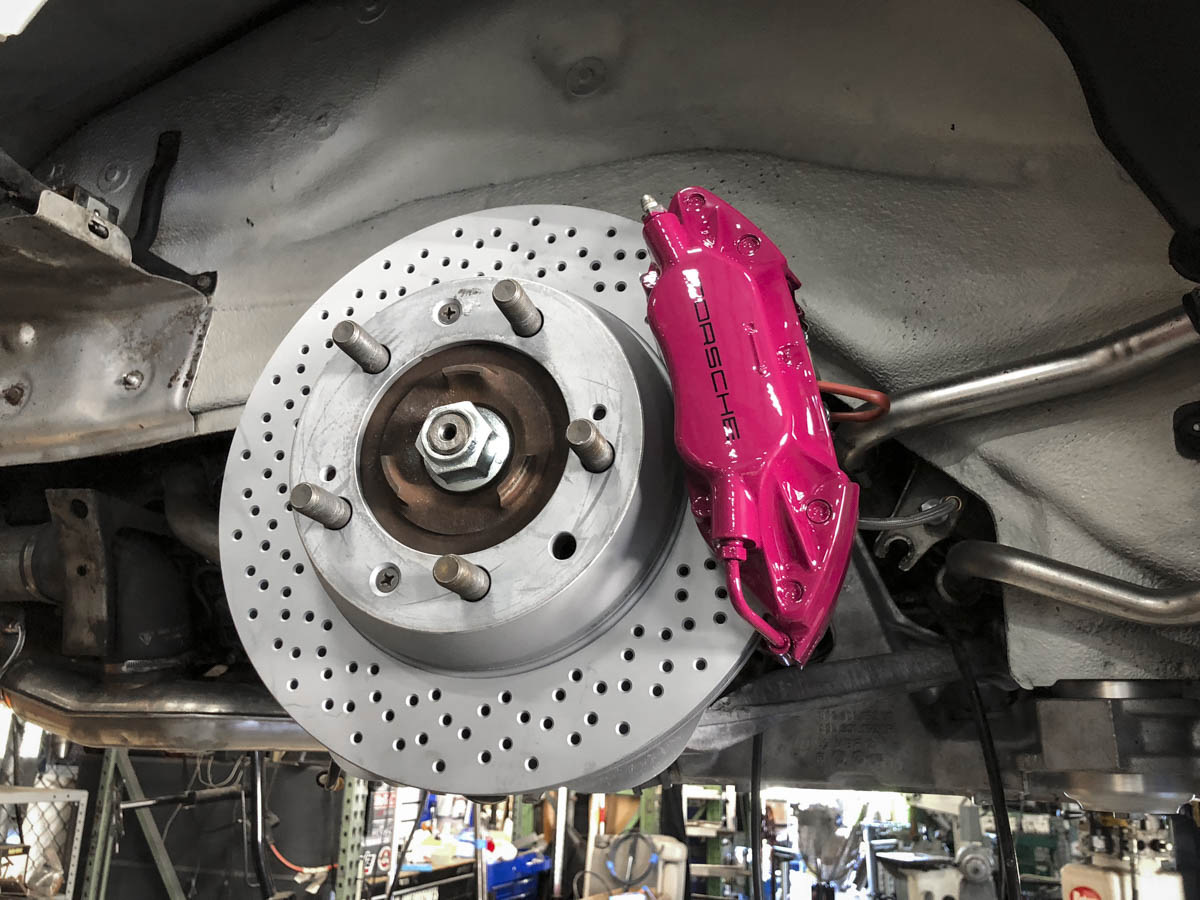
Couldn't resist a photo opportunity while I waited for the correct fronts to get delivered from WorldPac(notice no pads installed yet). Good eye.
Last edited by onelove; 09-24-2018 at 11:01 PM.
09-24-2018, 10:48 PM
#53
Basic Sponsor
Rennlist
Site Sponsor
Rennlist
Site Sponsor
Thread Starter
I've finally managed to catch up in real time with my photos and posts and am hoping to make good progress on the rear suspension this week so we can finally get the car on the ground and out of the shop. I've got a ton to do on the interior but just want to win this small battle first.
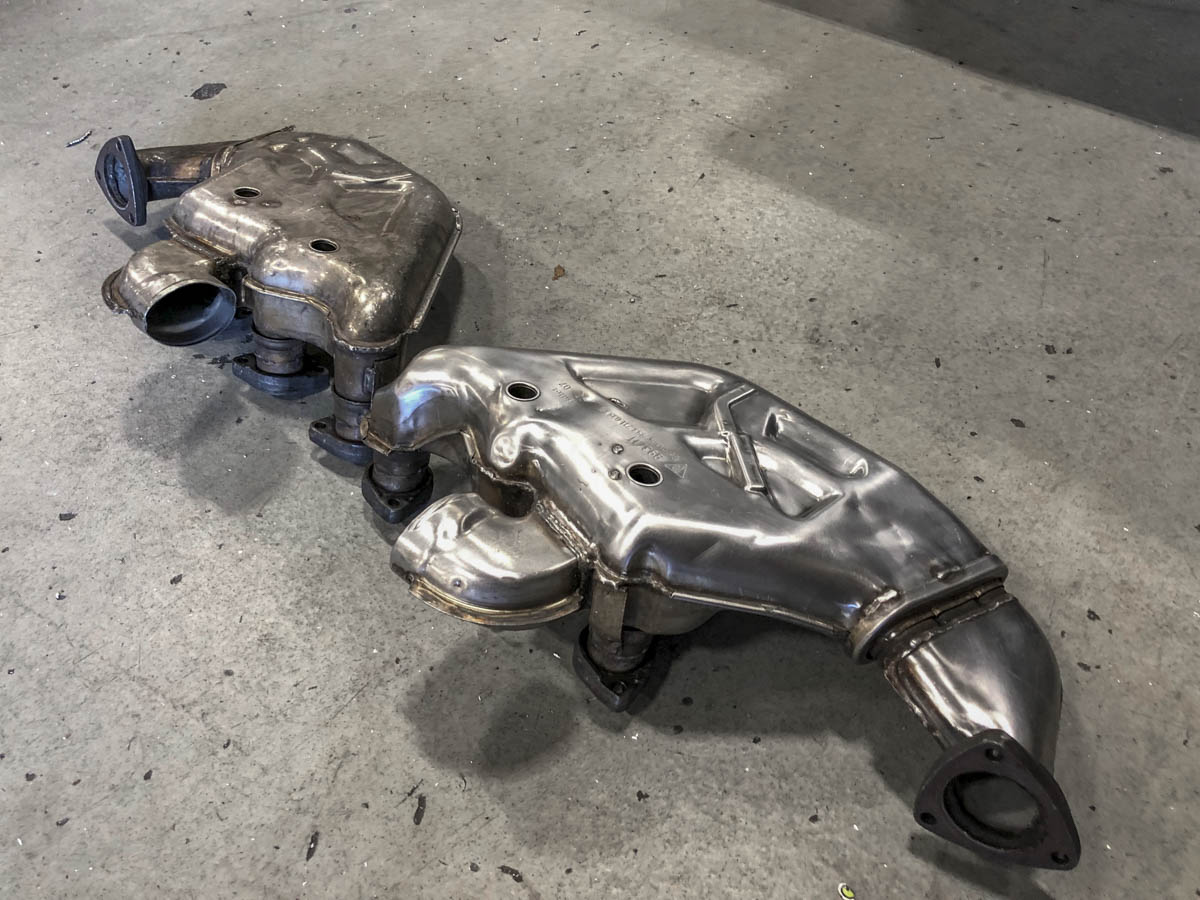
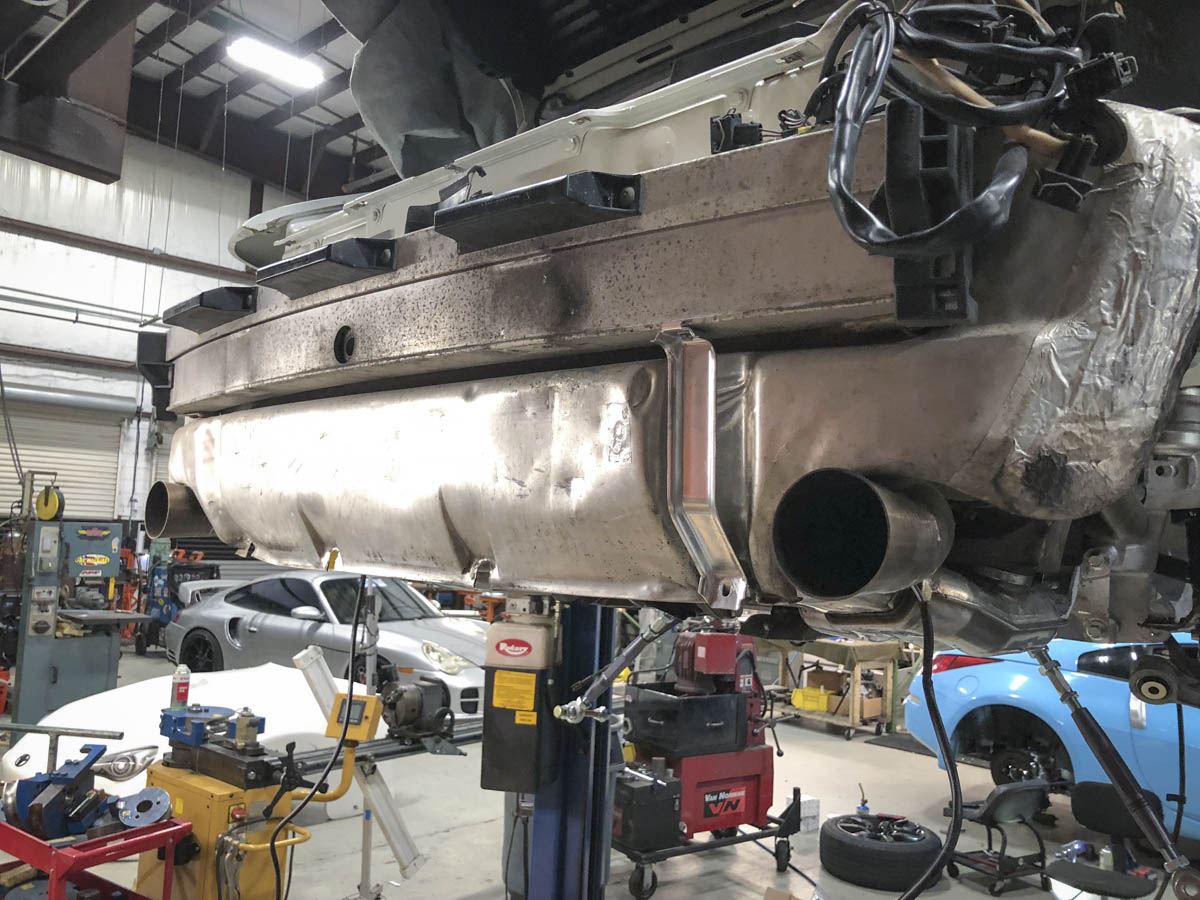
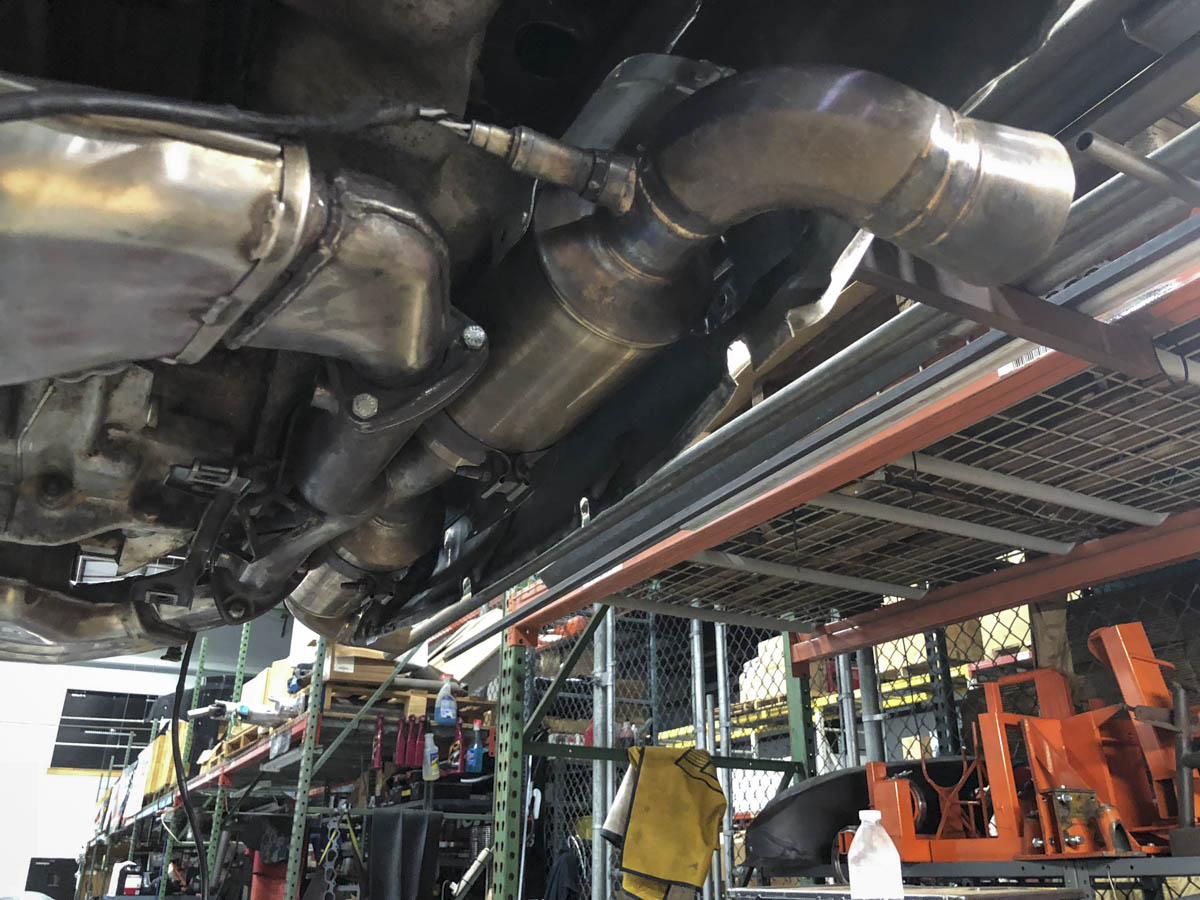
We had fabricated a pair of X-pipe / screamer exhausts for a good friend last year, one for his RWB Porsche and another identical setup for his fathers stock 993. Essentially it was a muffler delete with a hand fabricated X-Pipe and a pair of Burns stainless race mufflers in place of the original cats. His father ended up going with a setup with Mufflers after the fact to quiet things down and his exhaust found a new home on this project..... The only problem is that my car was a Bischoff car, and the exhaust was built for Gillet flanges.

Rather than re-Fabricate the flanges and cut up the exhaust, I tracked down a used set of Gilet heat exchangers on eBay, they arrived in decent condition but a bit greasy on the outside. A few cans of brake clean to get the grease off and I set out to blend the scratched using a small circular sander with a fine Scotch-brite pad. It didn't take much work to get the shine back.
I hand sanded the freshly DA'd head exchanger to give them a more uniform look. This method surprisingly took much less time than I expected, I believe less than 15 minutes to knock out both of them. (I will admit I didn't spend much time on the non-visible side outside of degreasing them).
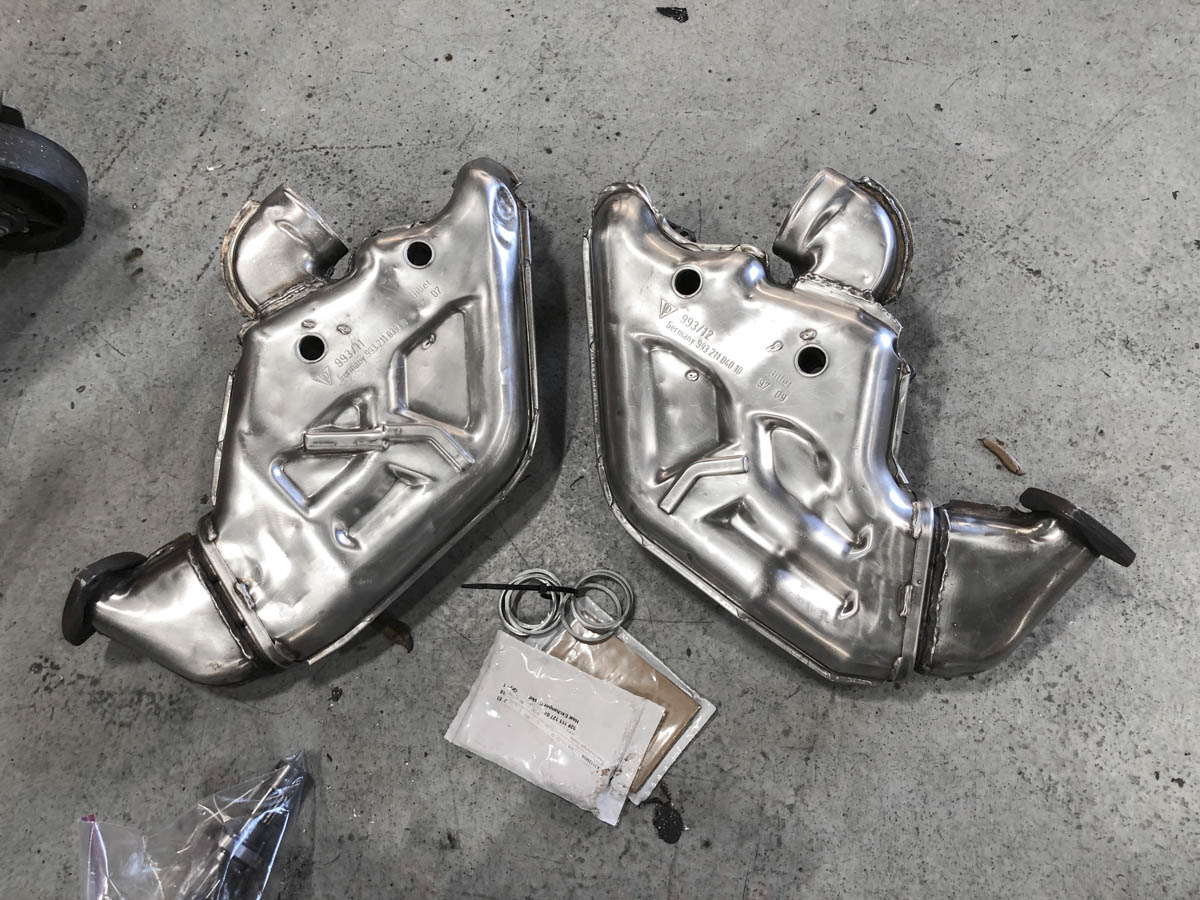
Off with the old, in with the new.
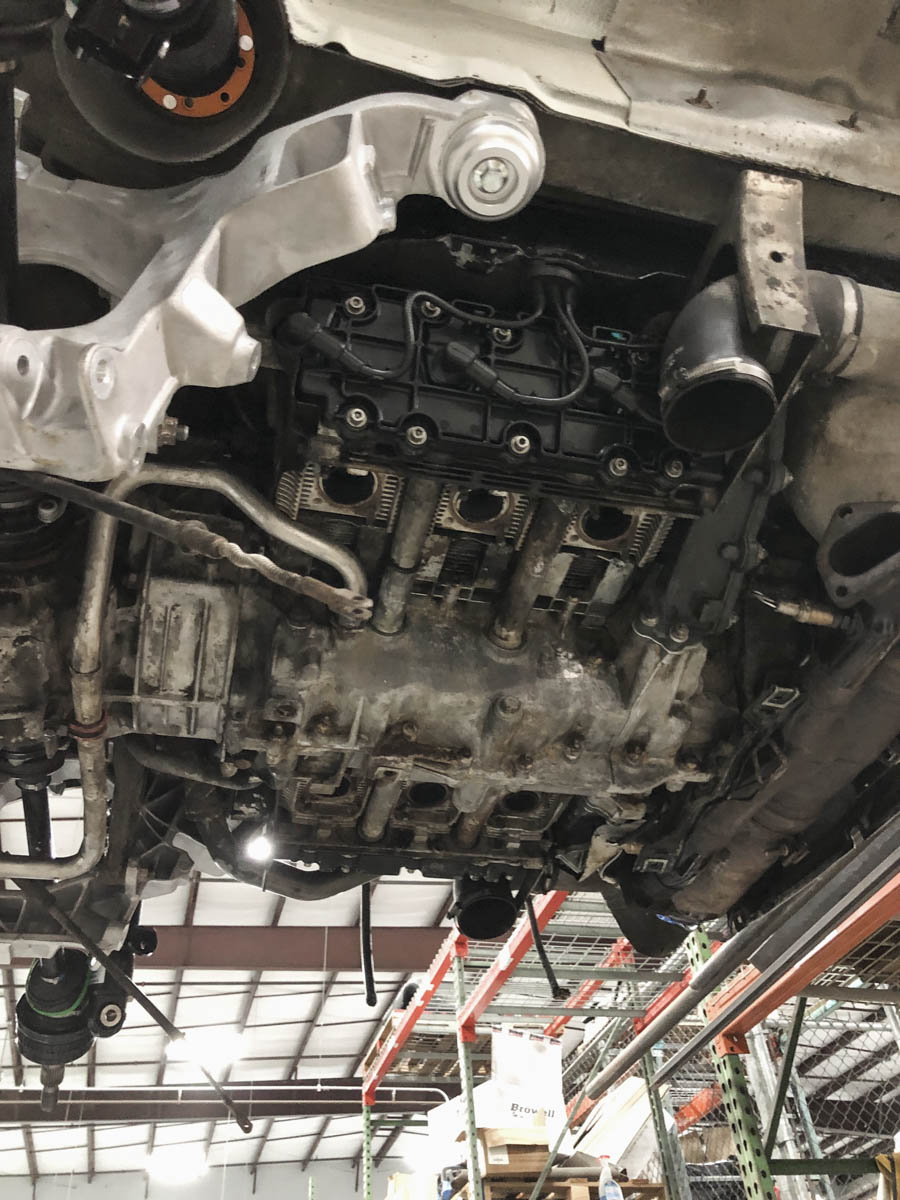
I'm waiting on a fresh pair of O2 sensors to arrive and then I'll work on installing the new exhaust this week. I've got some more cleaning of the transmission and engine block ahead of me for sure but will handle that when I can get the car outside with a pressure washer in tow.
We had fabricated a pair of X-pipe / screamer exhausts for a good friend last year, one for his RWB Porsche and another identical setup for his fathers stock 993. Essentially it was a muffler delete with a hand fabricated X-Pipe and a pair of Burns stainless race mufflers in place of the original cats. His father ended up going with a setup with Mufflers after the fact to quiet things down and his exhaust found a new home on this project..... The only problem is that my car was a Bischoff car, and the exhaust was built for Gillet flanges.
Rather than re-Fabricate the flanges and cut up the exhaust, I tracked down a used set of Gilet heat exchangers on eBay, they arrived in decent condition but a bit greasy on the outside. A few cans of brake clean to get the grease off and I set out to blend the scratched using a small circular sander with a fine Scotch-brite pad. It didn't take much work to get the shine back.
I hand sanded the freshly DA'd head exchanger to give them a more uniform look. This method surprisingly took much less time than I expected, I believe less than 15 minutes to knock out both of them. (I will admit I didn't spend much time on the non-visible side outside of degreasing them).
Off with the old, in with the new.
I'm waiting on a fresh pair of O2 sensors to arrive and then I'll work on installing the new exhaust this week. I've got some more cleaning of the transmission and engine block ahead of me for sure but will handle that when I can get the car outside with a pressure washer in tow.
Last edited by onelove; 09-24-2018 at 11:10 PM.
09-27-2018, 09:45 AM
#55
09-28-2018, 02:46 PM
#56
Drifting
Great project and looking great!
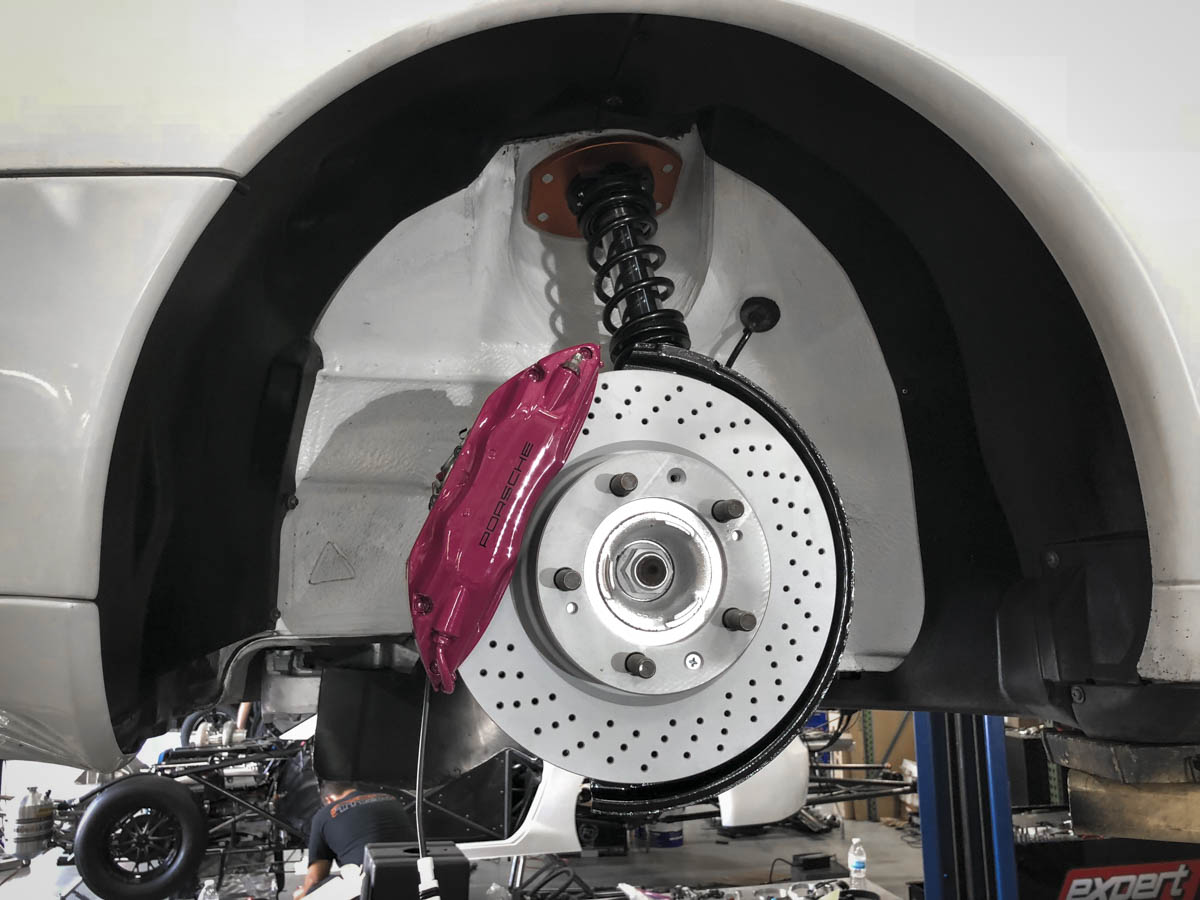
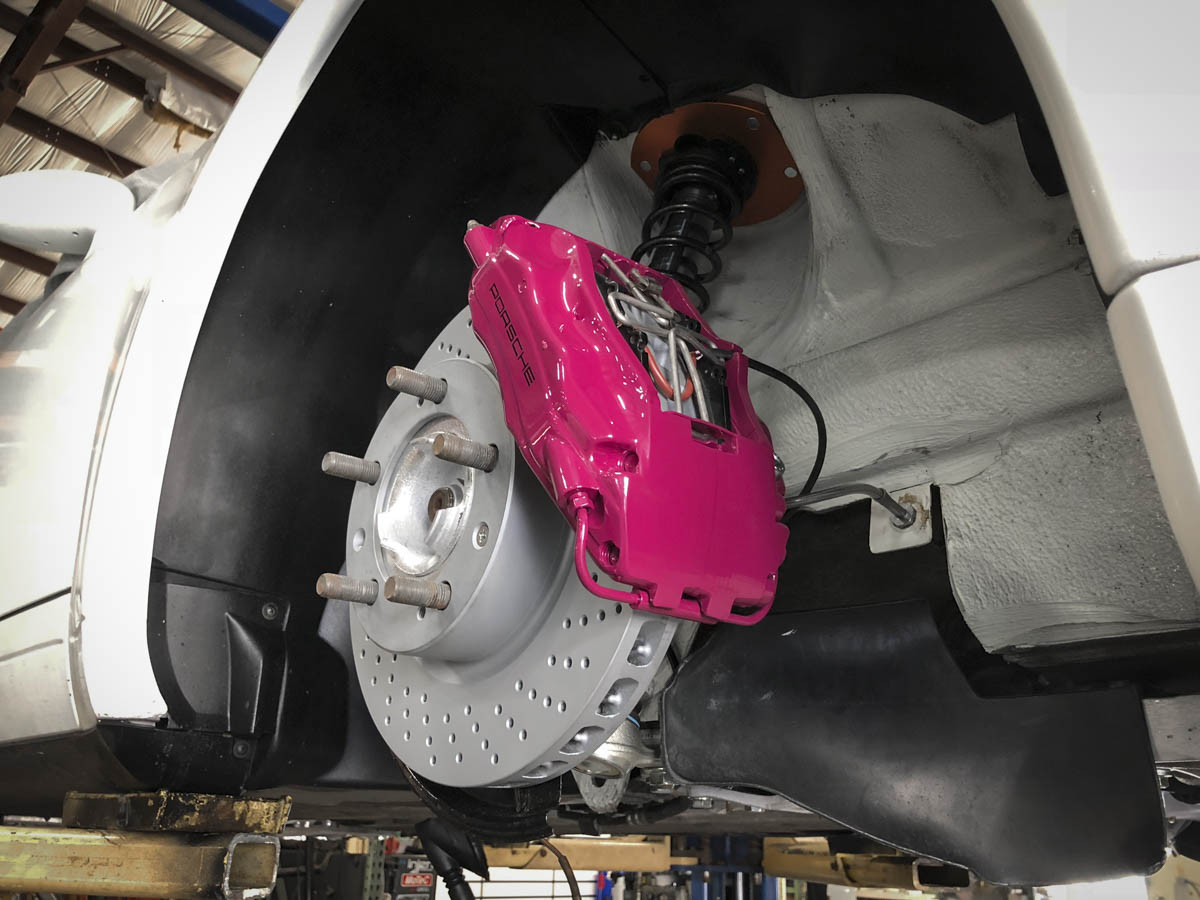
However, the front rotors are on backwards and need to be swapped around.
However, the front rotors are on backwards and need to be swapped around.
09-28-2018, 04:41 PM
#57
Basic Sponsor
Rennlist
Site Sponsor
Rennlist
Site Sponsor
Thread Starter
 I was doing a double take myself and my buddy laughed at me and said "you posted the wrong photos".....
 All 4 are correct now, just need some fluid and a good bleed.
09-28-2018, 11:09 PM
#58
Basic Sponsor
Rennlist
Site Sponsor
Rennlist
Site Sponsor
Thread Starter
Having a spare lift has been a real blessing on this one, it wasn't supposed to be on there this long.... unfortunately the race car that normally has a home on that lift arrives home from Australia in a few weeks so my timeframe is coming to an end. Building a new house right now and a 4 post has been on the must have list since the beginning, won't be quite the same but looking forward to it for maintenance and other small jobs!
09-28-2018, 11:29 PM
#60
Basic Sponsor
Rennlist
Site Sponsor
Rennlist
Site Sponsor
Thread Starter
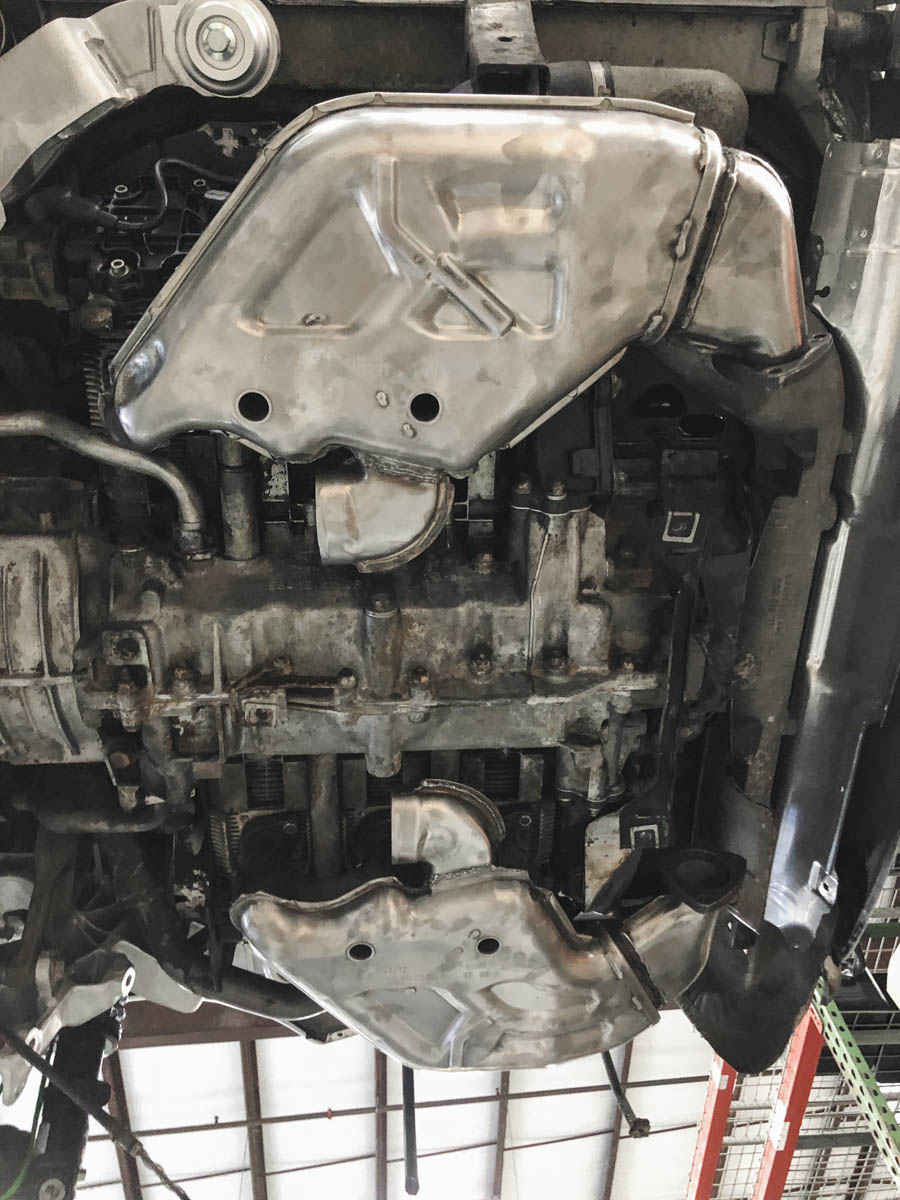
Center section of the exhaust installed, decided to just give it a wipe down to keep the nice rainbow'd stainless look in tact. Unfortunately the 2 primary oxygen sensors I had ordered didn't arrive until today, and the rear bumper still needs a re-spray before I can make sure everything is in perfect alignment.
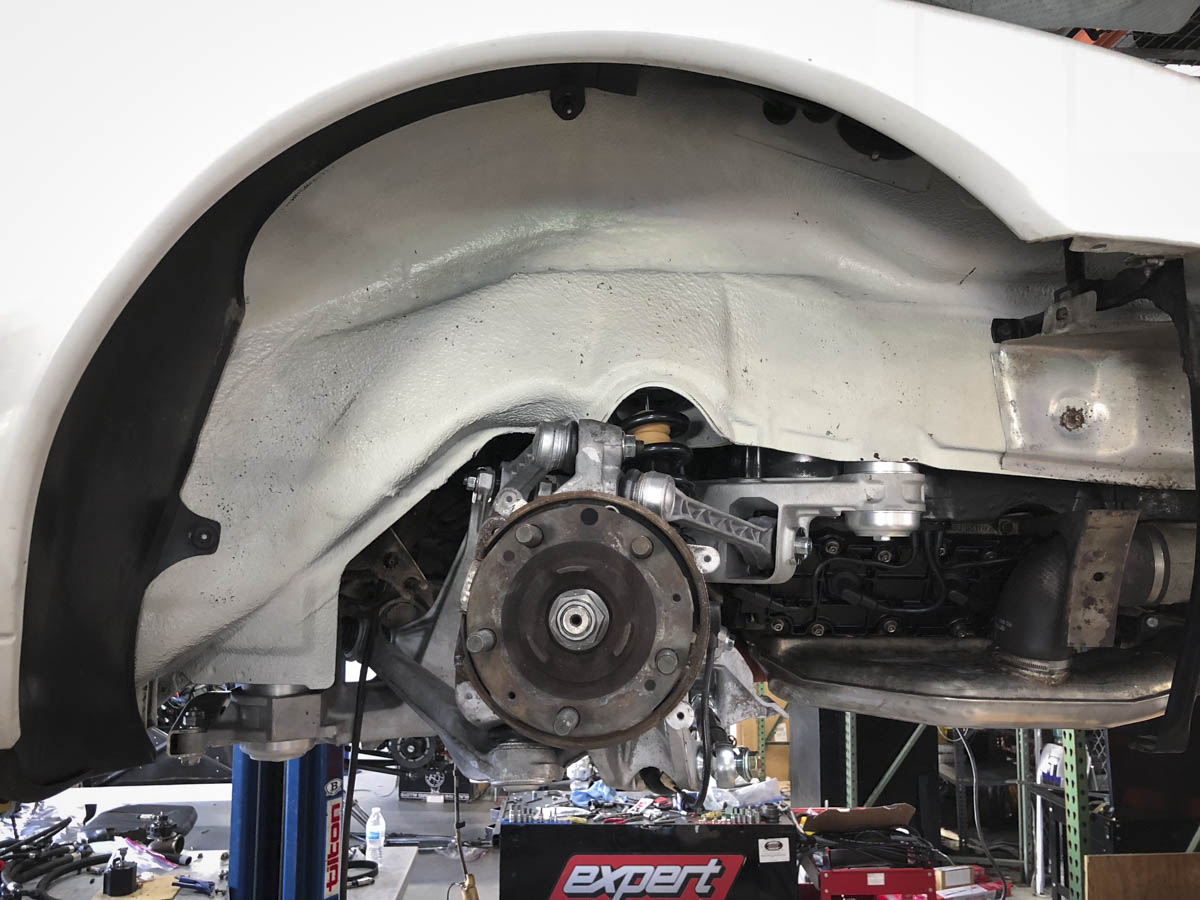
Cleaned and re-Greased the rear ball joints and installed the new Rennline HD bushings in all of the appropriate arms. Also took some time to get the Rennline rear toe arms assembled and mounted on the car with the lock out plates we made.
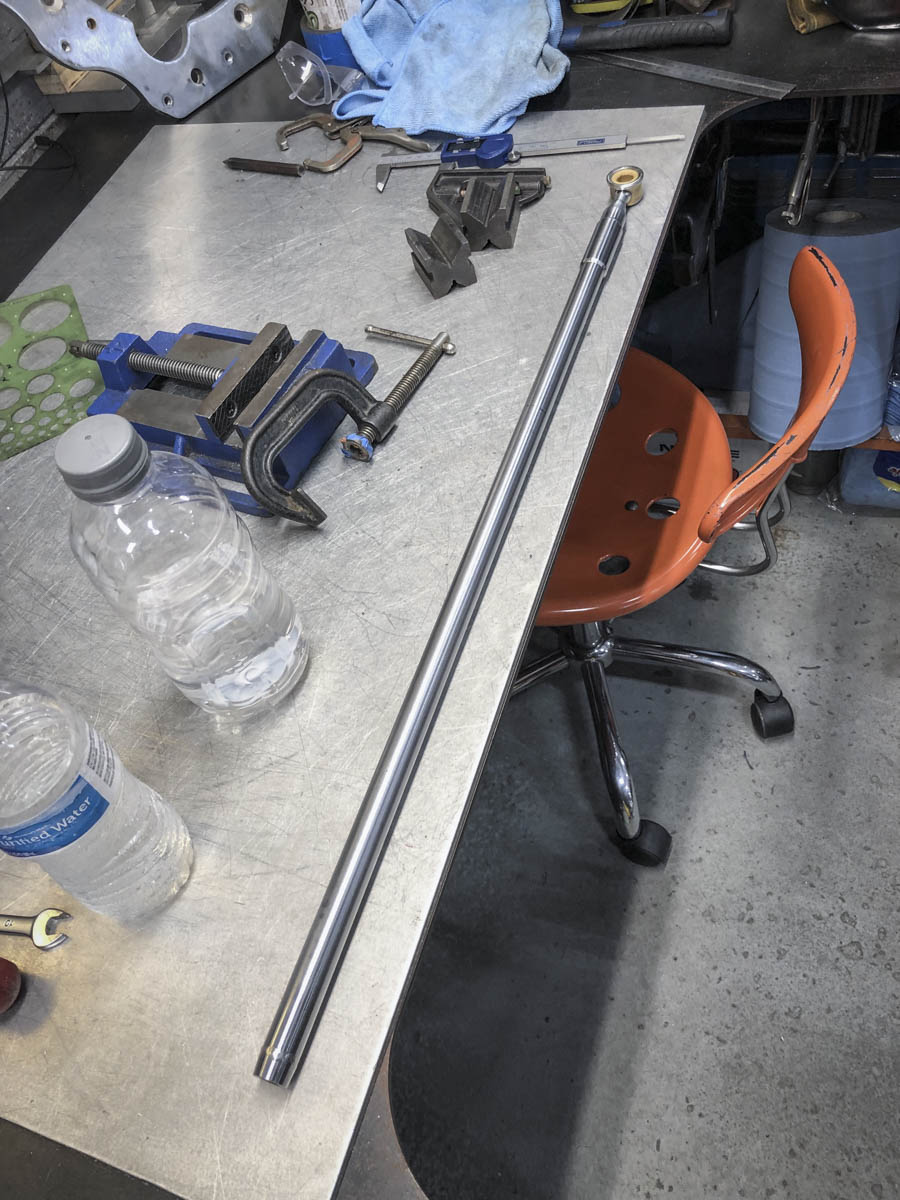
Another loose end was making the front short shift rod, the previous owner had just replaced the OEM rod so I kept the ball joint in place for the time being.
The passengers side rear primarily together, there were a few battles with rusty and stuck bolt that will now be a thing of the past with nearly all of the hardware re-finished.
Unfortunately the smallest part of the car went missing the drivers side, a 1.5mm x 6mm bushing for the e-brake, it was quicker to make than buy so a replacement was made on the lathe today and we'll work on finishing the drivers side and buckling up the suspension re-assembly next week so we can get some fresh fluids installed and finally see this project sitting with 4 wheels on the ground.
Cleaned and re-Greased the rear ball joints and installed the new Rennline HD bushings in all of the appropriate arms. Also took some time to get the Rennline rear toe arms assembled and mounted on the car with the lock out plates we made.
Another loose end was making the front short shift rod, the previous owner had just replaced the OEM rod so I kept the ball joint in place for the time being.
The passengers side rear primarily together, there were a few battles with rusty and stuck bolt that will now be a thing of the past with nearly all of the hardware re-finished.
Unfortunately the smallest part of the car went missing the drivers side, a 1.5mm x 6mm bushing for the e-brake, it was quicker to make than buy so a replacement was made on the lathe today and we'll work on finishing the drivers side and buckling up the suspension re-assembly next week so we can get some fresh fluids installed and finally see this project sitting with 4 wheels on the ground.