Build Thread - Project Swine 93 - My Barnfind Outlaw / RS Inspired 993

The following users liked this post:
C4SJOHN (03-10-2020)
 09-11-2018, 04:36 PM
#32
Basic Sponsor
Rennlist
Site Sponsor
Rennlist
Site Sponsor
Thread Starter
Absolutely. Shoot em an email or PM me, I just created the first bar to verify the jig and everything should be ready to go for a production run in the next week or two (we currently produce a number of mail order bars for other cars as well Supra / GTR / 996/997, etc) .
__________________
Instagram :Swine11 | TitanMotorsports
Swine11 ReBoot - 964 / 993 Shift Boot Trim Panel
2004 996 GT3 | 1986 Carrera 3.2 (future Keen Project) | 2016 Cayenne Diesel
Instagram :Swine11 | TitanMotorsports
Swine11 ReBoot - 964 / 993 Shift Boot Trim Panel
2004 996 GT3 | 1986 Carrera 3.2 (future Keen Project) | 2016 Cayenne Diesel
09-11-2018, 04:59 PM
#33
Rennlist Member
Absolutely. Shoot em an email or PM me, I just created the first bar to verify the jig and everything should be ready to go for a production run in the next week or two (we currently produce a number of mail order bars for other cars as well Supra / GTR / 996/997, etc) .
Thanks,
09-14-2018, 12:54 AM
#34
Basic Sponsor
Rennlist
Site Sponsor
Rennlist
Site Sponsor
Thread Starter
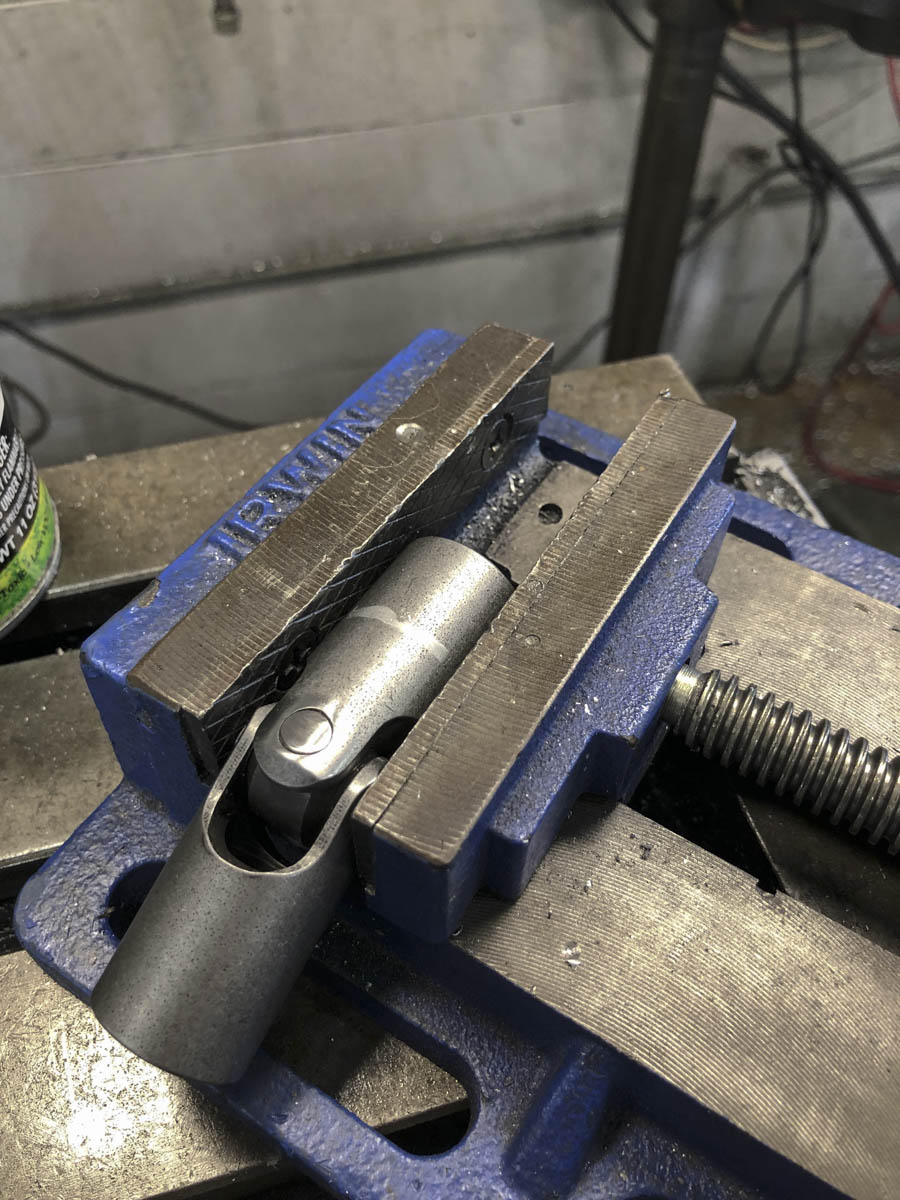
I'm going to preface the next few pictures by saying this. Support the fine people at FD Motorsports, they make a killer product with the Goldenrod.
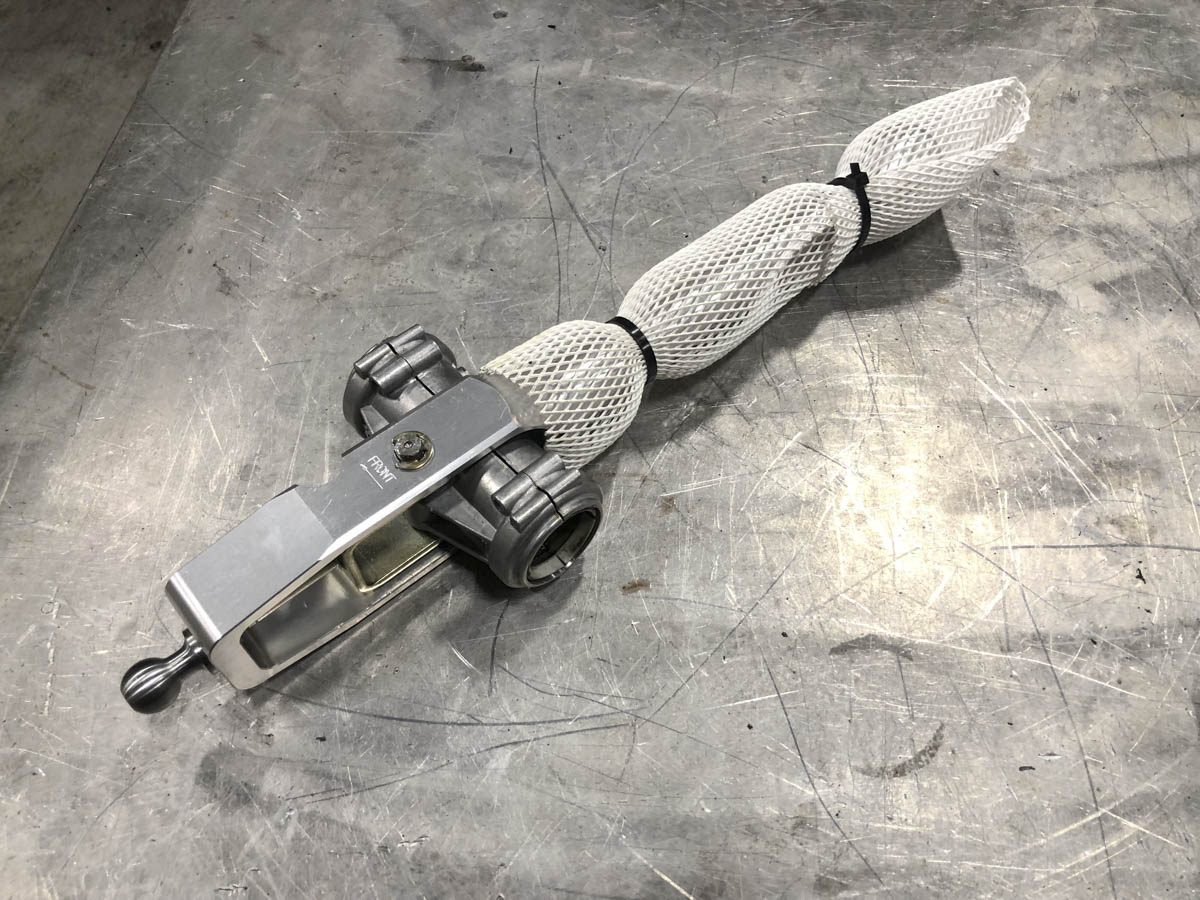
We build some pretty wild drag cars here and I just so happen to have an un-used steering joint laying around so I figured it was a good excuse to make my own shift linkage. This steering joints are made out of quite tough material so the first step of this process in drilling a simple hole was quite a bit of fun.


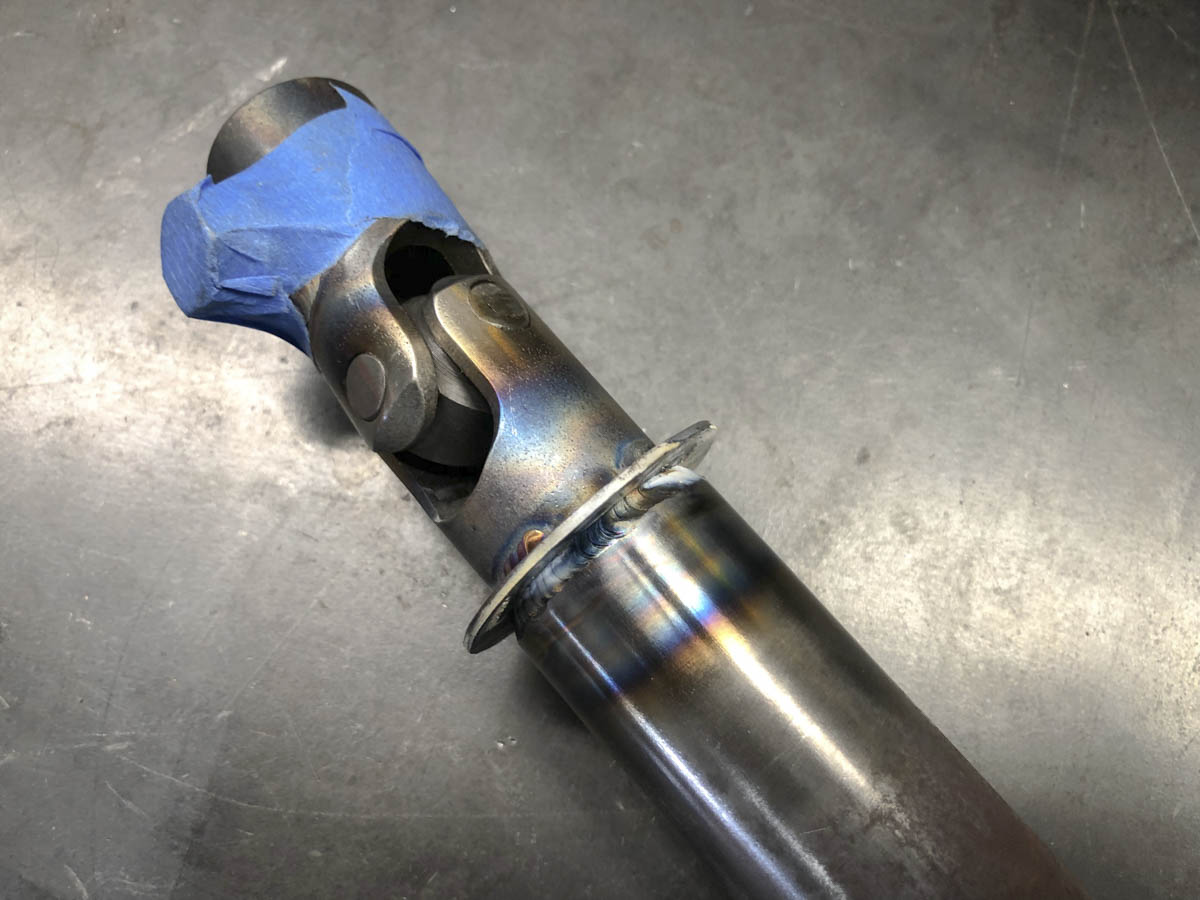
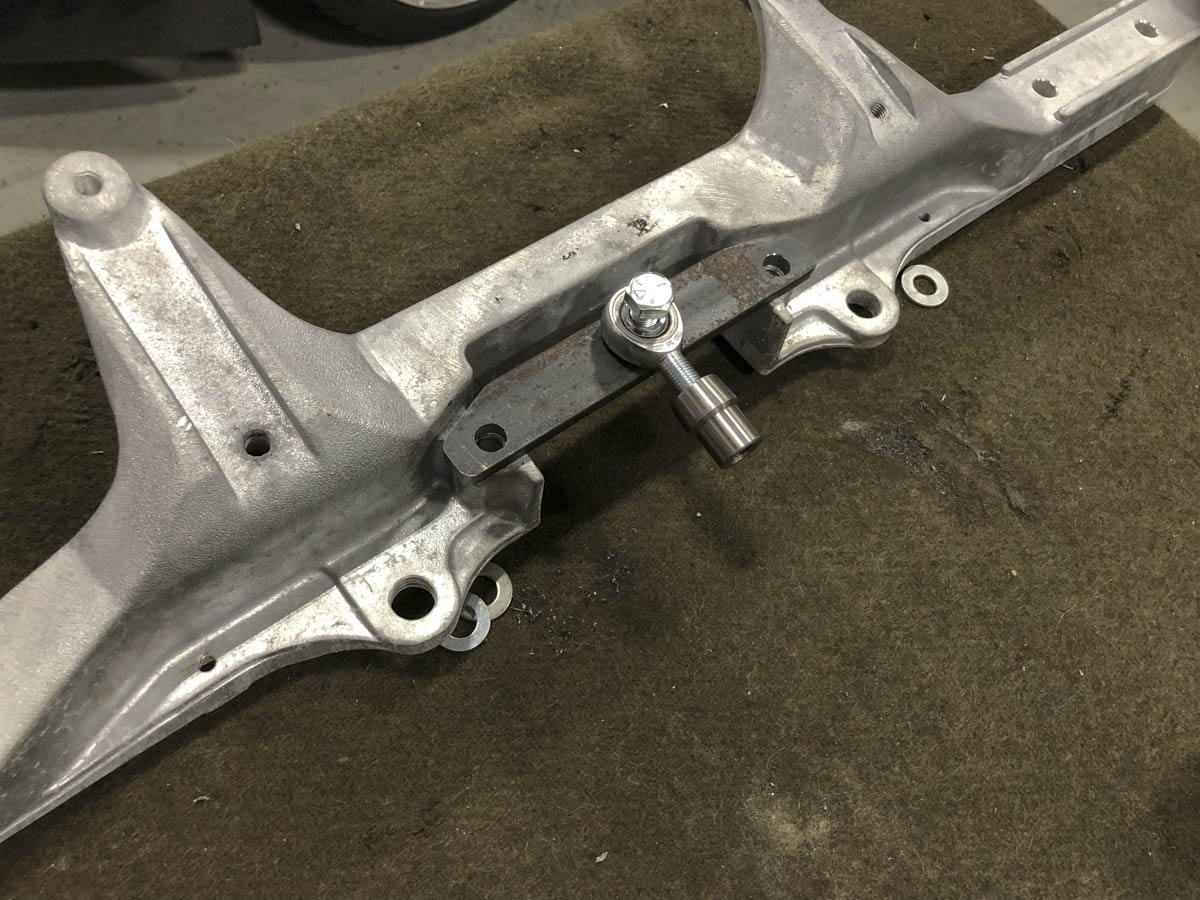
Measure twice, cut once. I re-purposed the forward portion of the shaft and my welder made a tube insert and tag welded everything together at the proper length. A few coats of paint and it's ready to go on the car.
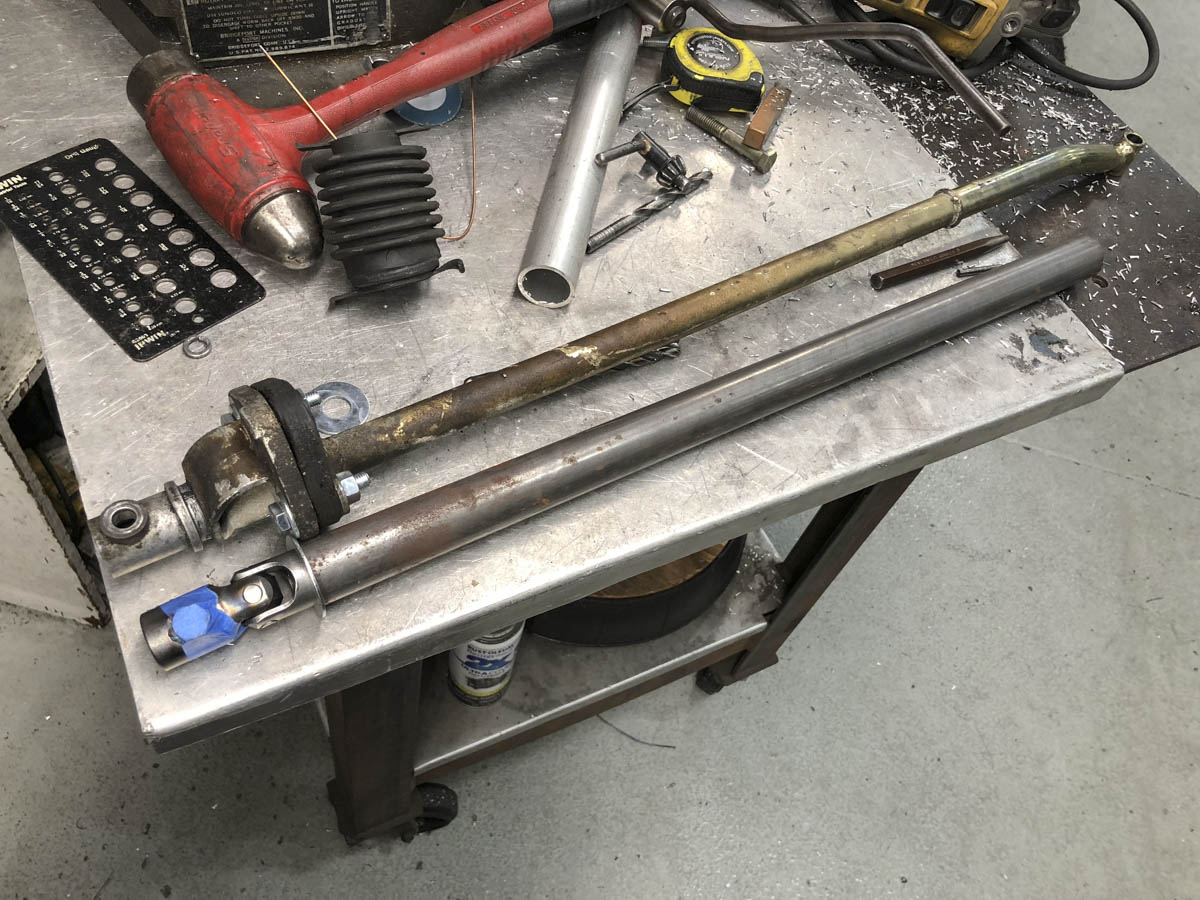
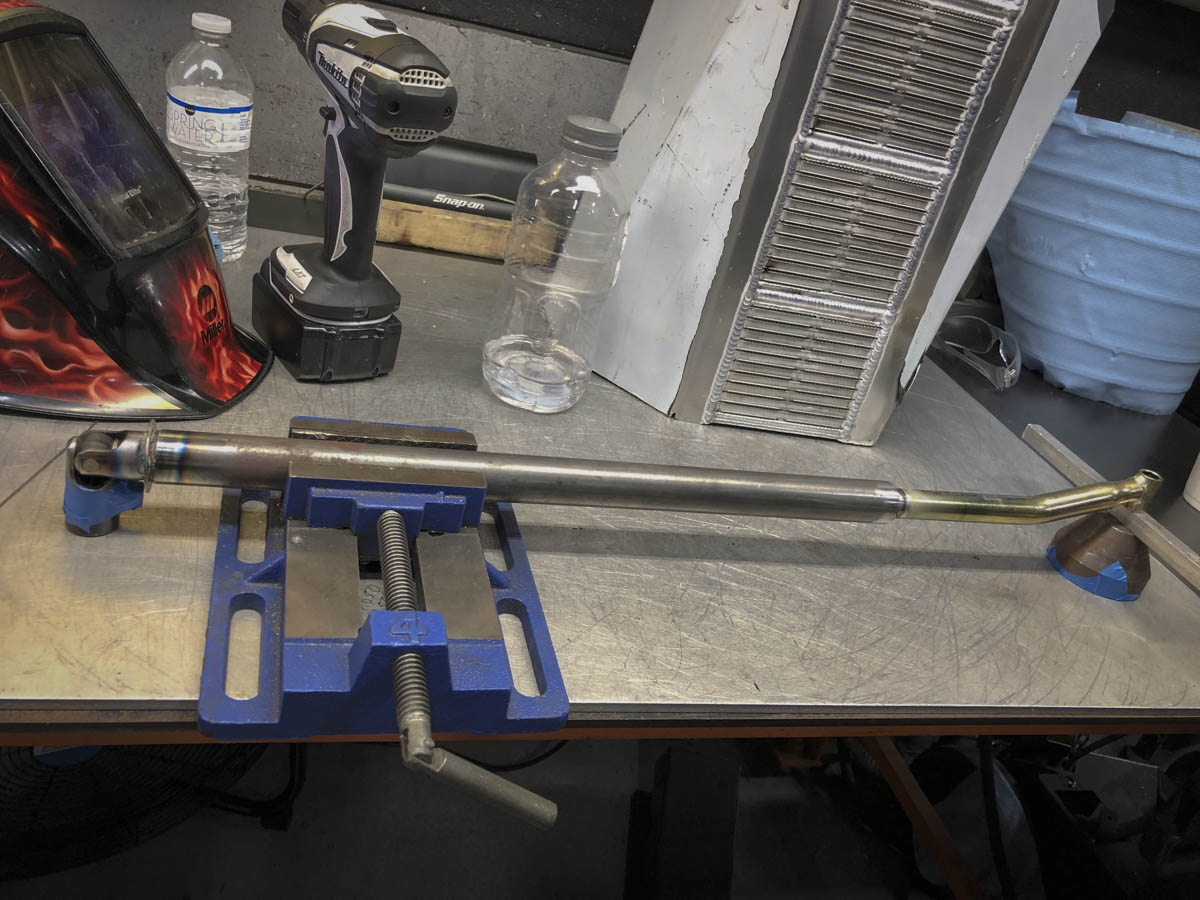
Since I converted from AWD to 2WD I also had to make my own forward rod in the proper length and forward mount. I finished the front section and will finalize spacing, shaft height and the final length of the rod once I get the shifter instaleld.
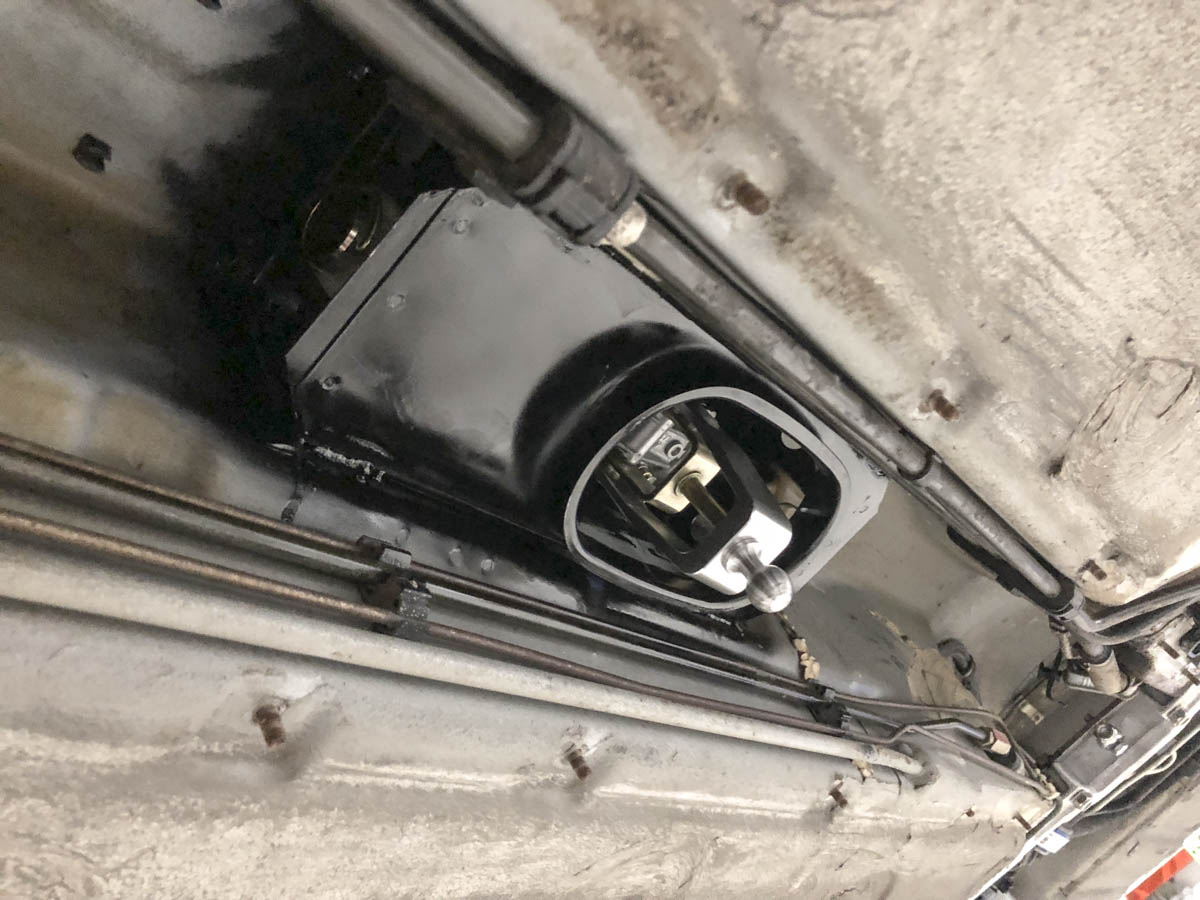
I originally was going to use the stock shifter to help reel in my spending, but after realizing the differences between the C4 and C2 hardware I decided to bite the bullet and get the Rothsport Shifter I've been wanting. We've installed this in a number of cars and I've always love the feel of this shift (although I will defiantly need to keep a sock stashed for our hot summer days).
A lot of people dislike the shift boot solution for this setup.... I've got a really trick solution wrapped up for this that I'll be post more details of once the final production version is in my hands.
Everything finish mounted into the car, I'll tackle the inside another night and get the spacing correct before finalizing the short shift front rod. I will admit that getting the washers and spring clips installed with the sliders was not a fun task.... this defiantly fought me for over an hour but was very satisfying to finally get ti right.
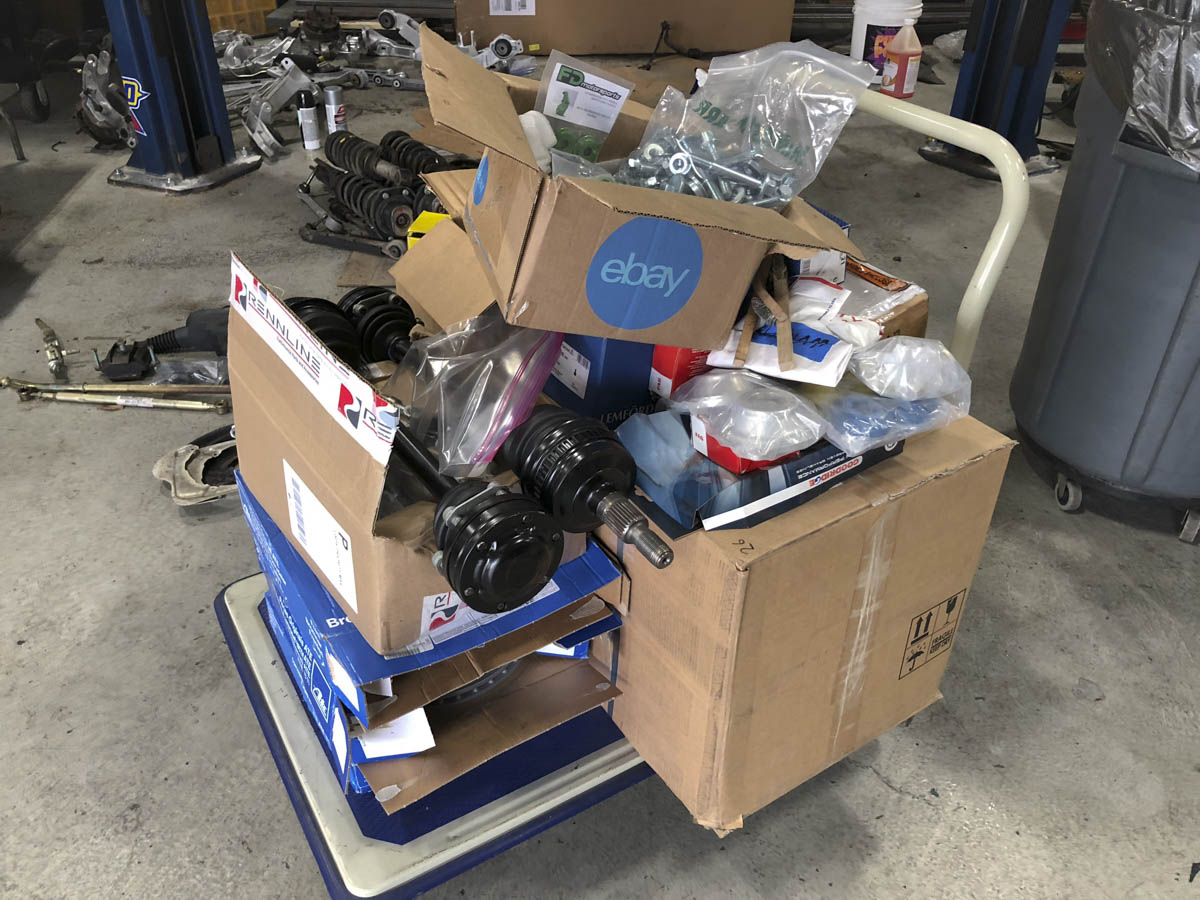
The stack of "ready to install parts" has piled up quite high, it's nice to get to final assembly but have plenty of late nights ahead to finish the suspension portion of the build.
We build some pretty wild drag cars here and I just so happen to have an un-used steering joint laying around so I figured it was a good excuse to make my own shift linkage. This steering joints are made out of quite tough material so the first step of this process in drilling a simple hole was quite a bit of fun.
Measure twice, cut once. I re-purposed the forward portion of the shaft and my welder made a tube insert and tag welded everything together at the proper length. A few coats of paint and it's ready to go on the car.
Since I converted from AWD to 2WD I also had to make my own forward rod in the proper length and forward mount. I finished the front section and will finalize spacing, shaft height and the final length of the rod once I get the shifter instaleld.
I originally was going to use the stock shifter to help reel in my spending, but after realizing the differences between the C4 and C2 hardware I decided to bite the bullet and get the Rothsport Shifter I've been wanting. We've installed this in a number of cars and I've always love the feel of this shift (although I will defiantly need to keep a sock stashed for our hot summer days).
A lot of people dislike the shift boot solution for this setup.... I've got a really trick solution wrapped up for this that I'll be post more details of once the final production version is in my hands.
Everything finish mounted into the car, I'll tackle the inside another night and get the spacing correct before finalizing the short shift front rod. I will admit that getting the washers and spring clips installed with the sliders was not a fun task.... this defiantly fought me for over an hour but was very satisfying to finally get ti right.
The stack of "ready to install parts" has piled up quite high, it's nice to get to final assembly but have plenty of late nights ahead to finish the suspension portion of the build.
09-14-2018, 12:55 AM
#35
Basic Sponsor
Rennlist
Site Sponsor
Rennlist
Site Sponsor
Thread Starter
I'm also very interested in the roll bar. What is the total weight of the bar please, and what price point? I note that you elected not to bend the horizontal bar a bit (like DAS) for more leg room. Interested o know if there is any limitation moving the seats all the way backward.
Thanks,
Thanks,
09-14-2018, 06:23 AM
#36
What a fantastic Thread to read and stop me from doing any Work on a Friday..! Inspirational stuff.. Damn I wish I had a space like that I could do work on my 993 C2 in..
 09-14-2018, 09:30 AM
#37
Rennlist Member
Damn I wish I had the time to work on mine like this!!!
09-14-2018, 11:40 AM
#38
Basic Sponsor
Rennlist
Site Sponsor
Rennlist
Site Sponsor
Thread Starter
Have a 3 year old and very supportive wife.... I definitely don't have the time but make it (a lot of 16 hour days with some family time squeezed in the morning and evening). An hour or two a night a few days a week adds up over time! After this car the next project will defiantly be a 2-3 year rotisserie style long hood that I can spread out a bit more and have some fun dialing in the body as well.

 09-18-2018, 12:08 AM
#40
Basic Sponsor
Rennlist
Site Sponsor
Rennlist
Site Sponsor
Thread Starter
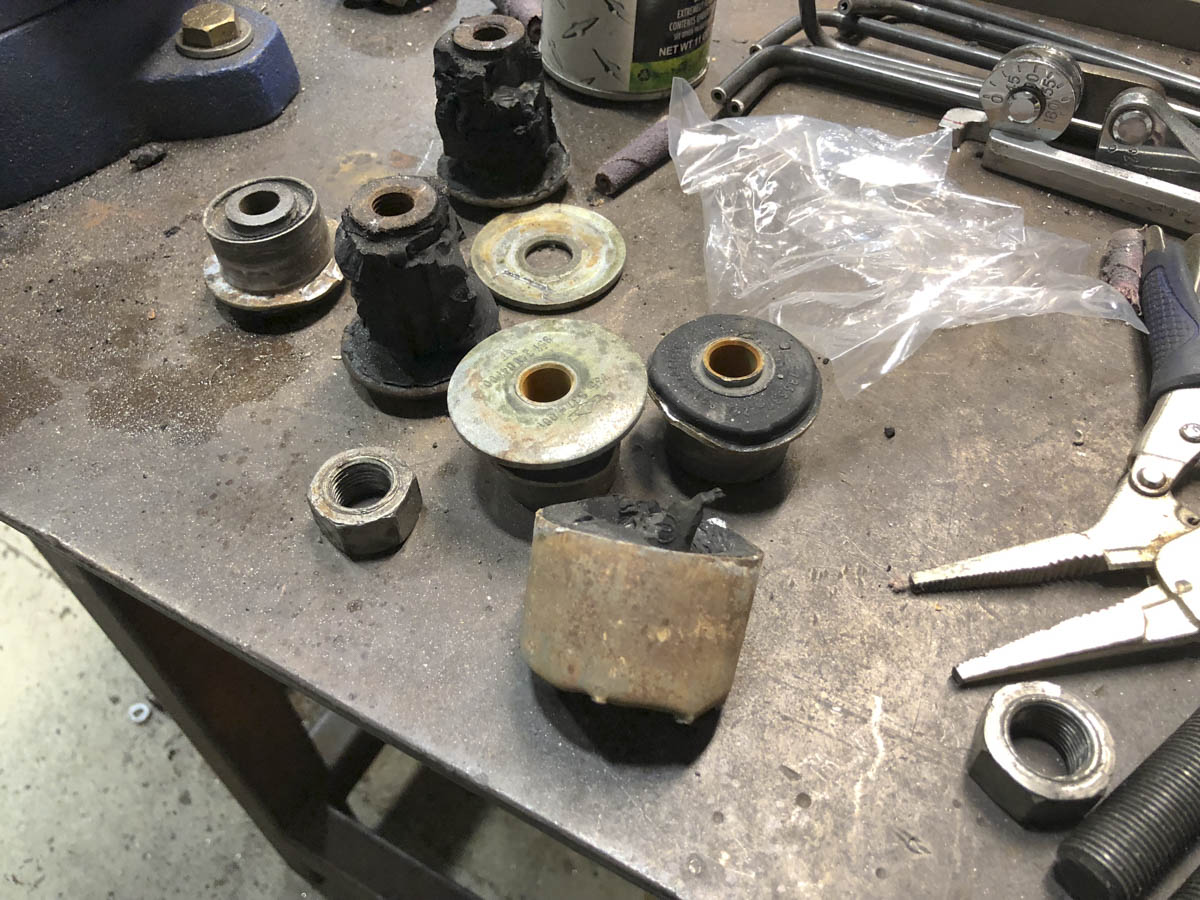
The fun task of removing the old bushings, installing new one and then re-assembling the suspension. There are some tools that make some of these bushings easier, but it's never a fun process.
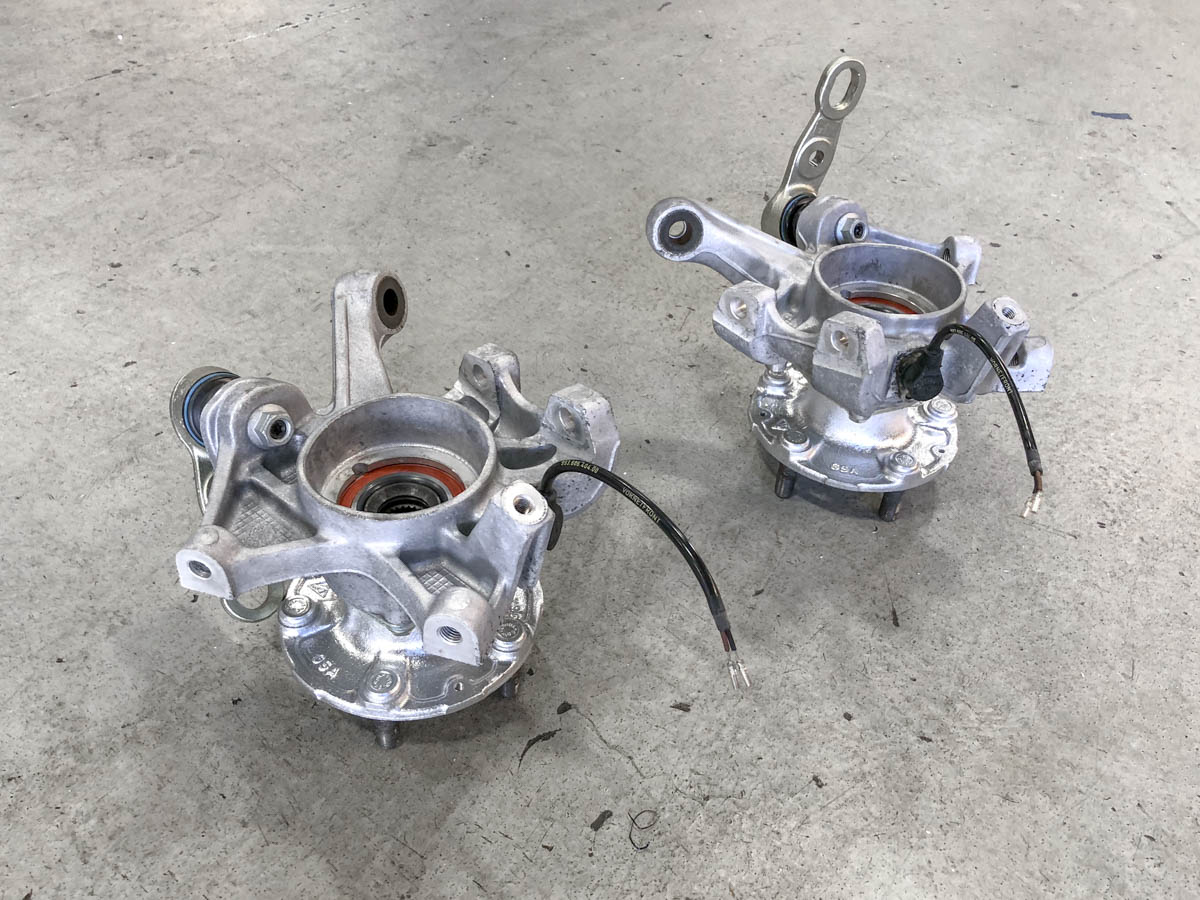
The front carriers with fresh wheel bearings went in and the front hubs got re-assembled. At some point I'd love to upgrade to RS or even better BBi carriers but for now the originals refreshed with the ERP bump steer kit should hold me over.

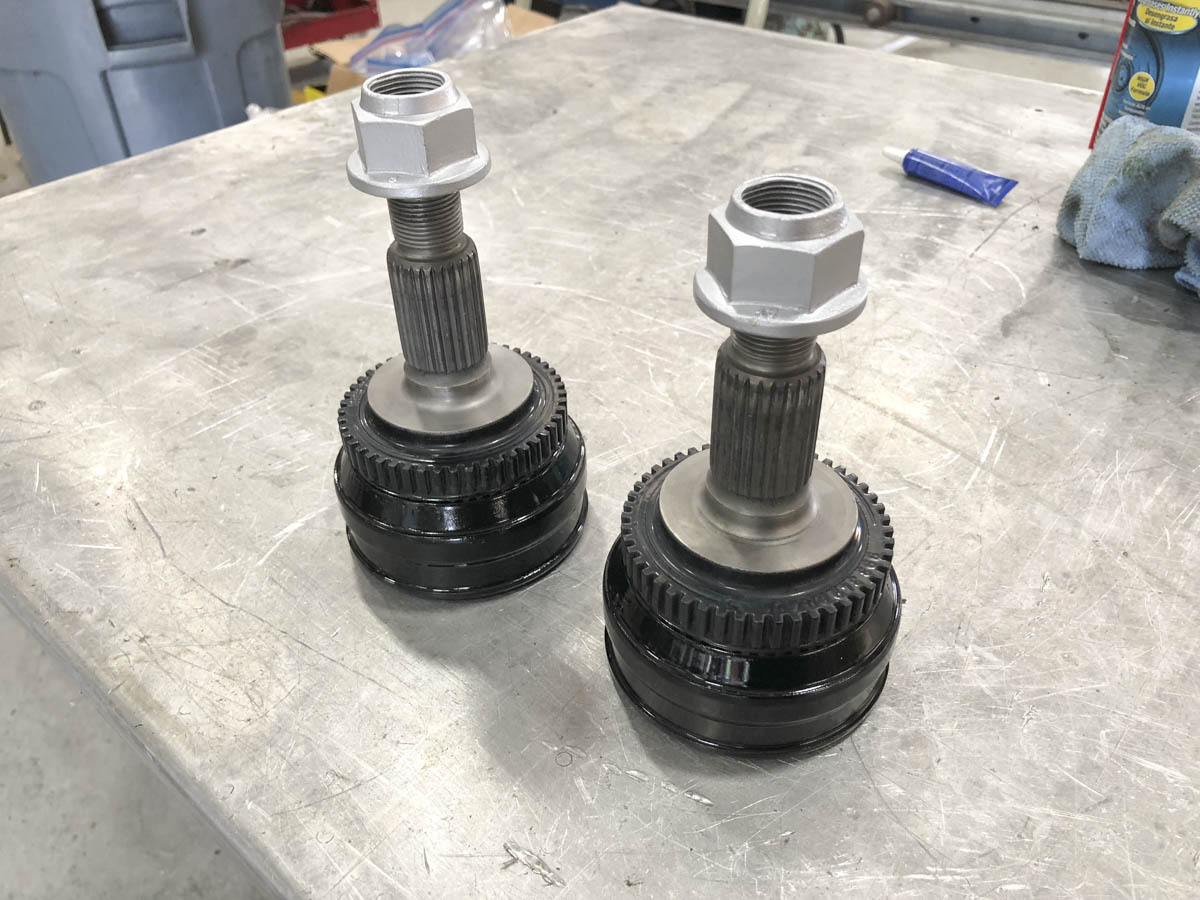
I opted to remove the outer stubs from the old front axles and treat them to a deep cleaning, the savings can go elsewhere. This was the freebie way to handle the front hub portion of the C2 conversion, and outside a slightly heavier part there isn't much downside to me over buying the C2 ABS rings.
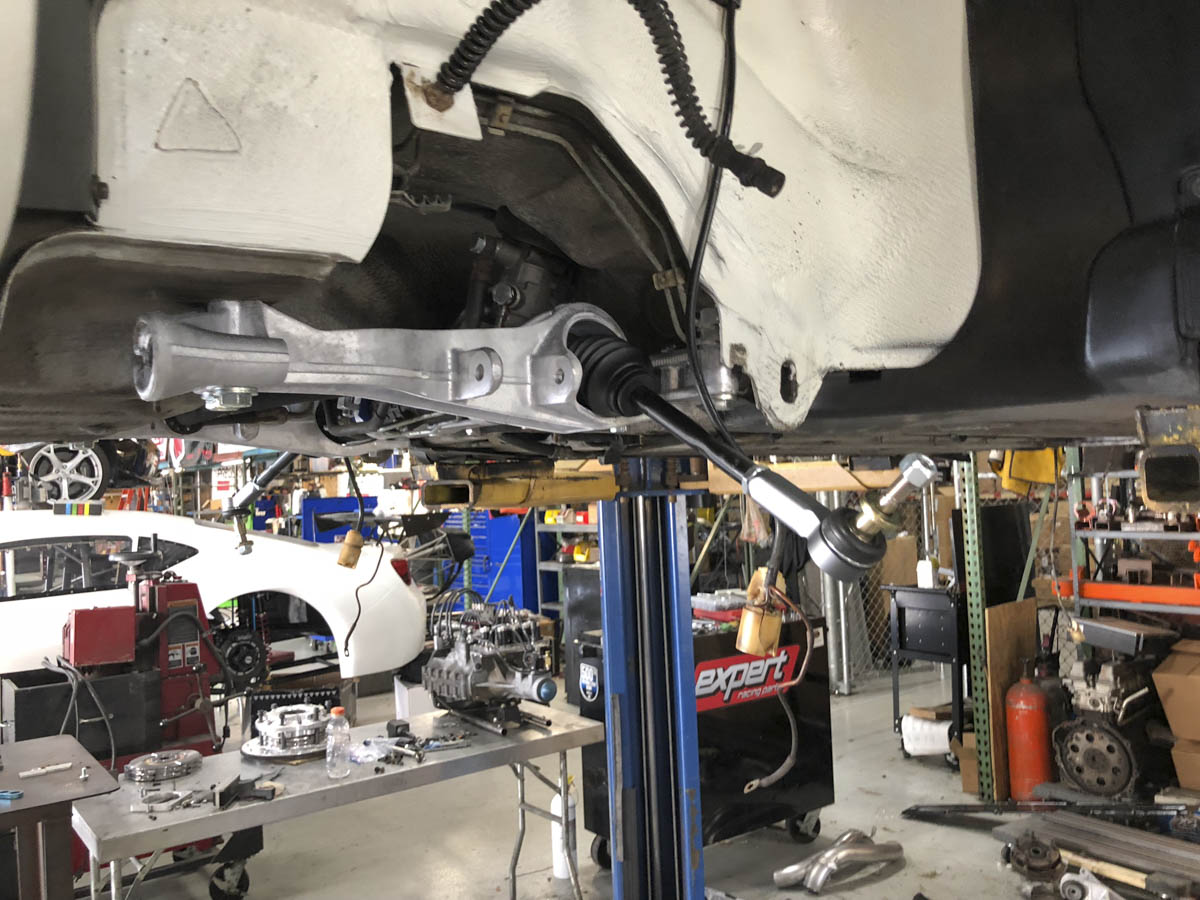
Front subframes and steering rack was next to be installed, the was recently replaced by the previous owner so a deep clean and fresh bushings were all that was needed.
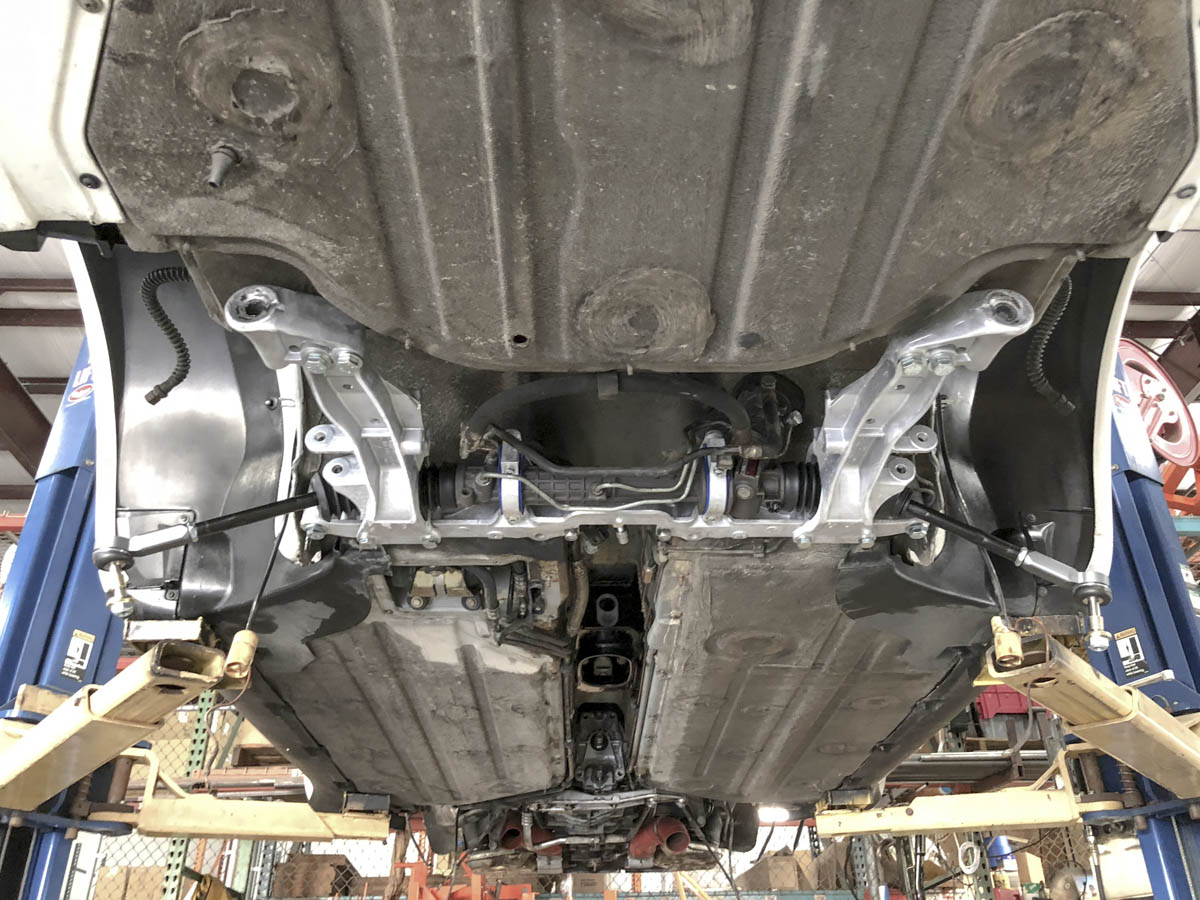
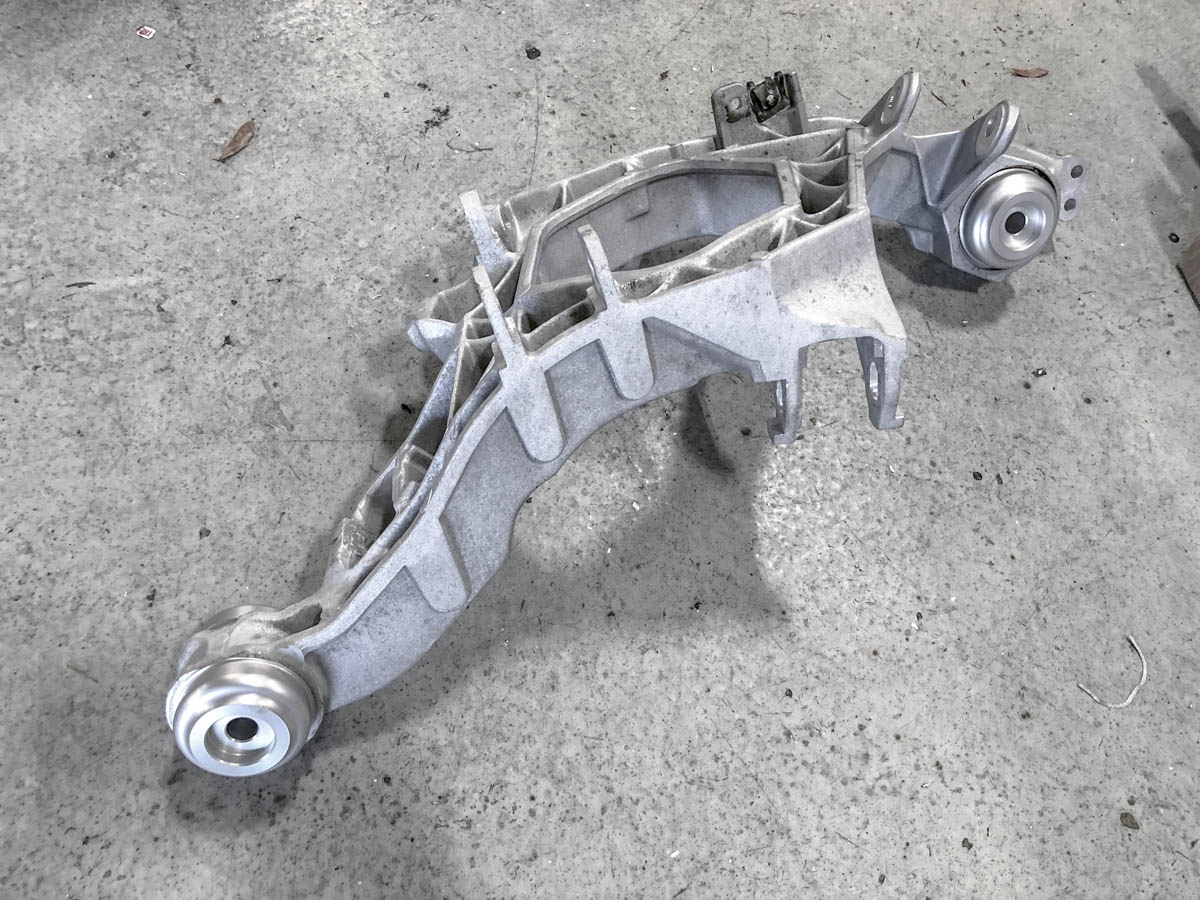
The rear subframe was up next, an air hammer made quick work of the worn original bushings.
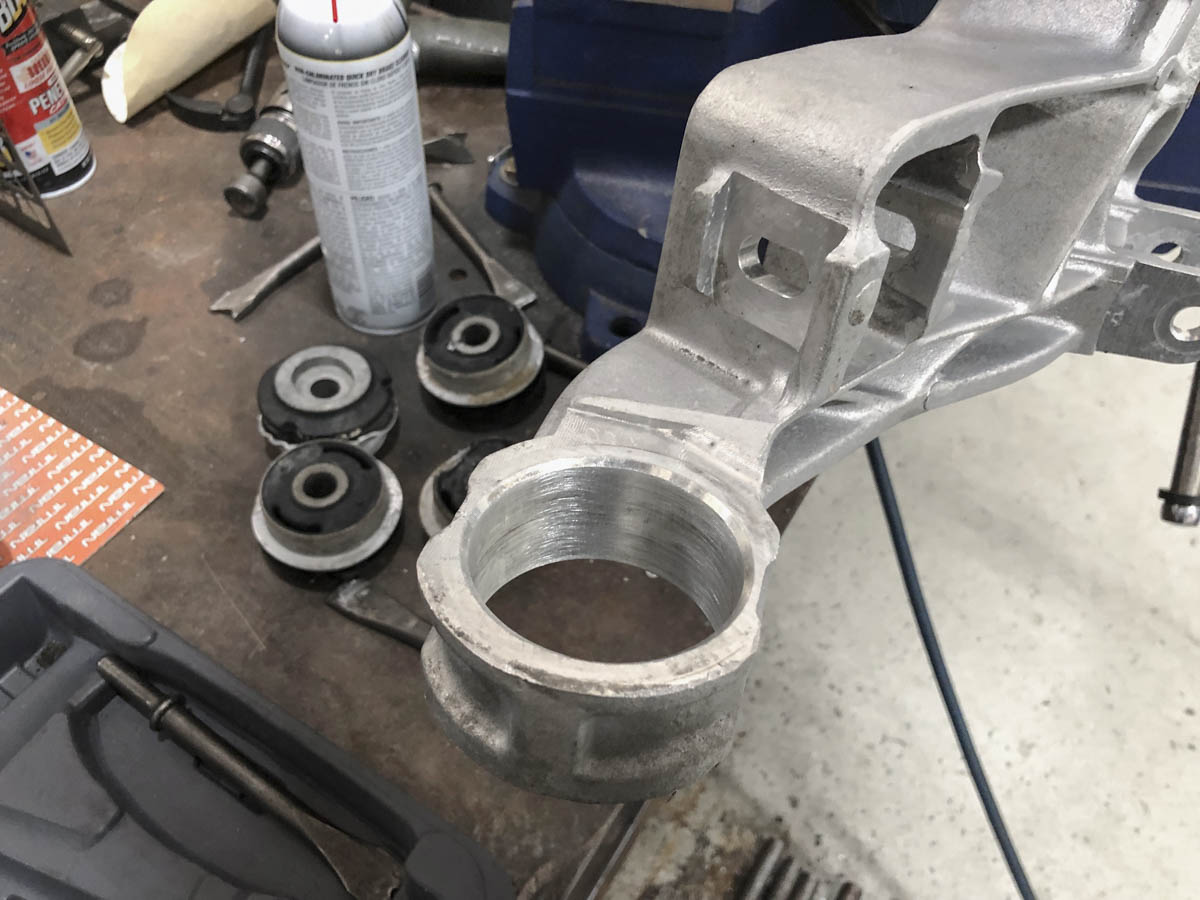

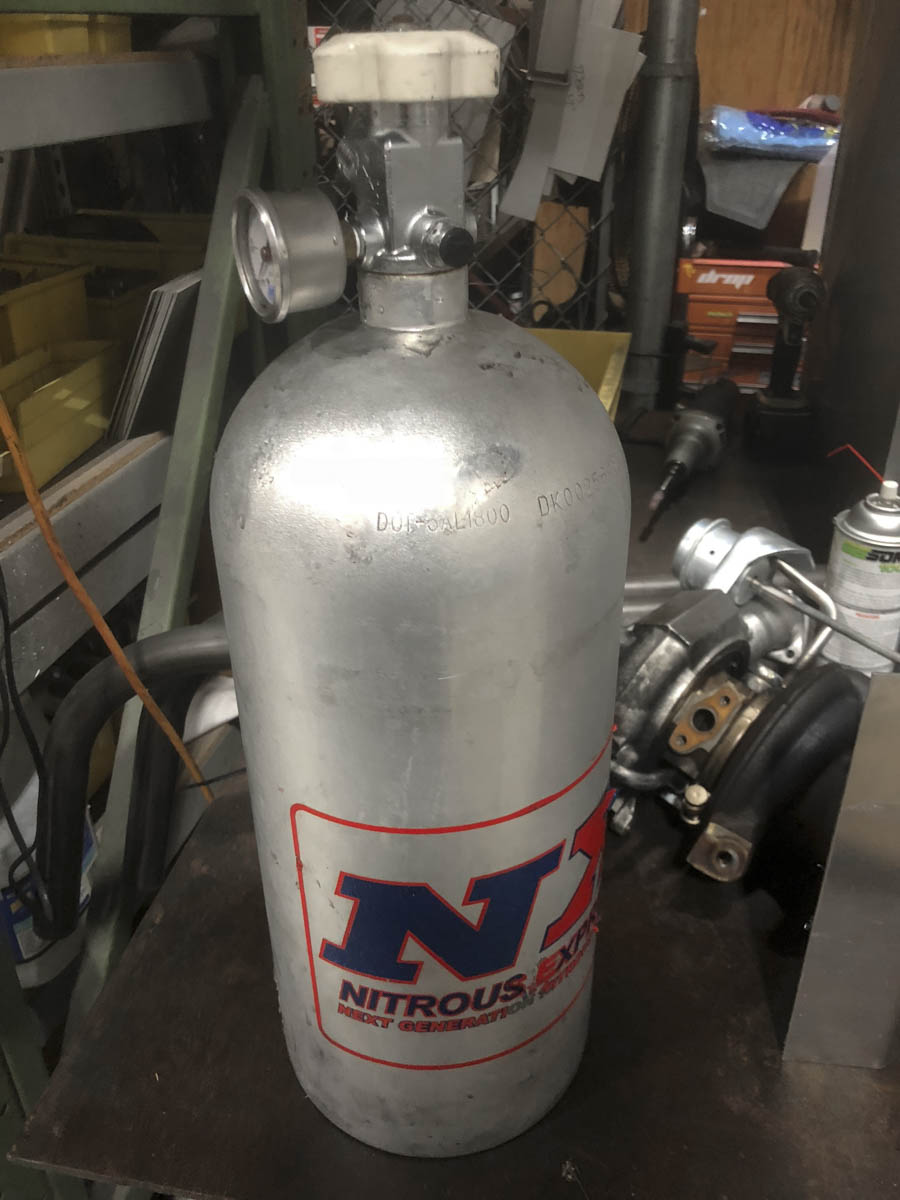
We were making good progress on the rear but had one set of bushings that just didn't want to go in, not wanting to stop and wait for them to cool in the freezer we noticed a bottle of compressed gas nearby...... a little nitrous goes a long way to cooling things down and bushings dropped right in!
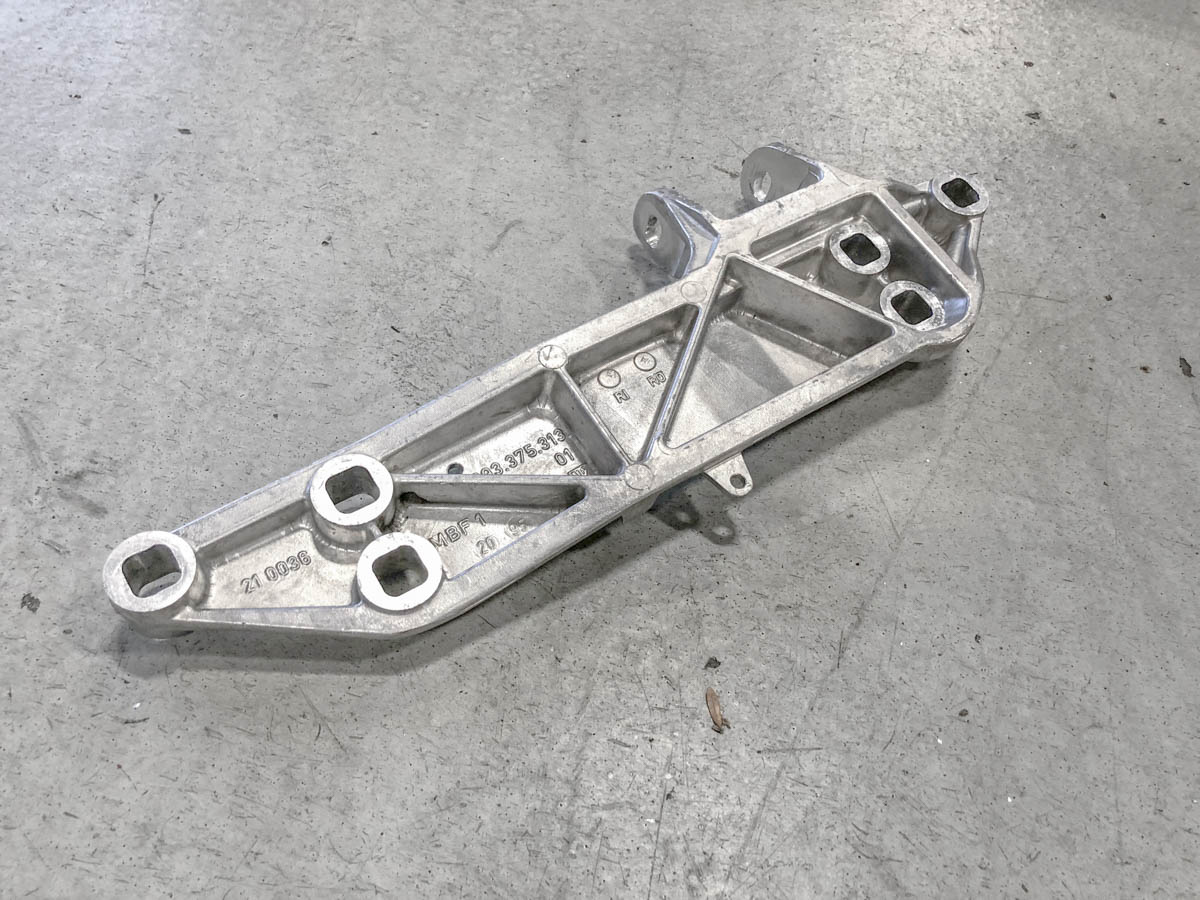
I also started working on the transmission and getting the FD Mount installed. I decided to stick with this upgraded side mount for now and will convert to the center at a later date if I opt for a full trans overhaul.
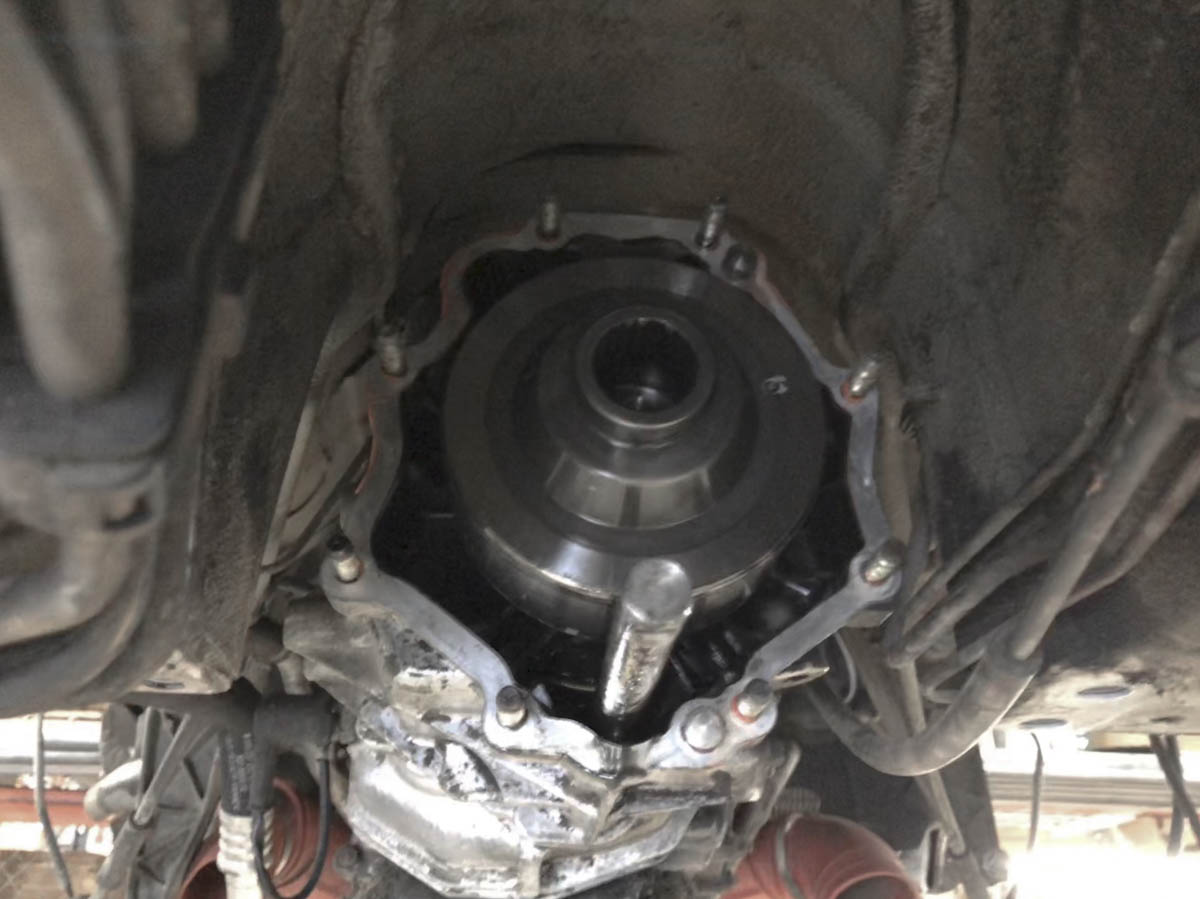
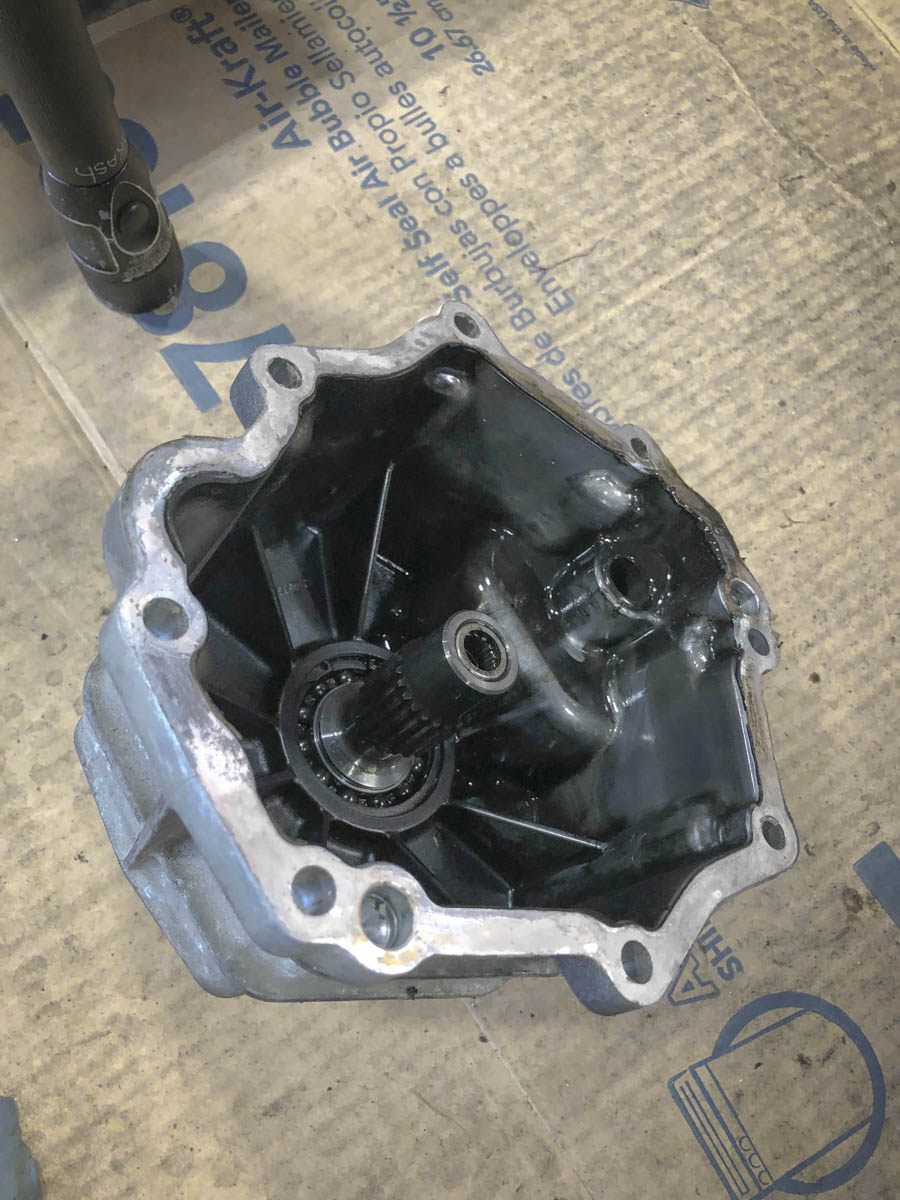
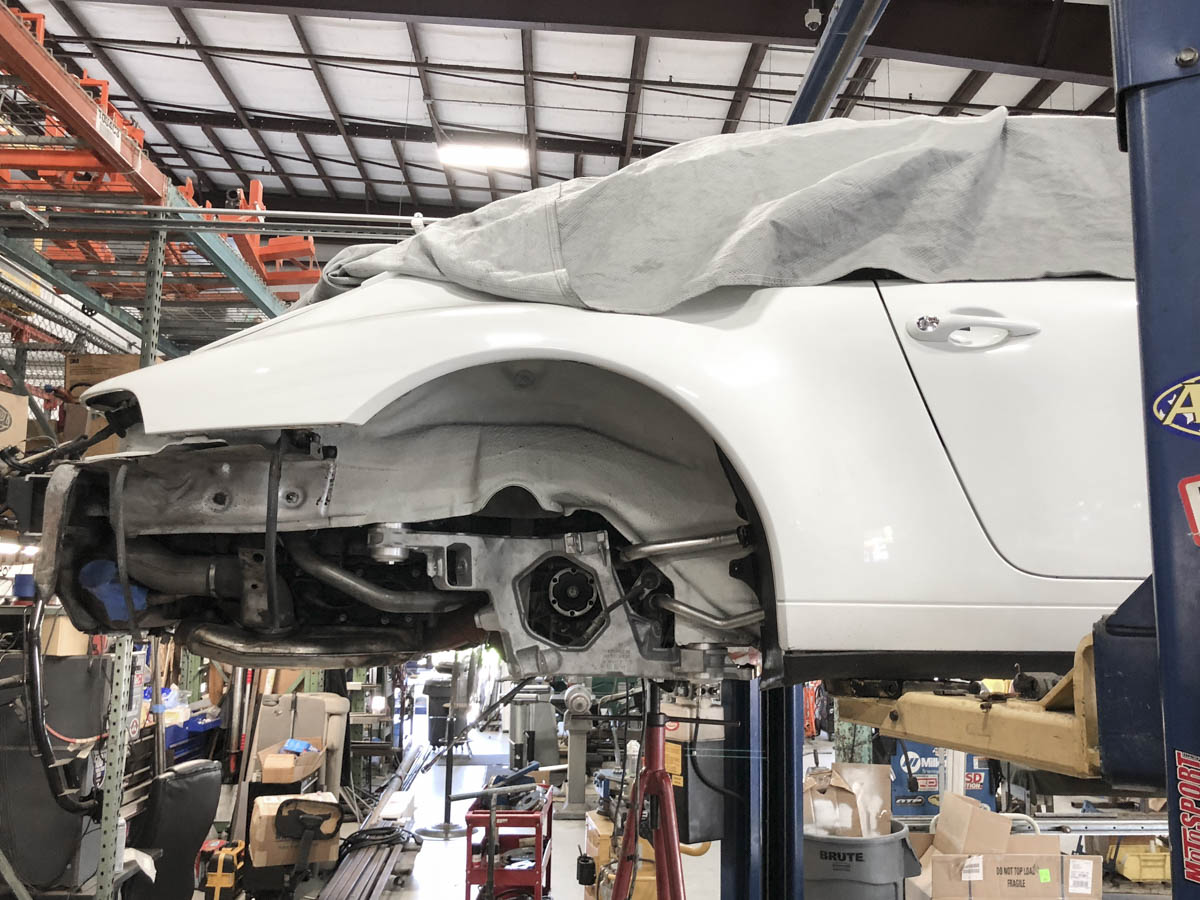
While I had the mount and lower cross brace out, I did want to deal with the viscous coupler by removing it and get rid of the shaft hanging out of the nose cone. Getting to the front housing bolts with the trans in the car had me cursing numerous time, 6 of the 8 bolts were easy to reach, the upper middle bolts required tilting the trans slightly and using a tiny swivel attachments and plenty of patience made it possible, needless to say I'm not looking forward to the reassembly process.
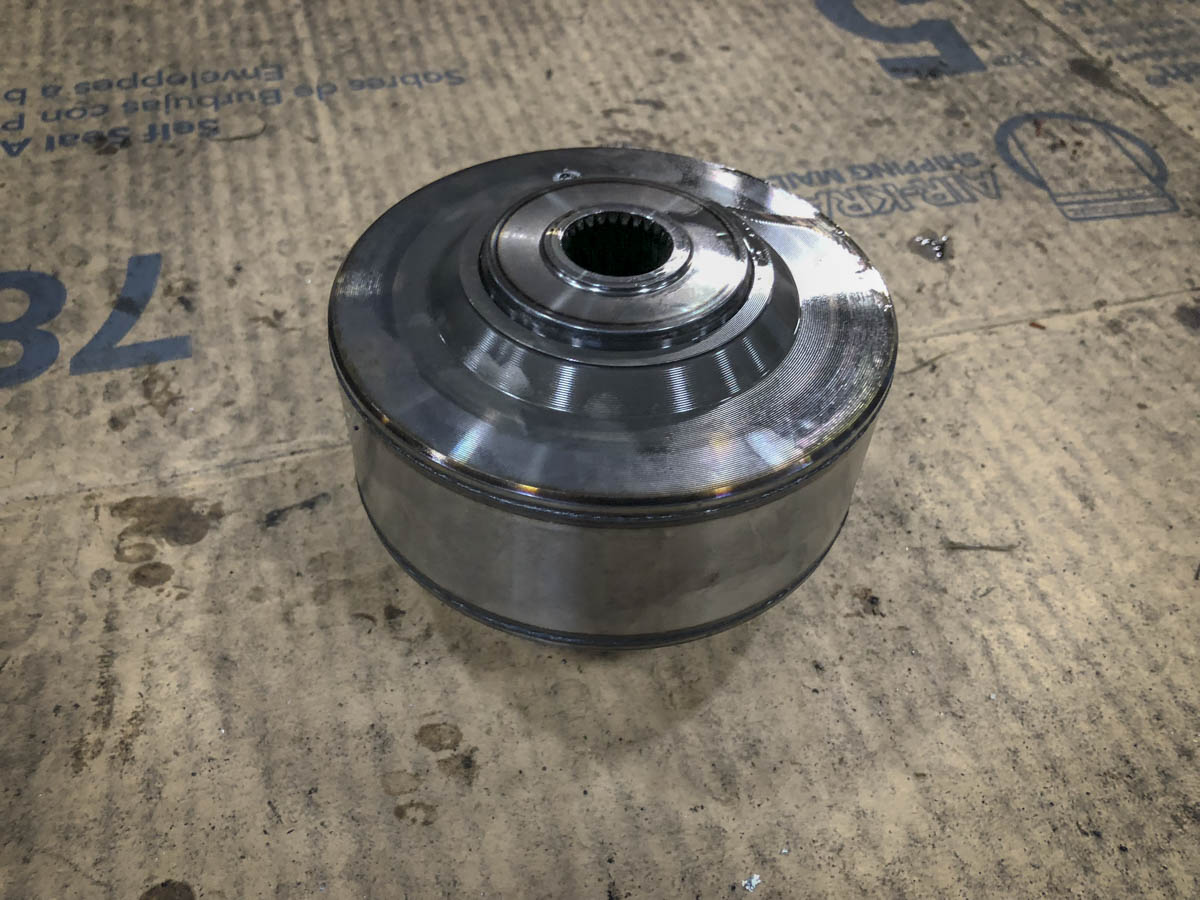
The coupler out of the car, records show the previous owner had replaced this unit a short time ago, it's too bad but I'm sure it will find a new home as it's in great shape.
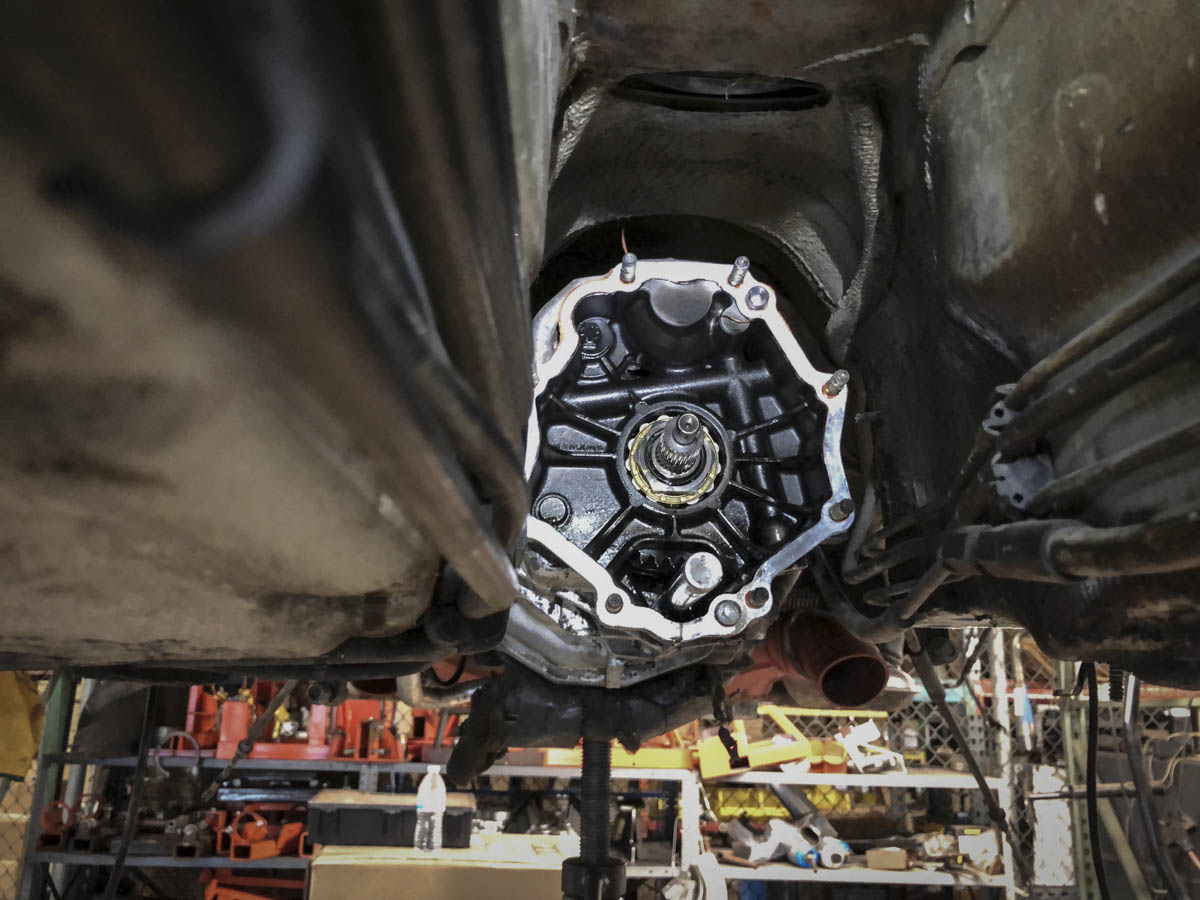
The leftover shaft that connected the coupler to the front torque tube, with the snap ring removed the bearing and shaft came out with ease. The plan will be to machine an aluminum spacer to take the shafts place and preserve the existing seal to prevent oil seepage and close the hole where the shaft previously passed through.
The front carriers with fresh wheel bearings went in and the front hubs got re-assembled. At some point I'd love to upgrade to RS or even better BBi carriers but for now the originals refreshed with the ERP bump steer kit should hold me over.
I opted to remove the outer stubs from the old front axles and treat them to a deep cleaning, the savings can go elsewhere. This was the freebie way to handle the front hub portion of the C2 conversion, and outside a slightly heavier part there isn't much downside to me over buying the C2 ABS rings.
Front subframes and steering rack was next to be installed, the was recently replaced by the previous owner so a deep clean and fresh bushings were all that was needed.
The rear subframe was up next, an air hammer made quick work of the worn original bushings.
We were making good progress on the rear but had one set of bushings that just didn't want to go in, not wanting to stop and wait for them to cool in the freezer we noticed a bottle of compressed gas nearby...... a little nitrous goes a long way to cooling things down and bushings dropped right in!
I also started working on the transmission and getting the FD Mount installed. I decided to stick with this upgraded side mount for now and will convert to the center at a later date if I opt for a full trans overhaul.
While I had the mount and lower cross brace out, I did want to deal with the viscous coupler by removing it and get rid of the shaft hanging out of the nose cone. Getting to the front housing bolts with the trans in the car had me cursing numerous time, 6 of the 8 bolts were easy to reach, the upper middle bolts required tilting the trans slightly and using a tiny swivel attachments and plenty of patience made it possible, needless to say I'm not looking forward to the reassembly process.
The coupler out of the car, records show the previous owner had replaced this unit a short time ago, it's too bad but I'm sure it will find a new home as it's in great shape.
The leftover shaft that connected the coupler to the front torque tube, with the snap ring removed the bearing and shaft came out with ease. The plan will be to machine an aluminum spacer to take the shafts place and preserve the existing seal to prevent oil seepage and close the hole where the shaft previously passed through.
09-18-2018, 12:22 AM
#41
Burning Brakes
Amazing work. Congratulations
 09-18-2018, 05:10 AM
#43
Great work  and love how clean everything is! Hadn't heard of the BBi uprights, so had a quick search and they look great. My 993 is going in for some Winter Work next month, so might look at getting these done, I have a feeling the NSF wheel bearing has gone anyways..
and love how clean everything is! Hadn't heard of the BBi uprights, so had a quick search and they look great. My 993 is going in for some Winter Work next month, so might look at getting these done, I have a feeling the NSF wheel bearing has gone anyways..
09-19-2018, 12:25 AM
#44
Banned

great project i just picked up 95 c4 that needs the same love !
09-19-2018, 11:05 PM
#45
Basic Sponsor
Rennlist
Site Sponsor
Rennlist
Site Sponsor
Thread Starter
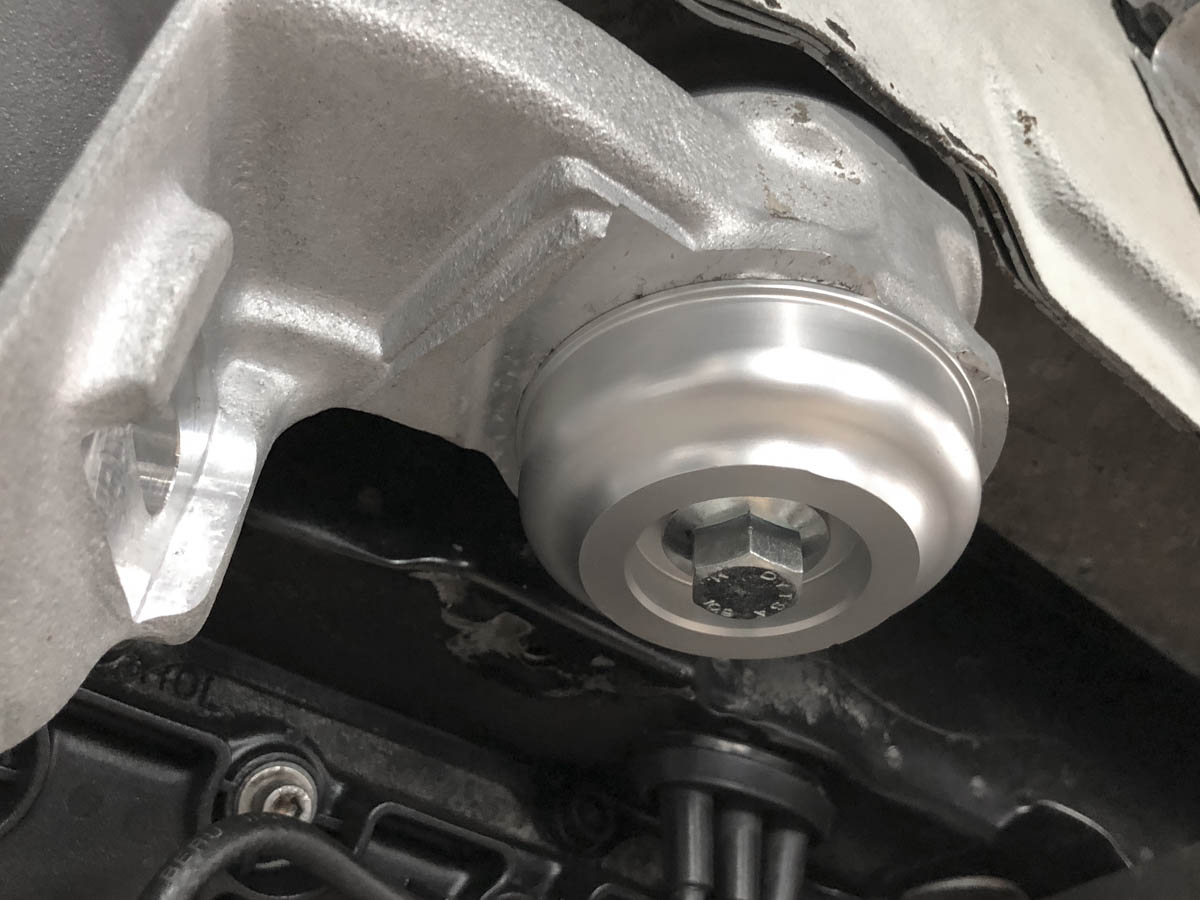
Had one of our fabricators chuck some aluminum on the lathe and whip me up a spacer based on measurements I gave him from the original bearing and now removed shaft.
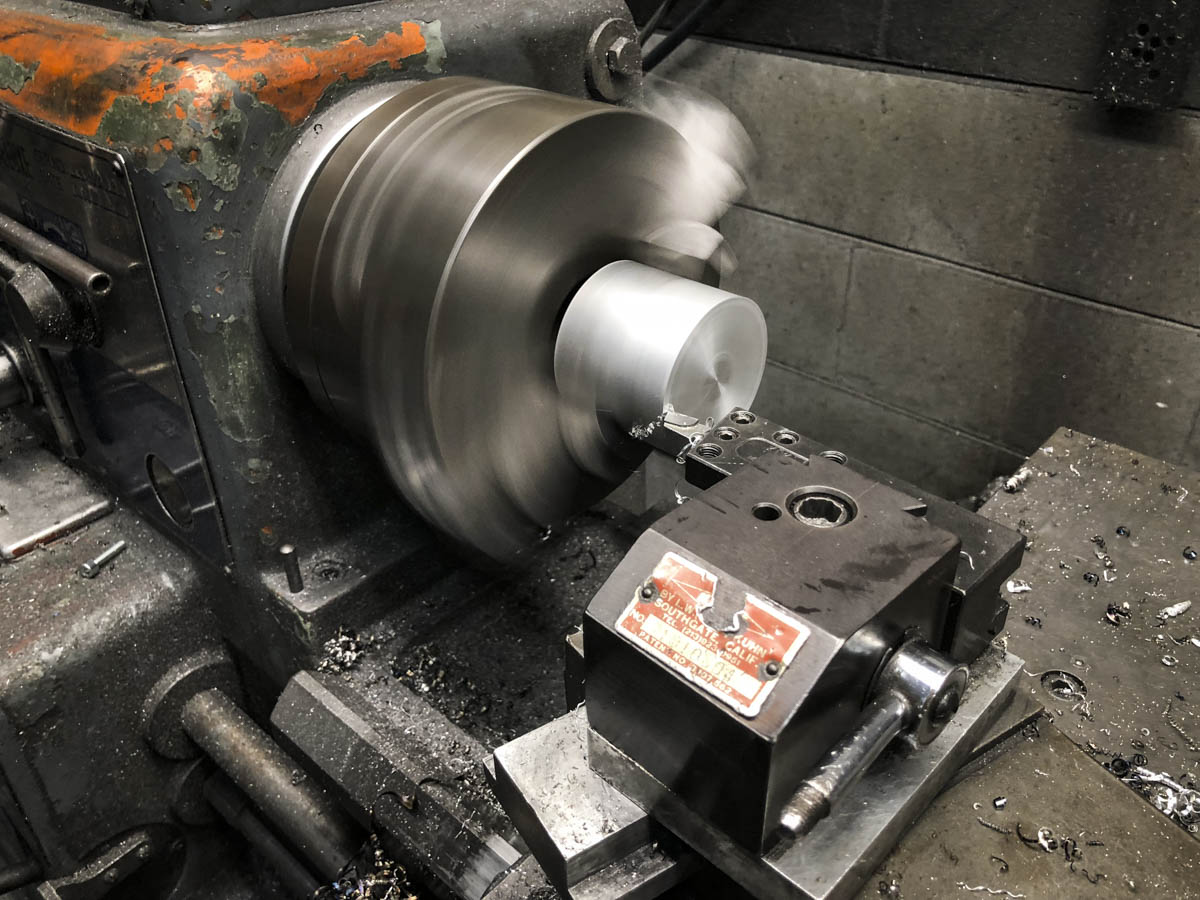
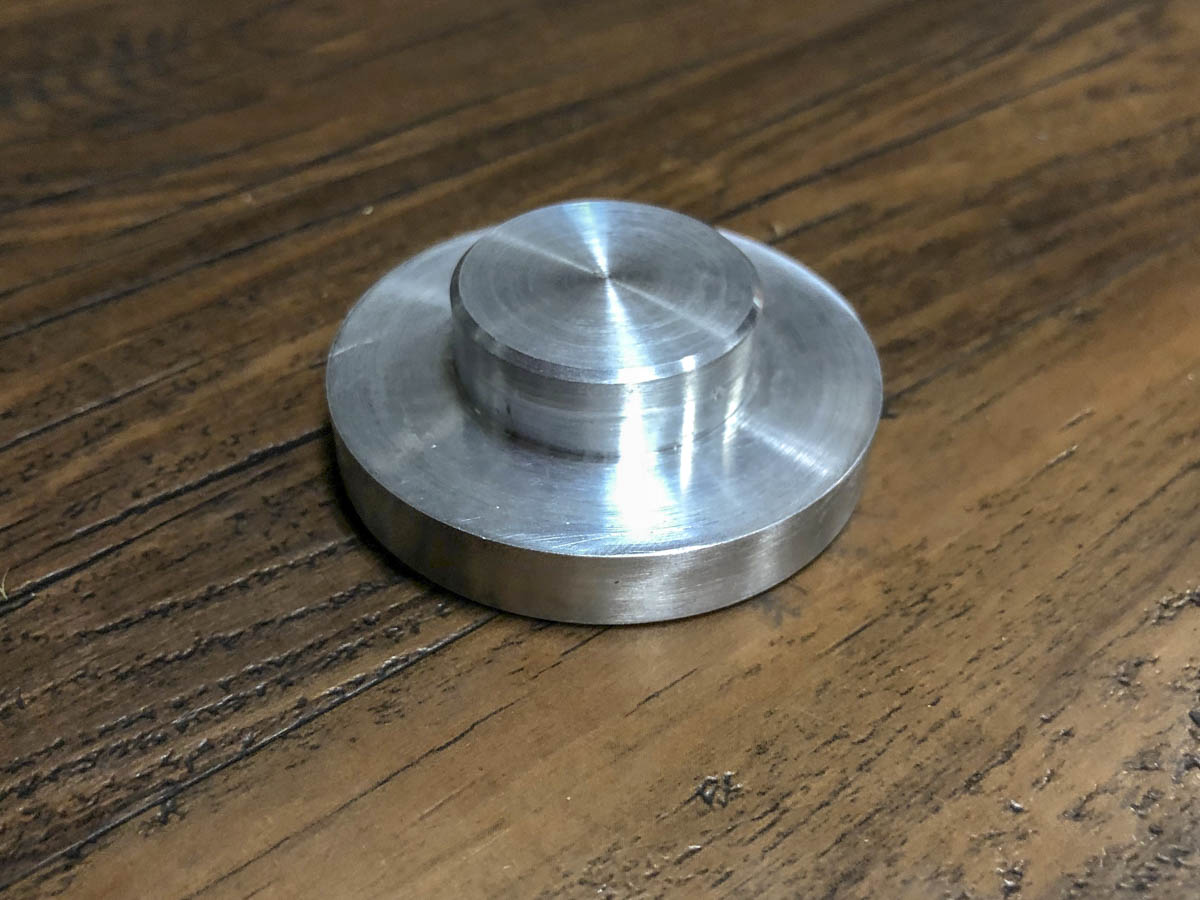
Simple and sweet but should do just the job I needed, it's pressed to fit and held in by the original bearing snapping.
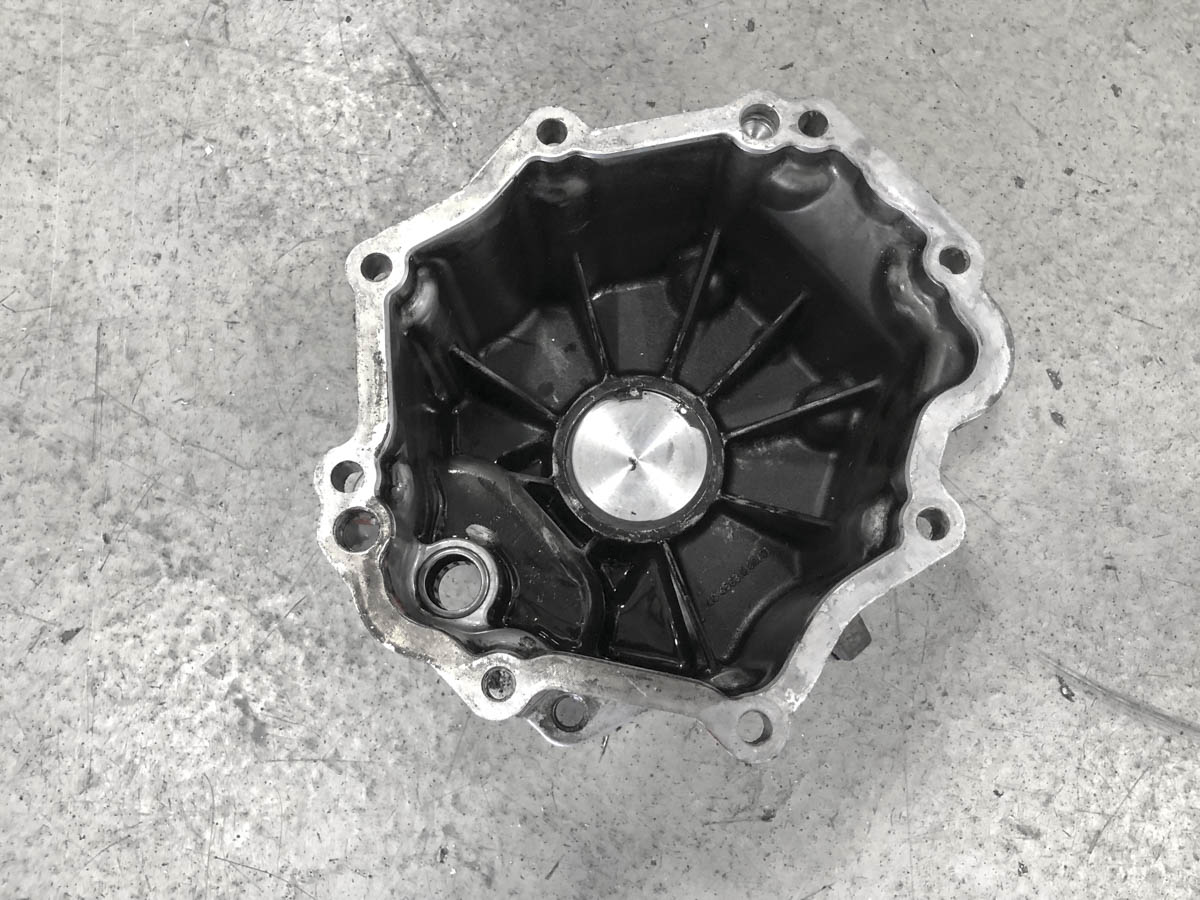
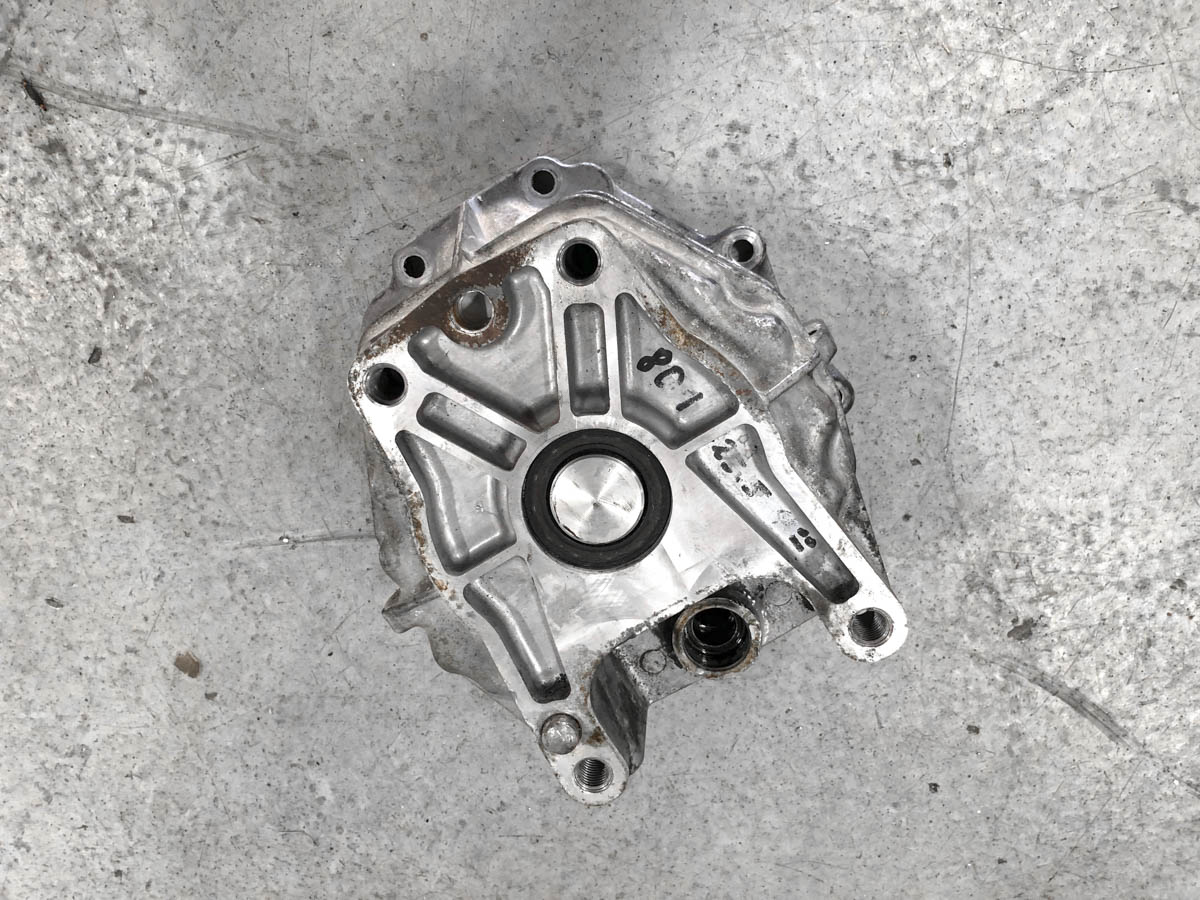
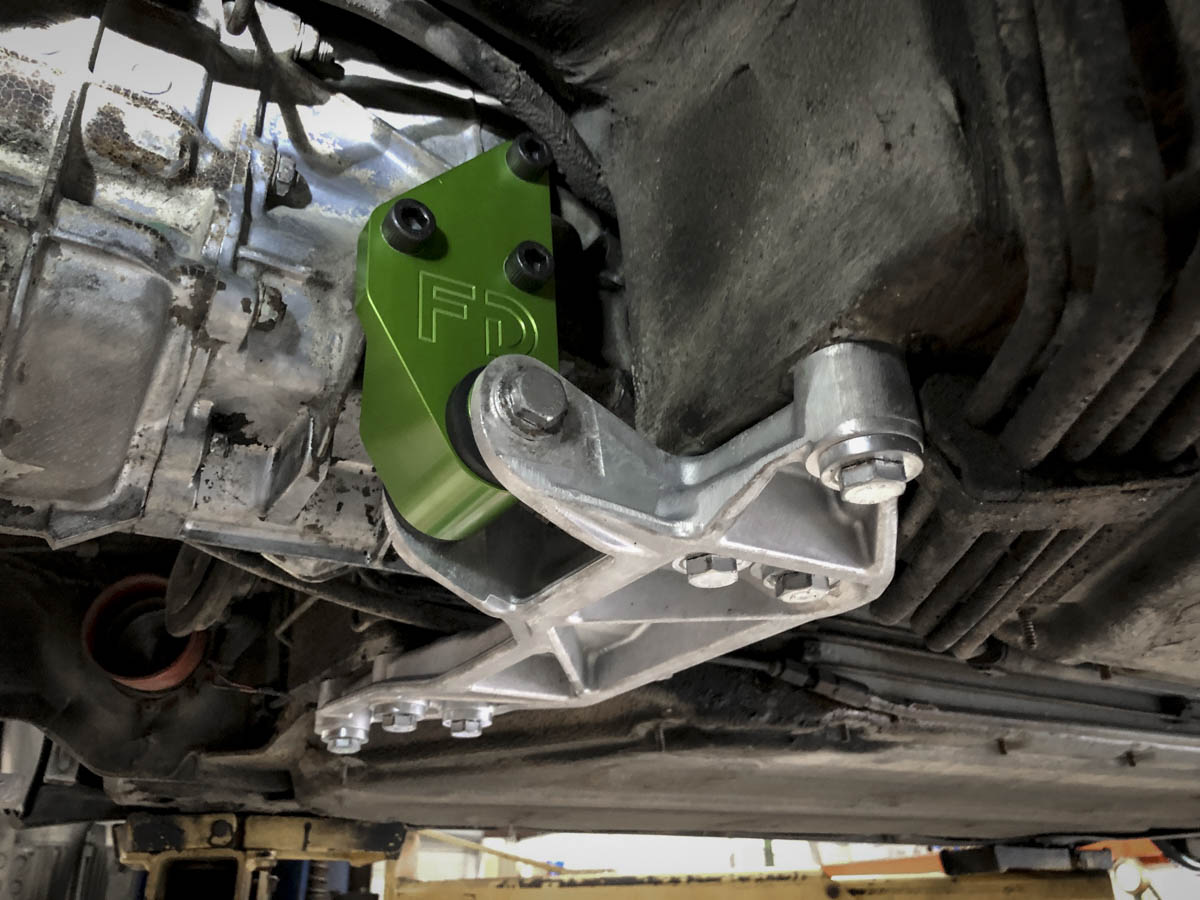
Of course after everything was test fitted the front housing received a deep clean and was re-installed on the transmission. I opted to stick with the side mount for now and installed the FD Motorsports billet side mount, I'll give it a nice shake down and pickup a C2 front nose if a deal come my way down the road or I remove the transmission for an overhaul.

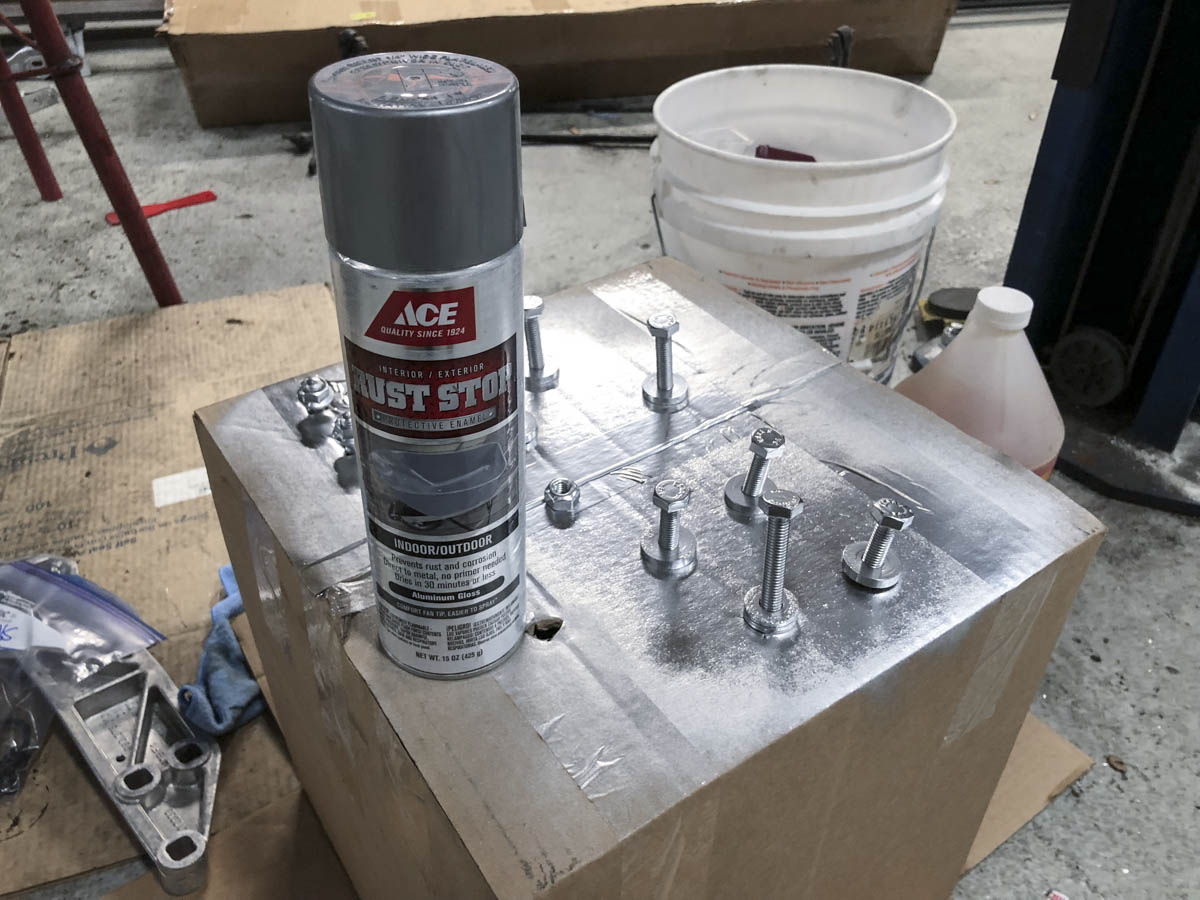
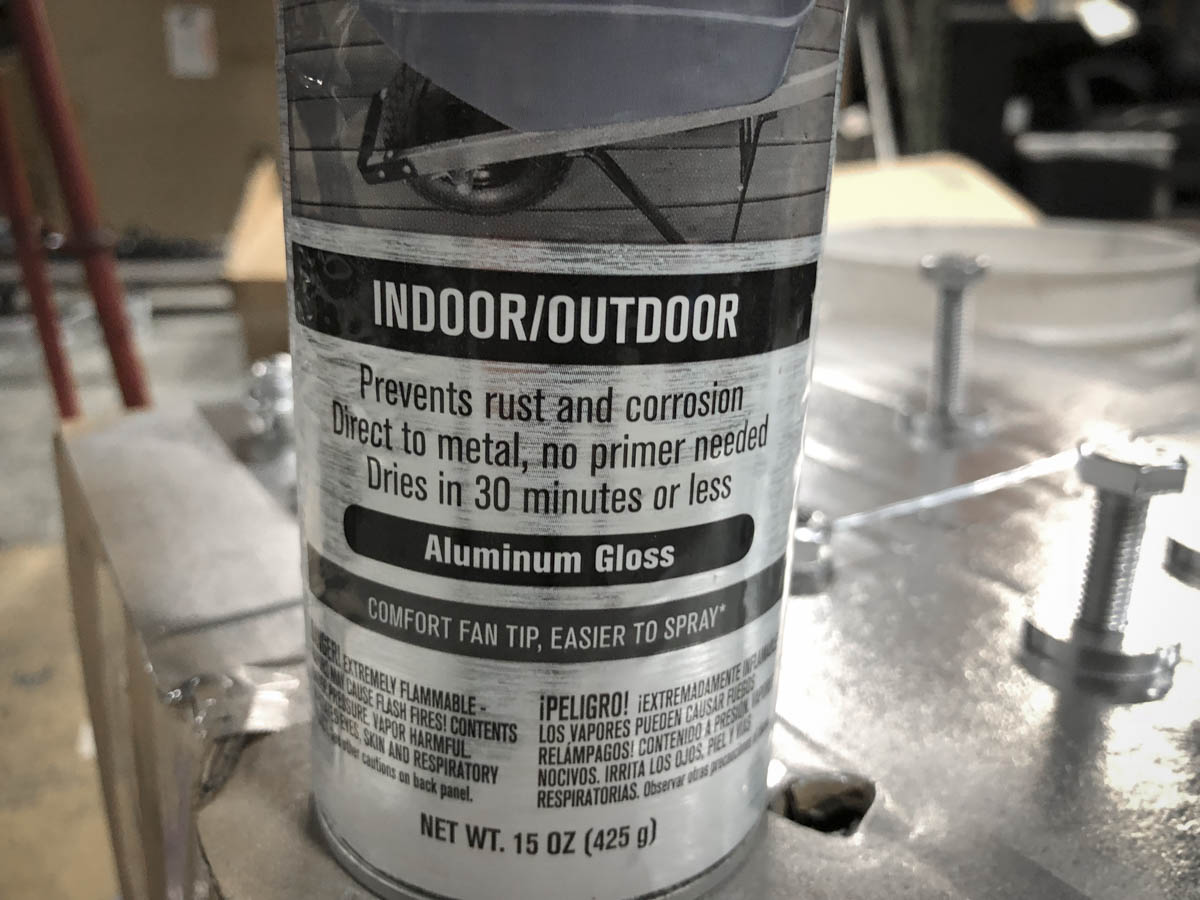
The transmission bolts and a few other bolts were removed after the Zinc batch when out, I found a great paint at Ace that is called "Gloss Aluminum". I've painted a few bolts and the shift linkage with it and am quite happy with the results.
The rear subframes were bolted into the car after installation of the Rennline solid subframe mounts, it'll be nice to begin re-assembling the suspension and seeing the rear go together after so much prep.

Simple and sweet but should do just the job I needed, it's pressed to fit and held in by the original bearing snapping.
Of course after everything was test fitted the front housing received a deep clean and was re-installed on the transmission. I opted to stick with the side mount for now and installed the FD Motorsports billet side mount, I'll give it a nice shake down and pickup a C2 front nose if a deal come my way down the road or I remove the transmission for an overhaul.
The transmission bolts and a few other bolts were removed after the Zinc batch when out, I found a great paint at Ace that is called "Gloss Aluminum". I've painted a few bolts and the shift linkage with it and am quite happy with the results.
The rear subframes were bolted into the car after installation of the Rennline solid subframe mounts, it'll be nice to begin re-assembling the suspension and seeing the rear go together after so much prep.