When you click on links to various merchants on this site and make a purchase, this can result in this site earning a commission. Affiliate programs and affiliations include, but are not limited to, the eBay Partner Network.
I have the same realization every time I get done doing a repair on the 993: man, I should I have recorded what I did to share it. For comedy, for what not to do, for a nice example of human ineptitude. Over 7 years of ownership, I have had many of these misadventures. All of them required multiple trips to the hardware store. Some featured tears--privately, in the sanctuary of my garage. Fortunately, none of them required a flat bed to the repair shop.
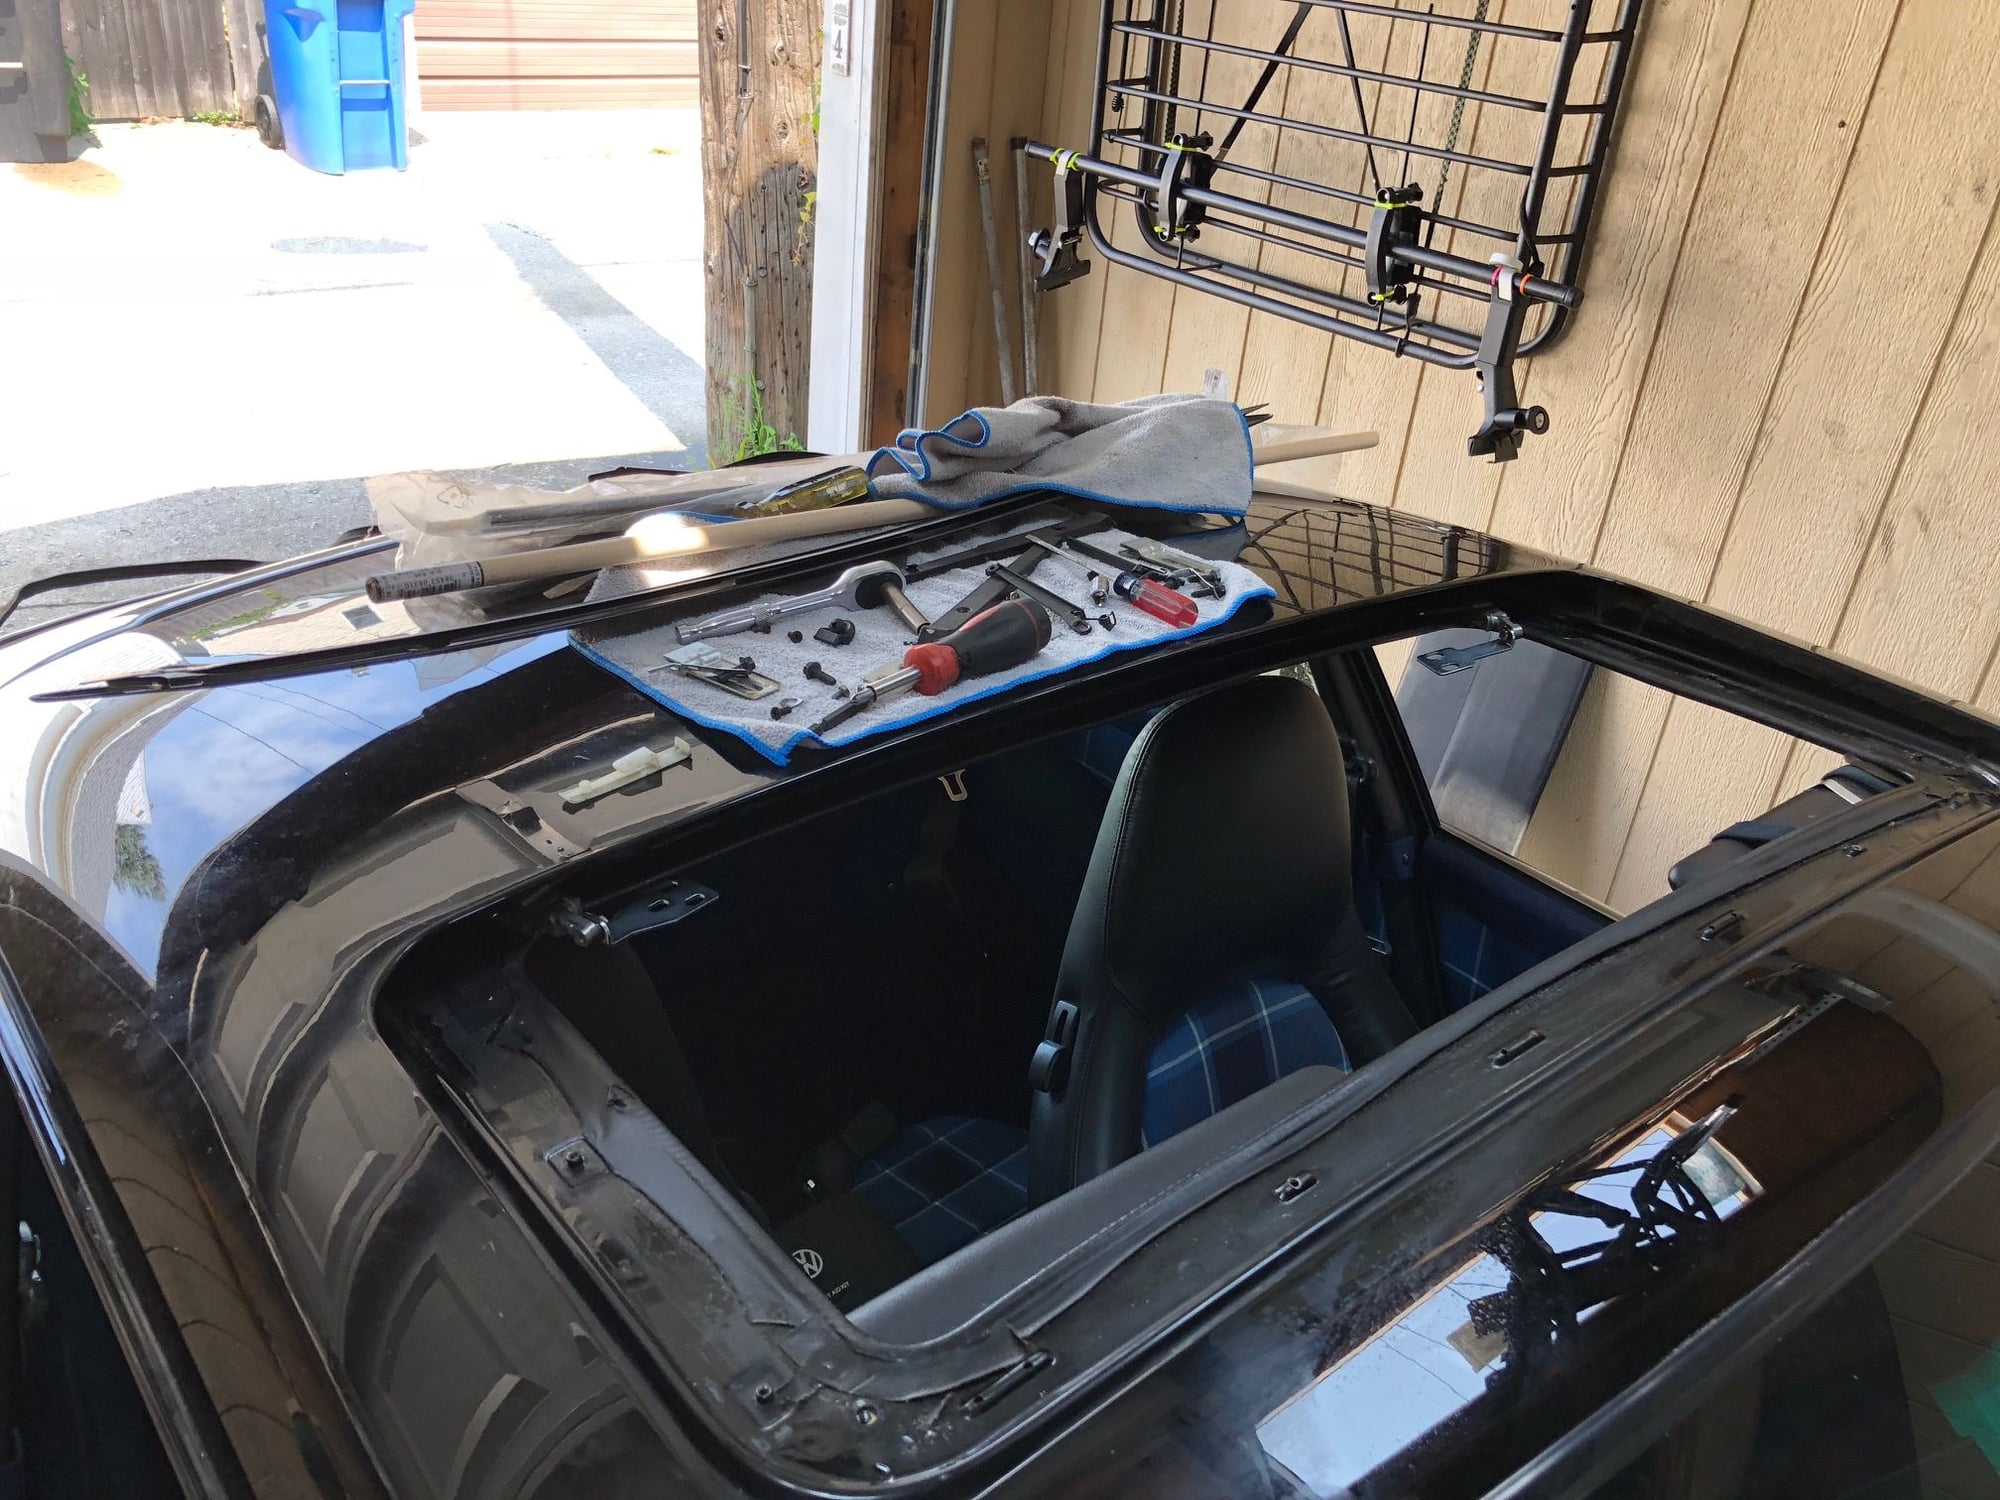
This time was no different. The last few weekends I have been trying to fix a bunch of issues that have been annoying me. This weekend it was a rattling and generally ragged condition sunroof.
My symptoms were lots of rattles with the roof all the way open, seals that were falling apart and apparently a tool box worth of tools banging around above my head when I cornered. I have been accumulating the seals and parts over the last two years. Procrastination. Because the car is my daily, I really needed to be careful how deep I got myself in. This is an easy job, right? Just disassemble the whole thing, replace all worn parts with new ones. 3 hours, max. I started on Friday night and worked 3-4 hours Saturday and the same today.
The good news is that it is "done." The bad news is that is not "done." Haha. I am still working out why it rattles when open, but I did locate the source of some of the other noise: a screwdriver(!), some bits, and a CCU puller U shaped tool. Funny. All not my doing except the CCU puller tool. My bad. I put it on the roof a few months ago with the roof open then drove away and it slid right in.
Now I have new parts in and it slides smoothly and is adjusted right. The new seals, that is another story. Have to revisit the ones I put in from time to time. I am not so hopeful.
The trim piece cover that snaps into the roof lid on the inside of the car looks like it was hand hammered by a coppersmith. Rough shape. It is bent to **** at this point. The pleather covering it is tattered. Next time I will take that out and cover it. It looks awful.
All in all, I took everything apart and put it back together 5 times(!) The only thing I did not take out was the electric motor and metal guide tubes. I think I understand how it all works now. Or not.
So why tell anyone this? Well, I am not a mechanic but I am not not a mechanic. I like taking stuff apart and am somewhat less adept putting it back together. But I don't give up.
That might be my only redeeming feature as a fixer of my machines.
Thanks for sharing, M. Sharing those misadventures (after all has been rectified) I find is cathartic; although the anxiety one feels while in the middle of such an misadventure is so acute! Given that you have done this 5x now, Do you have any thoughts on which set of DIY instructions are best to follow (or more specifically, what things to watch out for?) I have been procrastinating the disassembly of my own sunroof mechanism for several years as well --- there are rattles up there when the roof is closed that I wish to fix.
Thanks for sharing, M. Sharing those misadventures (after all has been rectified) I find is cathartic; although the anxiety one feels while in the middle of such an misadventure is so acute! Given that you have done this 5x now, Do you have any thoughts on which set of DIY instructions are best to follow (or more specifically, what things to watch out for?) I have been procrastinating the disassembly of my own sunroof mechanism for several years as well --- there are rattles up there when the roof is closed that I wish to fix.
Hi:
I think I looked at Pelican when I did it a few years ago but this time I just took it apart, most from memory.
PM me and I can give you my cell number if you run into difficulties.
I found that most of the DIYs leave things out so familiarize yourself with the parts, take pics along the way for part orientations and dive in.
I suspect a few plastic bits are broken that you are not aware of.
My sunroof seal is done and need to replace it. Besides getting a new one of those seals what did you end up replacing "while you were in there"?
Thanks!
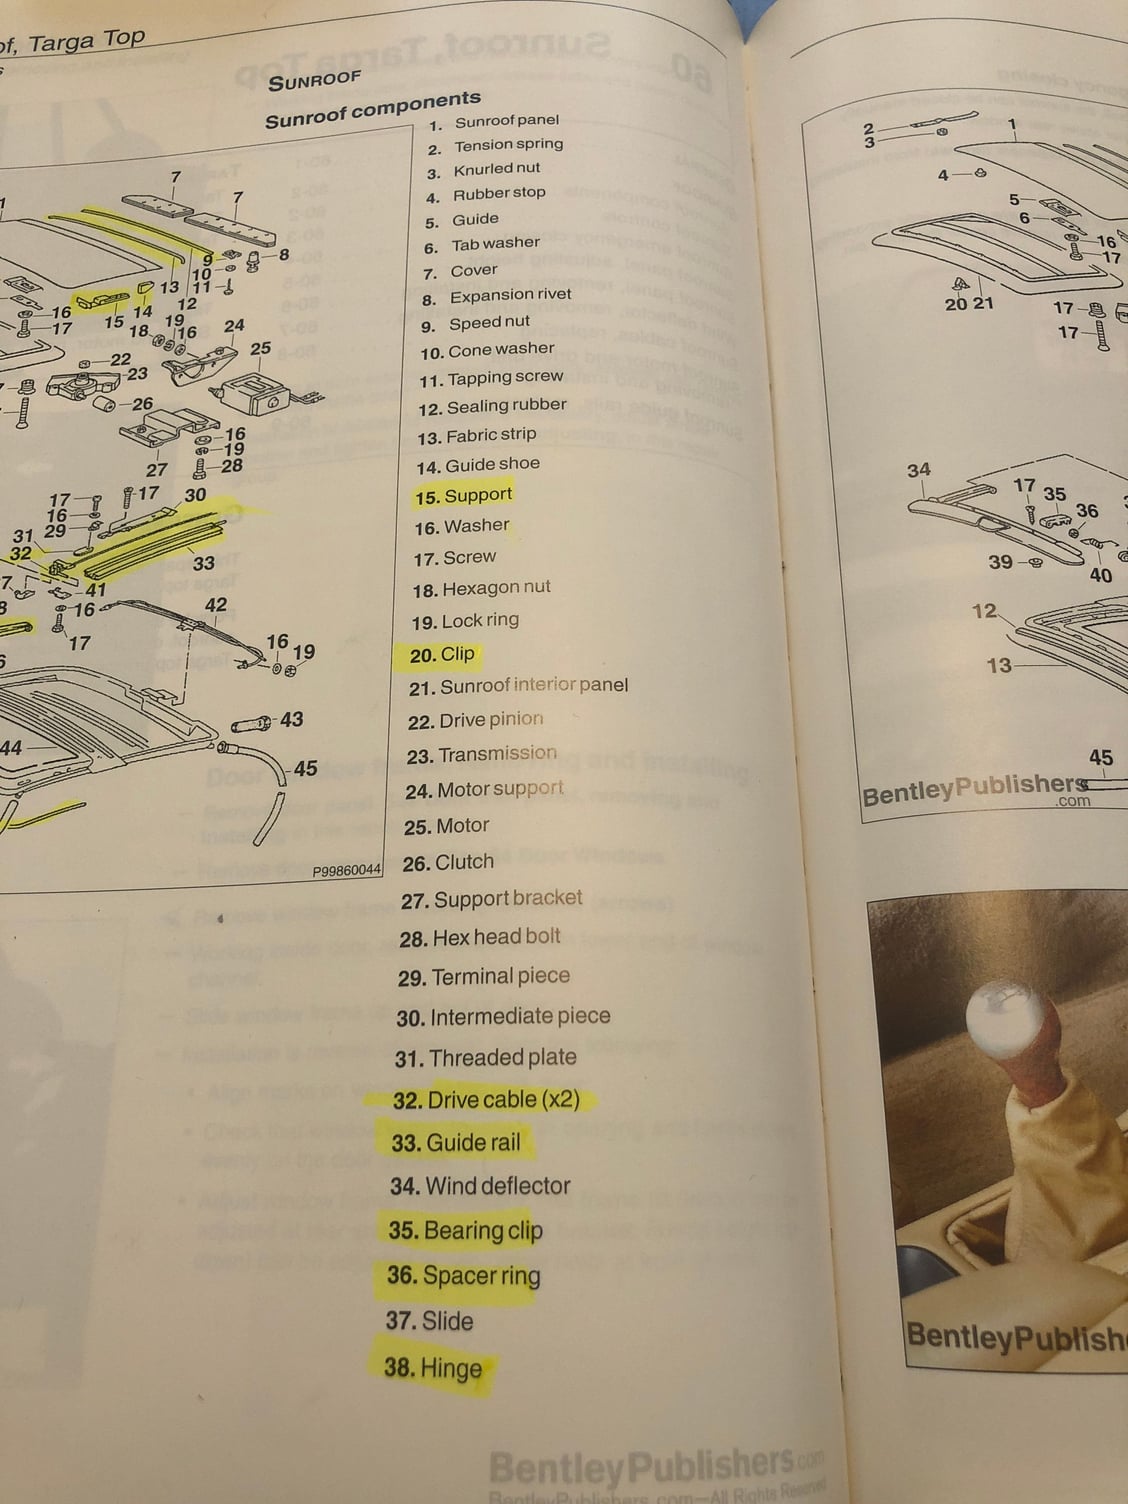
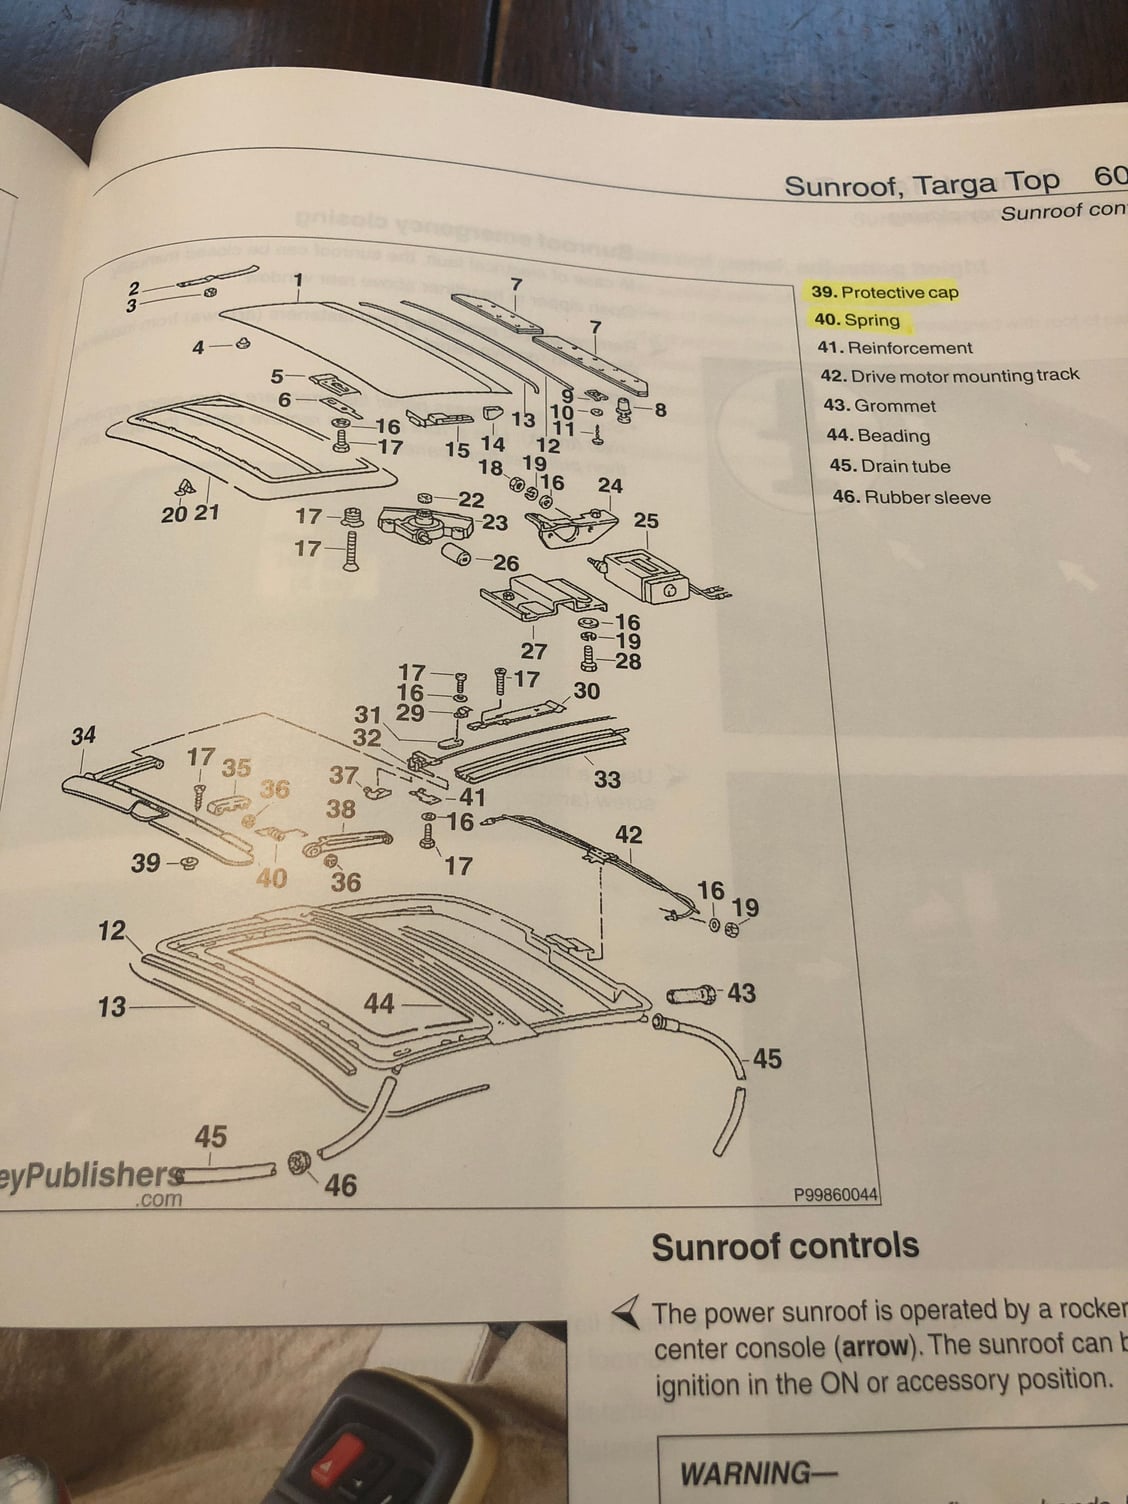
I replaced the guide rails, a bunch of the plastic clips, some nuts and bolts on the drive shafts, and some of the brass/copper v-pins that hold the trim piece in. Not too much. If I were doing it again I would buy all of the small plastic parts and replace them. After 22 years of use, everything was loose with lots of freeplay causing rattles.
--Michael
Wondering based on your experience of doing this job a few times do you know which parts in this diagram should be replaced? Thank you in advance!
 08-12-2018, 10:10 PM