When you click on links to various merchants on this site and make a purchase, this can result in this site earning a commission. Affiliate programs and affiliations include, but are not limited to, the eBay Partner Network.
Horn stopped working. Clock spring replacement job
A few weeks ago I noticed my horn stopped working. I concluded my clock spring failed and luckily fellow Rennlister 73.3.0-911 gave me a working one as he had a spare one that was sacrificed for his RS steering wheel upgrade.
The job was pretty easy and you can punch out in about an hour.
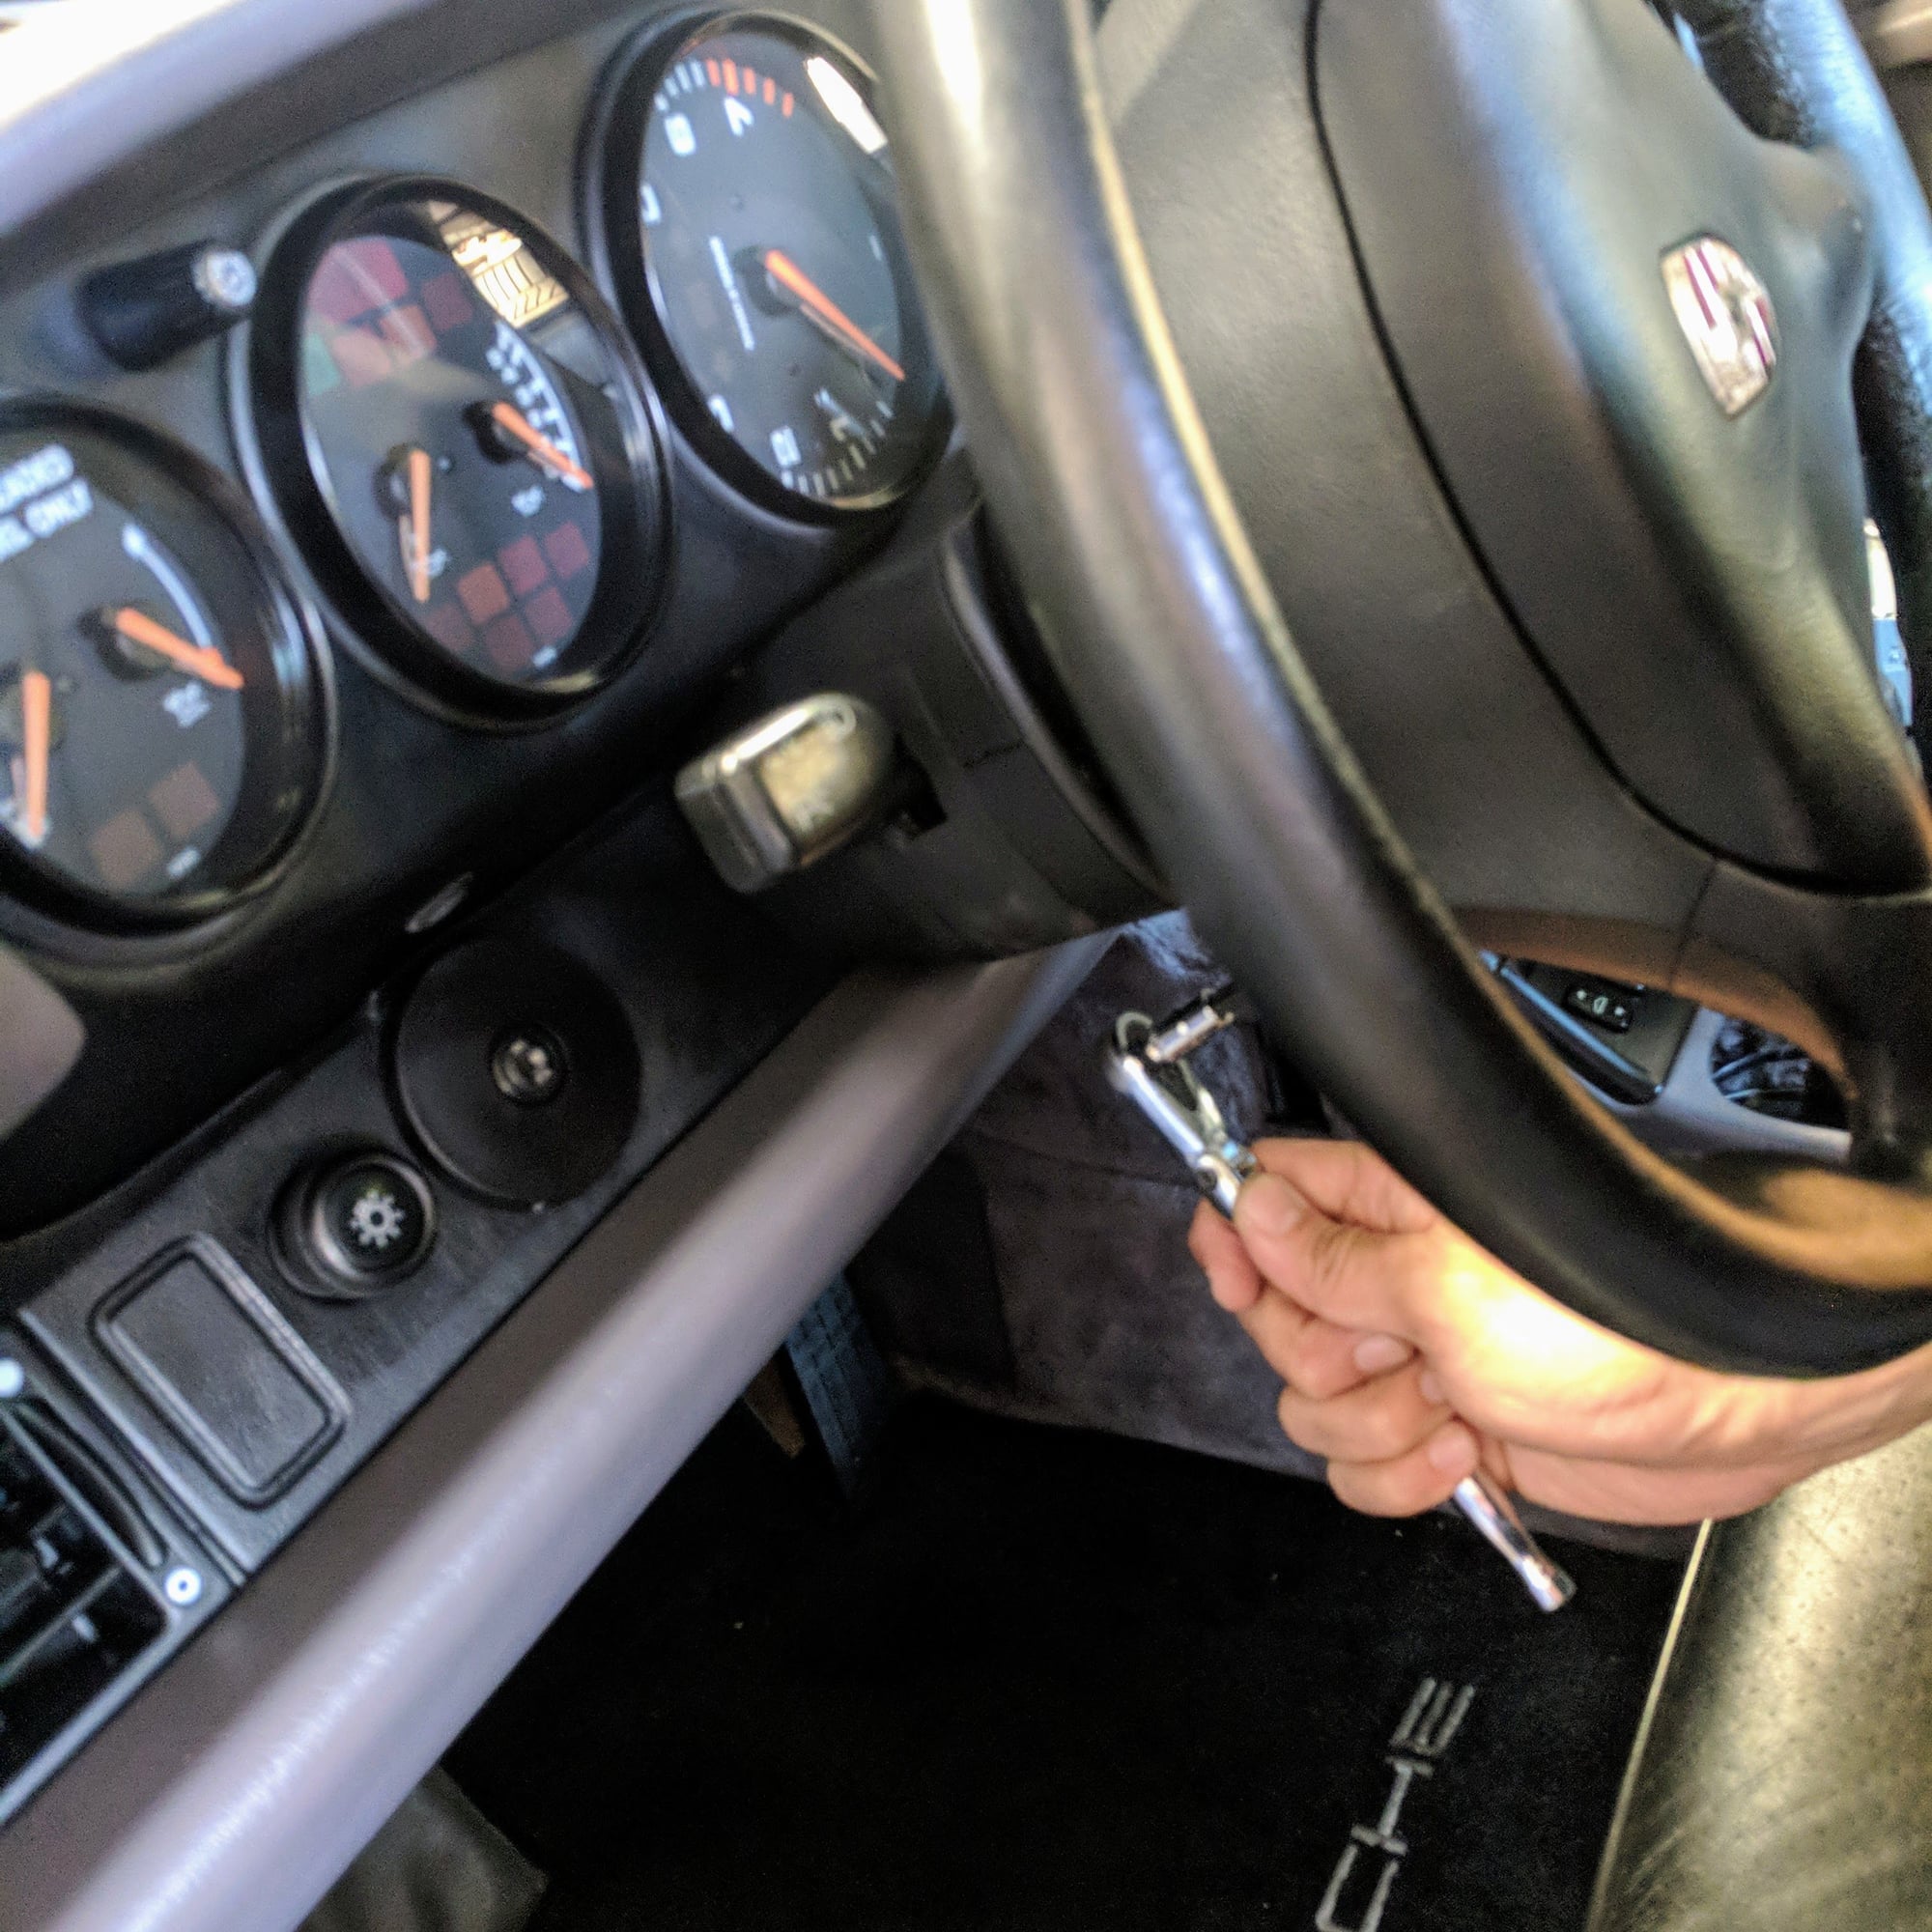
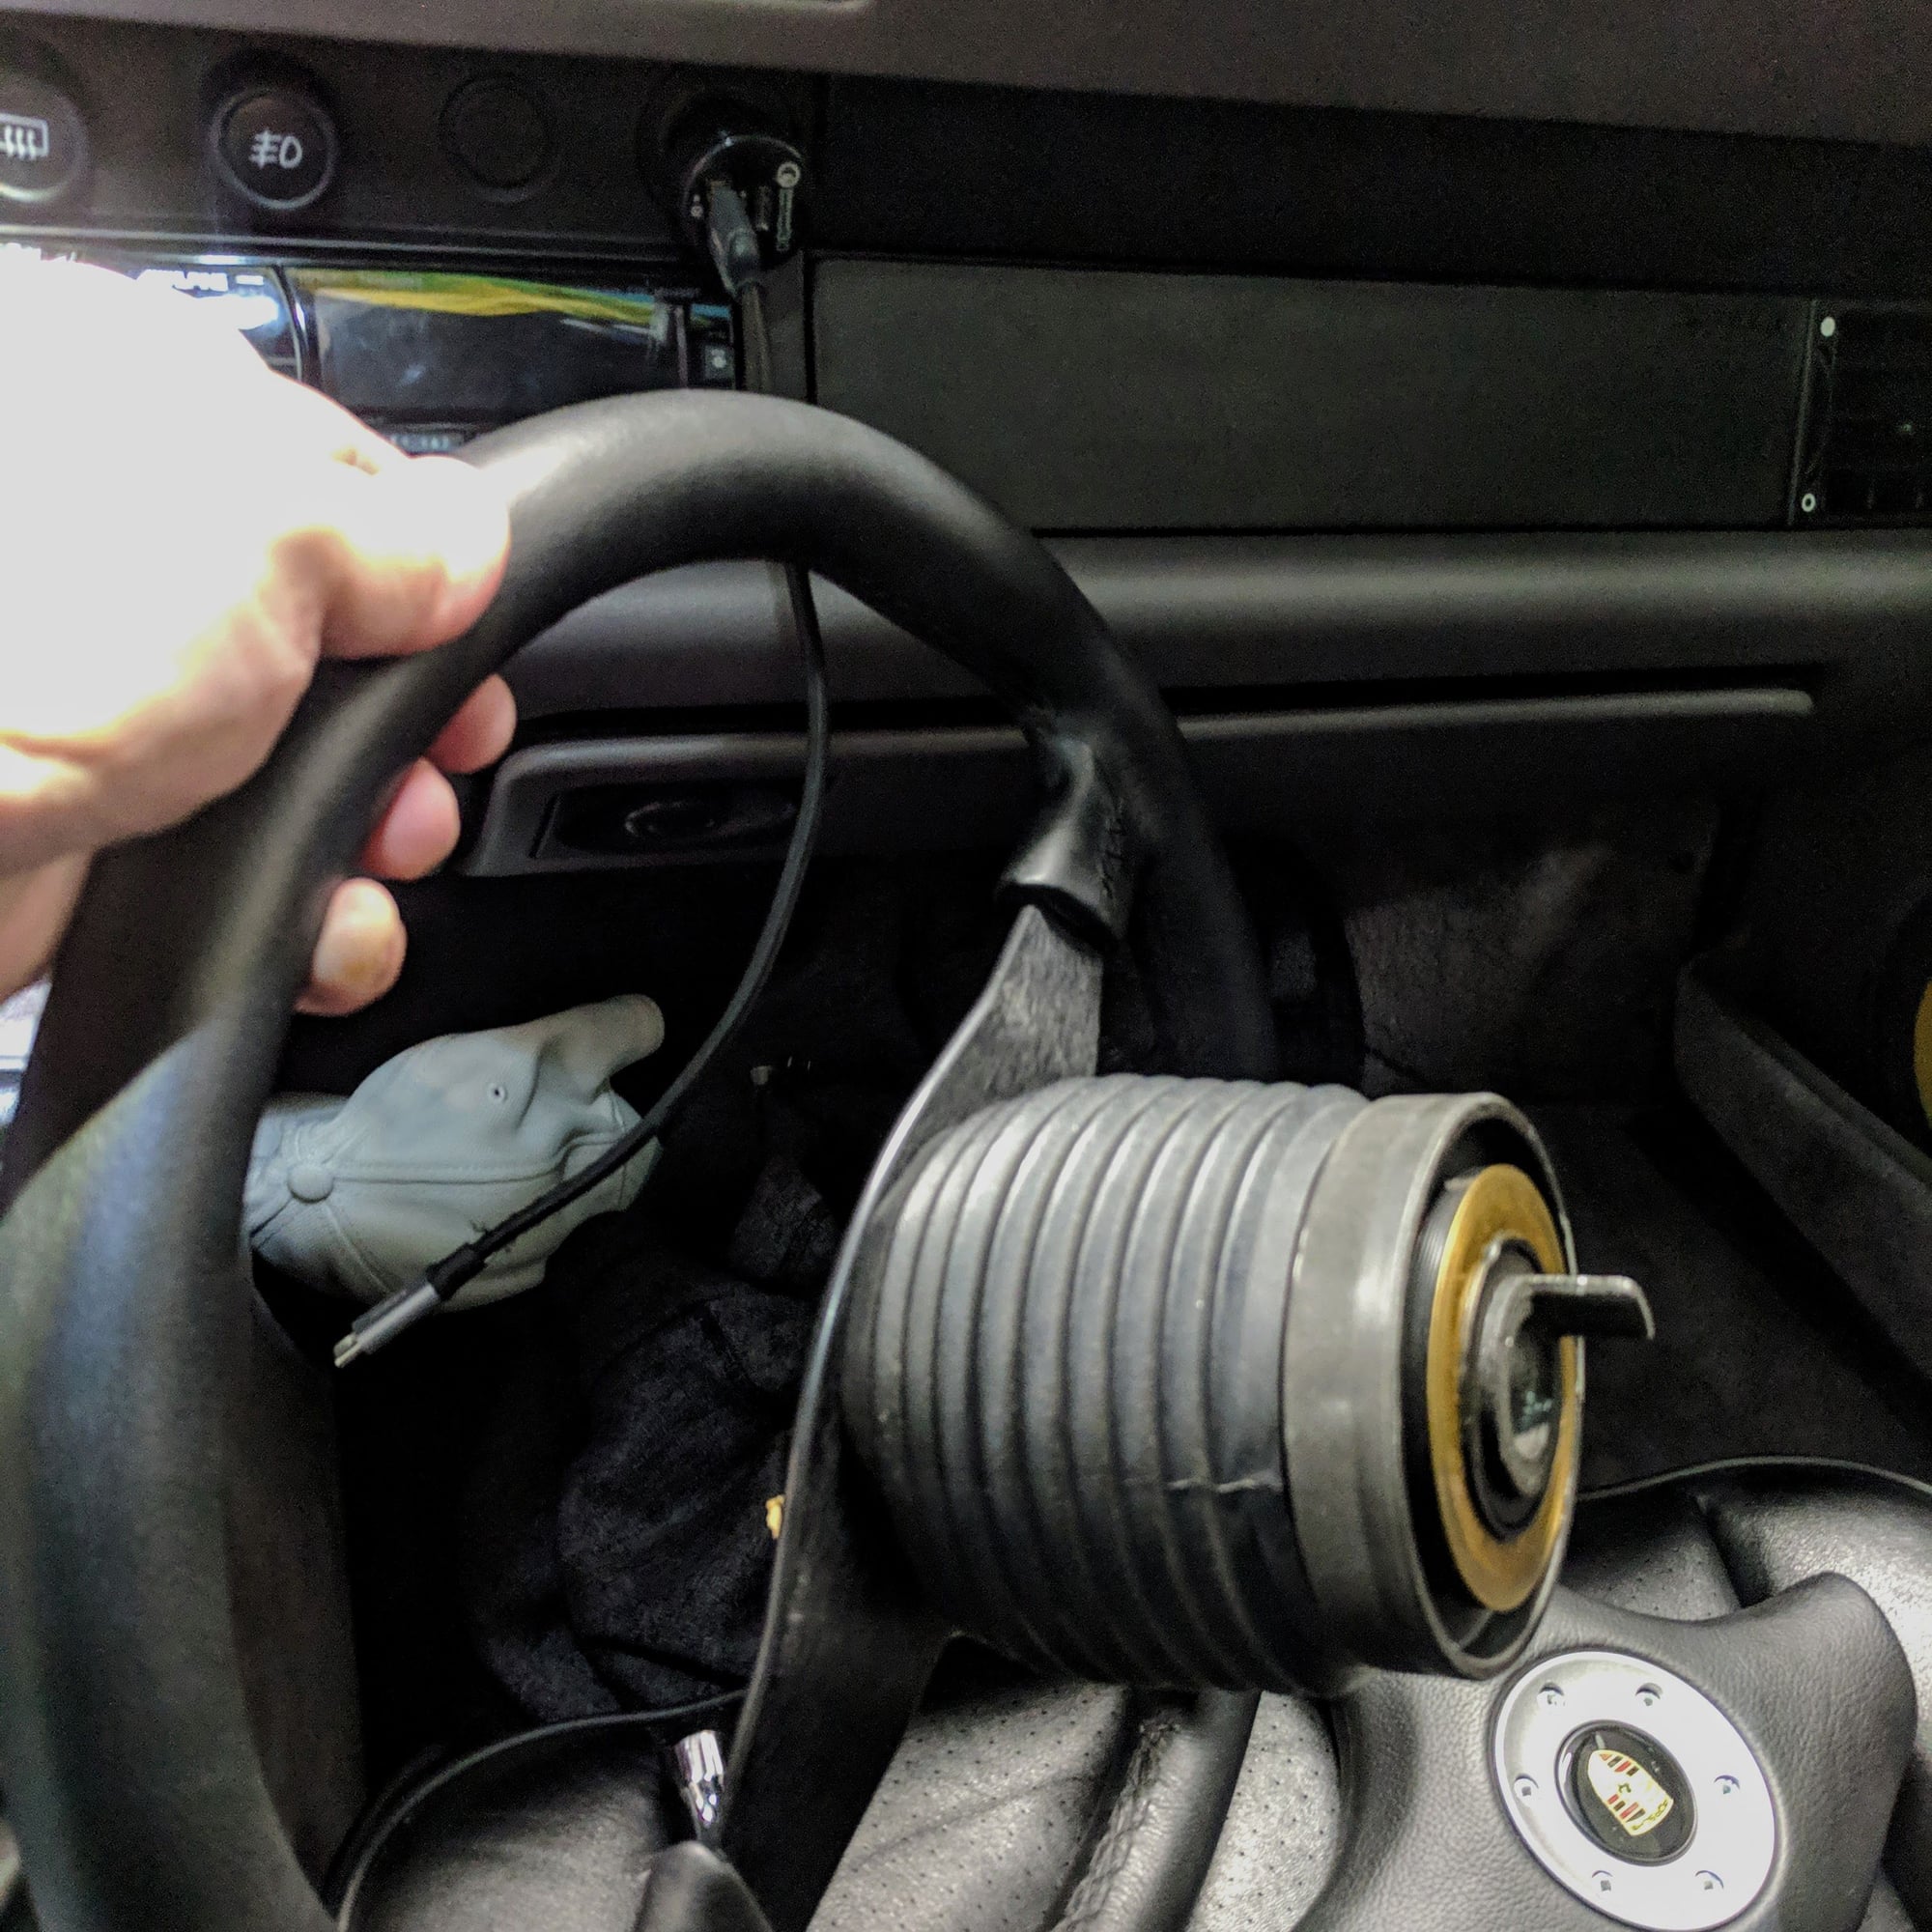
1. Remove the steering wheel. Remember to disconnect the ground from battery. If you don't you will cause an airbag fault. I learned the hard way and forgot. Luckily a local Rennlister had a Durametric pro and helped me reset the fault later.
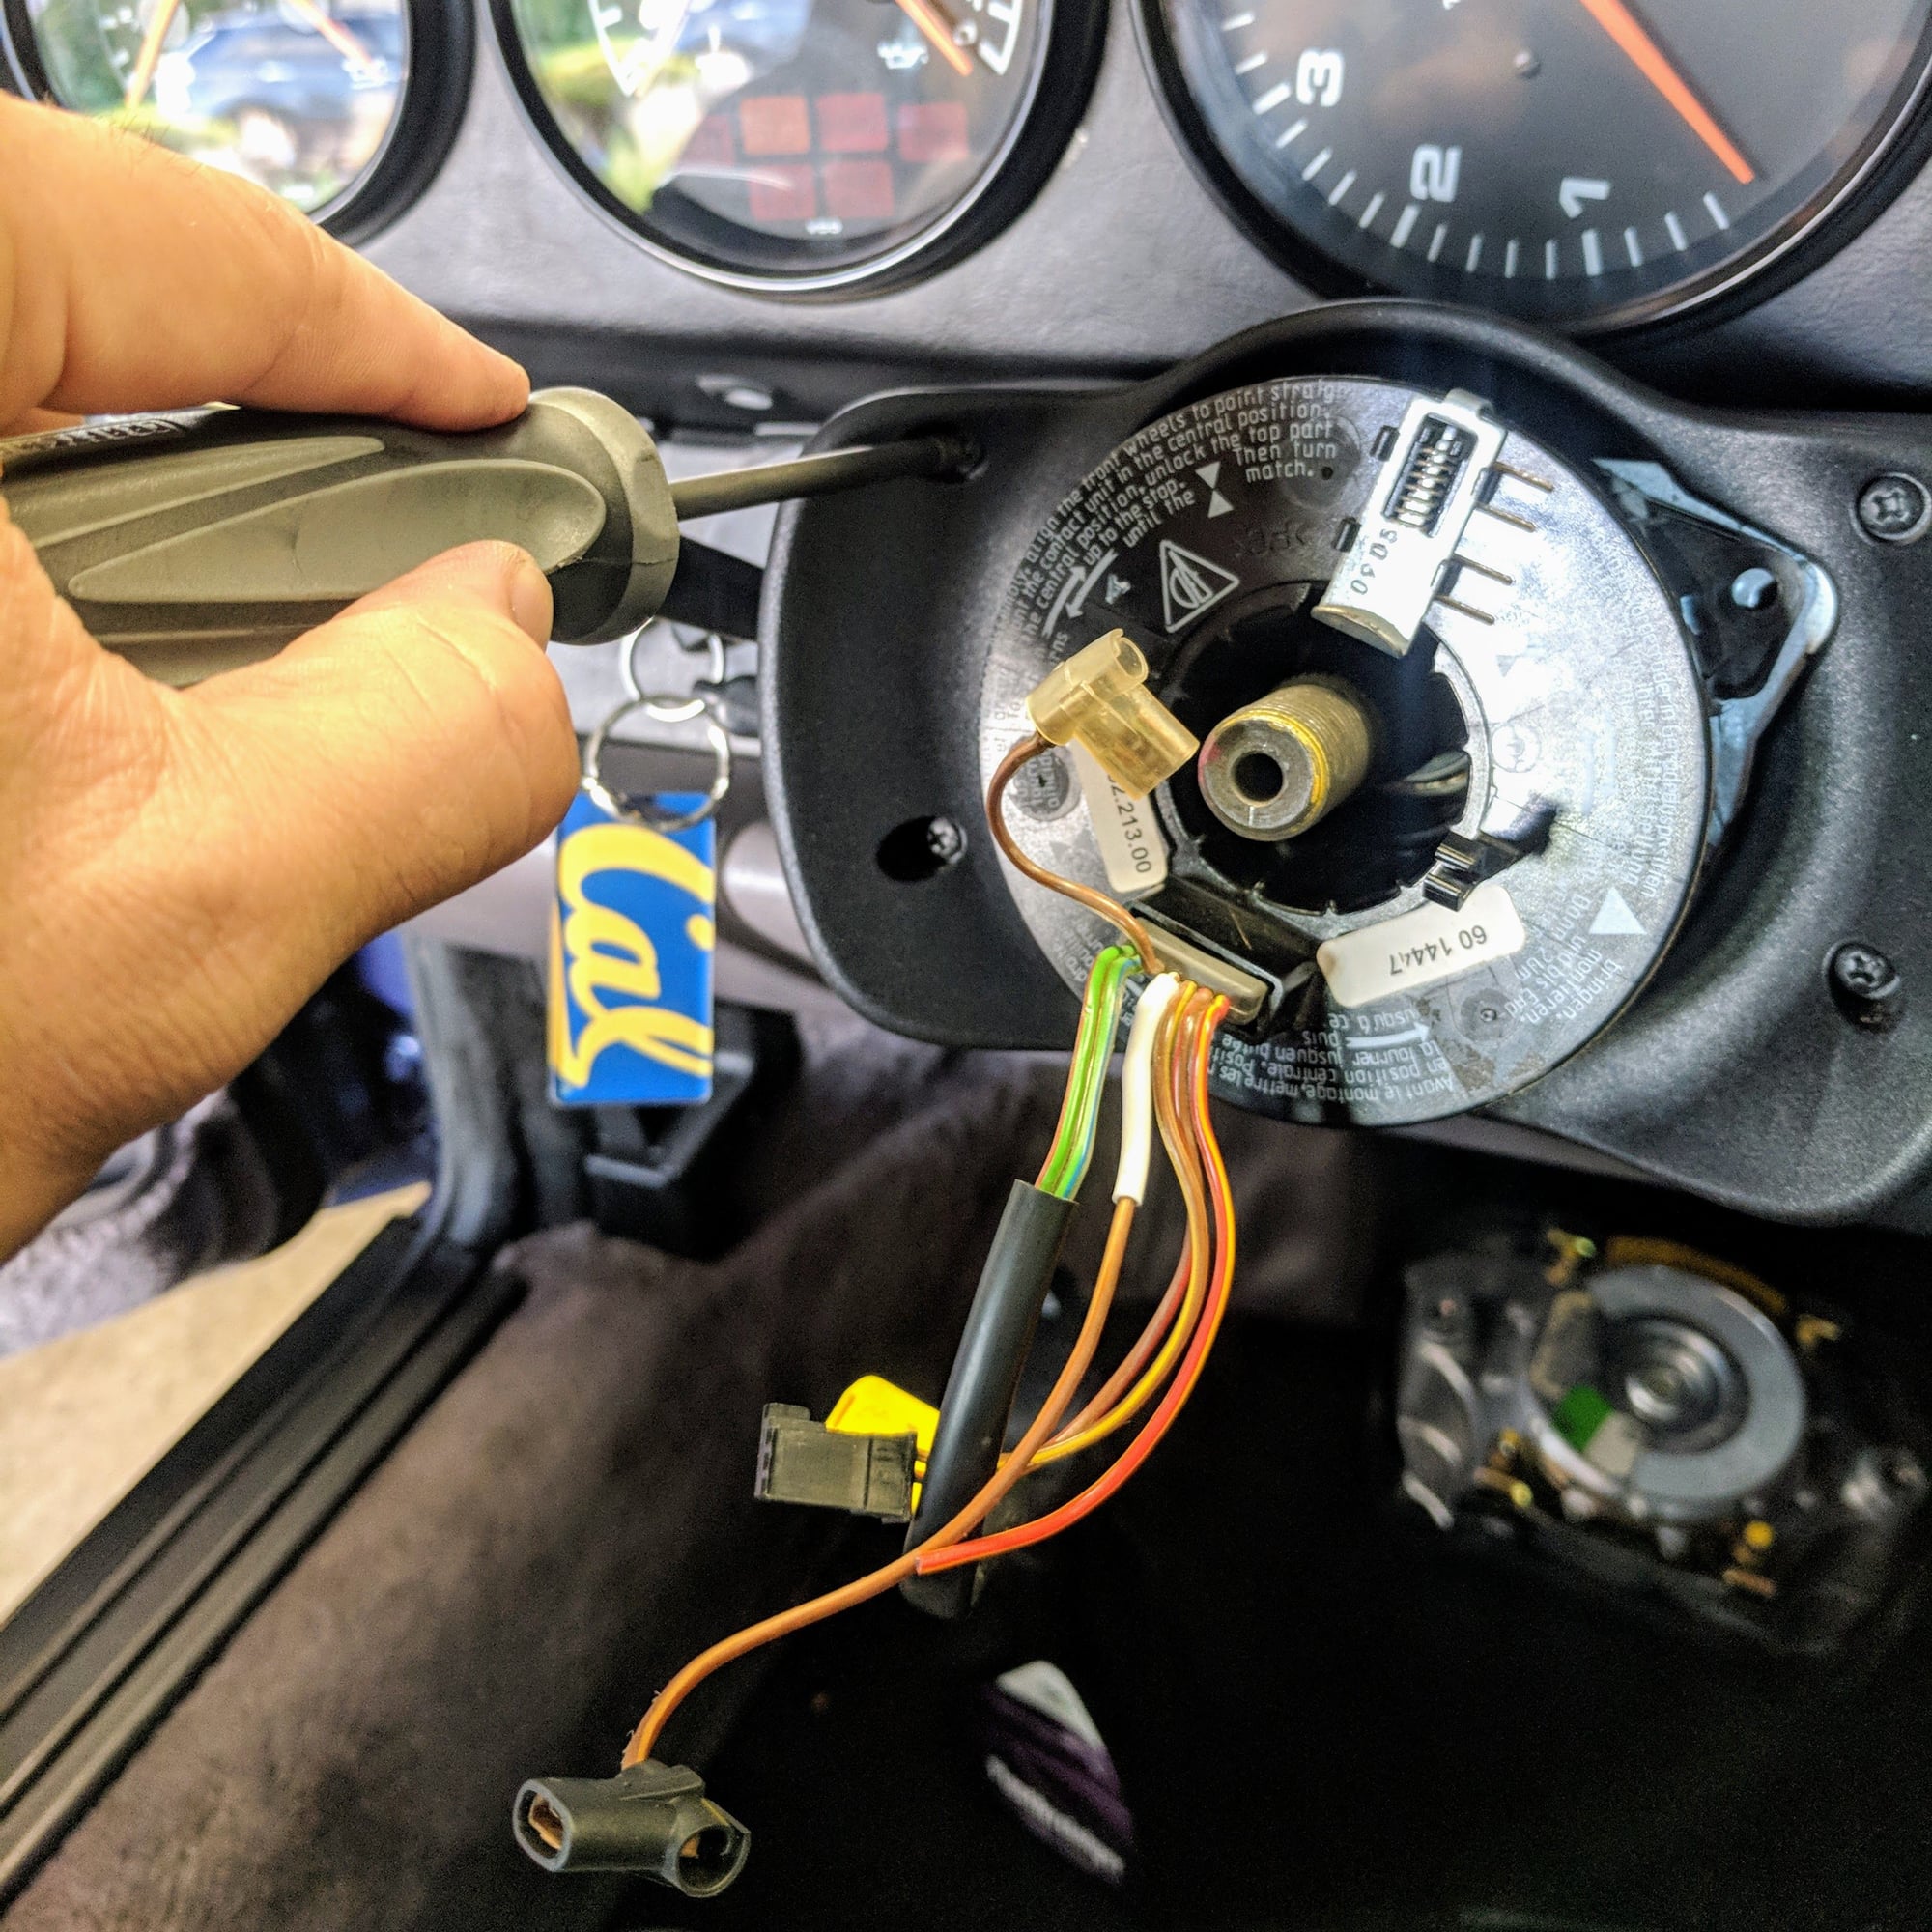
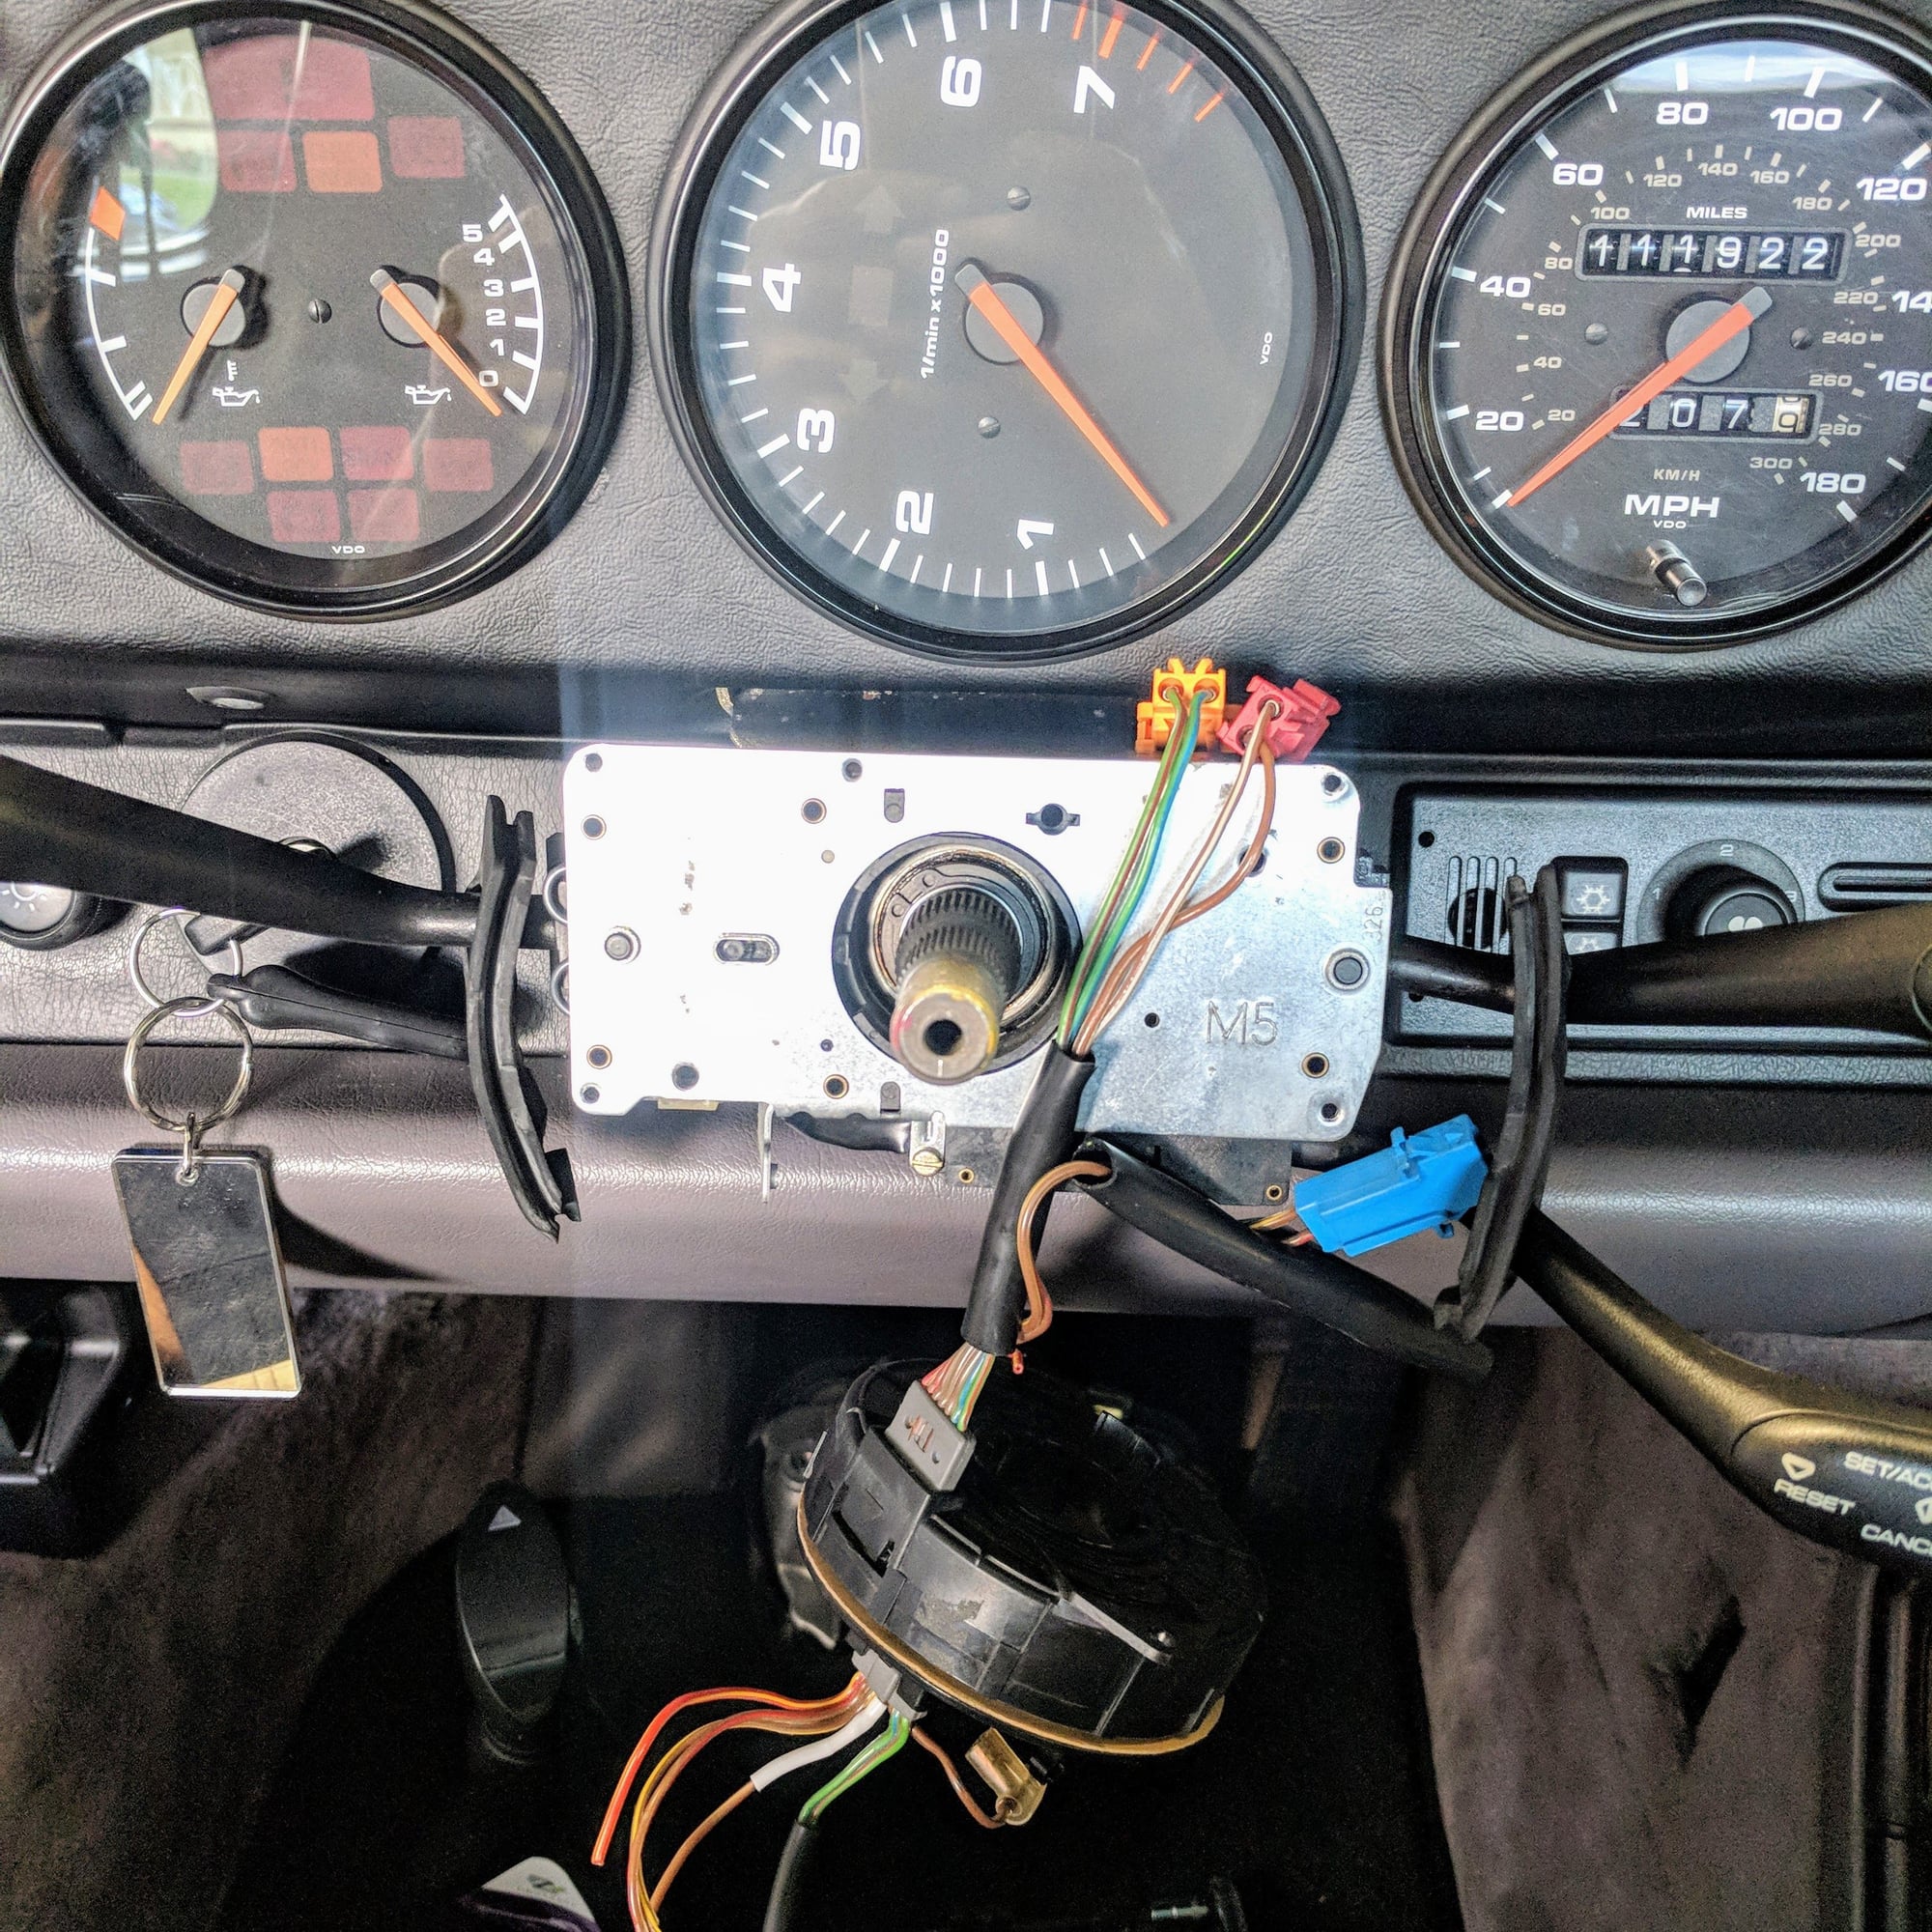
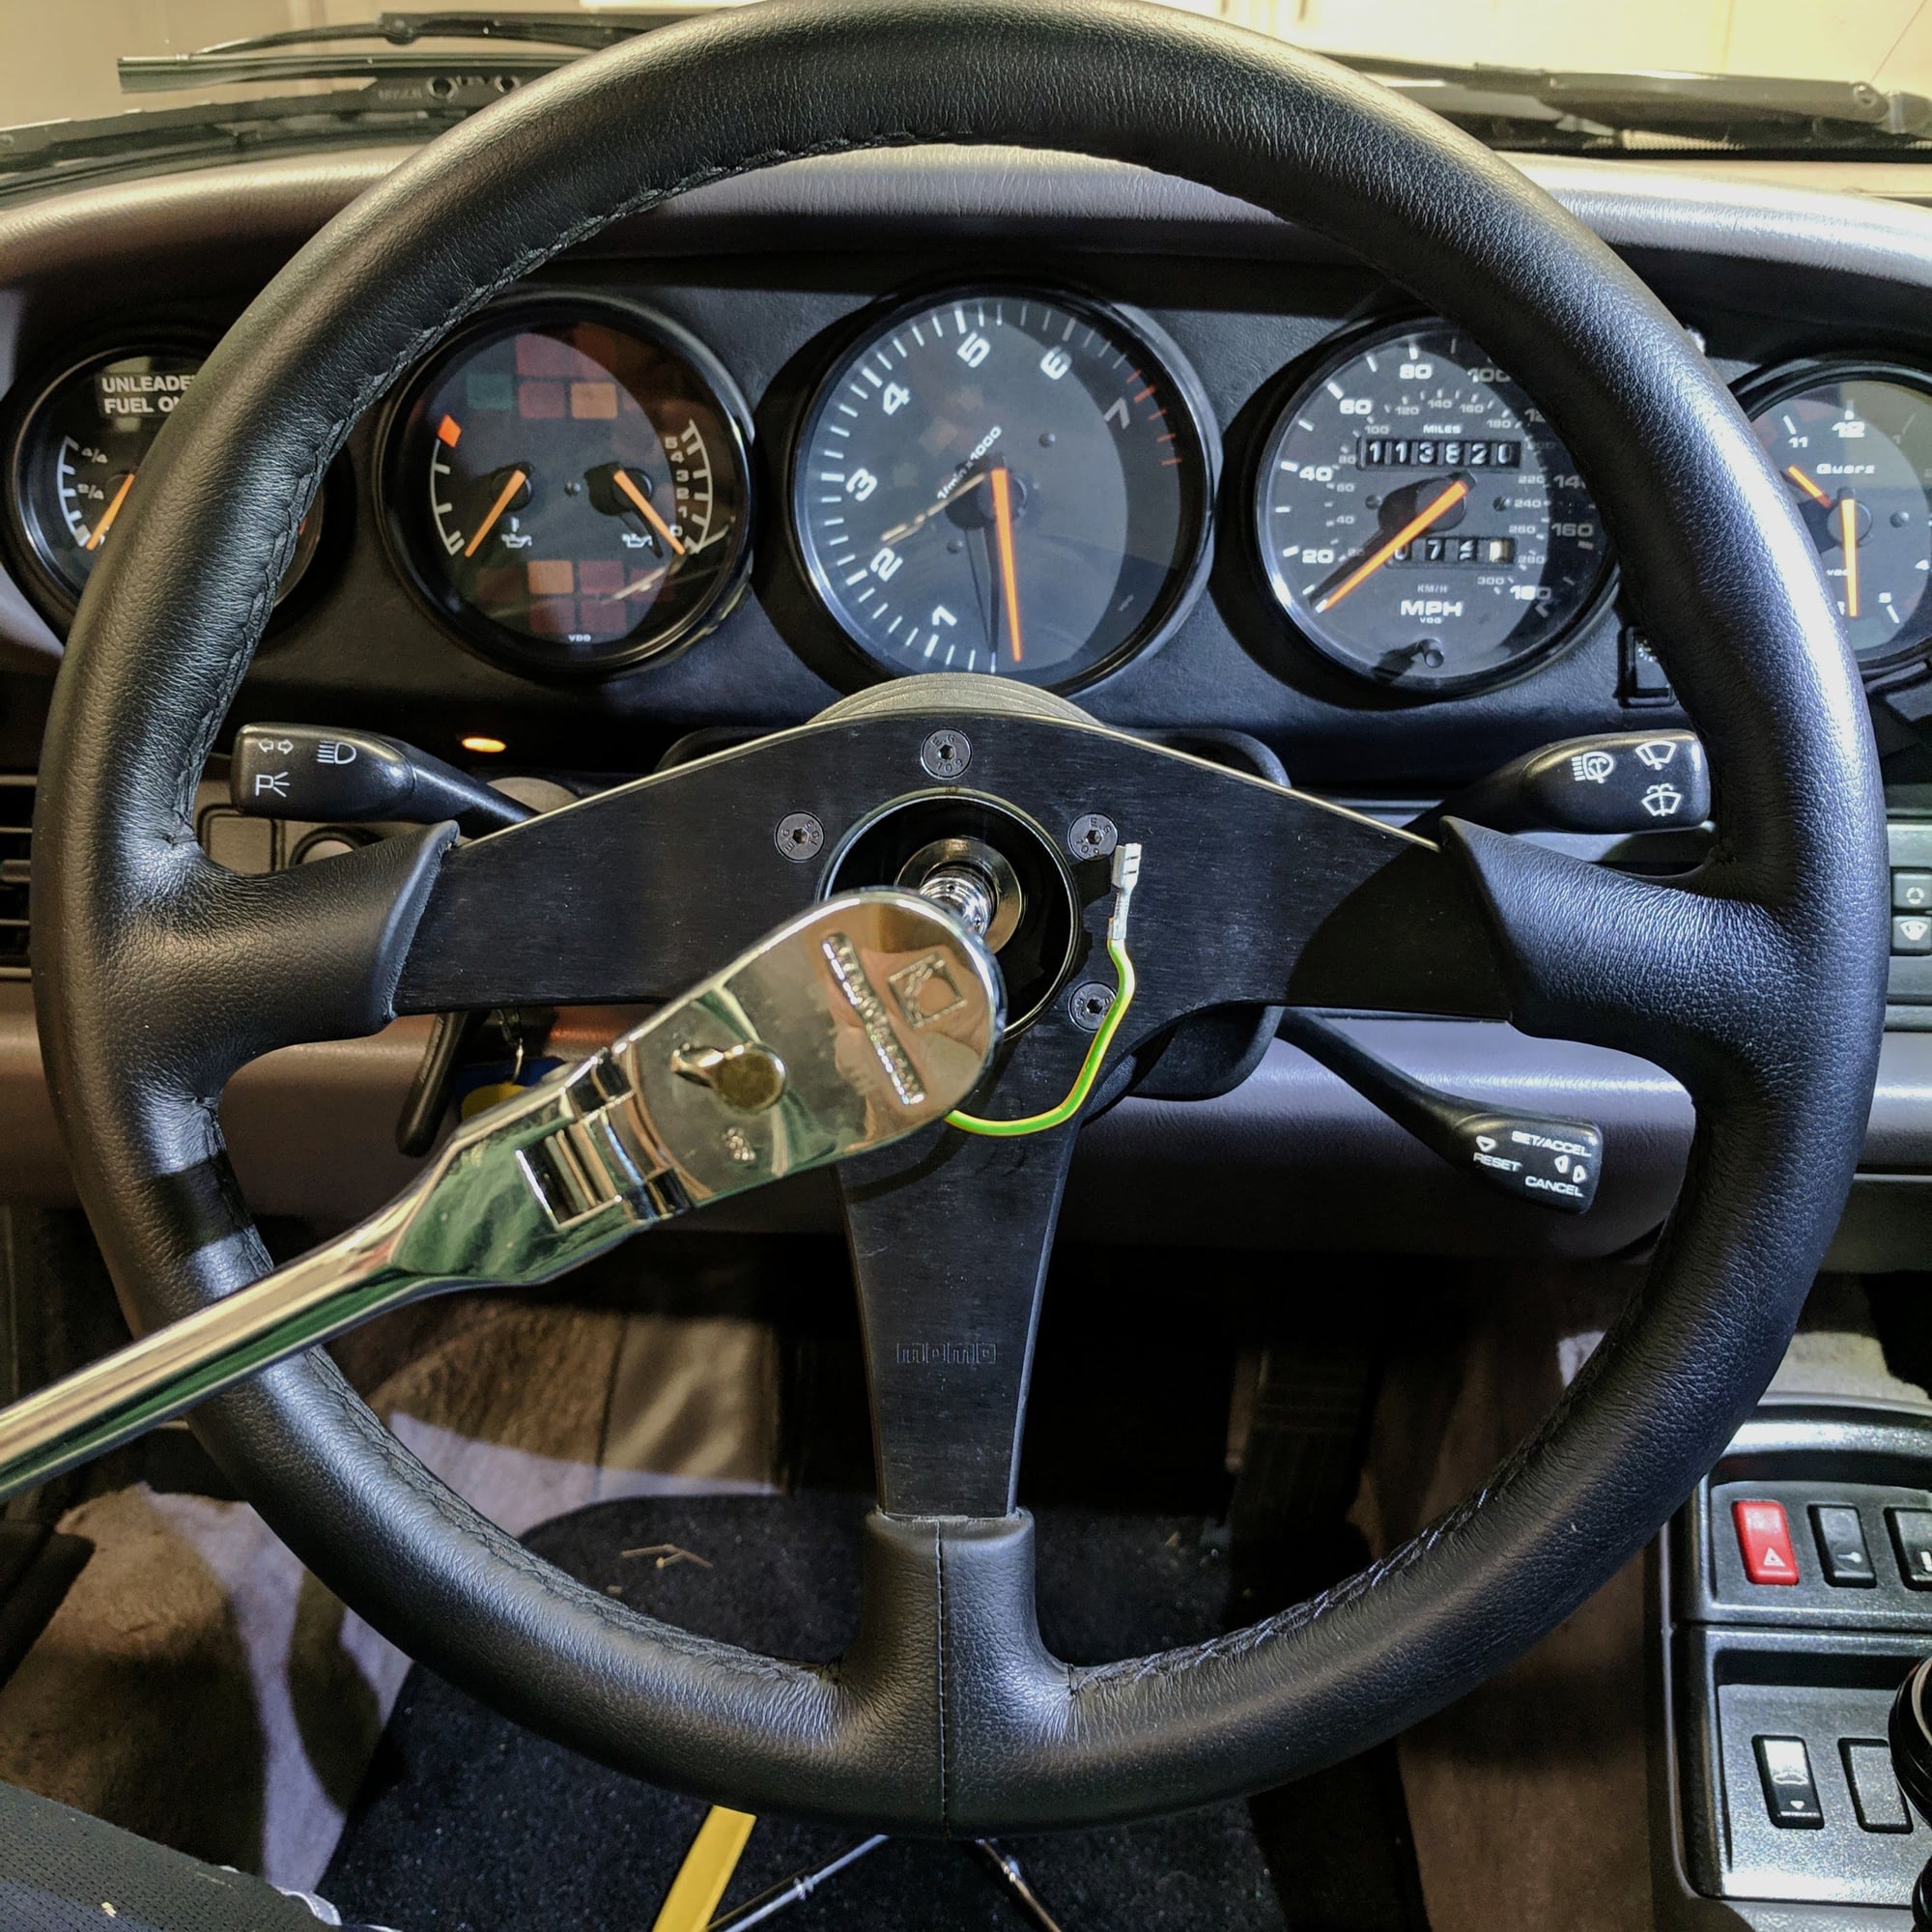
2. Once the steering wheel is off, there are a few screws the secure the bezel and the clock spring you need to remove.
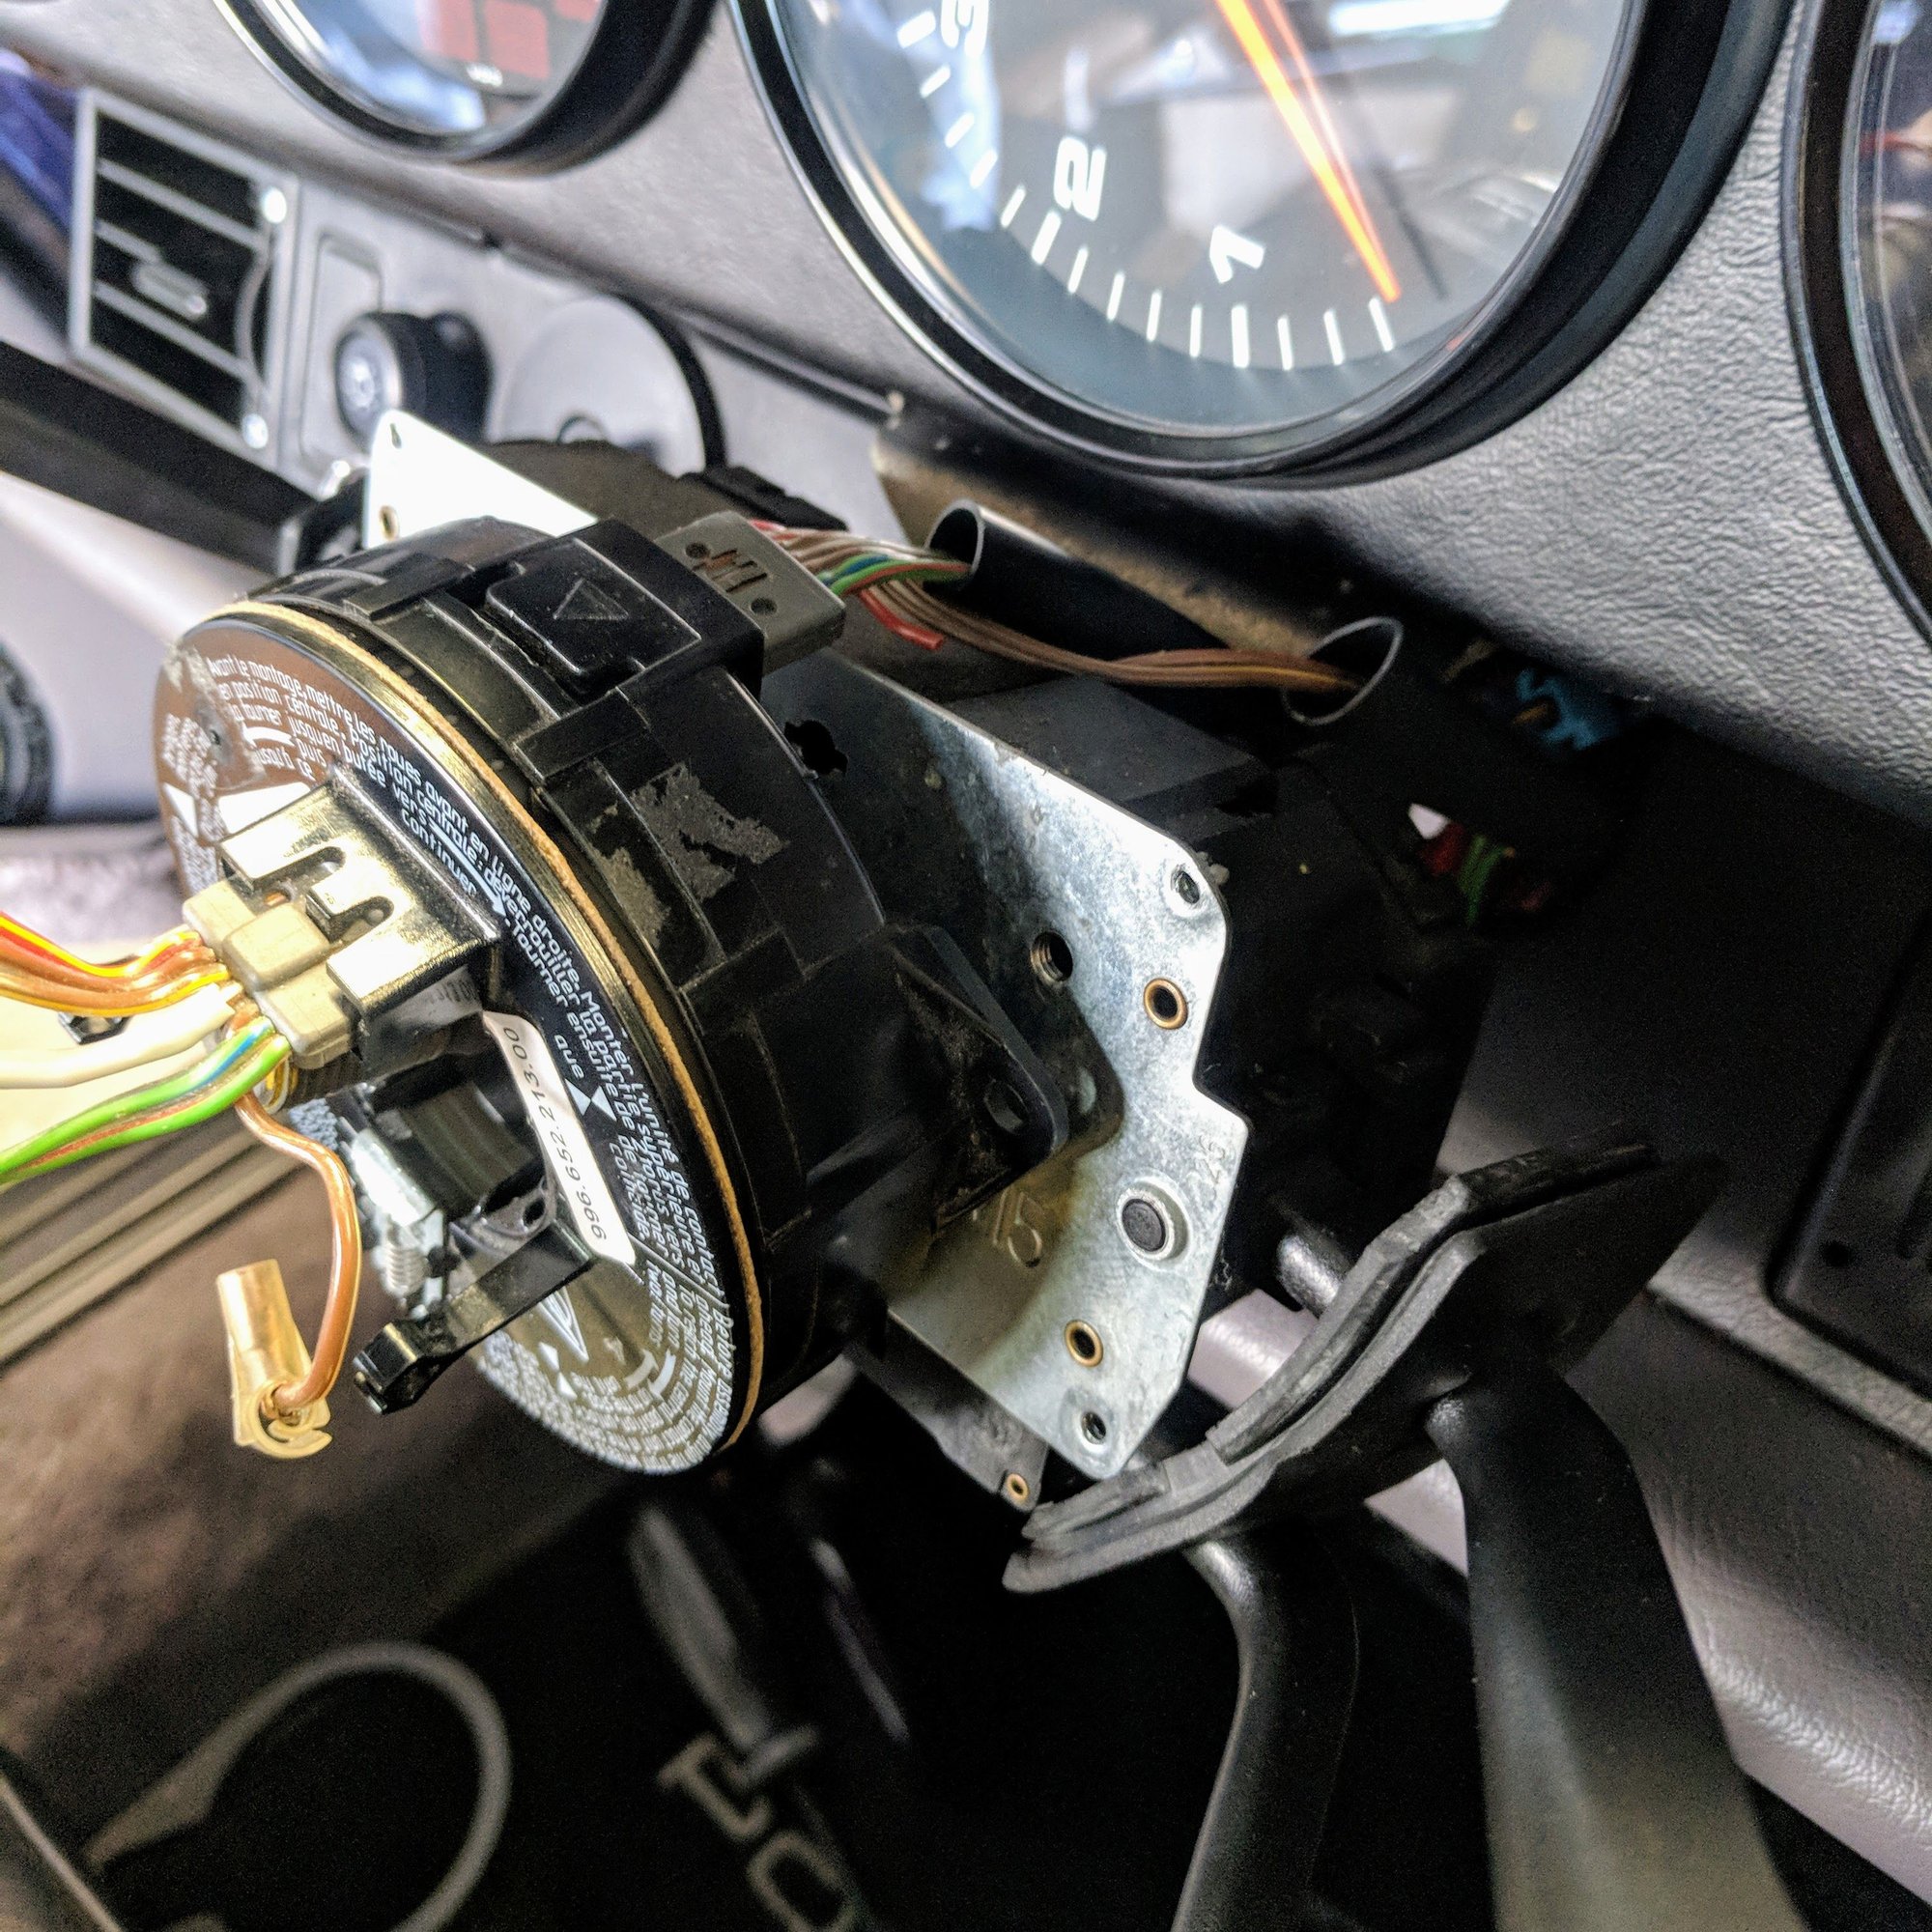
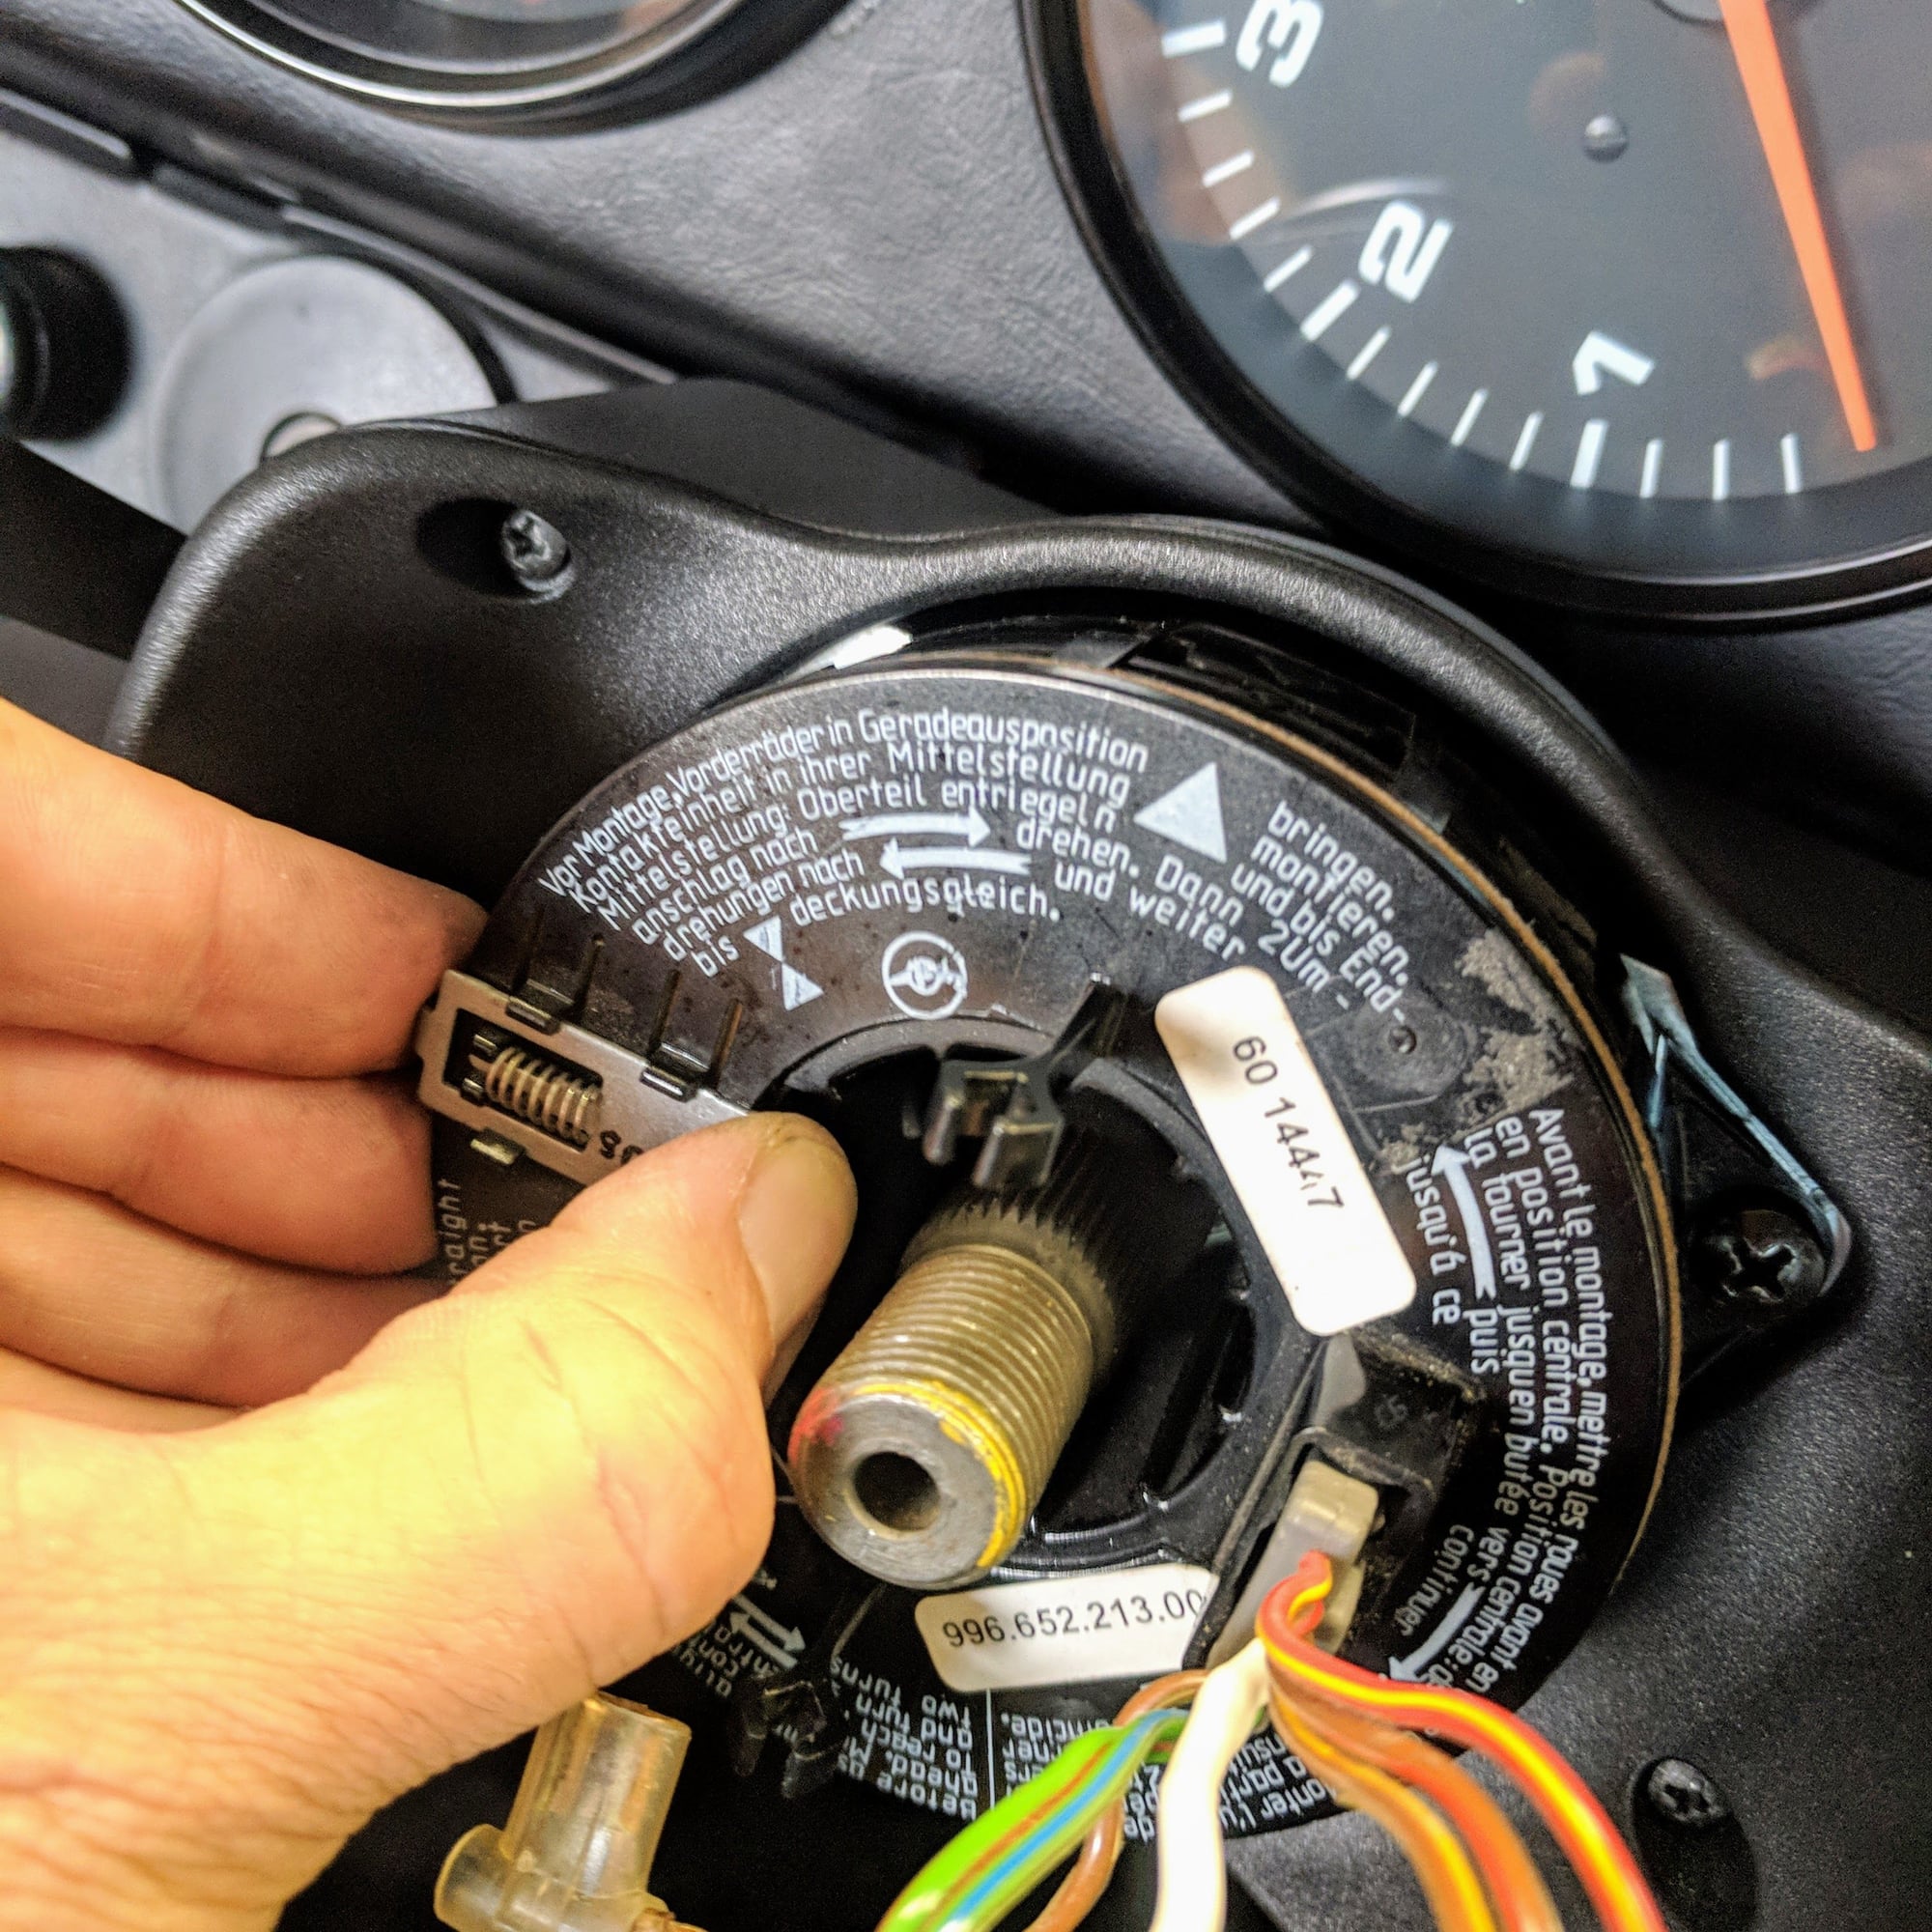
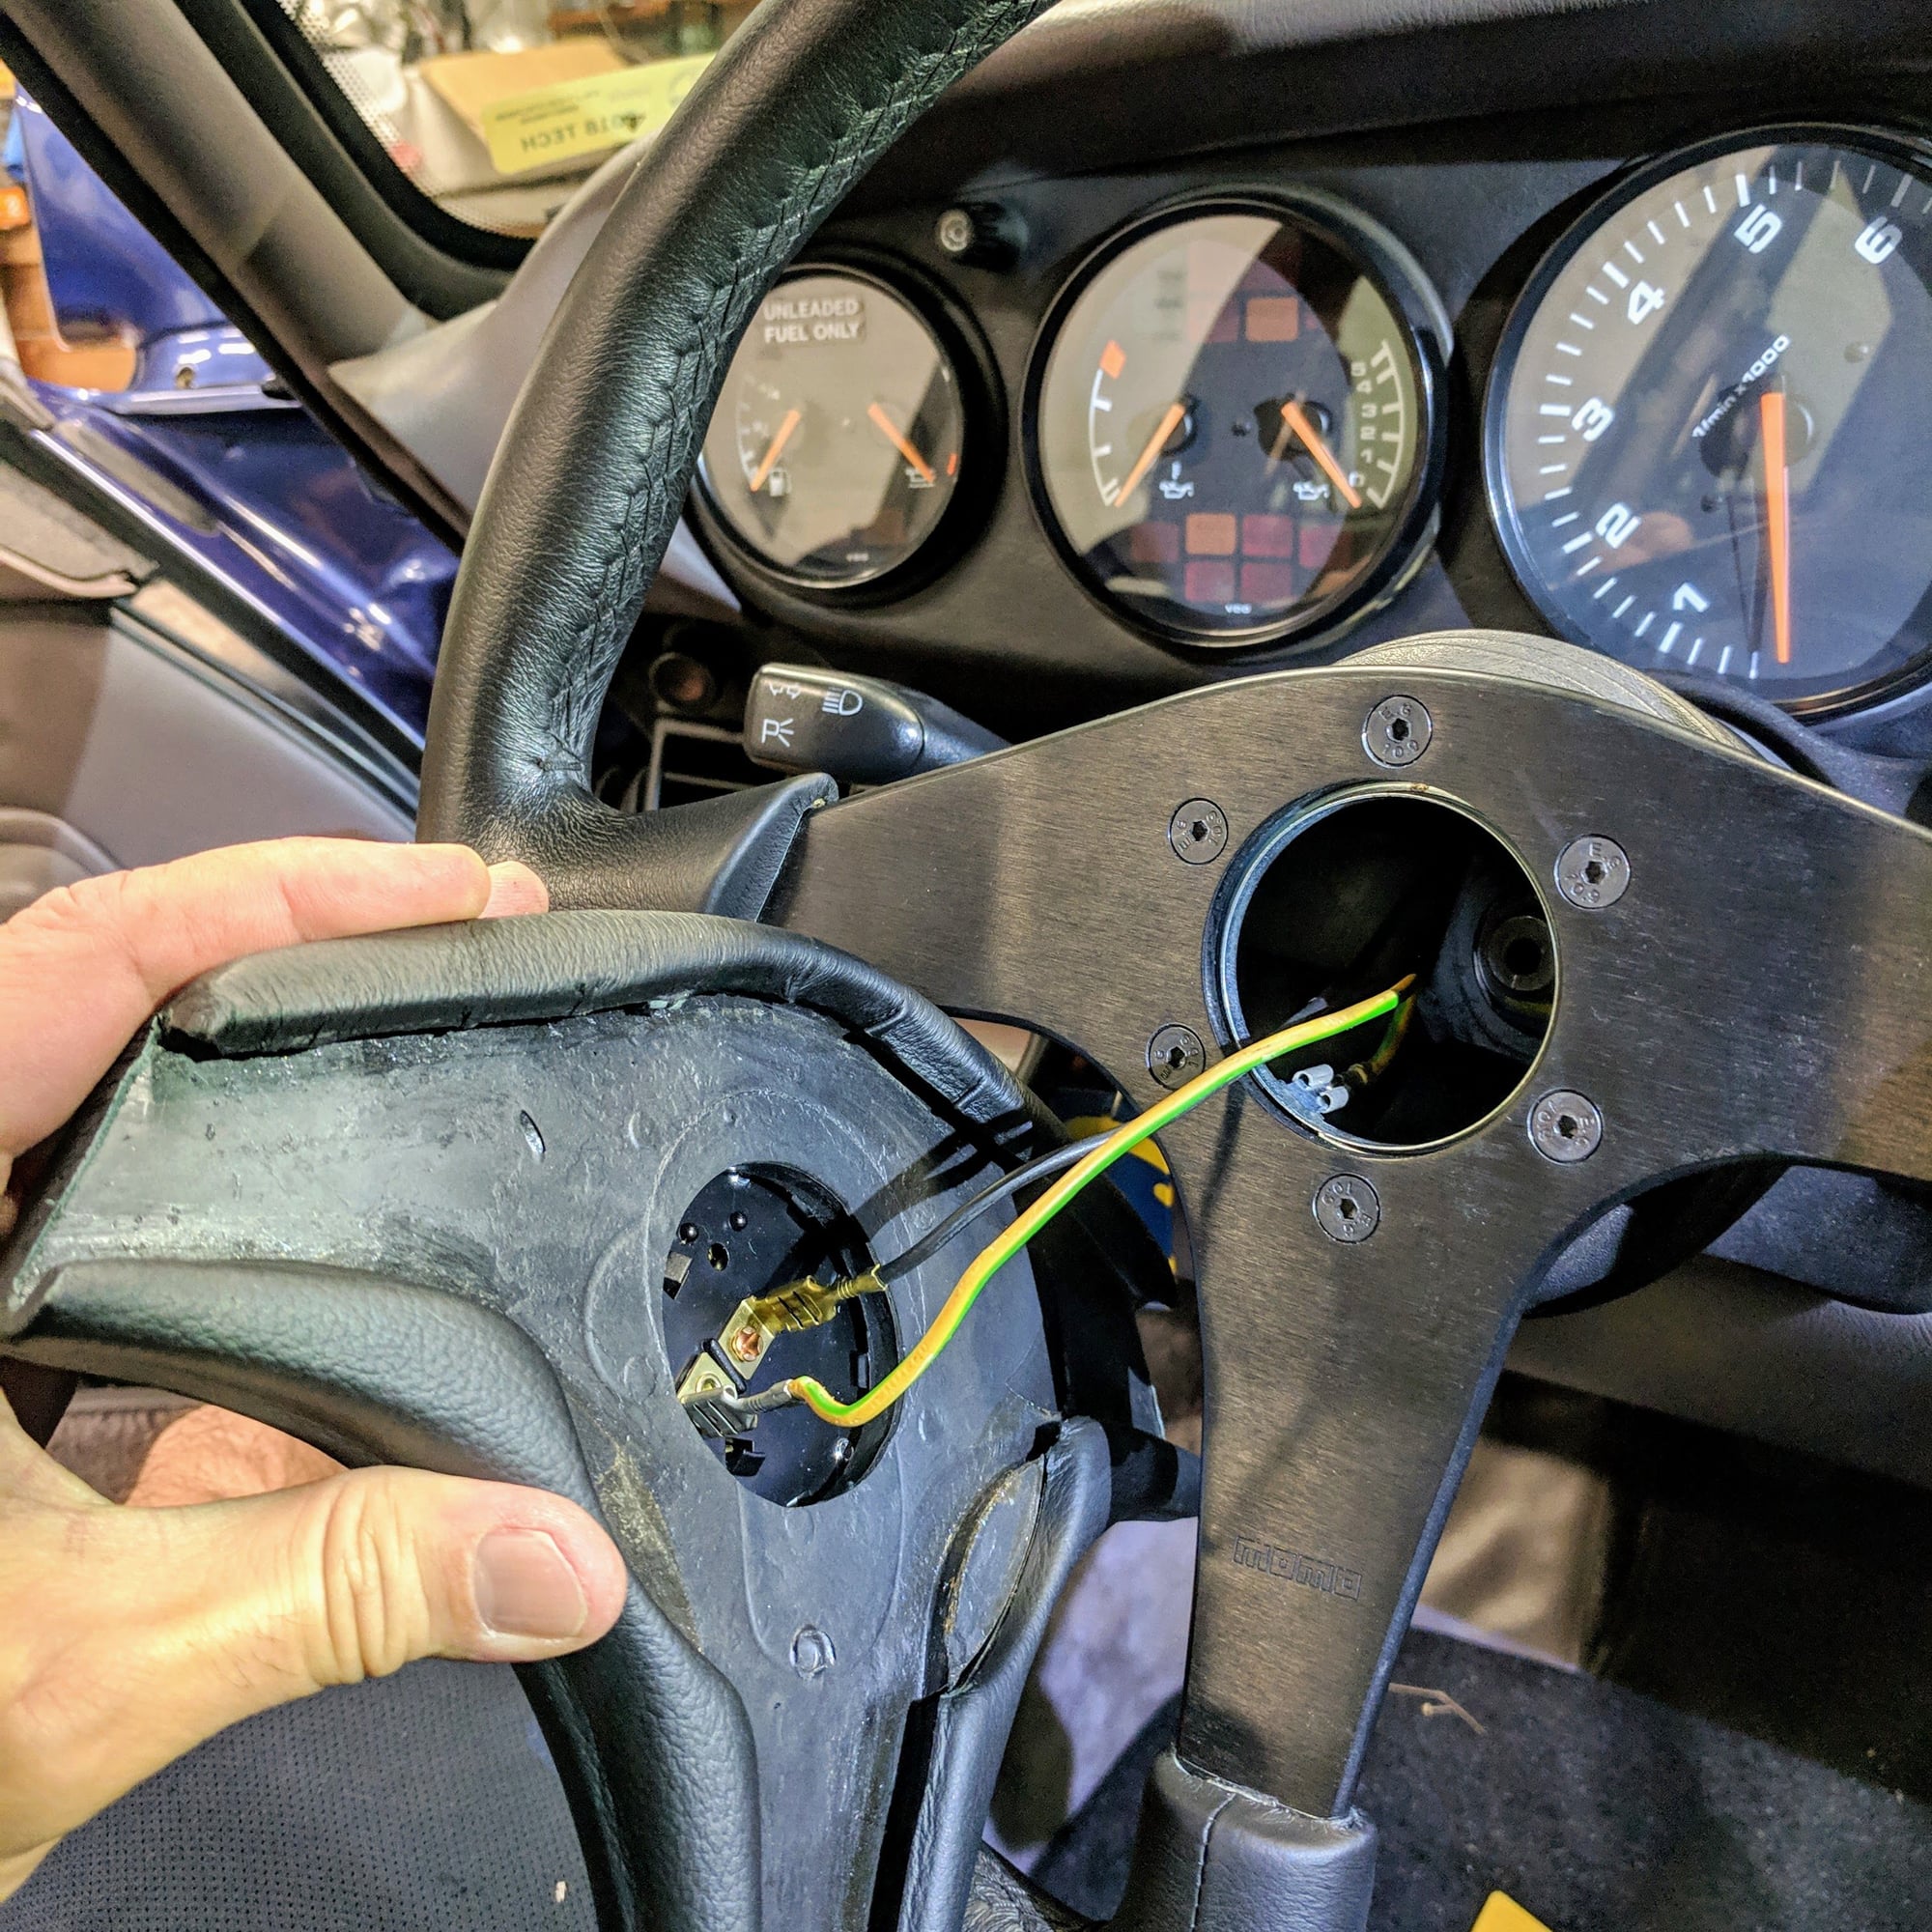
3. Pry apart the bezel to get access to the connectors that connect the clock spring to the car.
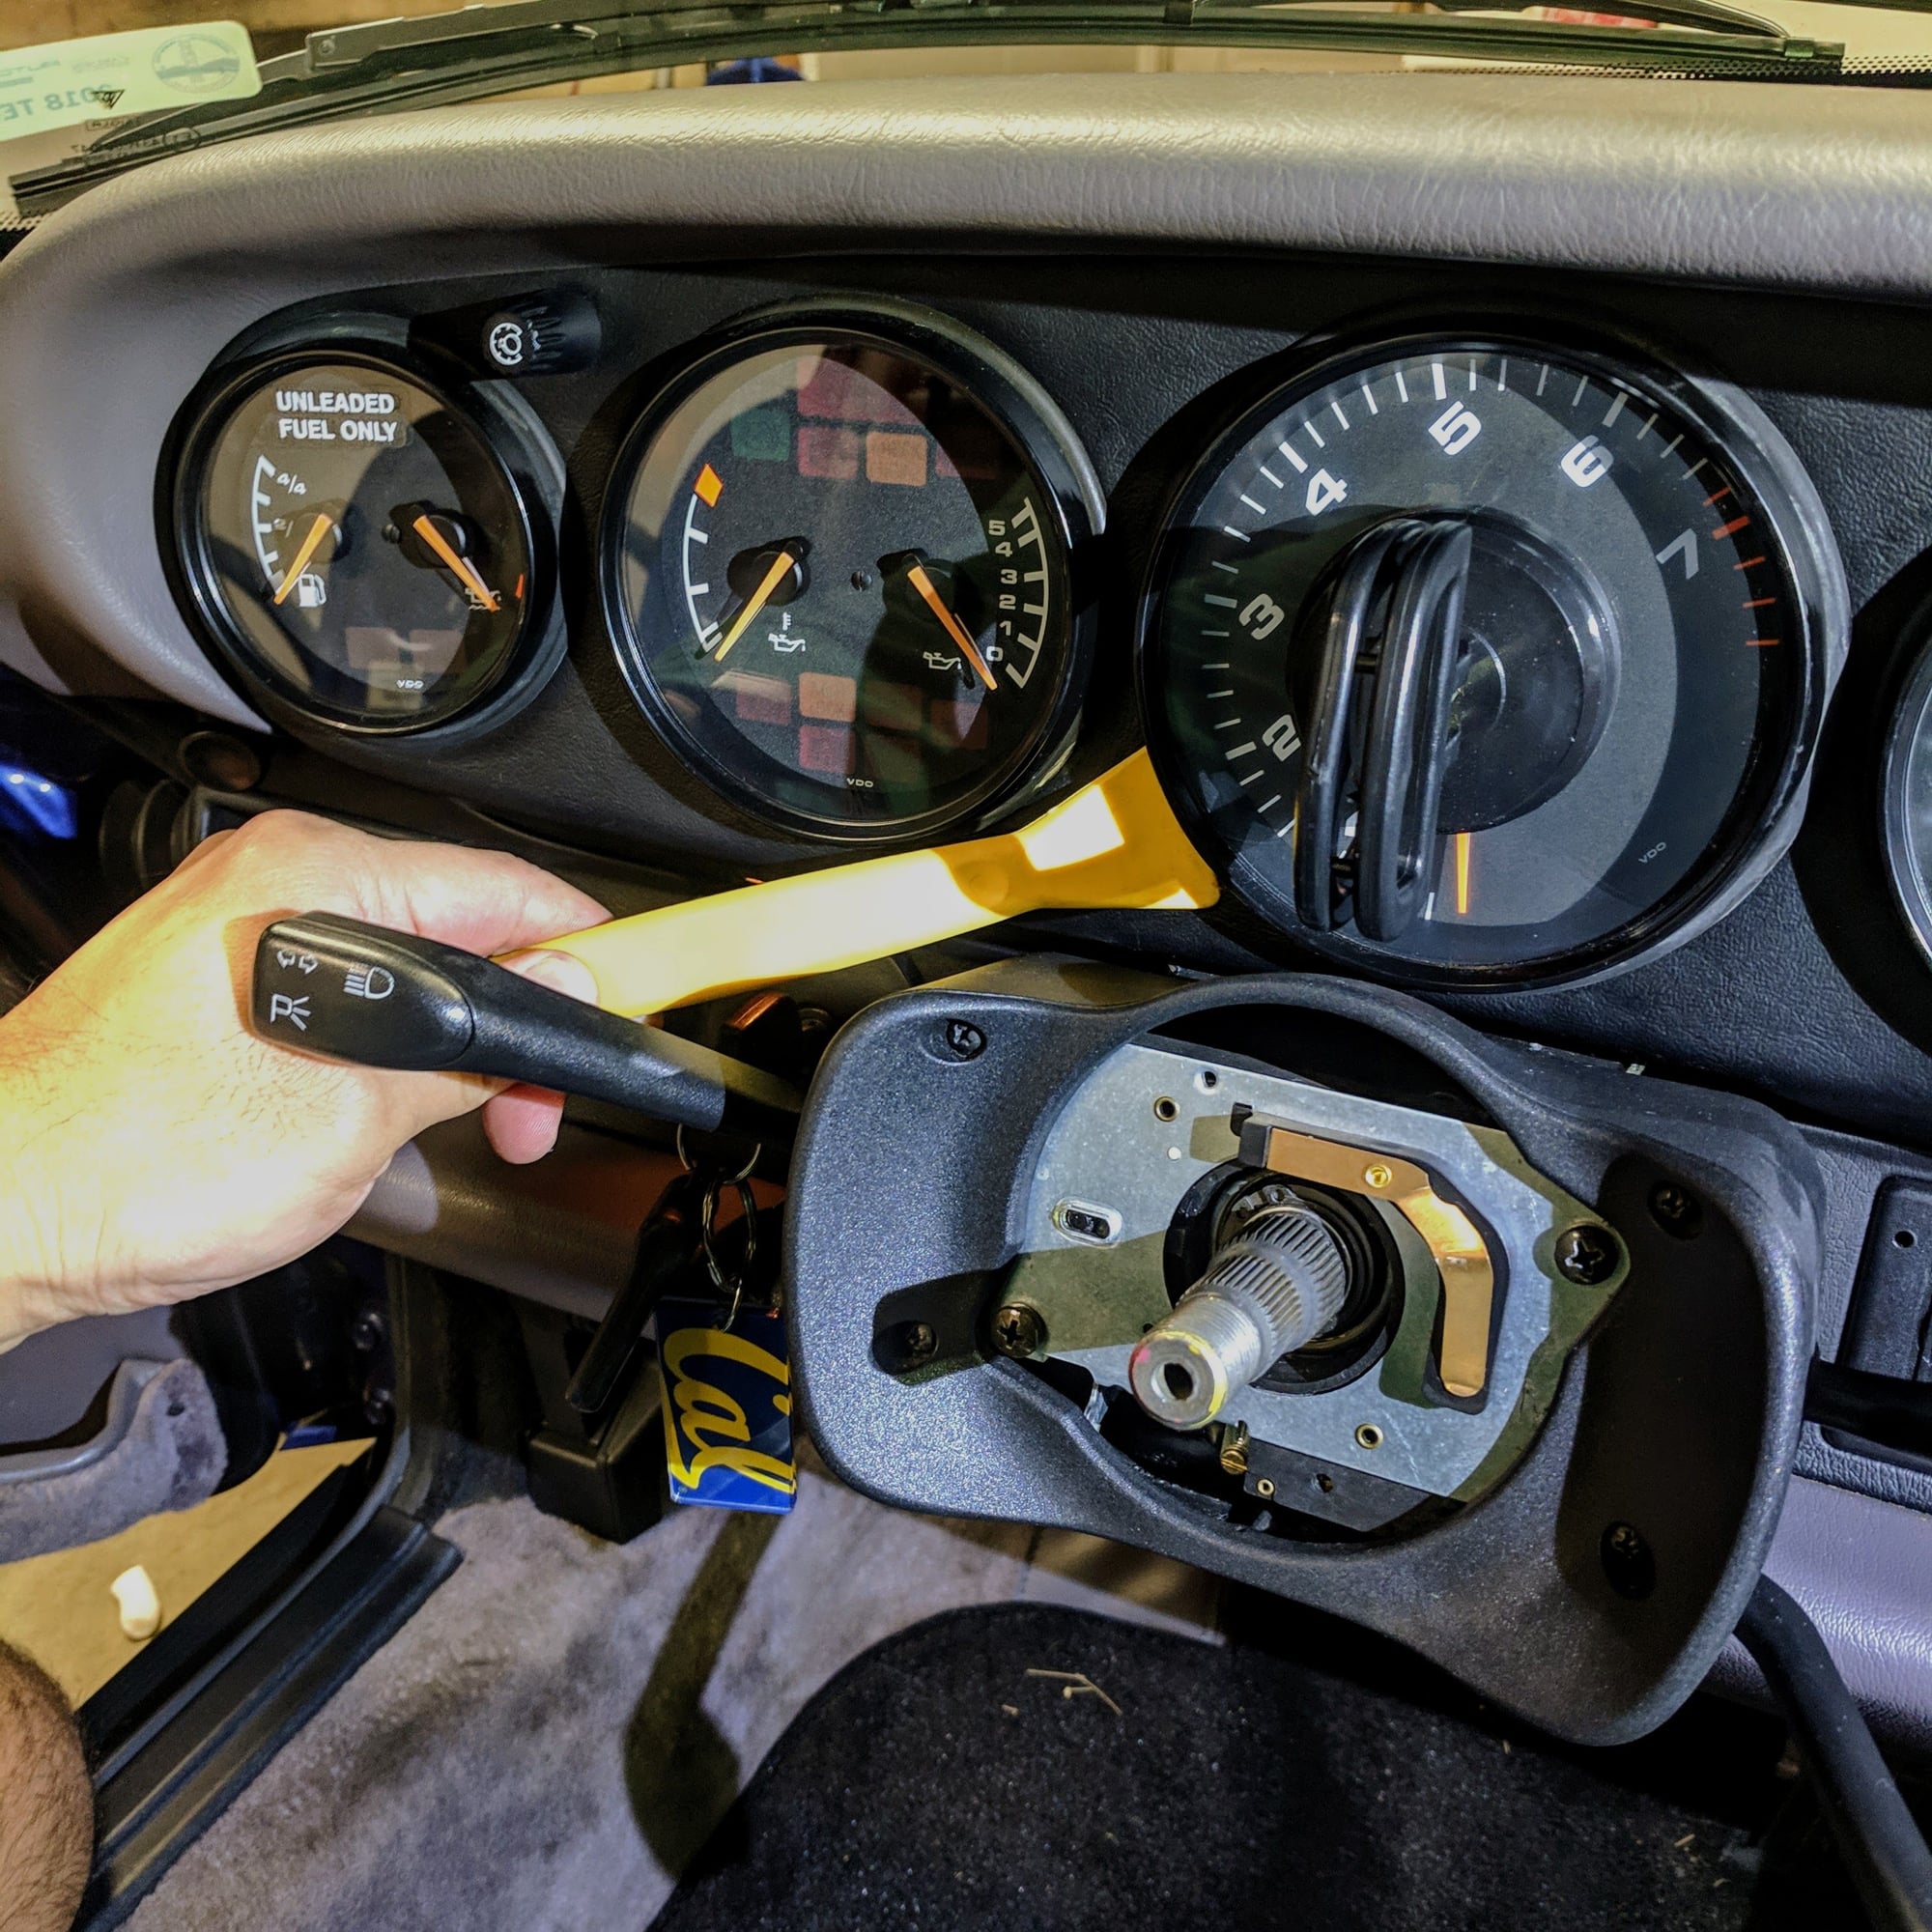
4. Connect the new clock spring and reassemble. Important note! Notice how the clock spring harness is on top and not on the bottom of the steering column. You will not be able to reassemble the steering column bezel if the harness is on the bottom.
5. Follow the instructions on the clock spring and wind it up and then wind it down. This winding step will properly set the clock spring so when you turn the steering wheel lock to lock it will not strain the clock spring.
Last couple months has been a whirlwind. My wrenching and upgrade activities have taken a back-burner as I started a new job at a start-up and my daughters after-school activities in full motion. Nonetheless, been able to sneak in a few projects, one of which as some of you seen is the group-buy I have organized with Cars Dream. This gave me the excuse to finally replace some burned out backlight bulbs in my tach, as well as install a 3 spoke RS wheel I picked up from @DutchNy earlier this summer.
I used a 3ohm 1W resistor ordered from Amazon here... Prime shipping so showed up my door next day for free! No issues with the onboard computer throwing airbag errors.
I wanted this mod to be easily reversible. I got super lucky where fellow Rennlister @Chuck W. gave me a set of used clock spring connectors. Thanks @Chuck W. !
Here is some pics...
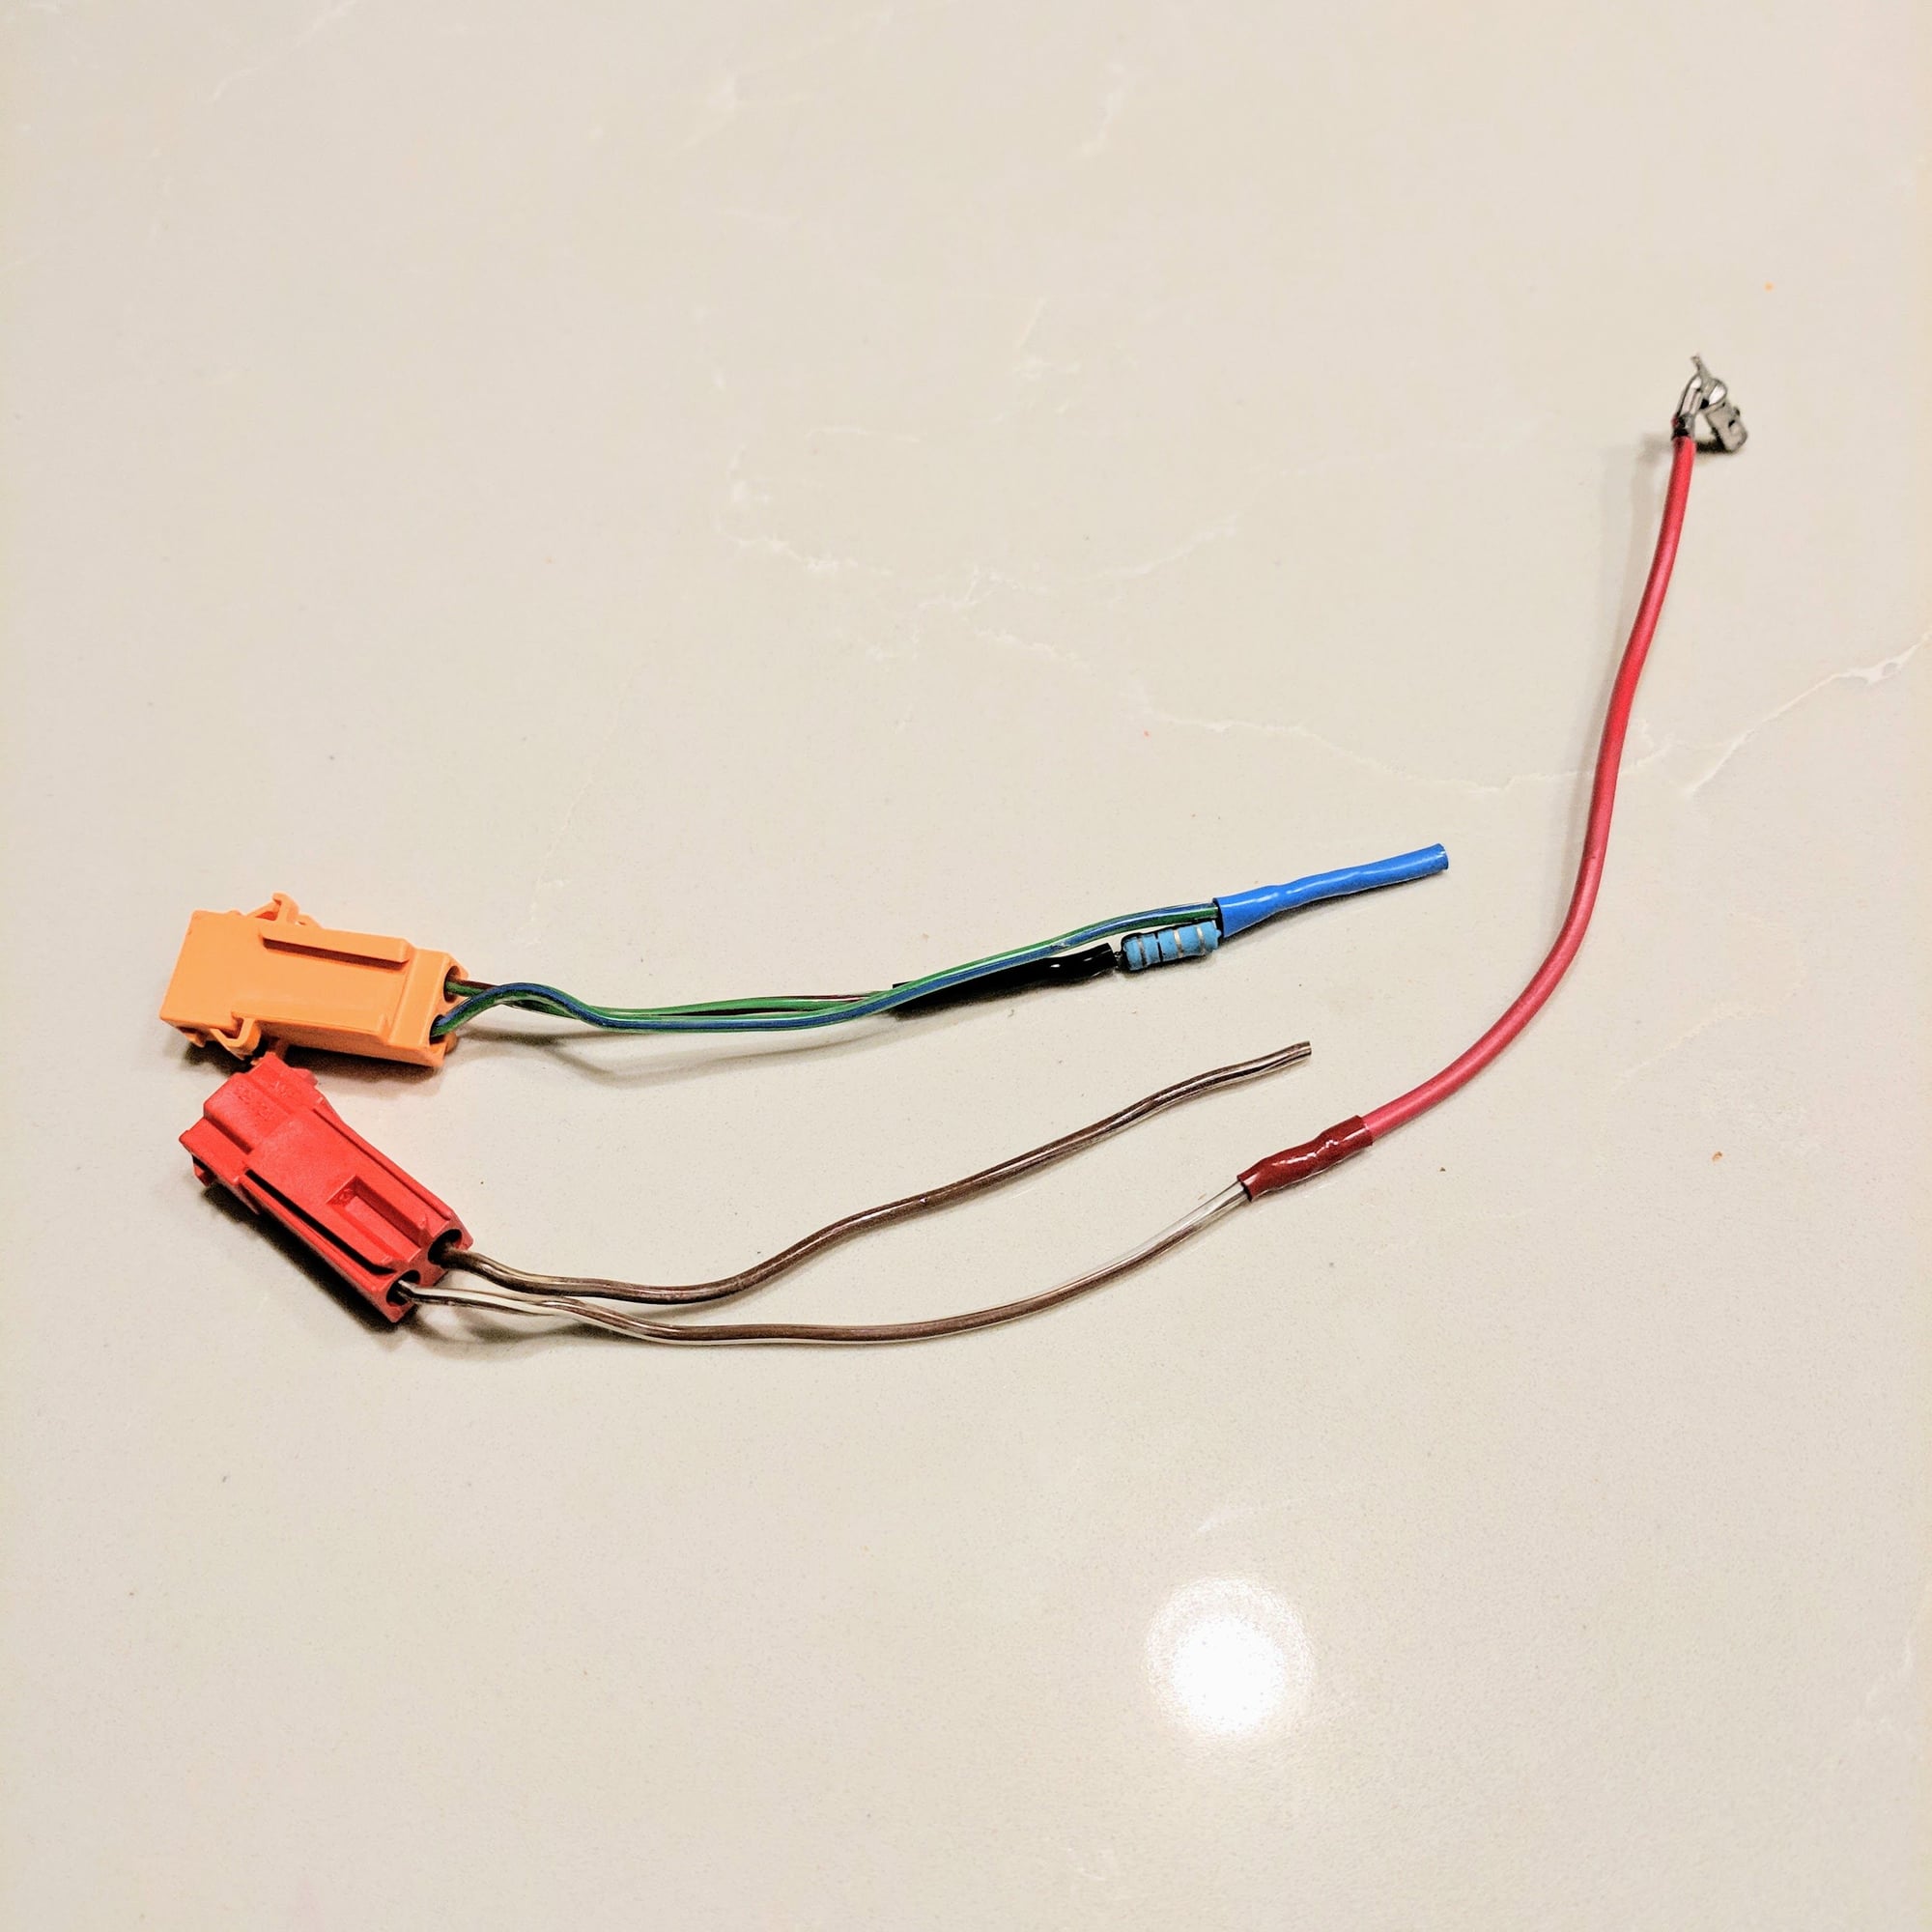
1. Soldered, crimped, and heat shrink'd a set of leads for the horn lead and airbag defeat resistor.
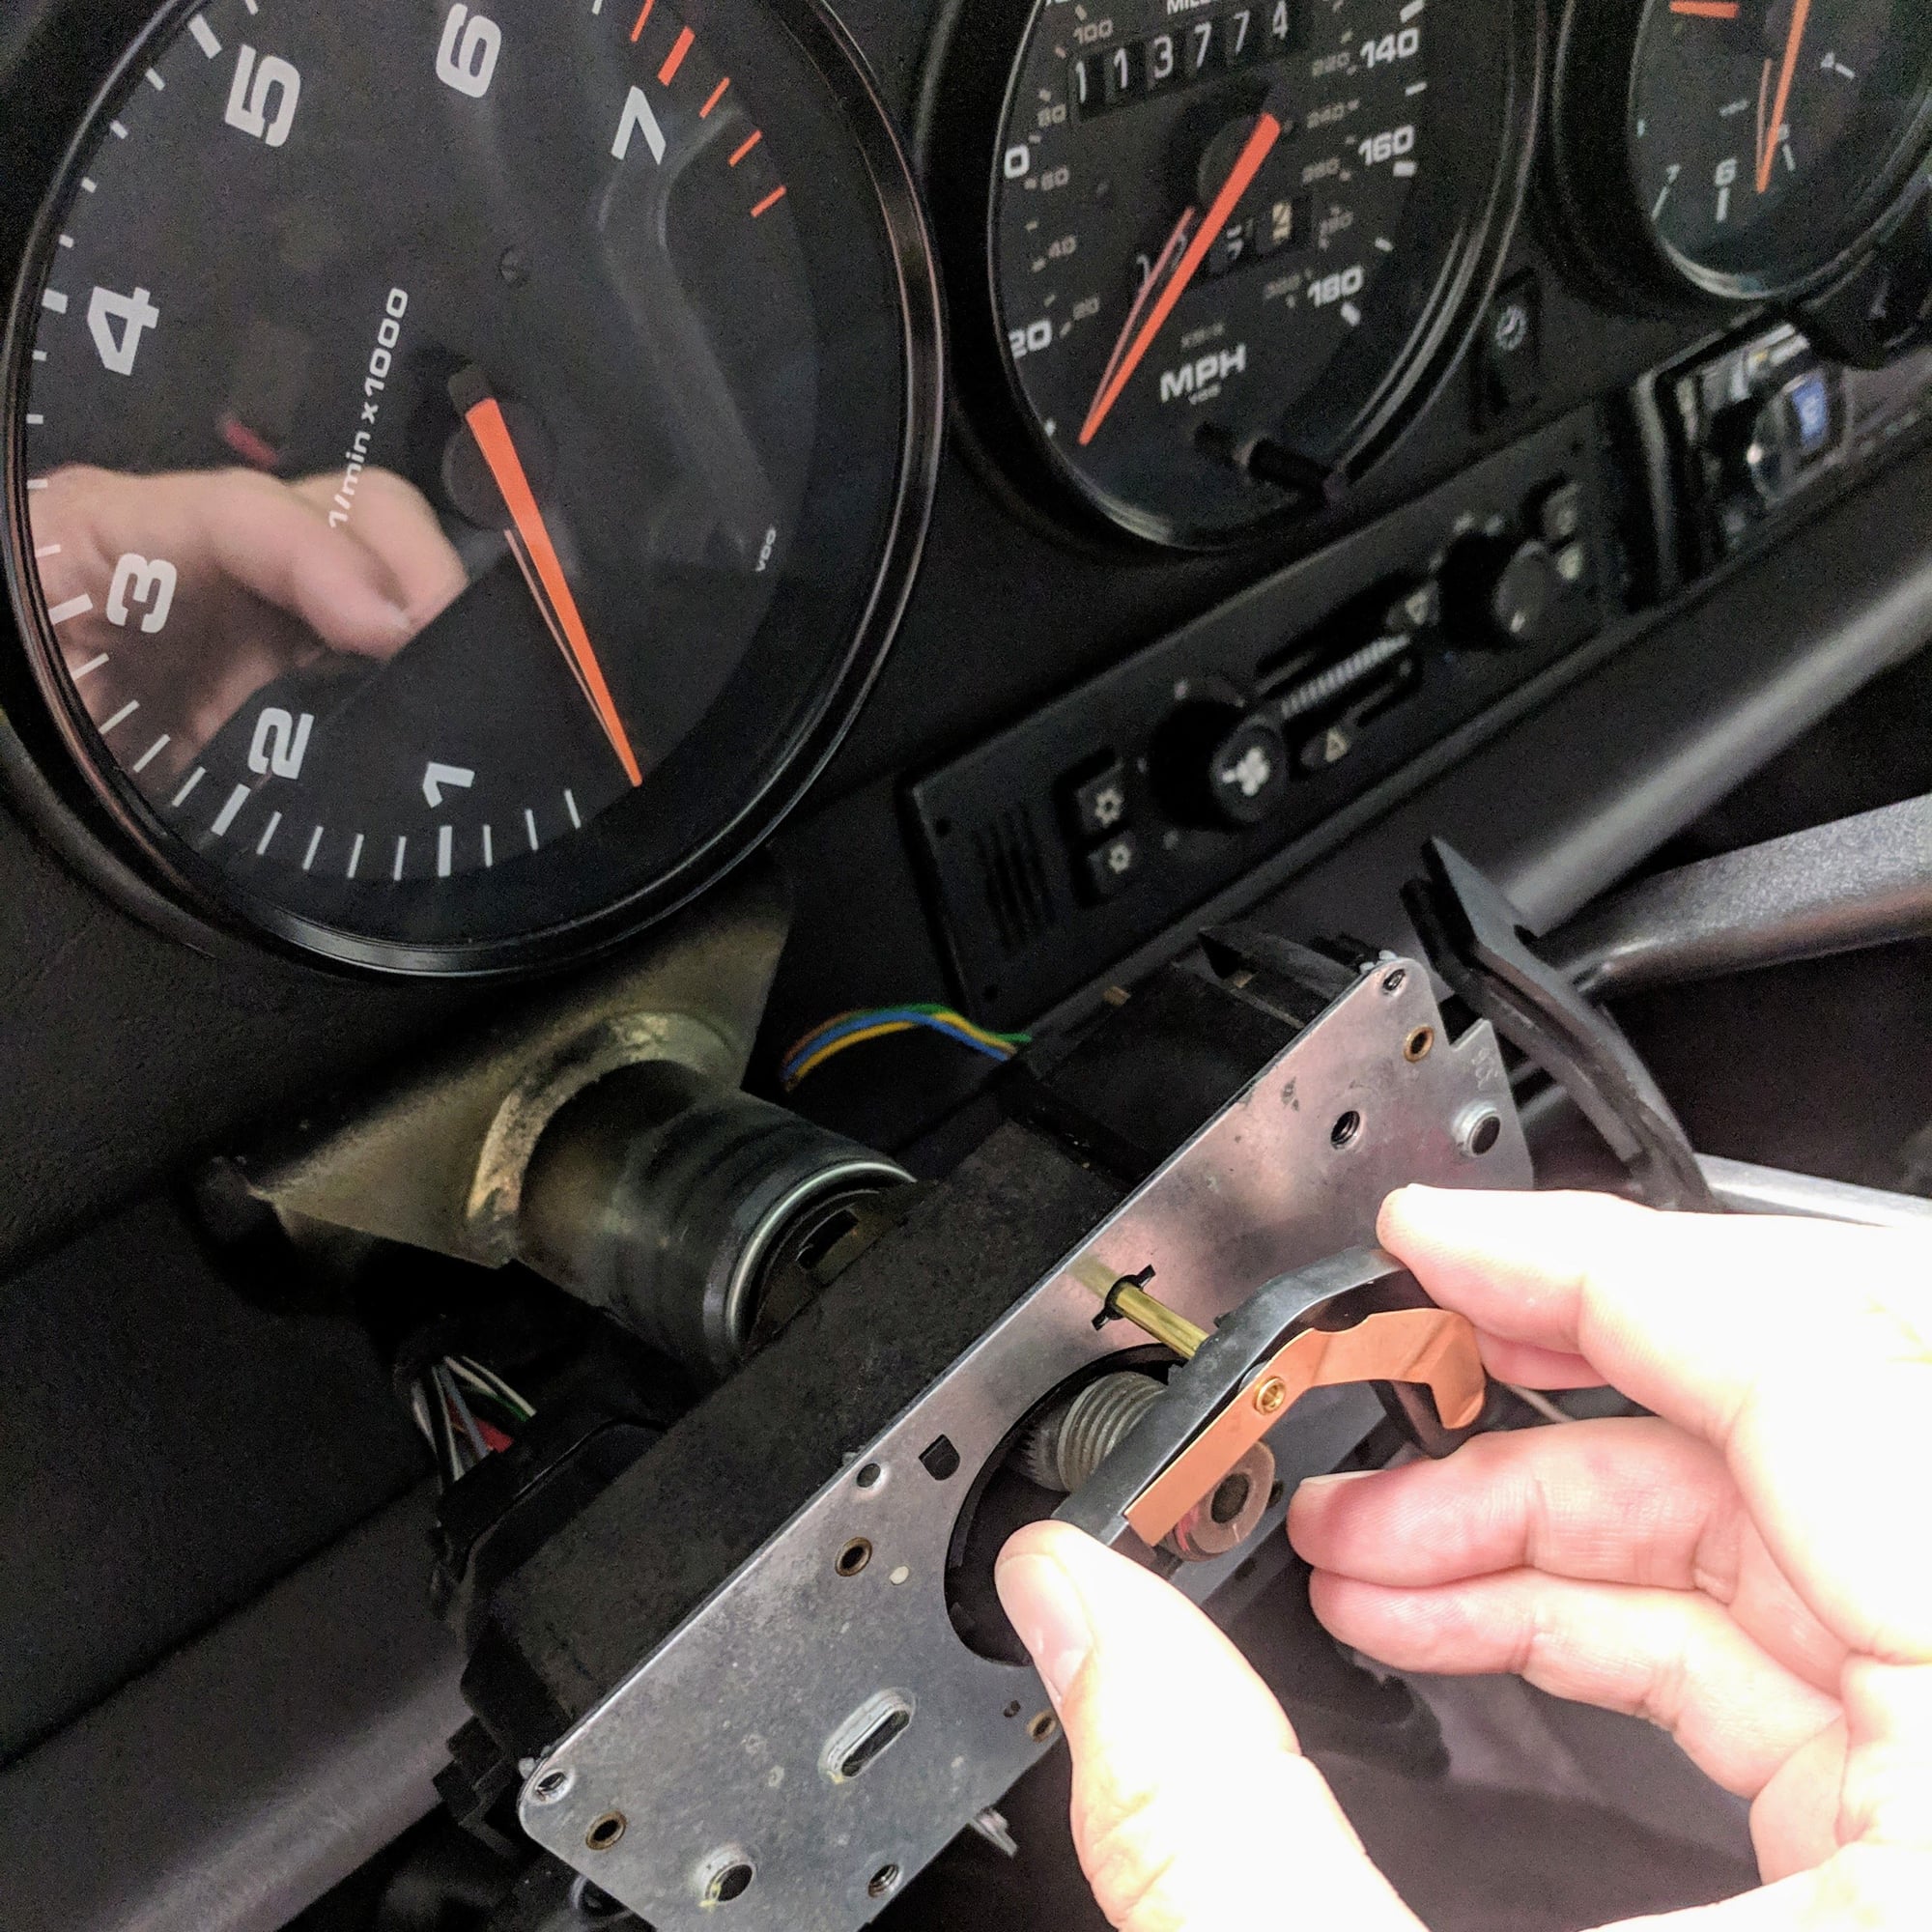
2. What I found the easiest for assembly and disassembly of the steering column bezel is to loosen the 8mm bolt hidden under bezel. Porsche engineering designed a hole on the underside of the bezel that allows you to slide in a 8mm socket with an extension to access the bolt with the bezel installed. Once you loosen the bolt the entire cruise control, turn signal, and headlight column assembly easily comes off which makes dissembling and reassembling the bezel easy, as well as access to install the horn wiring. This picture is when I was reinstalling the cruise/turn/headlight assembly...
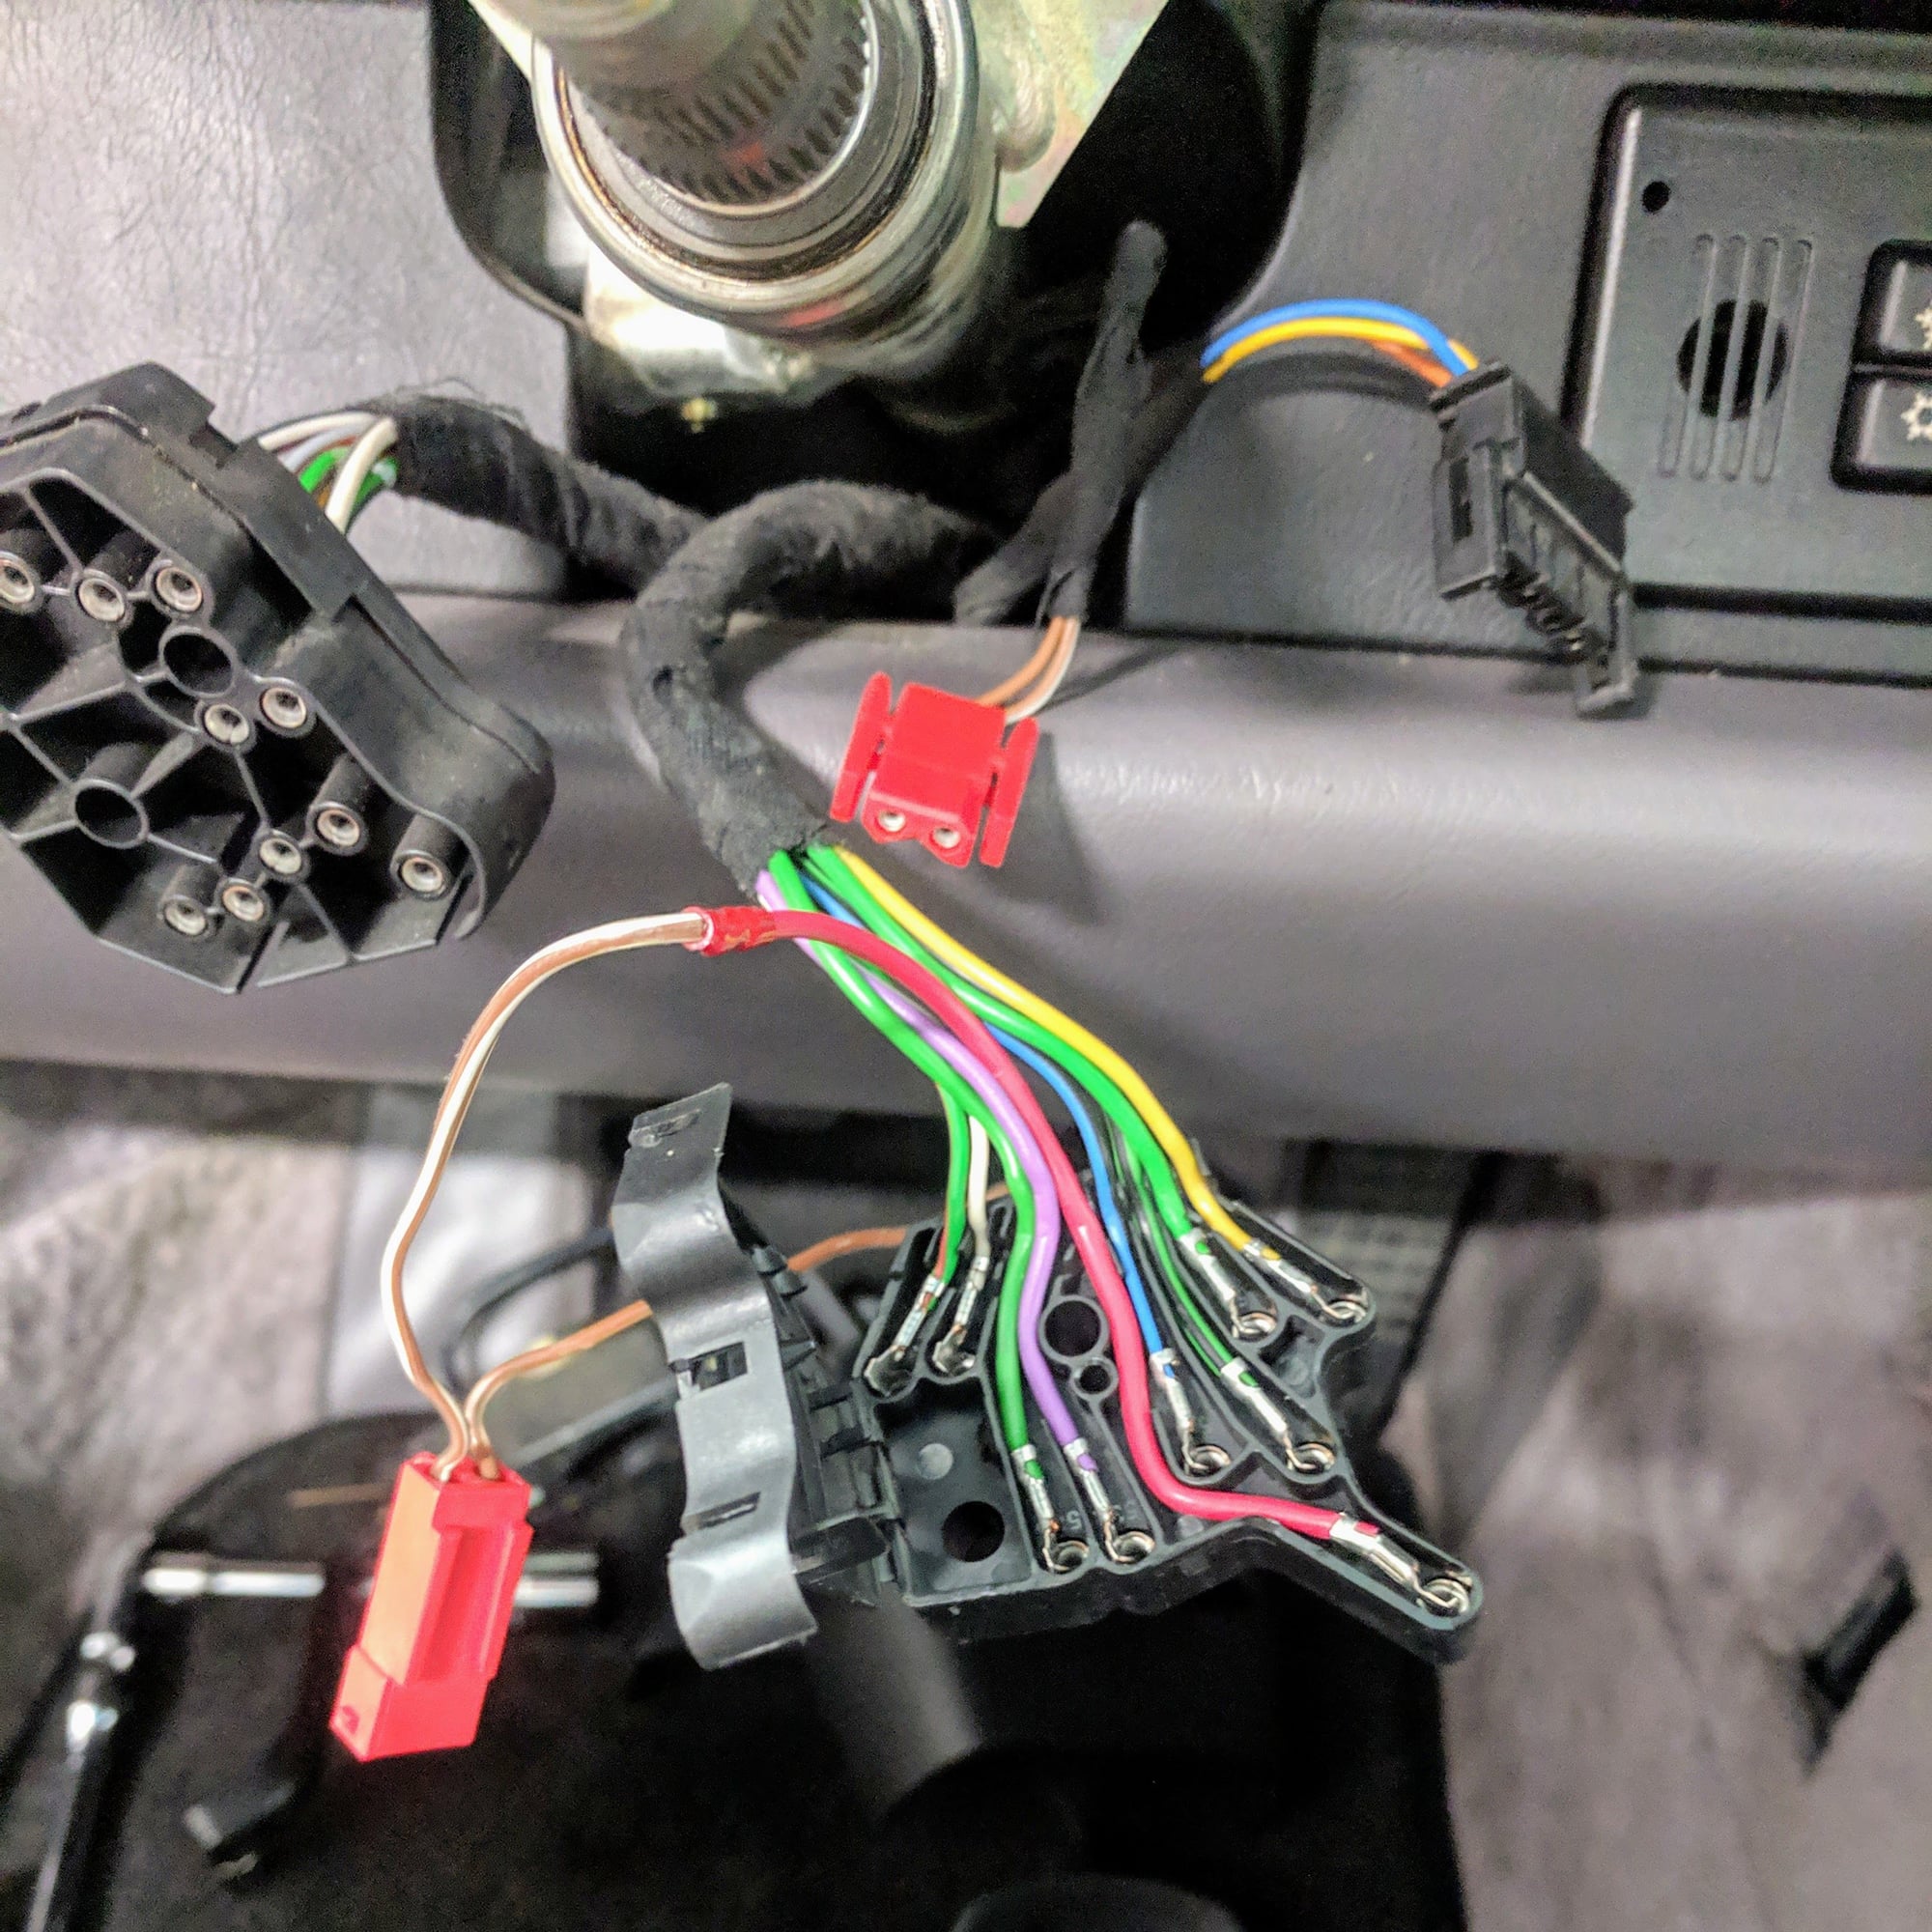
3. Install of horn wiring...
4. Install of the horn contact... The tolerances for this contact is super tight. I had to use a box knife to shave off some of the plastic nubbins that hold the contact with the cruise/turn/headlight assembly.
5. Then install the wheel. I initially tried the wheel with the spacer which moves the wheel up and closer to me. I didn't like the feel as I like to sit low and have my wheel low, as well as I have long arms. So here is the install of the wheel, with the OEM Momo hub adapter that works with the horn connector above without modifications, as well as no spacer...
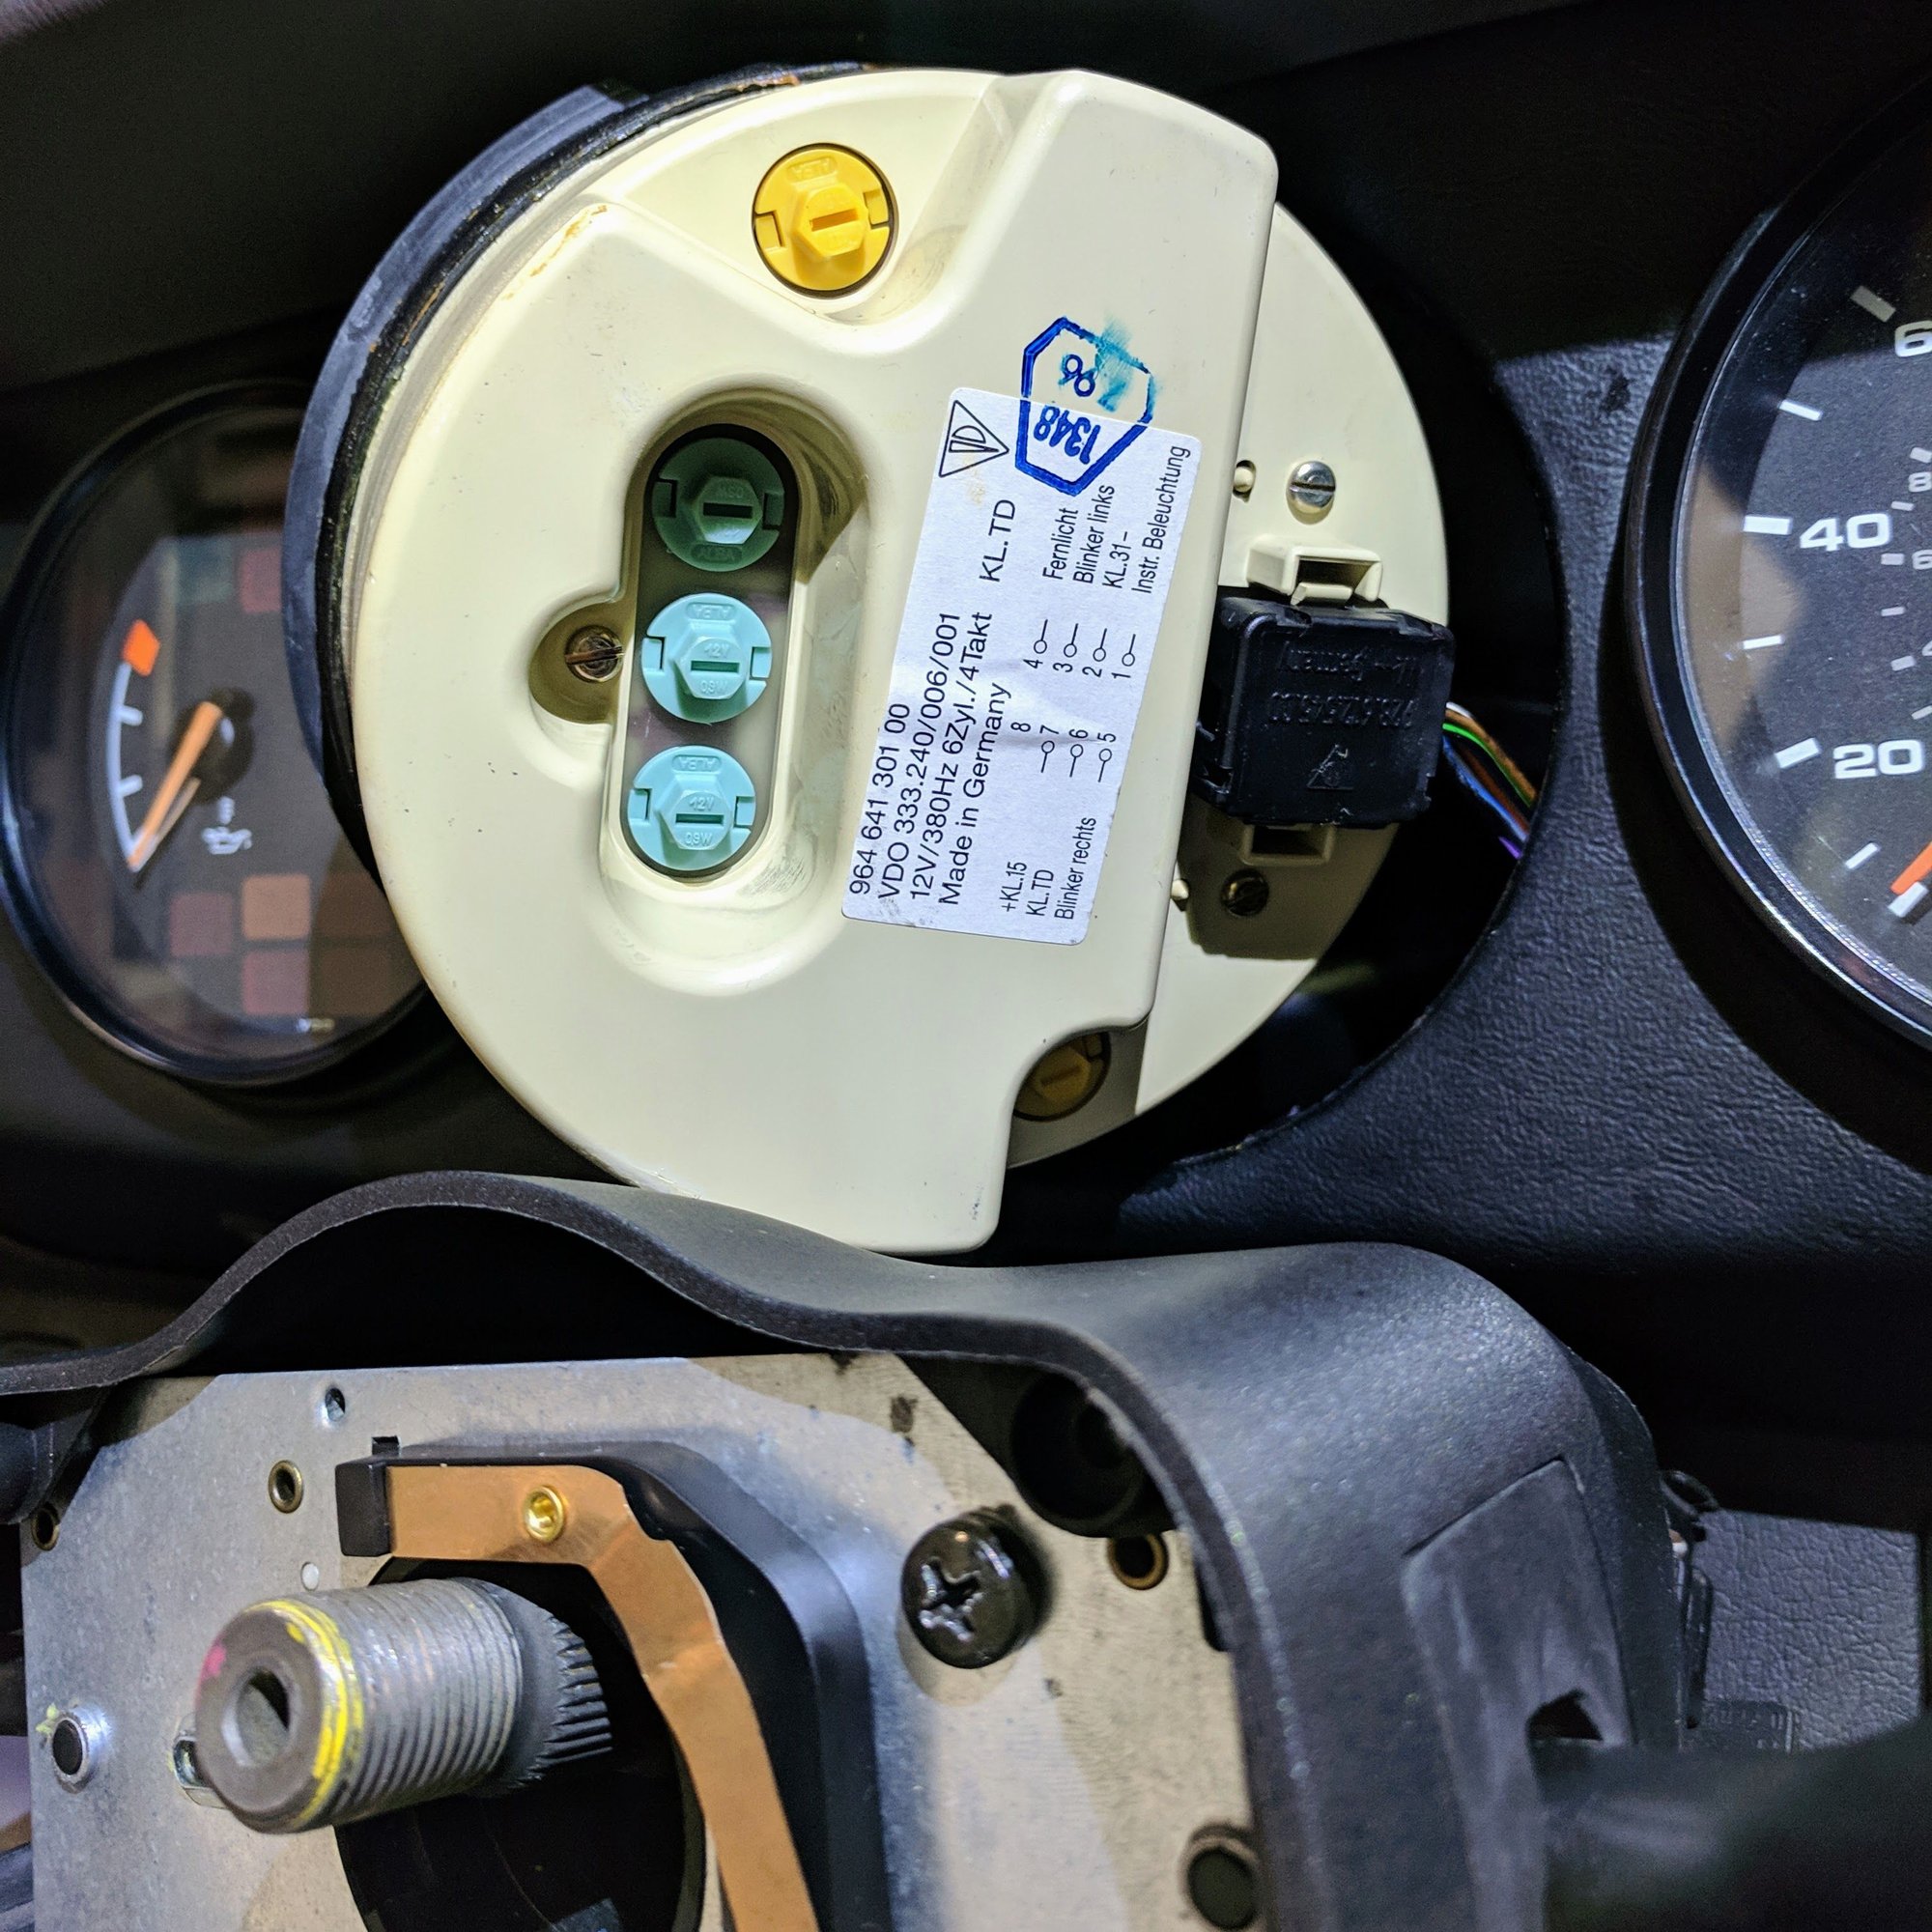
Since I was replacing the steering wheel it was also a perfect time to replace some burned out backlight bulbs in my tachometer. Doing some research I found the MB bulbs are a direct replacement. MB P/N: 910141-000000 for Porsche P/N: 999 631 027 90
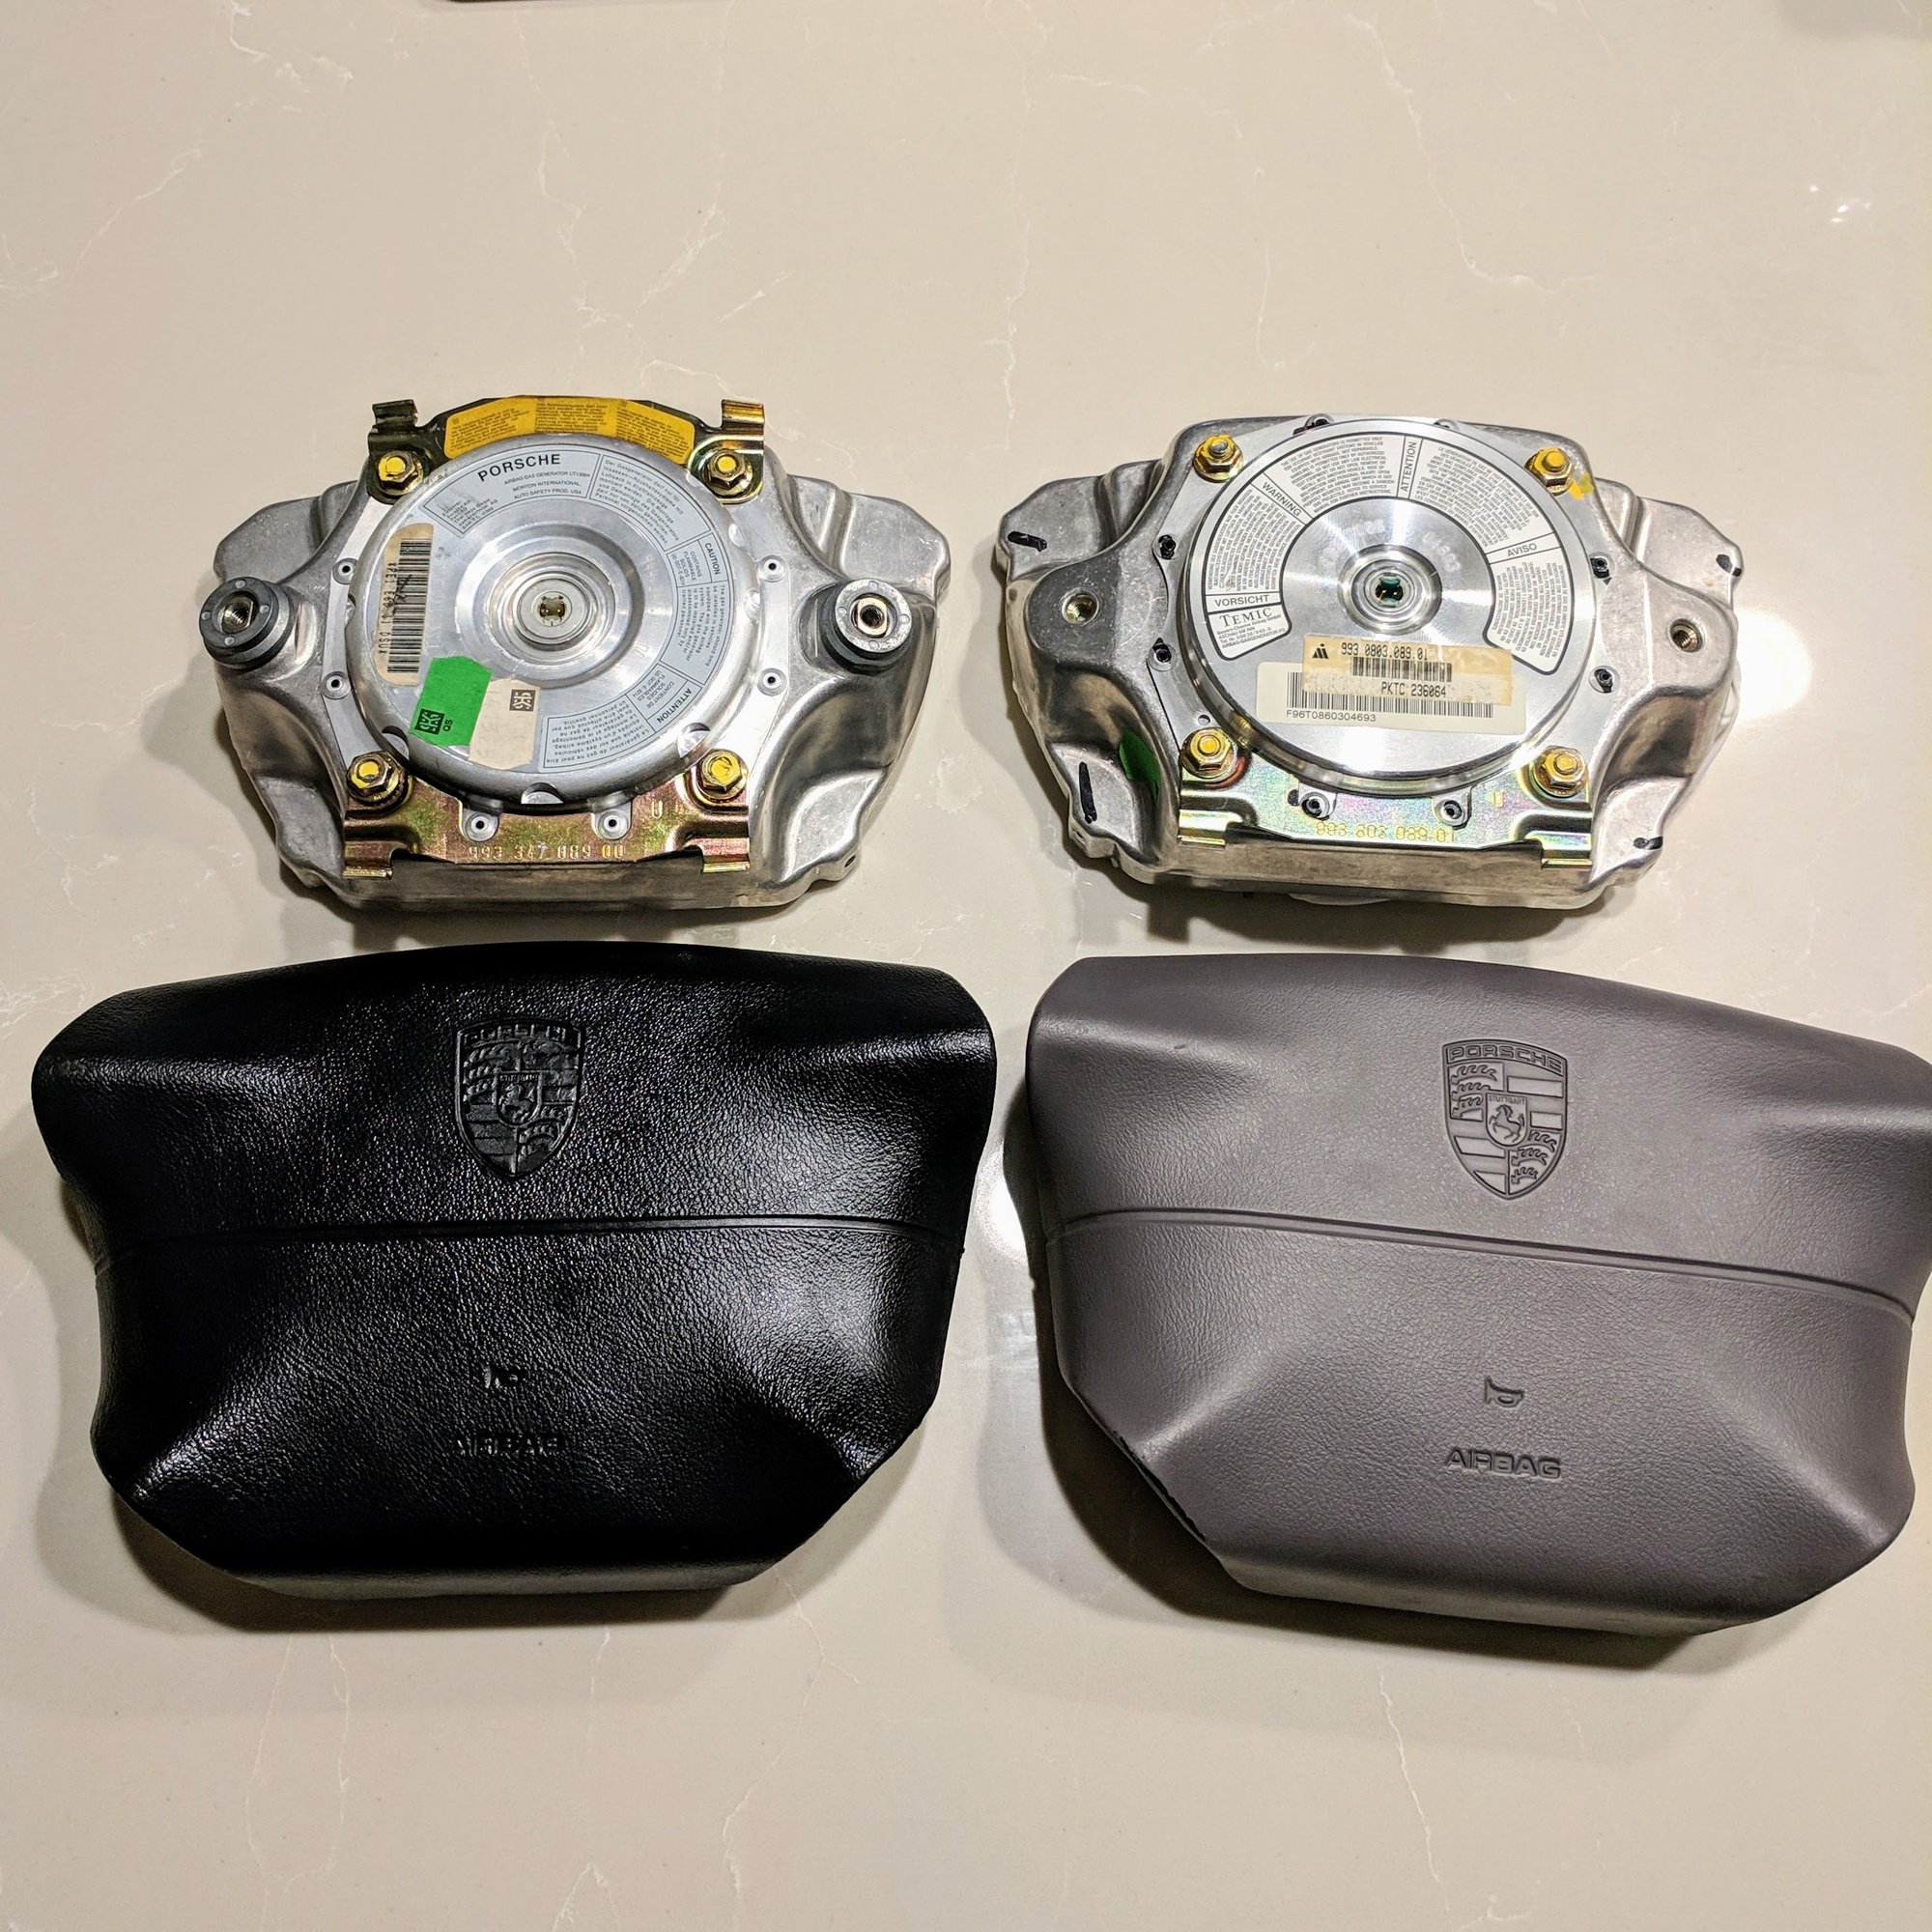
Lastly, in prep for a Cars Dream re-wrap order I am going to send a 95 993 4 spoke wheel to be rewrapped along with my 996 3 spoke one. I have two 4 spoke 993 wheels, one a 95 and the other a 97. I am going to use my 97 airbag cover with my 95 airbag. As some of you know, while both 95 and 97 airbags look identical from a cover point of view, but the airbag is different. Luckily the covers are interchangeable which allows you to mix and match airbag covers.
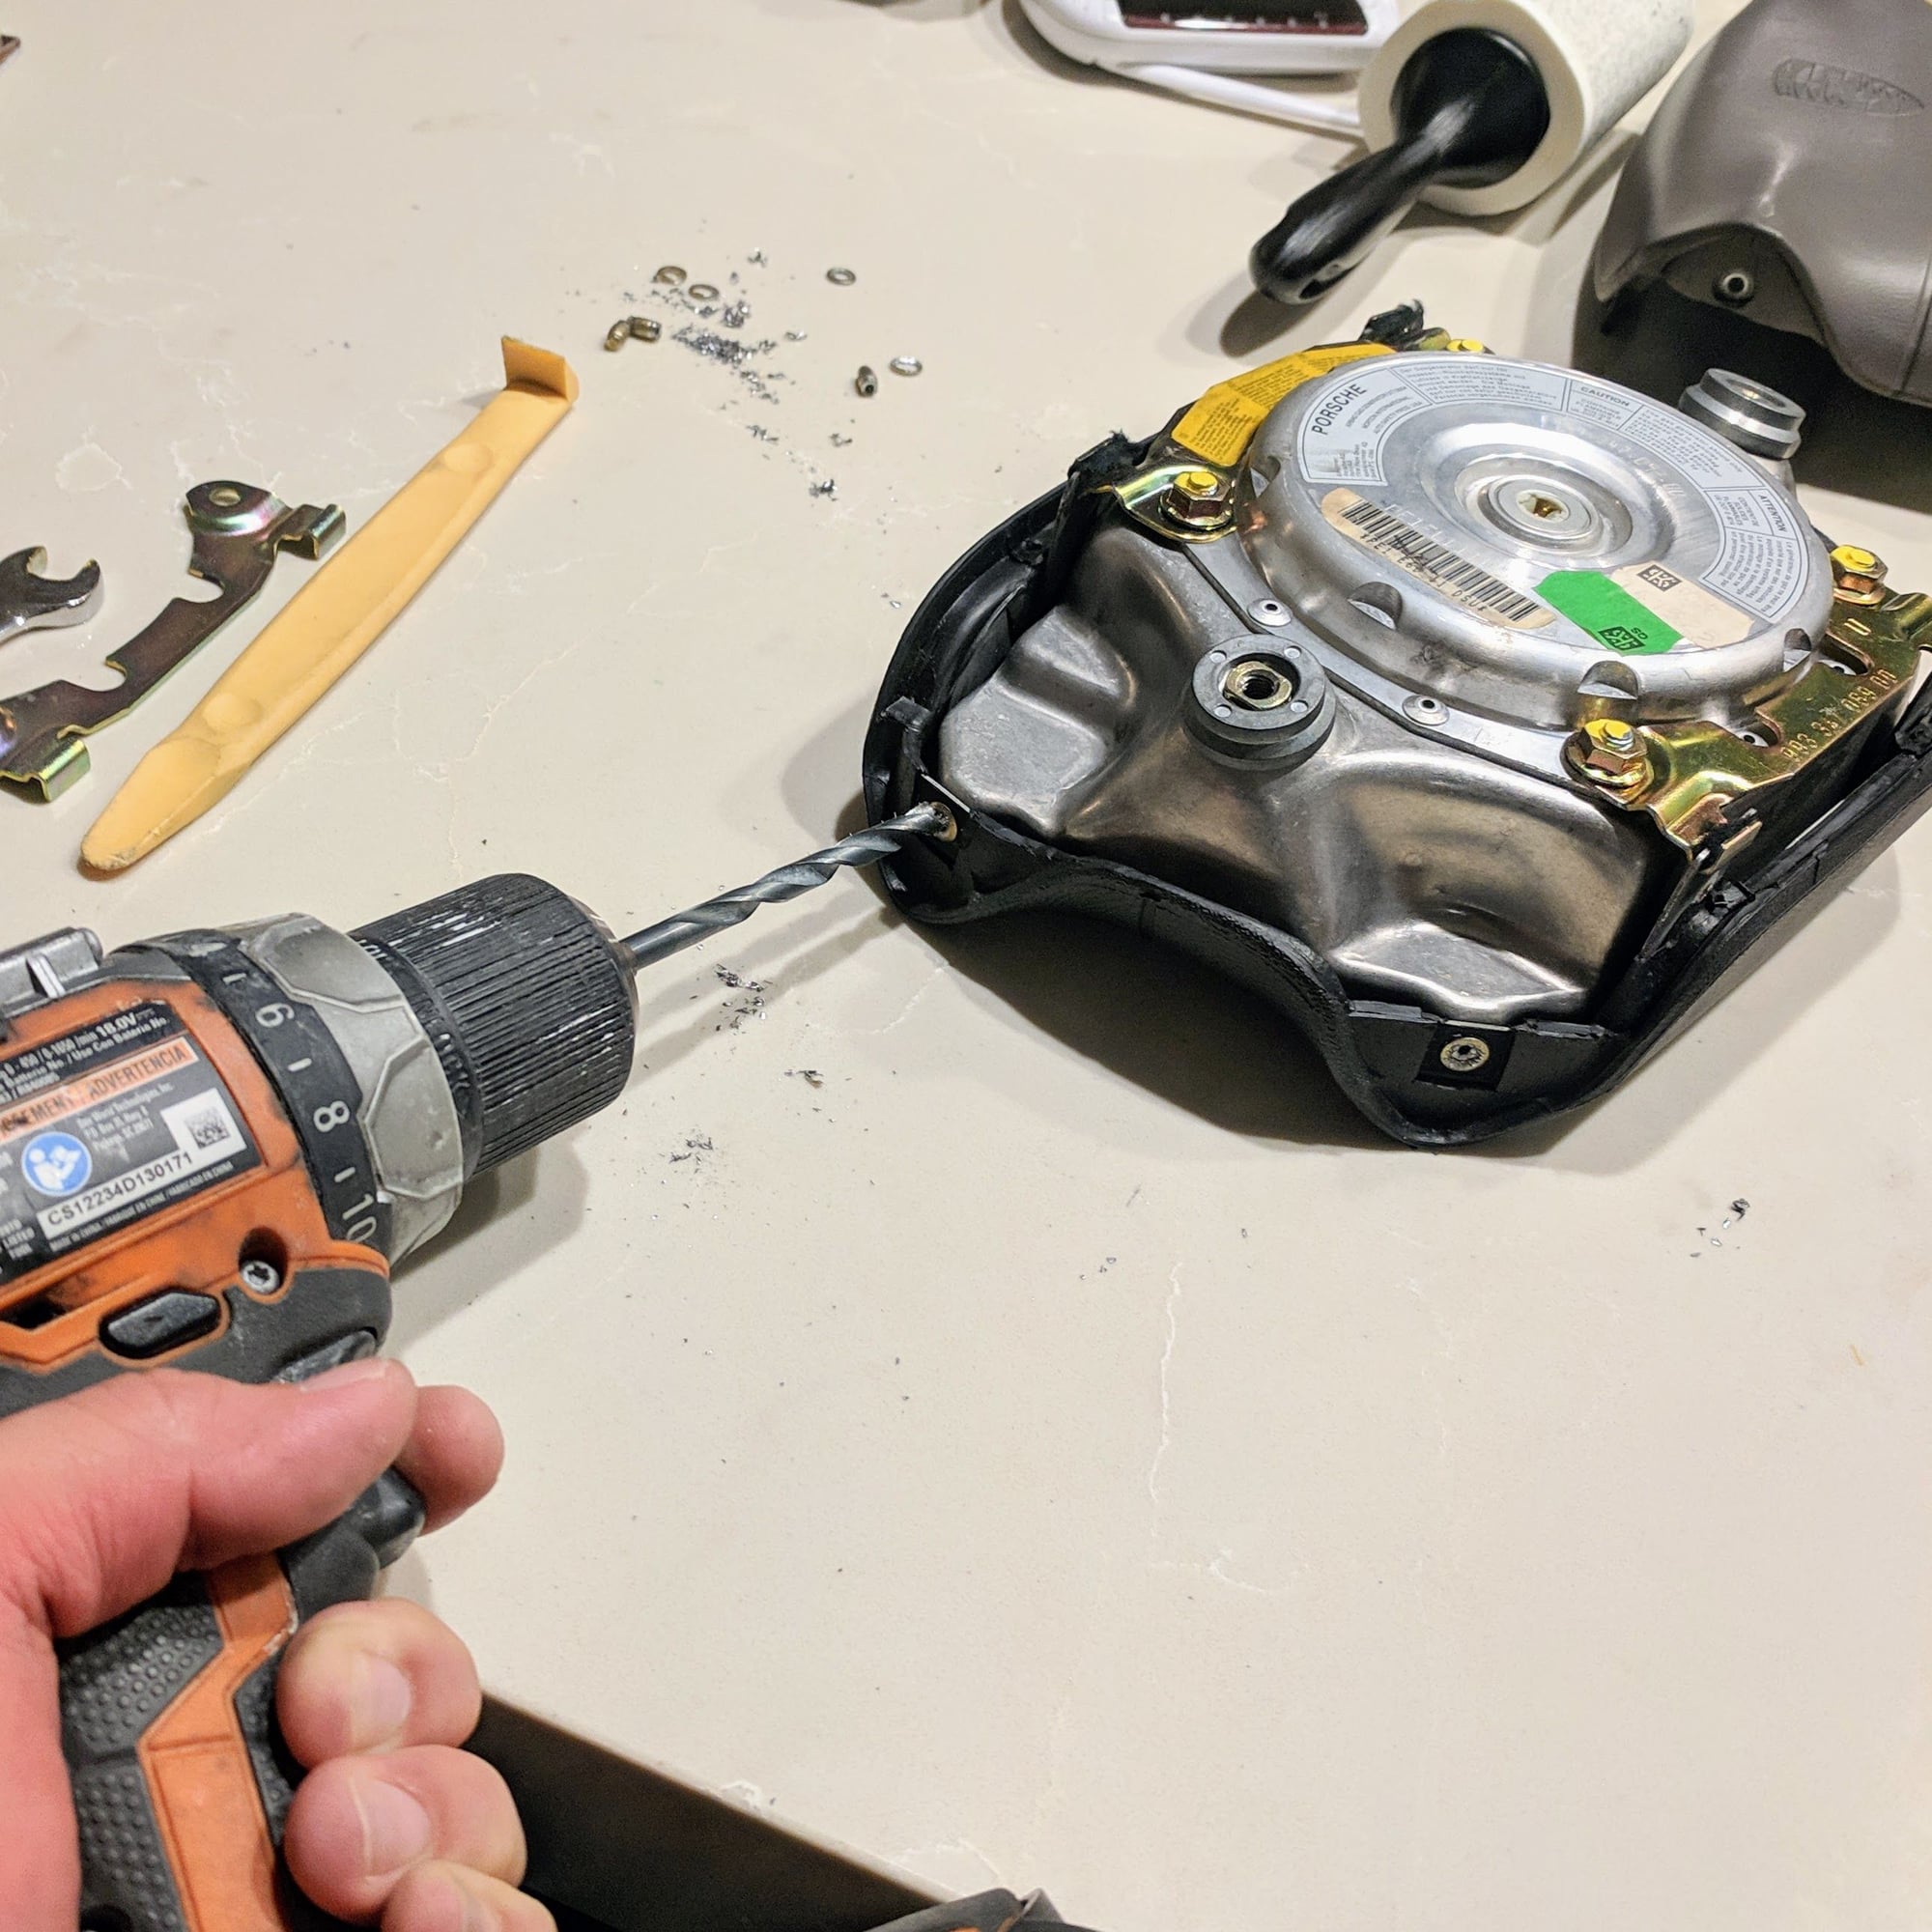
Here is how you remove the airbag cover from the airbag
1. Drill out the rivets
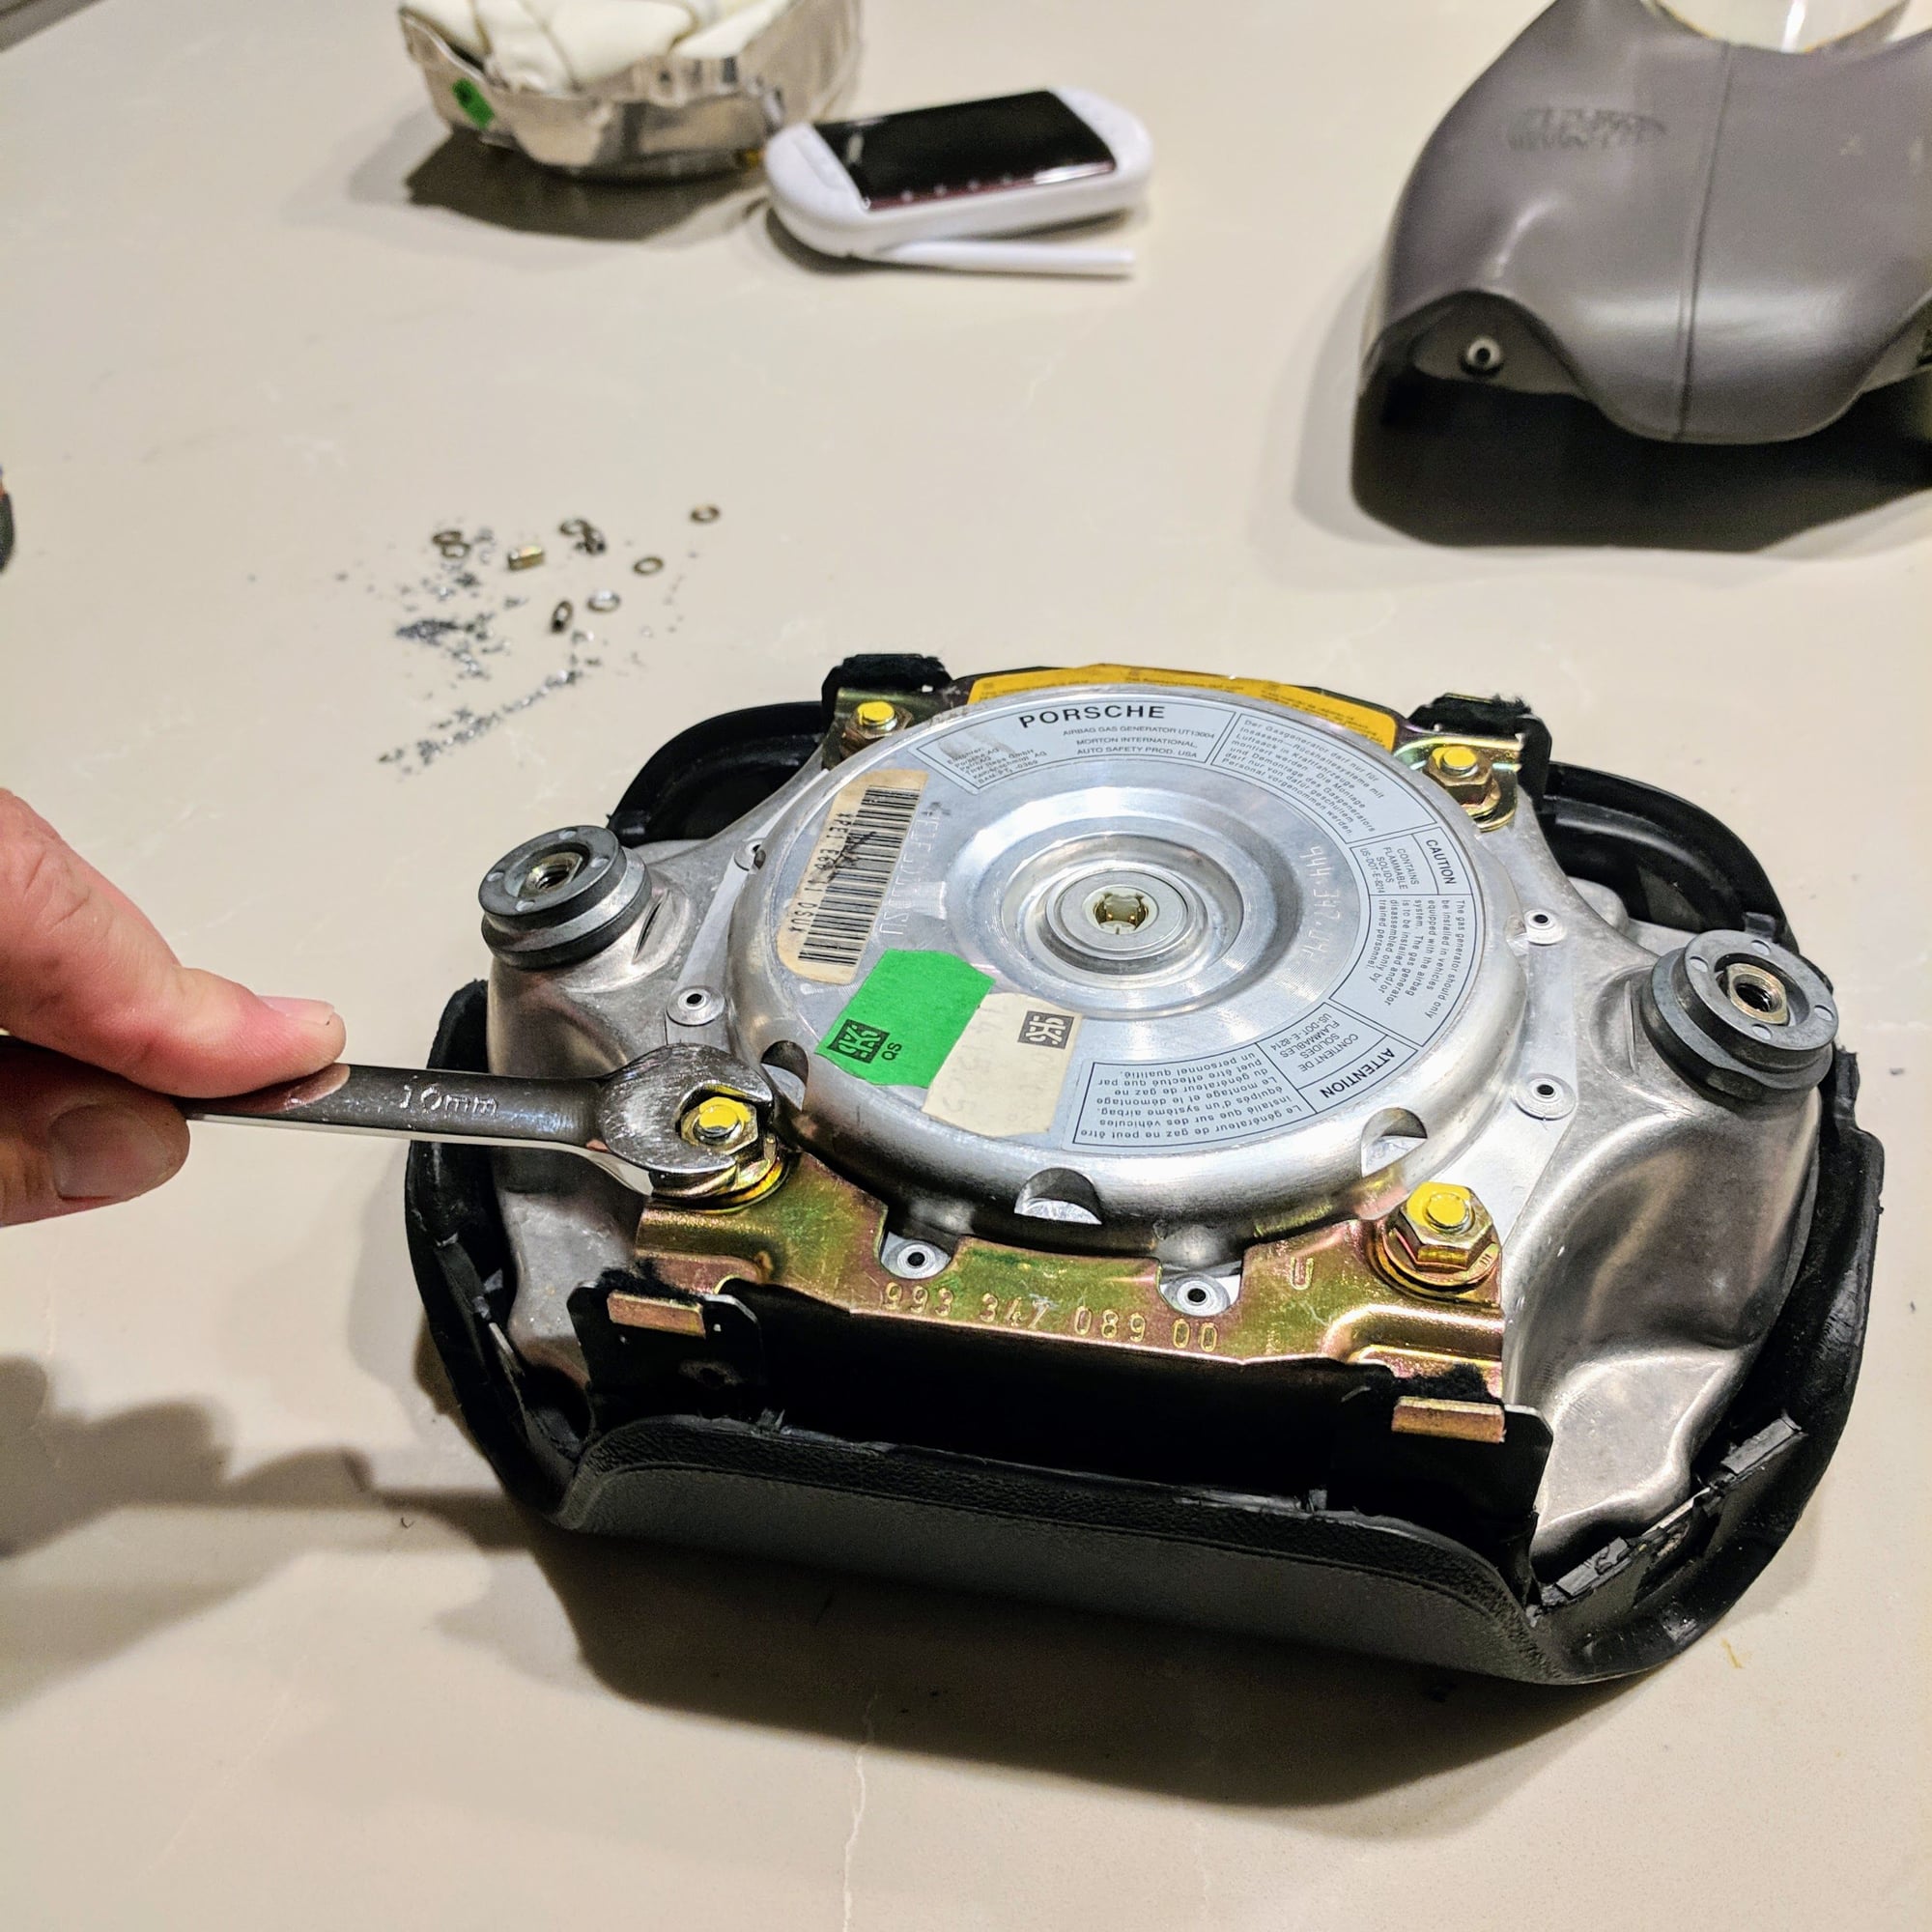
2. Remove the nuts from the airbag to release the cover from the airbag...
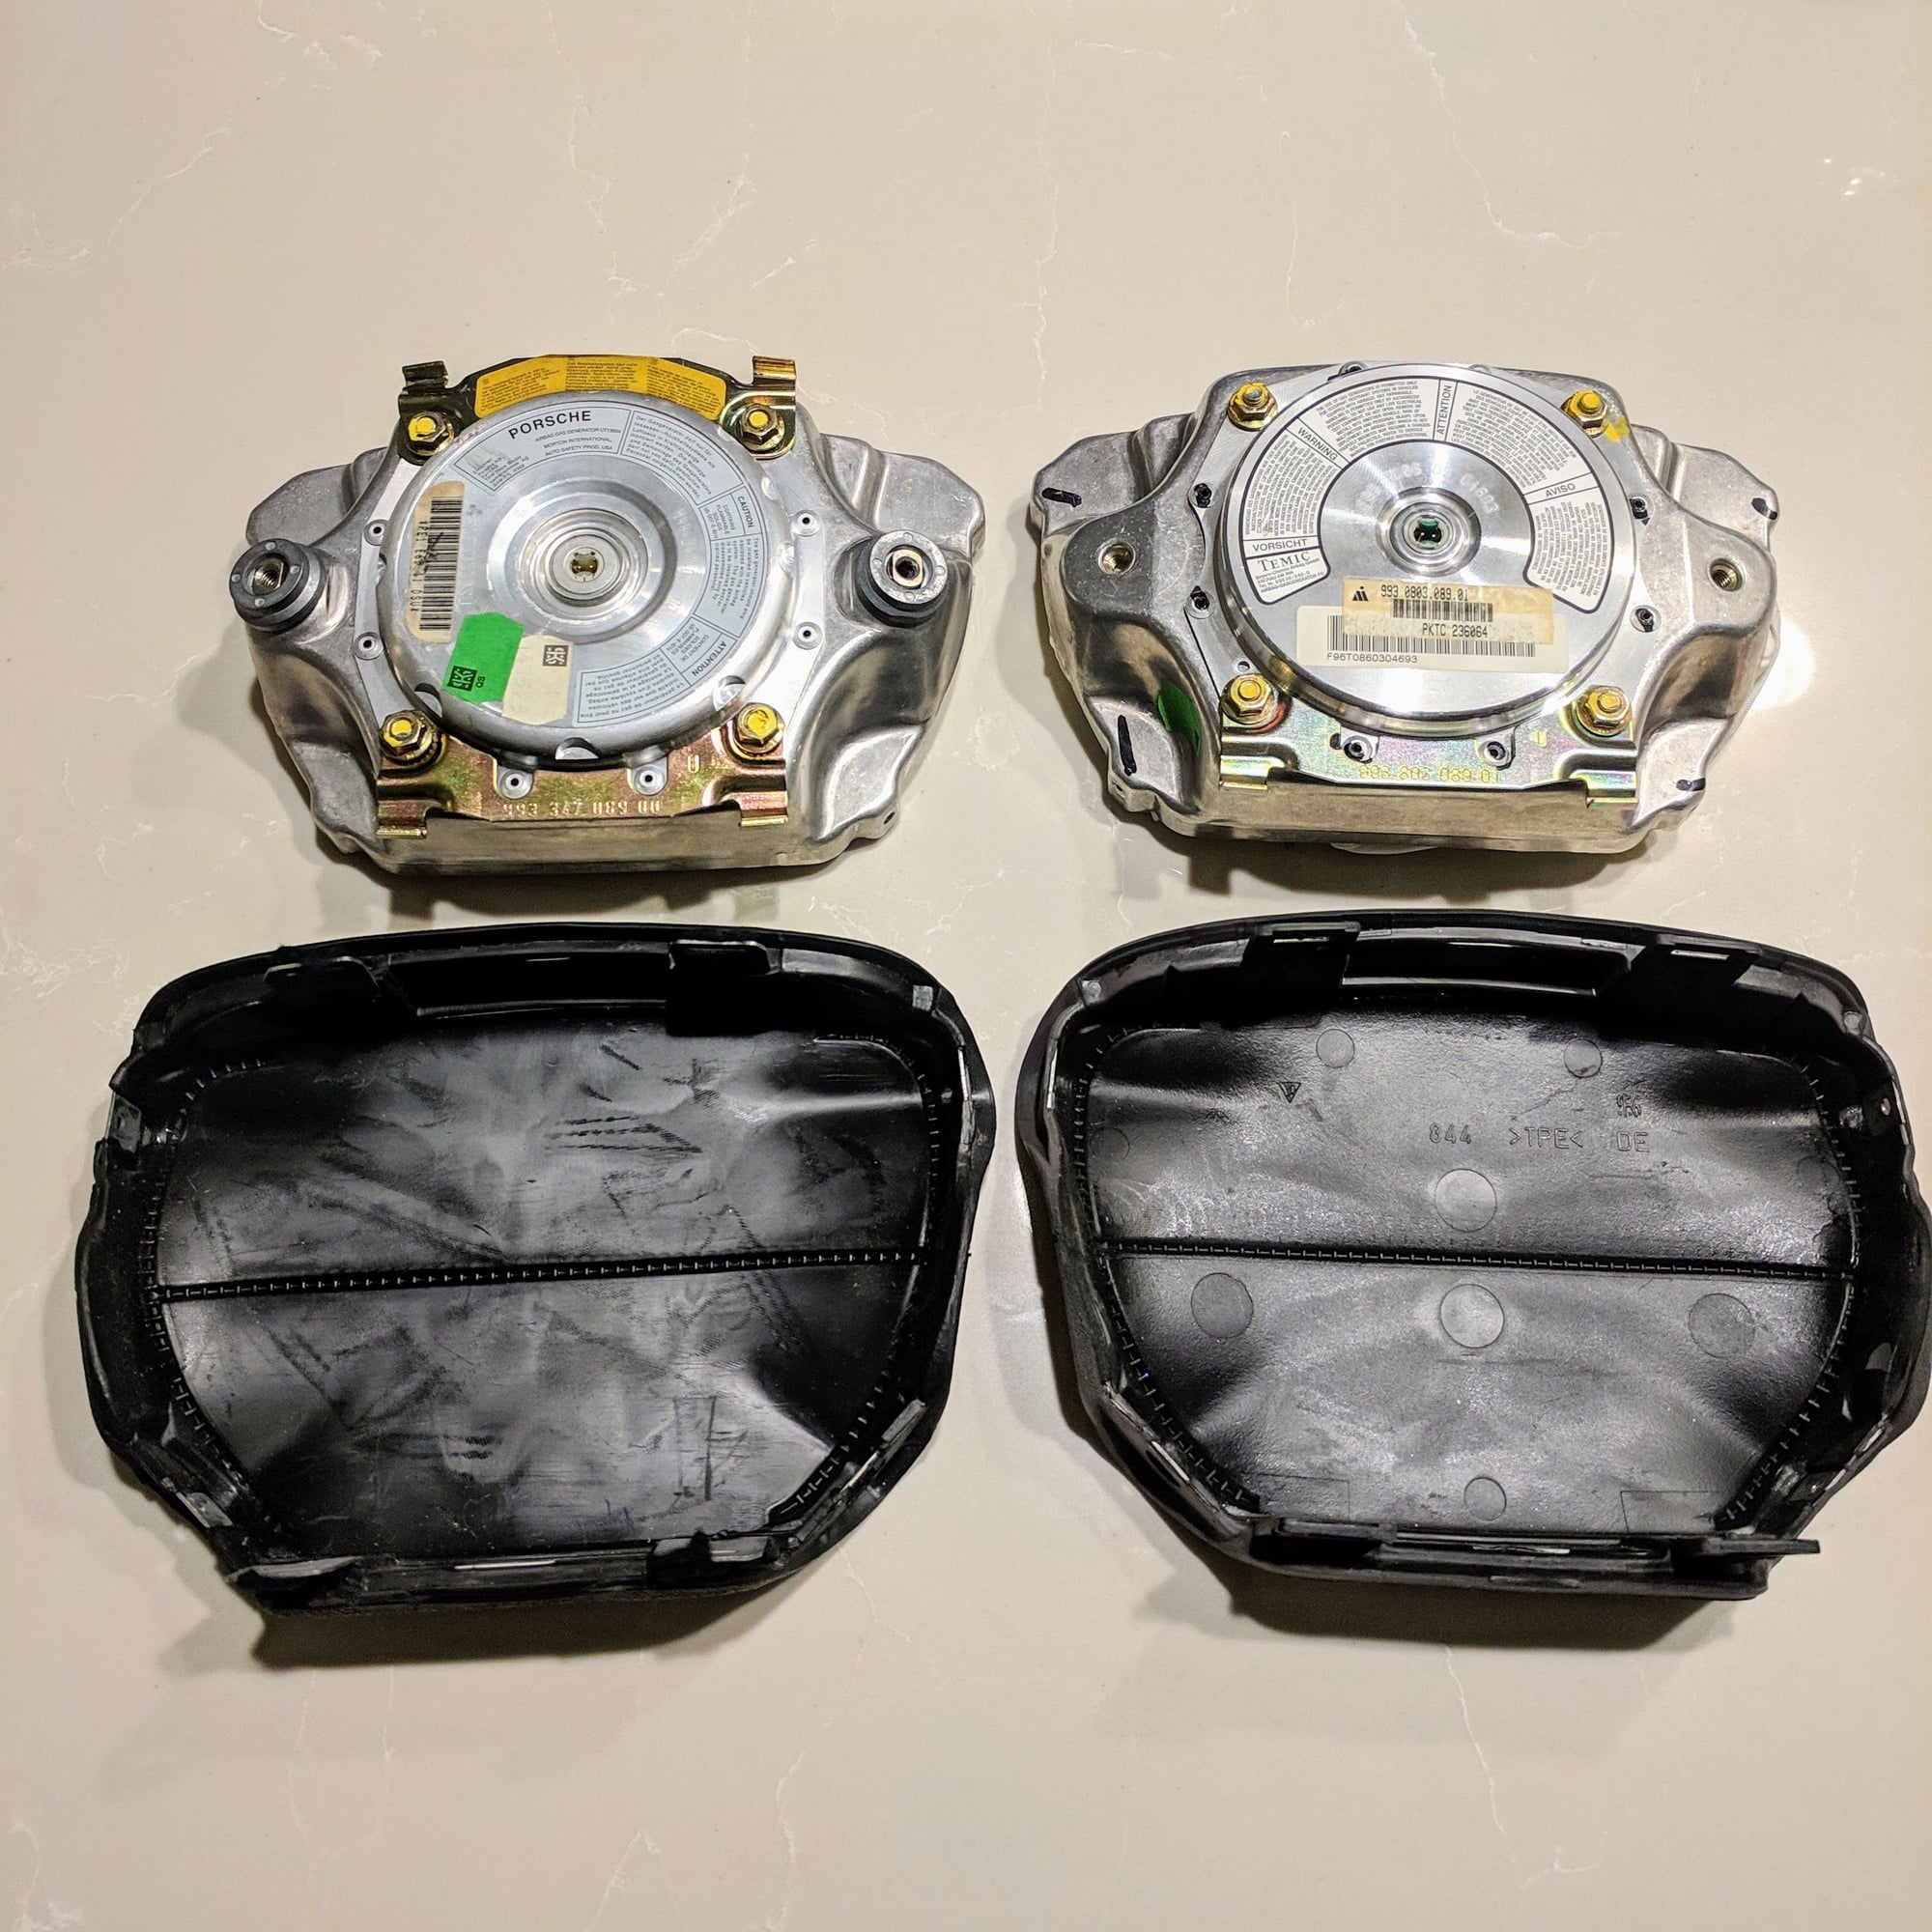
3. Airbag covers removed. Do you know which one is a 95? It is the right one. Notice the aluminum nubbins that are attached the the airbag which the 97 doesn't have.
The RS wheel looks fantastic!!
BTW, the 964 sport seats look right at home in the 993
Thanks @P-daddy . The seats are great for a DD. Got lucky picking up those.
This week drove the car almost everyday to work and confirmed the slippery slope of more NVH. Took some time to get used to the smaller diameter and skinnier wheel, but could definitely feel the road more as there is no dampening/rubber between the steering column and the steering wheel now as the momo hub is a solid piece of metal. Last AX event of the year in two weeks so can't wait to test it out!
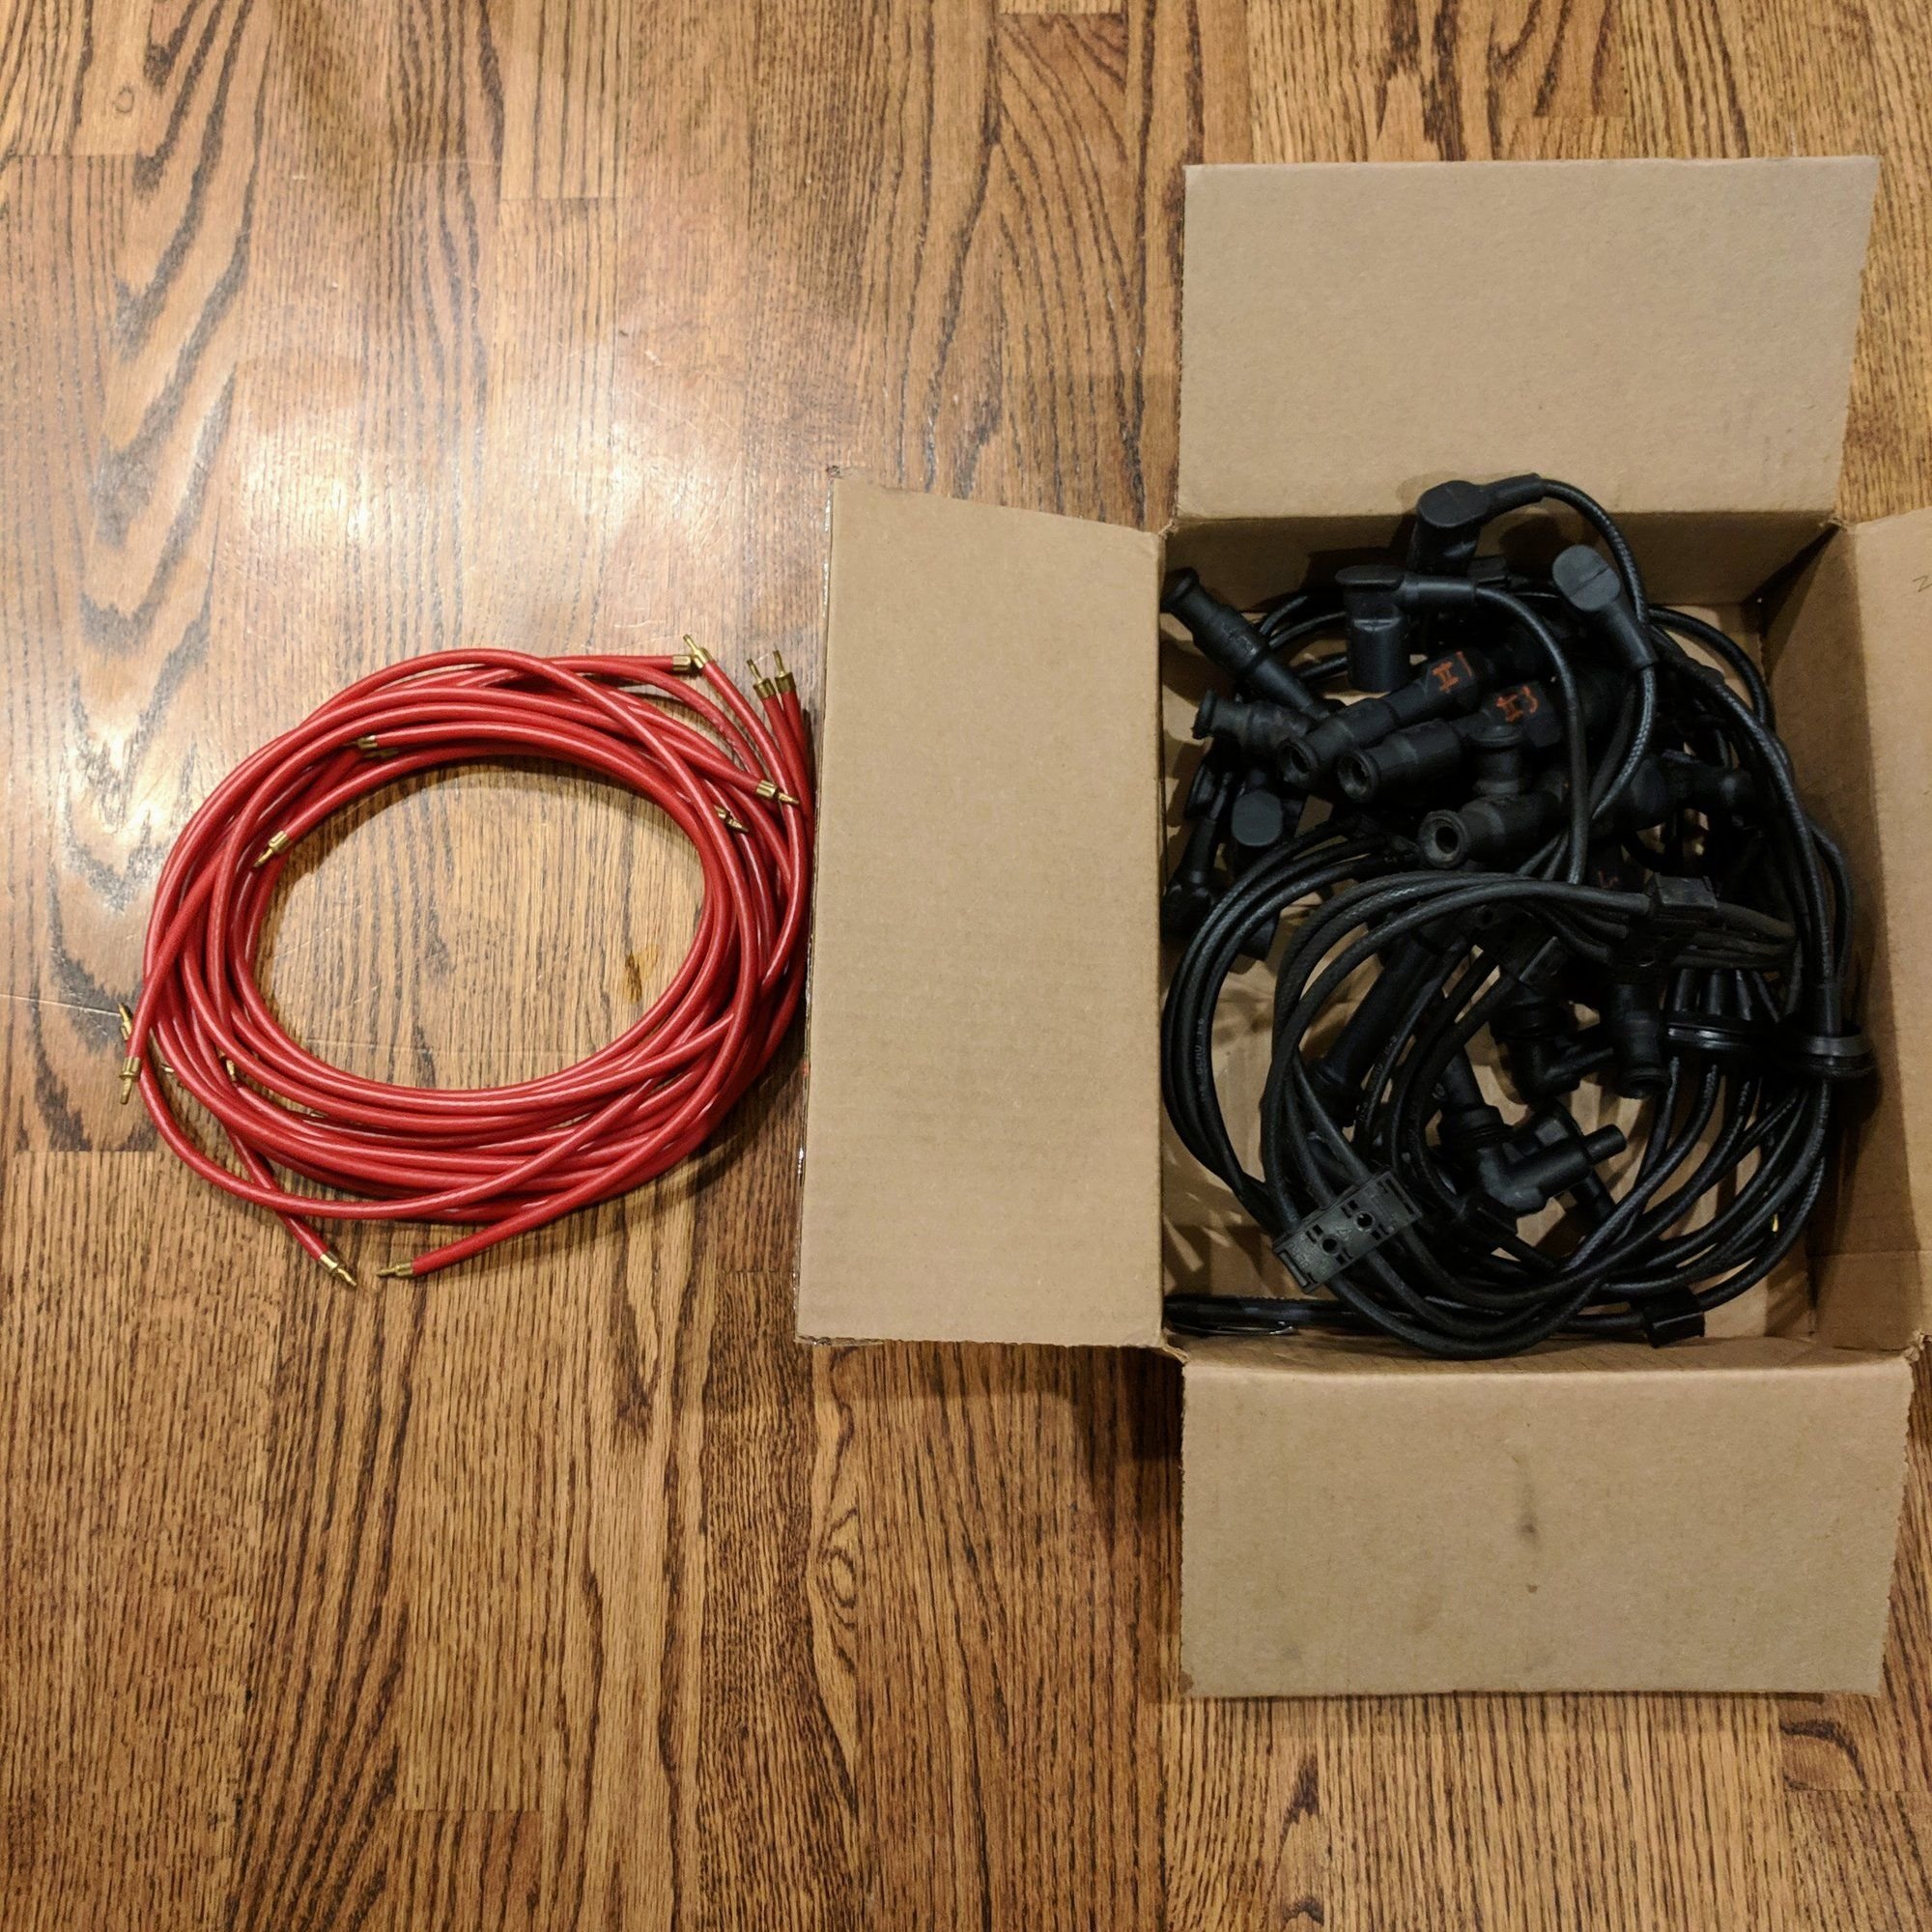
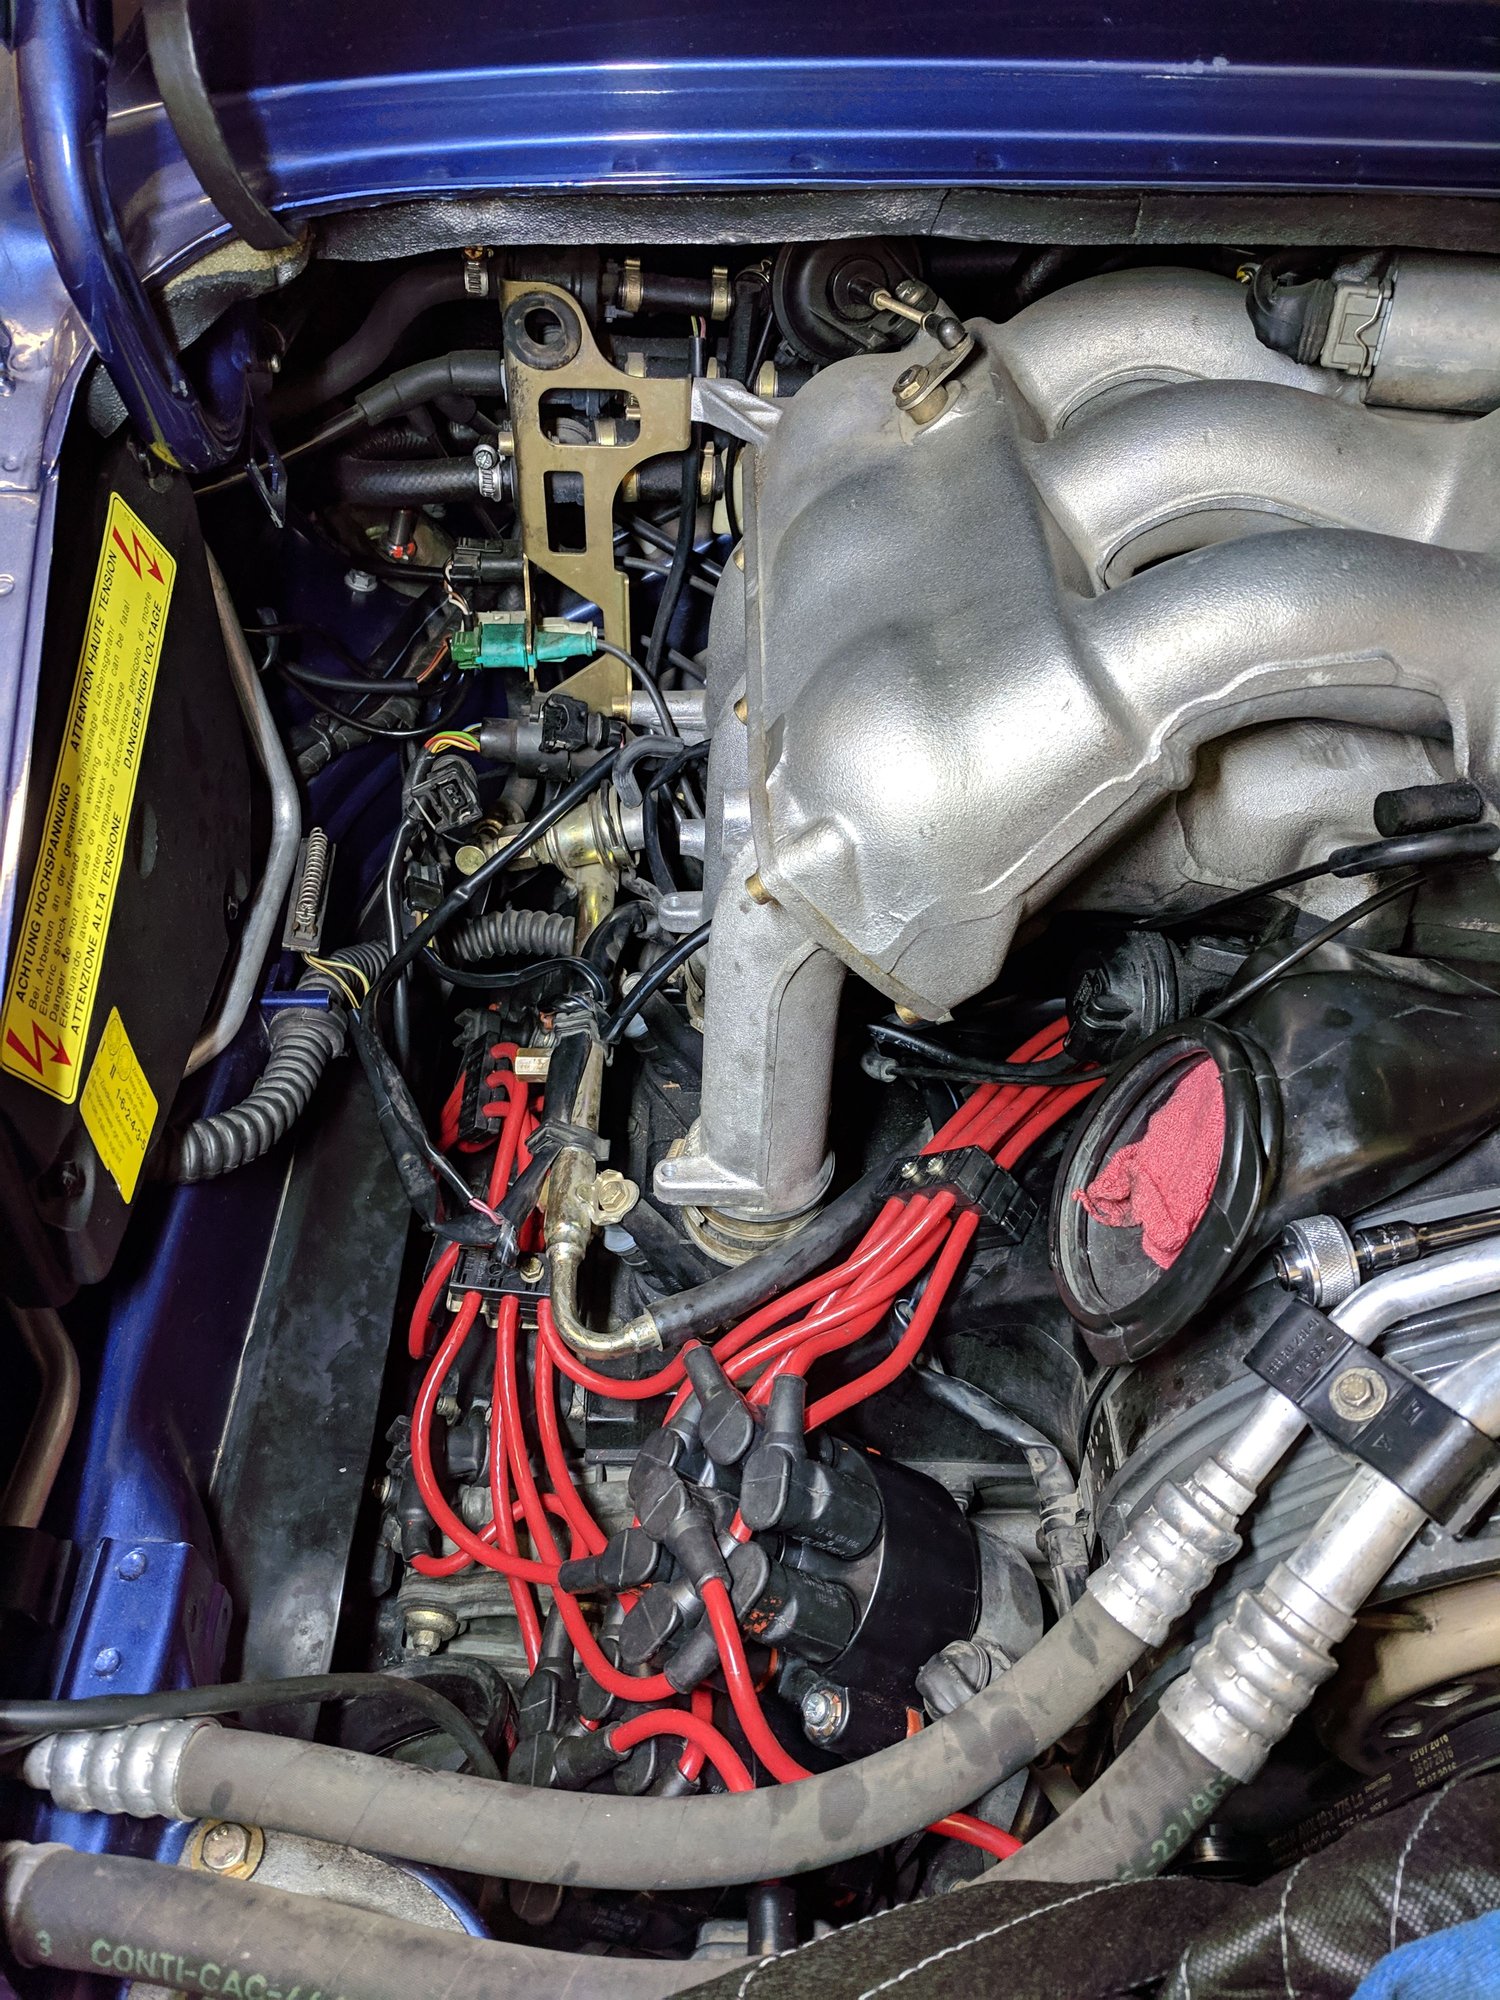
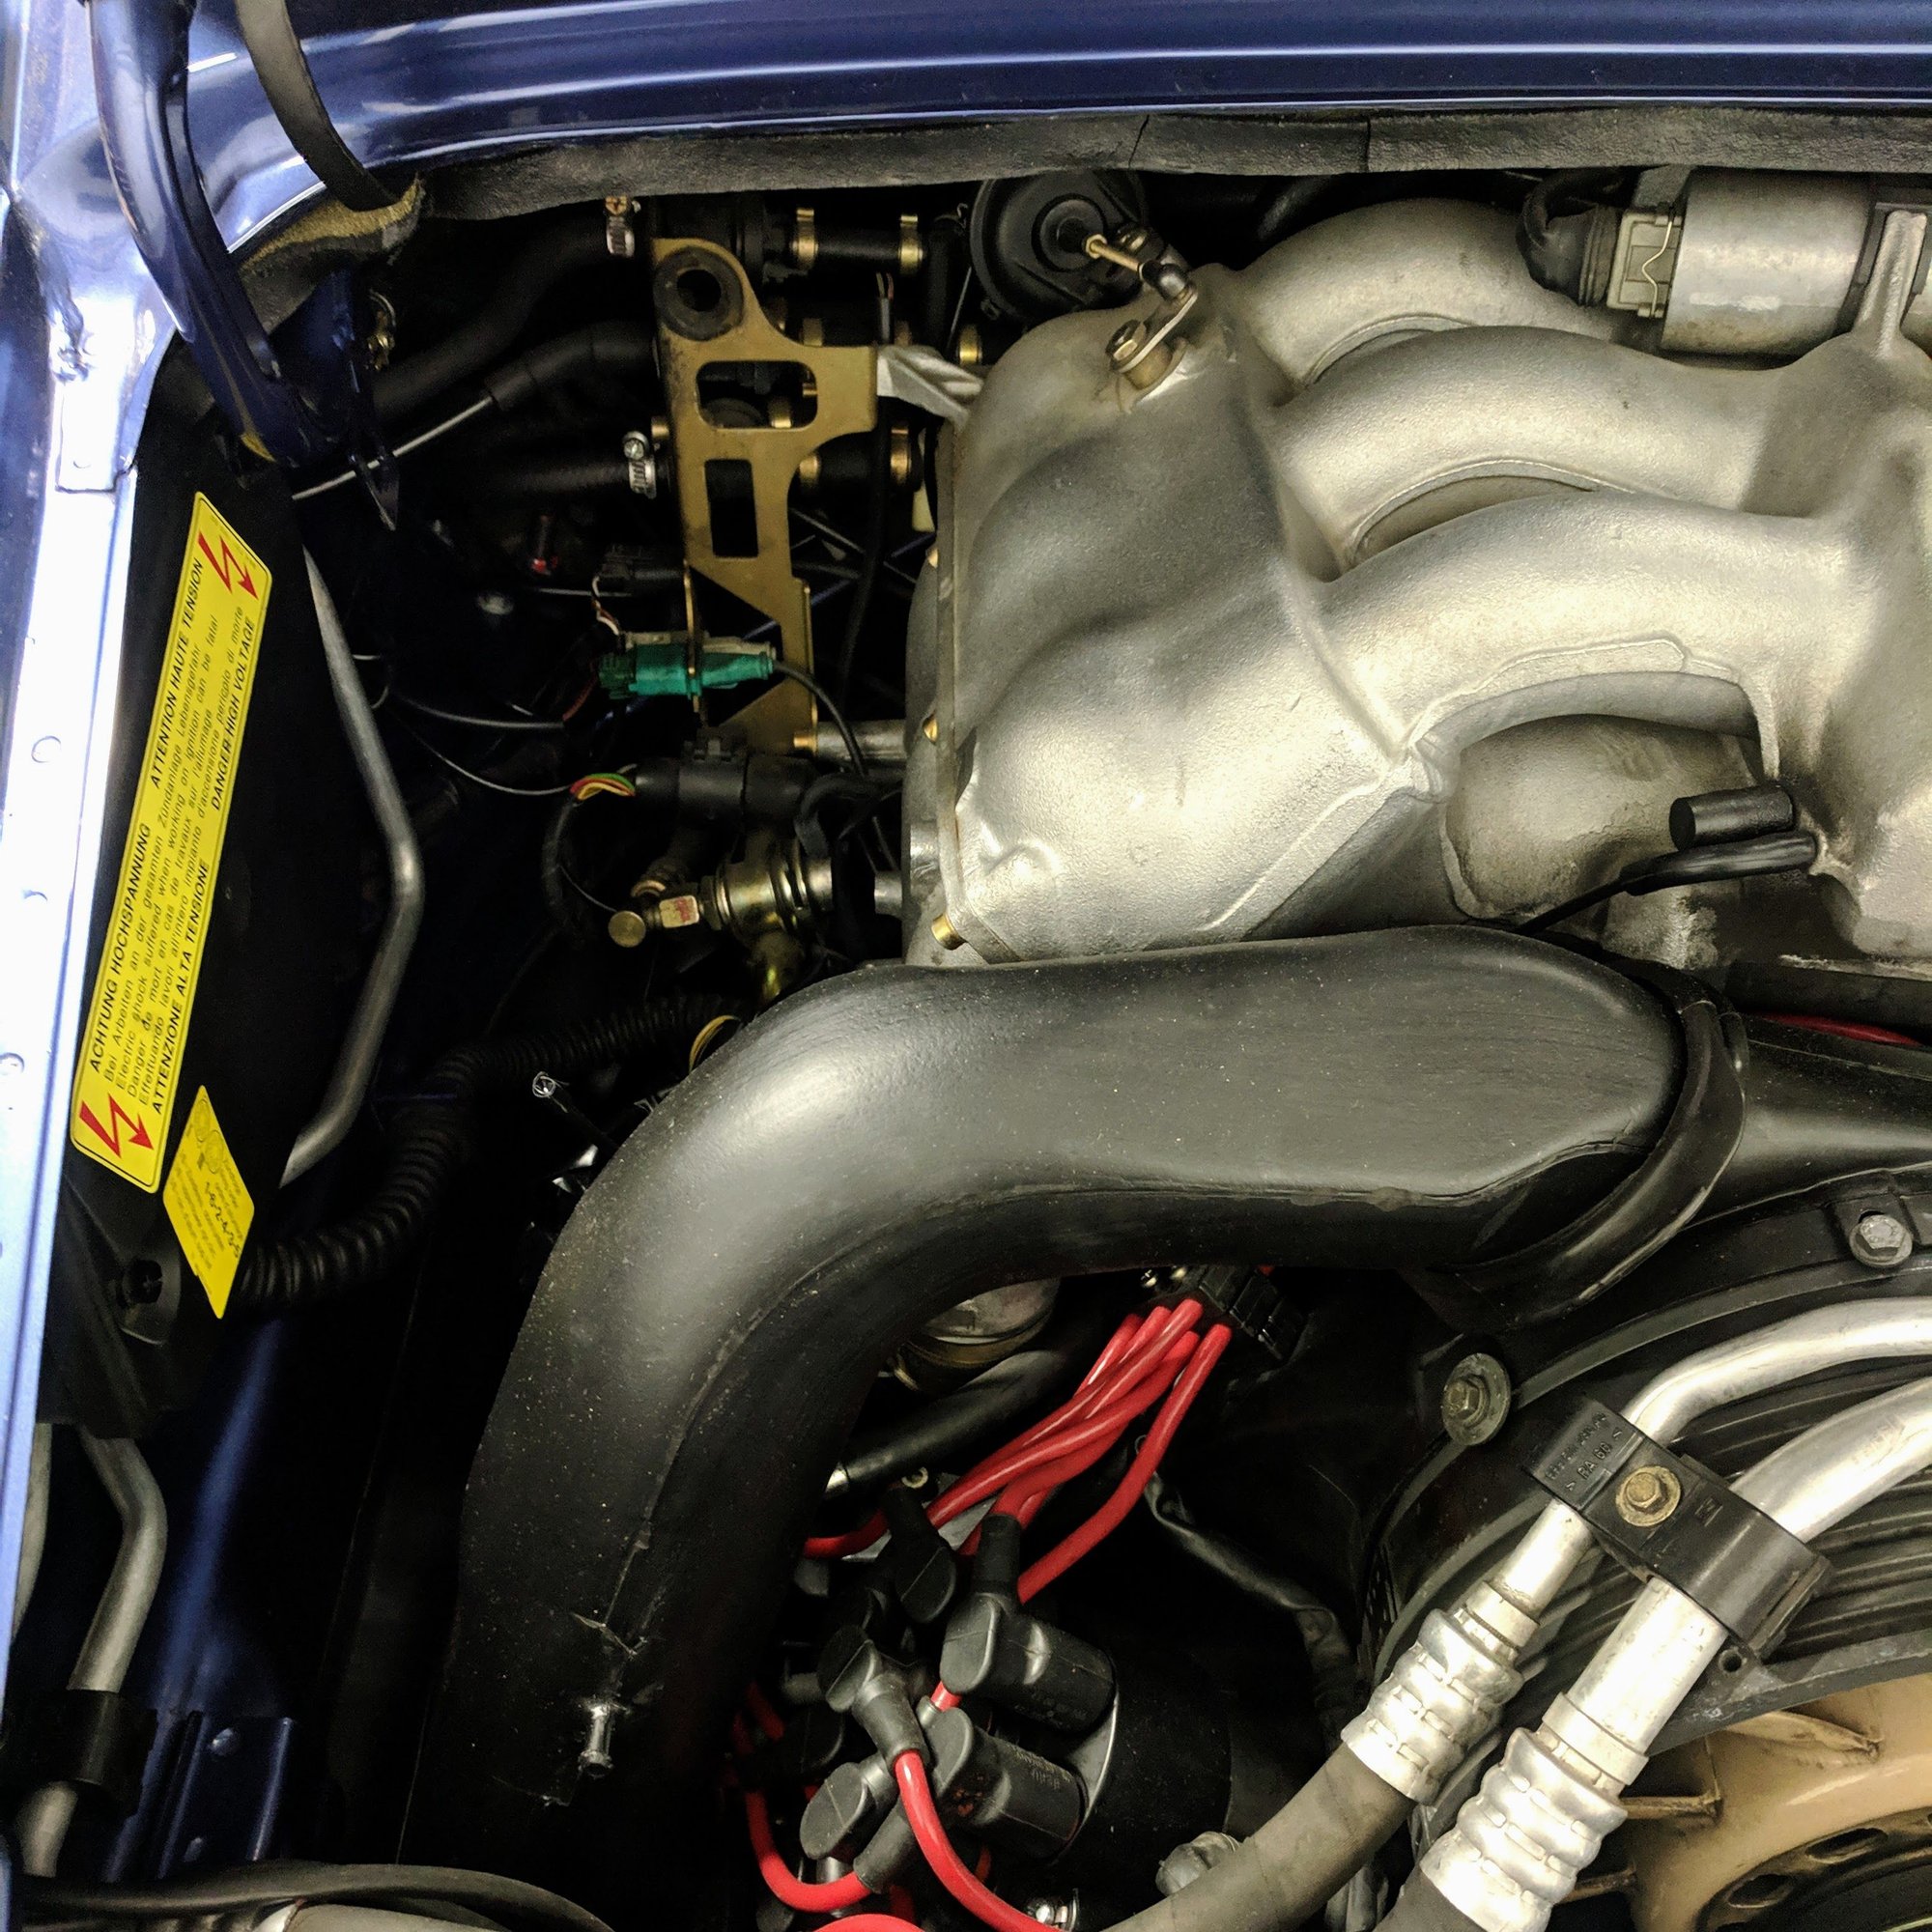
This past summer I started getting random cylinder misfires. Rotors/caps were replaced 10K miles ago and the plugs a year ago. Inspected the wires and noticed the lower wires next to the mufflers were showing their age as the insulation jackets were shot so it was time for a spark plug wire replacement.
What a world of difference the new wires have made! Misfires are finally gone and the engine noticeably idles better.
I ended up going with a DIY Beru wire replacement kit from Pelican as all of my plug ends with the exception of one were all within spec of the factory resistance. One Beru OE replacement plug end and the kit being on clearance scored a great deal!
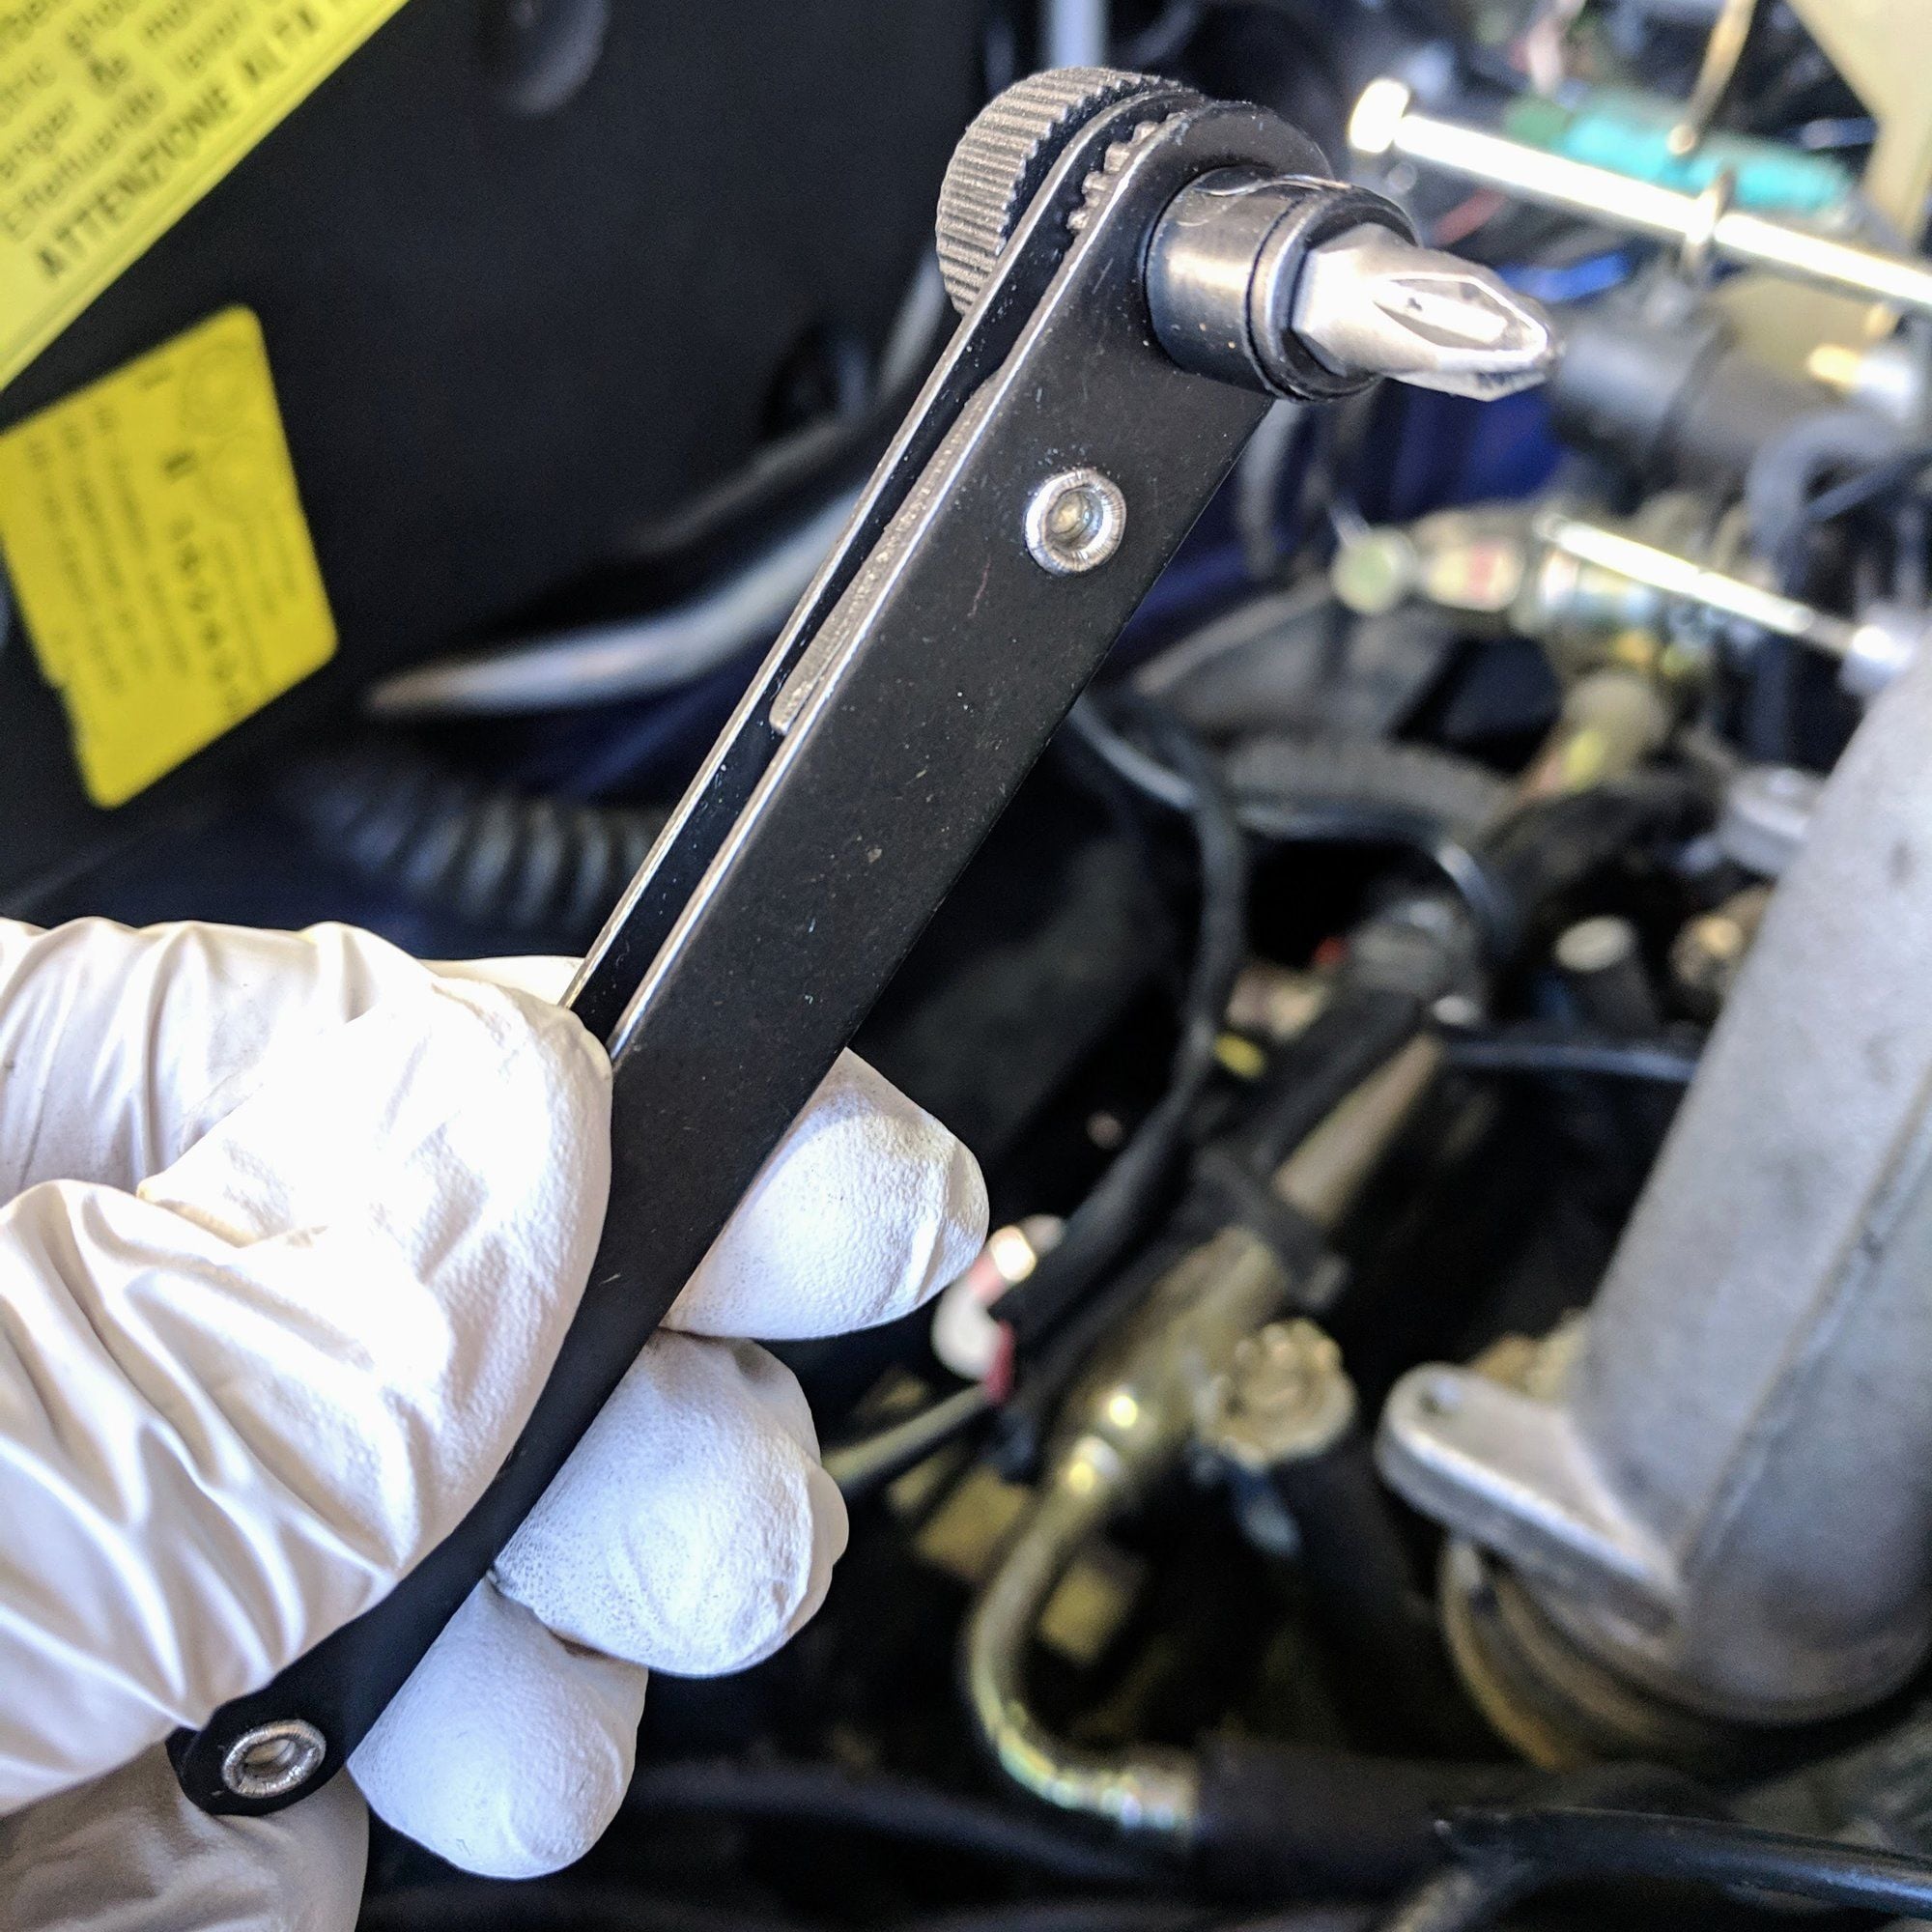
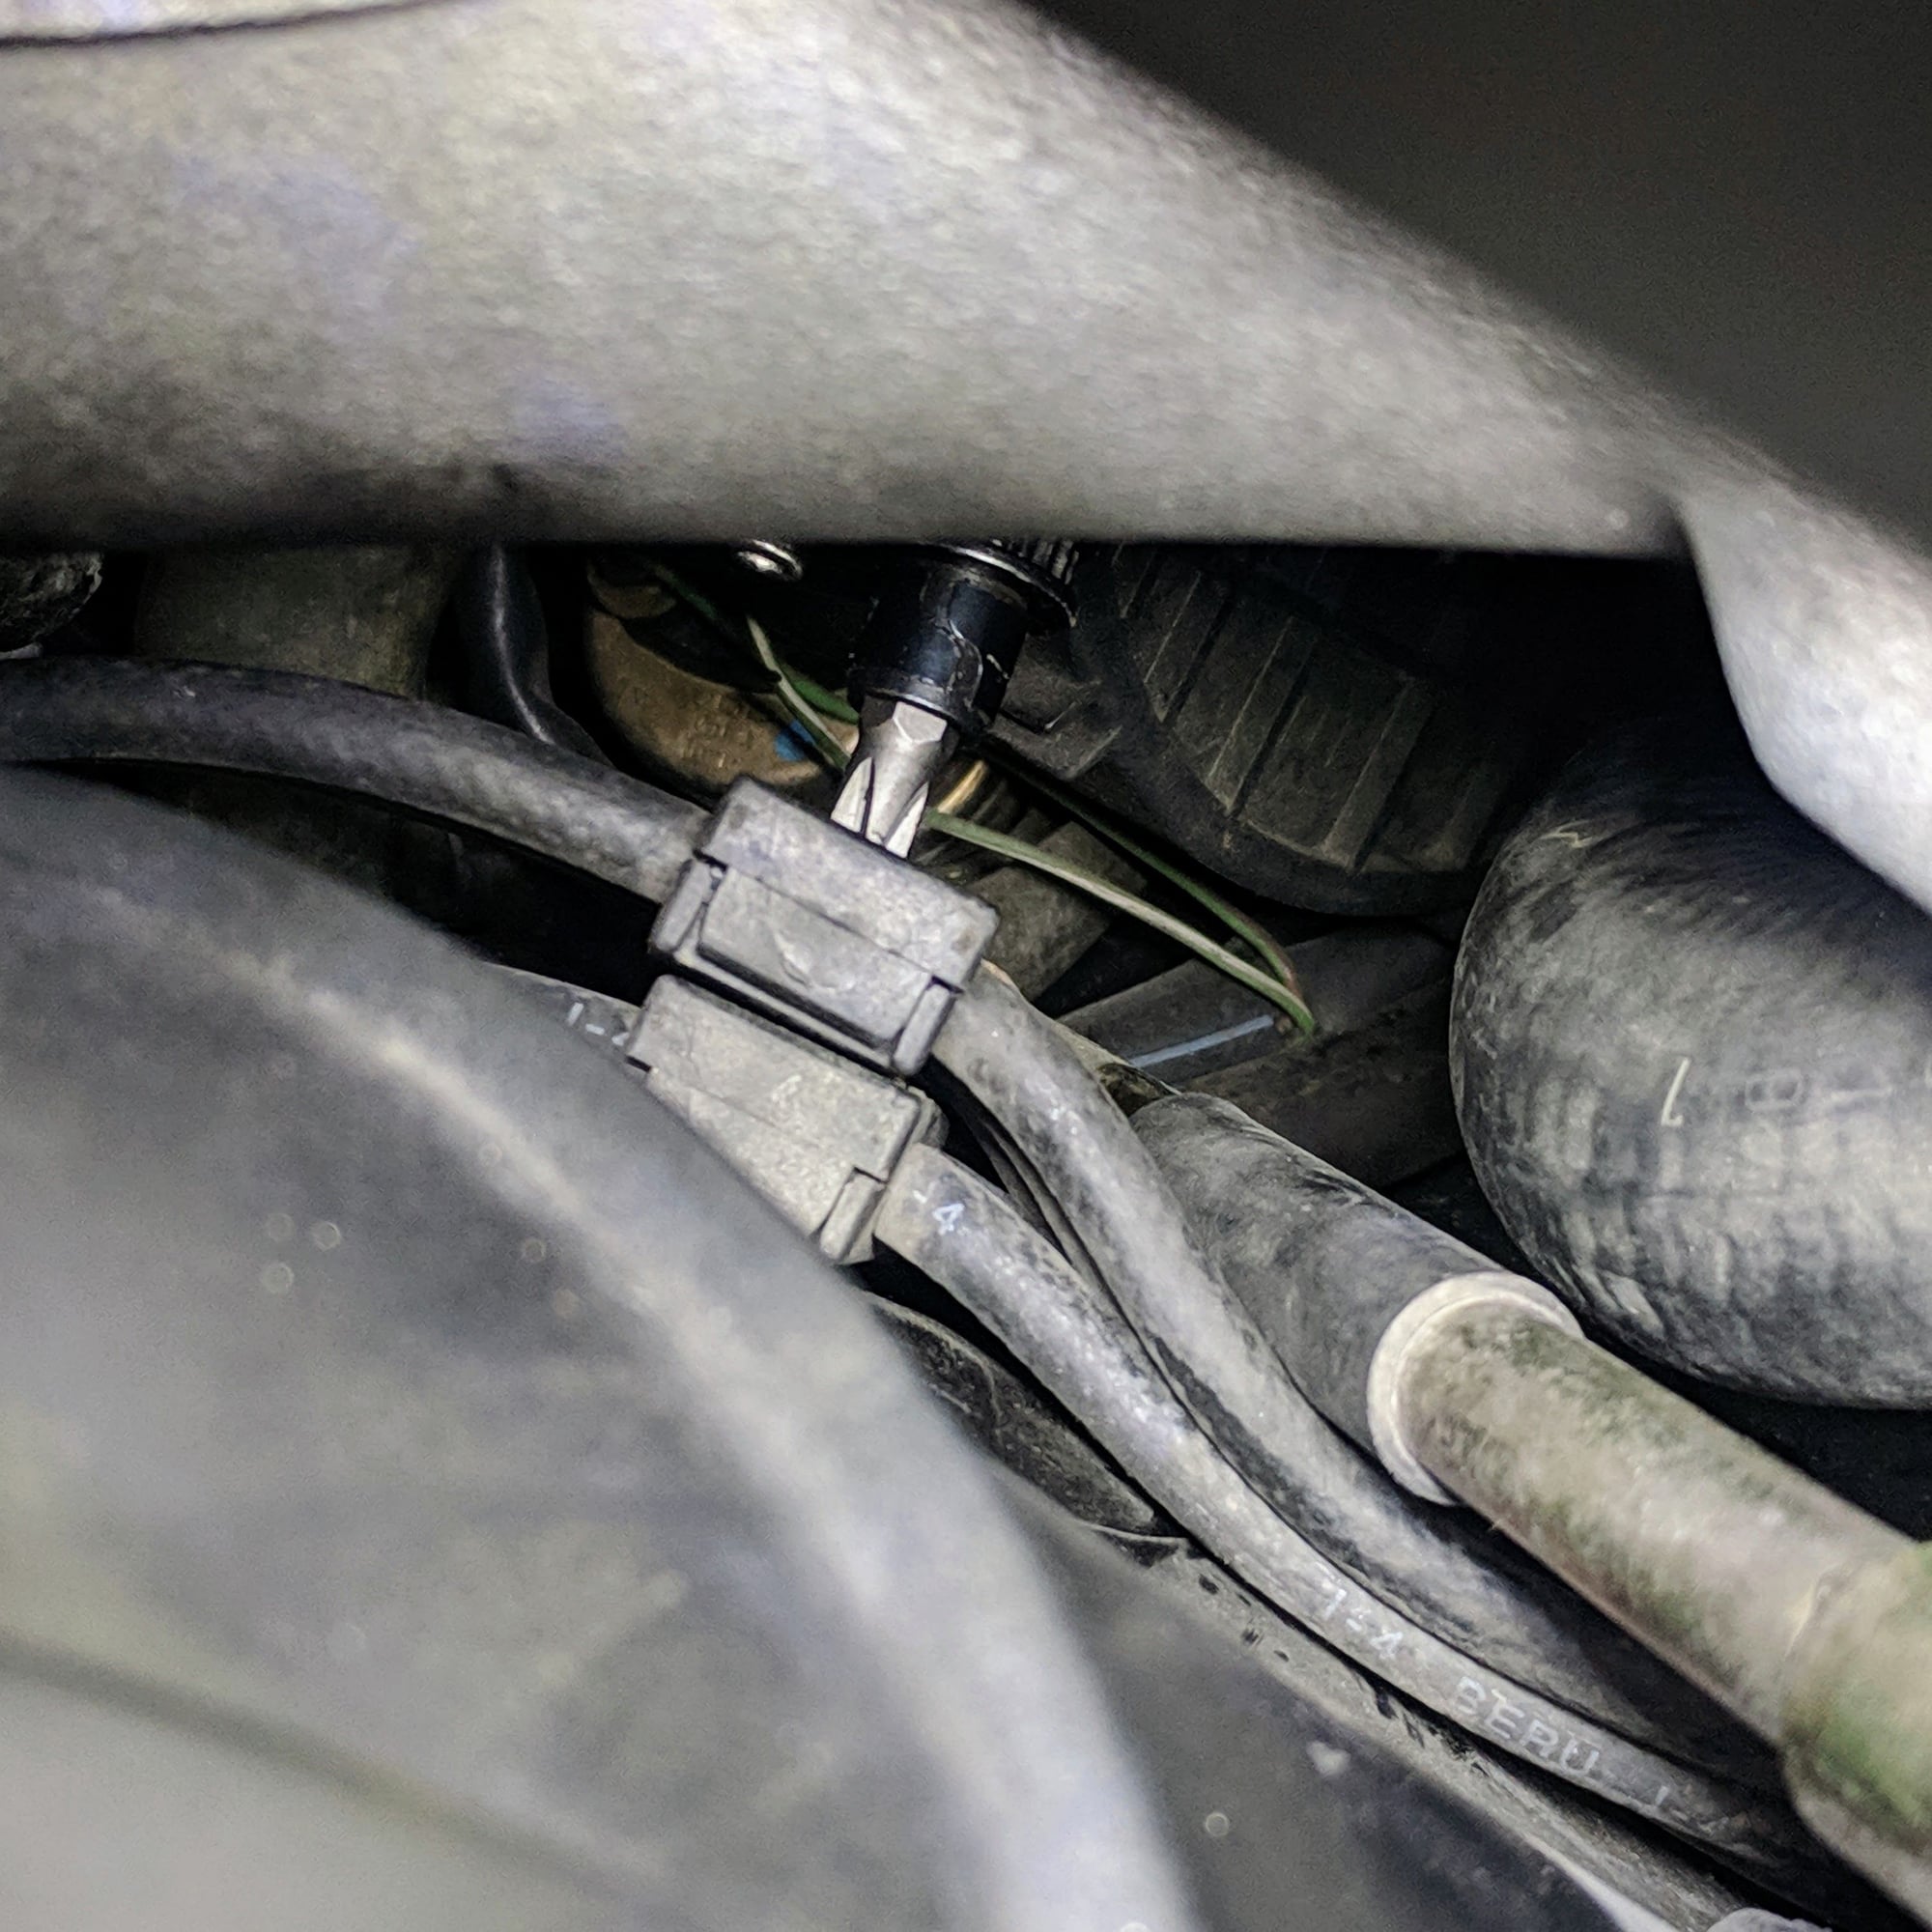
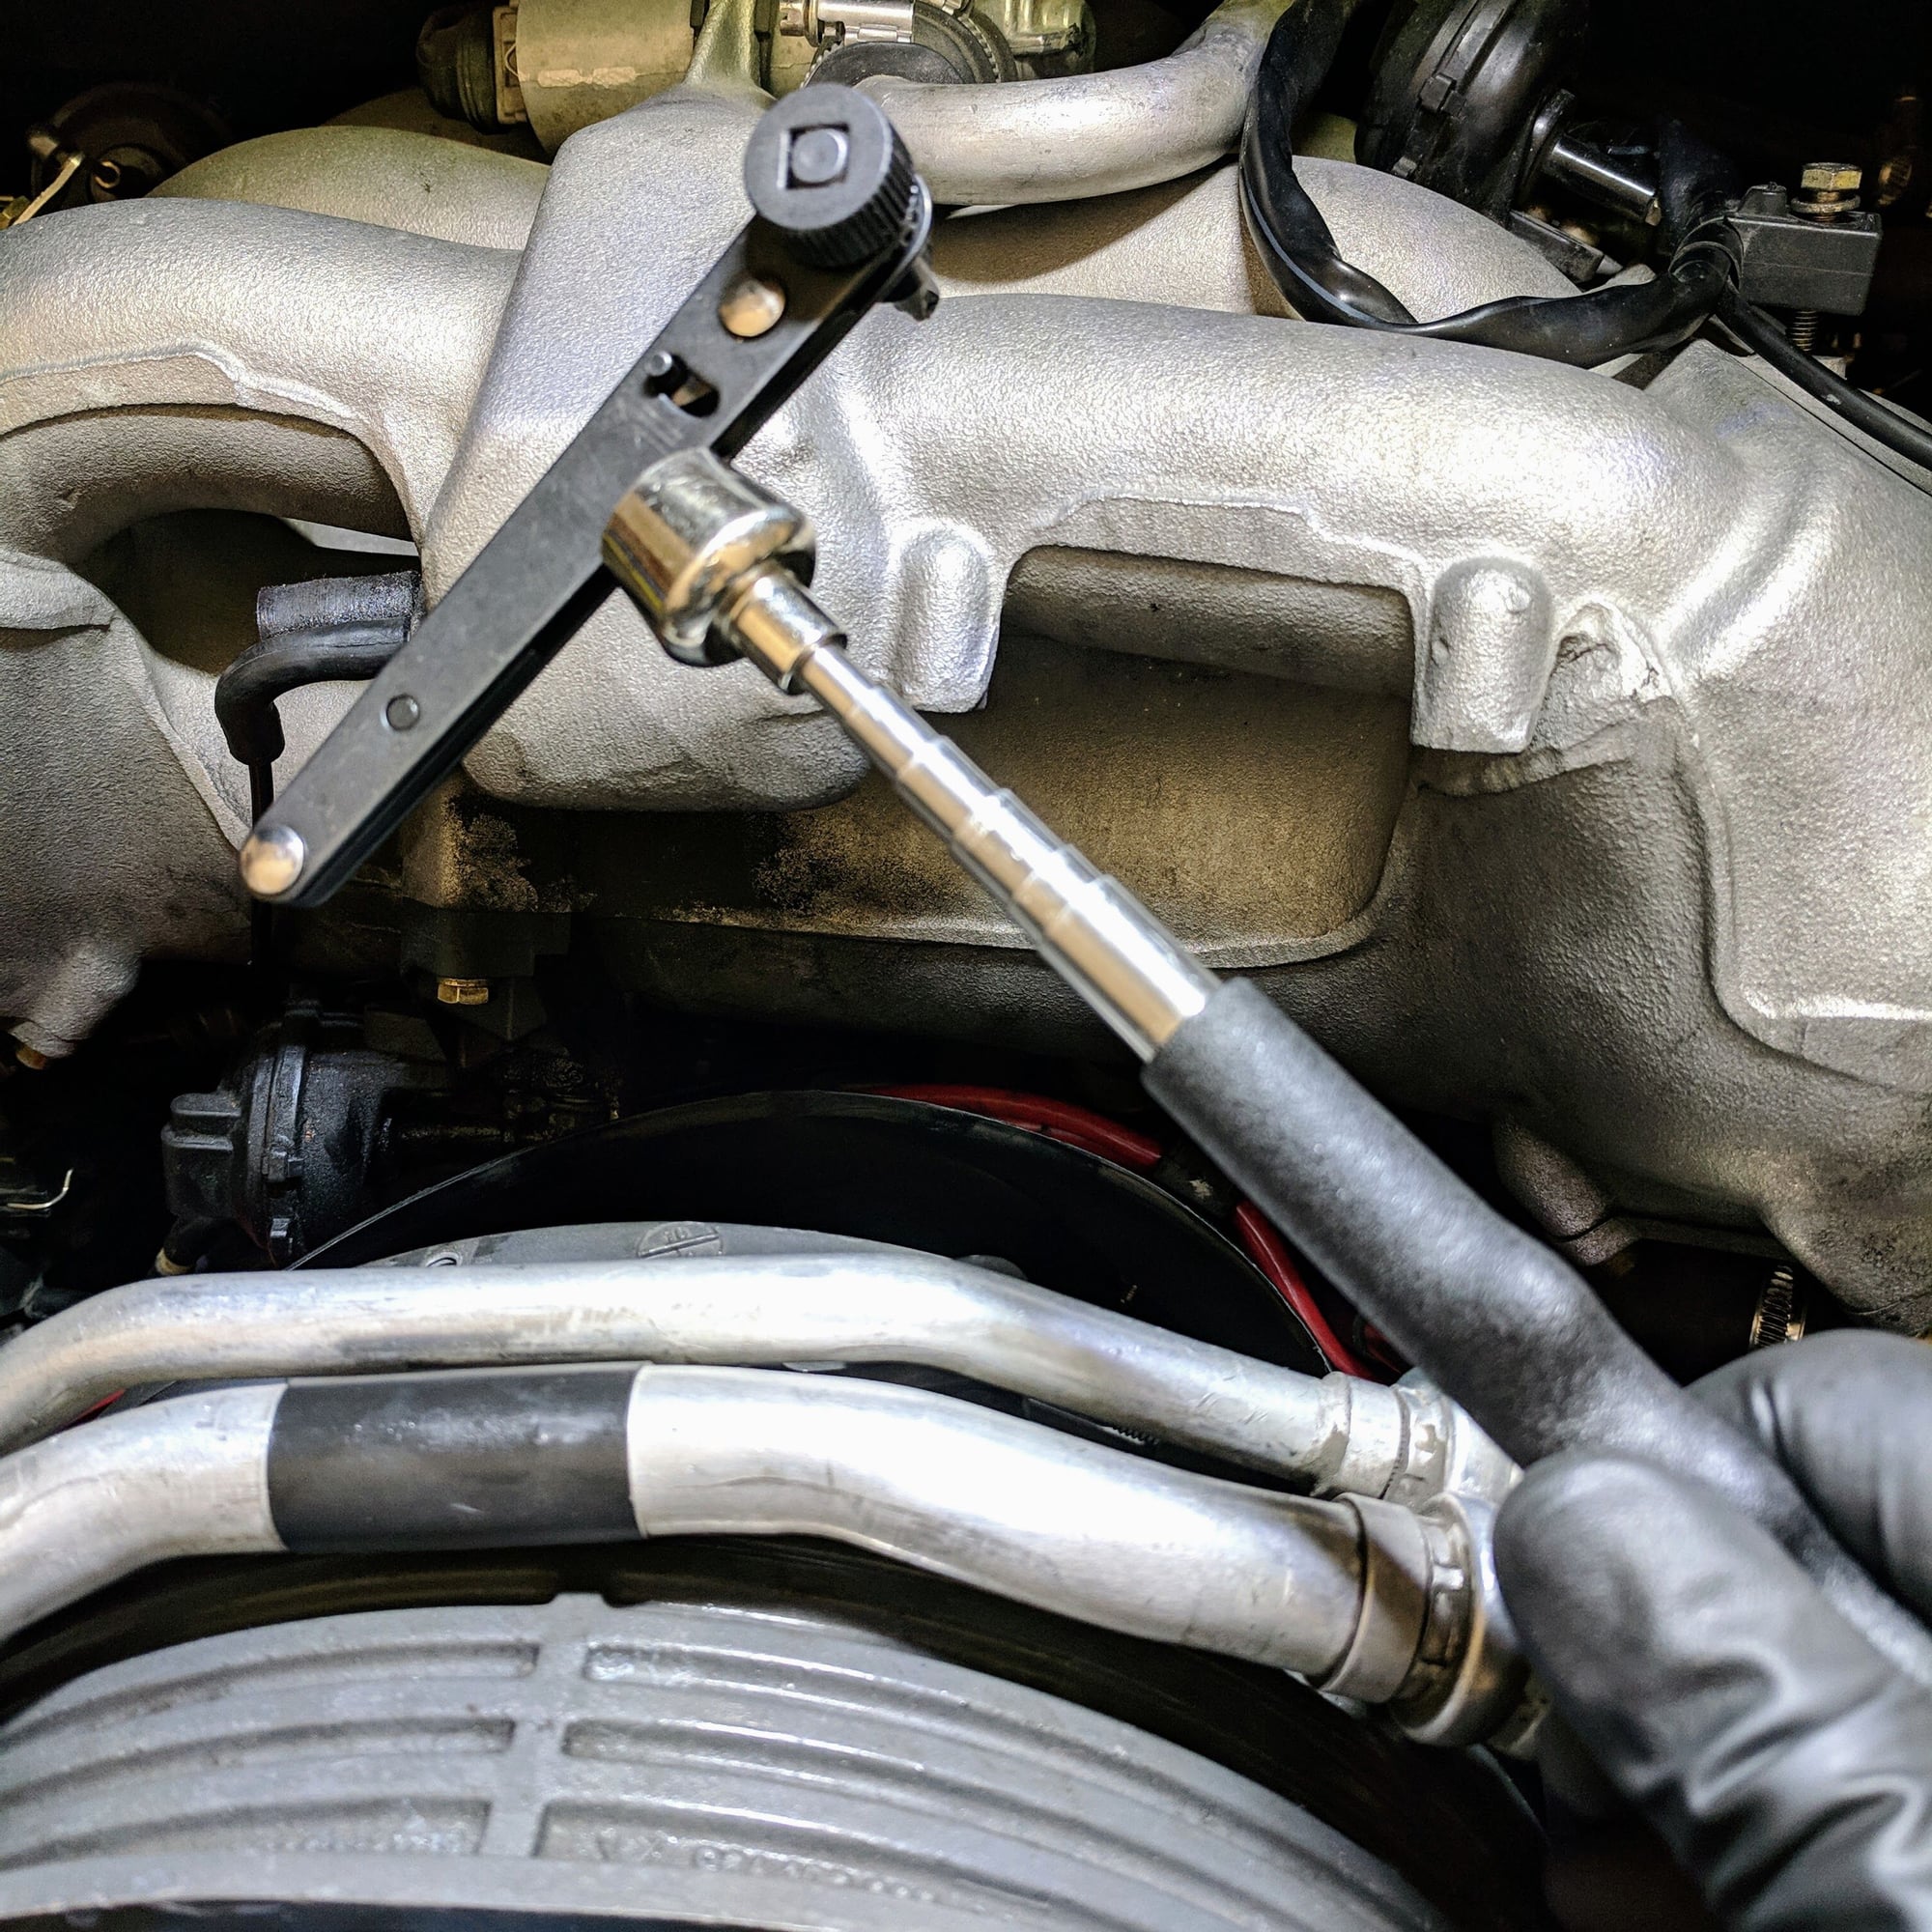
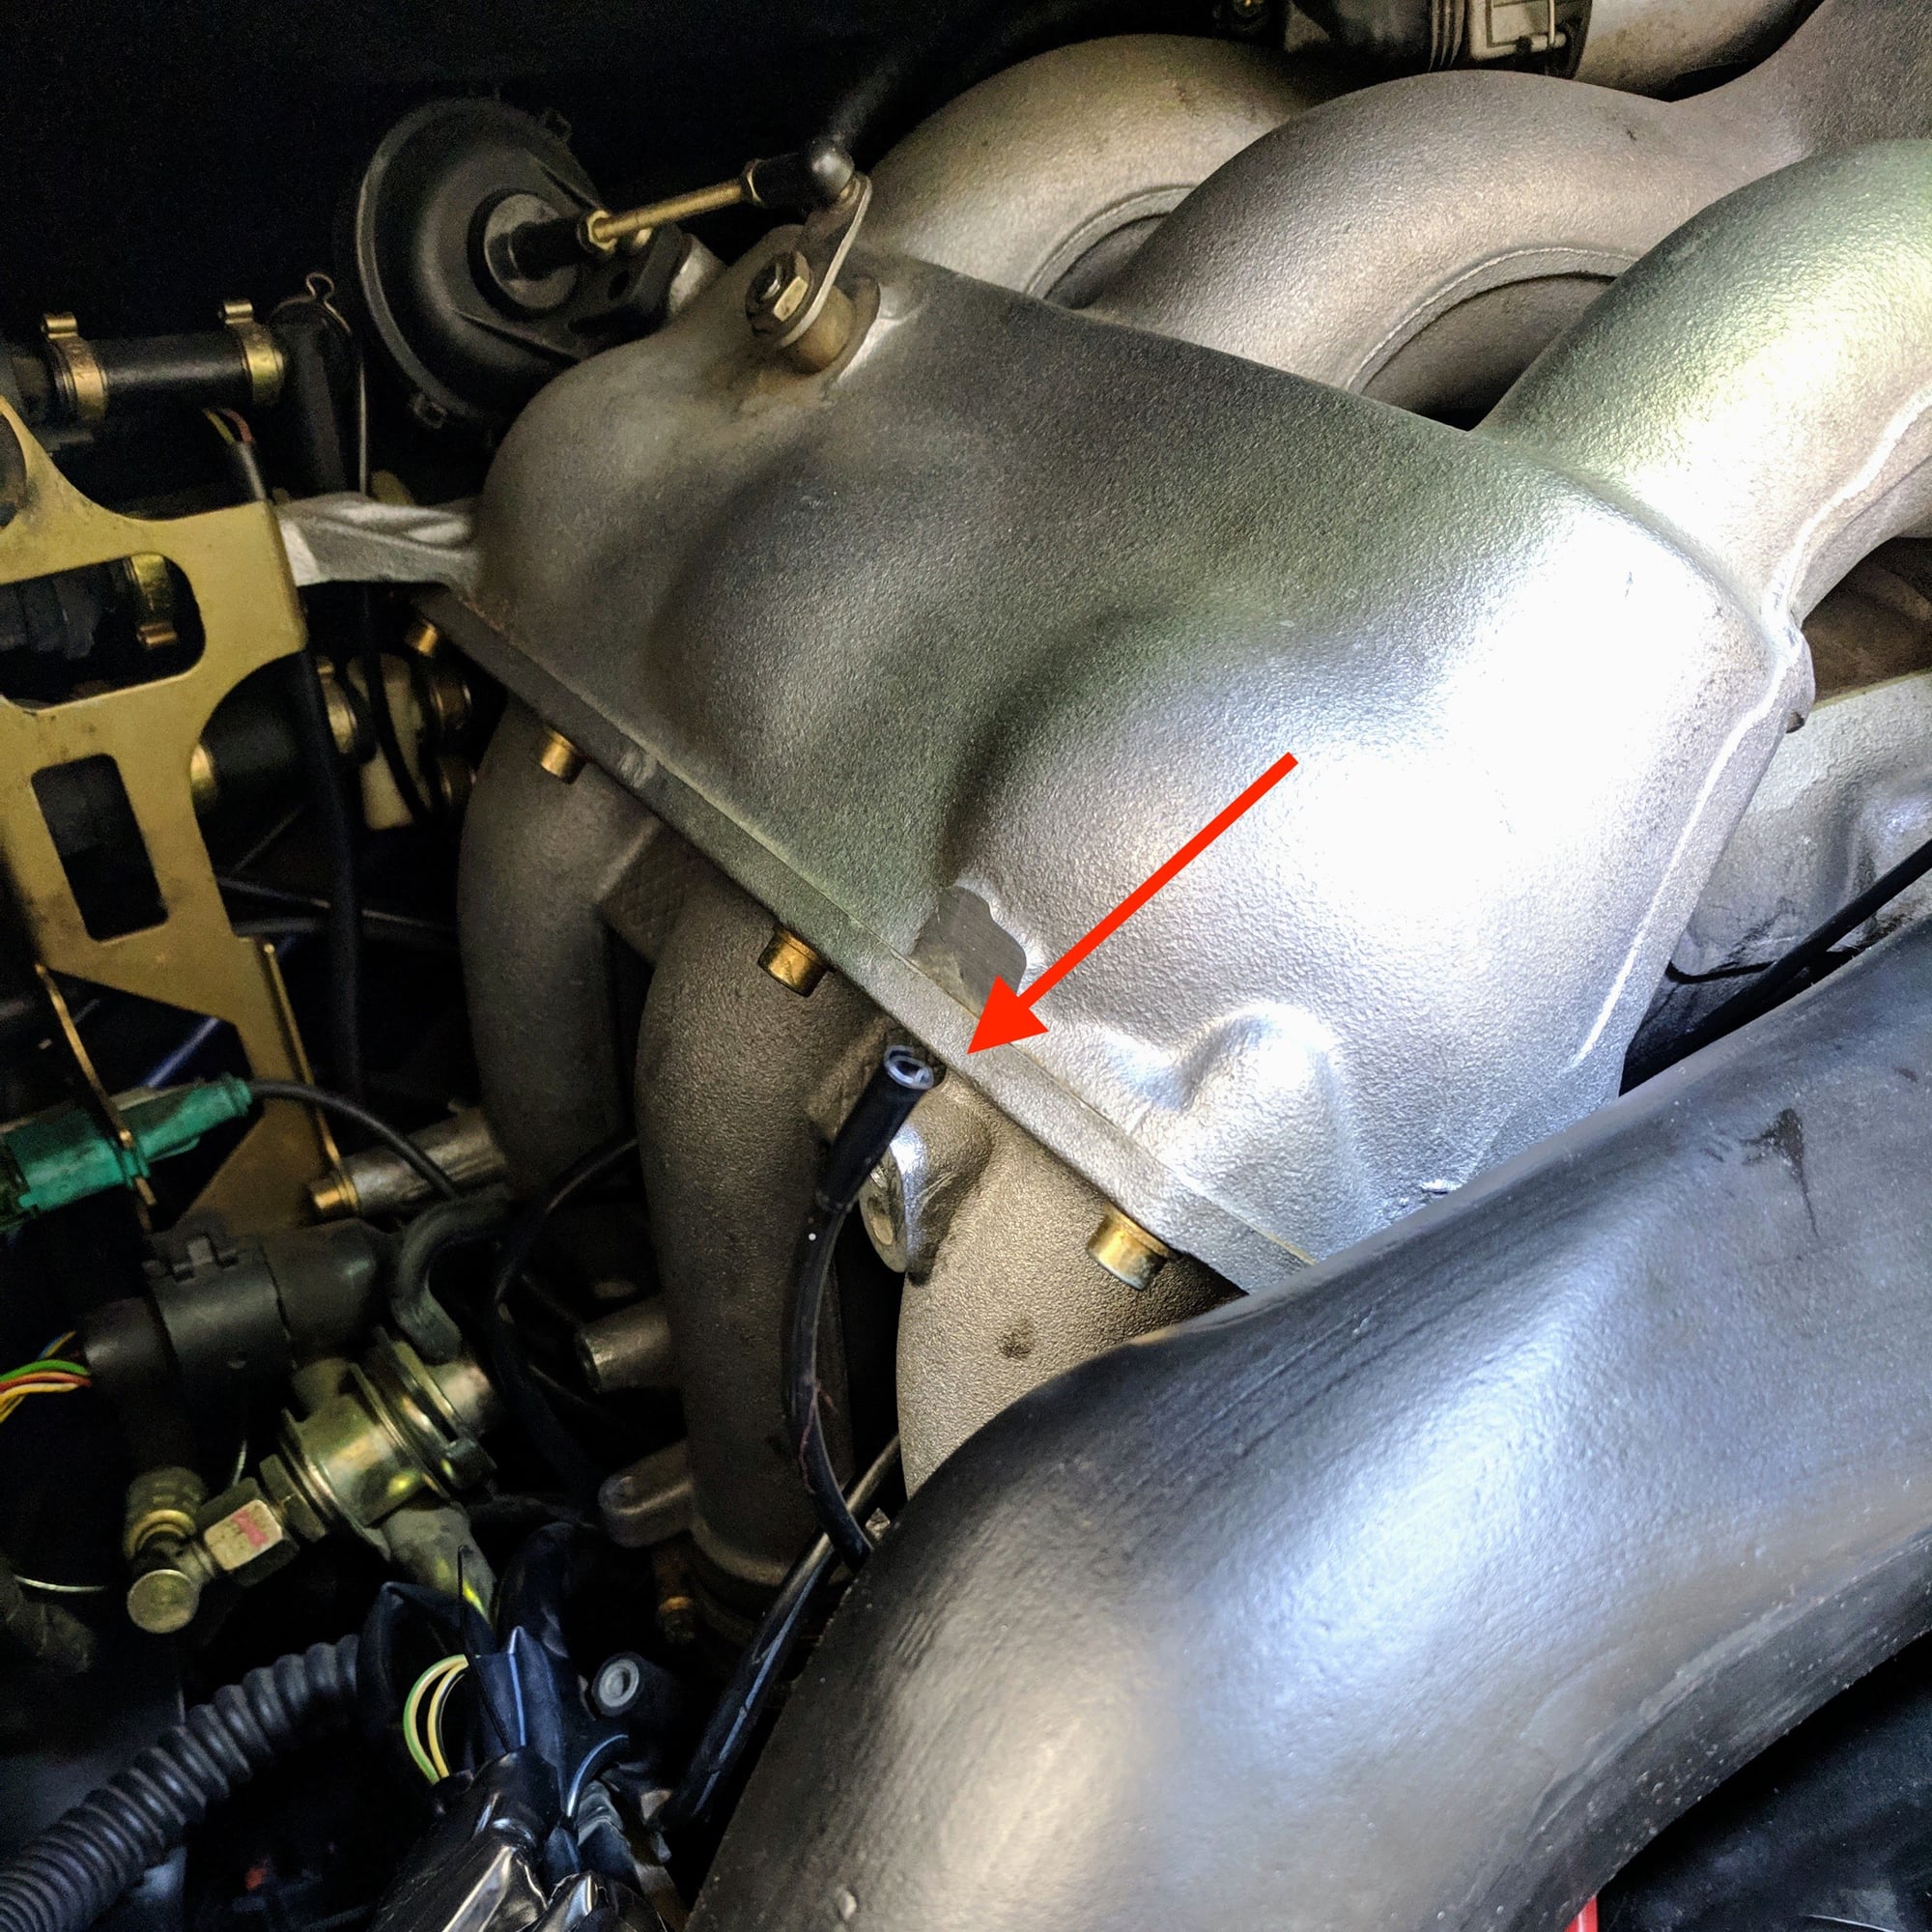
Overall the job to remove and install new wires is a major PIA. This ratcheting screw driver is a must to loosen/tighten the screws that secure the wires under the intake manifold without messing with loosening the intake manifold.
Here is the summary with some tips...
Part I: Wire removal:
1. Remove the airbox and the heater blower
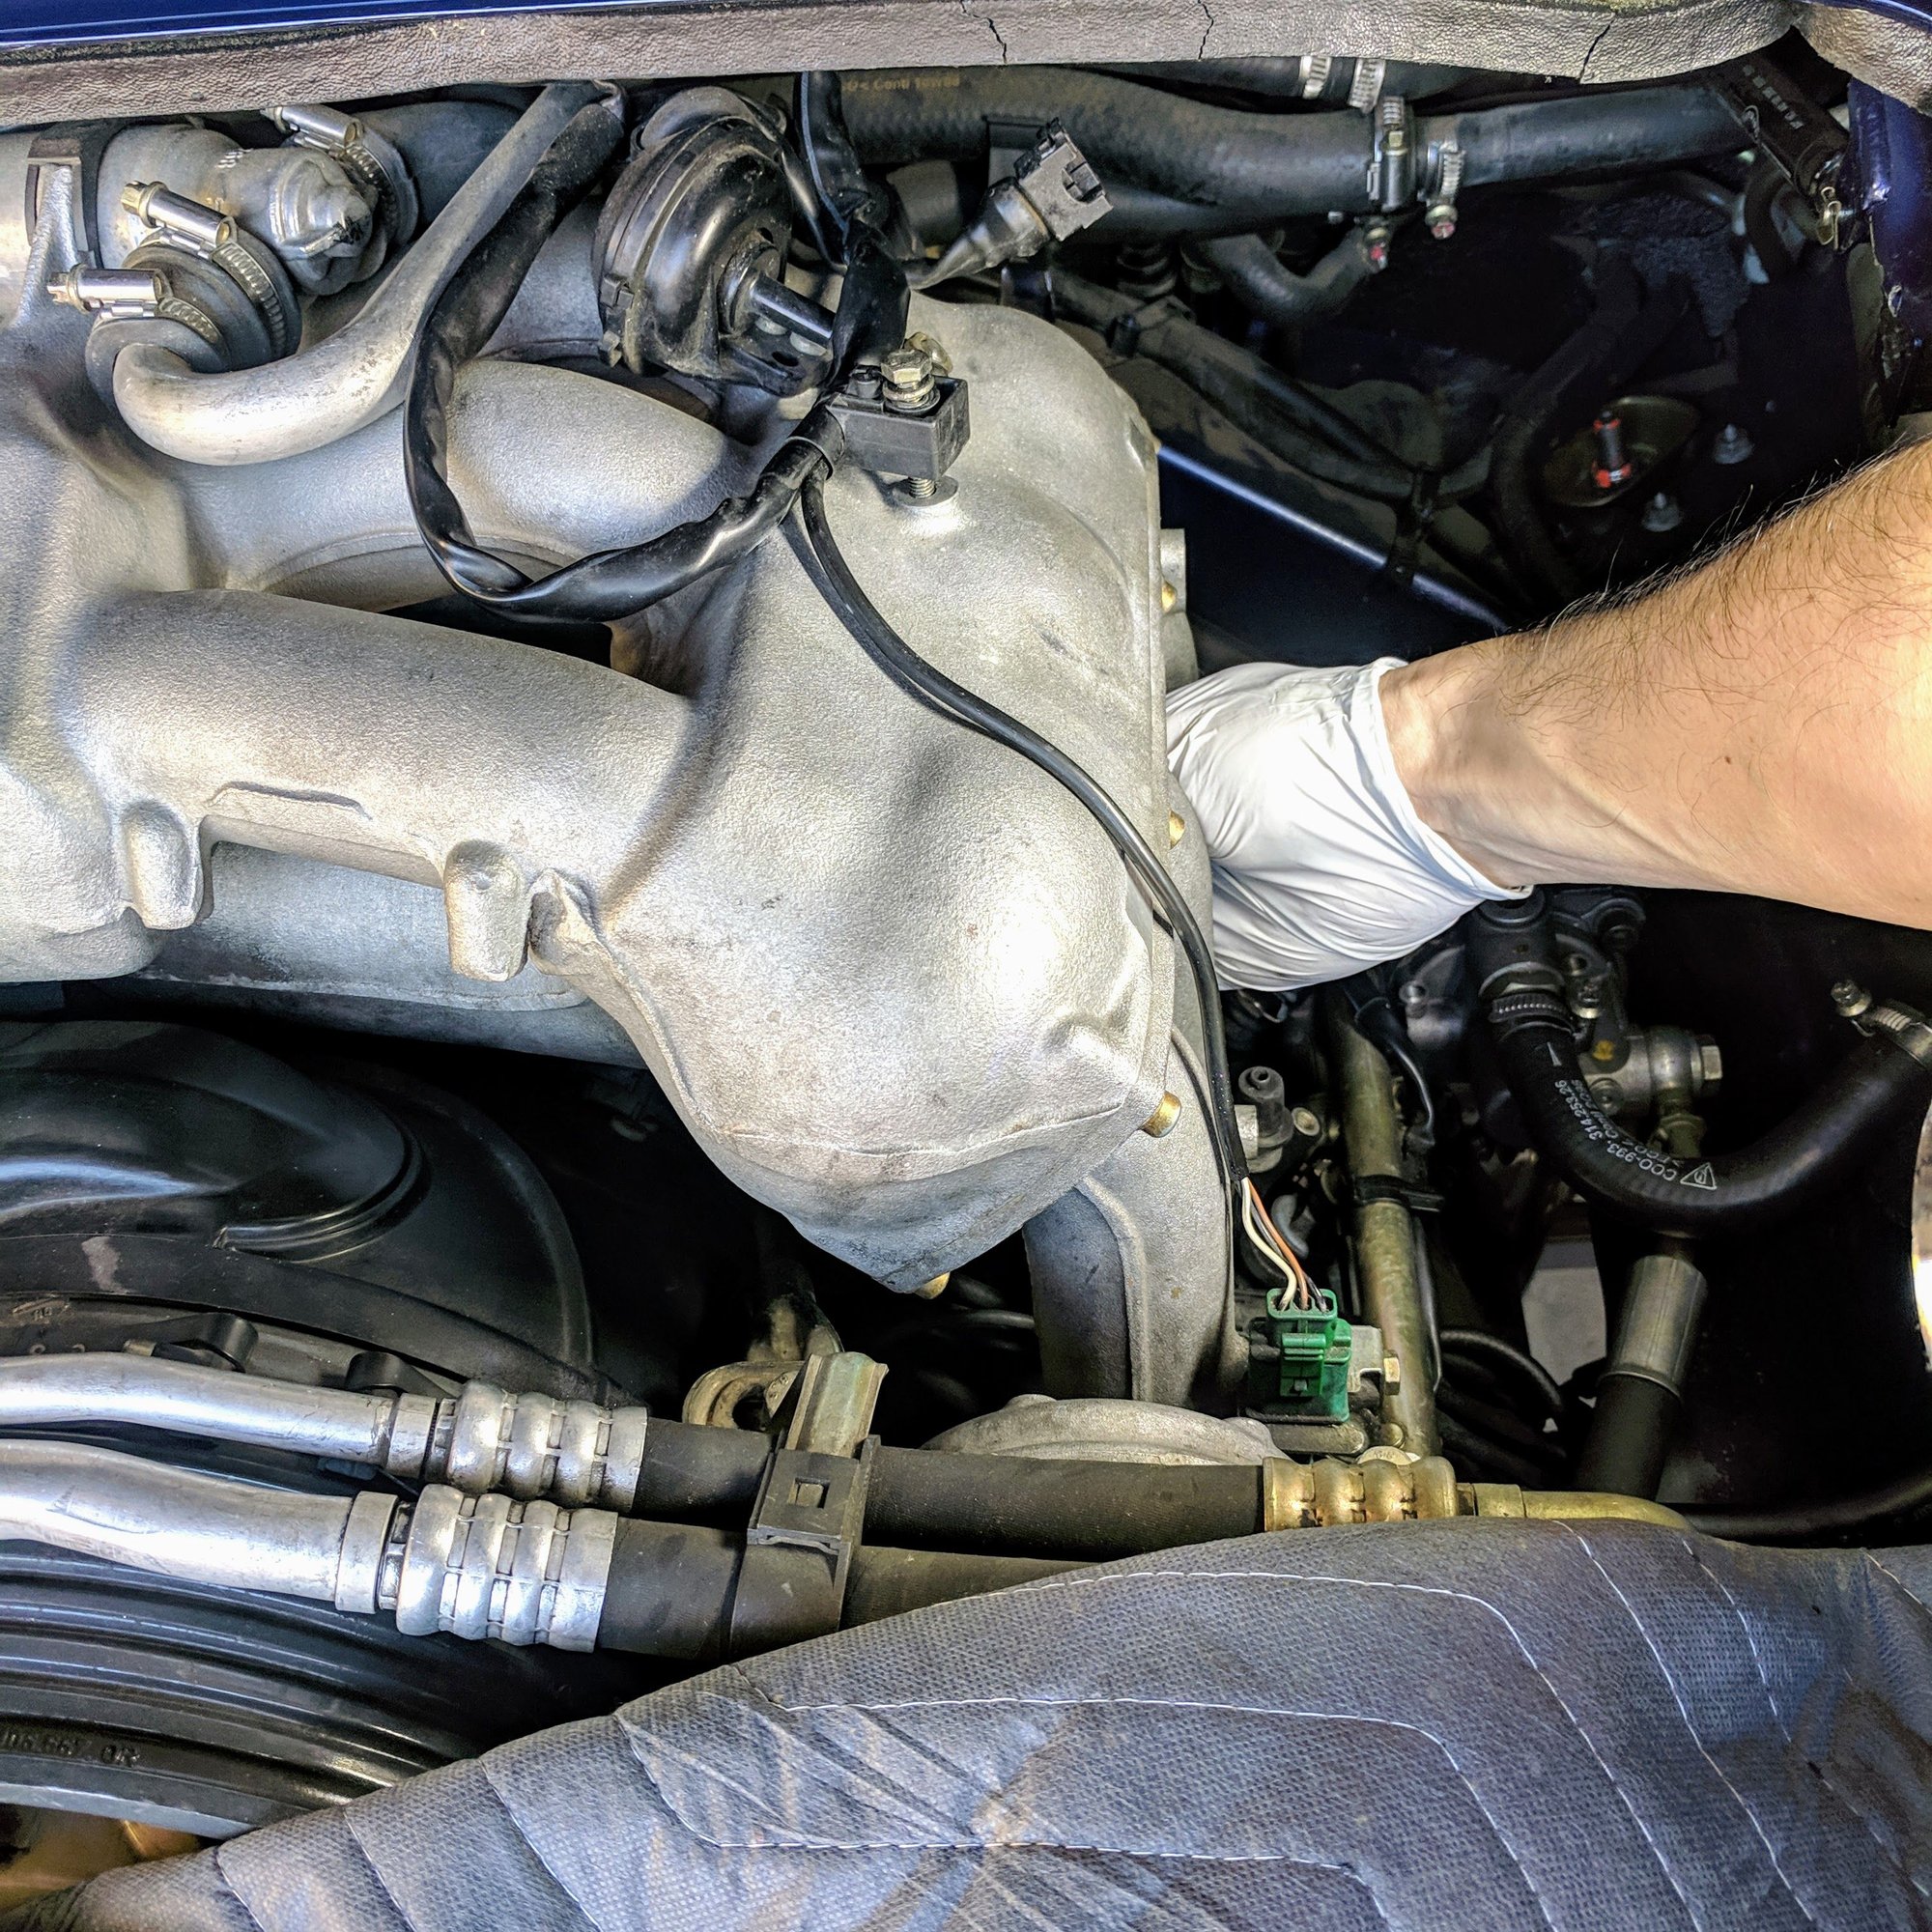
2. Slide your right hand into the manifold to loosen the right wire bracket with the screw ratchet
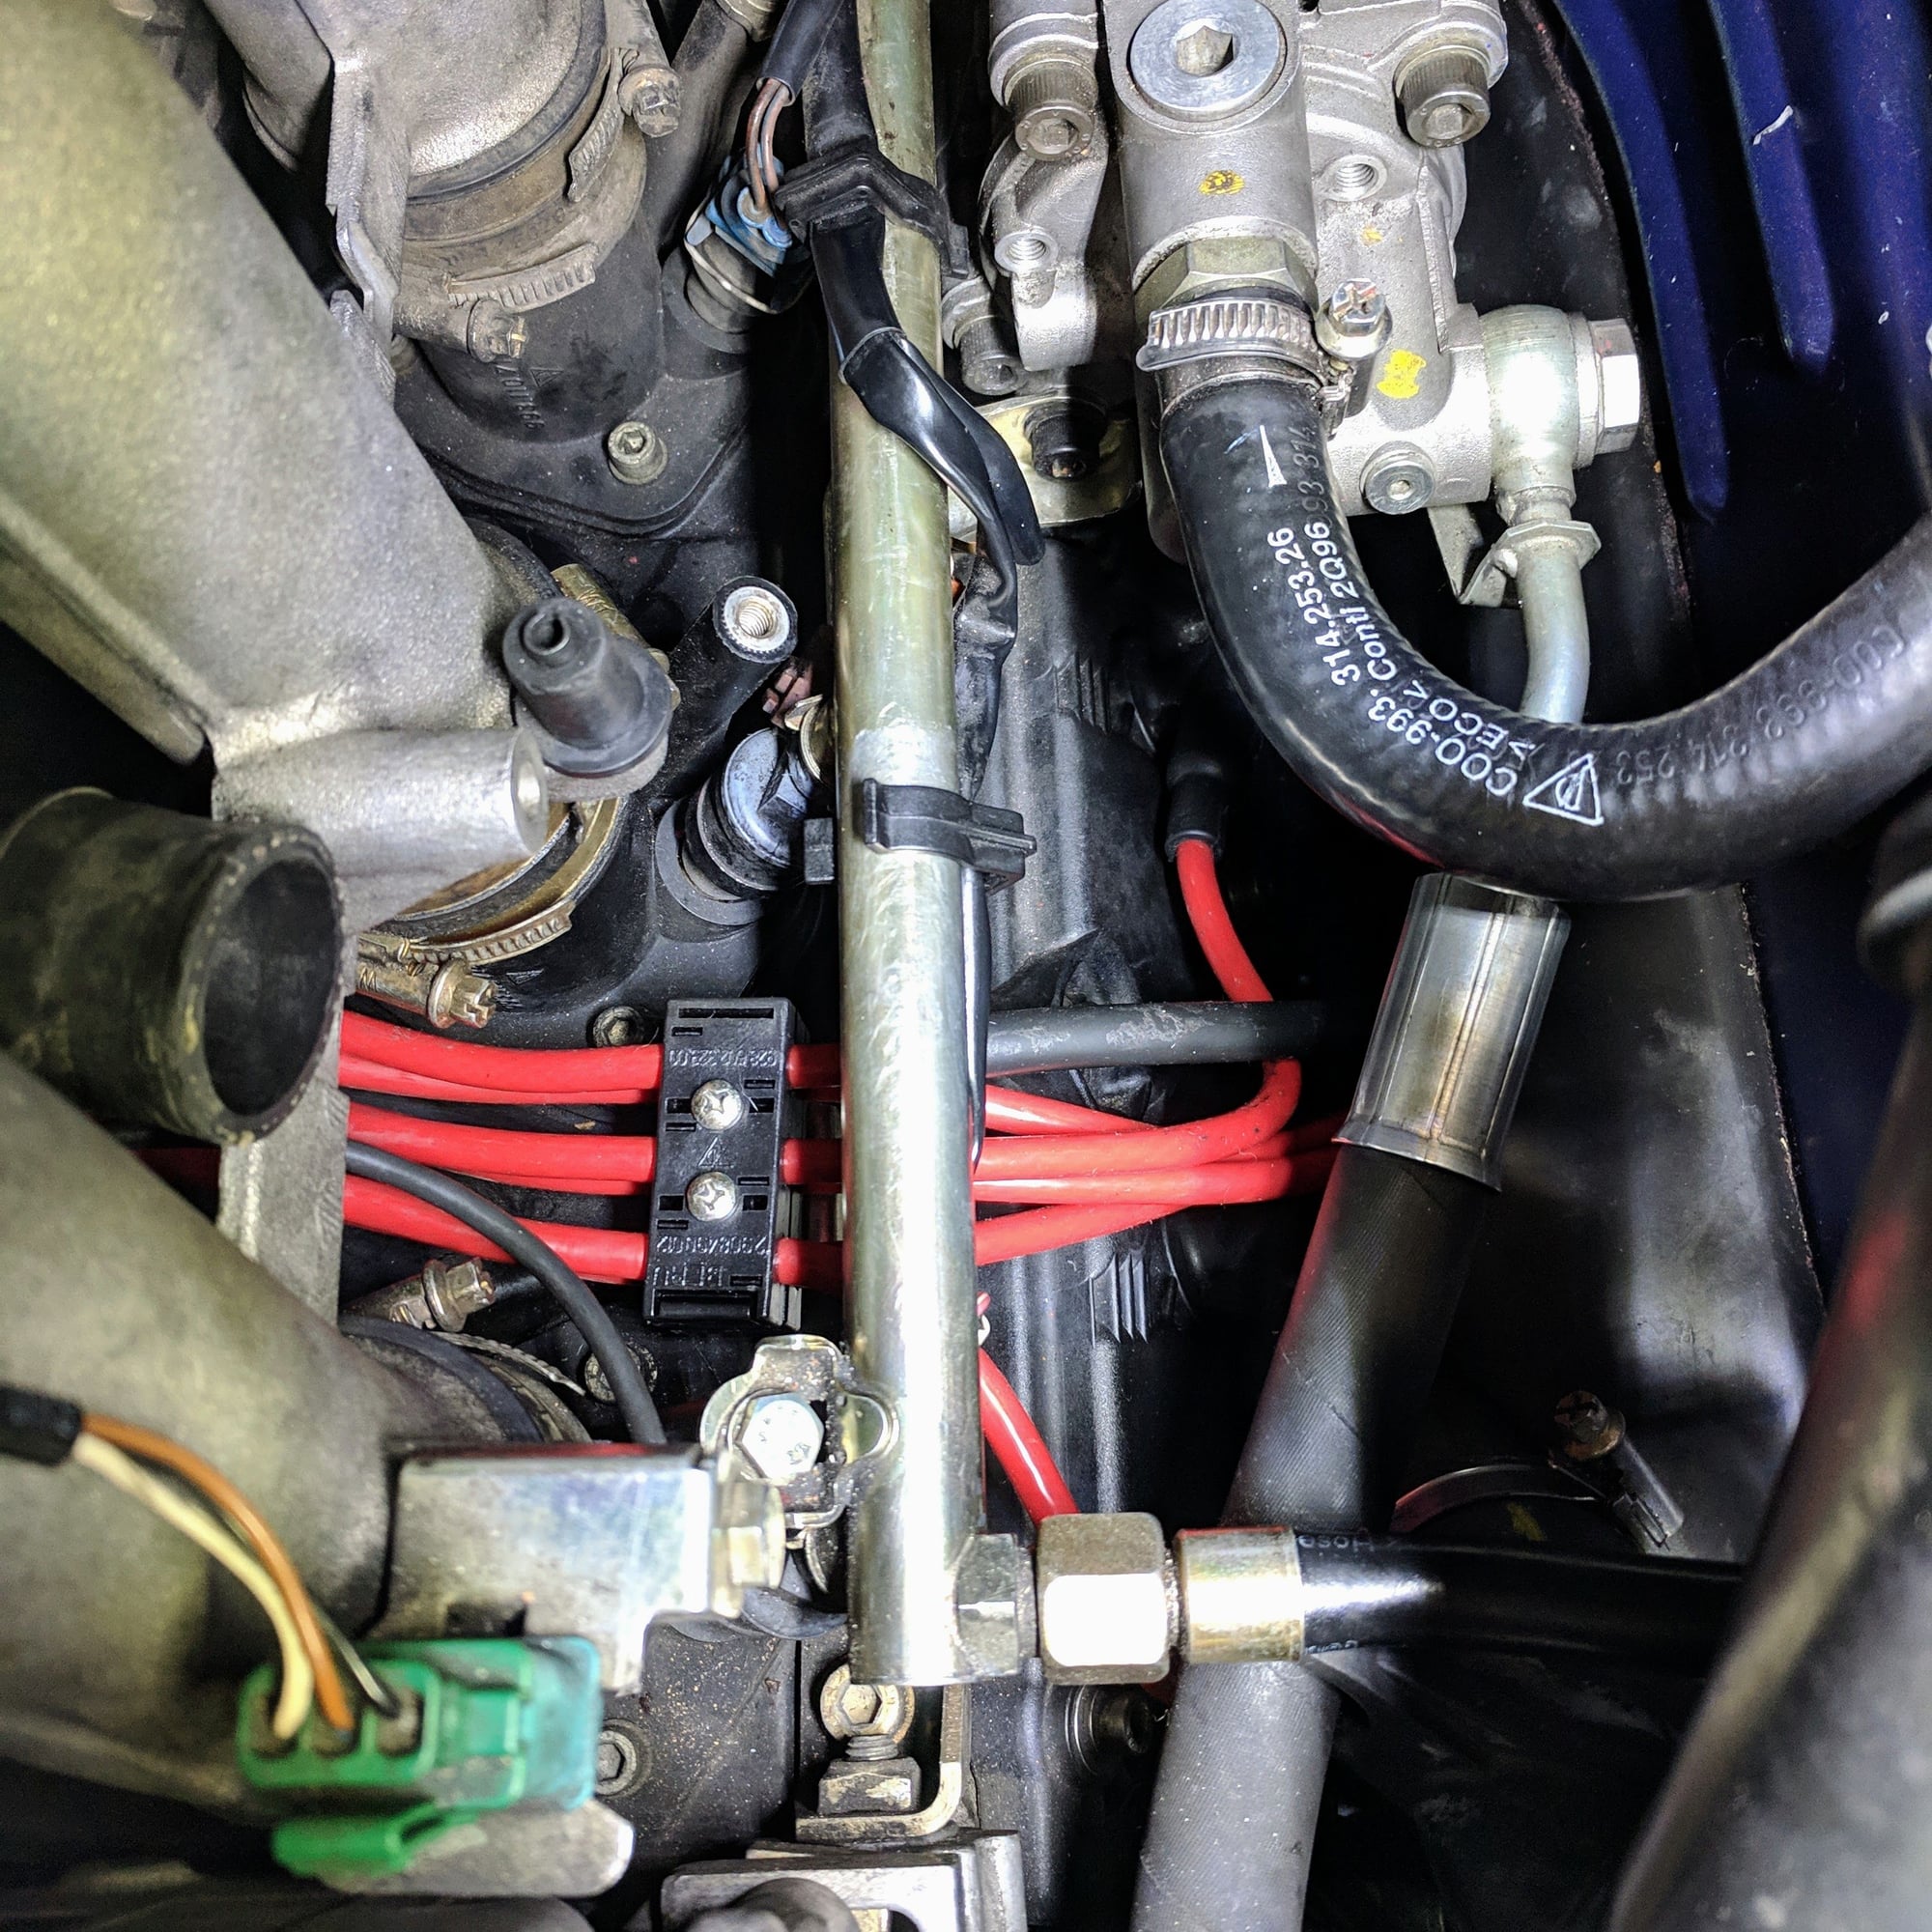
3. Do the same with your left hand and slide your hand in the under the intake manifold and loosen two sets of wire brackets with the screw ratchet
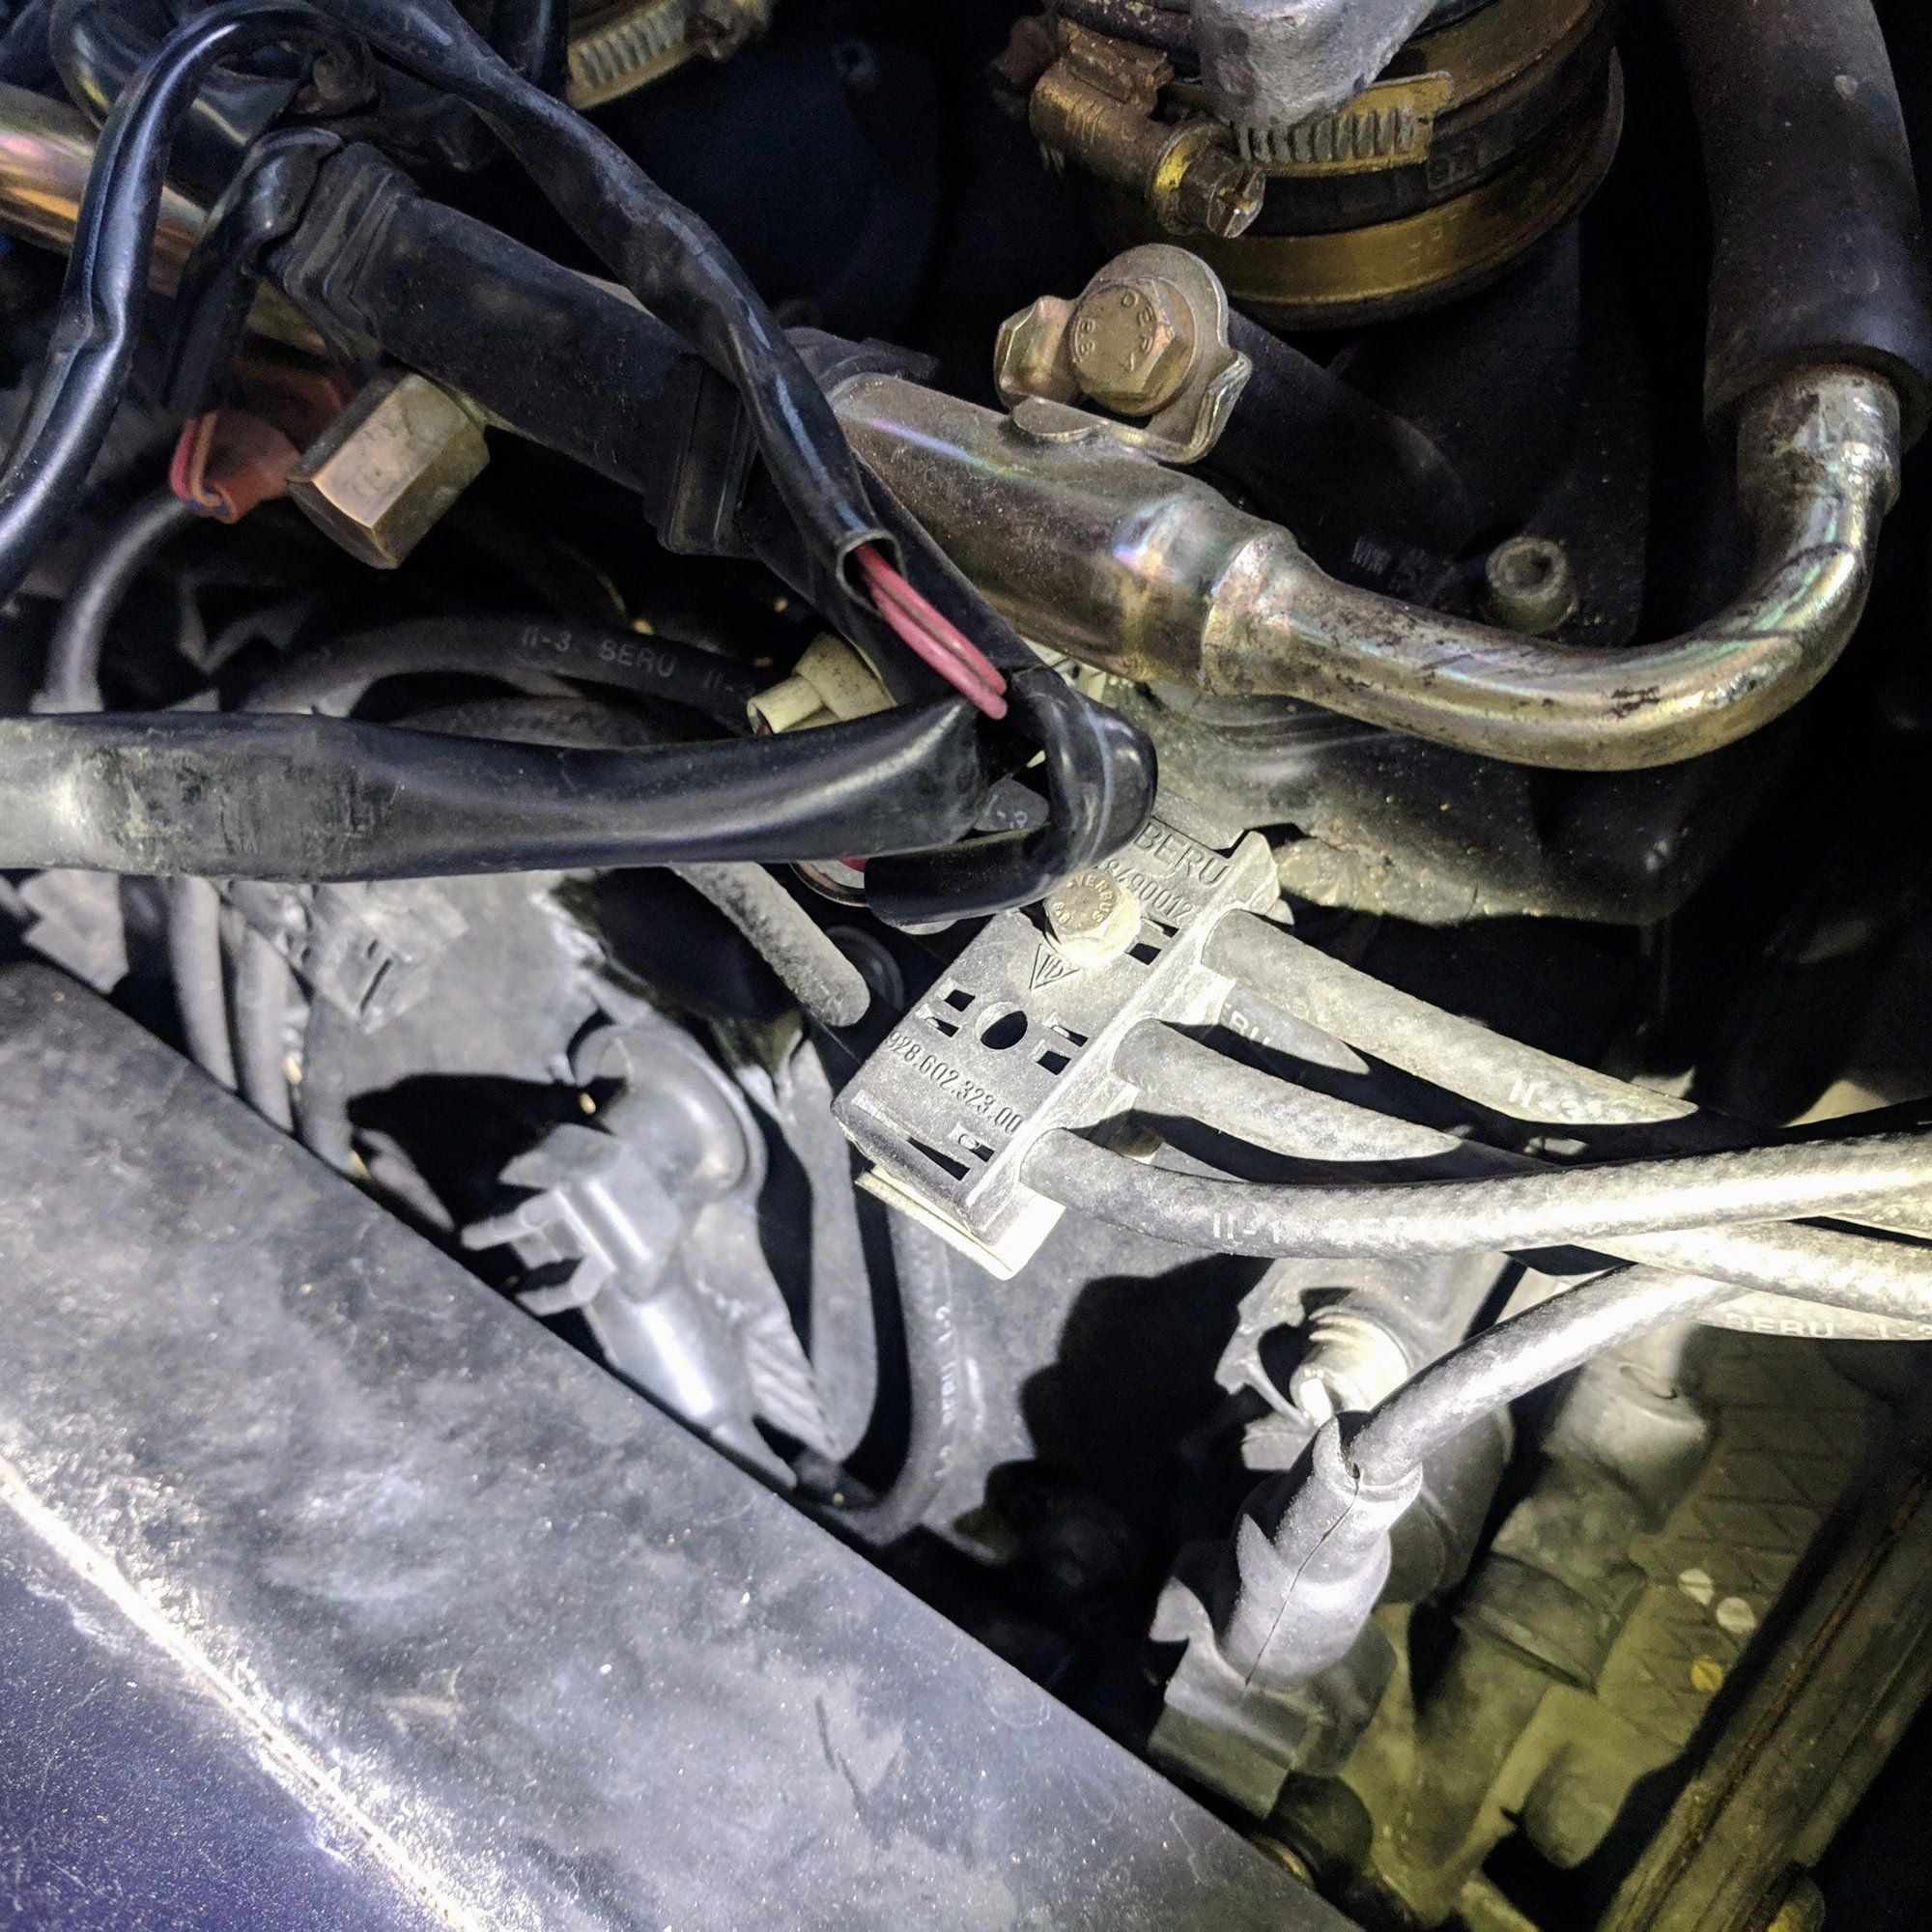
4. Hunt down the rest of the wire brackets and remove them from the engine...
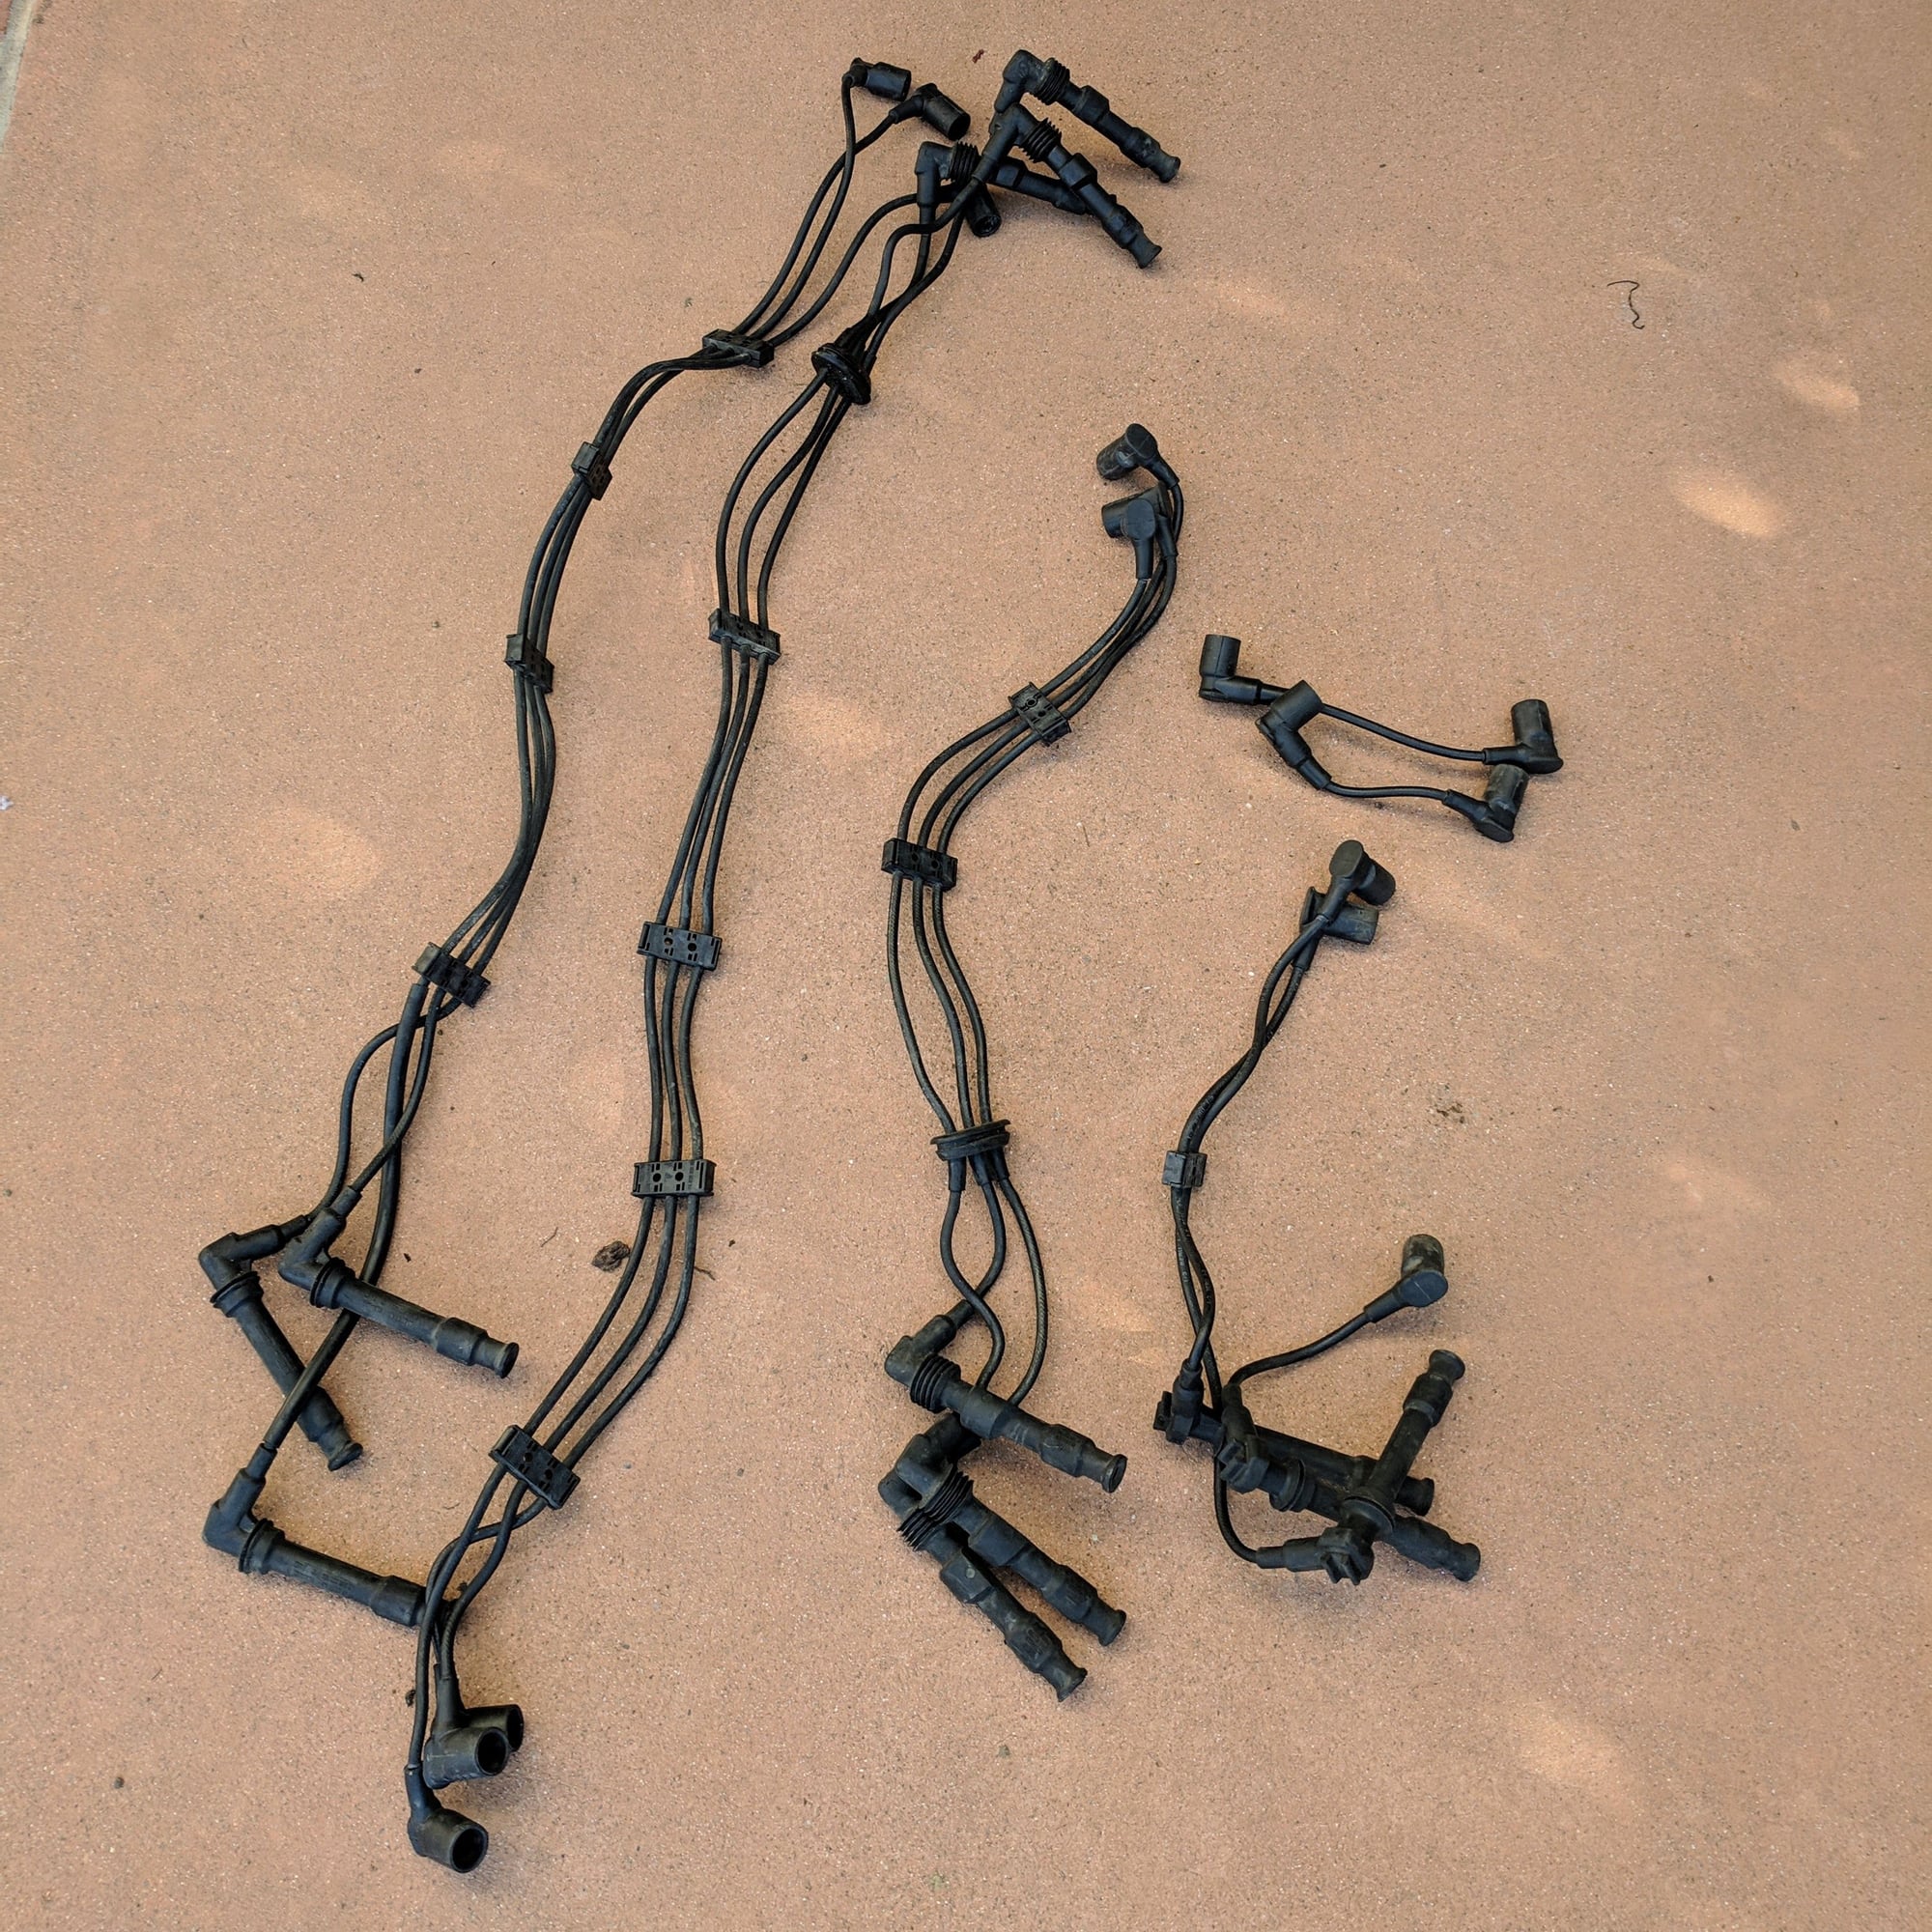
Done! Wires are out of the car� cracks in the insulation jackets were worse than I thought.
Part II: Wire assembly:
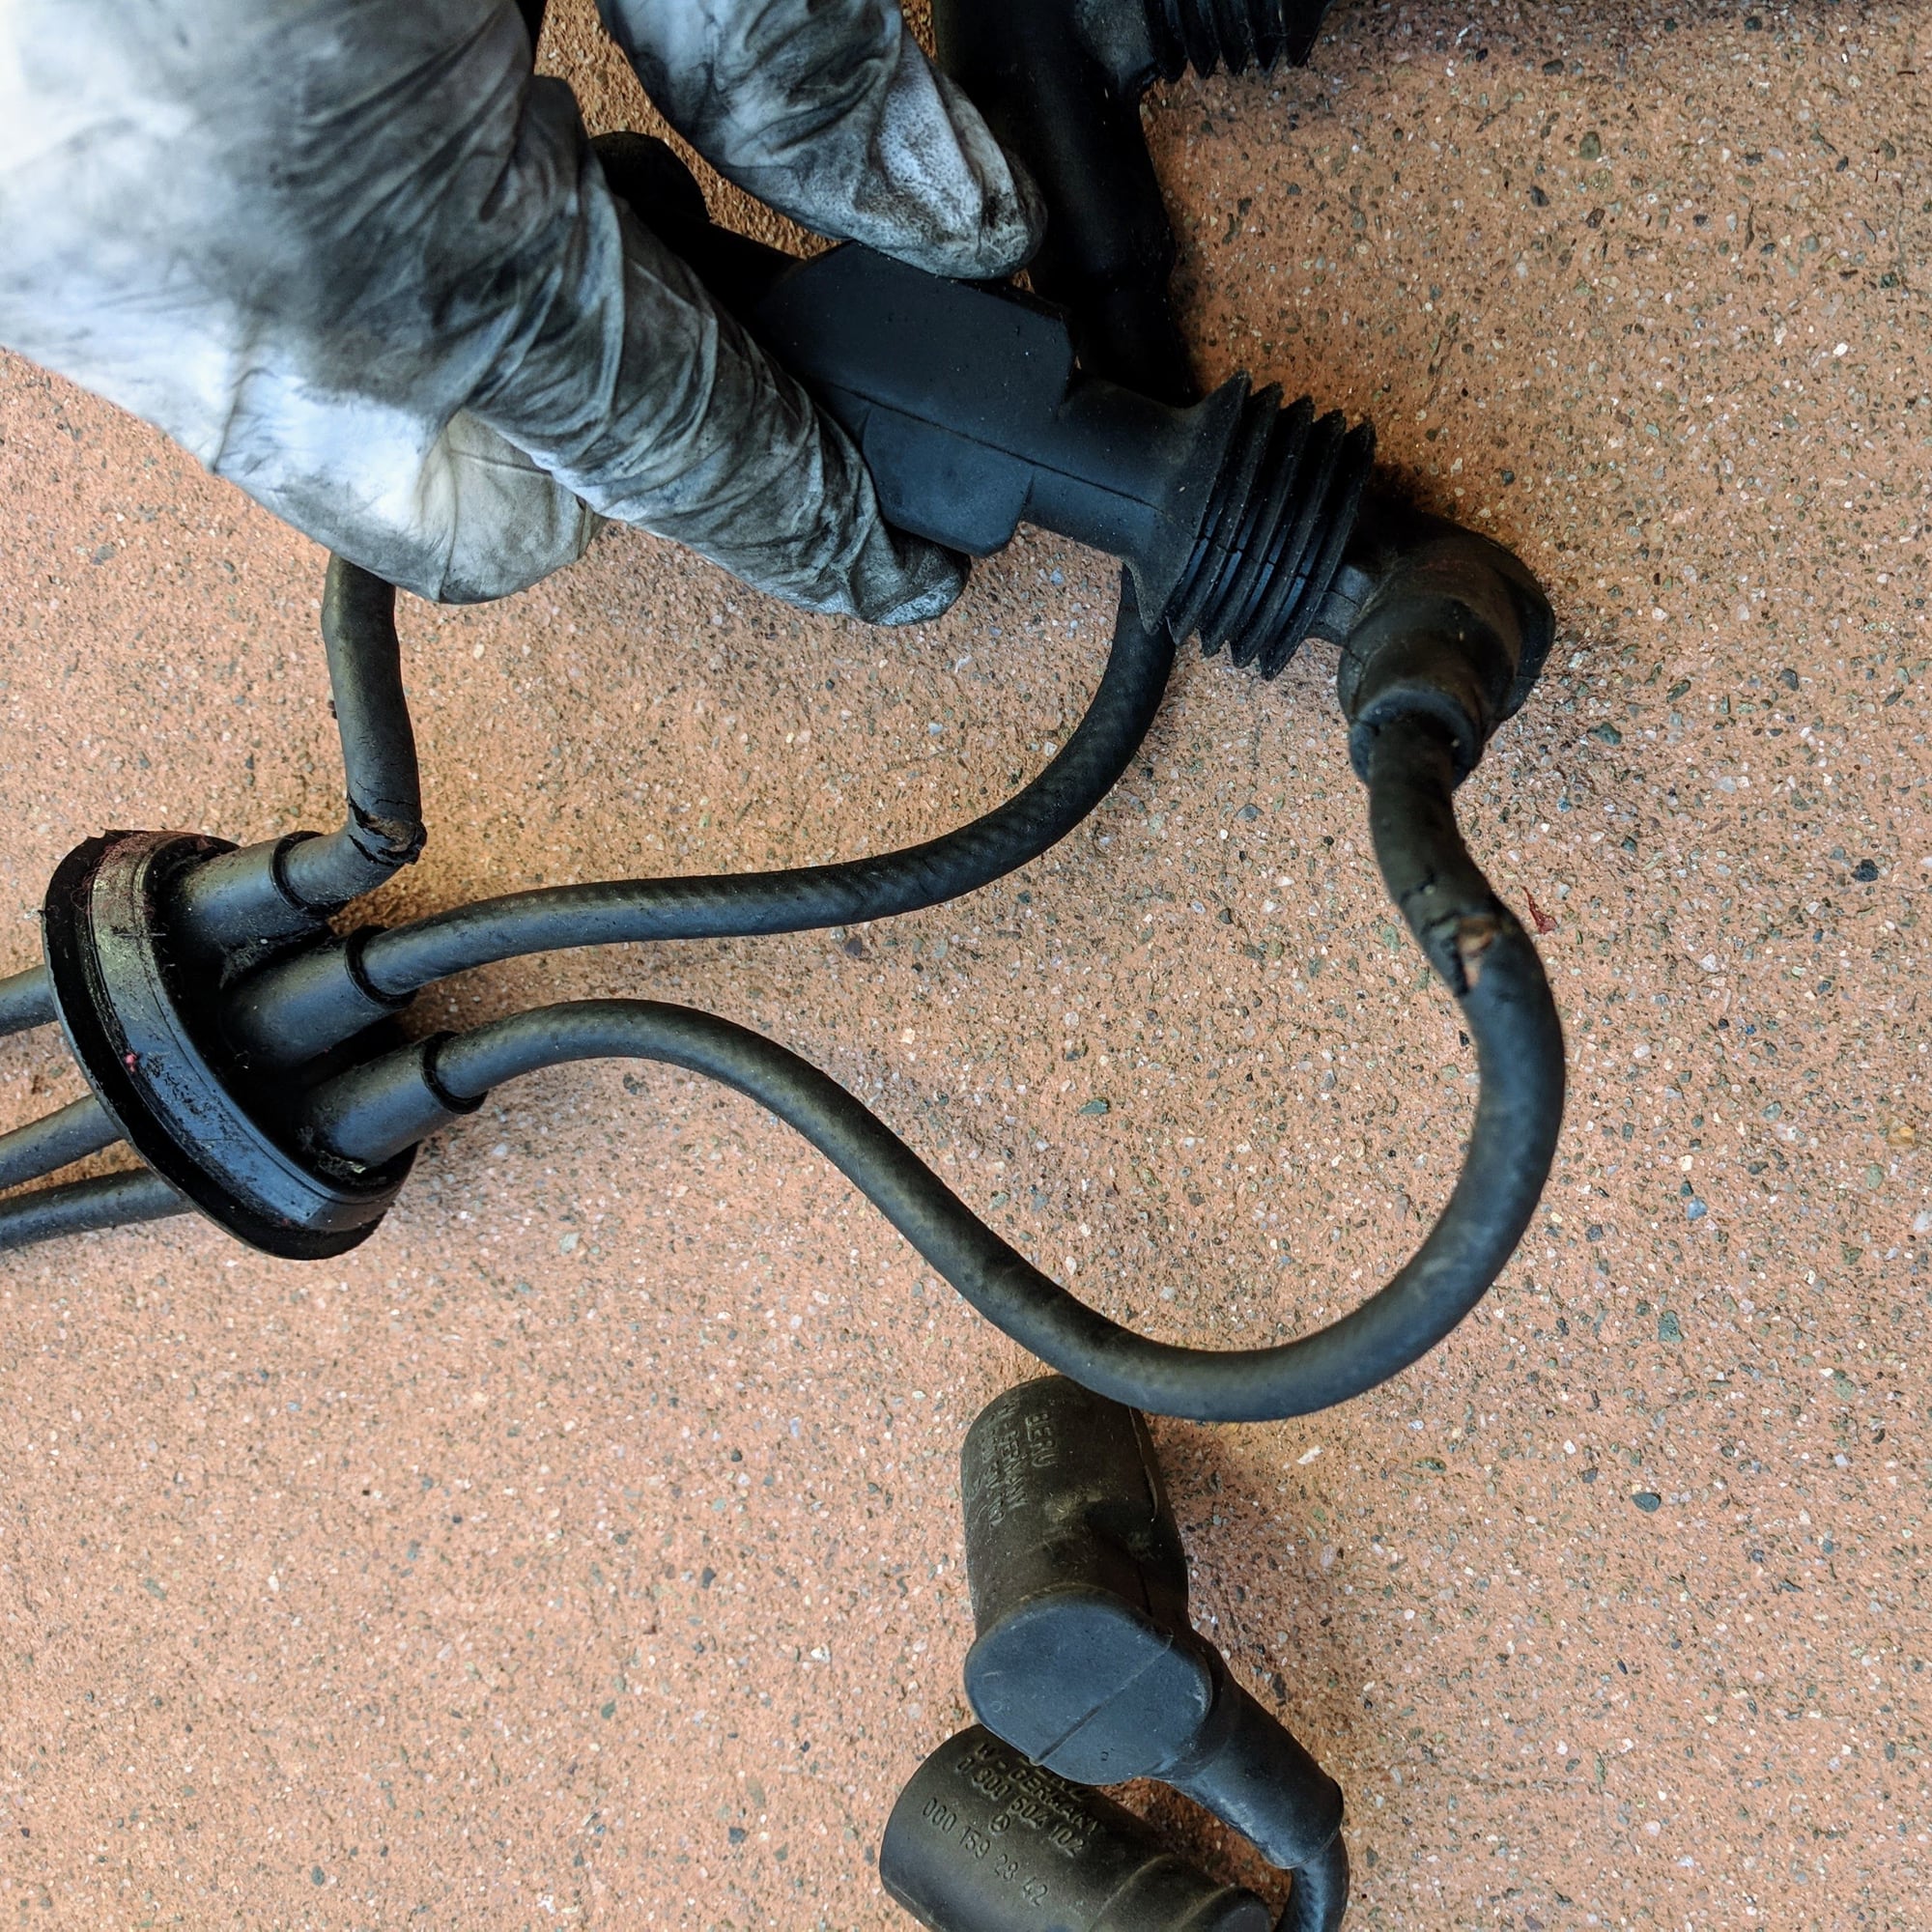
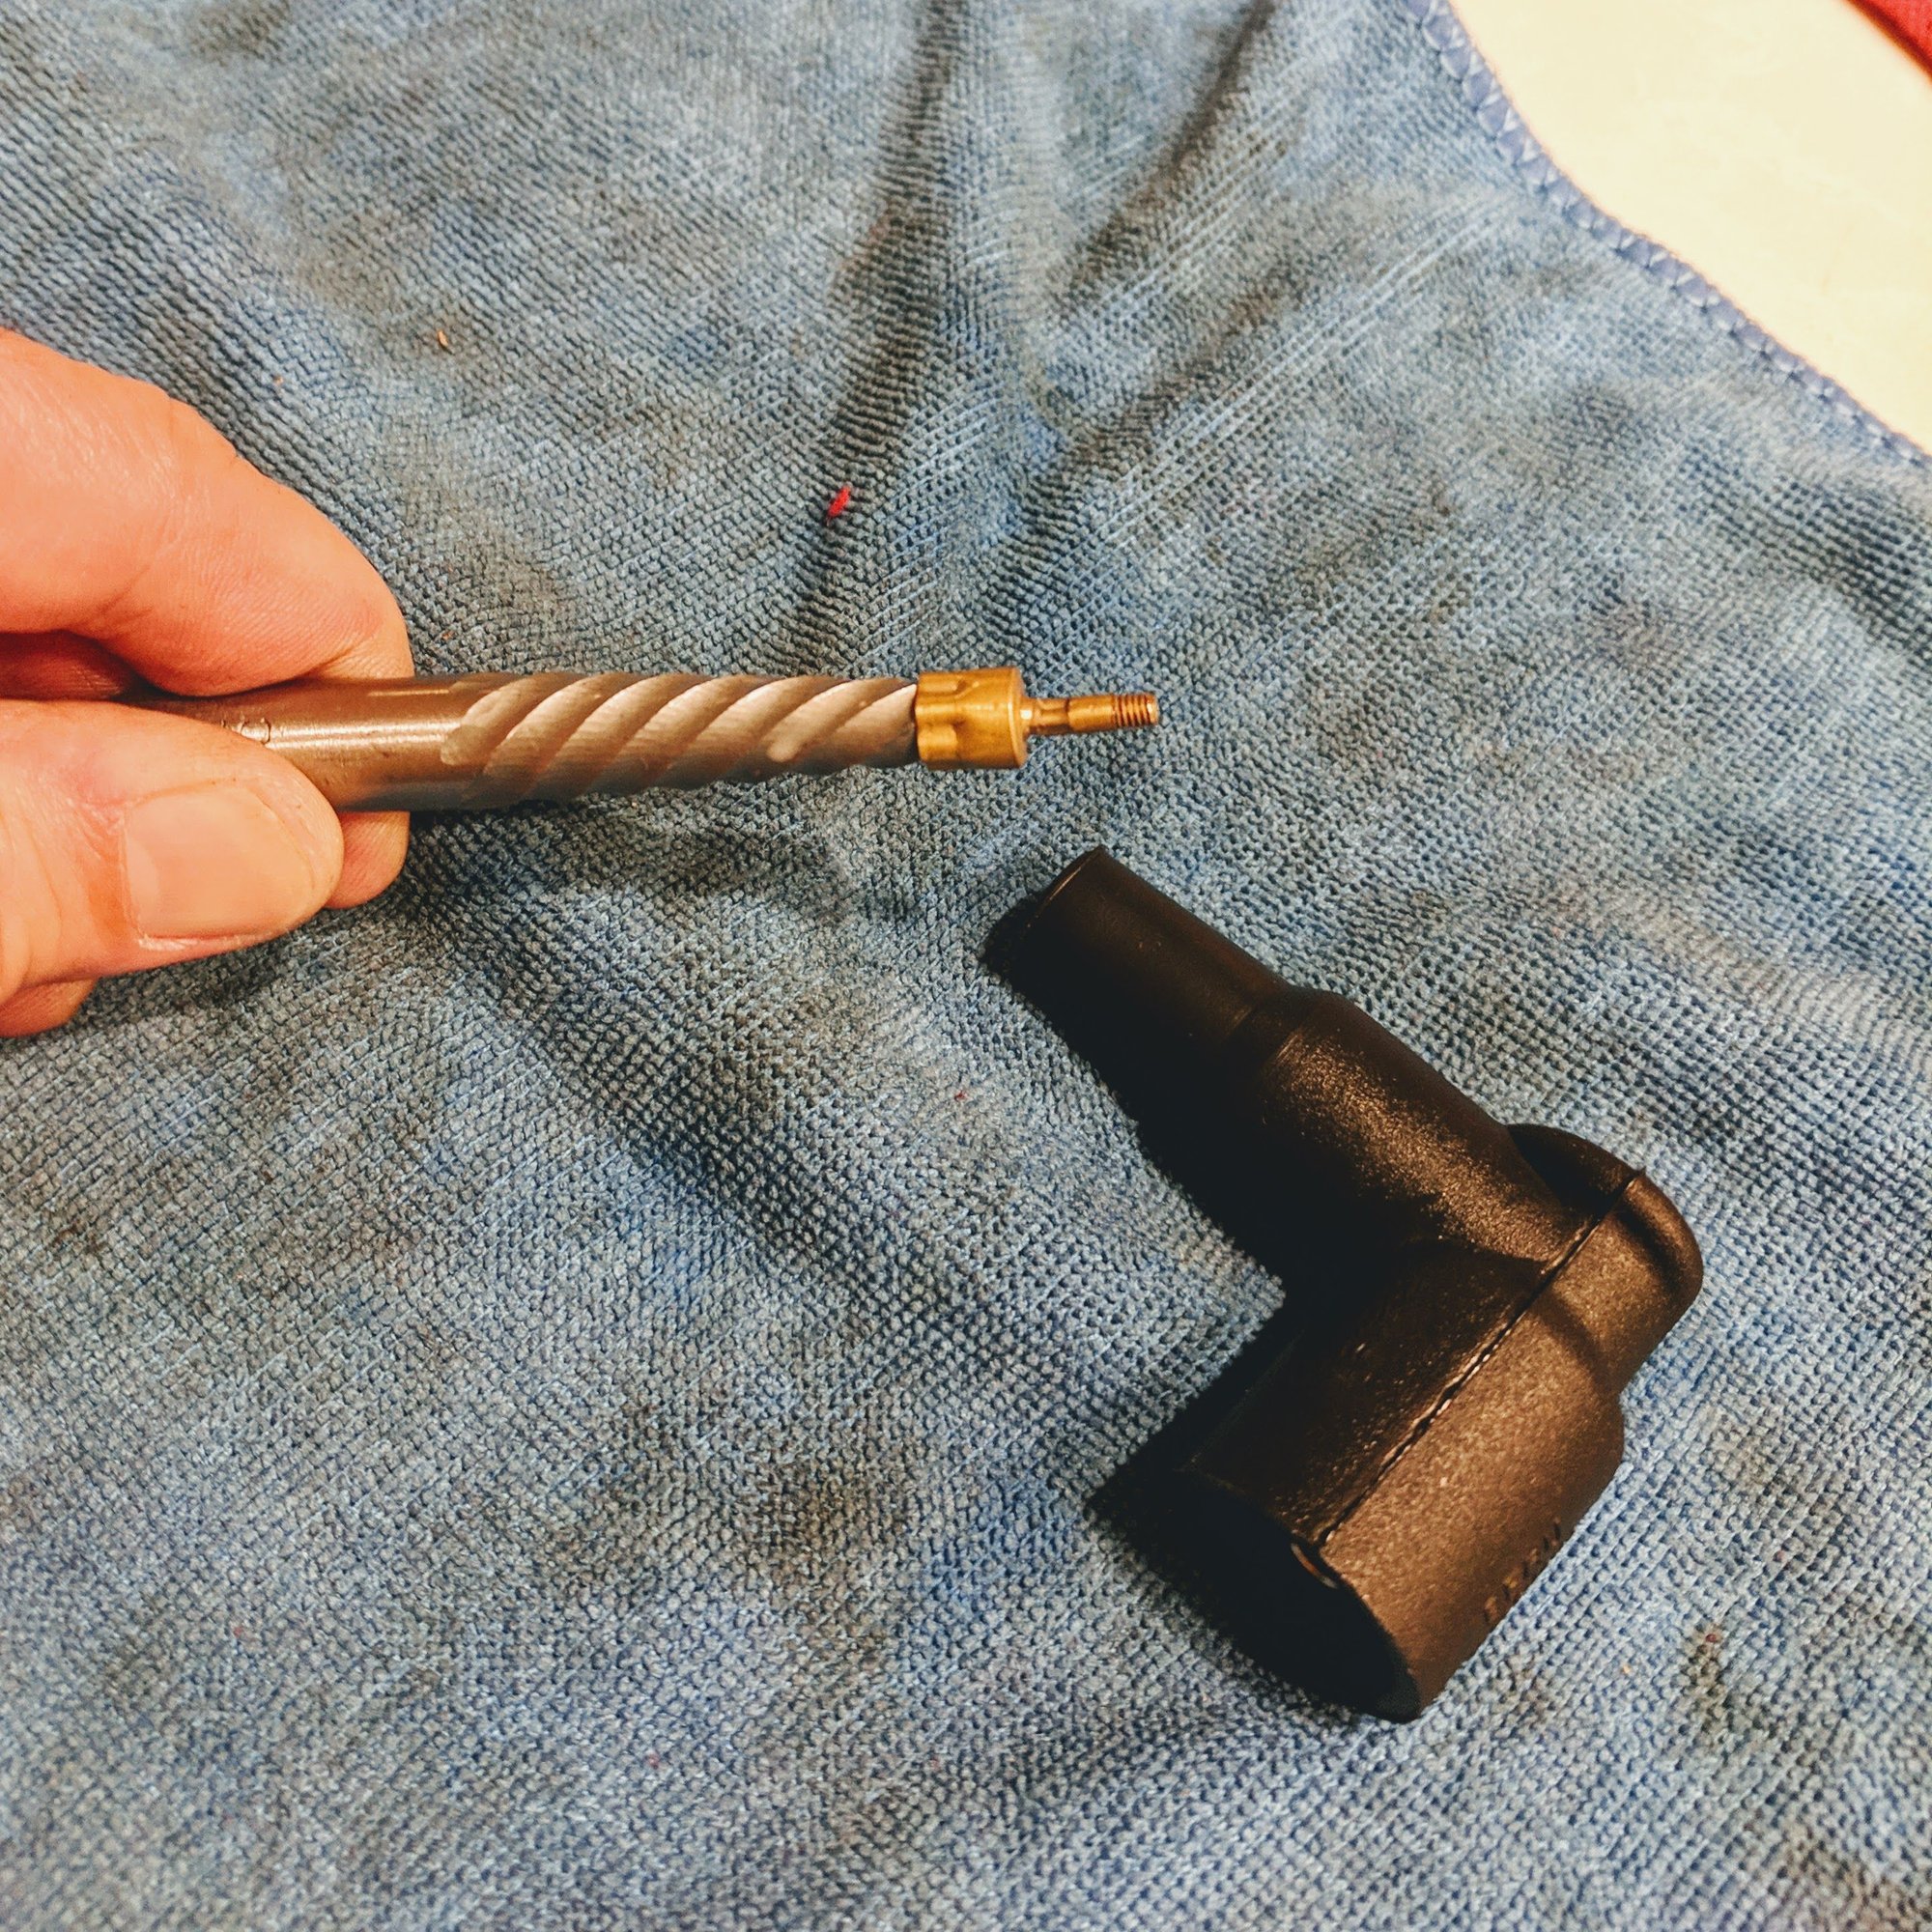
The plug ends are attached via threads and they come off easily. One of mine was seized which ripped off the connector inside the plug end. I jammed a bolt extractor in the boot and worked perfectly to remove the connector.
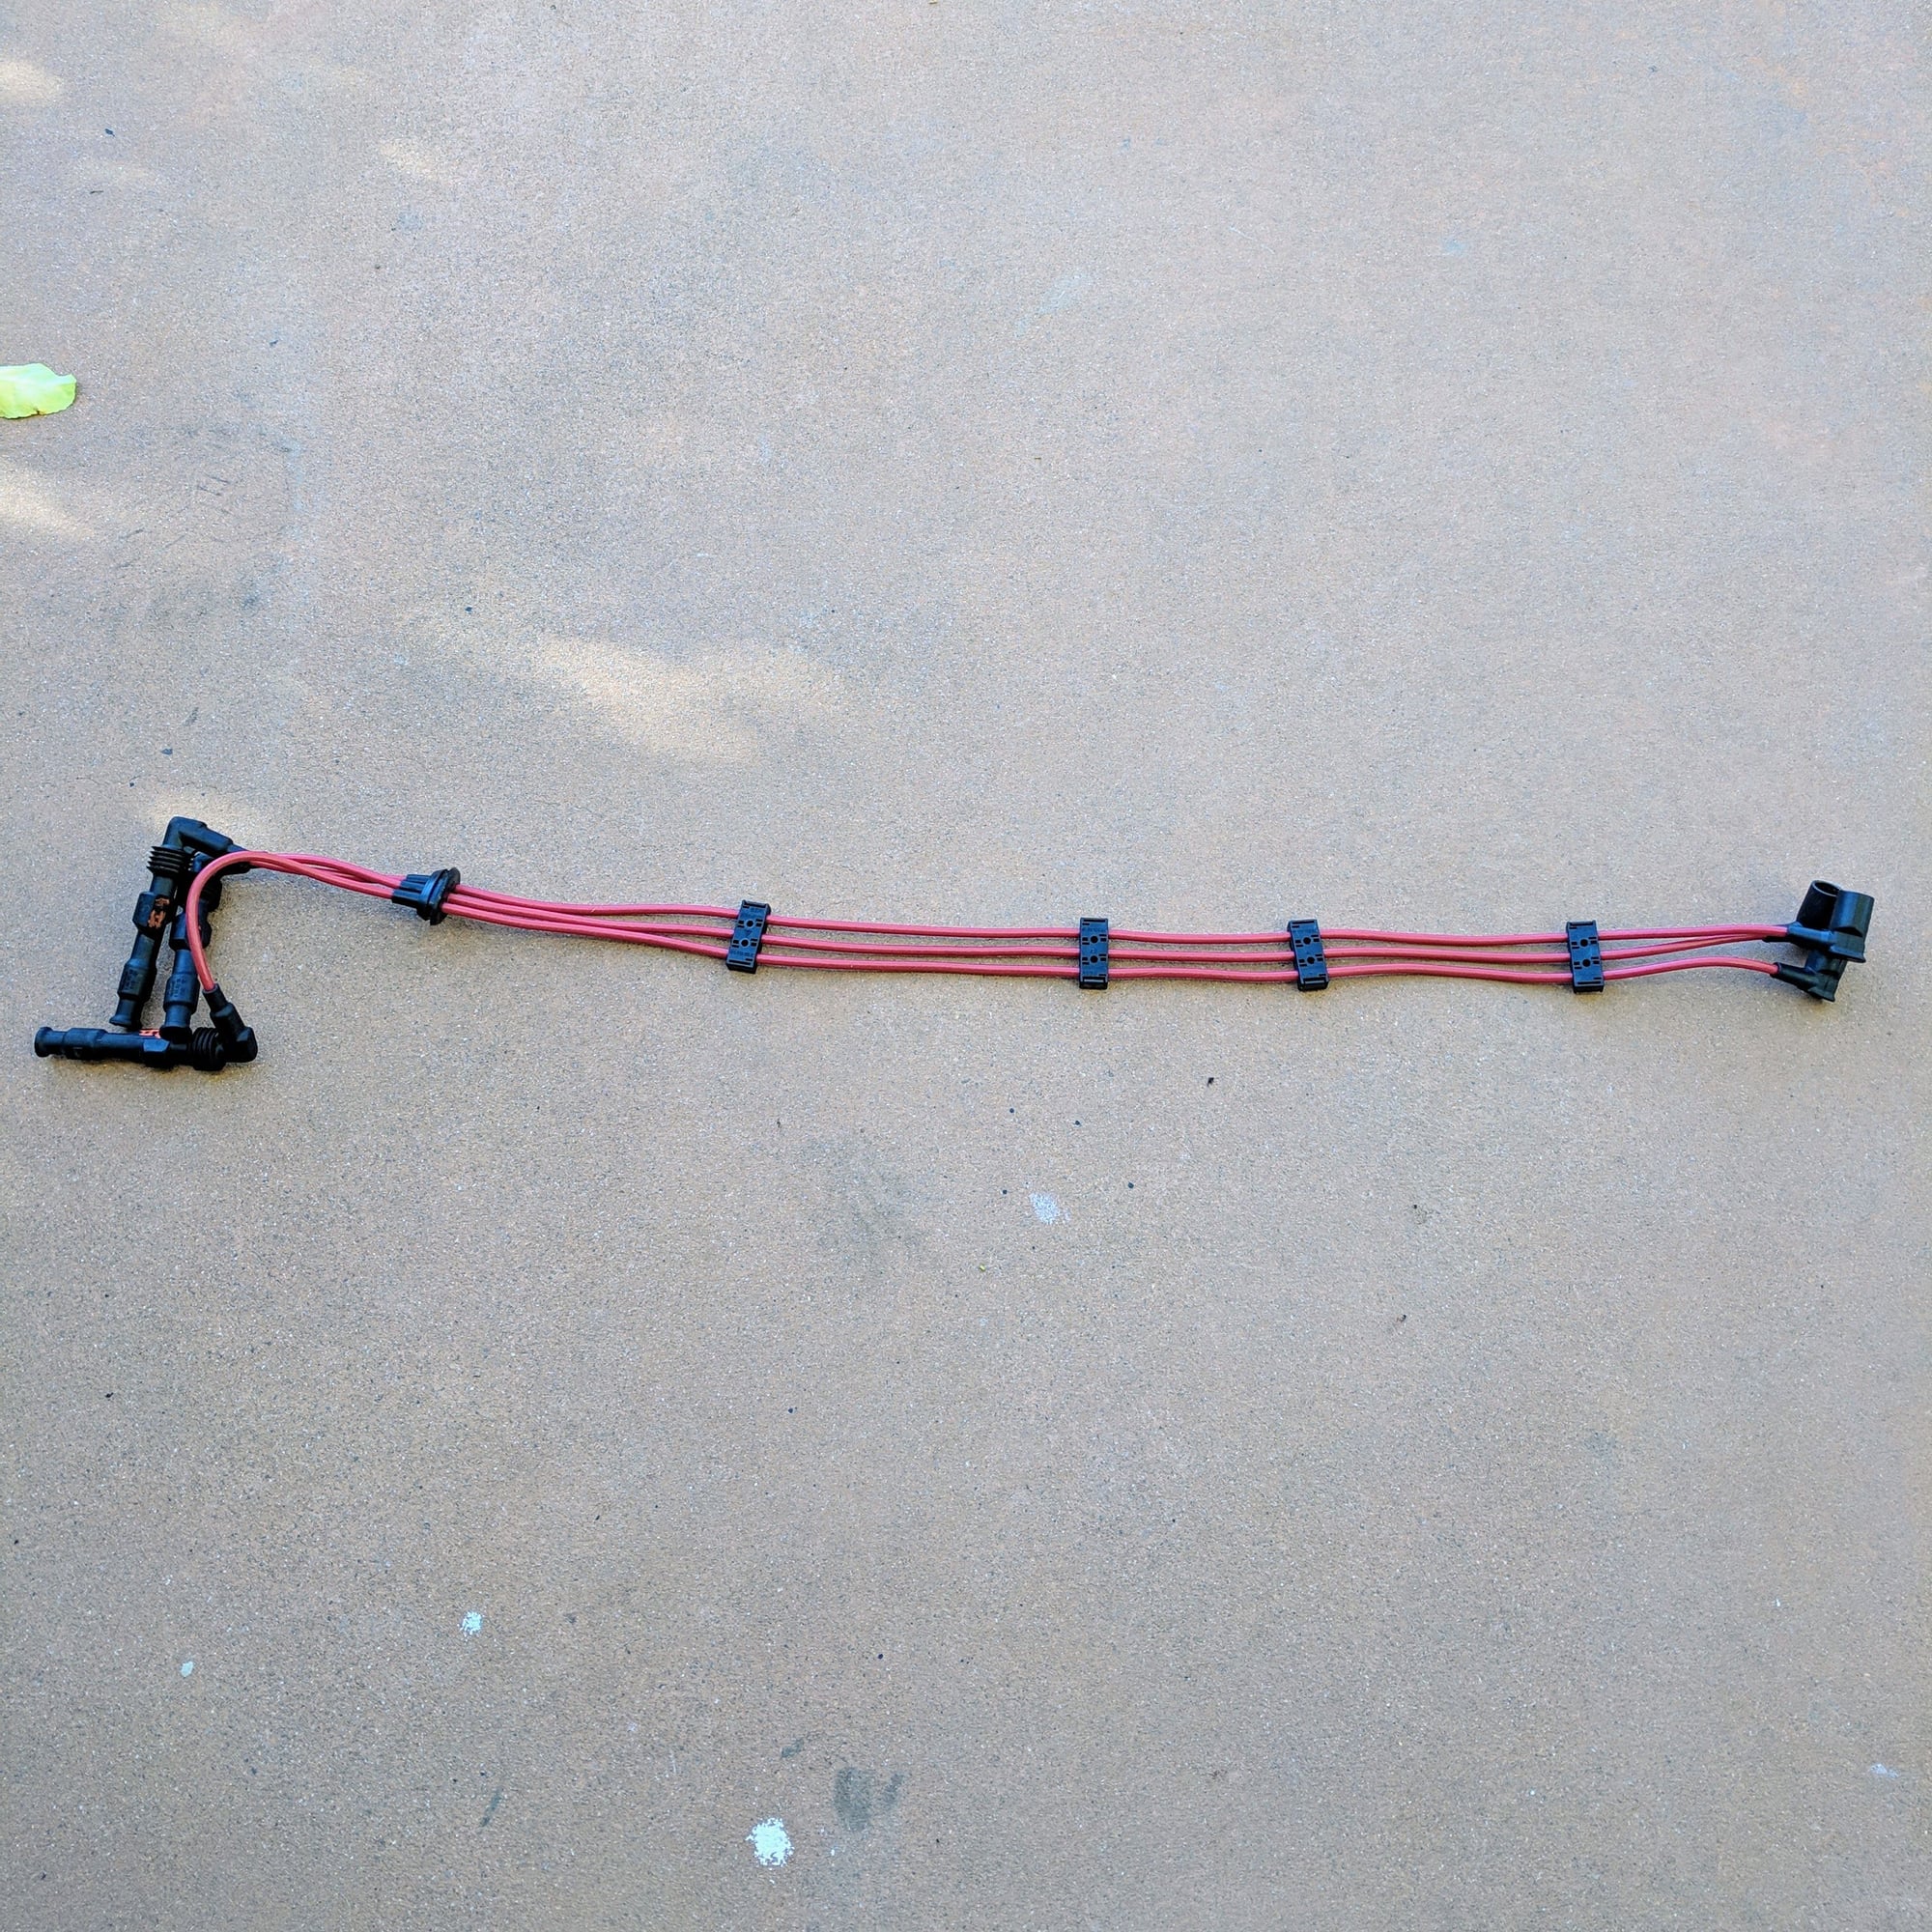
Assembling the wires back together is a good activity with beer in the kitchen. An old bottle of armor all came in handy to make it slippery enough to screw in the plug ends on the new Beru wires.
I used the old wires as a template to eyeball where the brackets go. You don't need them to be perfect as you will adjust the brackets and length of the wires once they are installed on the engine.
Part III: Spark plug inspection:
Since the wires were out I also decided to inspect the plugs. More wrenching�
1. Remove the mufflers
2. Remove the hoses that connect the heat exchangers
3. Remove the engine tins
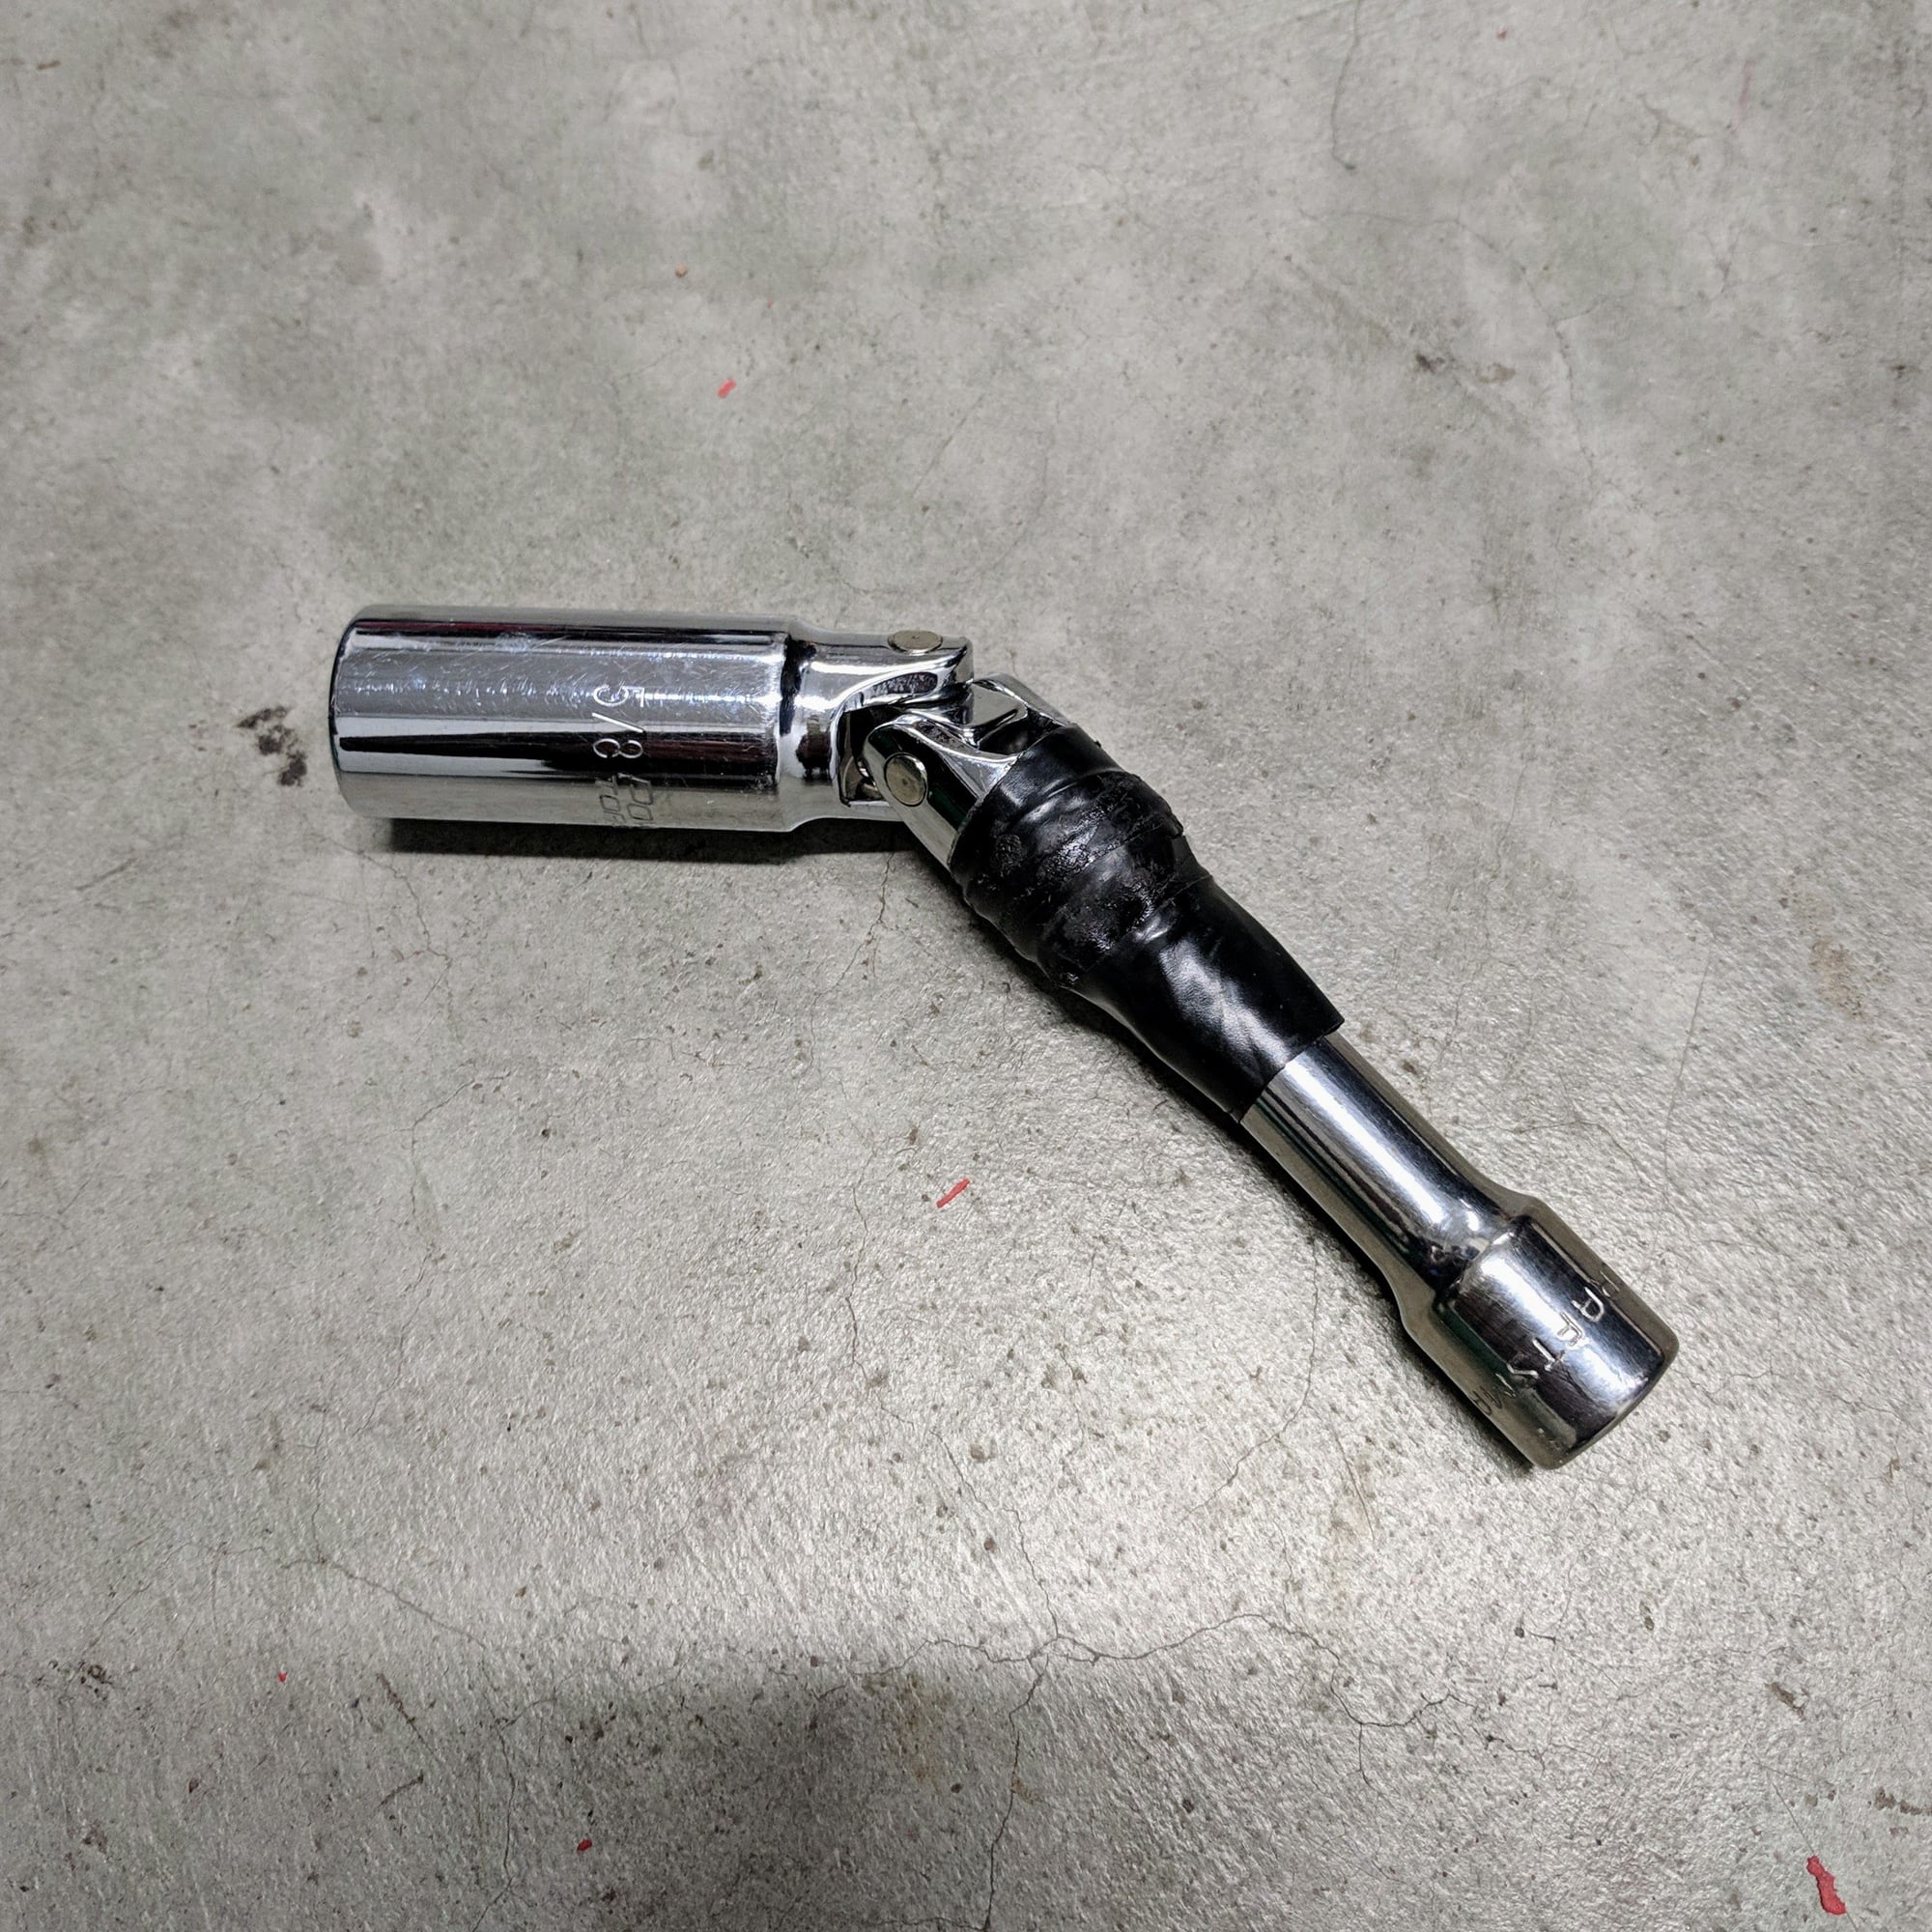
Some wobble extensions, 1/4� drive torque wrench, u-joint socket, and a 5/8� spark plug socket with a u-joint from AutoZone made it a breeze to remove and install the plugs.
Make sure you tape up the extension connecting to the spark plug socket. I learned the hard way where on one of my plugs when I installed it the socket got stuck in the lower valve cover head and had to use the needle nose pliers to pull out the socket.
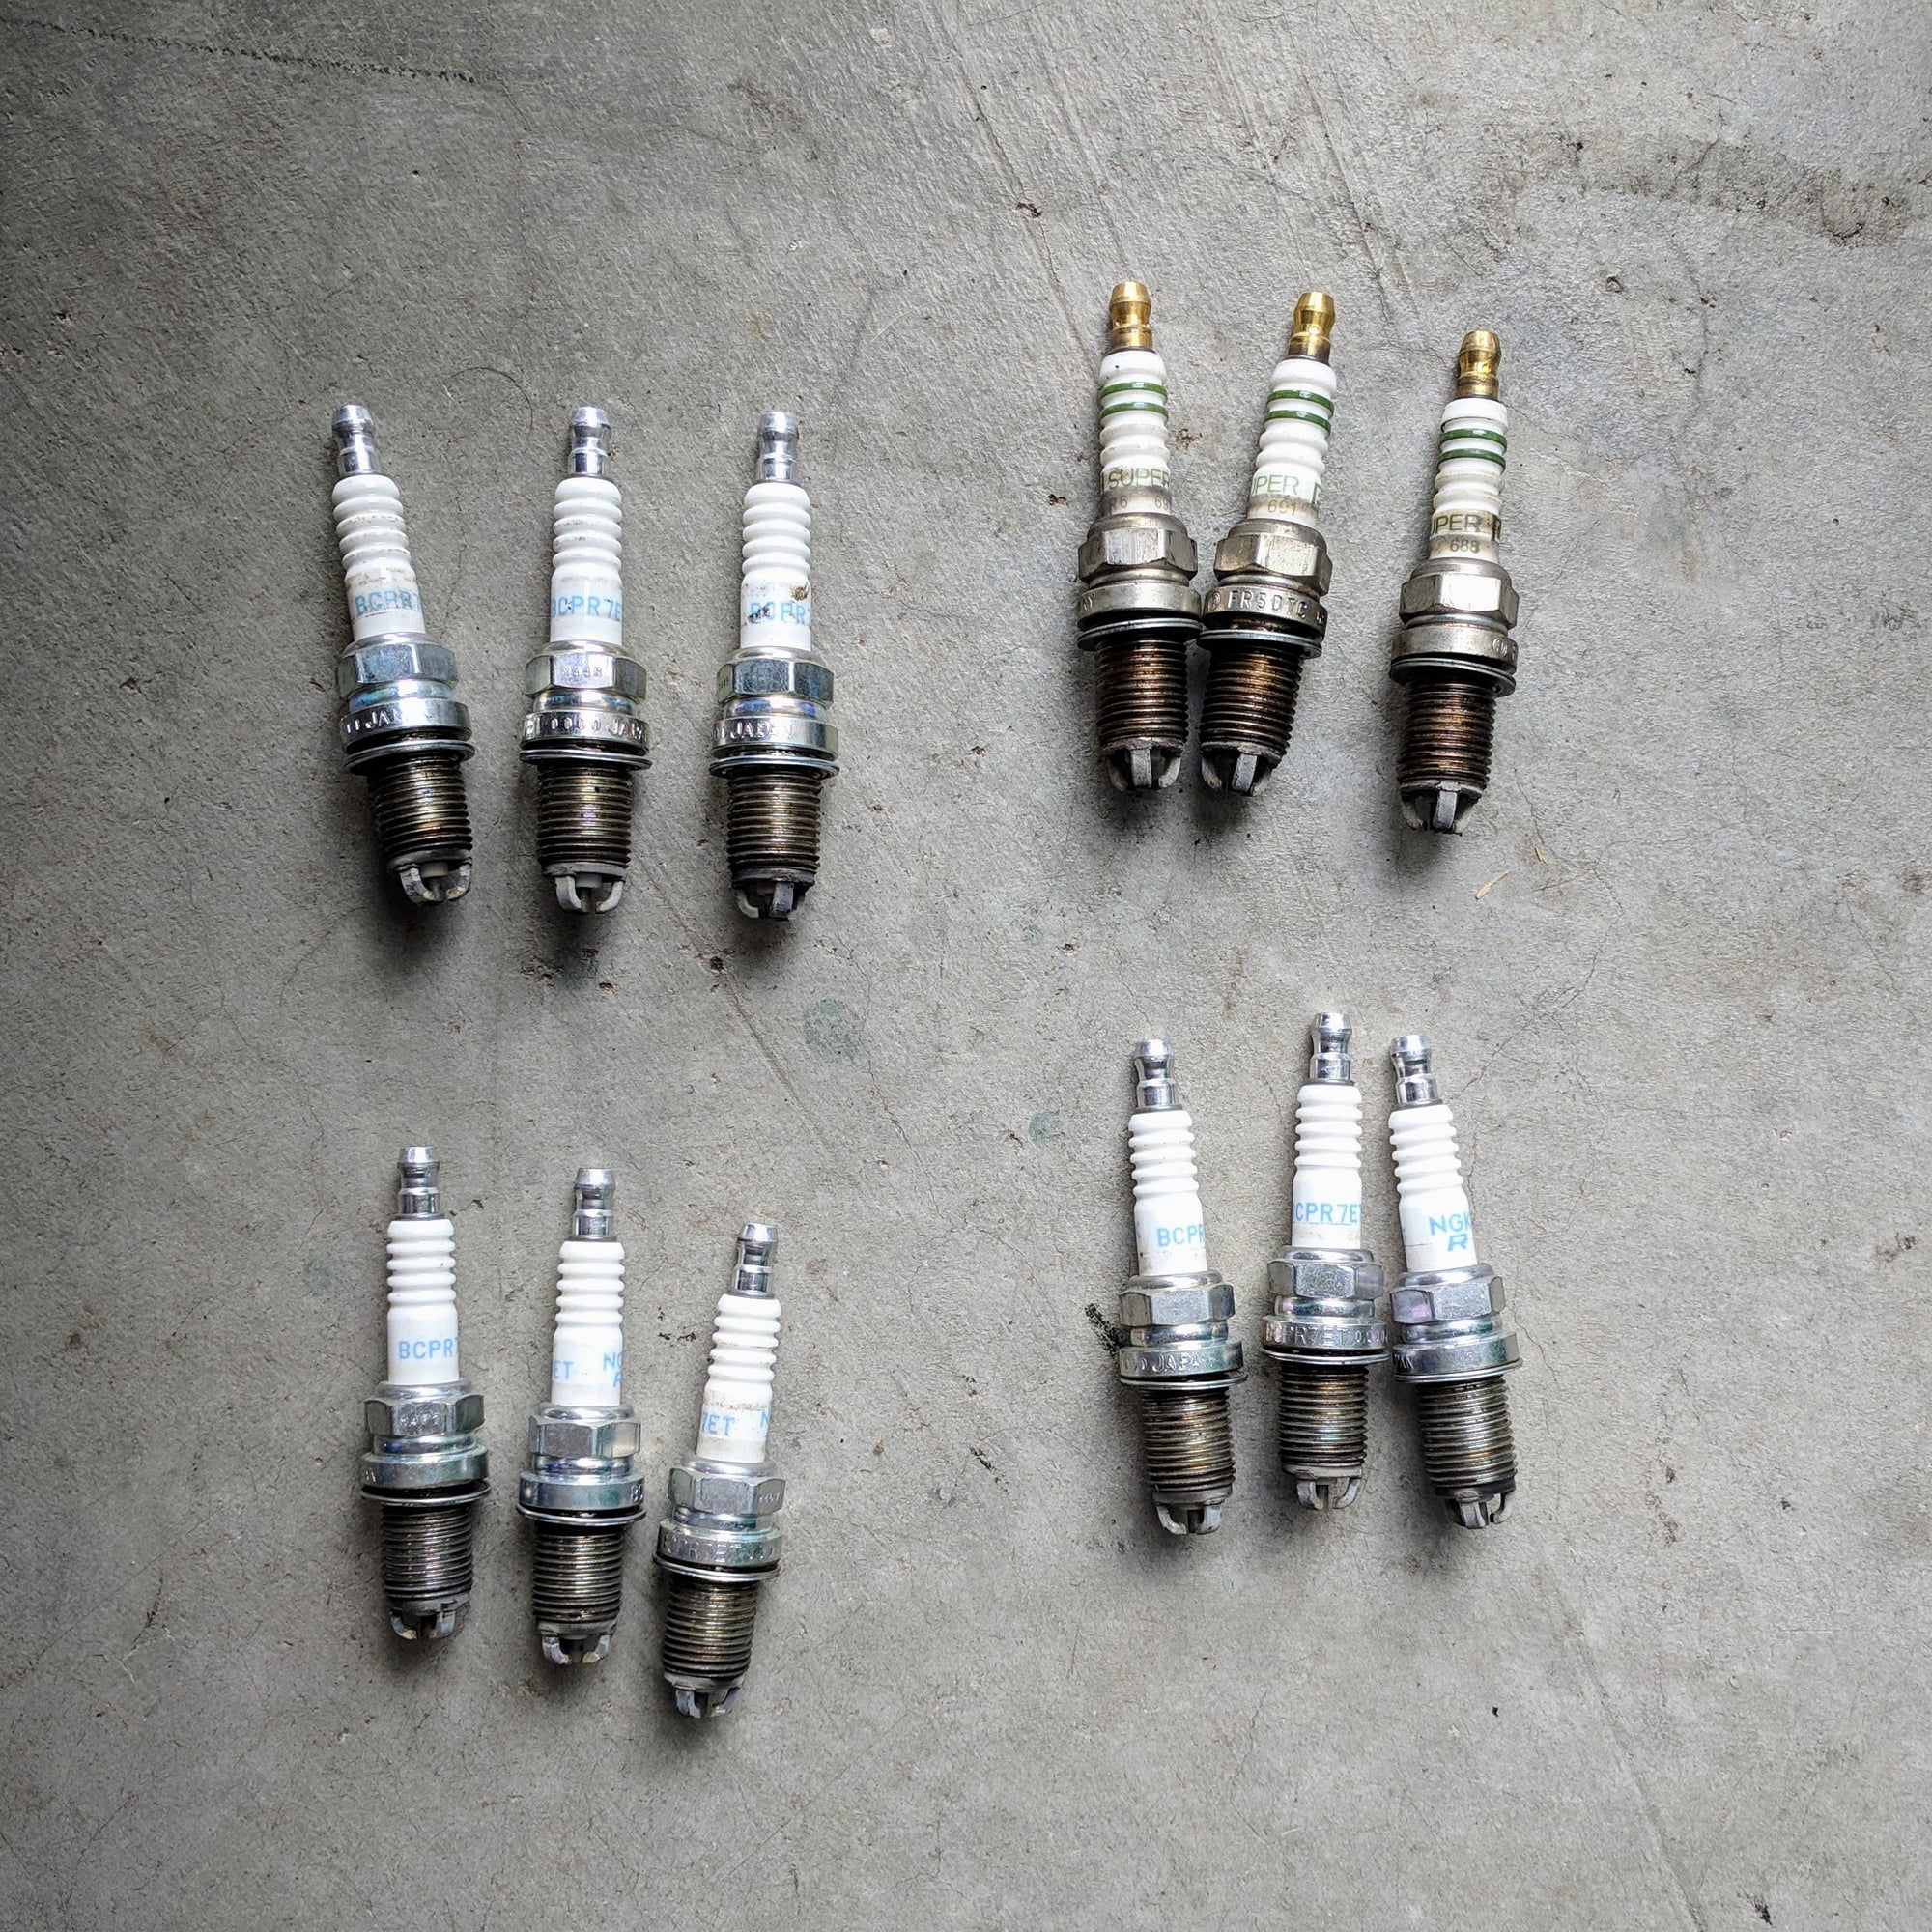
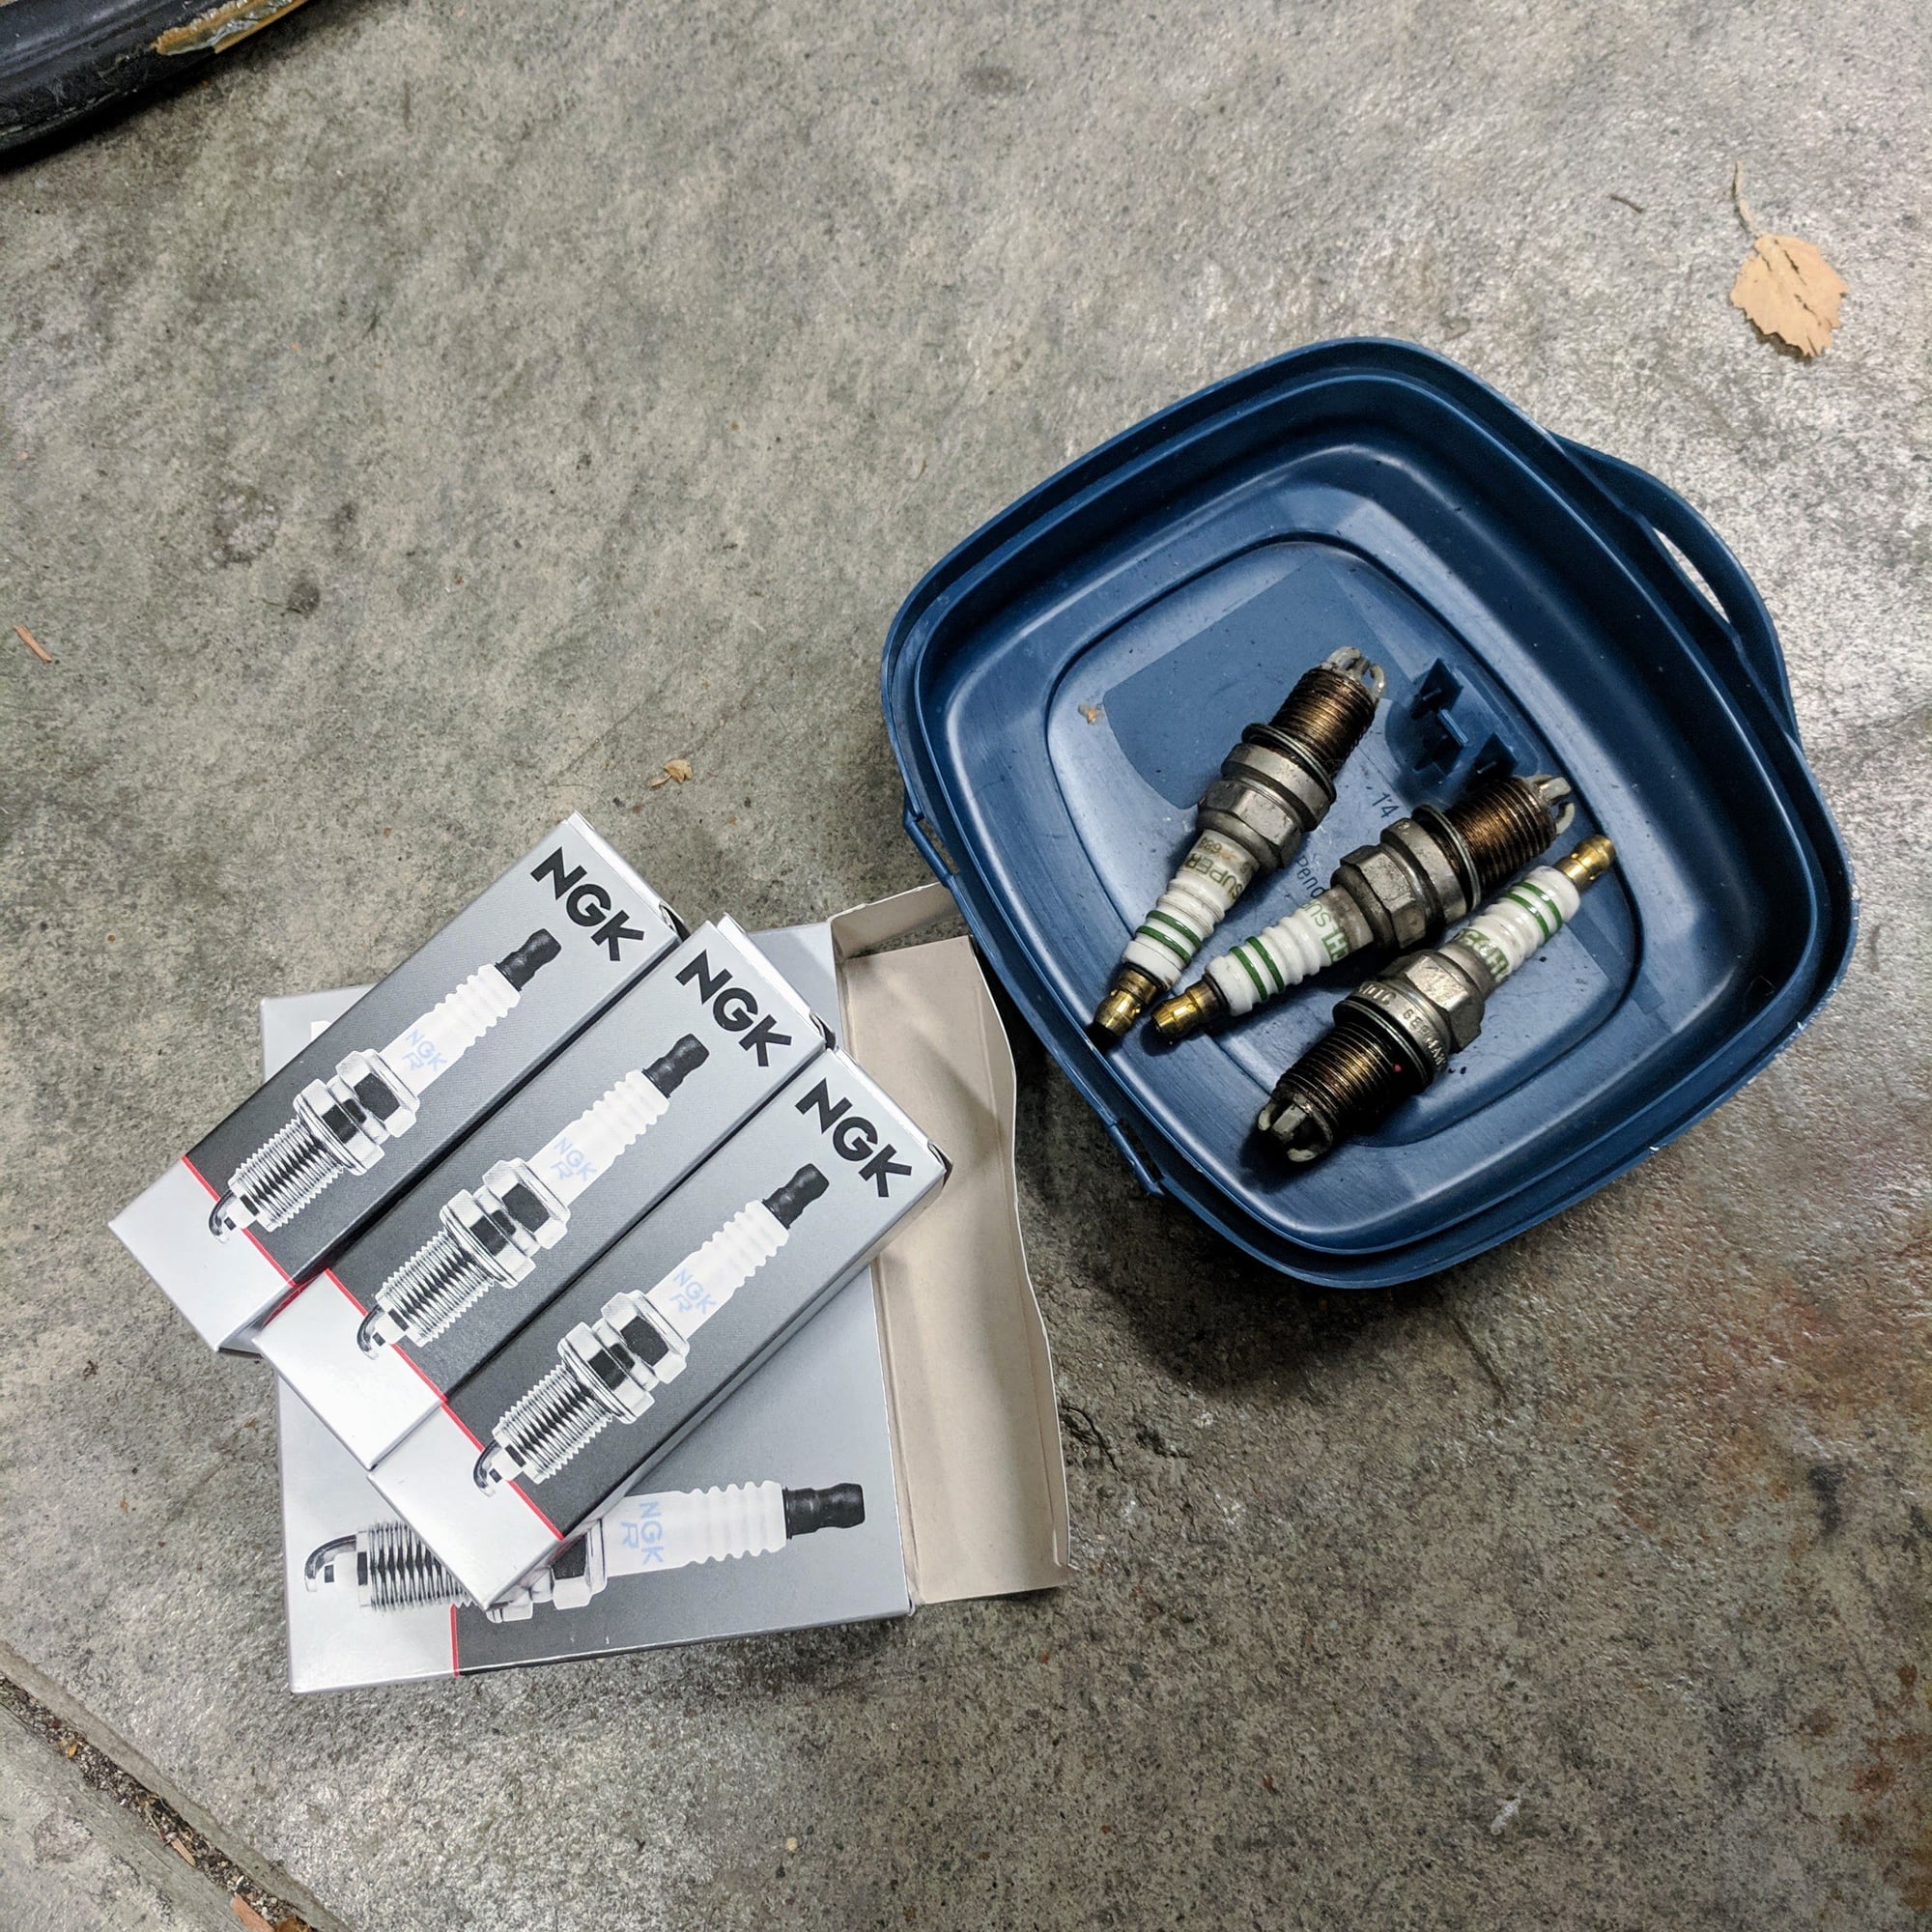
It was uneventful until I pulled out the the top bank of plugs on the passenger side which were not changed on the last major service! So ordered some new plugs to match the other ones which were�
Part IV: Wire installation
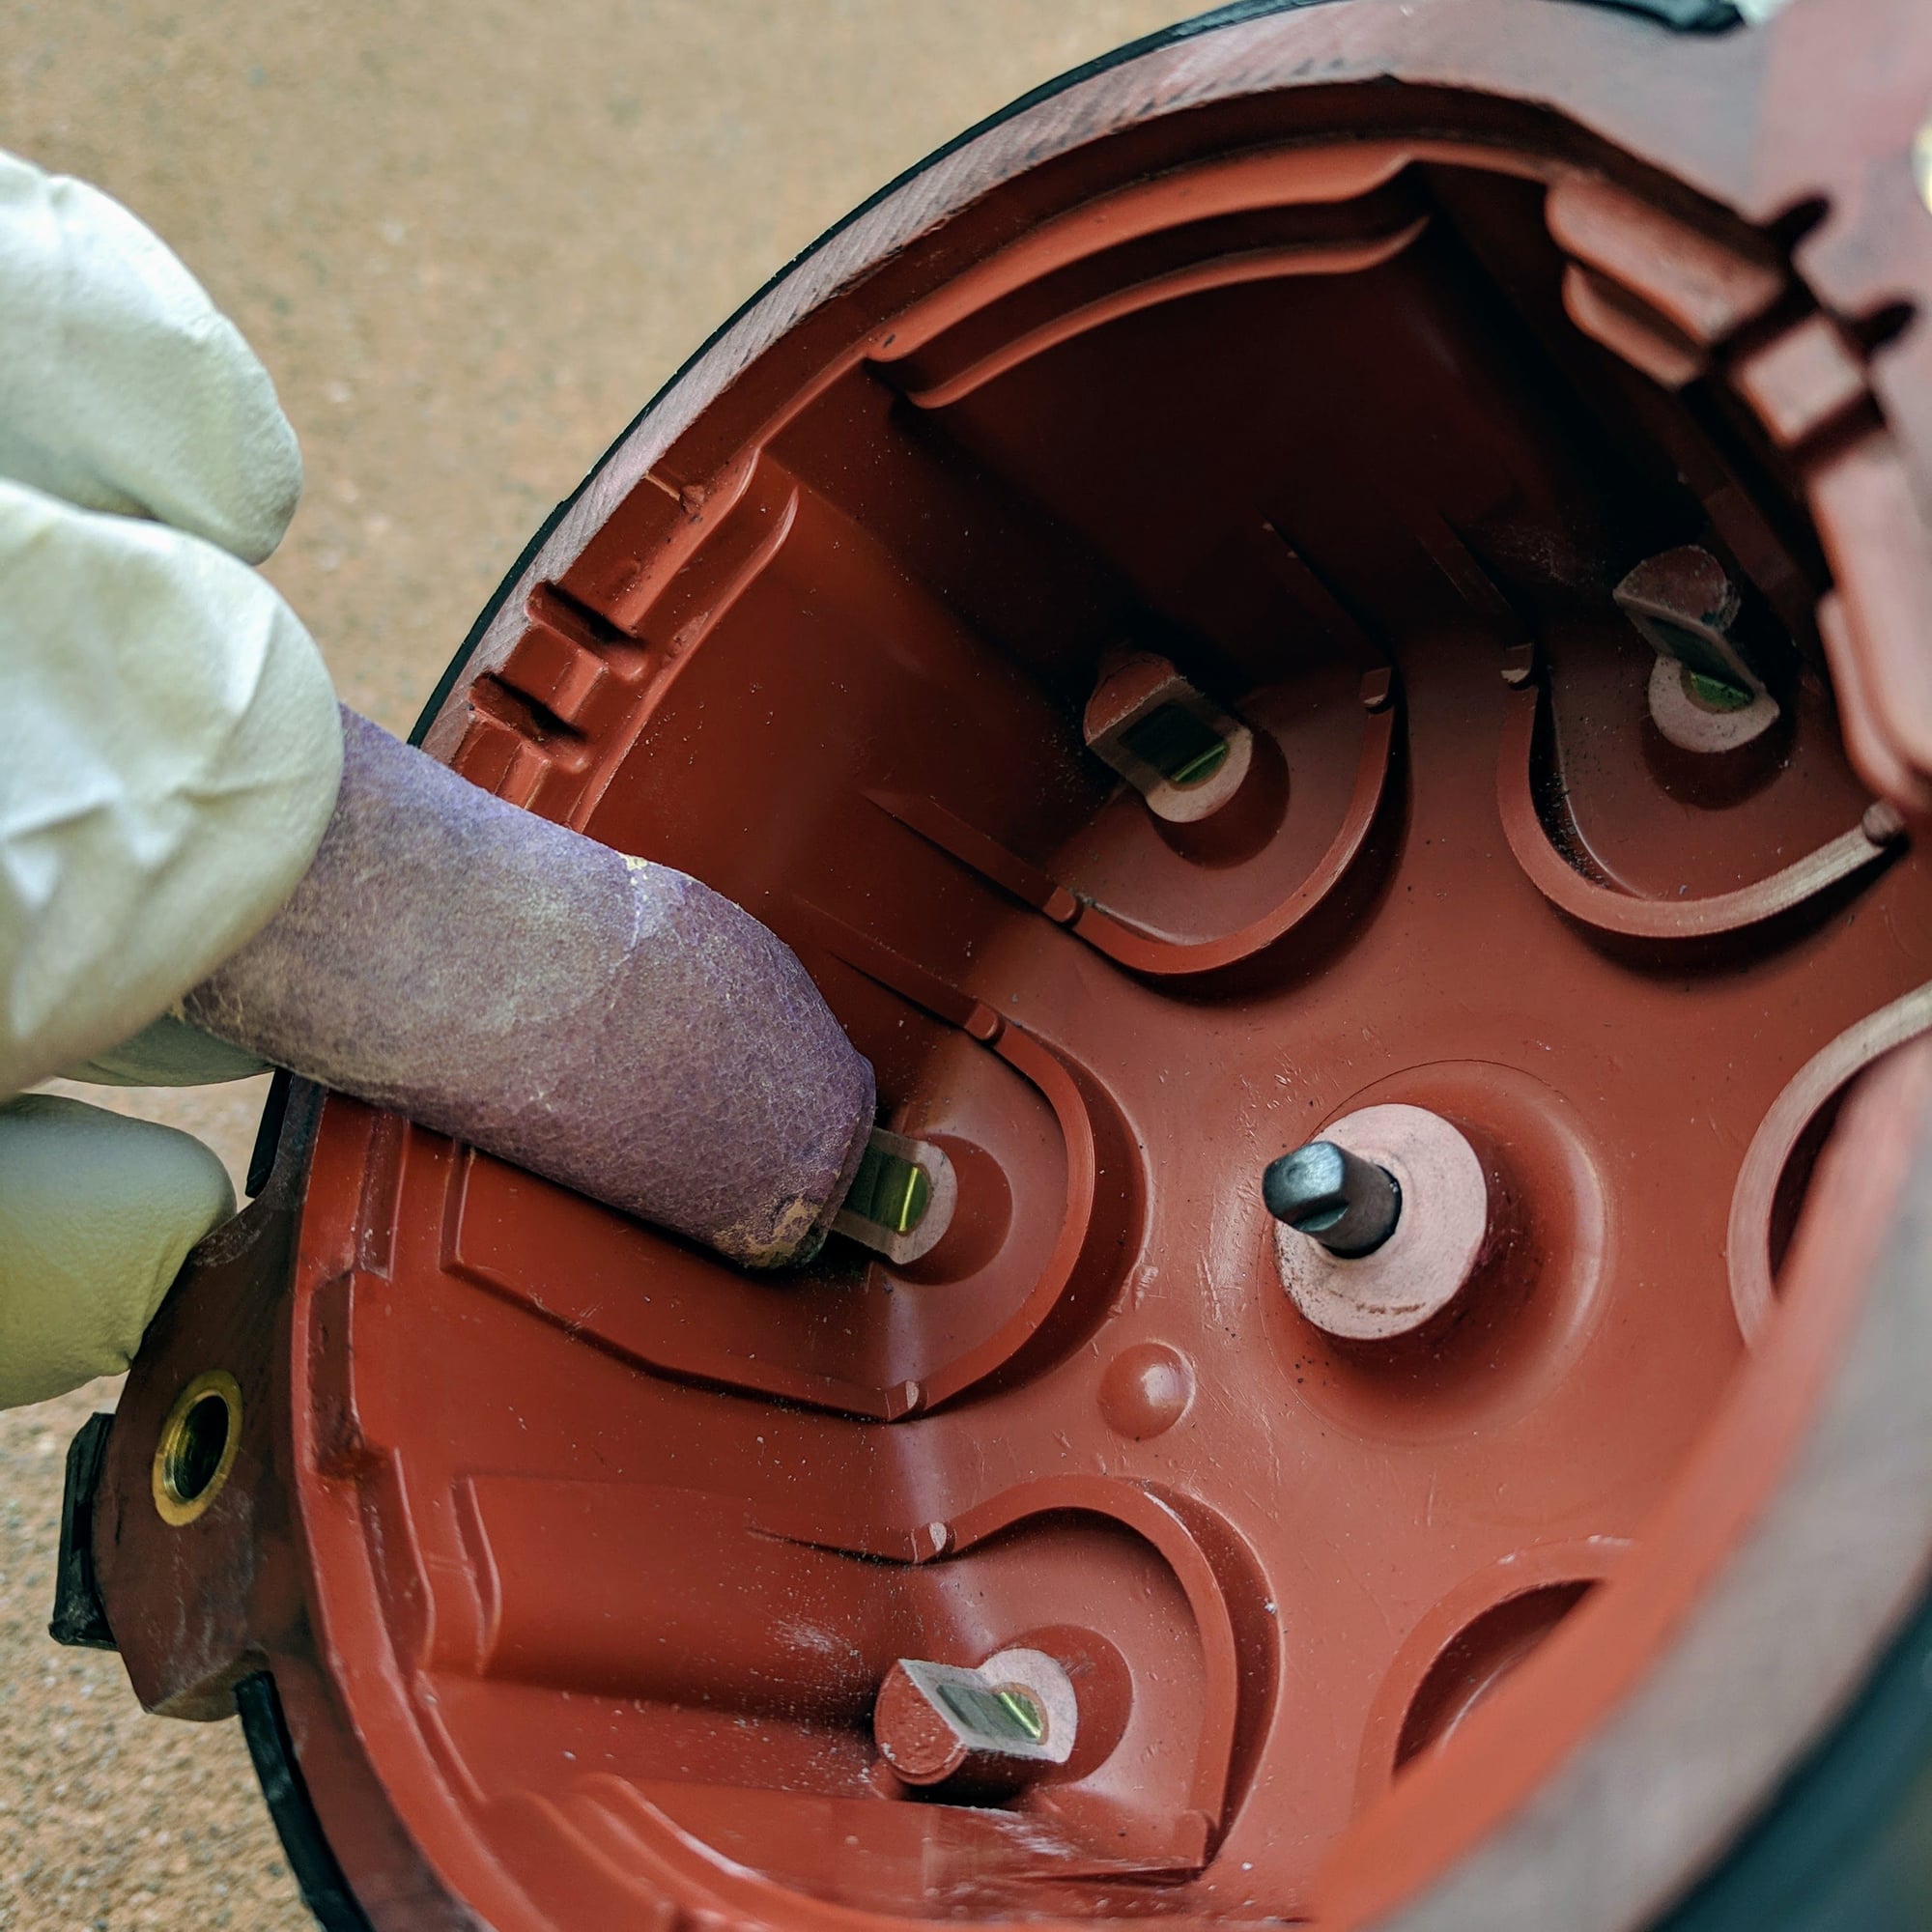
Before putting the wires back in, I cleaned up the contact points on the rotors and caps with some fine sand paper as they were replaced about 10K miles ago.
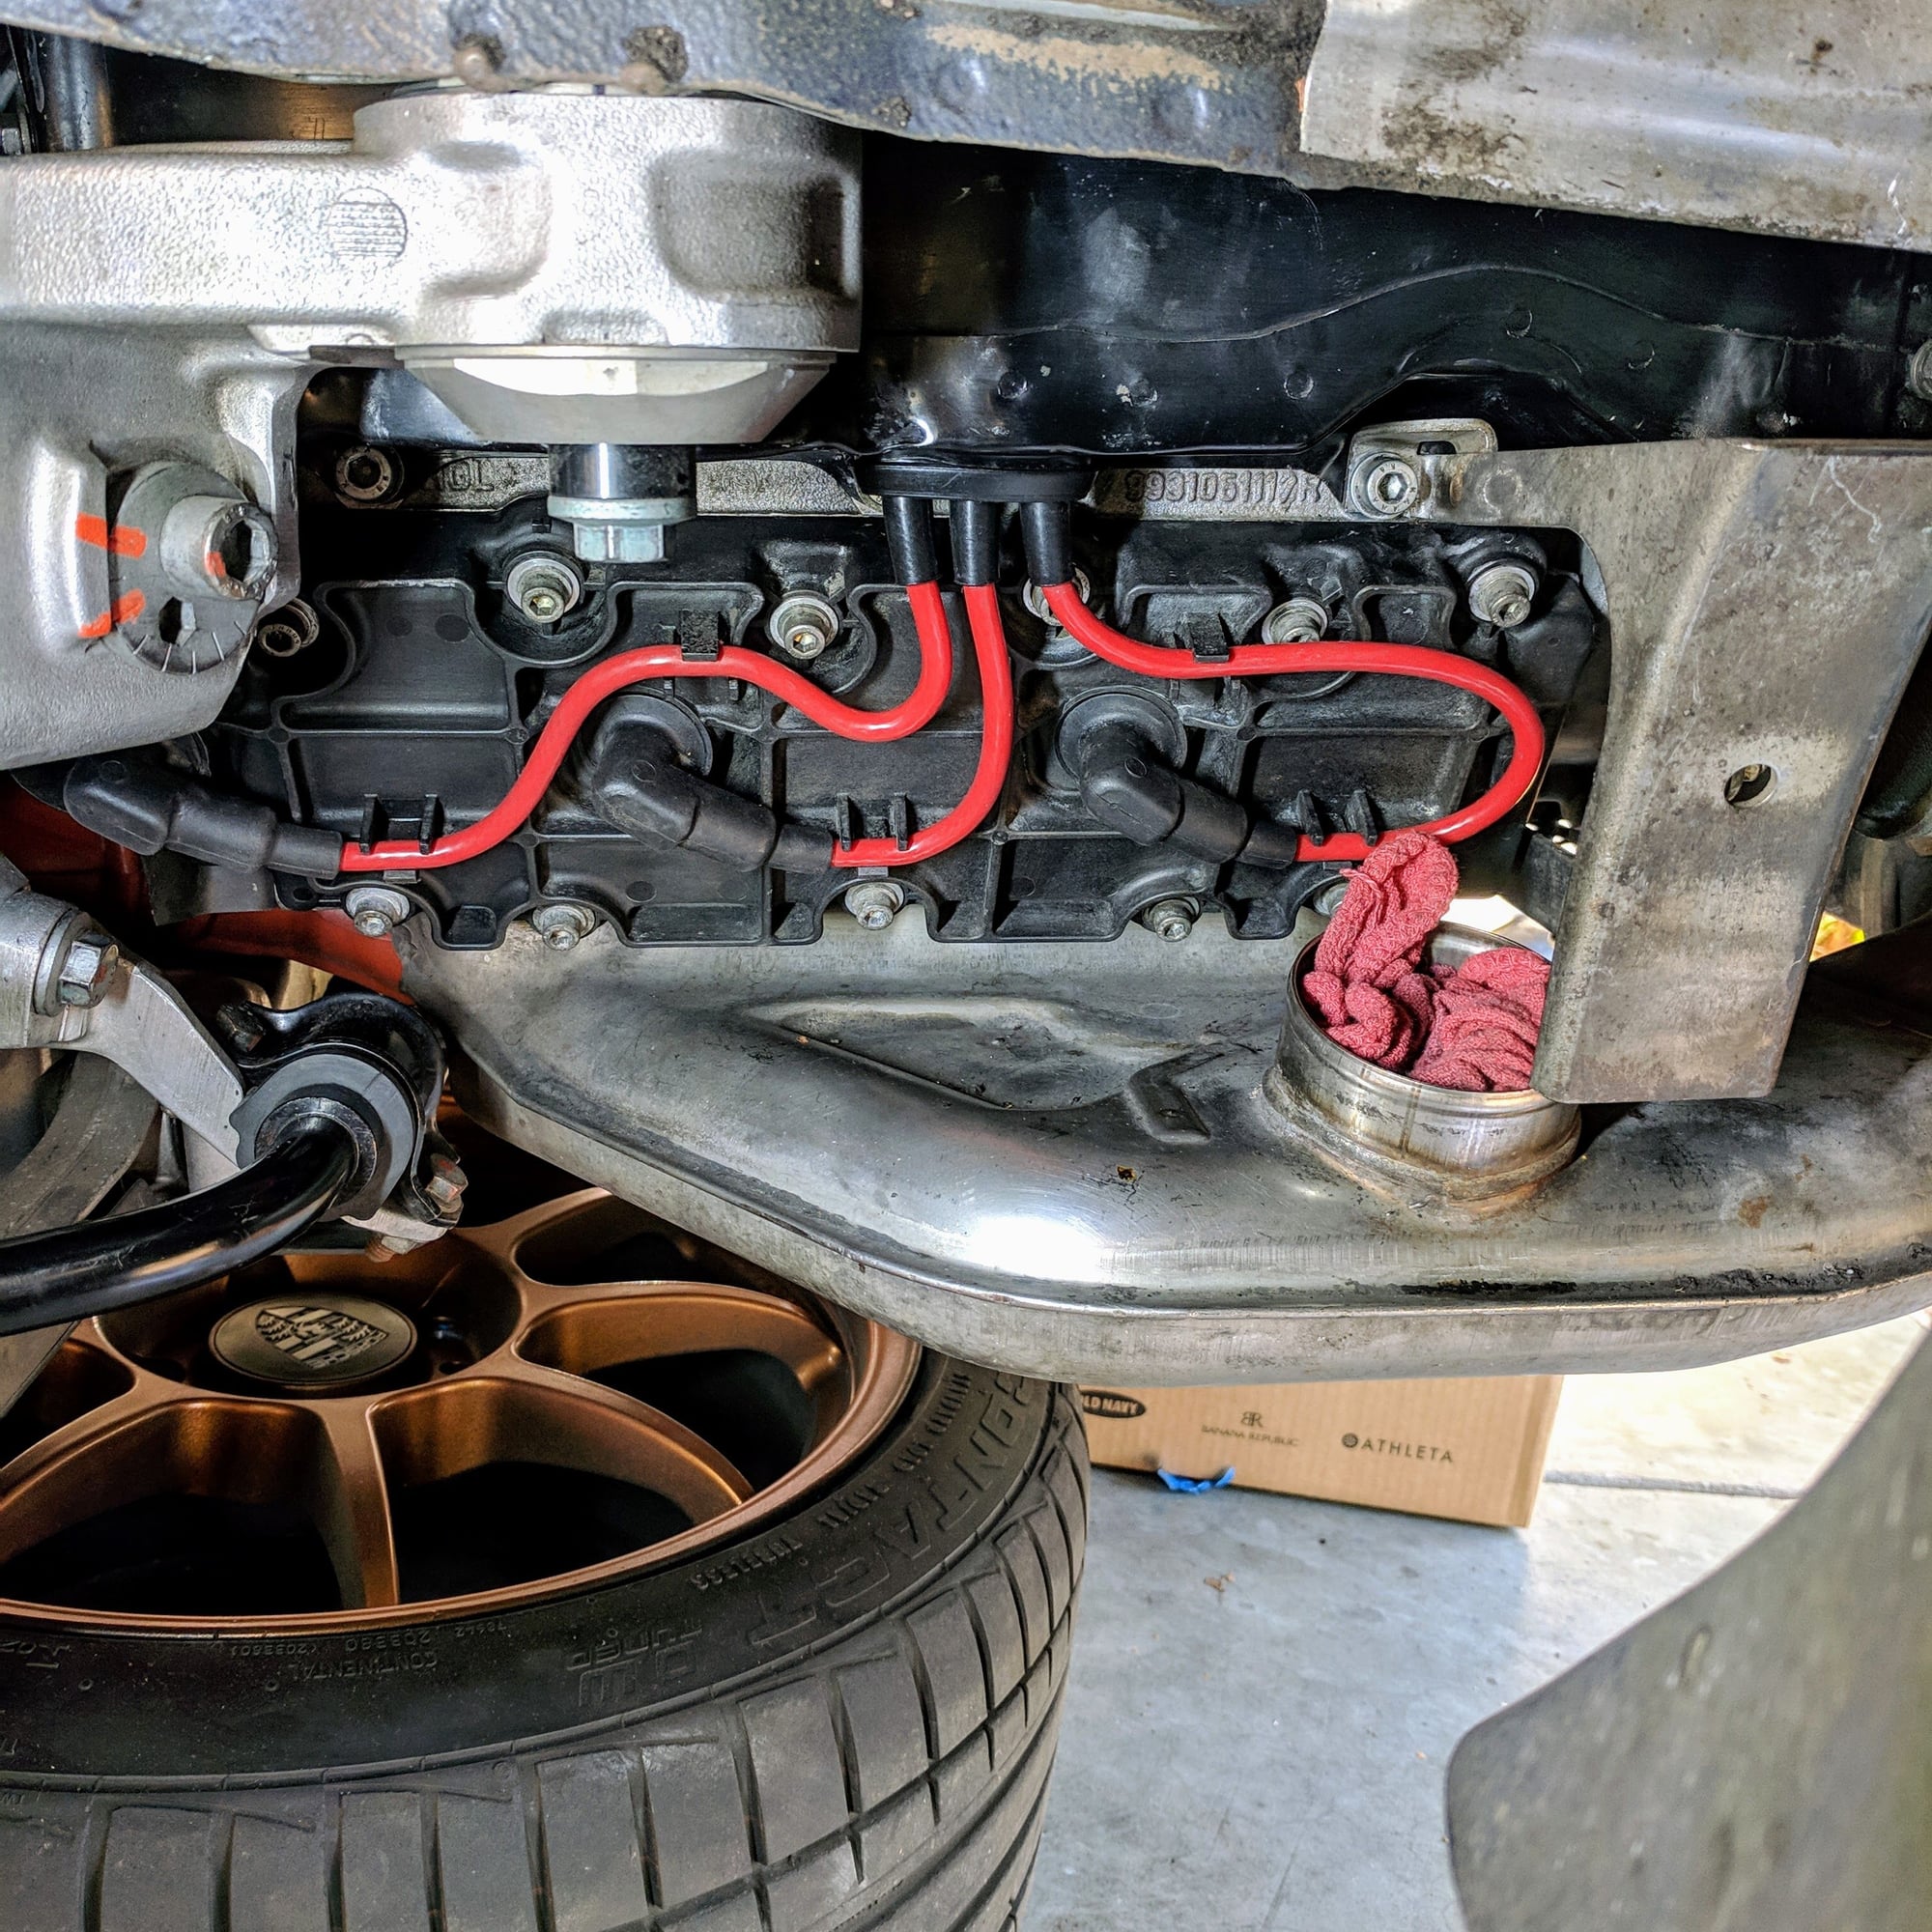
Installation of the wires is more work than taking them out. One tip to make it easy is I used a paint pen and labeled each plug end where it would attach to the distributor cap.
I started with attaching them to the distributor caps and then snaking them under the intake manifold and under the AC compressor brace and ultimately through the engine tin.
I removed the alternator fan shroud to get better access to the wire mounts as I kept on dropping the screw ratchet. Magnetic tool was my friend.
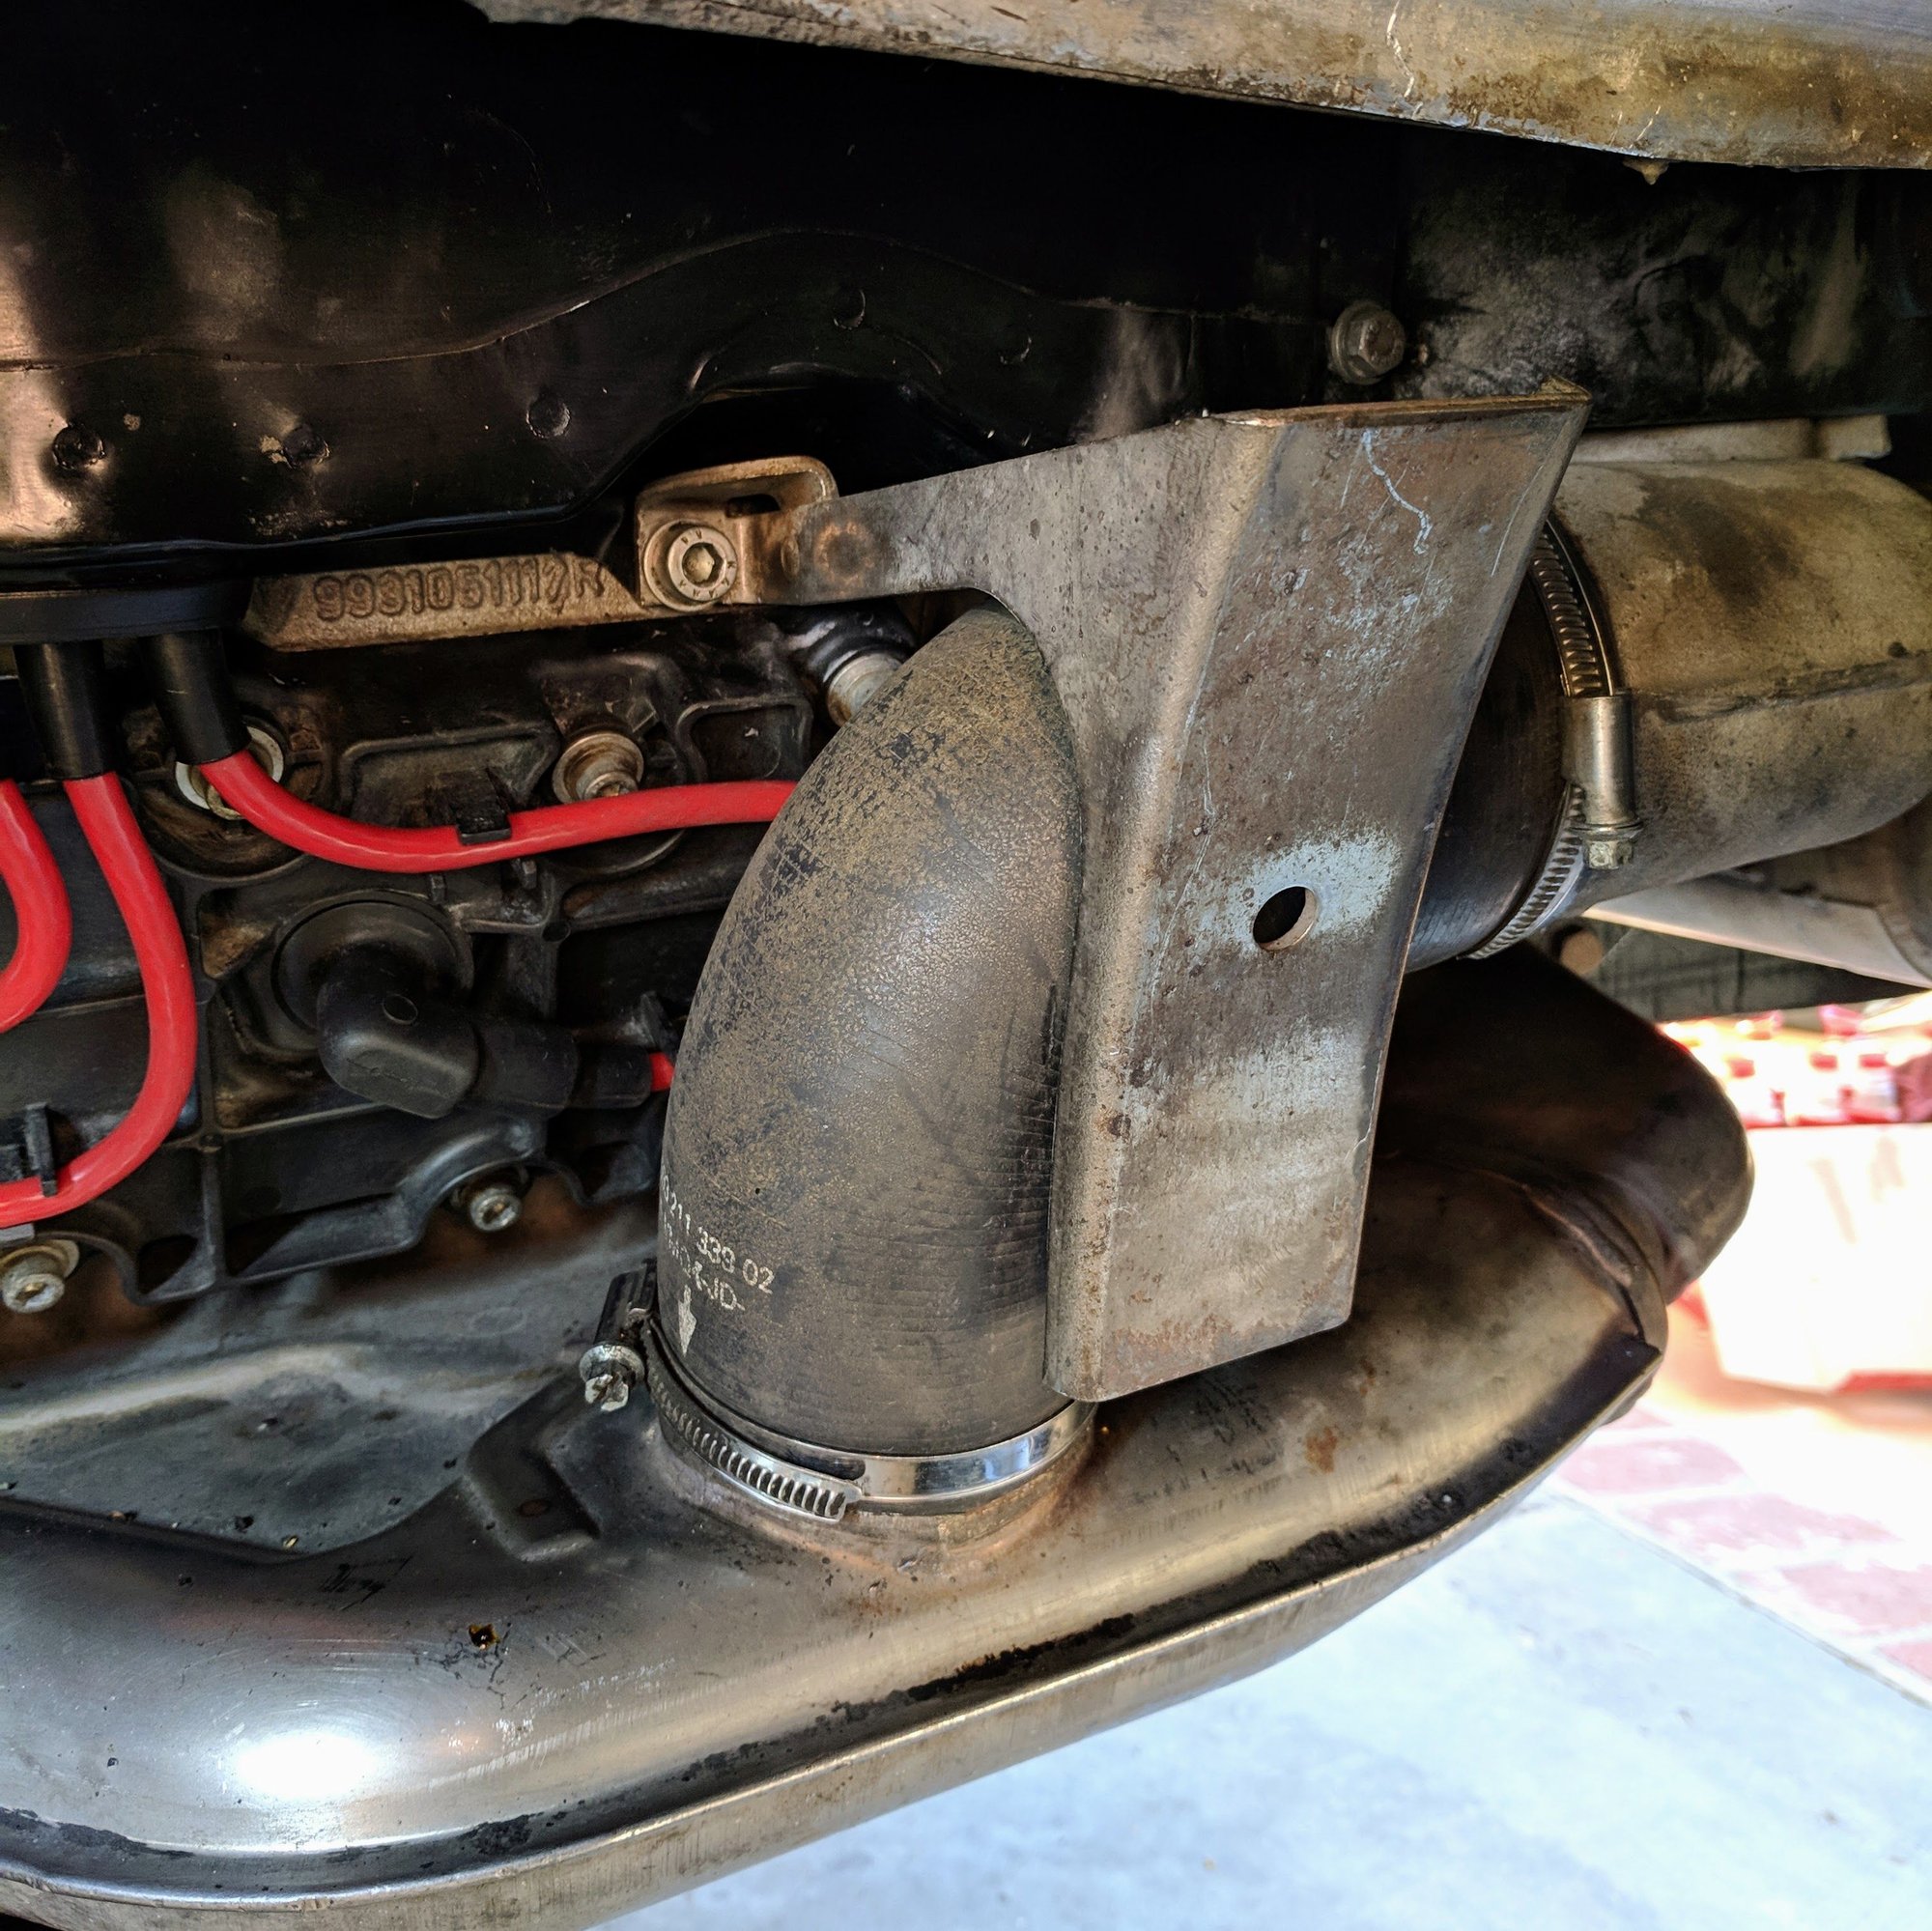
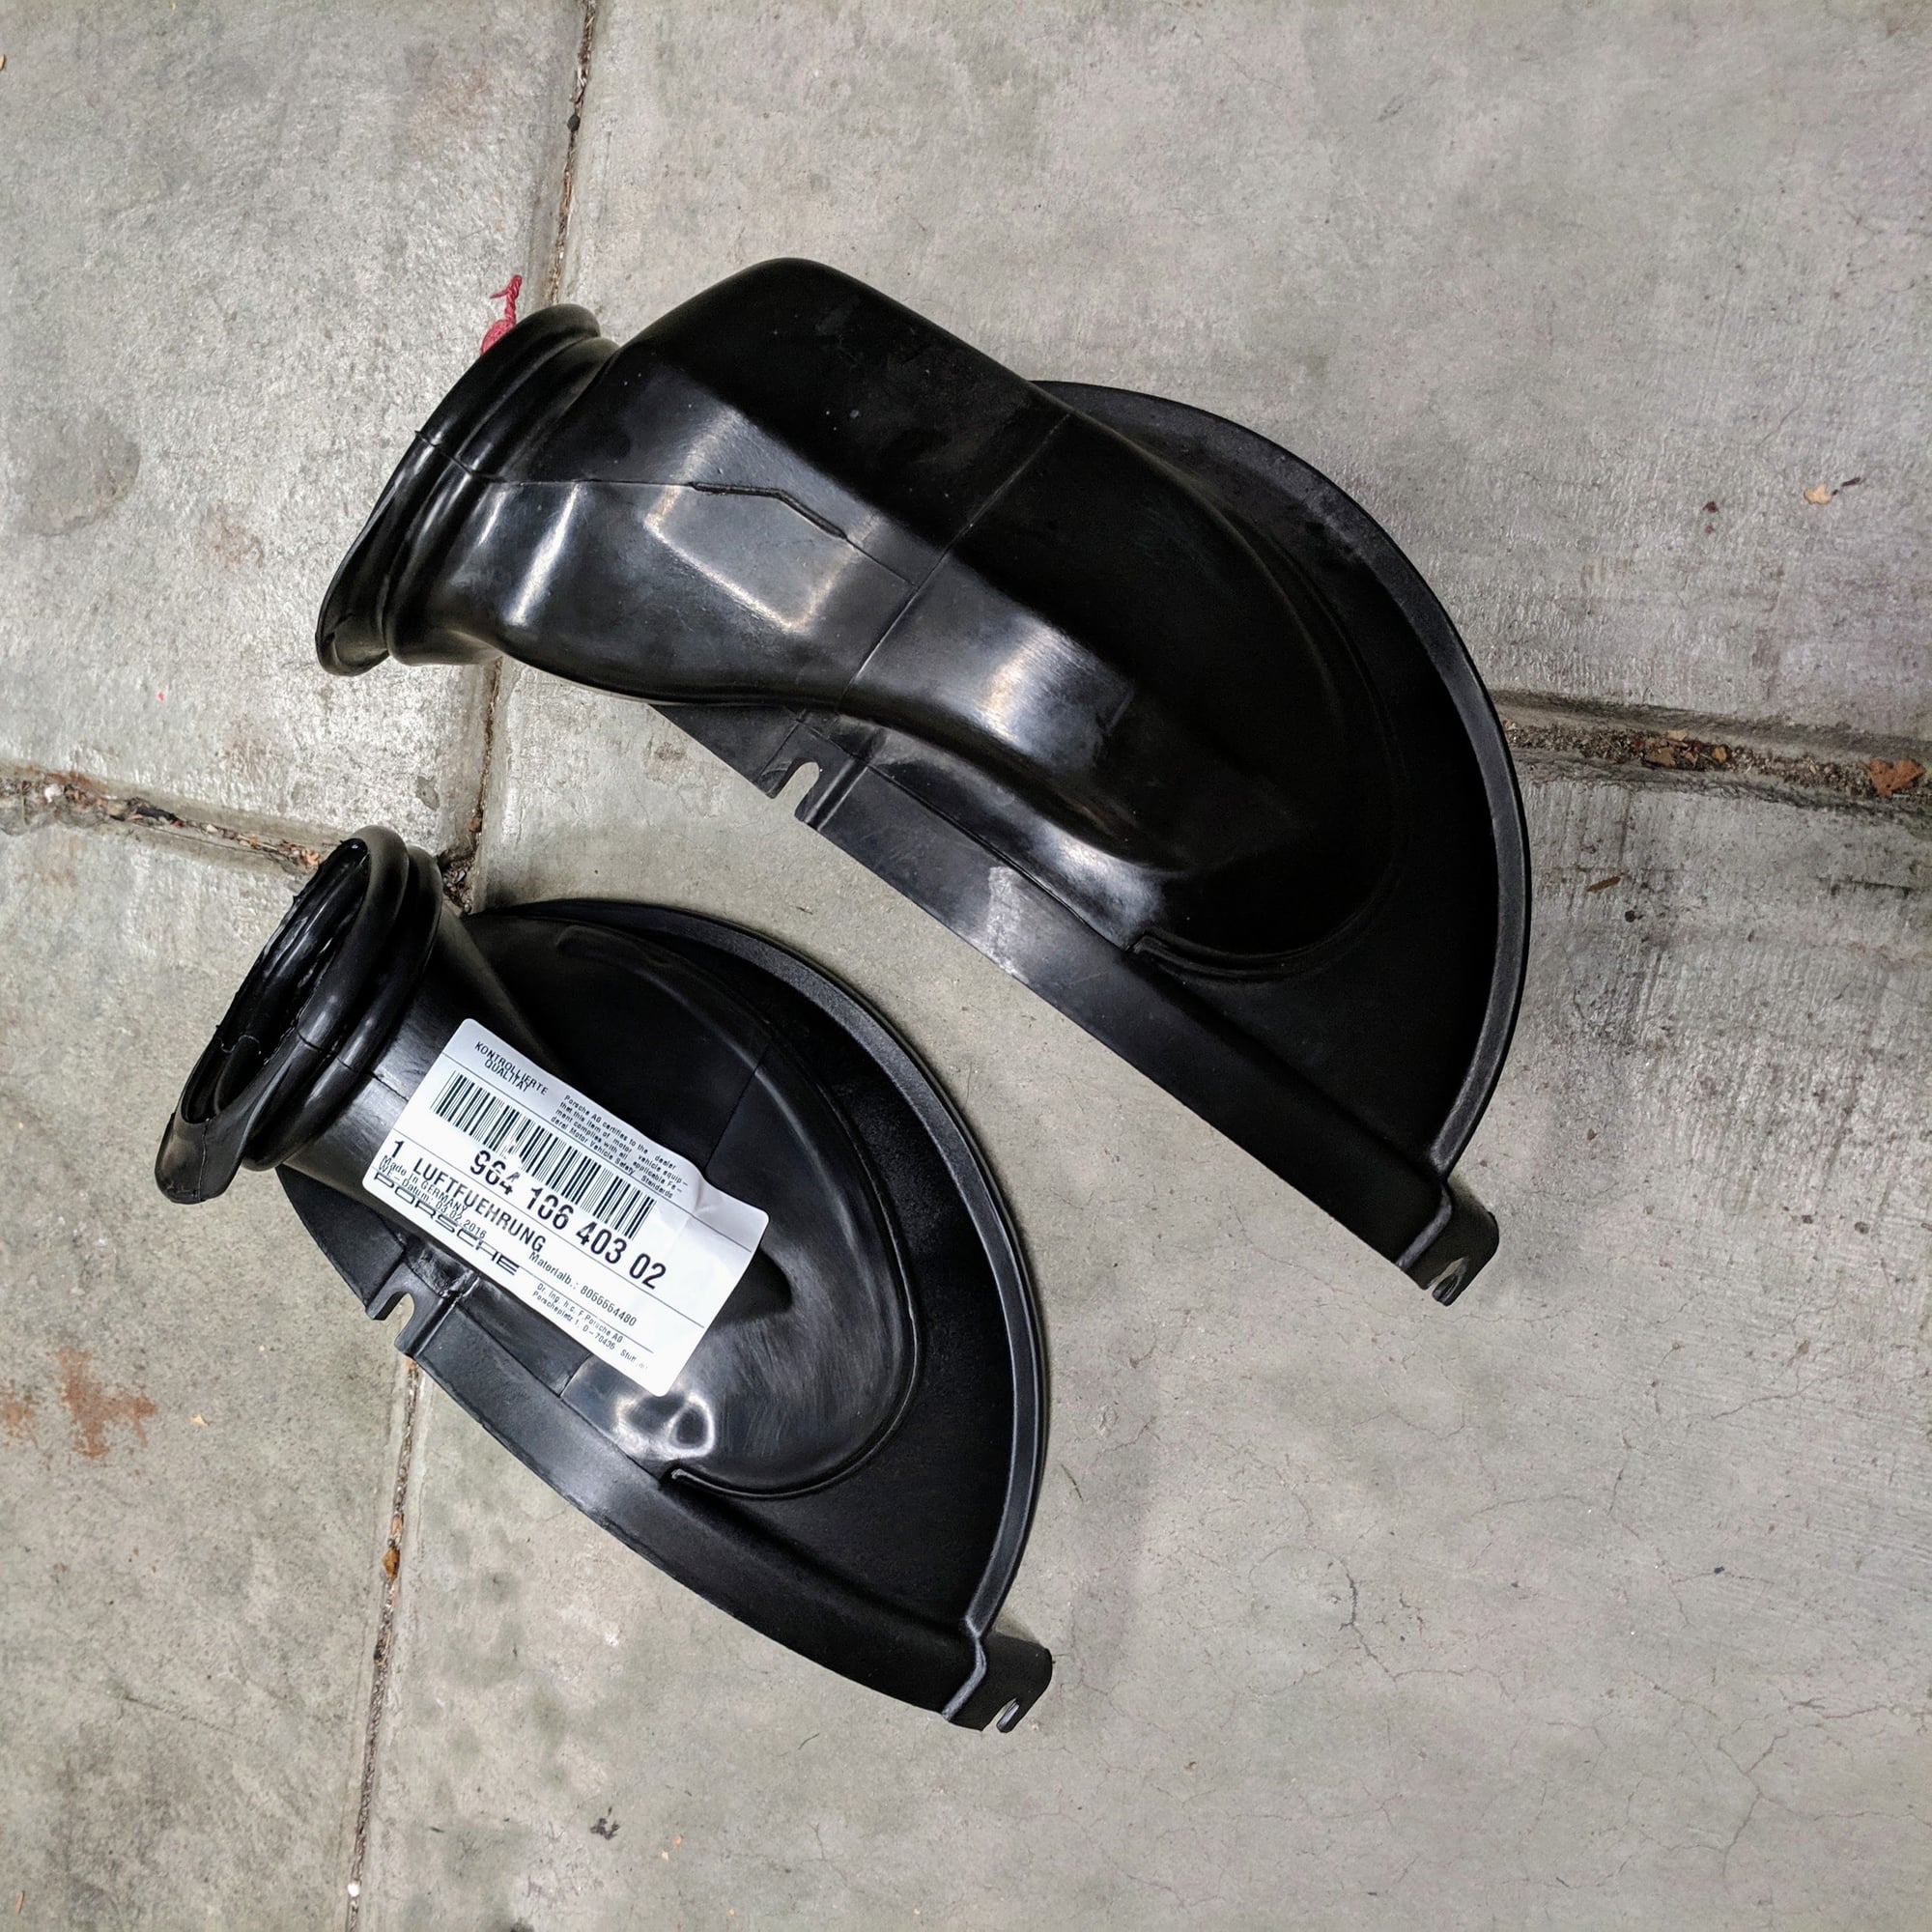
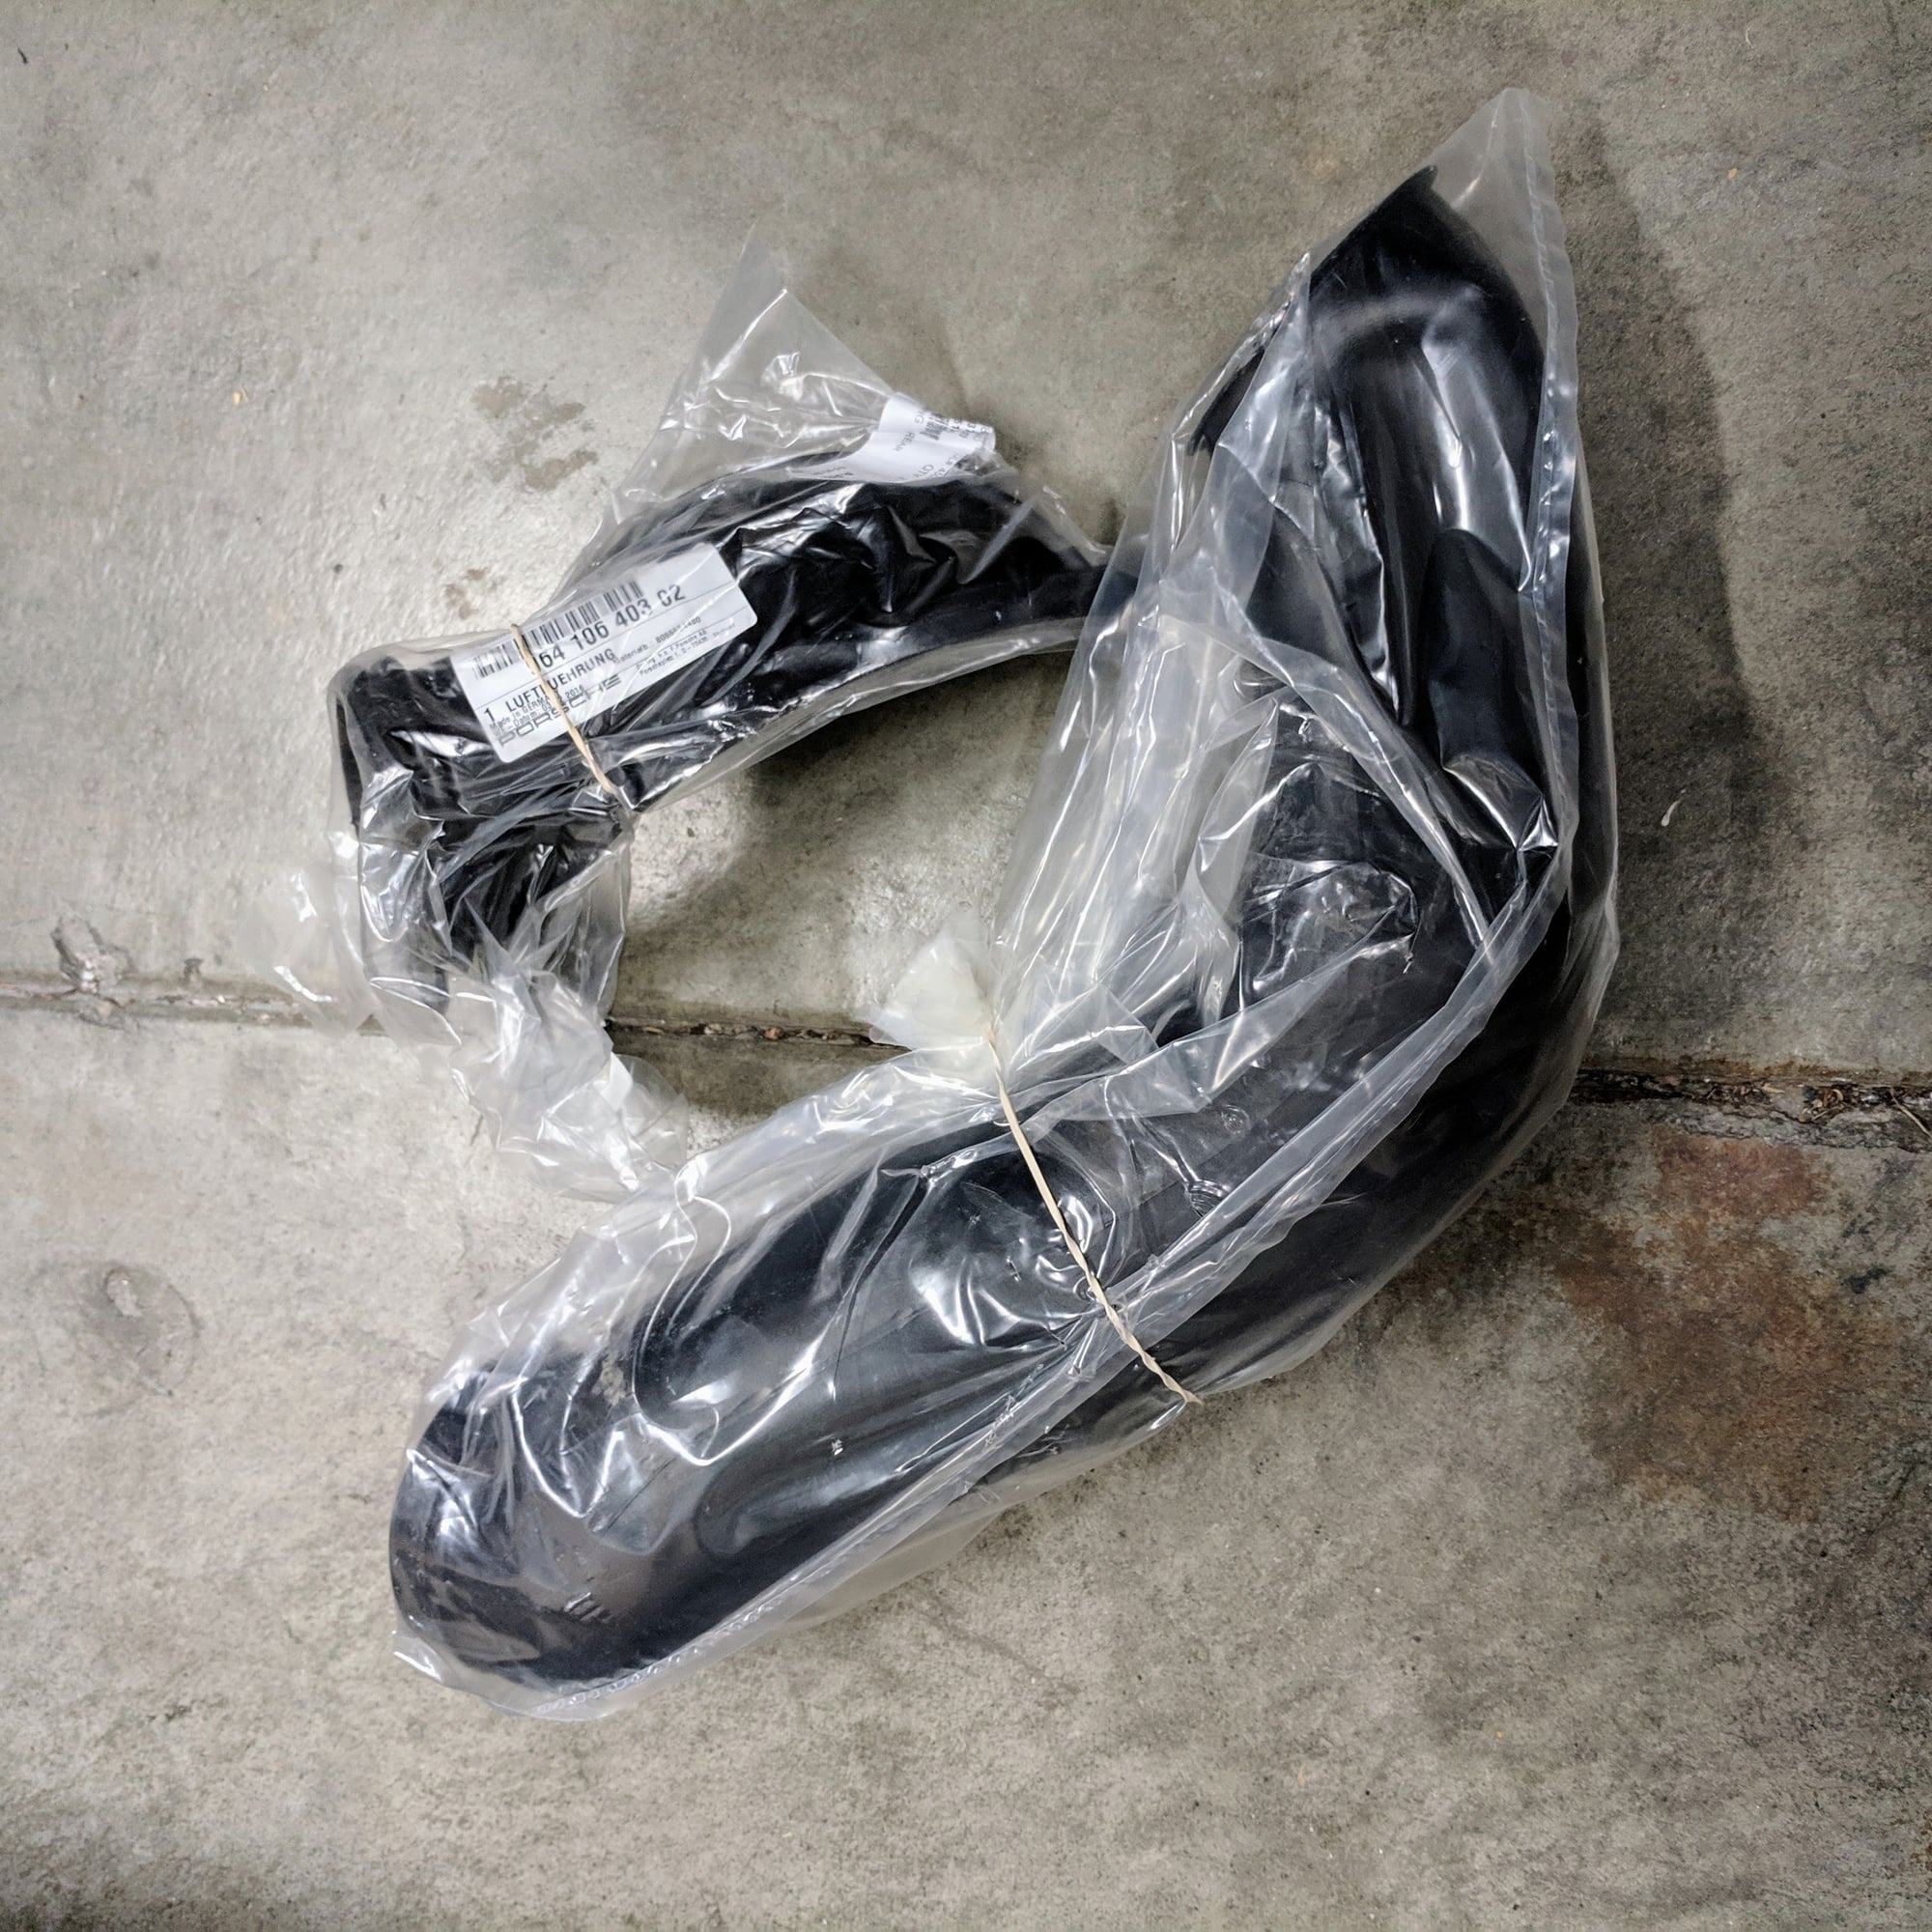
Since I had the alternator fan shroud/air guide and heater blower out from the spark plug wire replacement, decided to install a RS heater blower bypass tube to clean up the engine bay. I live in the Bay Area and this winter with sub 40 morning temps and rain, the bypass worked fine heating up the car and defrosting the windshield on my drives.
Here are the part numbers:
Tube: 99321194100
Fan shroud/air guide: 96410640302
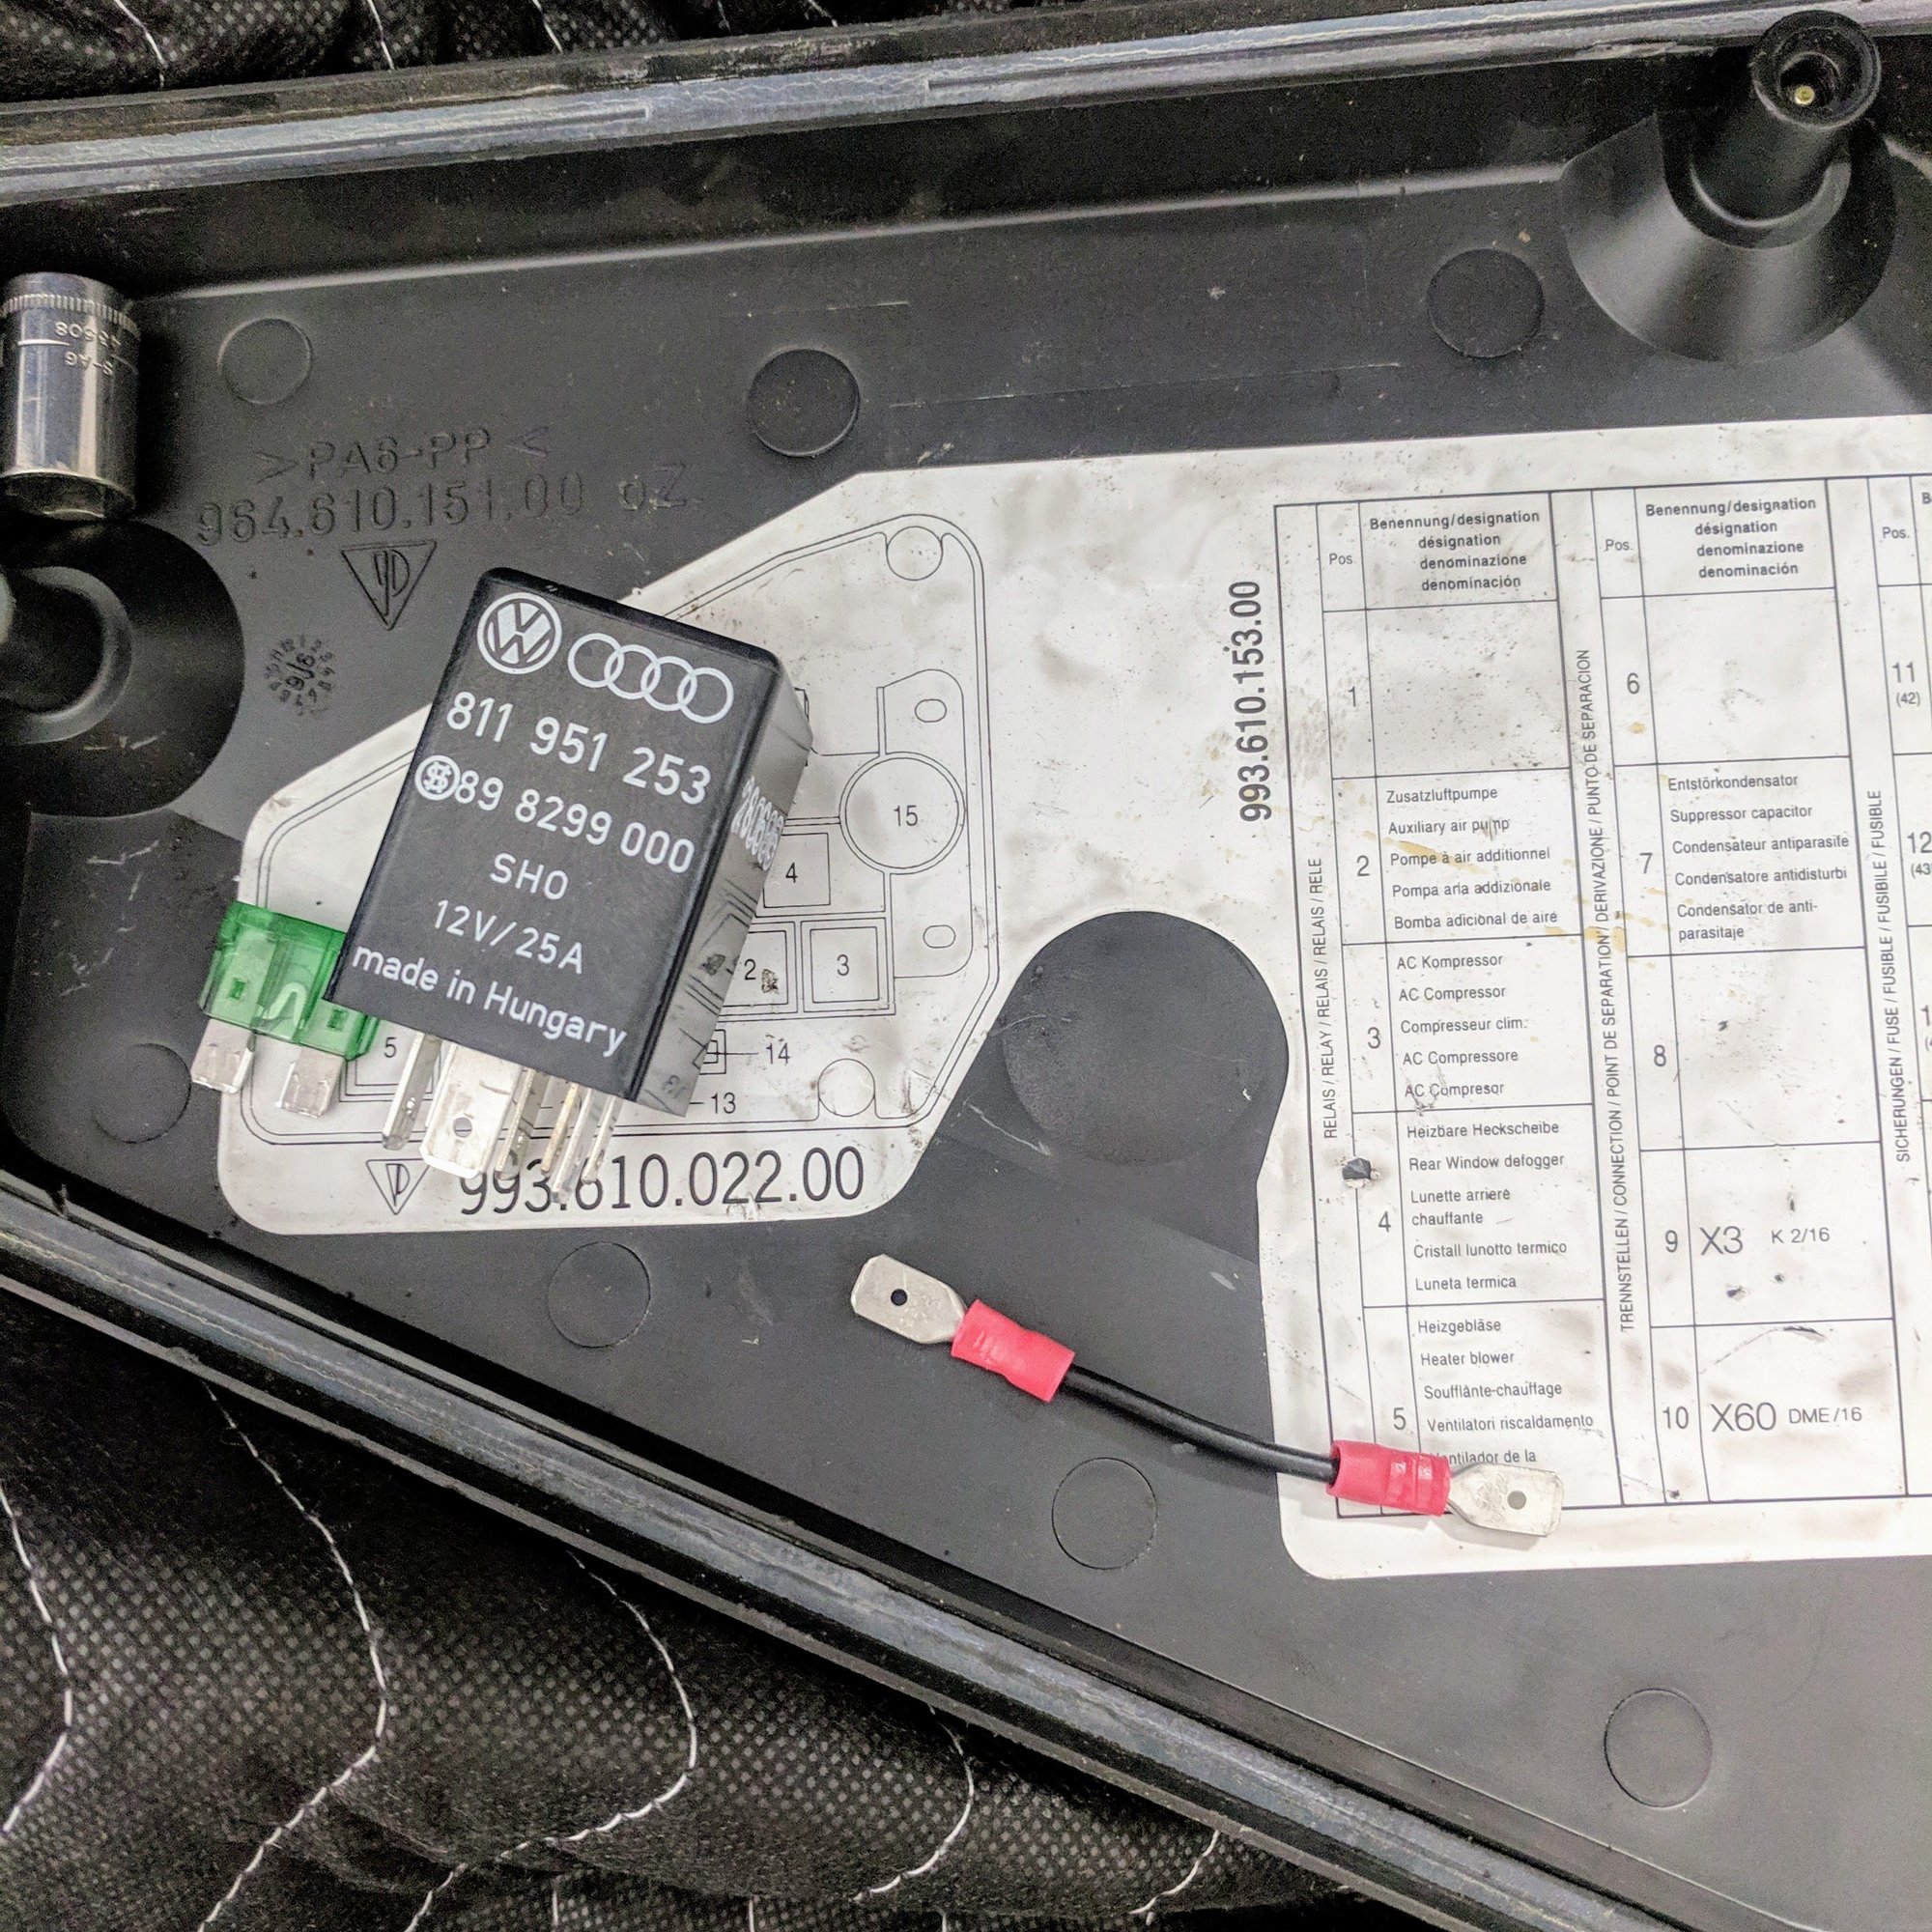
Once you install the bypass you will need to plug the vacuum hose that used to attach to the blower housing. I used some electrical tape and tape it off. Working fine so far.
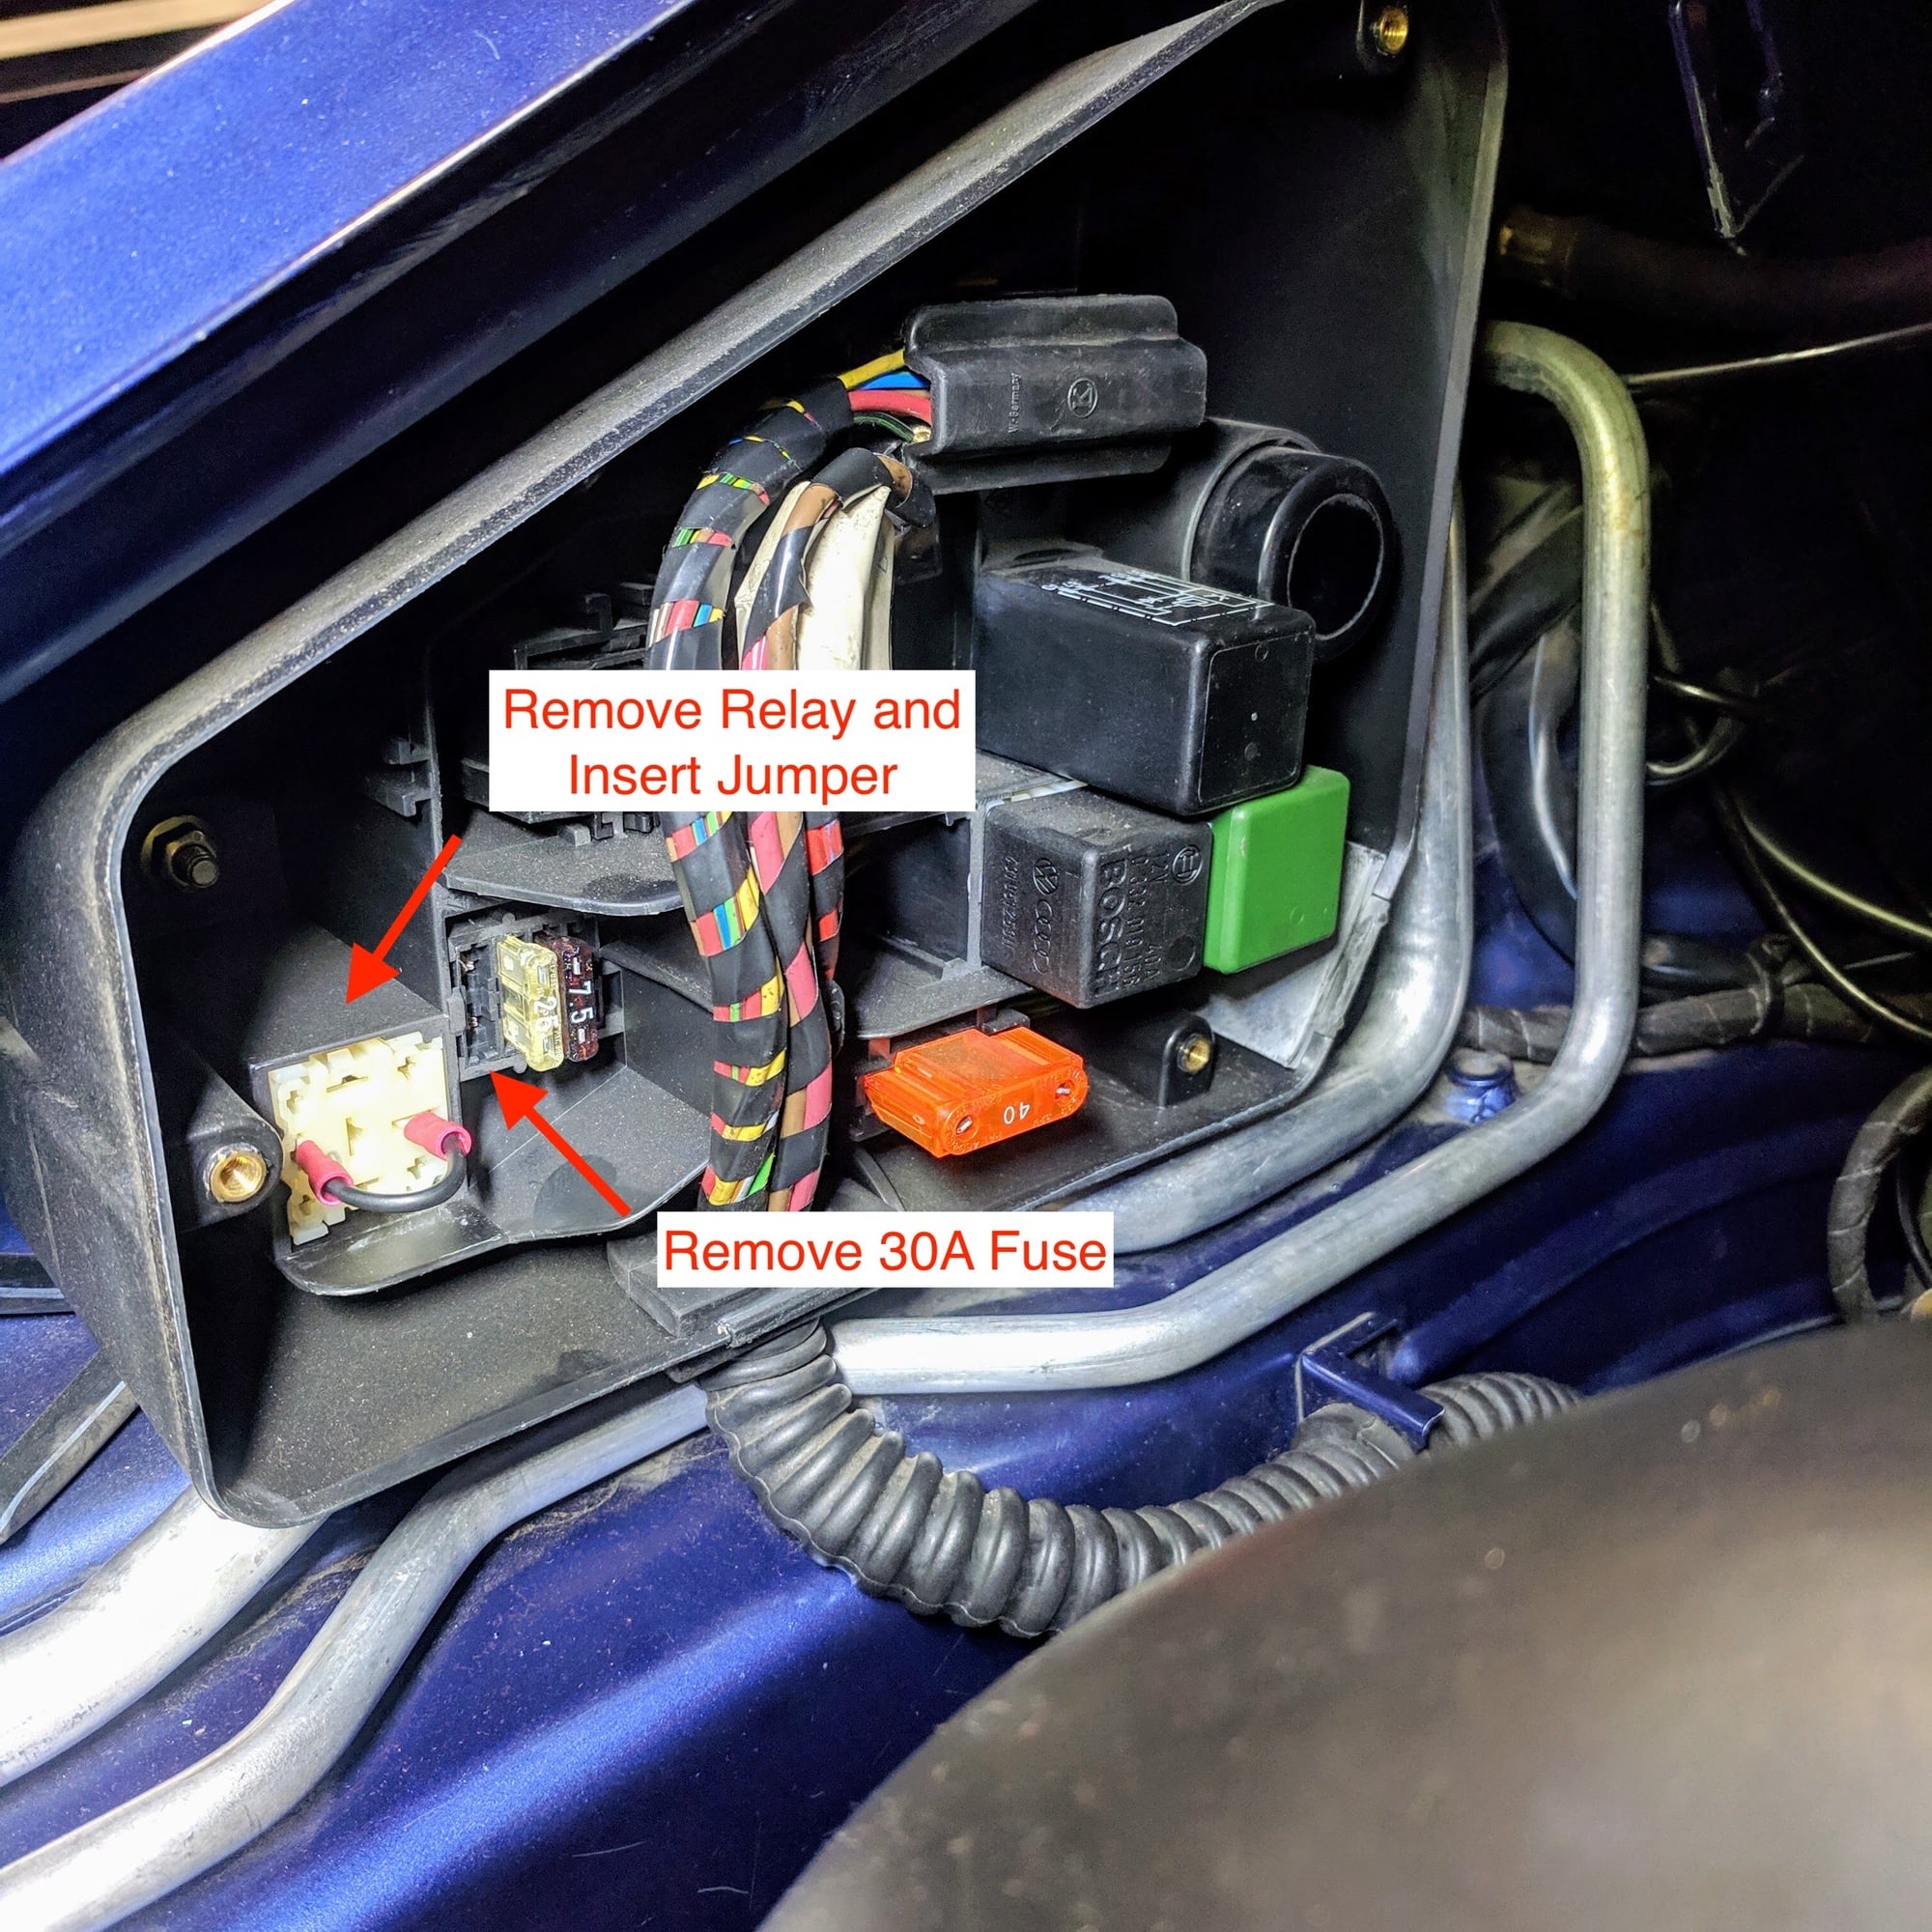
Lastly, you will need to add a jumper and remove a fuse for the bypass and heater to work correctly.
Since I had the alternator fan shroud/air guide and heater blower out from the spark plug wire replacement, decided to install a RS heater blower bypass tube to clean up the engine bay. I live in the Bay Area and this winter with sub 40 morning temps and rain, the bypass worked fine heating up the car and defrosting the windshield on my drives.
Once you install the bypass you will need to plug the vacuum hose that used to attach to the blower housing. I used some electrical tape and tape it off. Working fine so far.
Lastly, you will need to add a jumper and remove a fuse for the bypass and heater to work correctly.
Done!
Nice! Been thinking of doing this as well but wasn�t sure about the functionality of the heater/defrost in cold temps. Sounds like it shouldn�t be an issue.
Samurai, do you get full fan speed when the temp dial is turned to heat? I have this mod (done by PO) and I only get full fan speed when the temp is full cold.
 05-18-2018, 04:03 AM


