When you click on links to various merchants on this site and make a purchase, this can result in this site earning a commission. Affiliate programs and affiliations include, but are not limited to, the eBay Partner Network.
Samurai, do you get full fan speed when the temp dial is turned to heat? I have this mod (done by PO) and I only get full fan speed when the temp is full cold.
@ @Tlaloc75 I checked this morning and my car is similar to yours. I am guessing there is some other things to trick the factory HVAC. I am ok with my current state as I never needed to use max heat + max fan here in the bay. Defrost works fine for me.
Great thread! Regarding the blower bypass, I have the same behavior with the fuse out and my fans cut out past 10 degrees and do not come on at the warmest setting. I found out that when I put the fuse back in place, my fans work at both the coldest and warmest setting only (they cut out in between). Not sure if this is the right behavior but so far I have not had any issues.
More winter maintenance- clutch hydraulics overhaul
This past fall I started to have issues with my clutch pedal. The pedal would �stick� partially and not come all the way back without my toe of my shoe to pull it up. Also the pedal travel became shorter where there was an inch of "play" before the pedal would start to disengage the clutch.
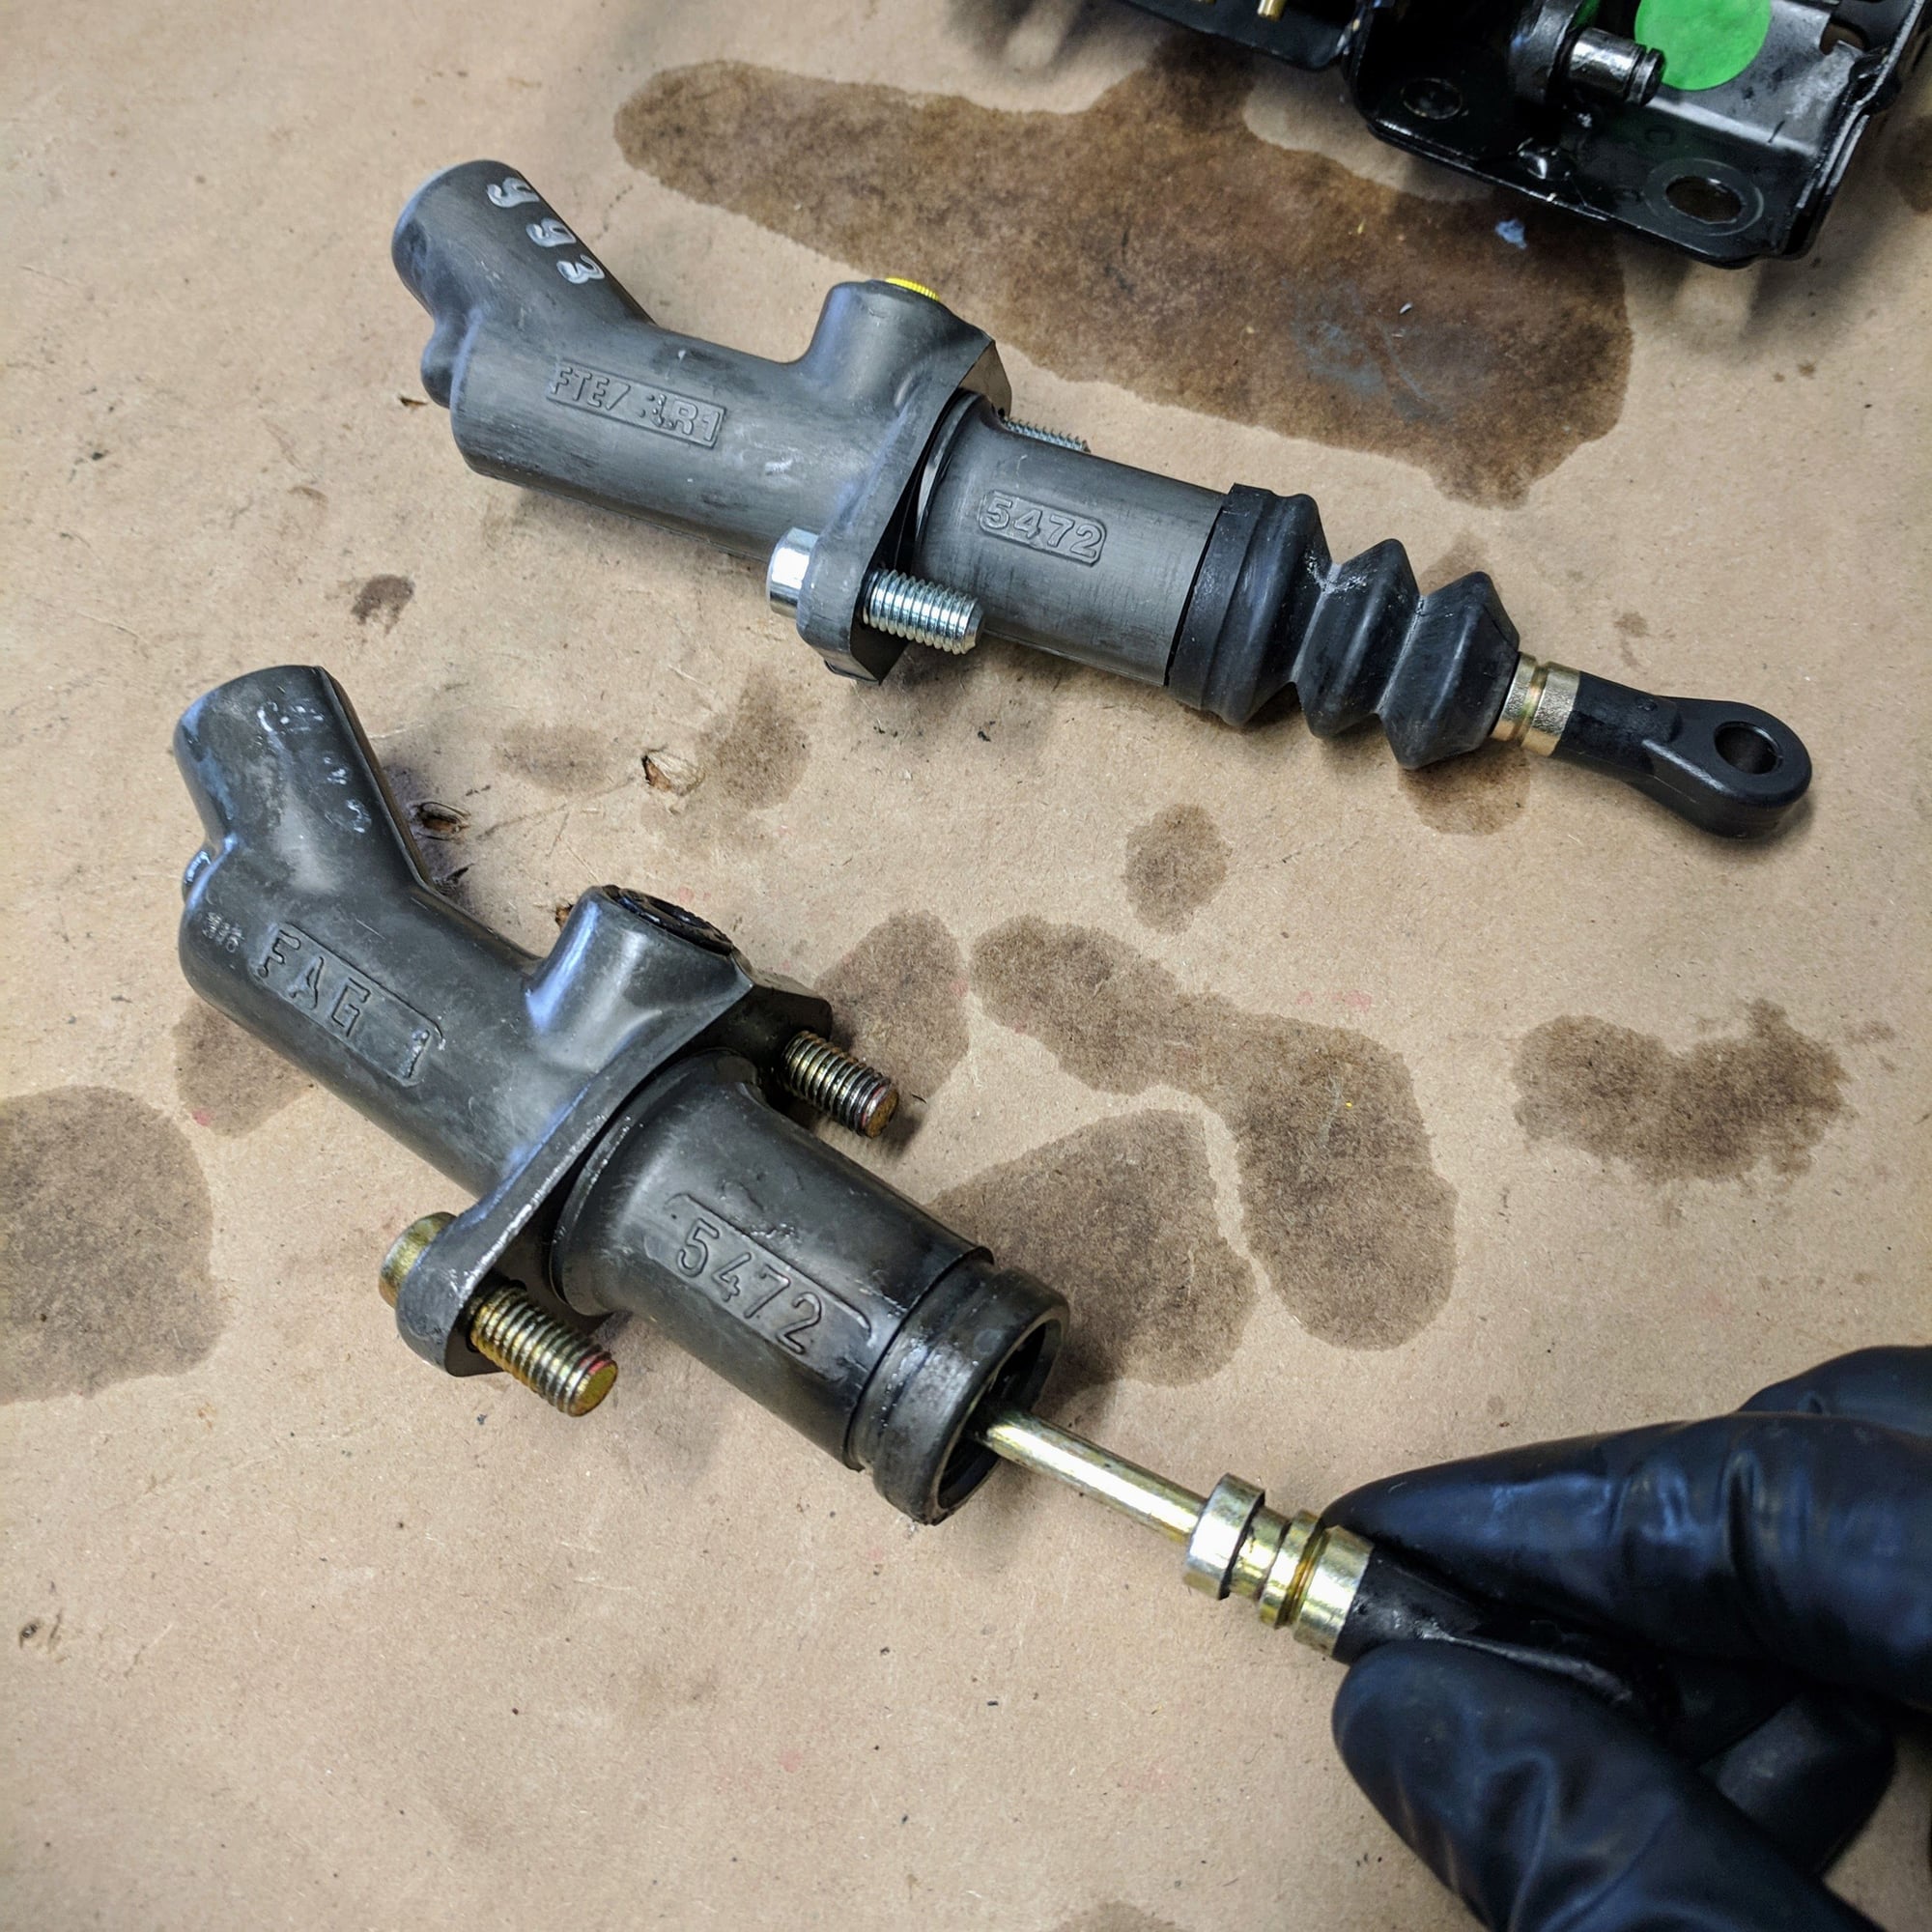
I initially bled/flushed the clutch and a bunch of blue fluid with black crap came out so it needed some love. Power flushed the lines thoroughly with new fluid and that made the clutch action smooth again, but the sticking clutch pedal problem cam back and still had excessive play so replaced the master and slave clutch cylinders which ultimately solved both problems completely. As an aside, the clutch also made a funny groaning sound when you engaged the clutch, which also is no longer present with the replacement of the slave.
There is lots of discussion/opinion the root cause of various clutch problems. Here is what I figured out through process of elimination by doing the overhaul
1. Groaning sound from transmission when you push the clutch in- new slave cylinder
2. Sticking clutch pedal- new slave cylinder
3. Excessive clutch pedal travel/play- new master cylinder
@@XLR8 made an excellent post and pictures on the procedure here:
Removal of both the master and slave cylinders are relatively easy wrench activities, with the slave being more tricky as you are doing it by feel given the unit is above the transmission and somewhat out of sight. I started with the slave side first...
Part 1. Removal of slave clutch cylinder
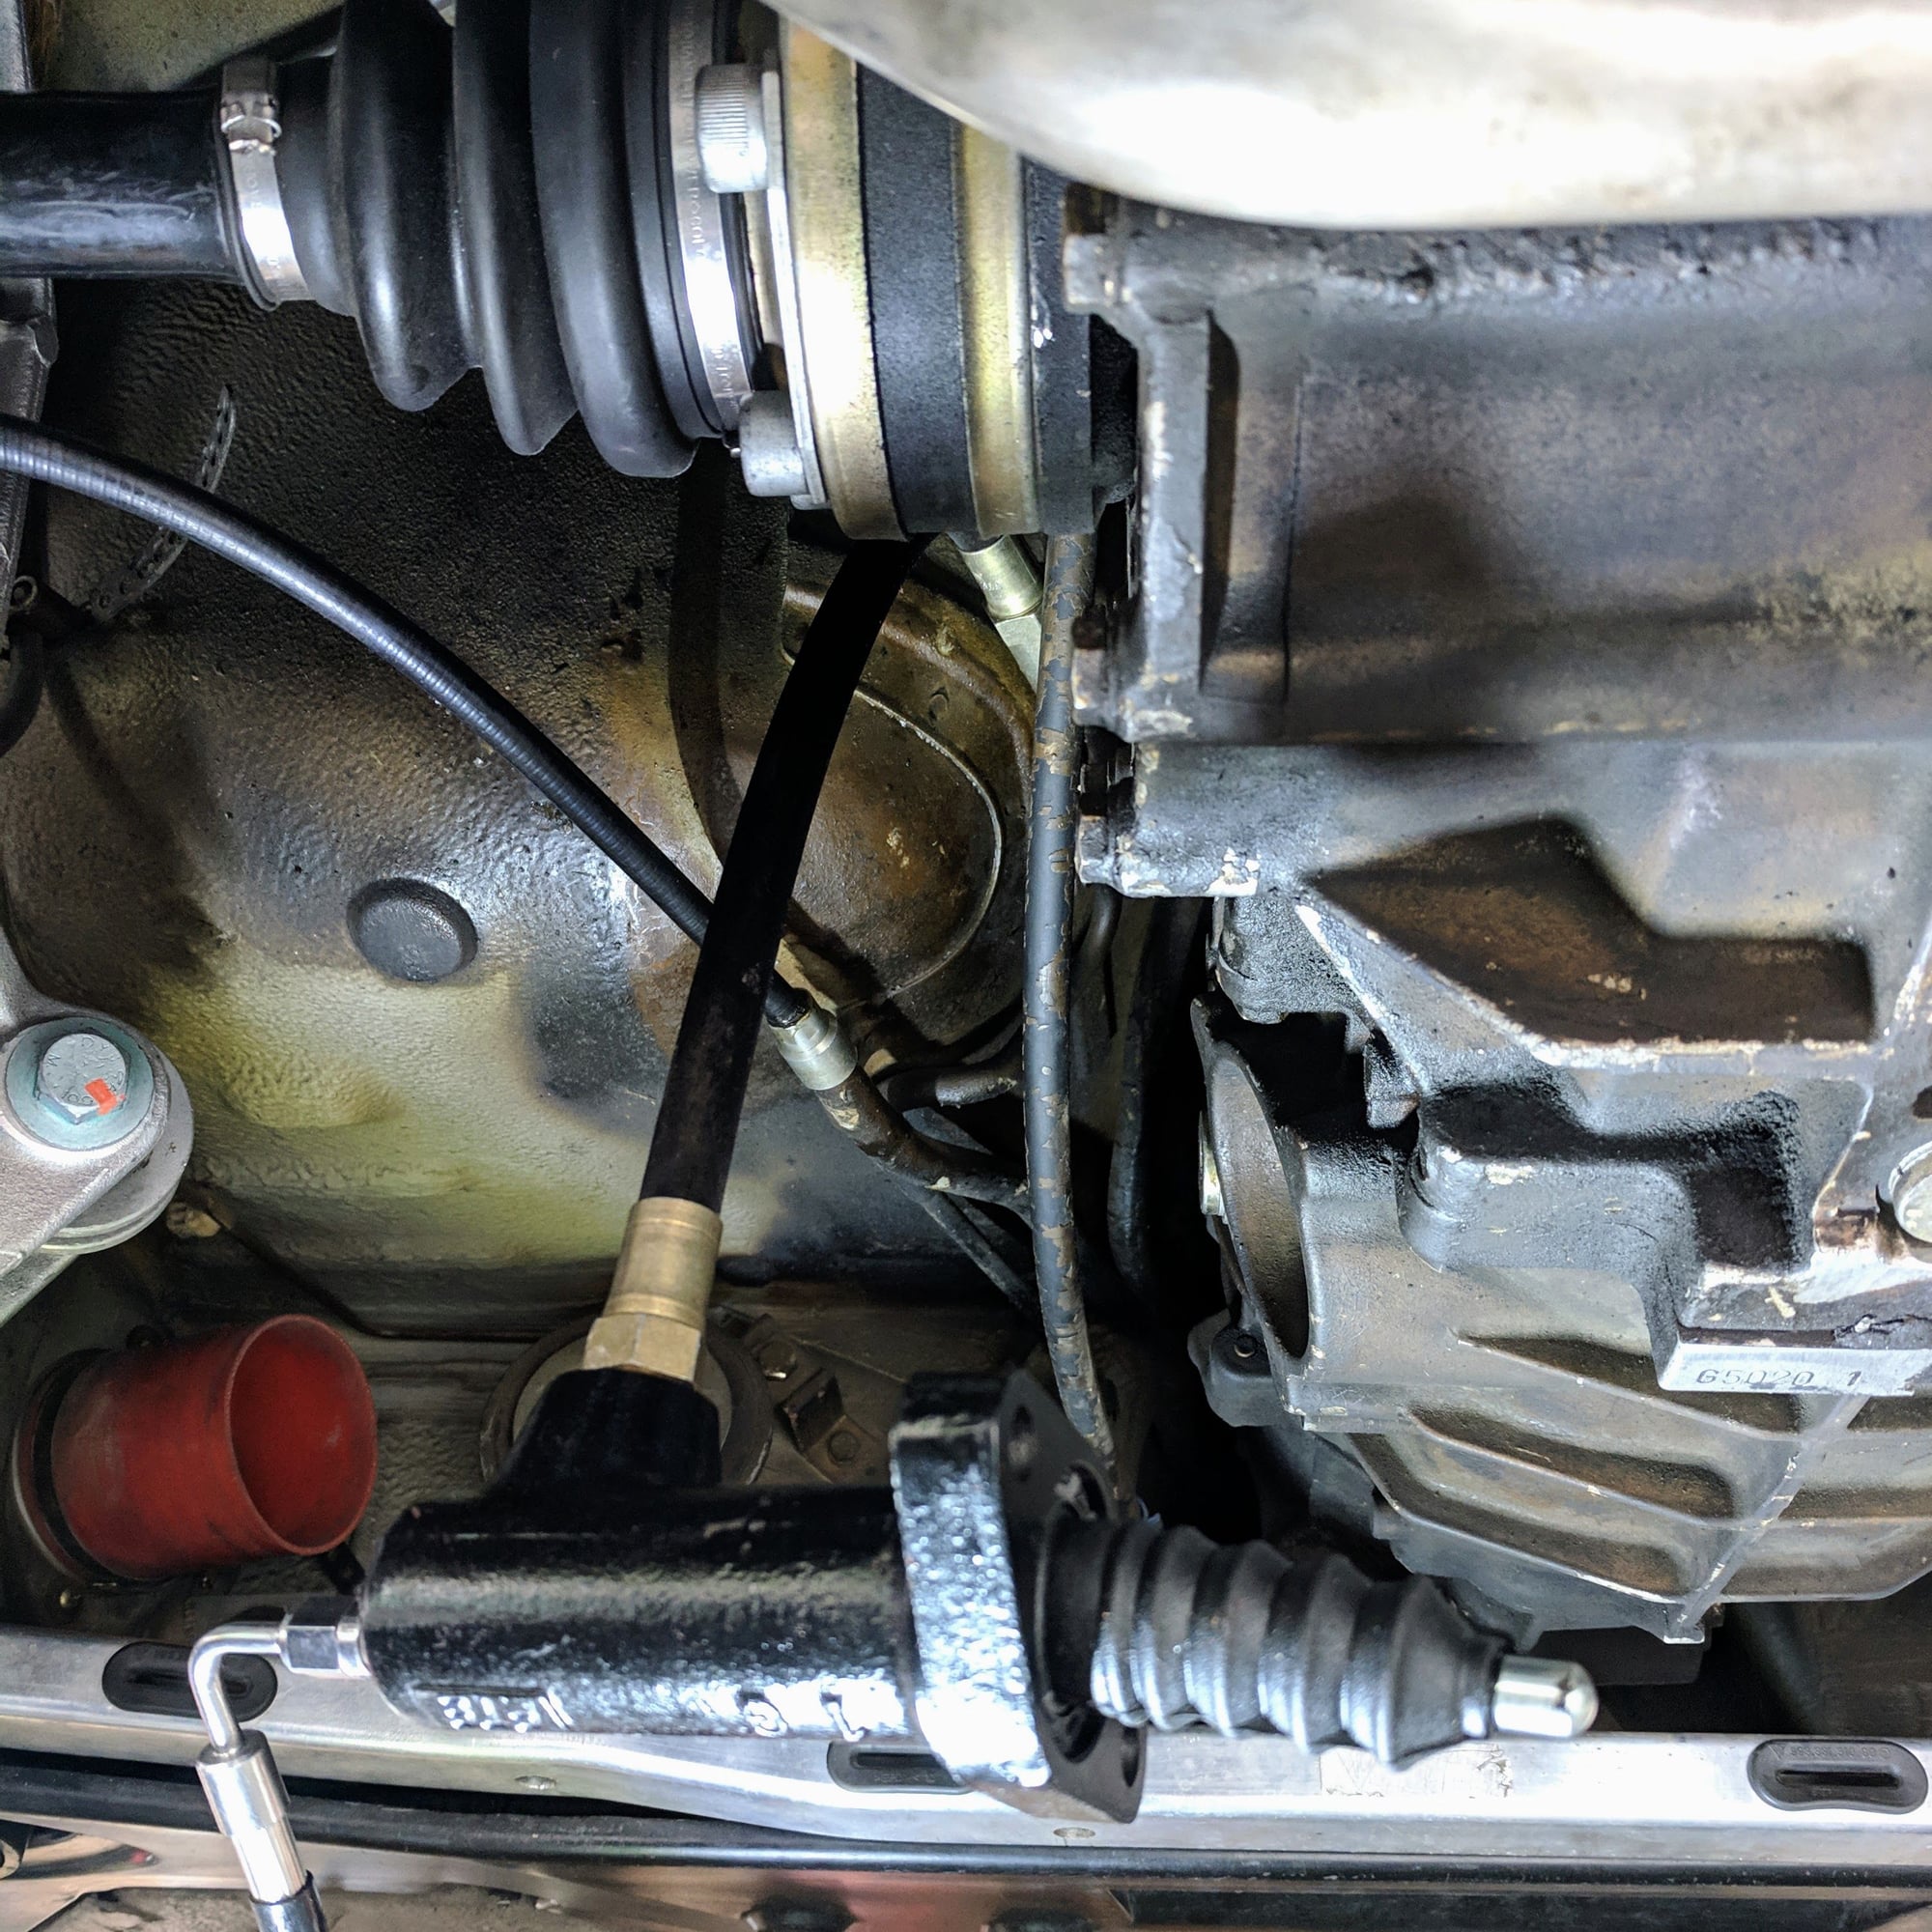
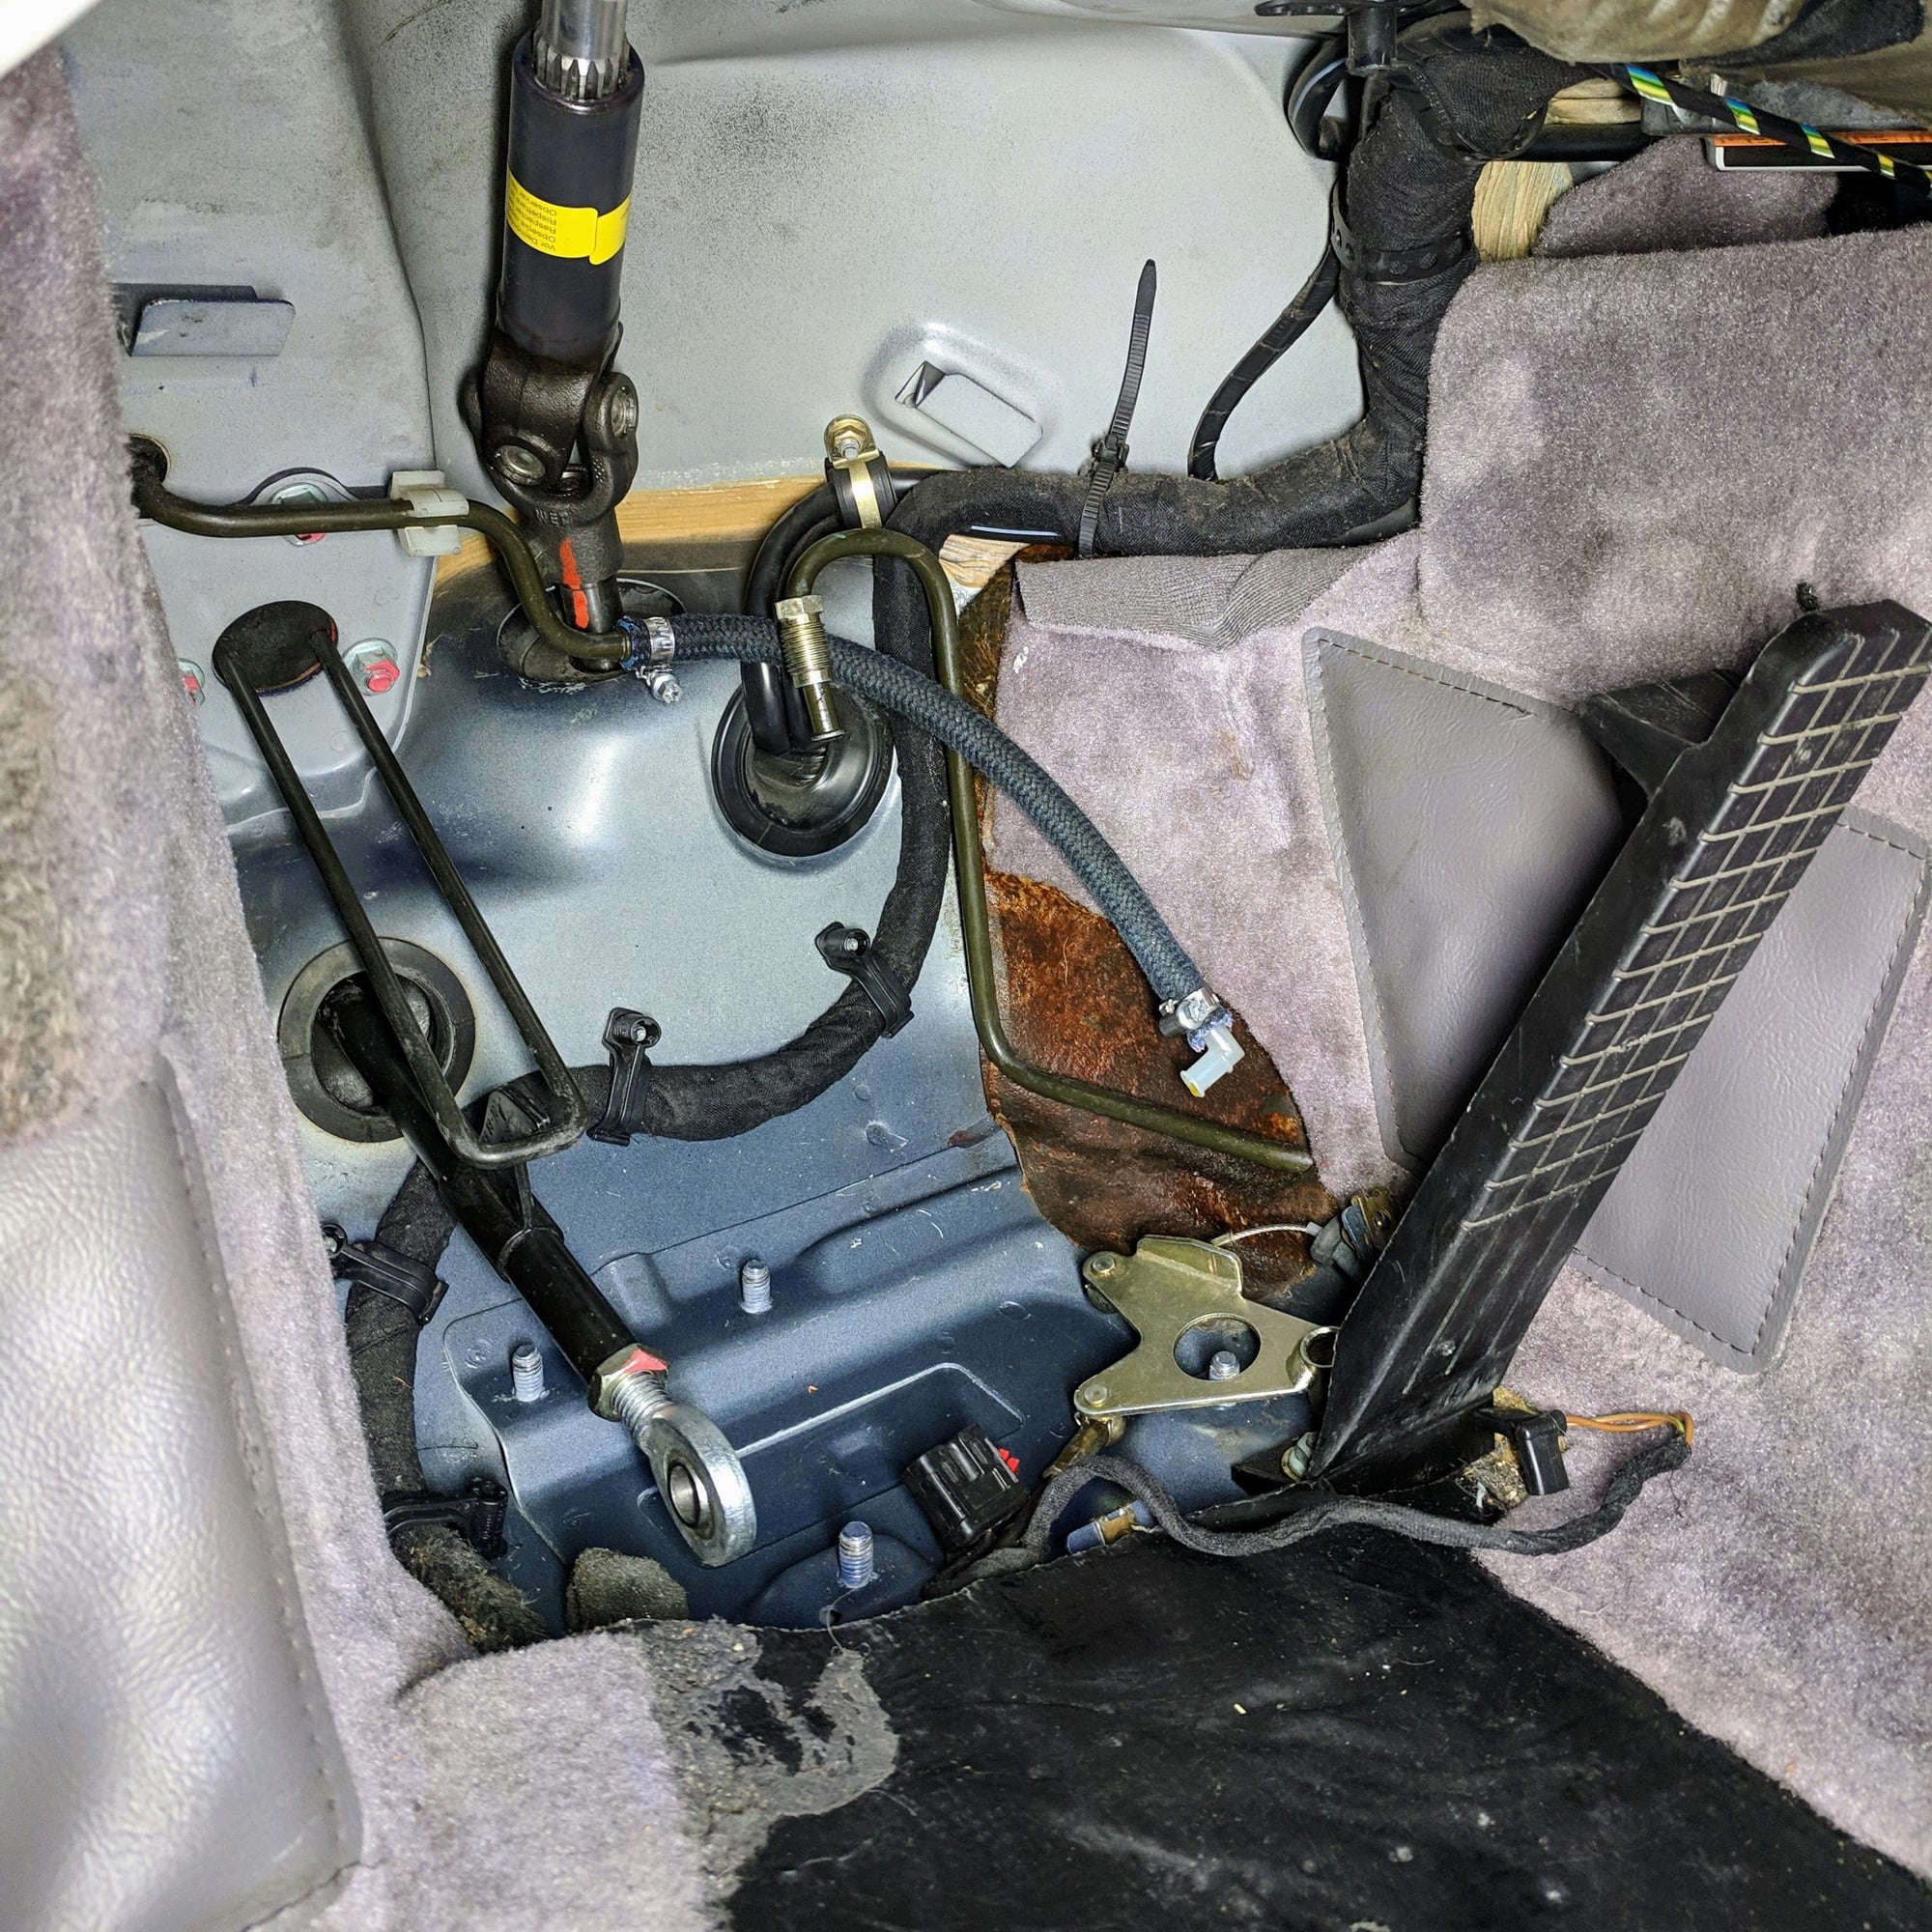
1. Remove the heater tube on the driver side
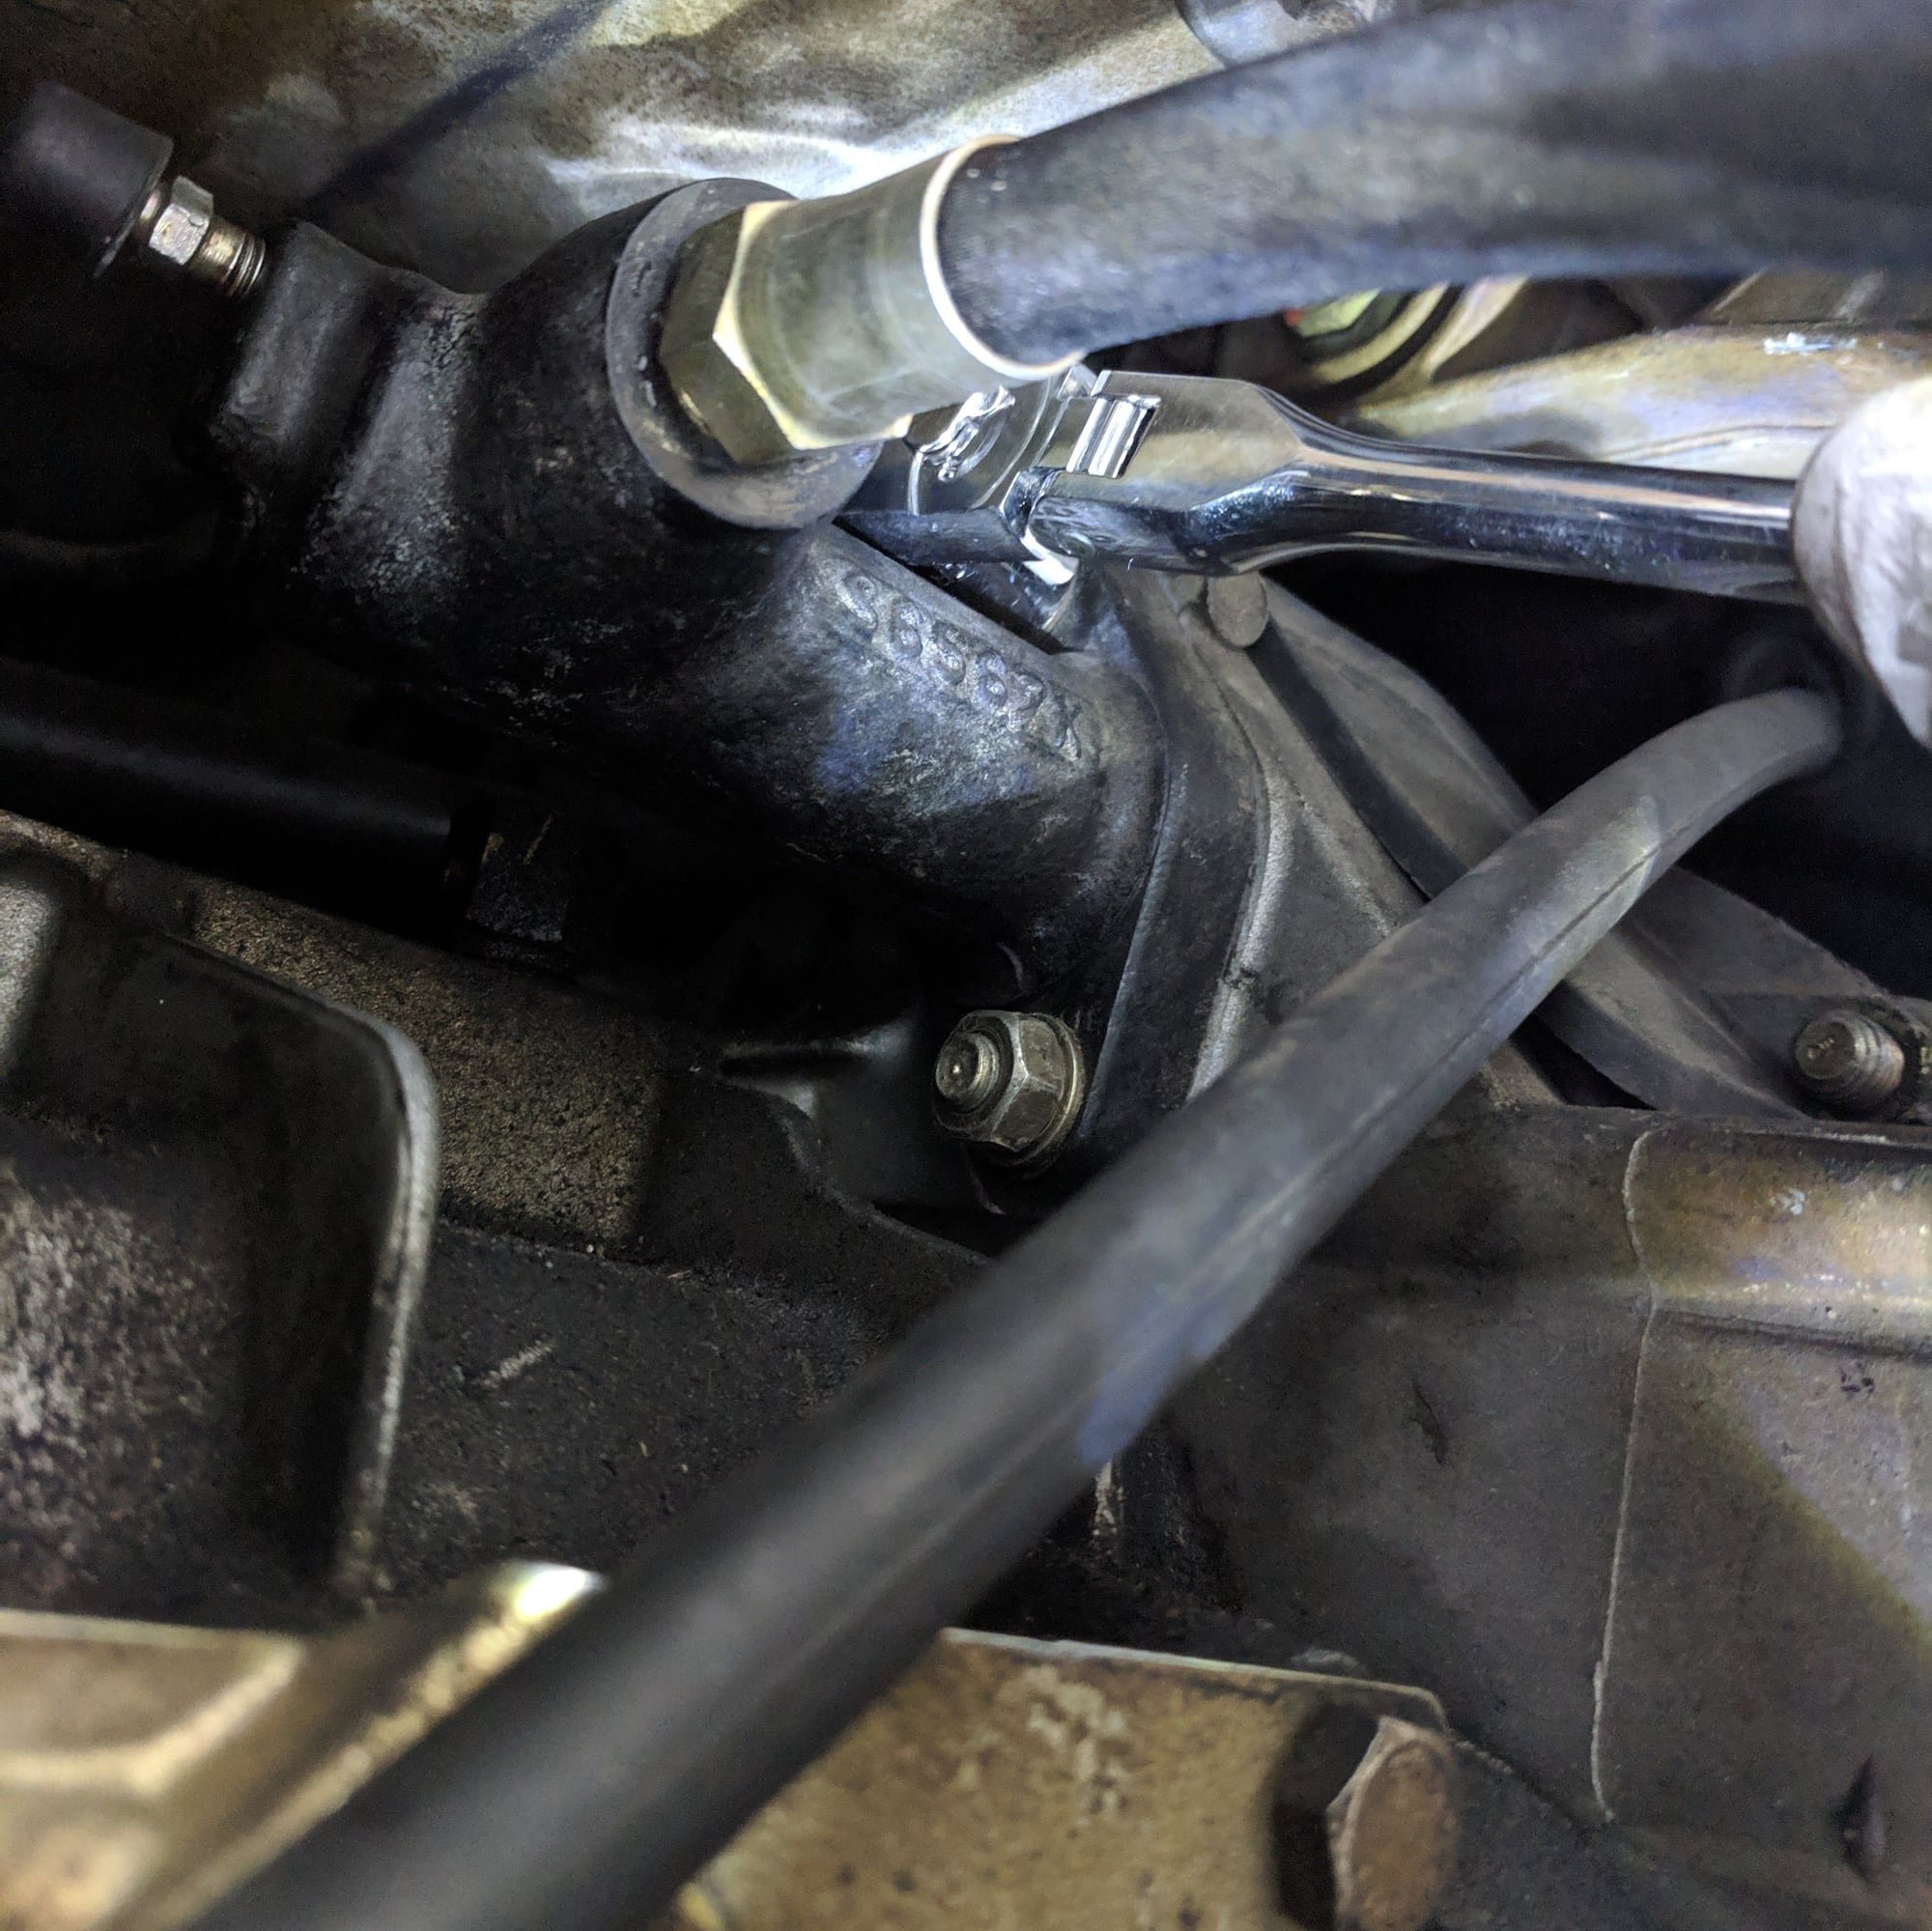
2. Loosen the two nuts that secure the slave cylinder on the transmission
3. Remove the slave cylinder from the rubber hydraulic hose
Done!
Part 2. Install of slave clutch cylinder
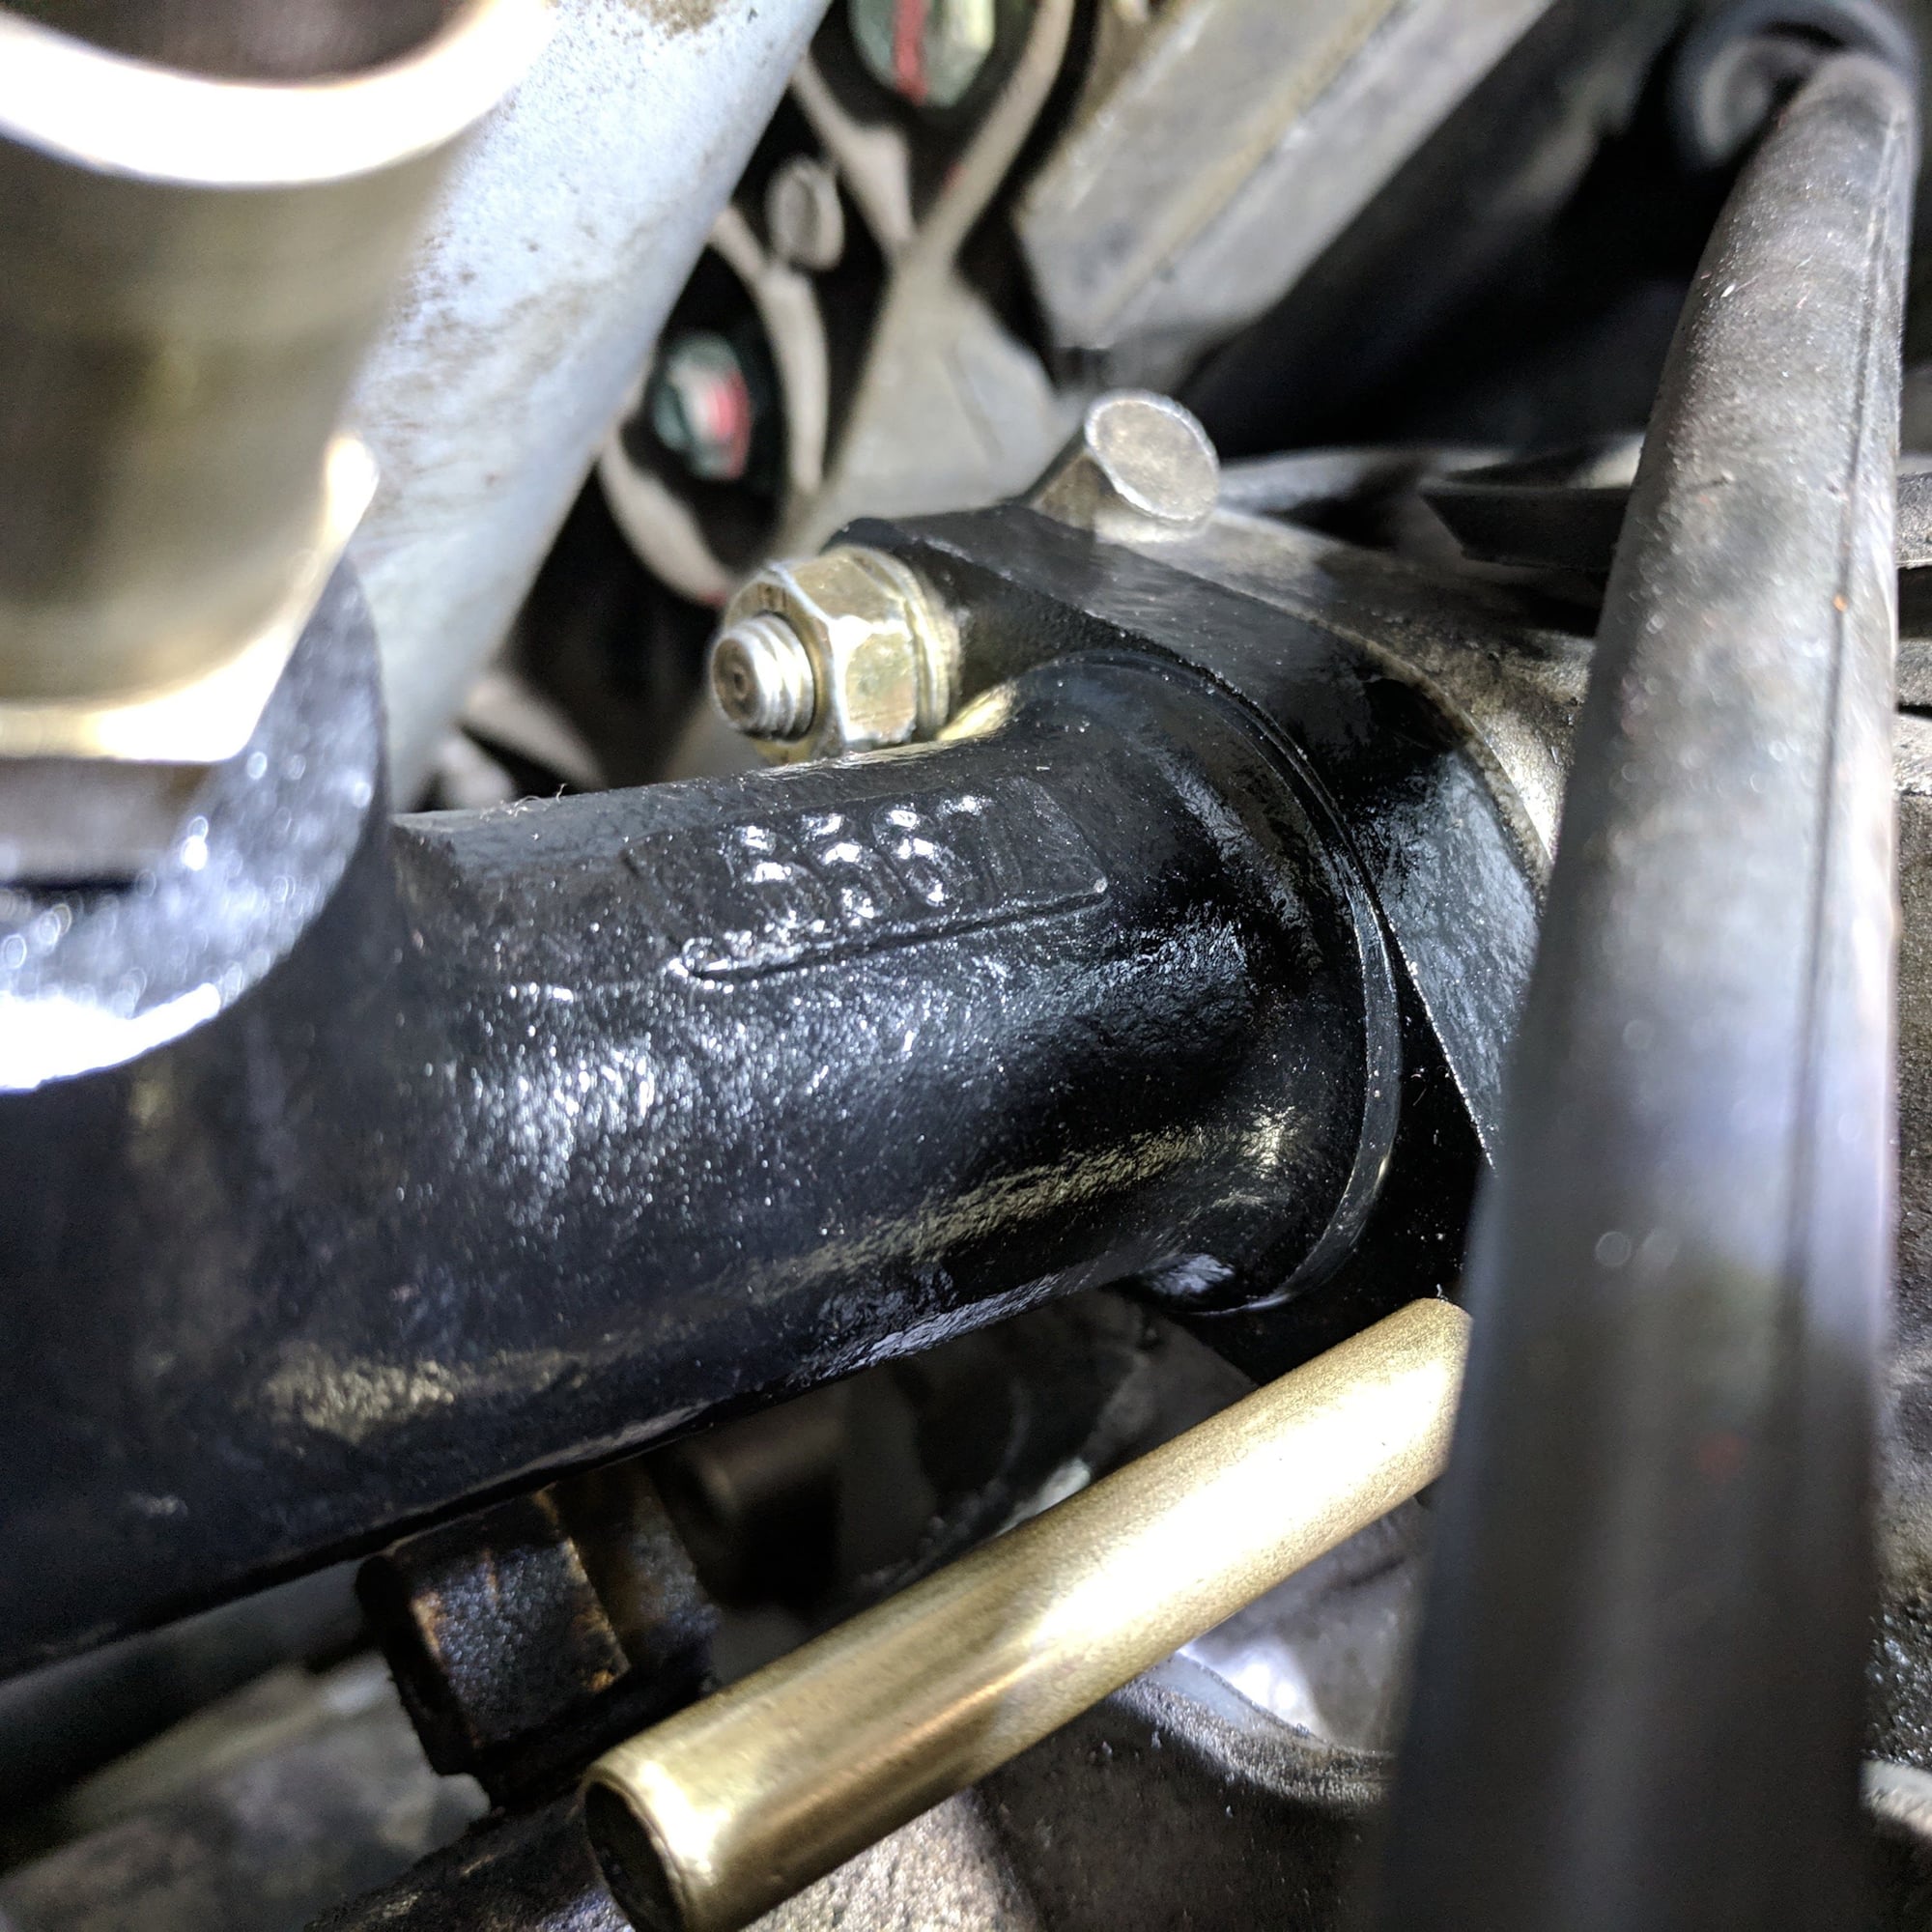
1. Screw new cylinder back on hose. My hose was recently replaced with a recent clutch job so reusing it until the next clutch job
2. Make a 2" guide tube from 11/32 brass tube you can get at Ace Hardware. This is a great tip from @XLR8 post above. The tube acts as a guide to slide the slave on the transmission. Easy job if the transmission is out of the car. Hard to do without the guide as you are doing it by feel in a tight spot with little leverage.
3. Get a q-tip and clean the clutch fork of the old grease and put some new grease in.
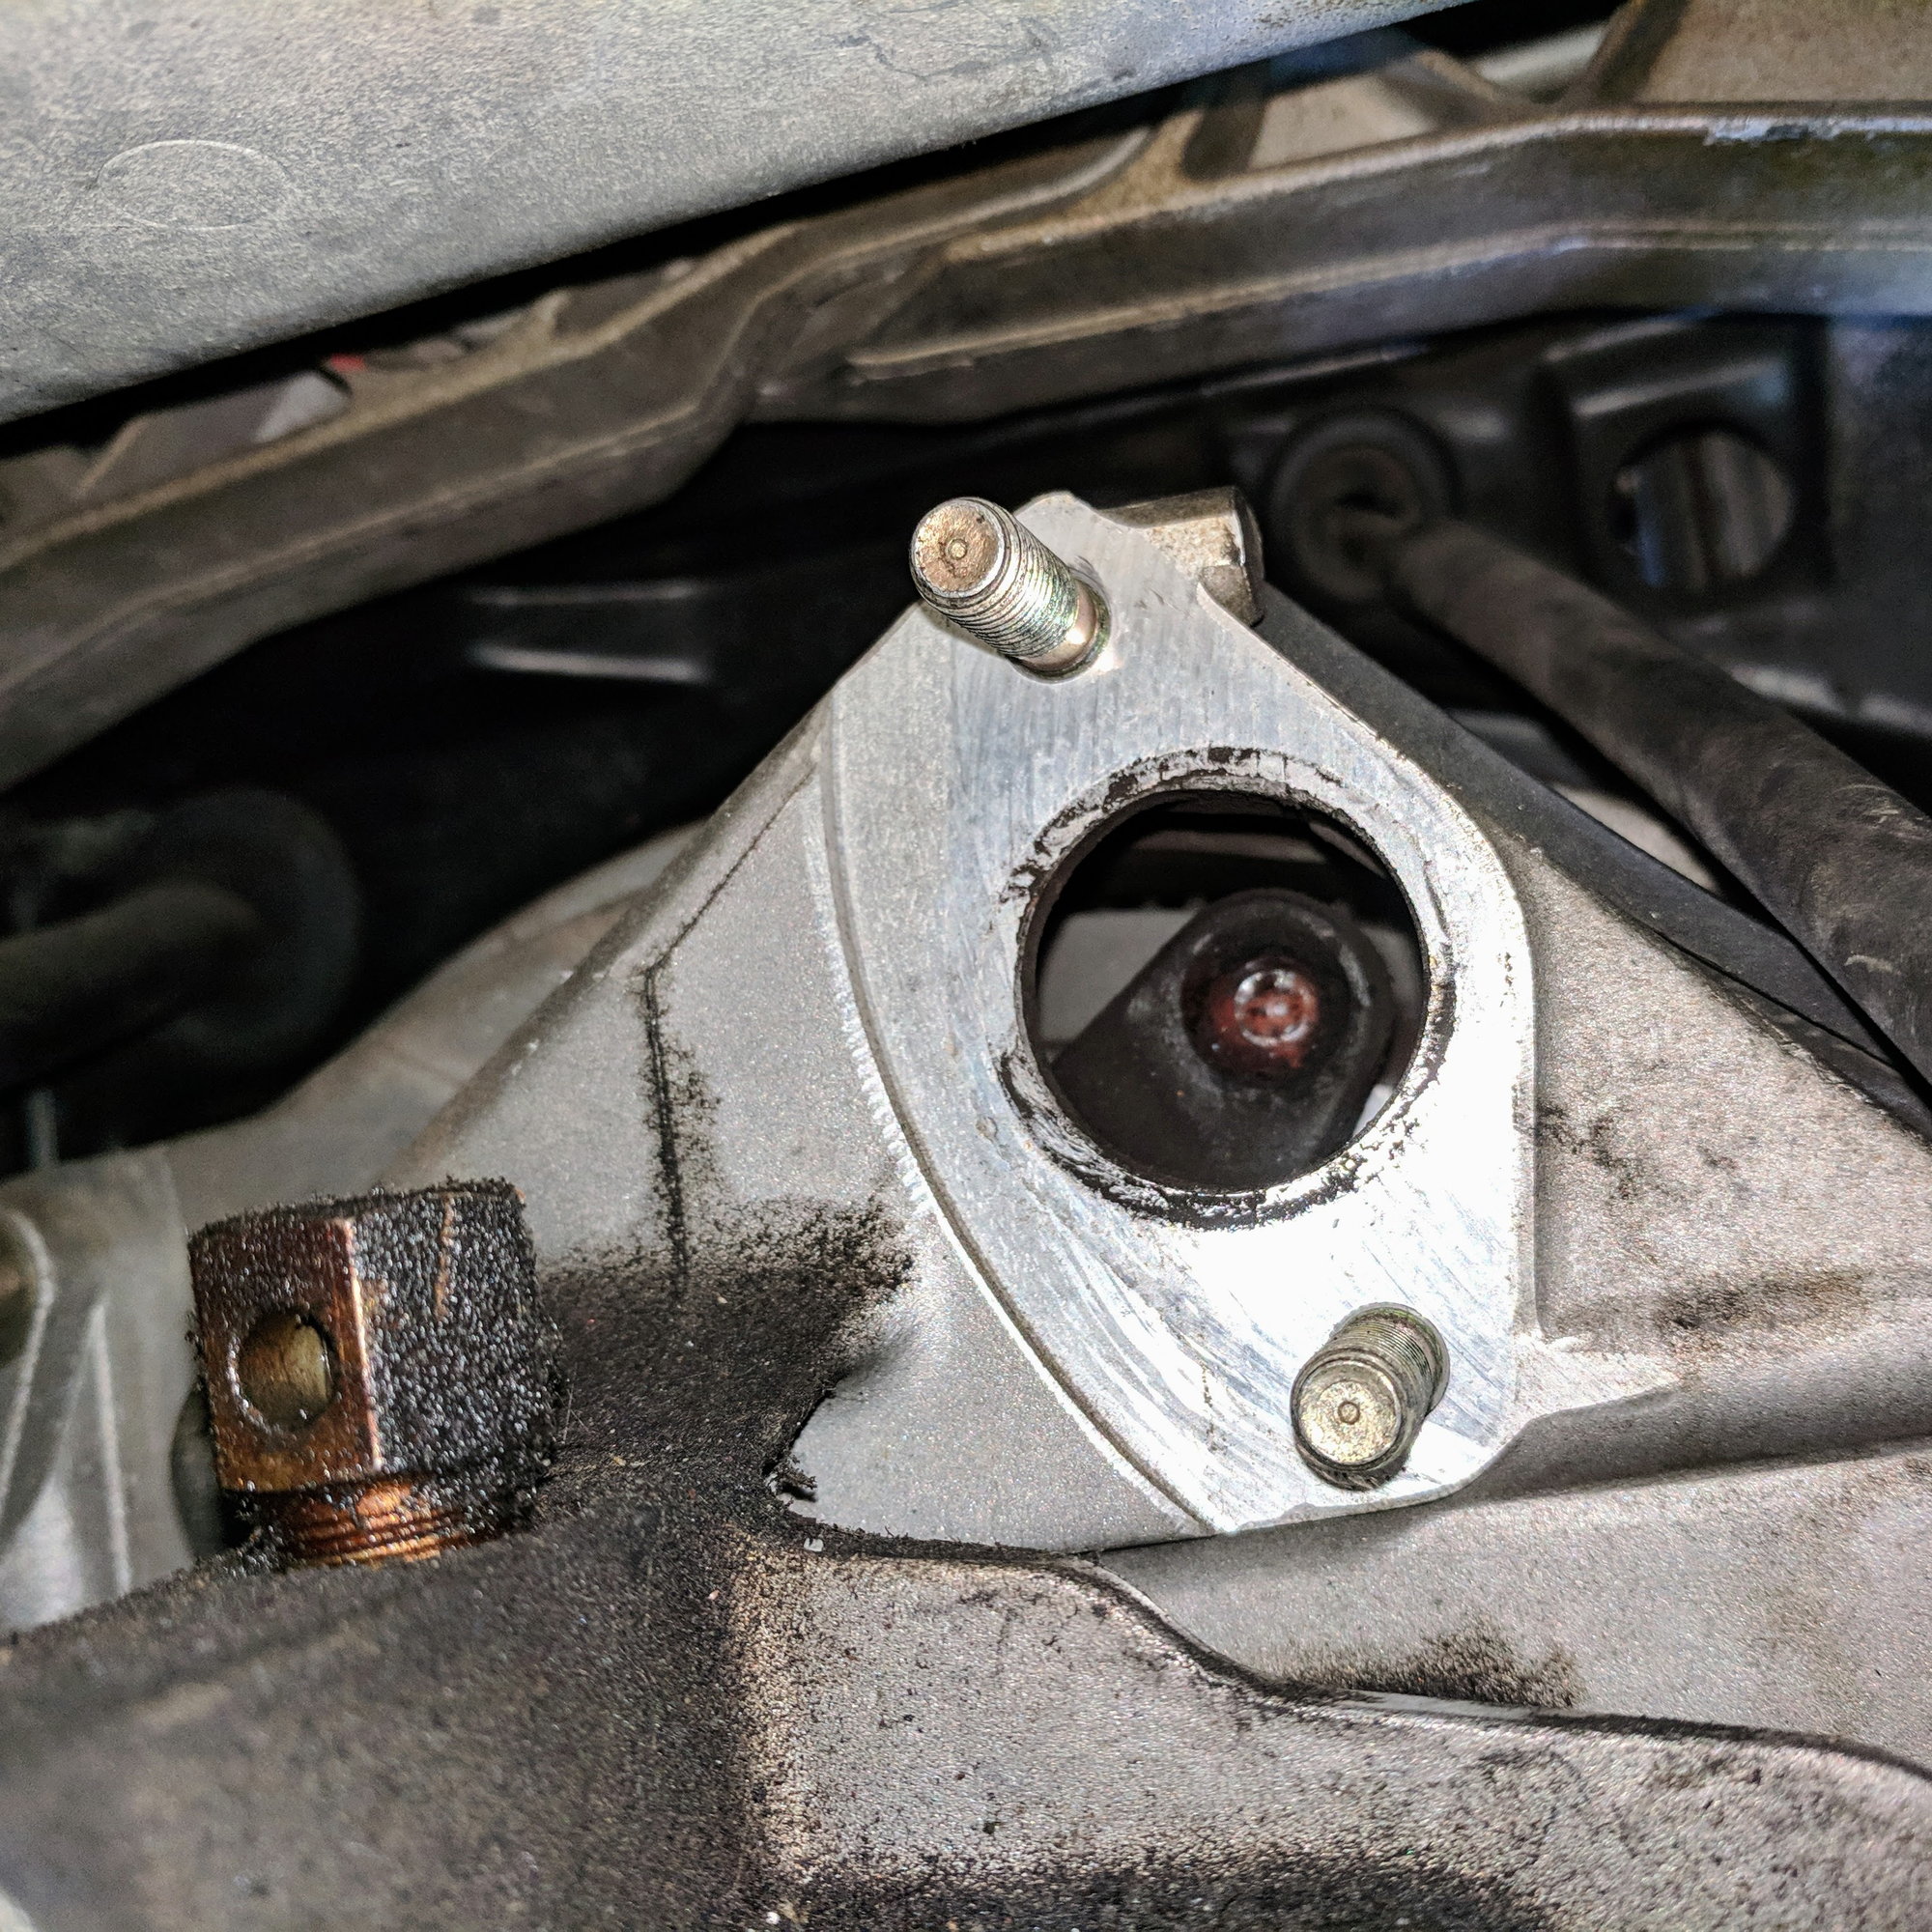
4. Slide the tube on the lower stud, slide the slave cylinder on the tube, and then push it on the transmission with your left hand and hand screw the nut on the top stud with your right hand.
5. Remove the guide tube and and screw on the other nut and tighten appropriately the nuts.
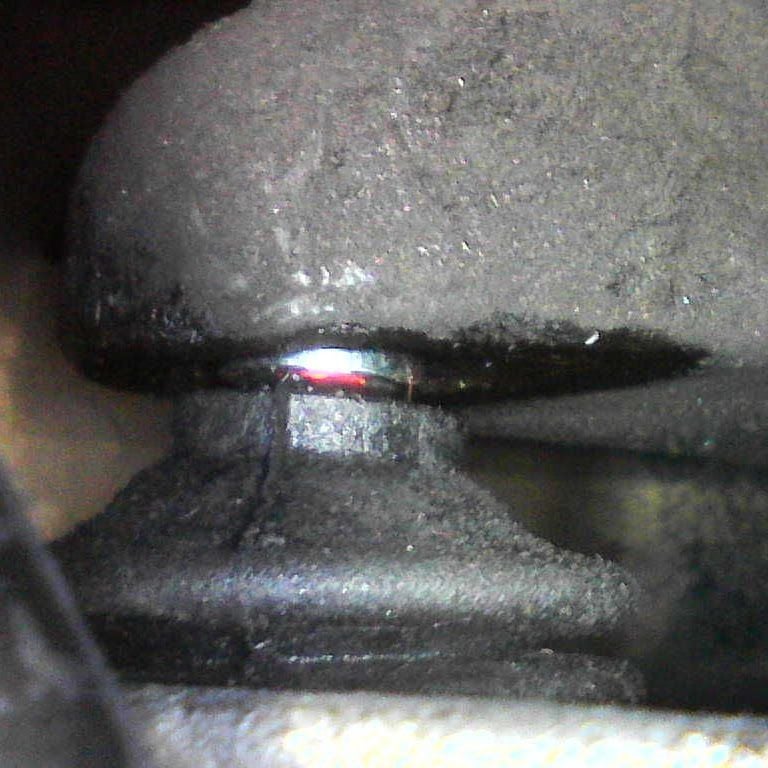
6. Inspect the slave cylinder rod is correctly positioned on the clutch fork. There is small rubber door on the transmission next to the slave cylinder studs you can remove and then using a boroscope you can check you have the slave cylinder installed correctly.
Done!
Part 3. Removal/Install of master cylinder
I bled the slave cylinder and the clutch is now quiet and the clutch pedal no longer sticks. The pedal still had excessive travel/play so it was time to inspect the master cylinder and pedal box.
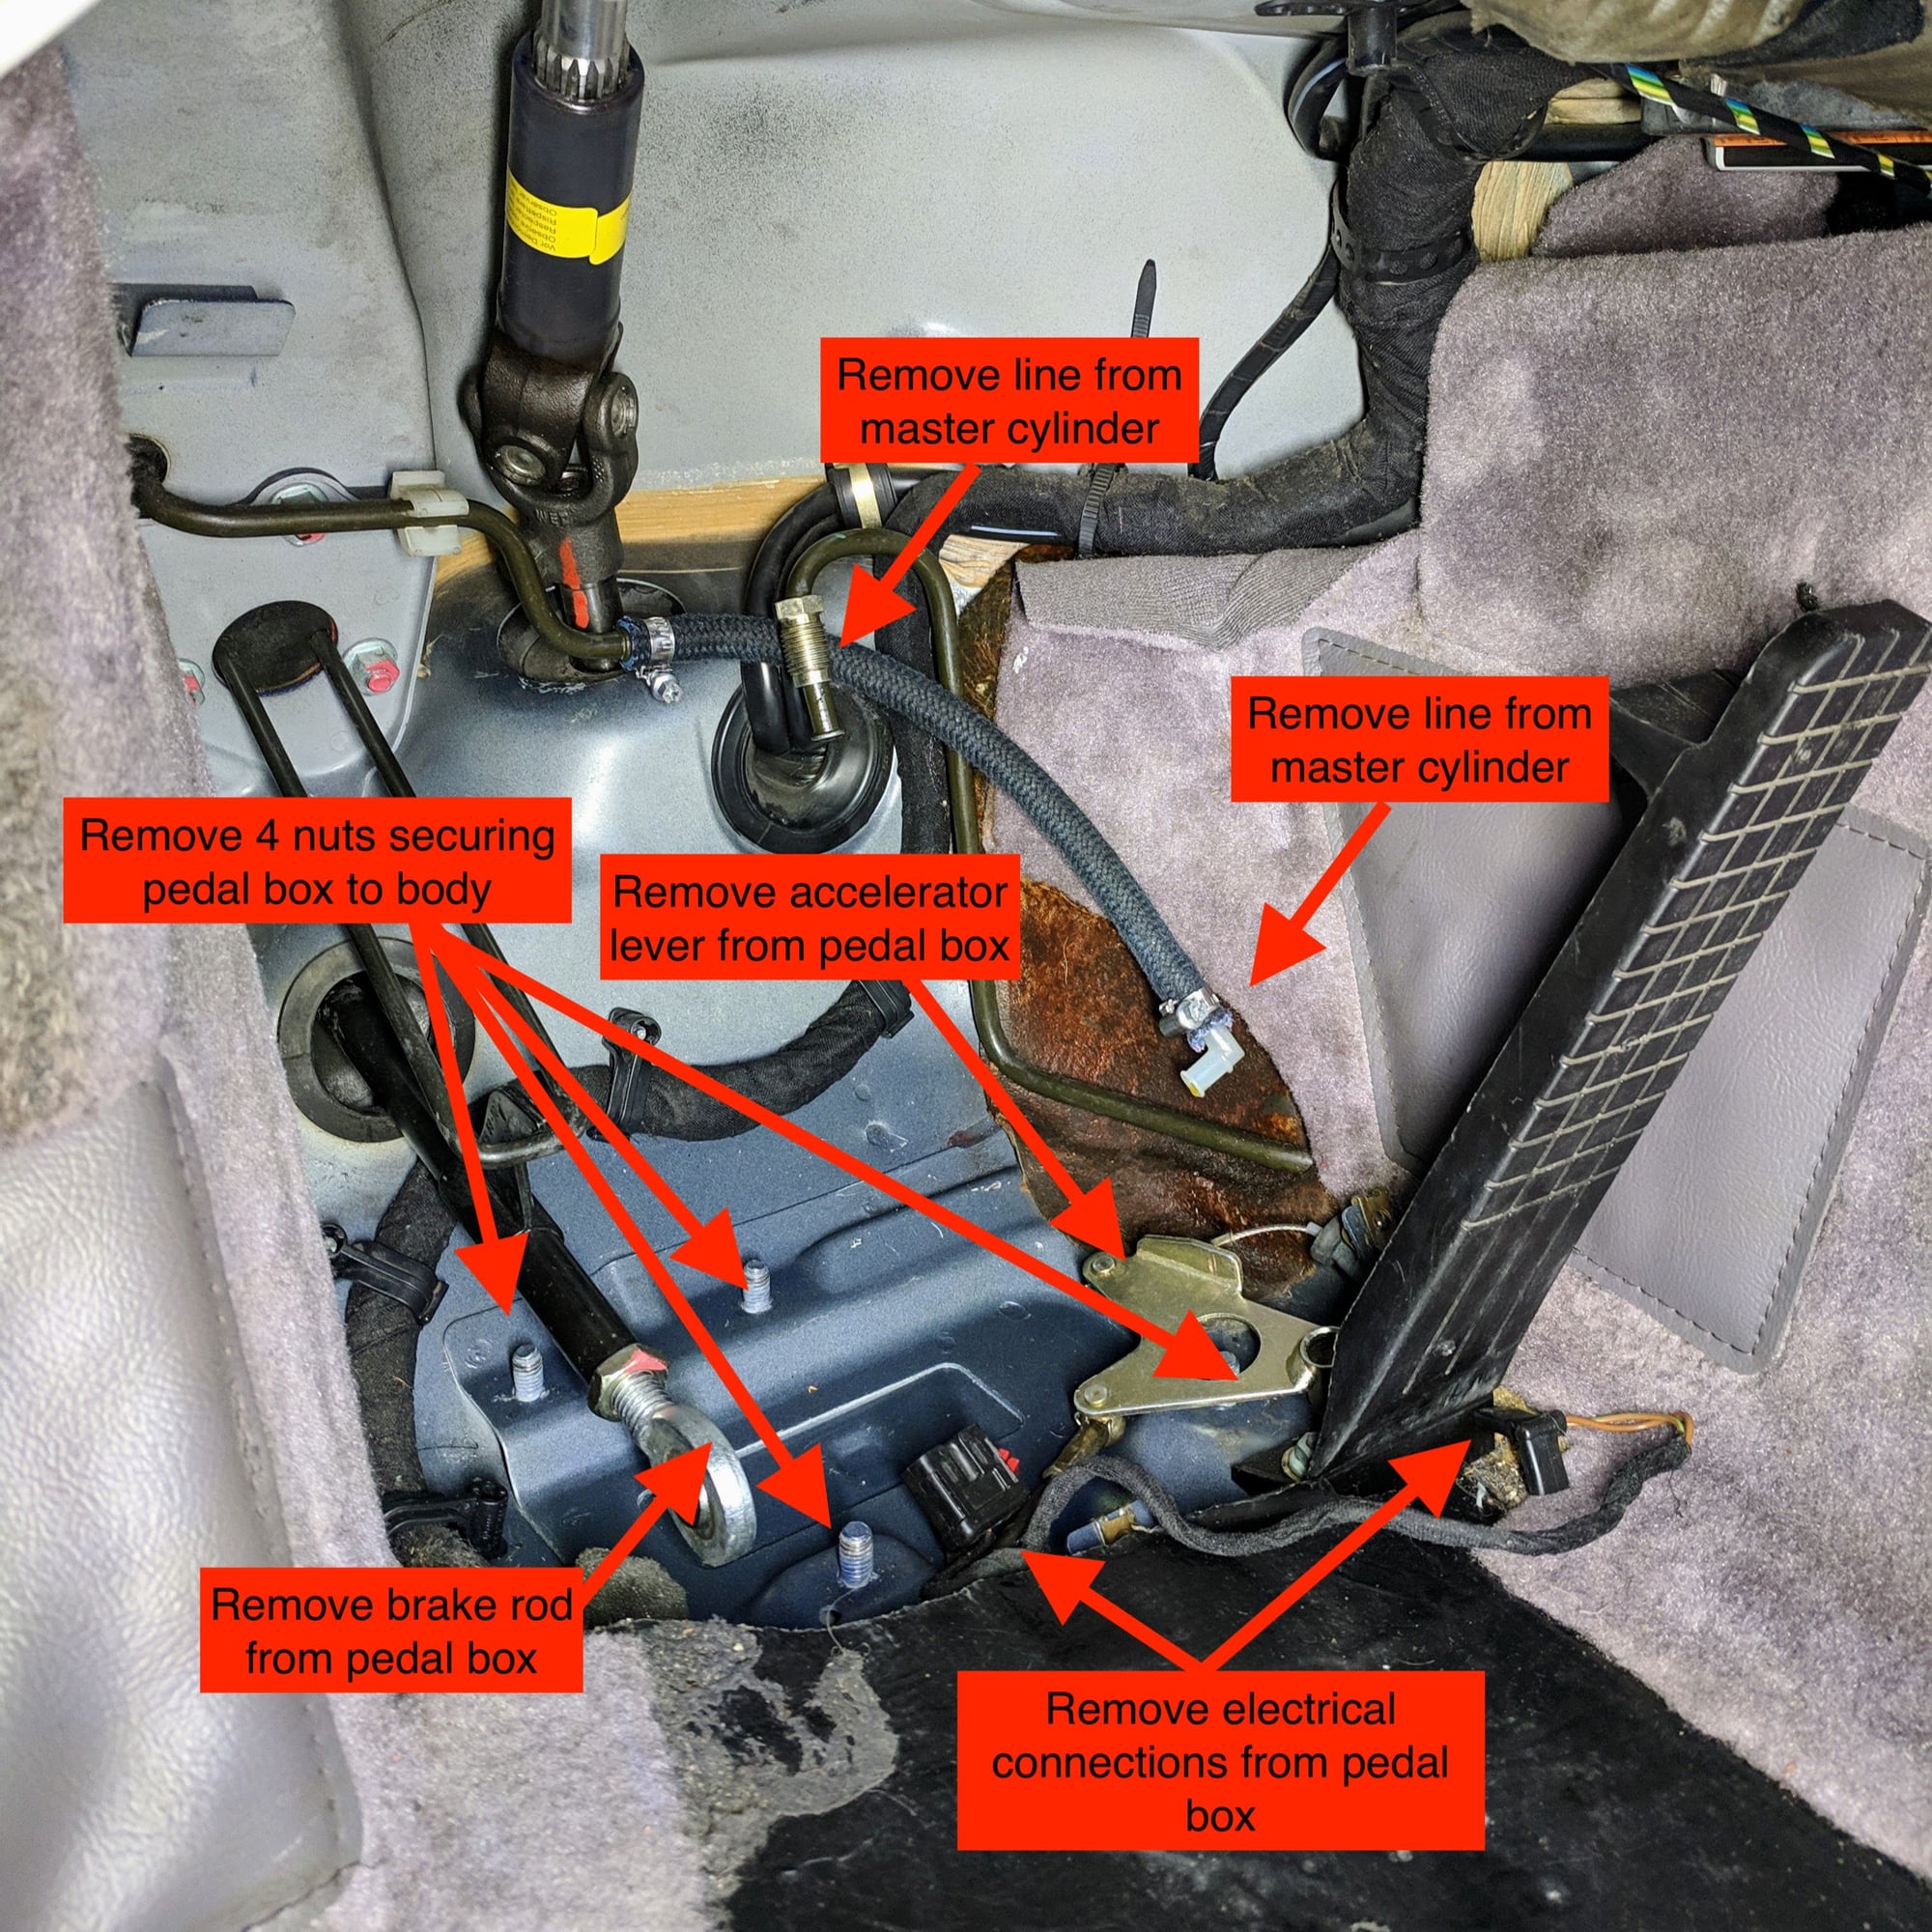
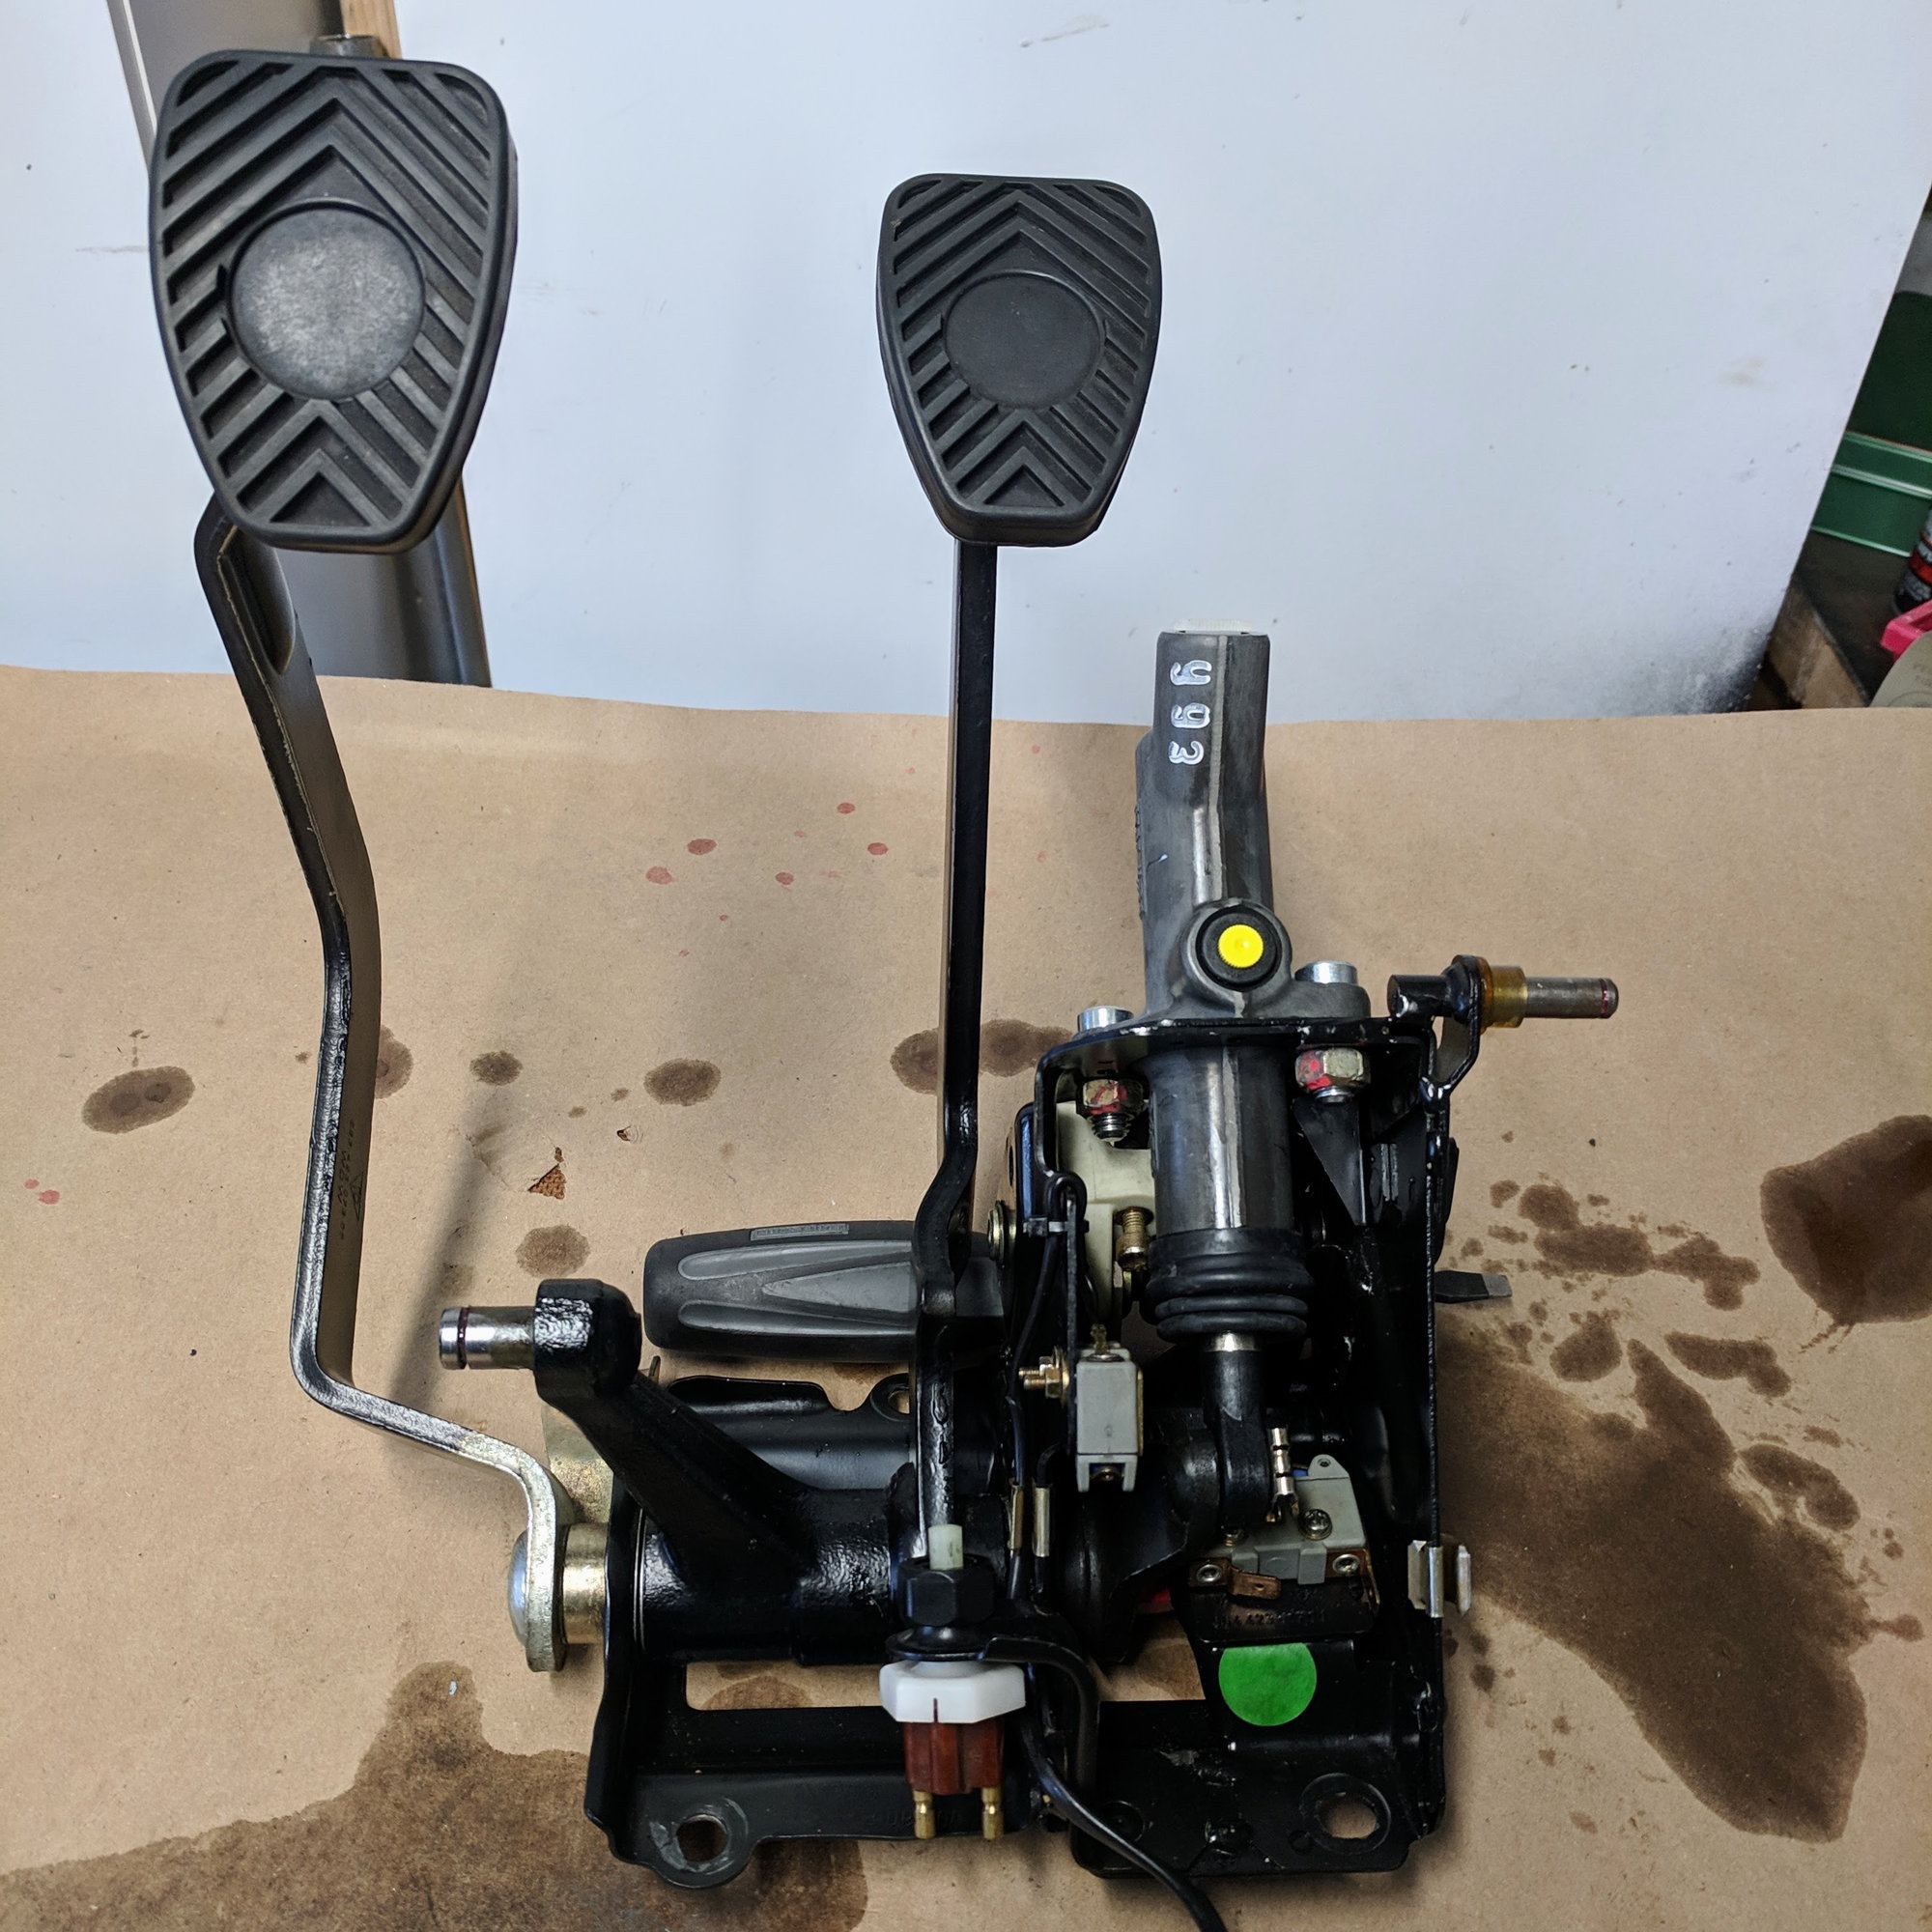
You will need to remove the pedal box from the car to remove the master cylinder. Here are the things you need to disassemble
1. Hydraulic lines connecting to master cylinder
2. Brake rod
3. Accelerator lever
4. Electrical connections
5. 4 nuts securing the pedal box to body
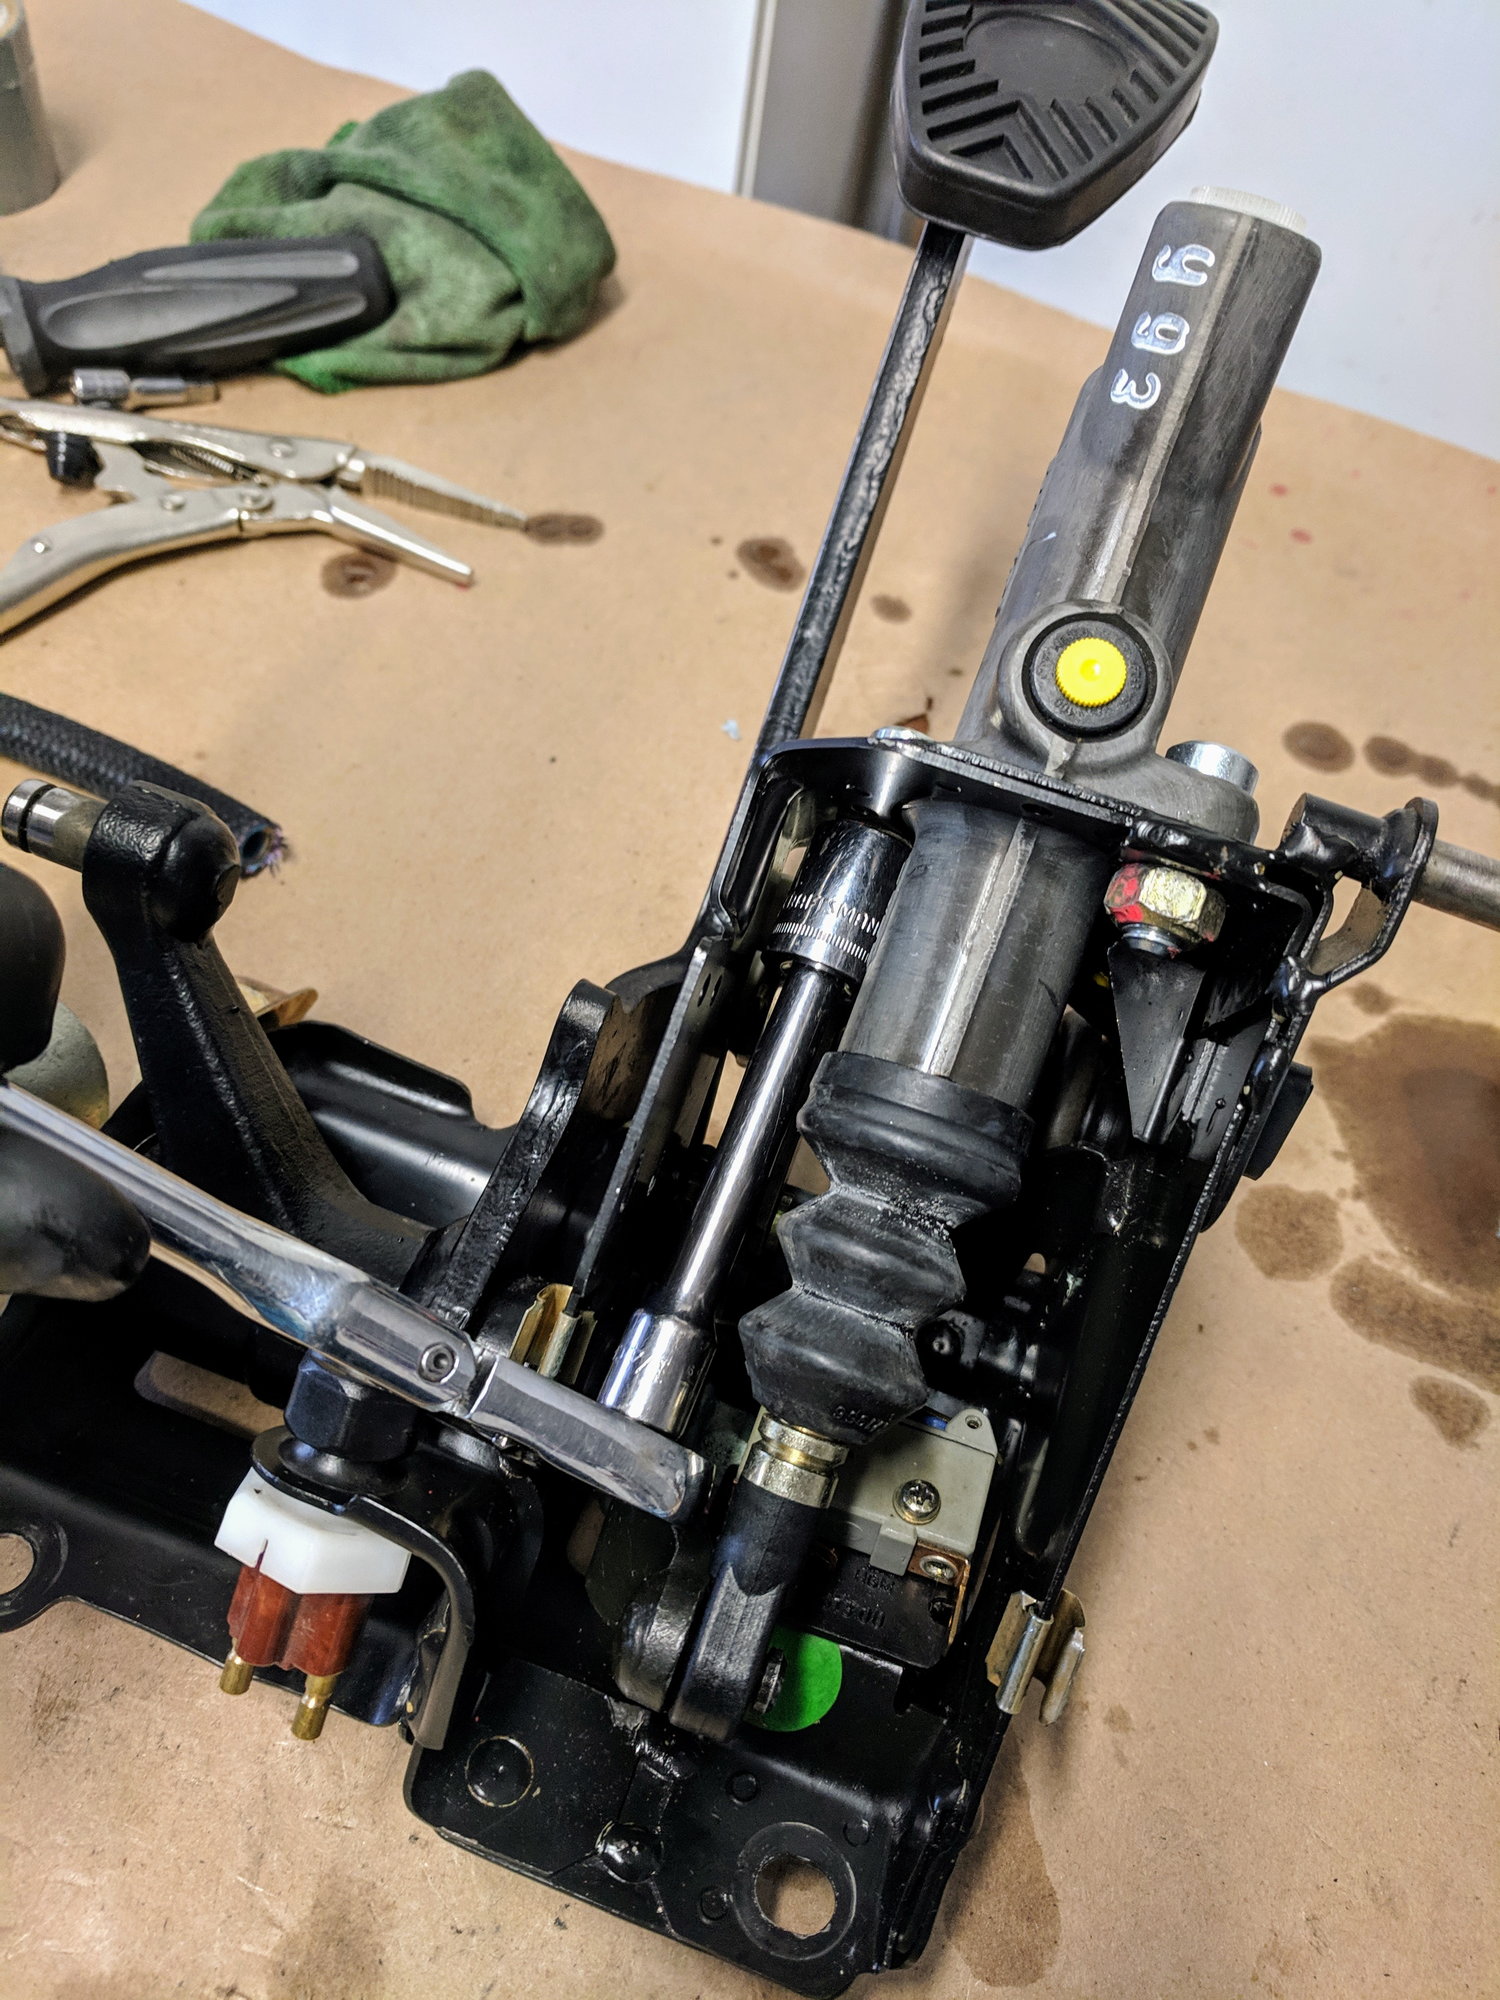
Once the pedal box is out of the car then you can remove the master cylinder easily on your bench. This is a good time to clean and lubricate the moving parts. Picture is out of sequence with the new cylinder already installed...
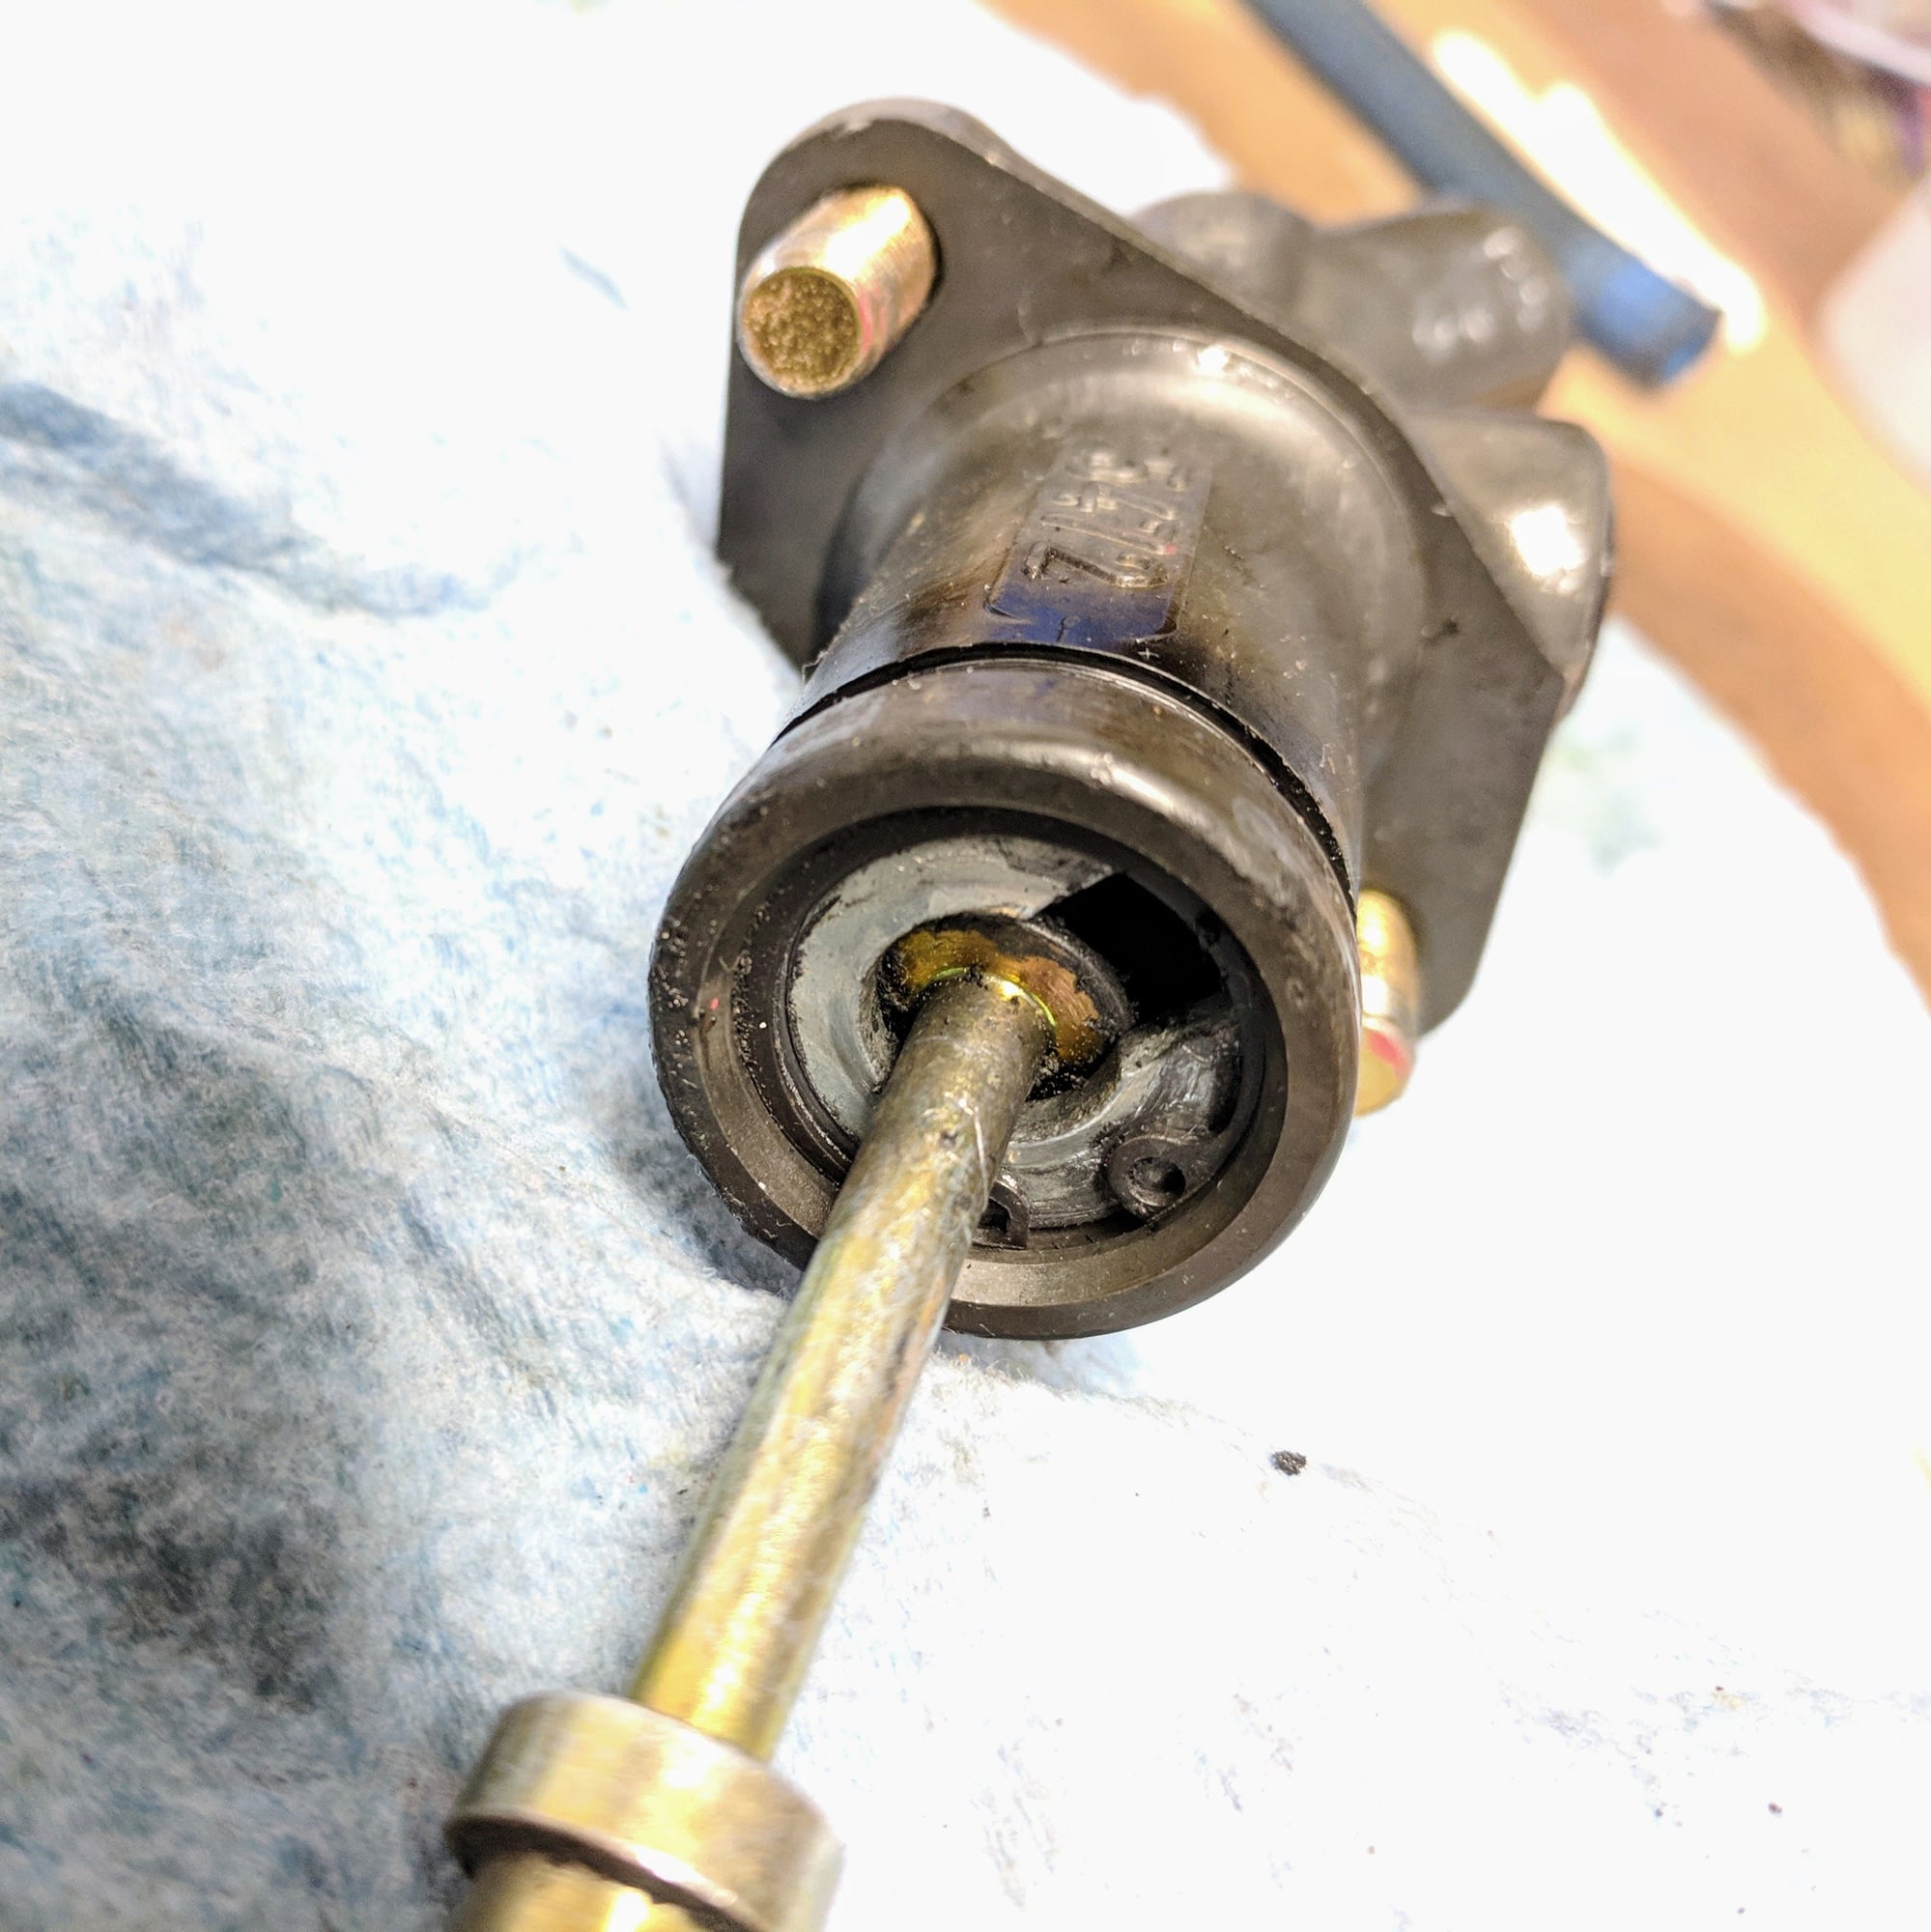
As I suspected, the master cylinder was shot. The rod that actuates the piston was loose and had massive play when compared to the new one.
Clean and lubricated pedal box ready to be installed back into the car.
Good time to clean out the pedal box area. I used compressed air, brush, and a vac to get everything tidy. I also installed a new flexible hose. The old one actually looked fine, but since I was in here touching the lines and likely to not touch it again for the foreseeable future, thought it would be good preventative maintenance. Having parts heaven local makes it super easy for me to pick up random odds and ends for these jobs. They sell the Porsche specific ID hose by the foot.
Buttoning everything back up... almost done!
Done!
Part 4. Bleeding the clutch
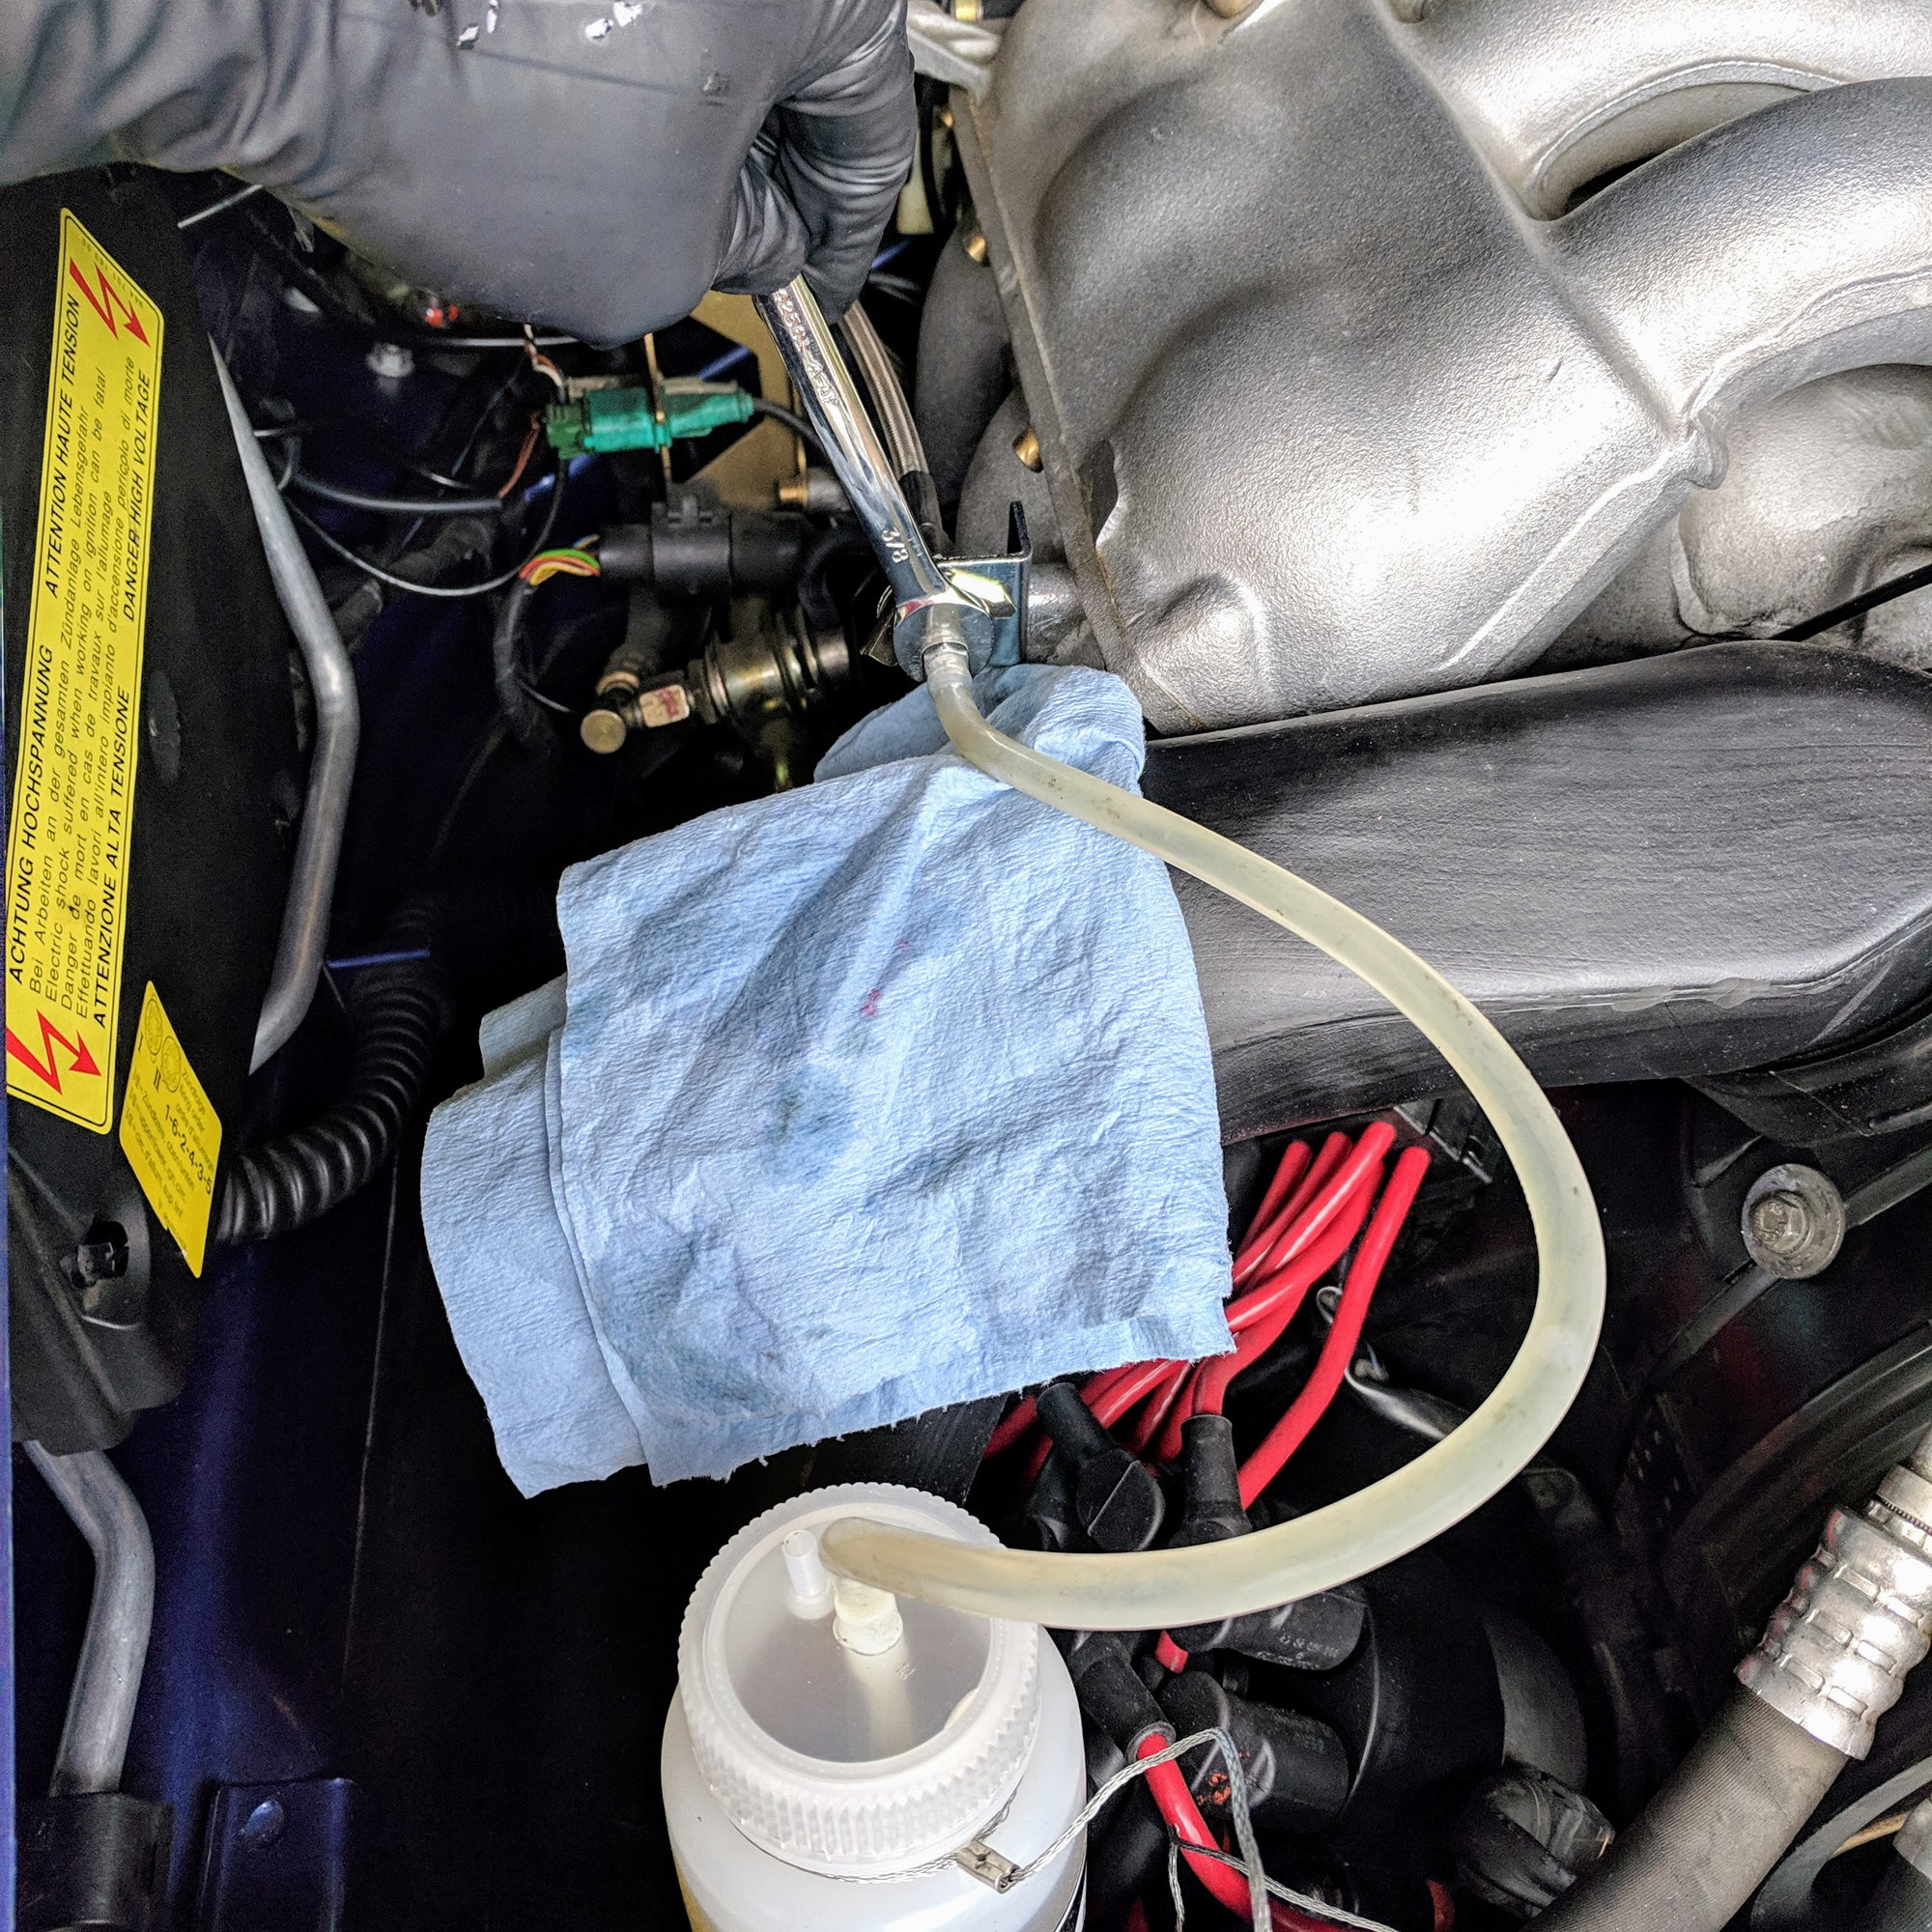
I have a power bleeder and pour the fluid in the bleeder inside it and use it to push new fluid into the fluid reservoir in one shot. The trick I found to bleed the clutch is you need to first open the bleed screw, then use your hand to push the clutch pedal to the ground, then flush the clutch line with new fluid until you don�t see any bubbles. It took about a 1L container of Super ATE to get all of the bubbles out and top off the fluid reservoir.
I really despise this job given the bleeder valve is under the car tucked away, so next up is to move the bleed valve to the engine bay and do clutch bleeds standing up! Thanks @ @AOW162435 for the idea and parts list.
 03-15-2019, 12:30 AM