When you click on links to various merchants on this site and make a purchase, this can result in this site earning a commission. Affiliate programs and affiliations include, but are not limited to, the eBay Partner Network.
No no, I mean attaching a ferrous plate on the back of the phone, over the receiving coil, will disrupt the coupling between the transmitting coil of the charger and the receiving coil in the phone. Four generations of Samsung Galaxy phones and now the iPhone have glass backs to allow wireless charging.
You can mount the ferrous plate to the back of a case that you use when driving the car, which easily solves that problem. There are also cases available that have enough metal in them to be magnetically attracted to the mount, though not as strongly as the ferrous plate.
By the way, I have a Samsung Galaxy S8 and it appears to have a plastic back, though perhaps I'm mistaken.
Big Thanks to ATLBond! Re: Modified Rennline Cell Phone Mount
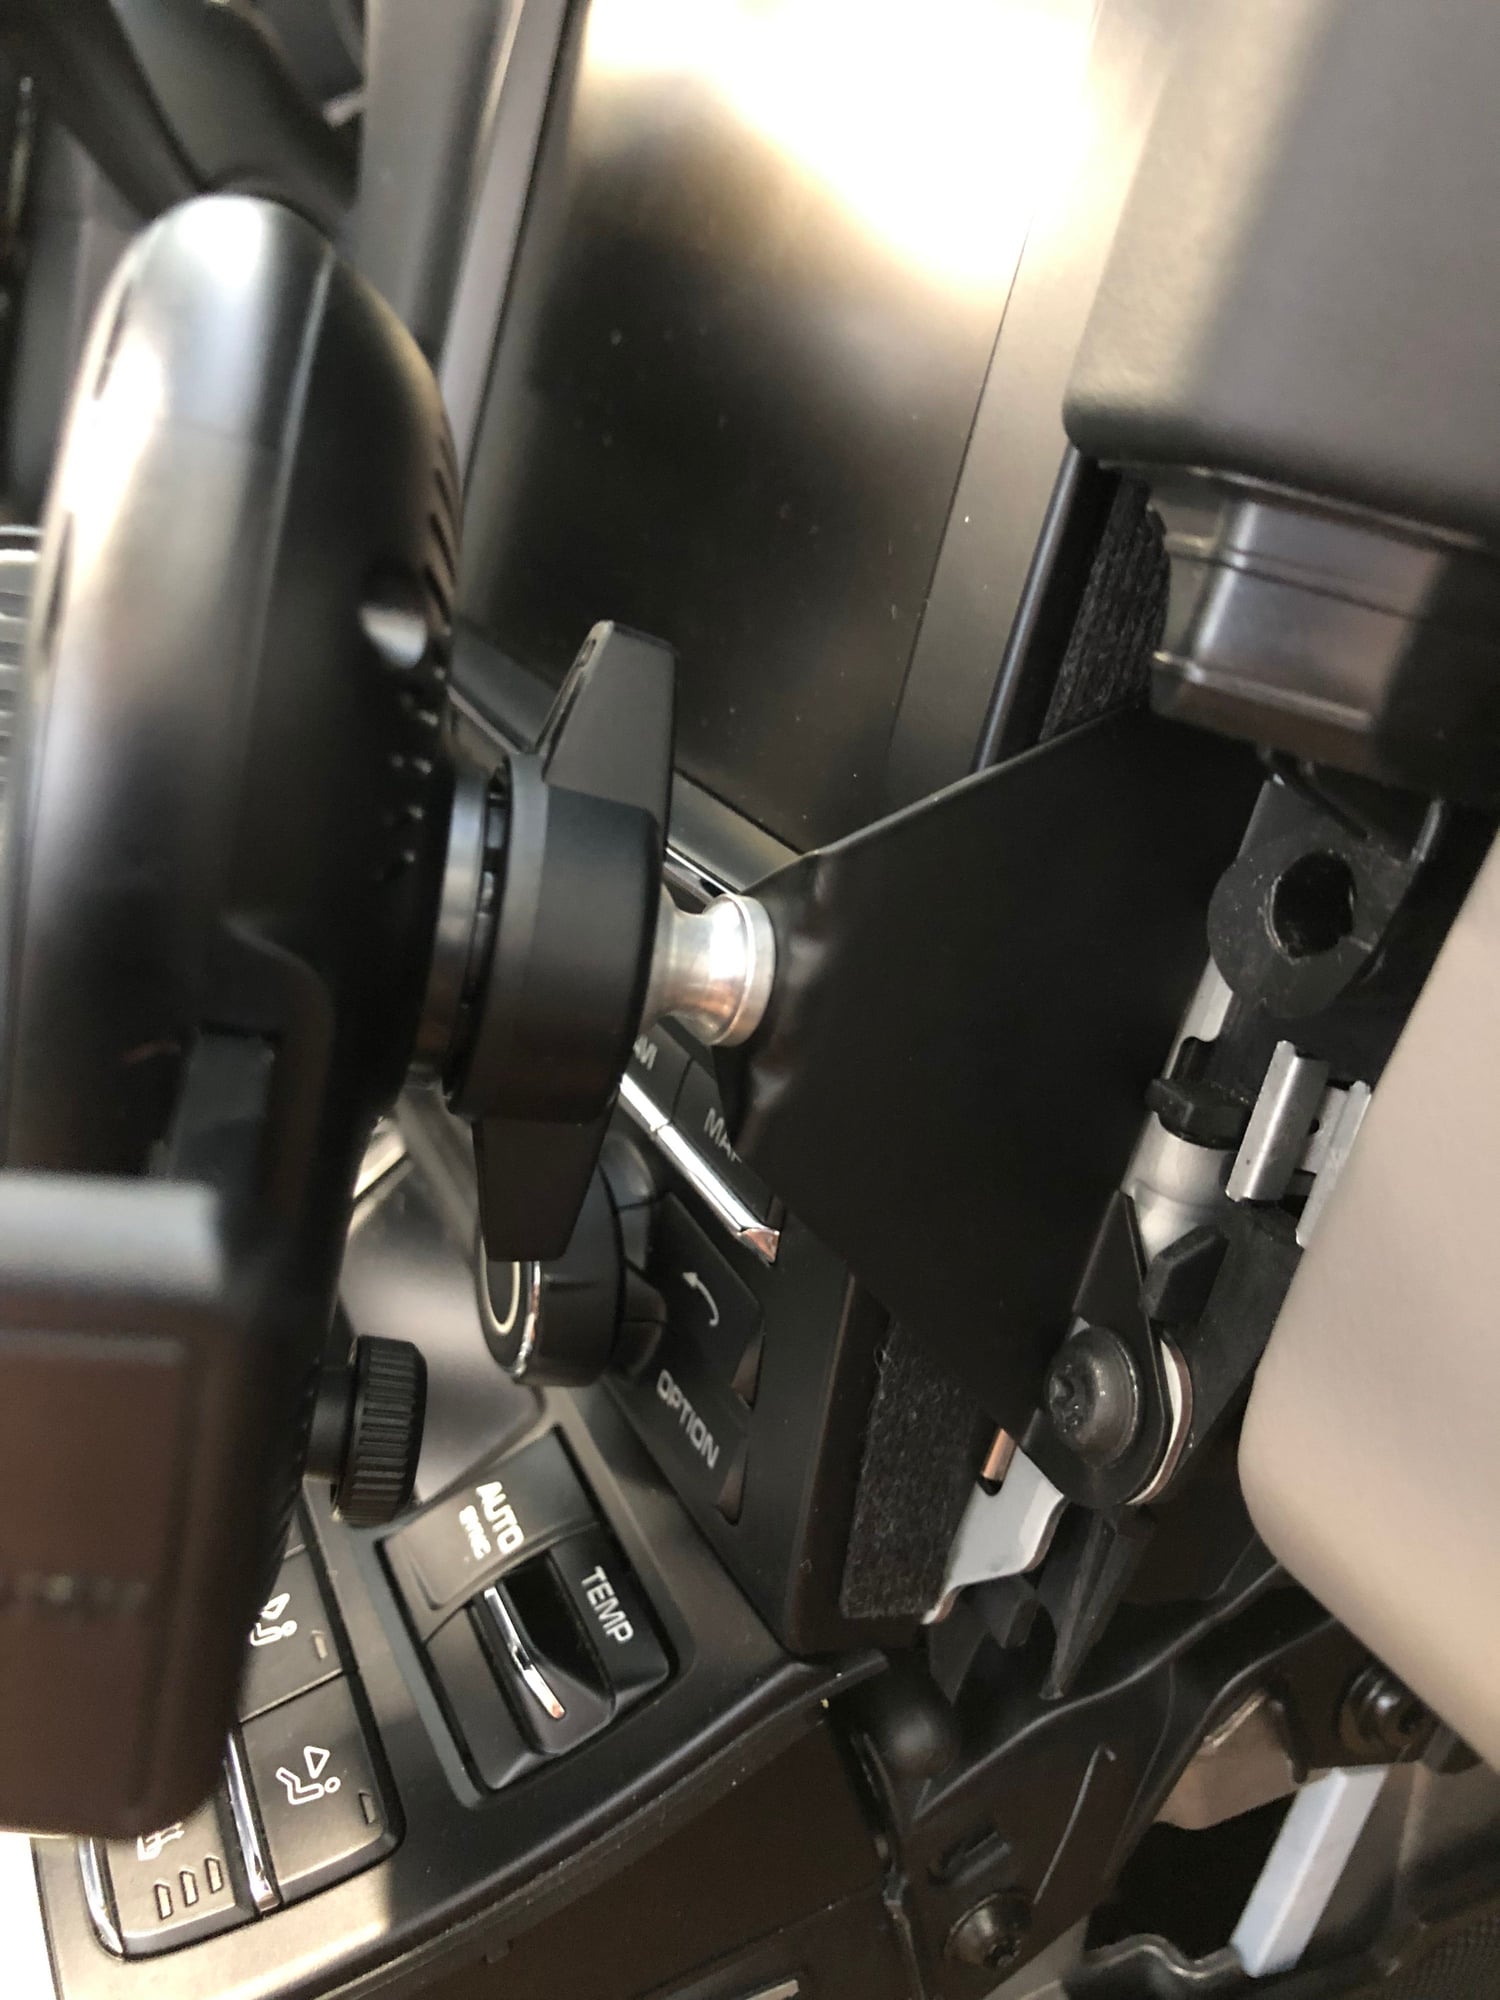
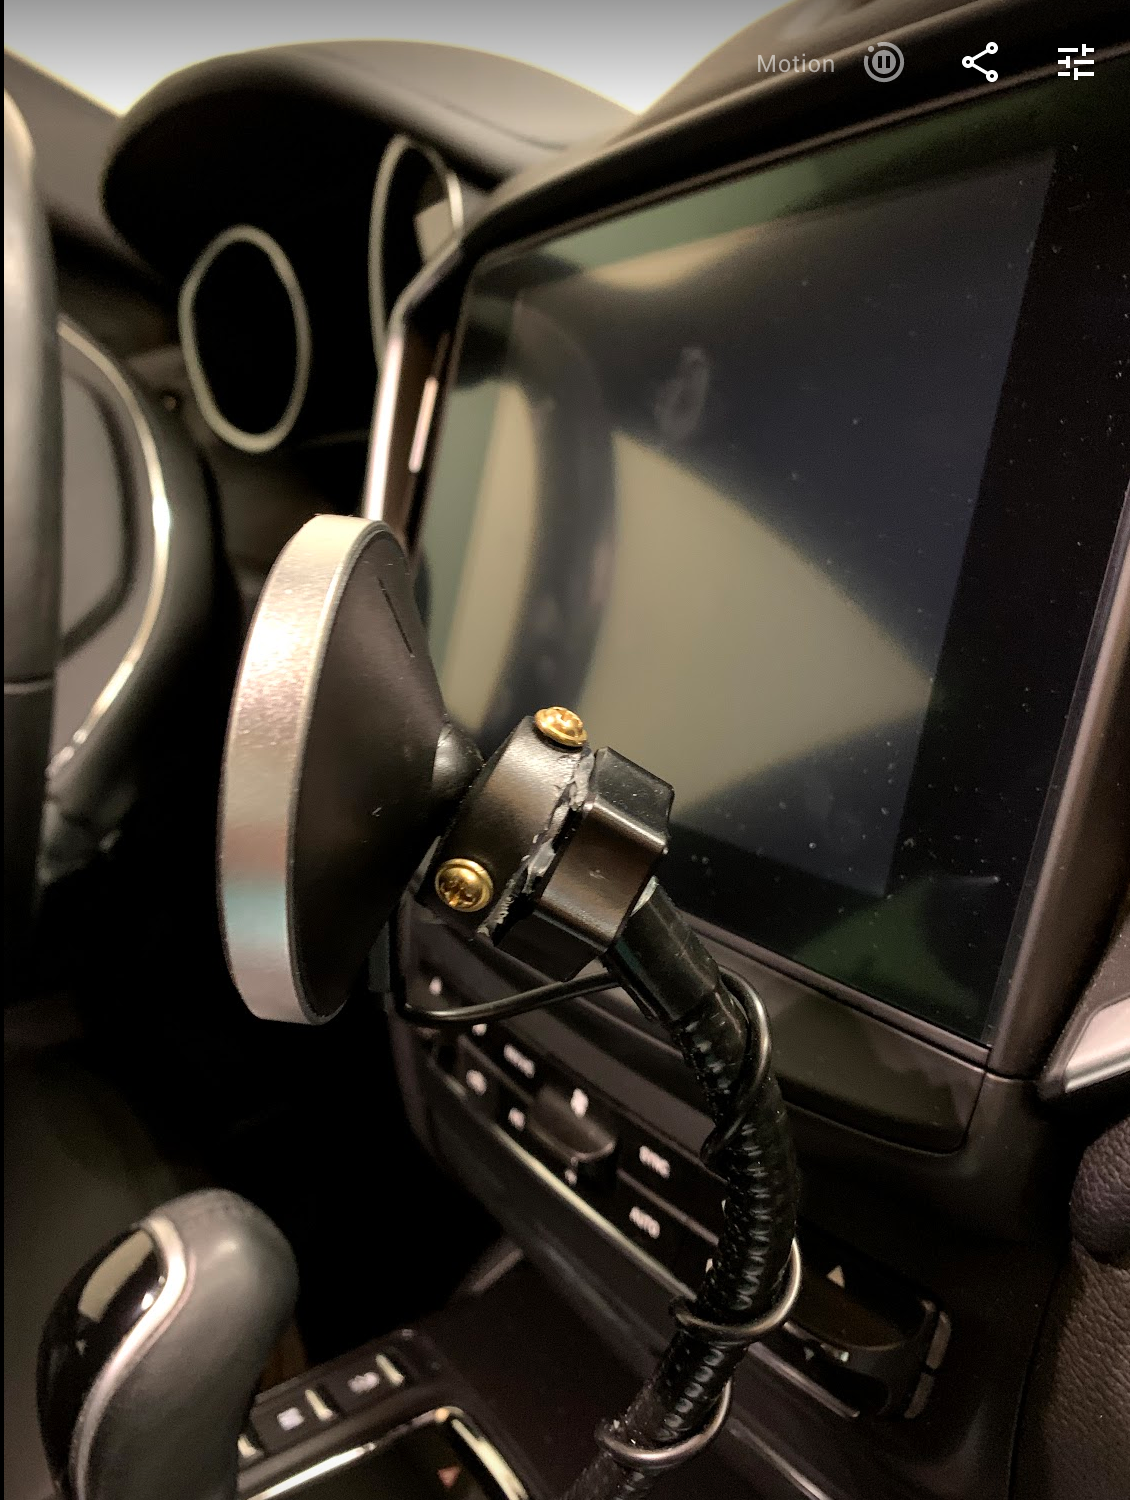
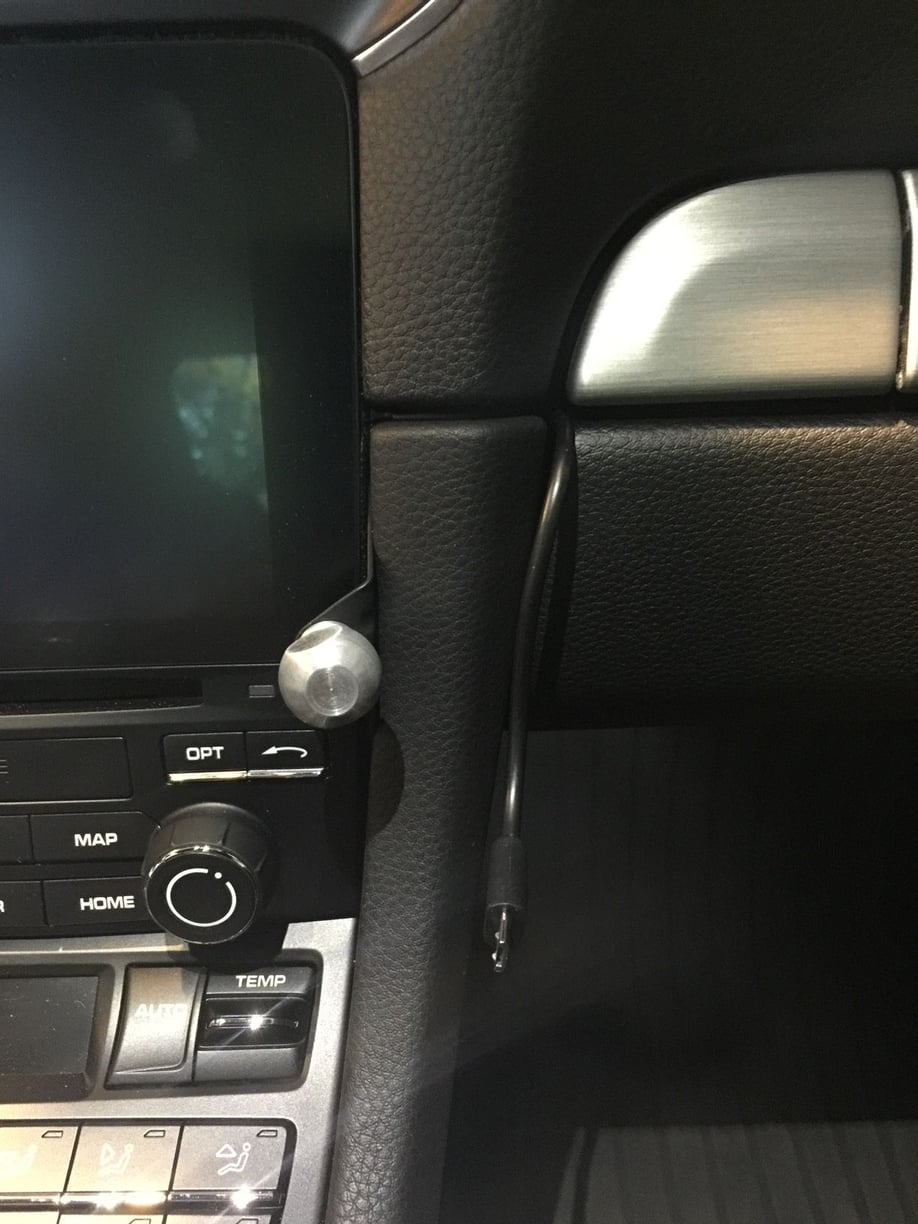
I had installed a Rennline cellphone mount which I coupled with an Ottie Qi wireless charging cradle and loved the convenience of quickly mounting and un-mounting the phone as well as easy wireless charging. The bracket supplied by Rennline places the pivot ball over the PCM which allows the phone to block the right side of the PCM display (this happens even if you use the magnetic mount they provide as part of the kit). With the help of ATLBond who in turn was provided a design by ValveFloat991, I sourced an alternative mounting bracket which places the pivot ball to the right and also higher up and now the phone cradle no longer blocks the right side controls nor the right edge of the PCM display. It's too bad that the Rennline mount does not come this way from the start.
Notice the blocked out right side controls as well as the right edge of the PCM) with the supplied Rennline bracket.
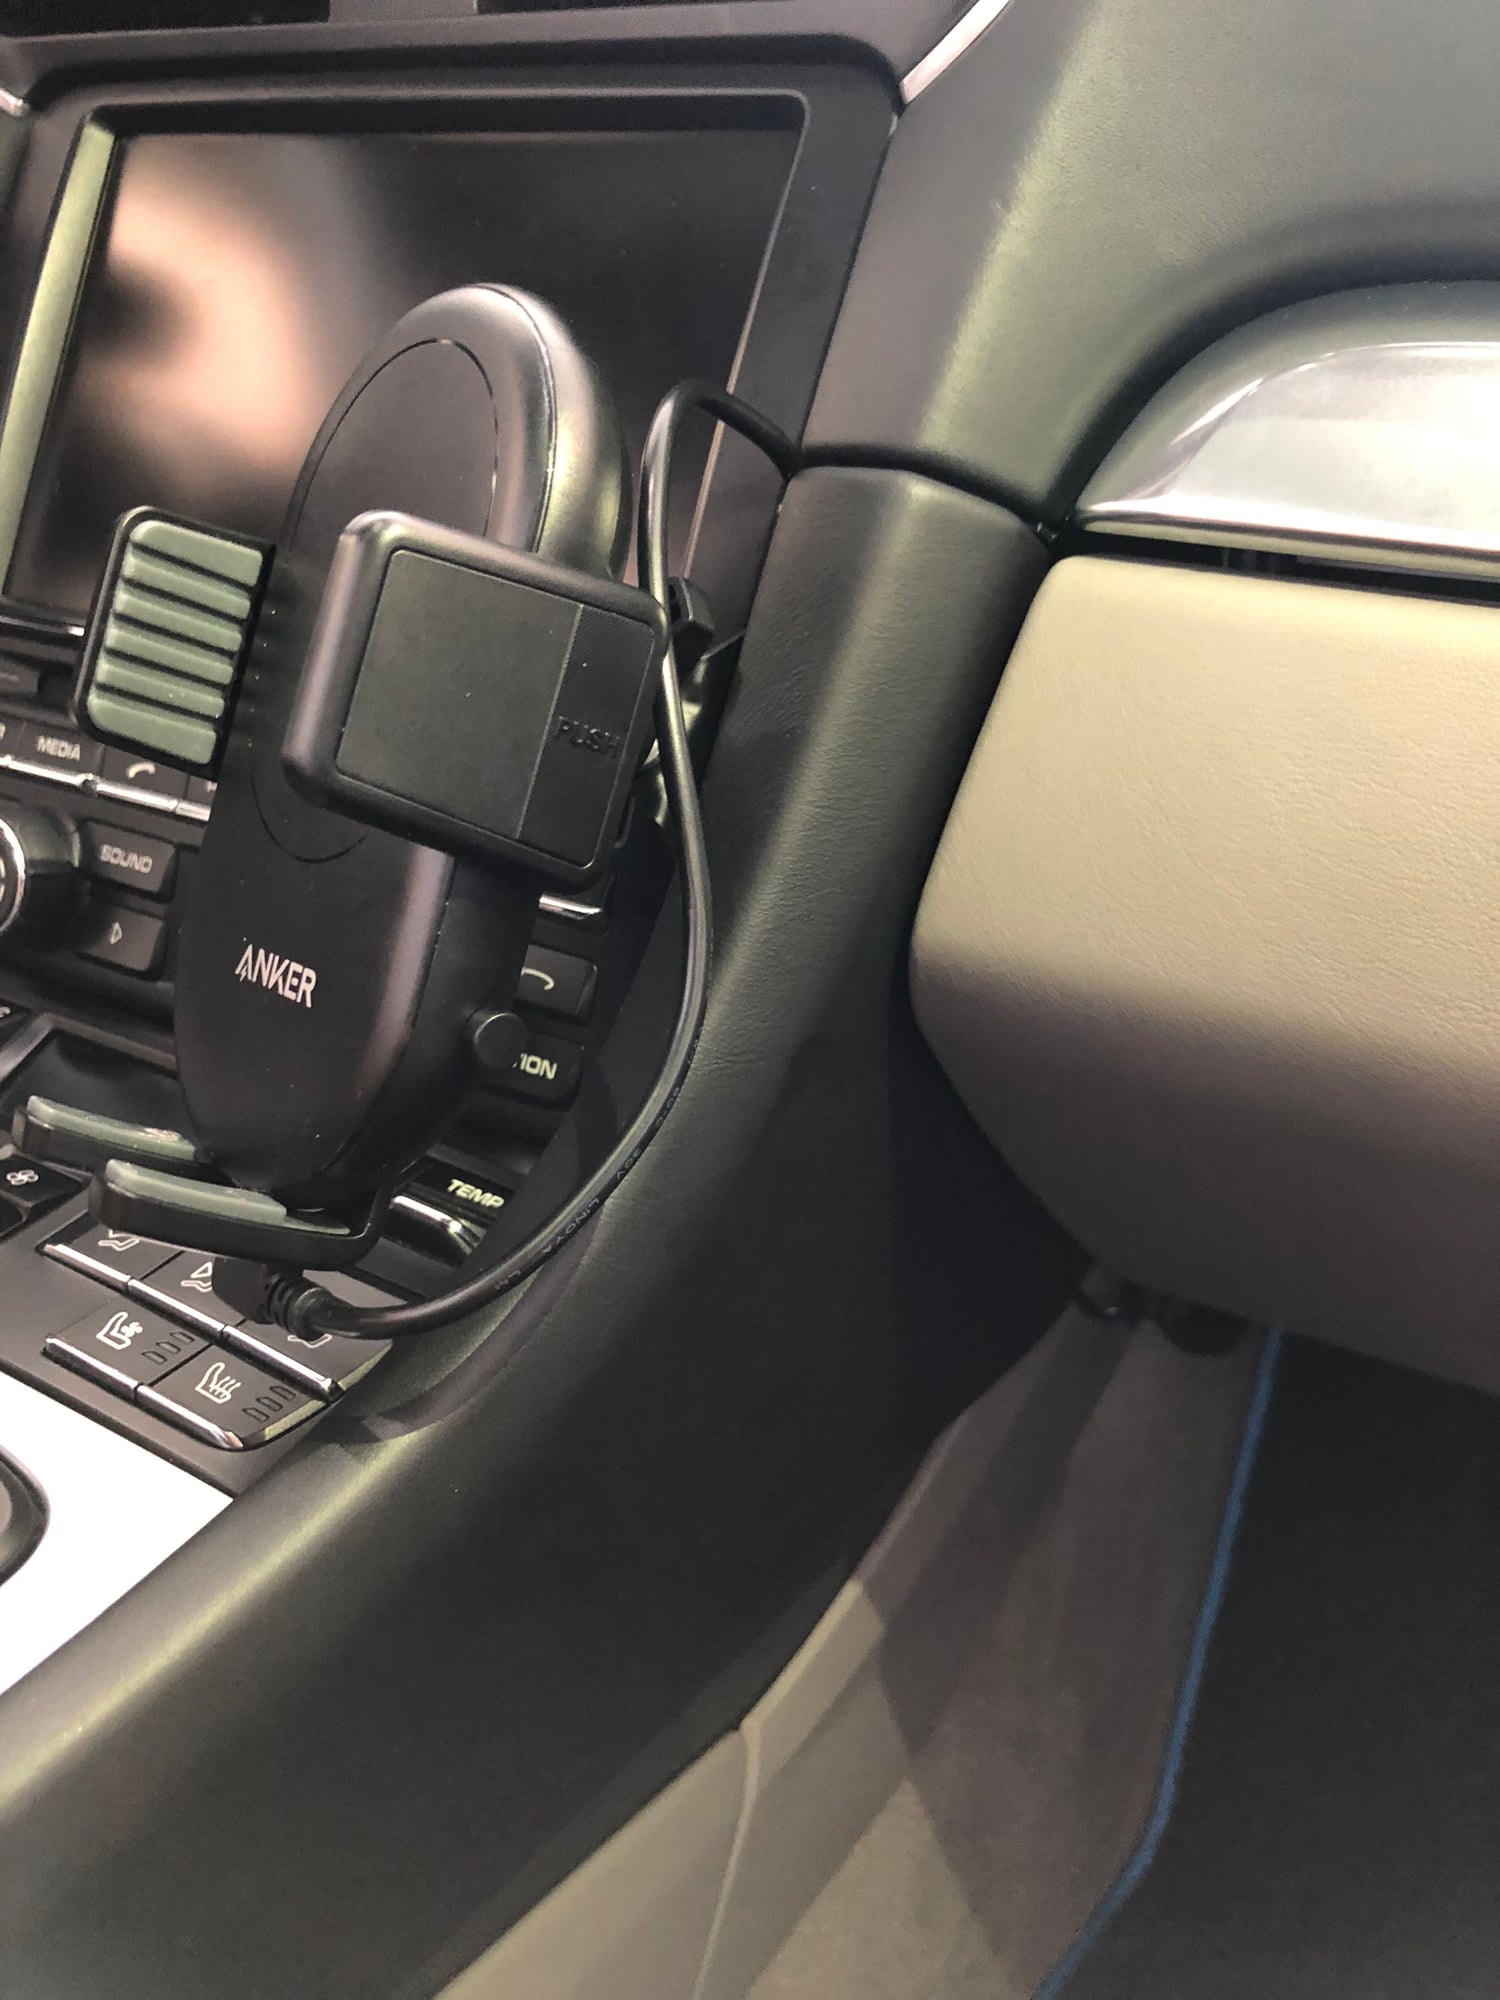
Here is my setup with the modified bracket installed. (PCM display and right side controls no longer blocked by phone/cradle). Far superior to the original Rennline design. Best of both worlds this way as no part of the PCM or the the right side controls are blocked any longer. I'm very pleased with the setup now!
I plug mine in and toss it in the back seat. Install so clean you cant even see the phone.
The car play interface is enough. Stupid phone is only going to ruin my drive anyhow if I can see it.
I had installed a Rennline cellphone mount which I coupled with an Ottie Qi wireless charging cradle and loved the convenience of quickly mounting and un-mounting the phone as well as easy wireless charging. The bracket supplied by Rennline places the pivot ball over the PCM which allows the phone to block the right side of the PCM display (this happens even if you use the magnetic mount they provide as part of the kit). With the help of ATLBond who in turn was provided a design by ValveFloat991, I sourced an alternative mounting bracket which places the pivot ball to the right and also higher up and now the phone cradle no longer blocks the right side controls nor the right edge of the PCM display. It's too bad that the Rennline mount does not come this way from the start.
Notice the blocked out right side controls as well as the right edge of the PCM) with the supplied Rennline bracket.
Here is my setup with the modified bracket installed. (PCM display and right side controls no longer blocked by phone/cradle). Far superior to the original Rennline design. Best of both worlds this way as no part of the PCM or the the right side controls are blocked any longer. I'm very pleased with the setup now!
You state that you were able to source this alternate Rennline bracket. This seems exactly what I need. Can you tell me where you sourced?
I am wondering the exact same thing. Where can I source this bracket?
The alternate Rennline bracket was produced from a CAD drawing created by Valvefloat991. A very generous member here on the forum happened to have had one fabricated from Valvefloat's design and sold it to me. If you have access to a machine shop, then can easily stamp out a metal plate using the CAD drawing. In the end, I only ended up using the aluminum pivot ball from the Rennline kit as I really wanted wireless charging and a secure cradle. The end product is very usable but not as clean as other solutions. What it lacks in elegance, it more than makes up for in usability. Placing the phone in the cradle or removing it is a one handed operation and as soon as it's in there, it's charging. All while allowing me to view the display for Waze, etc without blocking the screen on the PCM.
The alternate Rennline bracket was produced from a CAD drawing created by Valvefloat991. A very generous member here on the forum happened to have had one fabricated from Valvefloat's design and sold it to me. If you have access to a machine shop, then can easily stamp out a metal plate using the CAD drawing. In the end, I only ended up using the aluminum pivot ball from the Rennline kit as I really wanted wireless charging and a secure cradle. The end product is very usable but not as clean as other solutions. What it lacks in elegance, it more than makes up for in usability. Placing the phone in the cradle or removing it is a one handed operation and as soon as it's in there, it's charging. All while allowing me to view the display for Waze, etc without blocking the screen on the PCM.
I actually do have access to a shop. Do you mind sharing the CAD file?
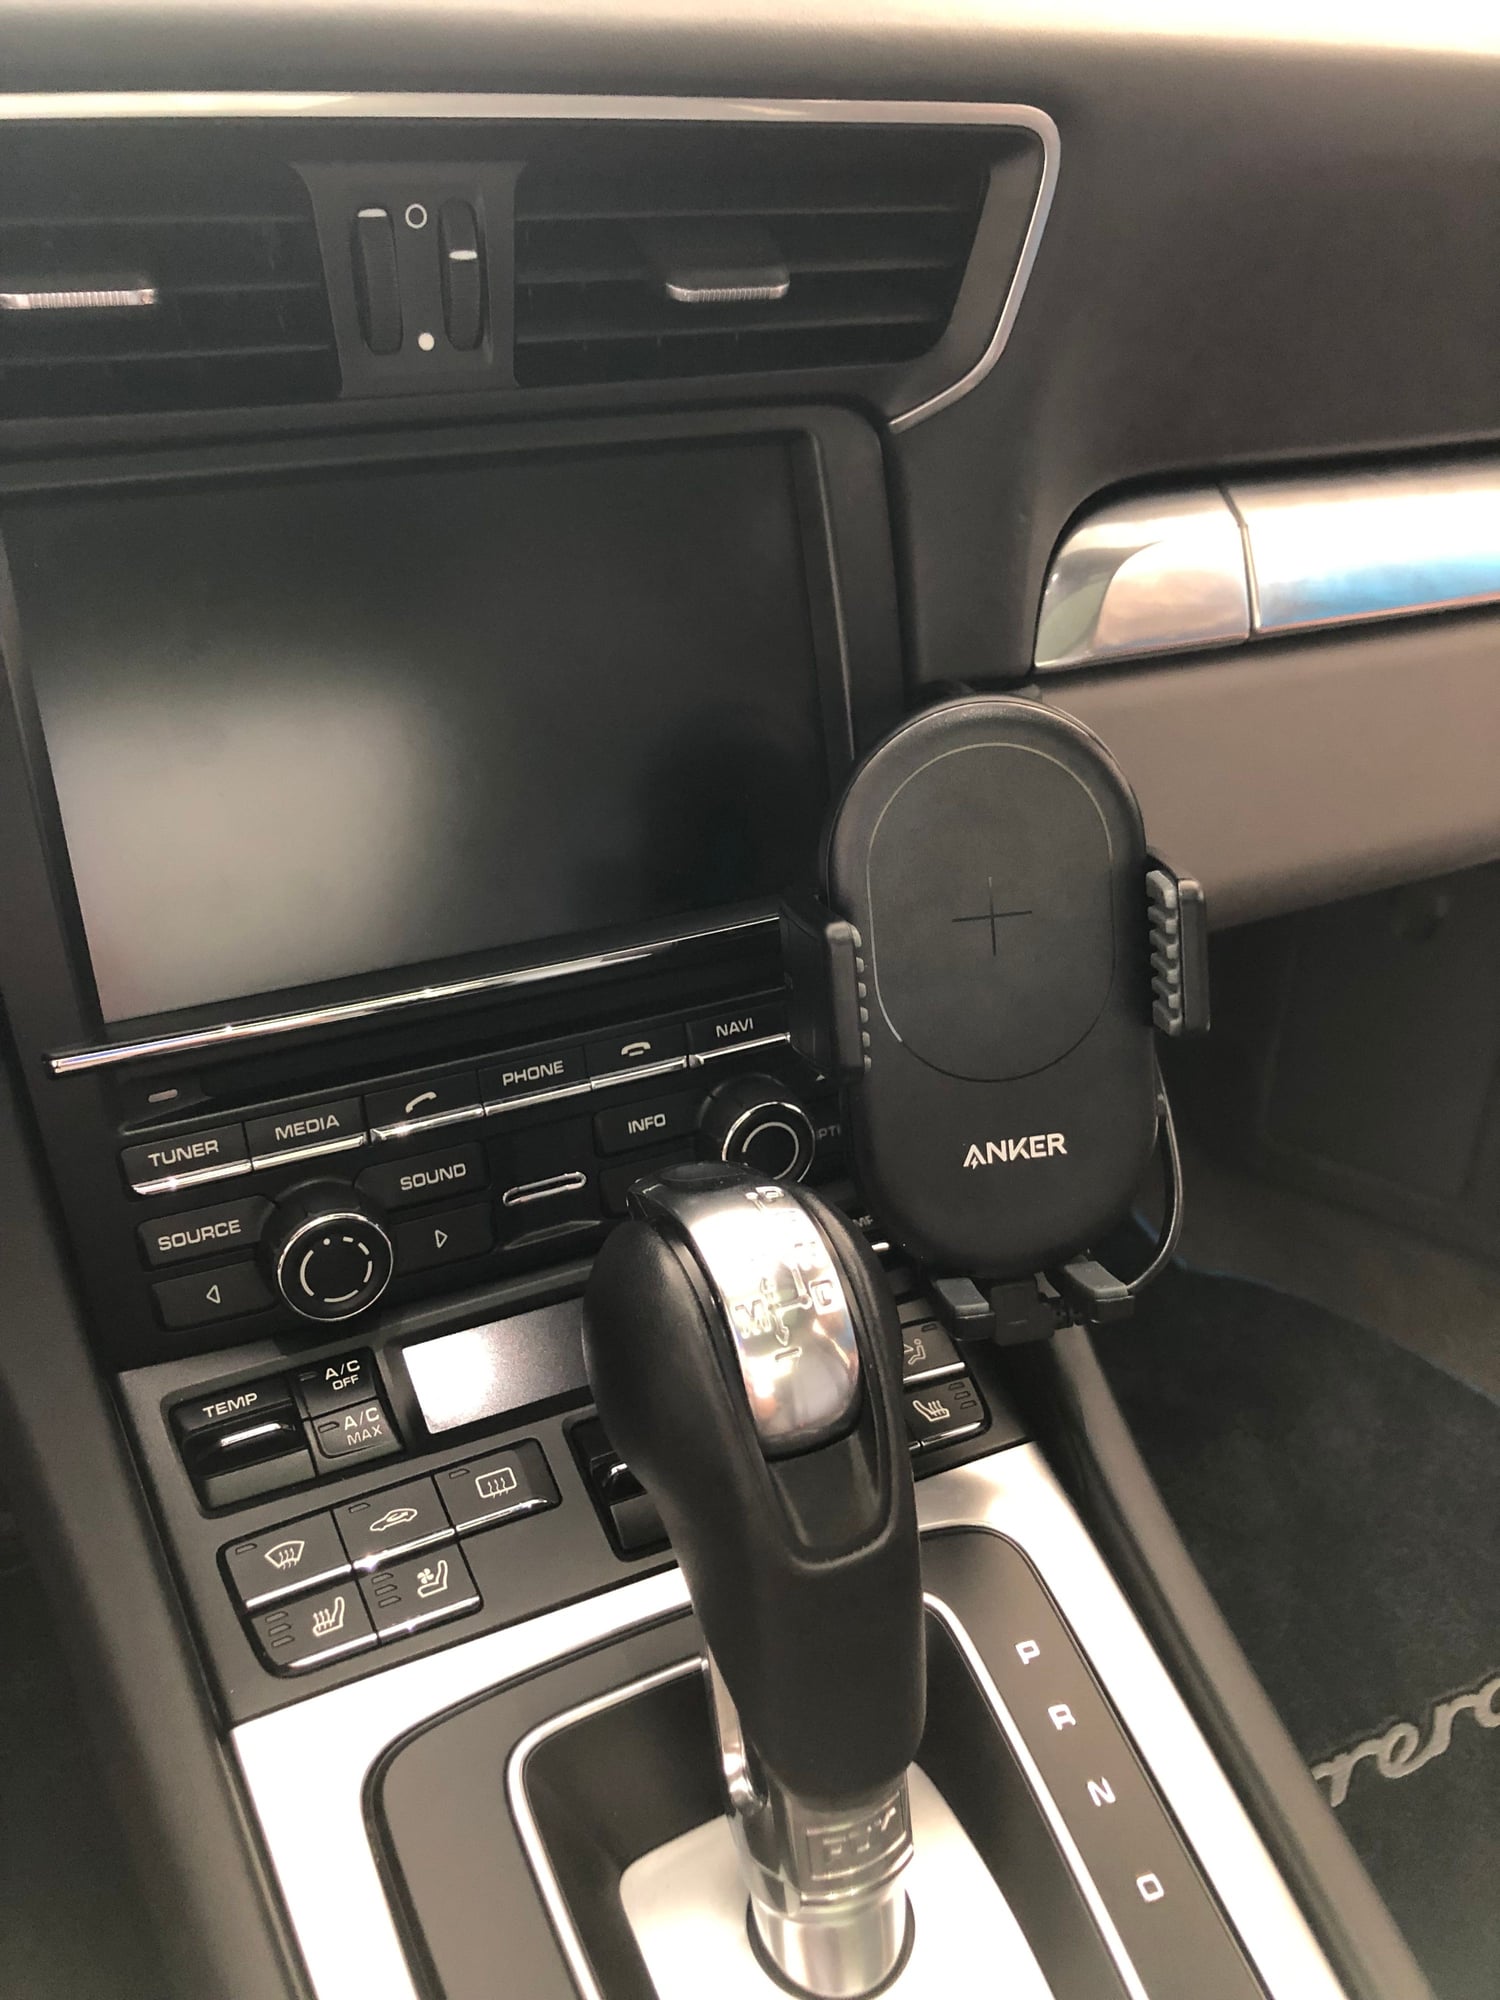
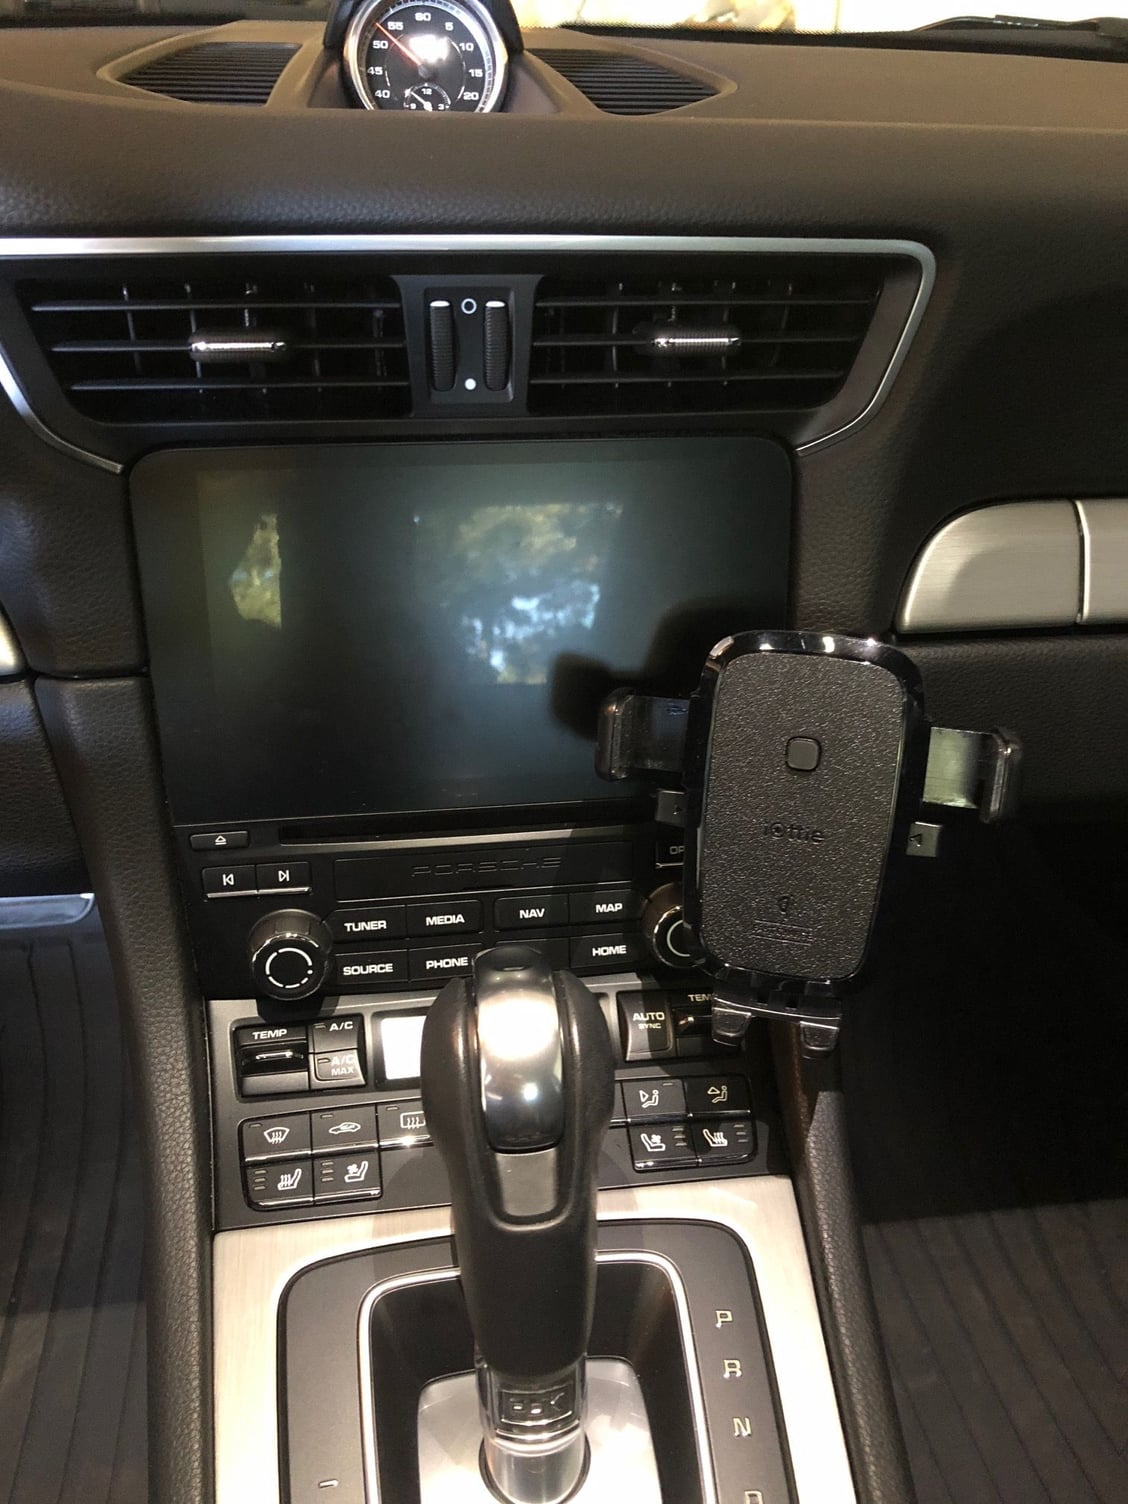
I originally used the Anker PowerWave Wireless Car Charger with the included vent mount, it worked ok but made it more difficult to use the touch screen. I purchased the Rennline Dash Phone Mount but didn't want to use the magnetic holder. The Anker PowerWave is an exact fit with the Rennline mounting ball. I think it could be enhanced a little bit more with the correct 90 degree USB - Micro cable. Anker PowerWave fits Rennline dash mount 90 degree USB The 90 degree micro cable provides more clearance to reach controls and the slack allows me to rotate phone to landscape mode Clean solid mount, does block cupholder
Trying to see if I can frankenstein a wireless charger to this Rennline mount (planning on high passenger side), maybe with valvefloat991 mod.
Previously, I had been using glue gun / superglue / screws between the following products to get an iPhone XS to get wireless charging on a Maserati Ghibli.
Don't really like phone cases but this hides the ugly metal ring
Just use painter tape to hold the ring against the case
Case goes on the phone and seems to be ok
Maybe somebody can think of a good way to get the rennlist bracket + valvefloat991 + these pieces to come up with a wireless charging iPhone mount for the 991 (just got this). I'm thinking that maybe you can just rip the cup off the Rennlist magnetic head and figure out a way to attach it to the magnetic wireless charging head?
The Maserati mount is not the awesome but it works (really need to clean this up)
Not sure how good the wireless charging portion works yet but the "mechanical" part fits the Rennline mount without any modifications
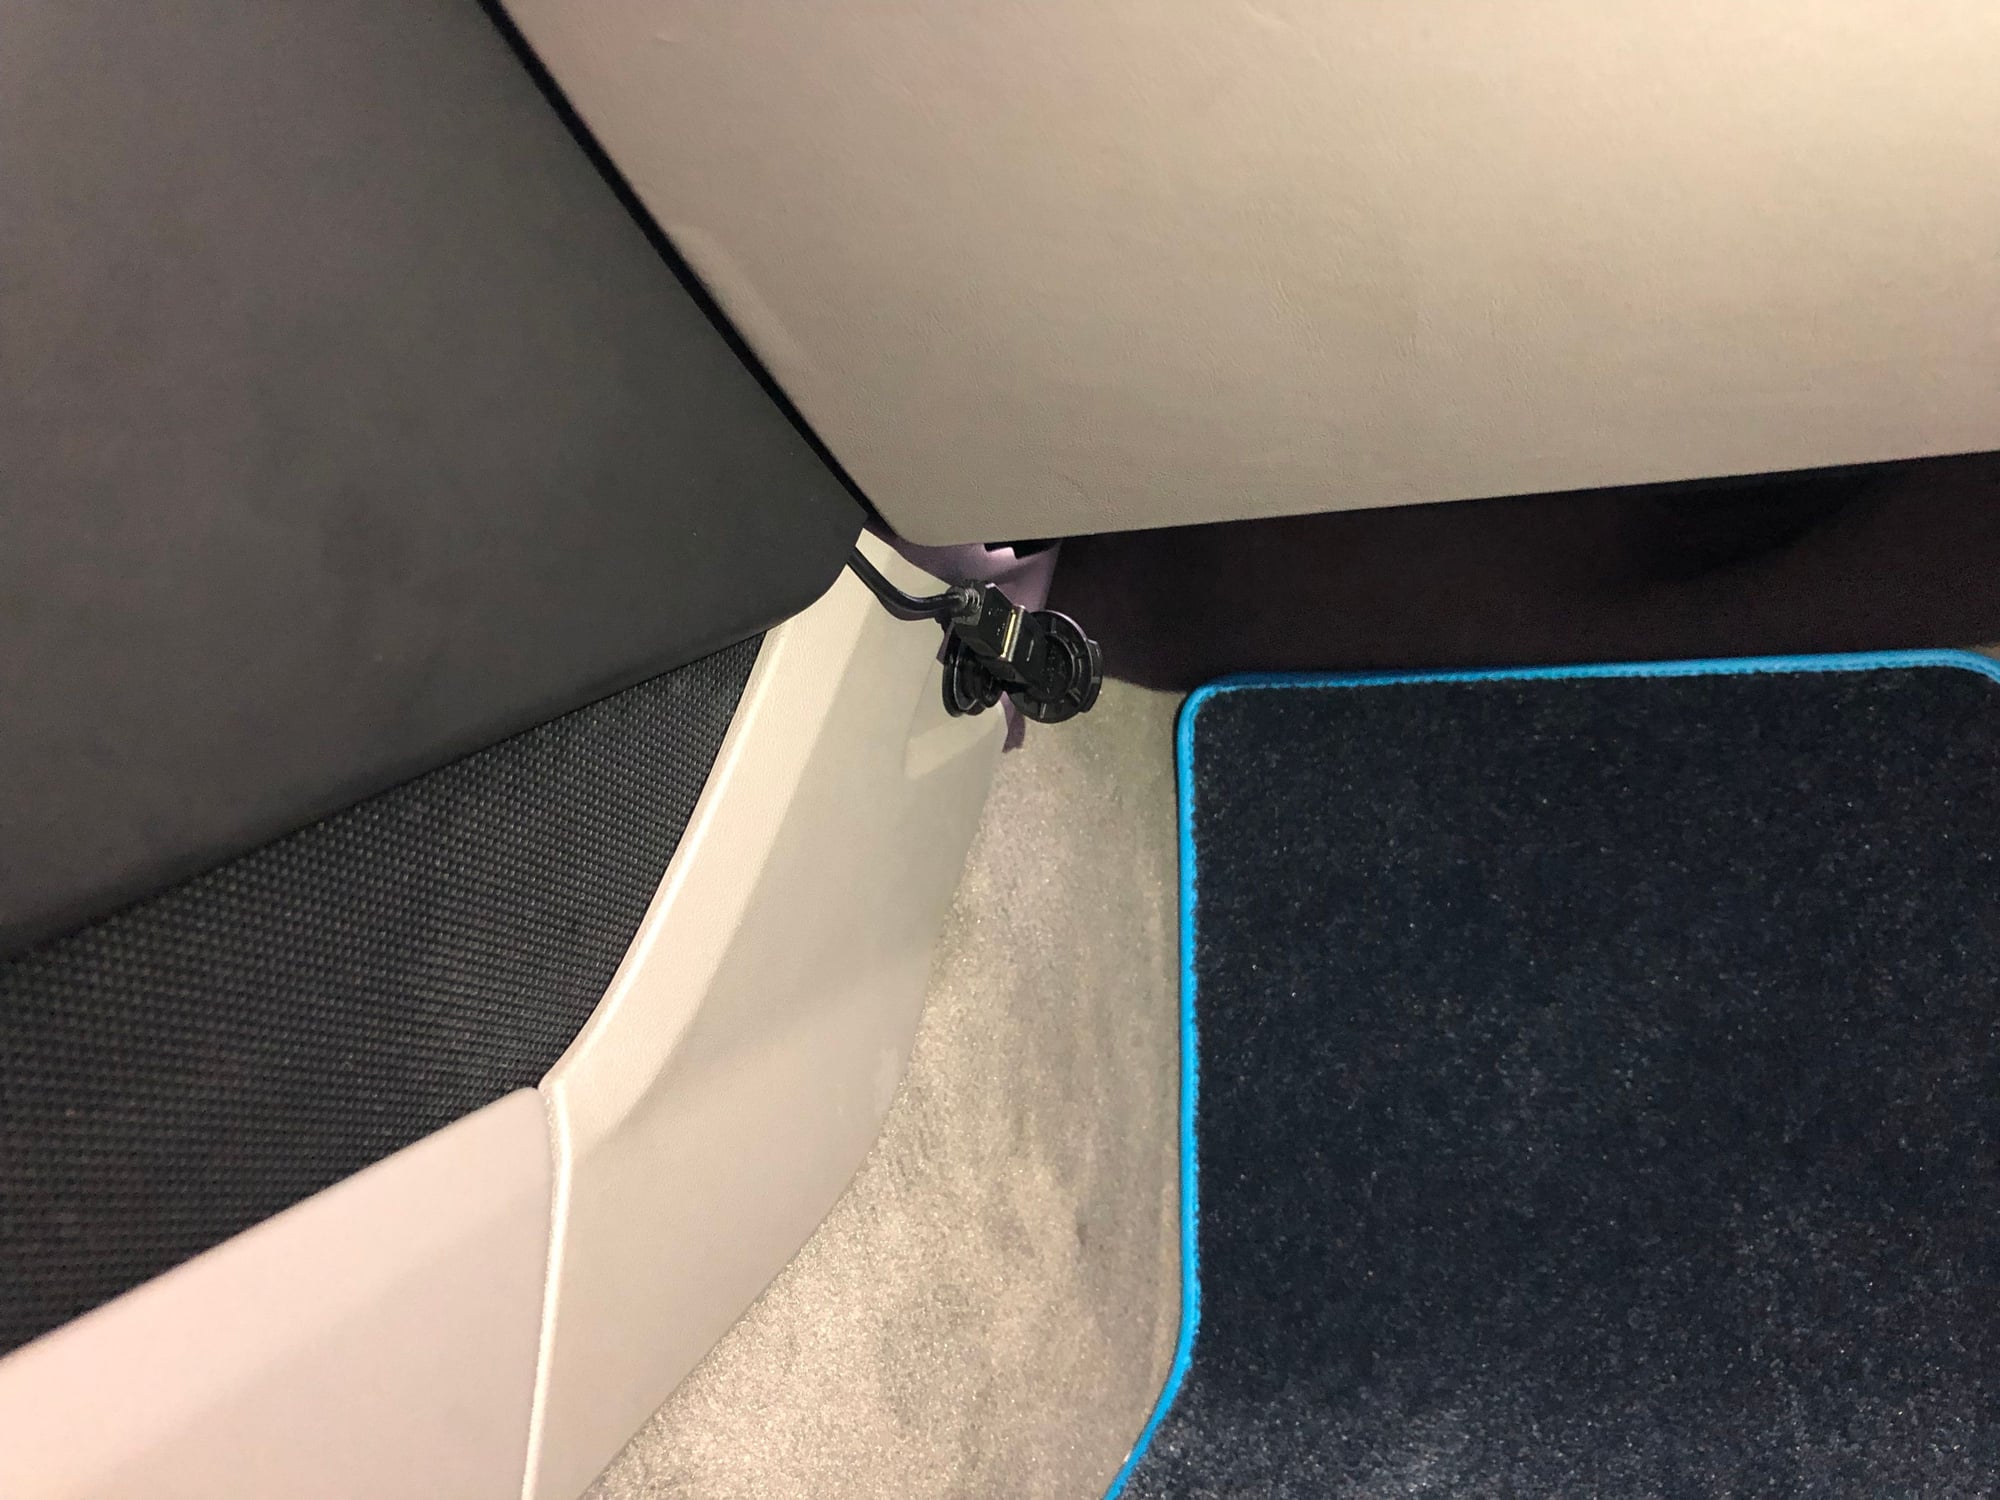
The problem though is I have it plugged into a USB in the passenger foot area (under the glove) and it is always ON (the charging circle is lit -- see photo) which may drain the battery. Anybody know how to make the 12V in the passenger foot well be on "switched" power? Only ON when the vehicle is running?
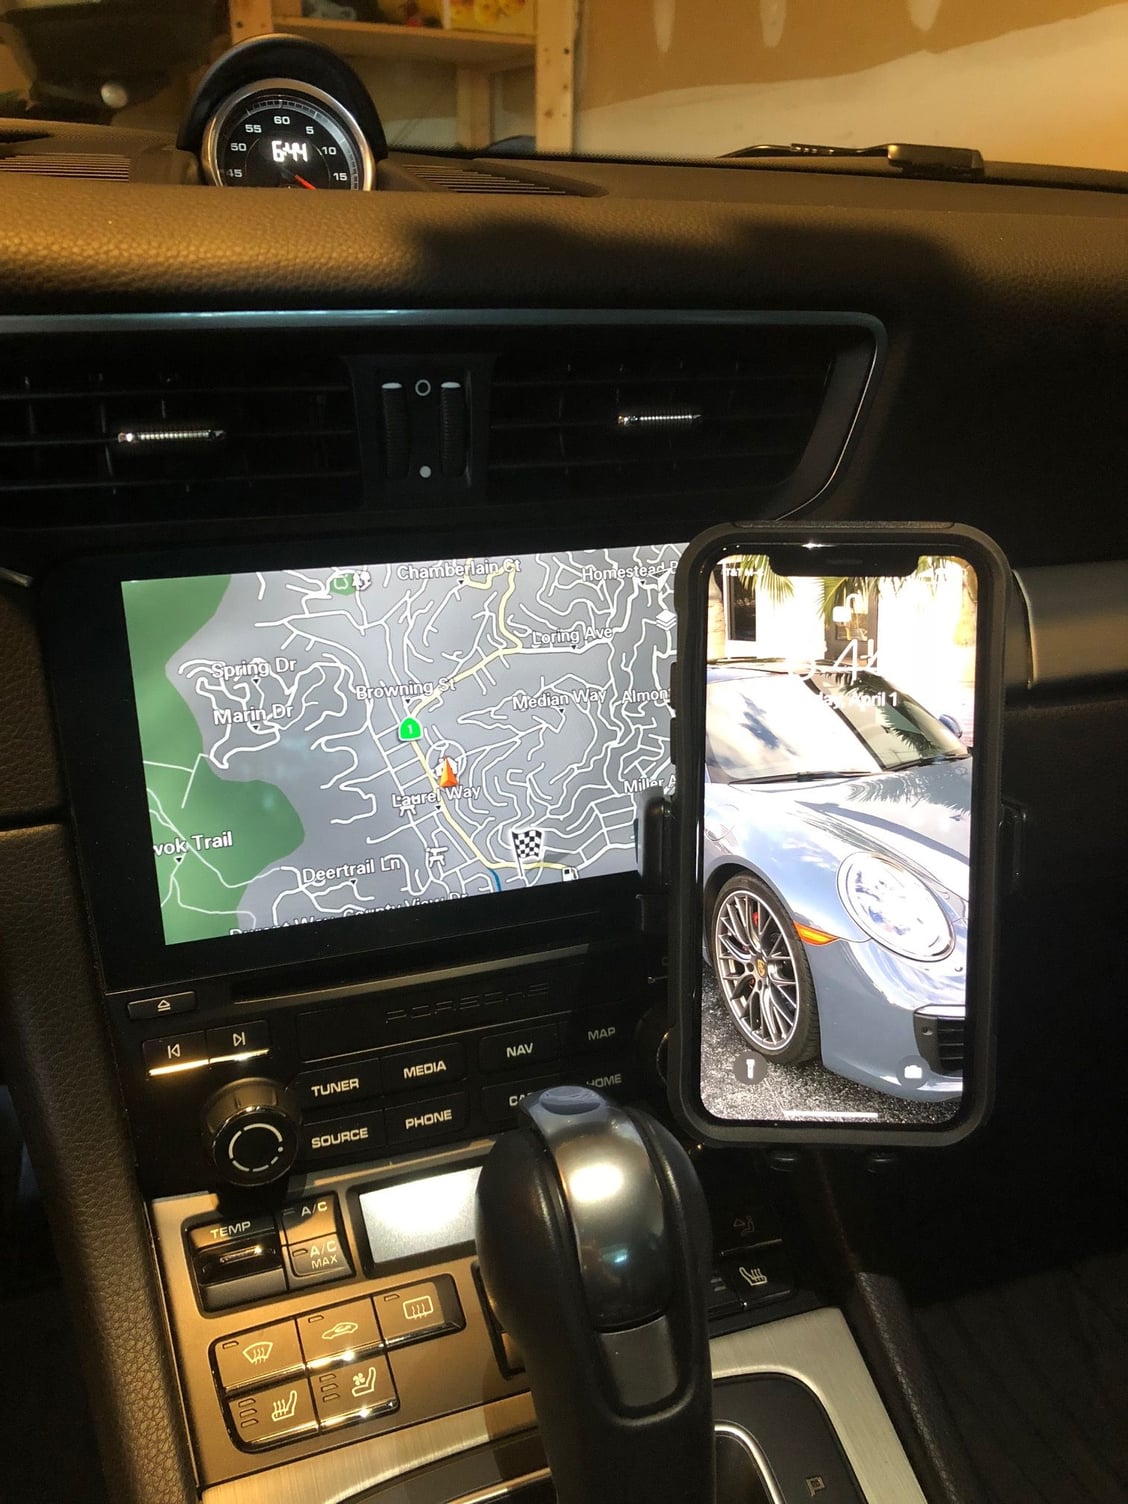
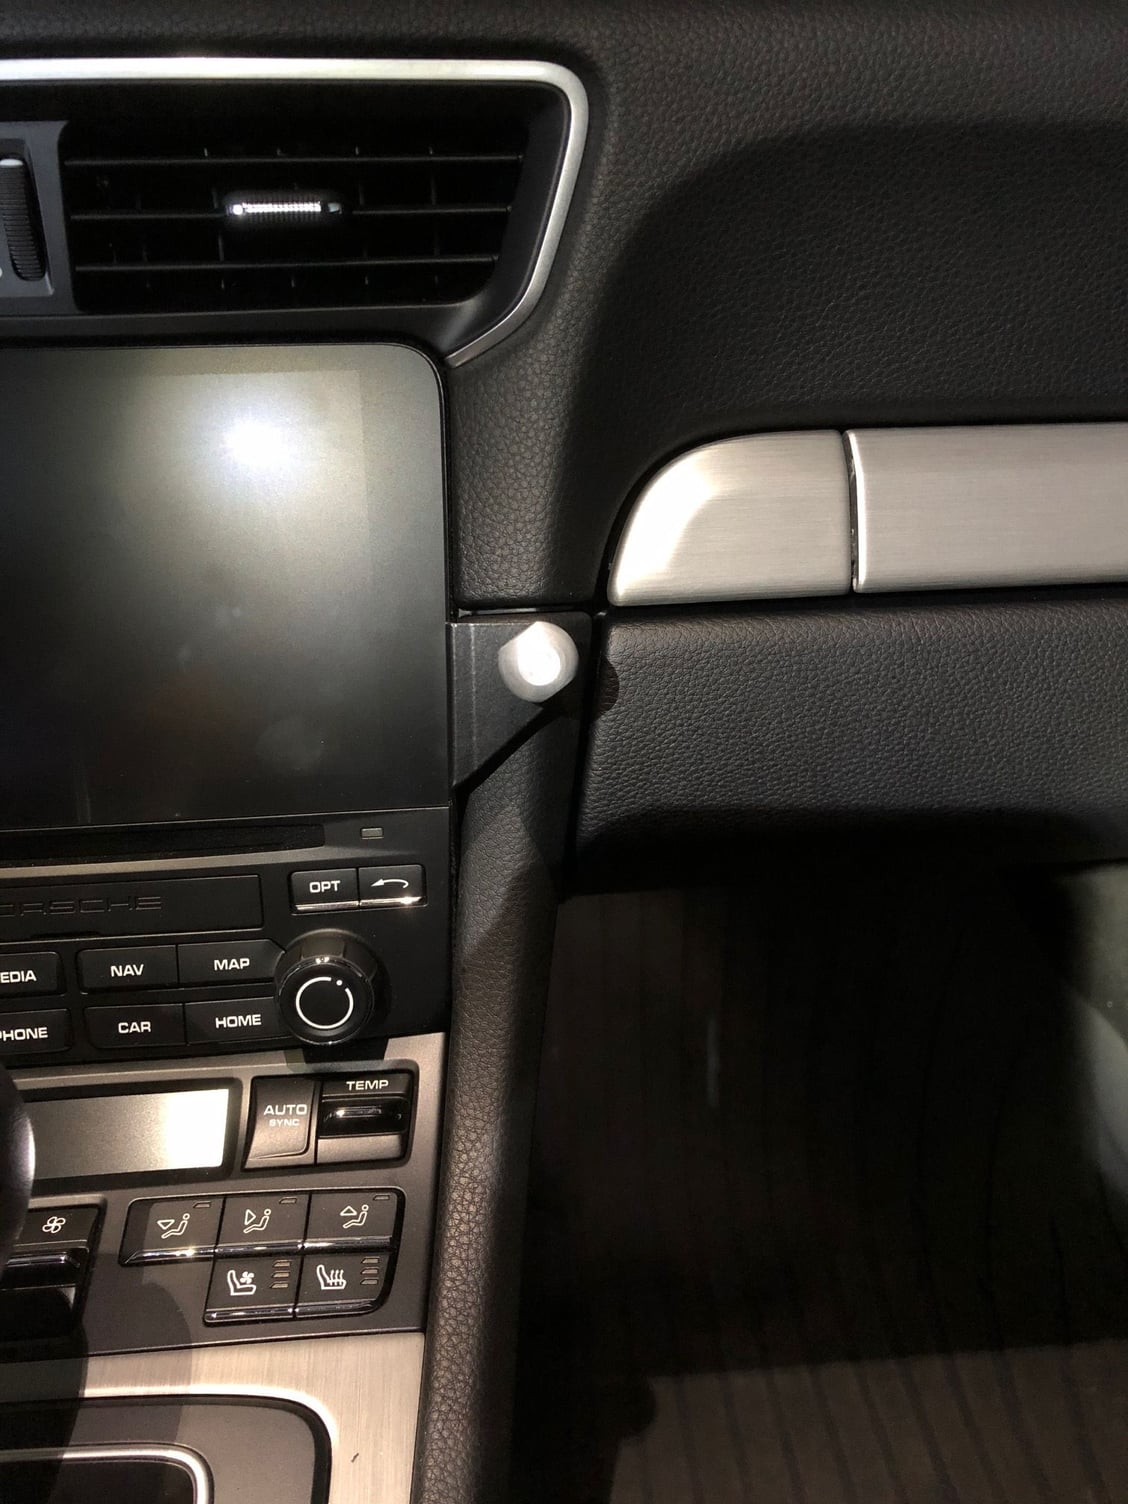
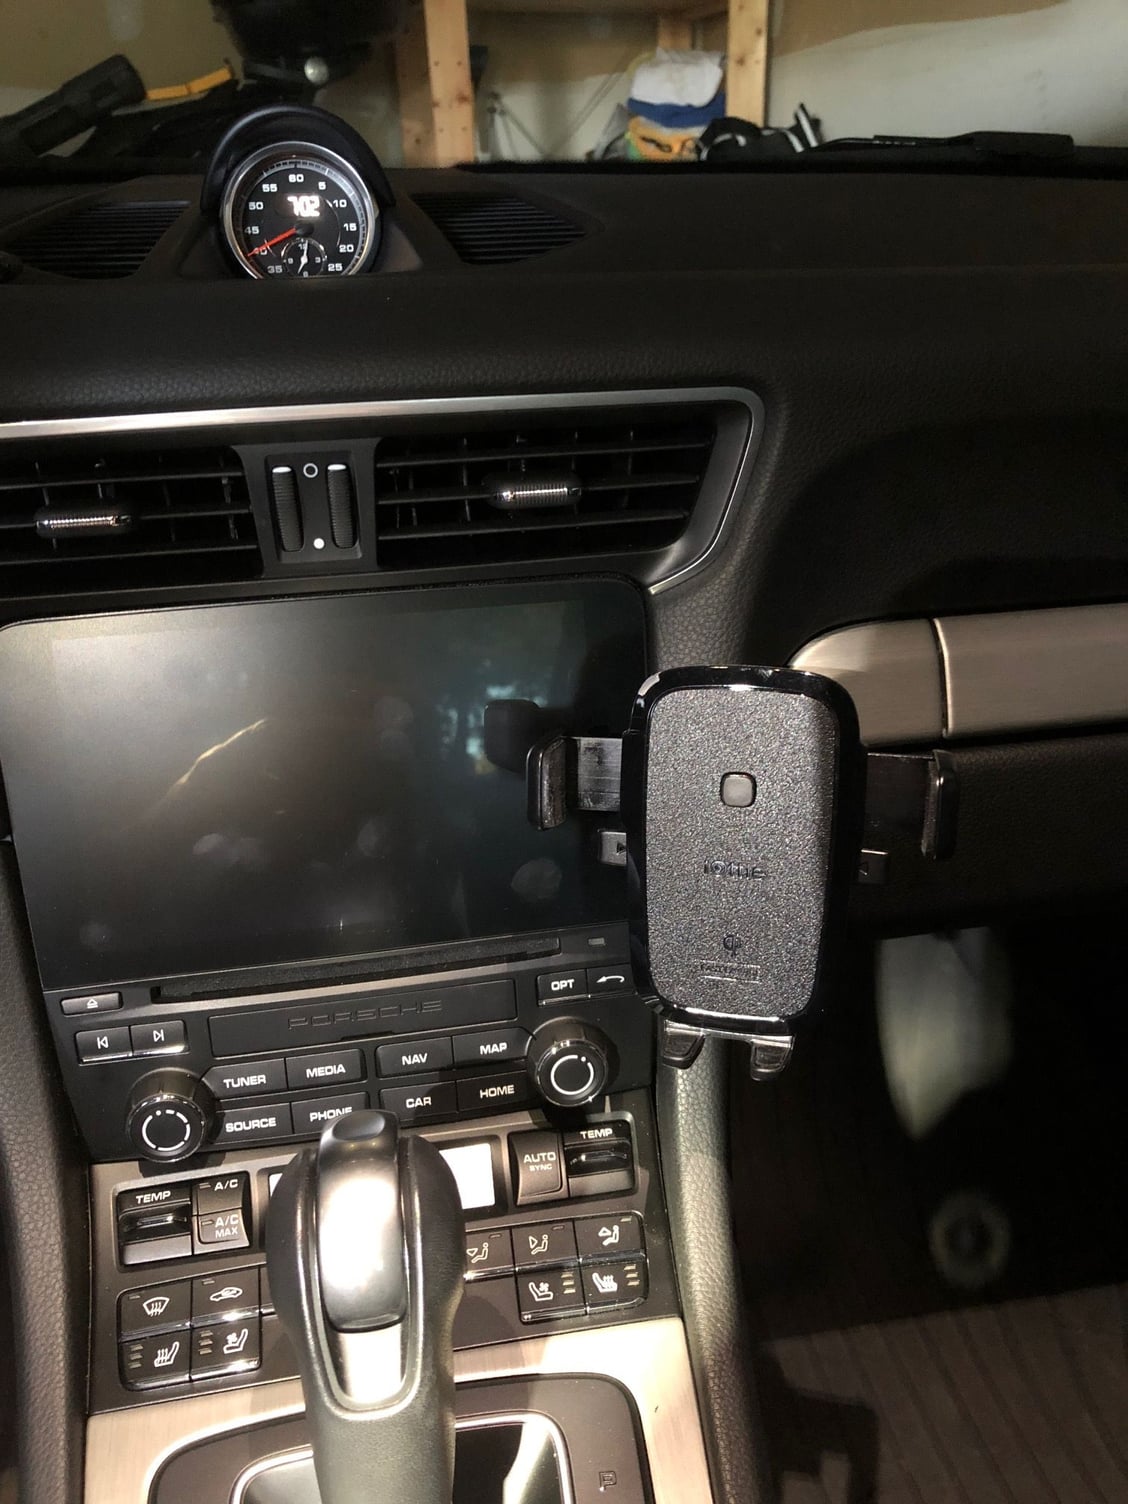
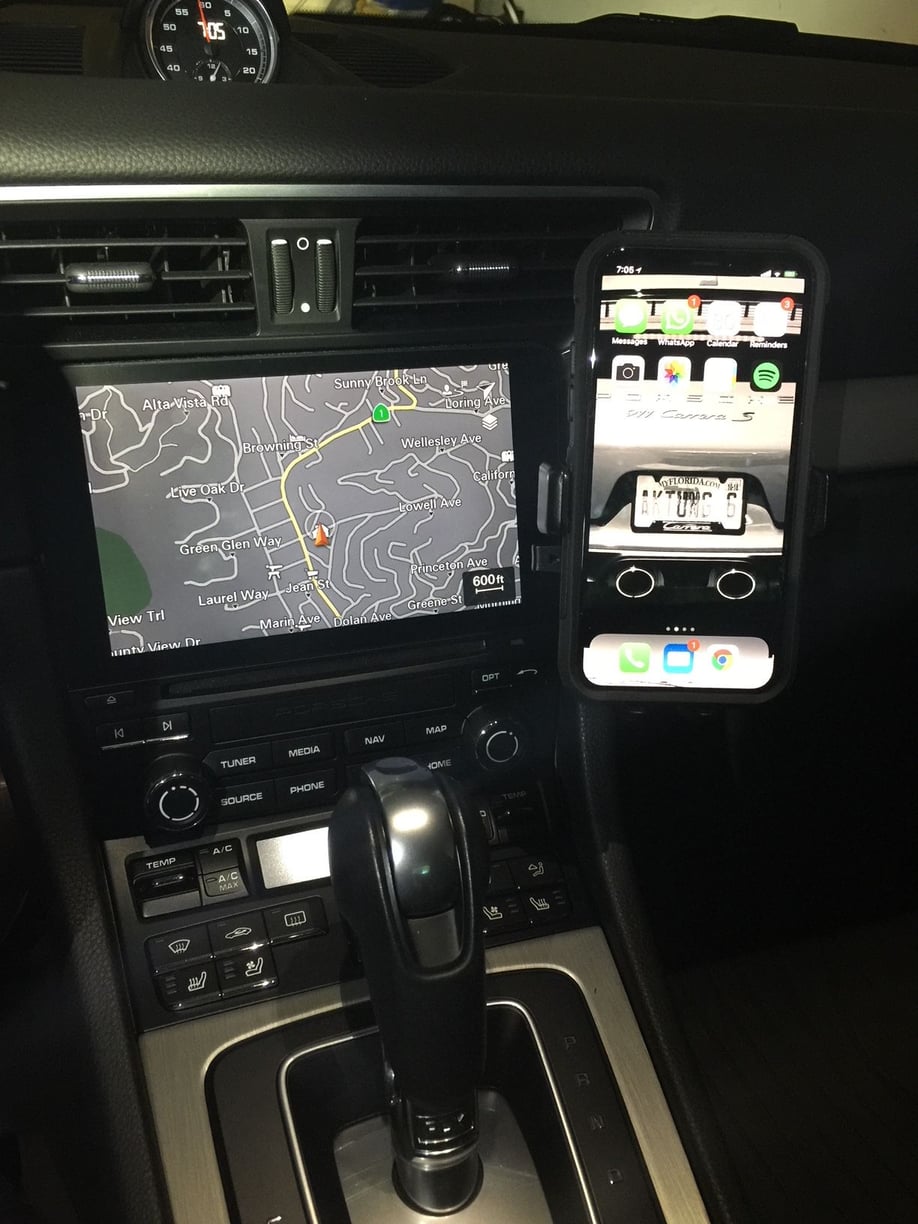
I had installed a Rennline cellphone mount which I coupled with an Ottie Qi wireless charging cradle and loved the convenience of quickly mounting and un-mounting the phone as well as easy wireless charging. The bracket supplied by Rennline places the pivot ball over the PCM which allows the phone to block the right side of the PCM display (this happens even if you use the magnetic mount they provide as part of the kit). With the help of ATLBond who in turn was provided a design by ValveFloat991, I sourced an alternative mounting bracket which places the pivot ball to the right and also higher up and now the phone cradle no longer blocks the right side controls nor the right edge of the PCM display. It's too bad that the Rennline mount does not come this way from the start.
Notice the blocked out right side controls as well as the right edge of the PCM) with the supplied Rennline bracket.
Here is my setup with the modified bracket installed. (PCM display and right side controls no longer blocked by phone/cradle). Far superior to the original Rennline design. Best of both worlds this way as no part of the PCM or the the right side controls are blocked any longer. I'm very pleased with the setup now!
Thank you @achtung6 for posting, This what I've been looking for..
@ATLBond & @Valvefloat991 I'd highly appreciate if you can point me in the right direction to source this bracket or the closest alternative.


 03-23-2018, 10:40 AM


 Install so clean you cant even see the phone.