When you click on links to various merchants on this site and make a purchase, this can result in this site earning a commission. Affiliate programs and affiliations include, but are not limited to, the eBay Partner Network.
991.2 Instrument Cluster Bezel Removal...Now Dash Mod
Anyone ever done this? I need to remove the black plastic instrument cluster trim (bezel). All I know about it is you must pull it straight out and not twisted or bent in any way. If you do that you’ll break alignment rods and maybe some attachment clips as well. I don’t see how you can get a trim tool in the upper part of it without causing dents in the leather. Any help greatly appreciated. 991.1’s might be the same, so if anyone has removed the bezel on one of those info would be helpful. Thanks
Anyone ever done this? I need to remove the black plastic instrument cluster trim (bezel). All I know about it is you must pull it straight out and not twisted or bent in any way. If you do that you’ll break alignment rods and maybe some attachment clips as well. I don’t see how you can get a trim tool in the upper part of it without causing dents in the leather. Any help greatly appreciated. 991.1’s might be the same, so if anyone has removed the bezel on one of those info would be helpful. Thanks
Never mind, I figured it out. Got it off (and didn't break anything!), did the work behind the bezel that I wanted to do, and then snapped it back on.
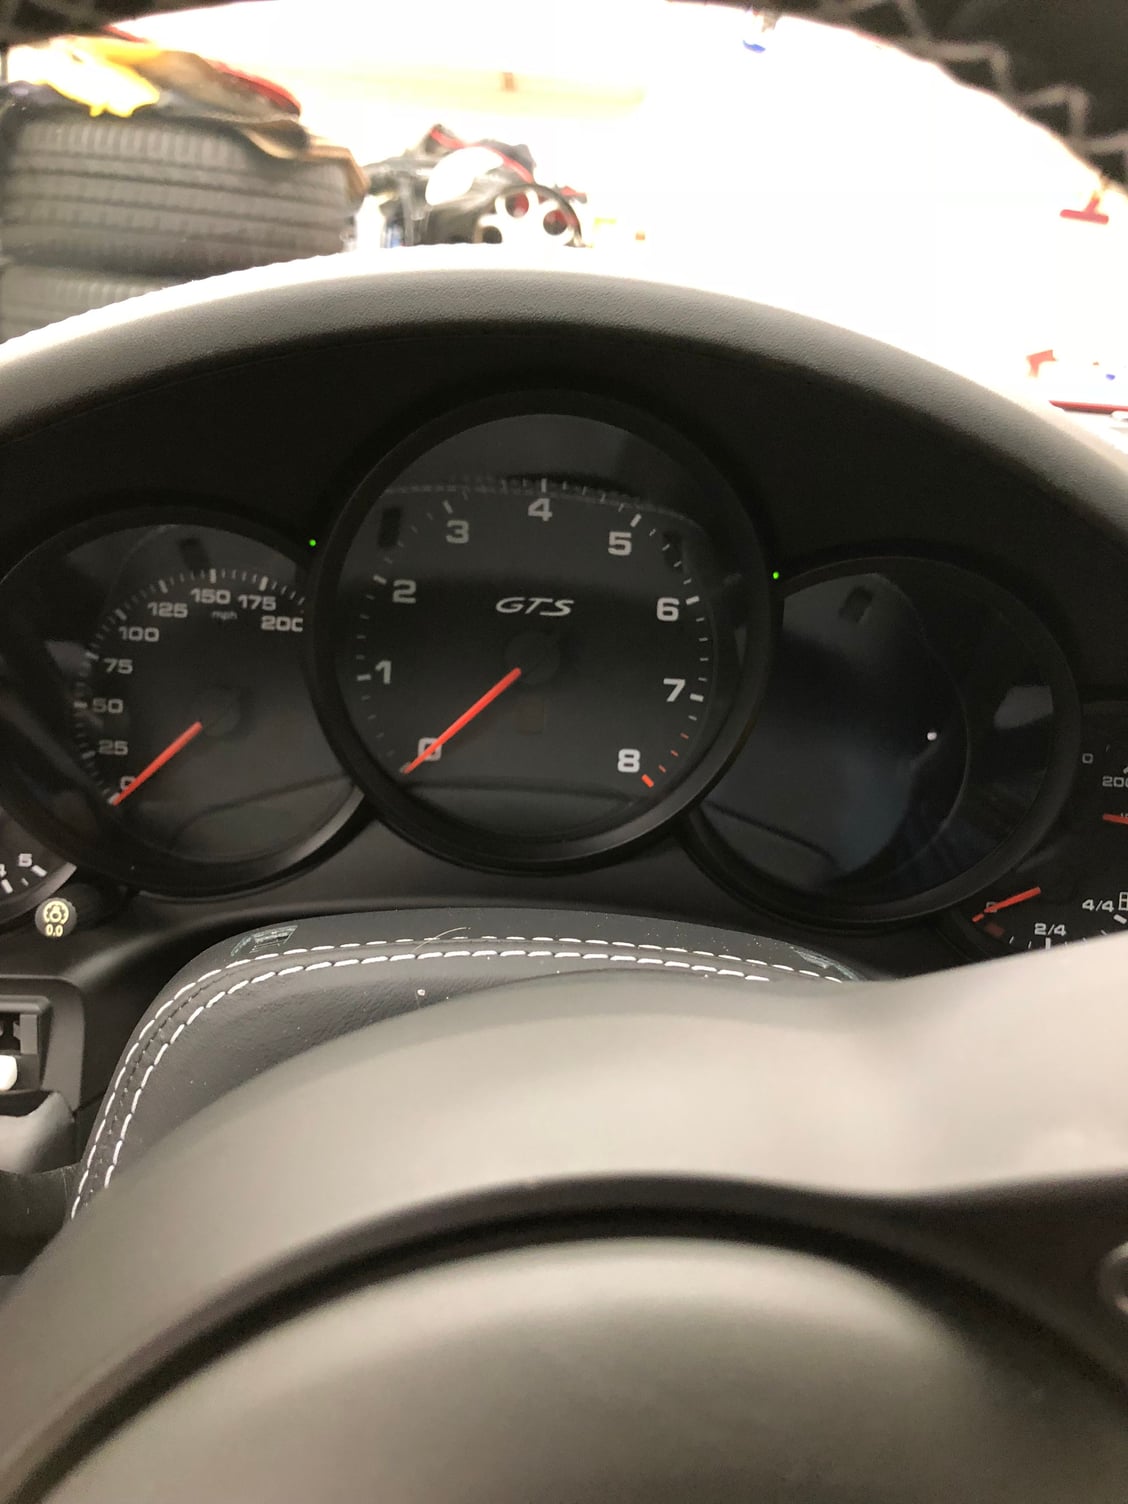
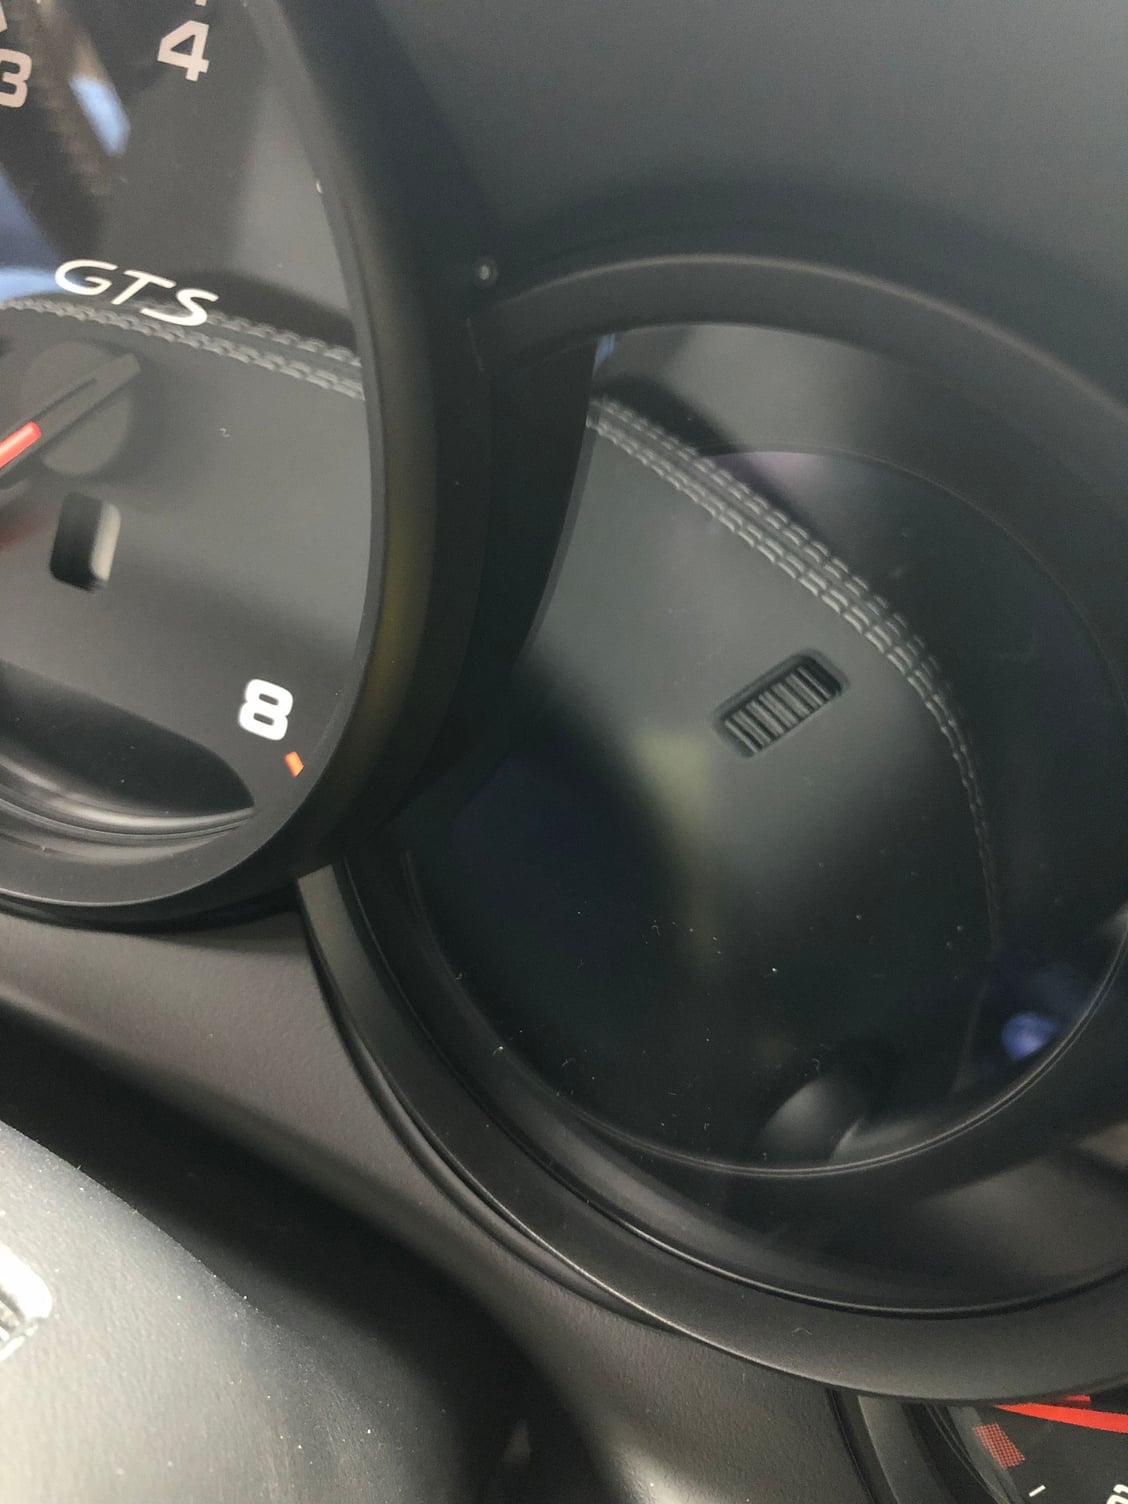
No one has asked why in the world I’d want to remove the instrument cluster bezel on a pretty new GTS, but the end result is in the pictures below. The color of the dots change depending on available info. Anyone want to guess what the mod is for?
We have a winner on both counts! Both systems have an LED that changes color depending on what is going on. Front and rear radar hits display different colors as do front and rear Laser hits. Both systems come with pretty good sized LED’s that need to be mounted somewhere. I did not want to drill holes to mount them and I wanted them to be stealthy. So a few nights ago I was contemplating what to do. Then a light bulb went off in my head and I came up with fiber optics and a behind the dash LED. So I rummaged through my box of old computer and stereo cables and found a 3’ Toslink cable. Using a very sharp razor blade I cut the ends off and then cut the cable in half to make 2 cables. Then I stripped off the thick outer insulation on one end which exposed the fiber cable with a thin layer of black insulation which you can see In the second photo. Then I held the larger diameter ends over a Dewalt electric drill battery charger with a relatively dim green LED for testing purposes and I was amazed at the amount of light at the other end. So then I started looking for a spot that would be in my normal field of vision and picked the 2 spots in the photo. The bezel wedges them in place between the bezel itself and the instrument cluster with a very slight interference fit, and the other ends go to the left a/c vent area. When I finish the installation the system LED’s will butt against the cable ends and heat shrink tubing will hold it all together, probably with 2 or 3 layers for rigidity. When the system is turned off you have to know where to look and look very carefully to see the cable ends. And because the cable ends are stuffed way back toward the bezel, you can’t see them from outside the car even if they are lit up. Plus, if I ever want to remove the system, the cables and LED’s can come out and you’d never know they were there. Anyway, this is but one piece of the puzzle and more to come soon!
Pretty neat. Talk about being hands on. Looks great!
Where do you live? I'd like to bring my car over to get some work done.
Thanks!
I'm afraid you'd have to negotiate with my wife for taking up the entire garage when the time comes to remove both bumpers to mount hardware and run wires. I have a feeling you would not be successful I have not taken over the garage quite yet and we have the 911 and her BMW in there now. She did not look too happy when I told her I'd need the entire garage for a week at some point. I know it will cost me...
Good for you to take on these types of projects yourself, most of us automatically just assume that because these cars are new and so technologically advanced that if we touch anything the car gets set on fire (including myself)
You've inspired me to try and tackle my A-pillar and sun visor alcantara upgrades myself lol
I hear you. The toughest part of doing this work is figuring out how the trim comes apart. Sometimes I'll try and get nowhere with a particular piece of trim, so I'll let it go and come back and try another time. That's the way it was with the a pillar cover. What I read online was it was held in place by spring clips, my Macan, 981, and my 991.1 were done that way. But I was really tugging and it wouldn't budge so then I knew Porsche was using a different attachment method for this car. It wasn't until I peeked down between the a pillar and the cover and saw that clip that I was able to figure that one out. After I saw the clip the a pillar was off in a minute or so. Same for removing the carbon fiber console trim. In other cars that trim was held in place with spring clips and you can remove it pretty quickly. The carbon trim uses a ball and post arrangement similar to the a pillar cover, but does not have a release mechanism. You have to pry with trim tools and put a LOT of elbow grease into the effort. I spent a solid 2 hours getting it off and I really thought I'd break it, but the carbon trim is laid on a metal frame (probably aluminum), so nothing bent or broke. After I got it off I loosened up the sockets a little in case it needs to come off in the future.
Moral of the story is take your time, search the internet and post questions on RL, and go slowly. Electrically for my project the only connection to the car will be 2 fused hot wires and 2 ground wires. That's a pretty simple task.
I'm afraid you'd have to negotiate with my wife for taking up the entire garage when the time comes to remove both bumpers to mount hardware and run wires. I have a feeling you would not be successful I have not taken over the garage quite yet and we have the 911 and her BMW in there now. She did not look too happy when I told her I'd need the entire garage for a week at some point. I know it will cost me...
LOL.....fellow Porsche owner with the wife having a BMW (X5) here.....anytime I have to take over the garage for more than an afternoon for a big project on my car means I'll be washing her Bimmer once I'm done!

 02-10-2018, 10:46 PM


 I have not taken over the garage quite yet and we have the 911 and her BMW in there now. She did not look too happy when I told her I'd need the entire garage for a week at some point. I know it will cost me...