When you click on links to various merchants on this site and make a purchase, this can result in this site earning a commission. Affiliate programs and affiliations include, but are not limited to, the eBay Partner Network.
Thanks for your reply Sidvicious7! Responses inline below
Originally Posted by Sidvicious7
The kit you ordered from Joyeauto I believe also utilizes the Unichip Integration box as NMautomotive.uk.
I'm not so sure - the box with all the smarts looks totally different.
Originally Posted by Sidvicious7
1.) Satellite Radio PC Board: You don’t have to remove the satellite PC board. By doing so you run the risk of losing your audio; which is what you stated.
Re-install the Satellite Radio PC Board and verify your connections are firm.
2.) The brass stand-offs you require are M3 x 23mm male to female at four pieces. Remove the four screws that hold the Satellite Radio PC Board secure.
Screw each stand-off where you removed the screws and “ONLY” hand tighten without too much force or you run the risk of cracking the PC board.
3.) You don’t need to bend the ribbon connector/s at a sharp 90 degrees. The ribbon connectors will have sufficient room for installation with the correct
23mm male to female stand-offs. There is sufficient room with the Satellite Radio PC Board and the CarPlay motherboard and ribbon connectors.
This is another difference with the Joyeauto kit - the ribbon cables go straight out, unlike the flat configuration of the unichip/nmautomotive kit. So unfortunately, there is not enough room with the Sirius satellite radio board installed, the antenna connector is so high up it really leaves almost no room at all.
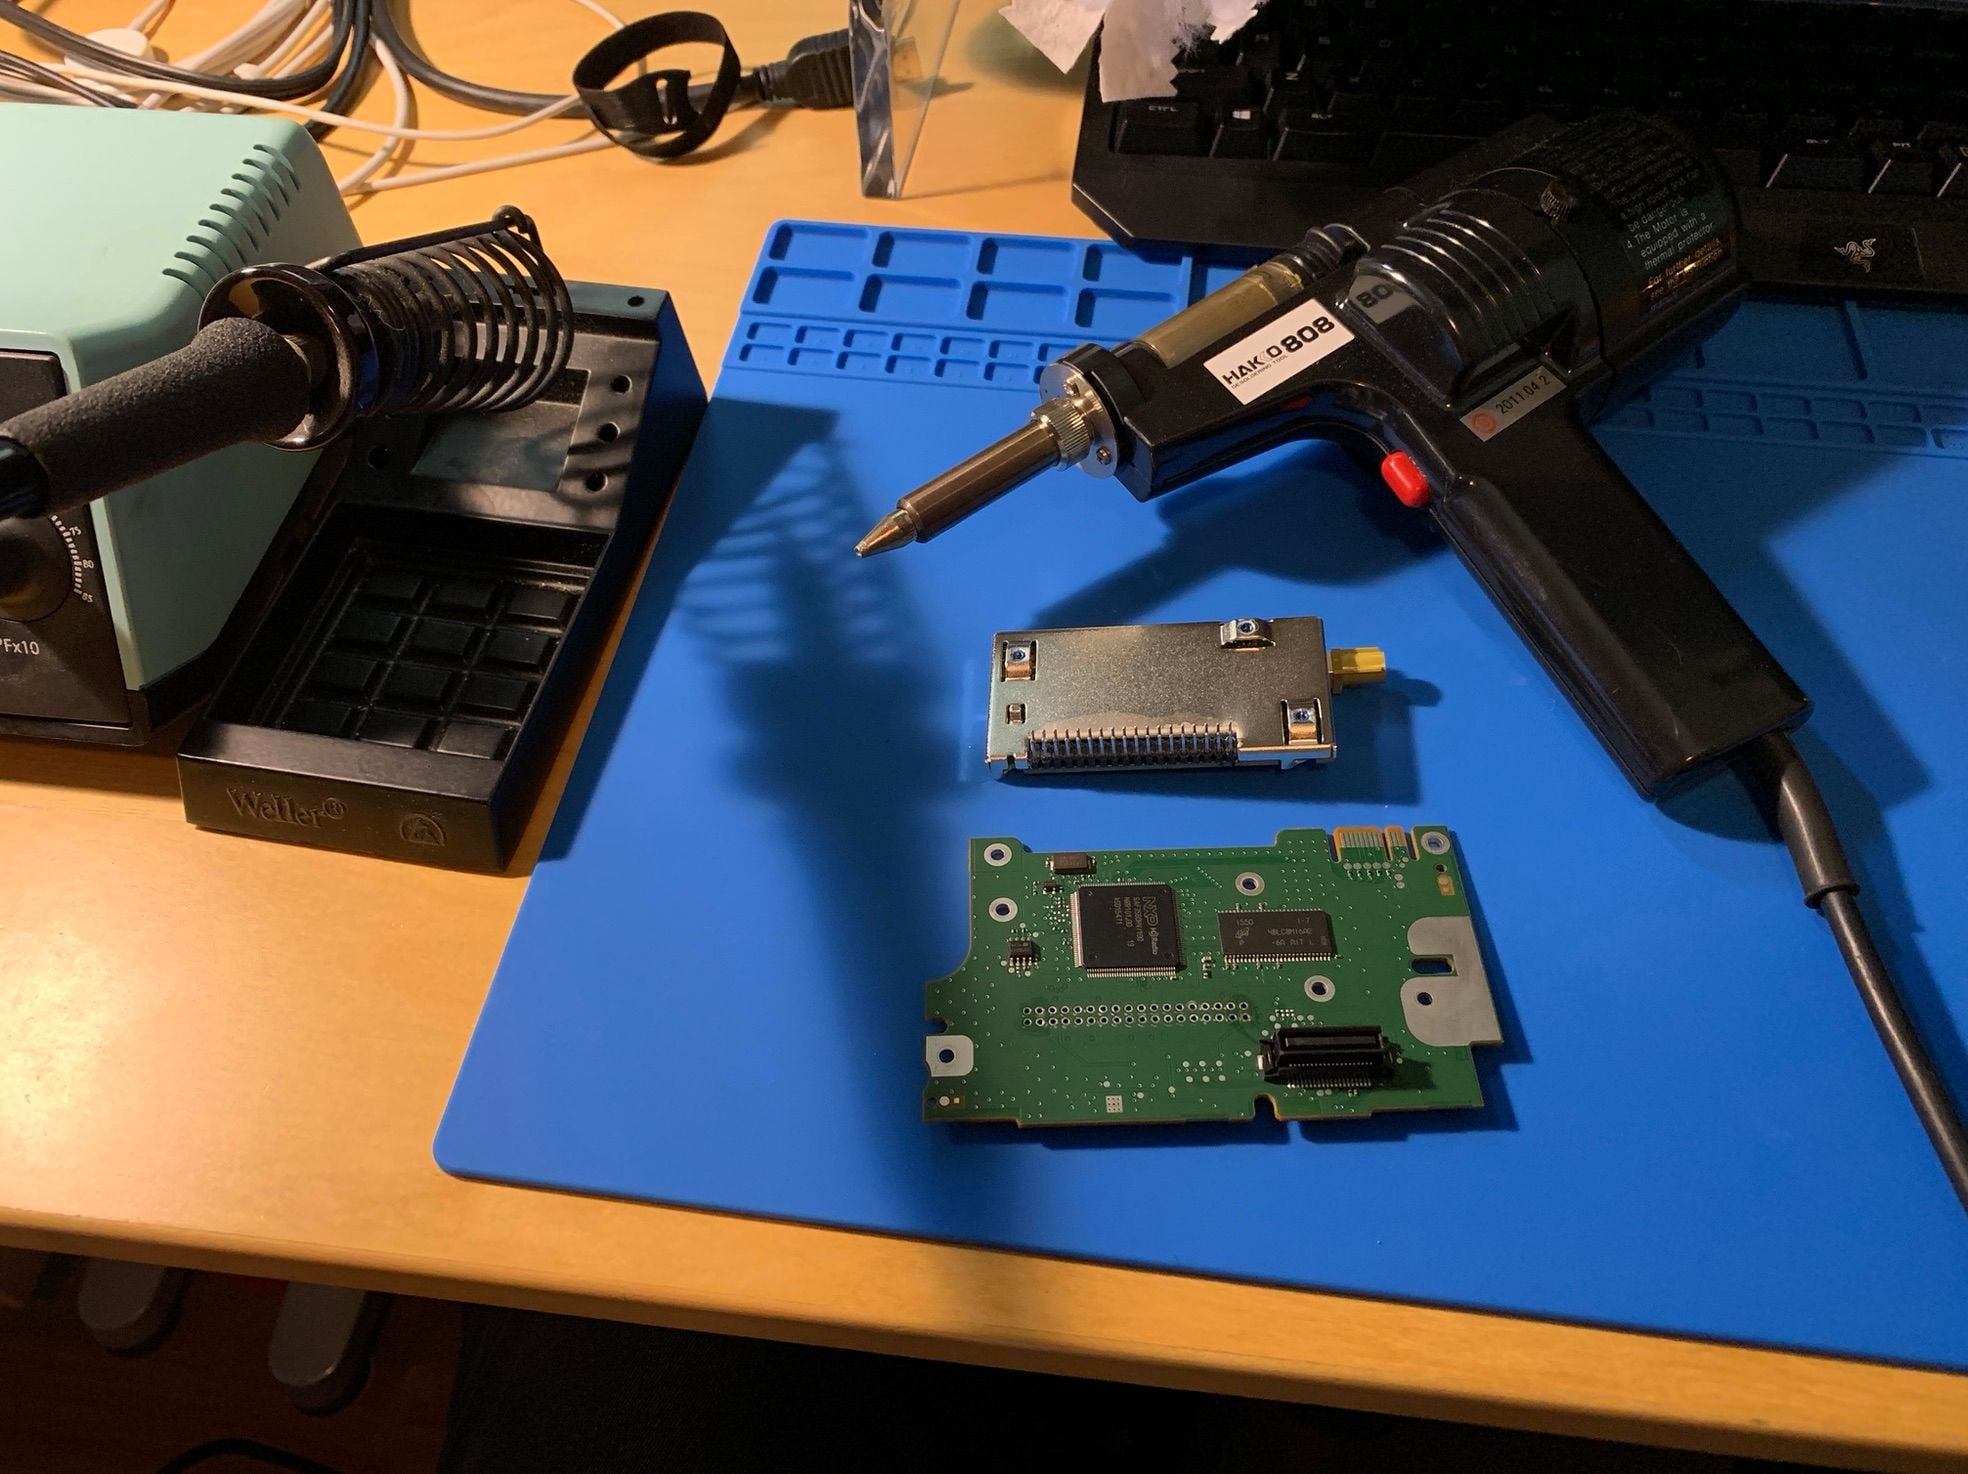
Looking closer, the Sirius satellite board that unplugs easily from the radio is actually TWO separate boards, soldered together with a set of header pins. I noticed an "HD Radio" logo on the one underneath, so having that assembly (HD radio board + satellite board) removed explains loss of FM radio (even if you aren't using HD Radio and tuning analog, sadly). I took a chance and un-soldered the Sirius board from the HD Radio one - I am happy to report, SUCCESS! This removes Satellite radio from PCM 3.1, but FM and AM radio both work now! And it leaves enough room for the Joyeauto board with ribbon cables popping straight up. I did not need to bend them.
Originally Posted by Sidvicious7
4.) As for your backup camera not working..... Try this! Go in to the PCM setup mode by holding the [CD-Eject] button for approximately 7 seconds and release. Your screen should display the setup mode. Verify the setting defaults to [Factory Camera/PDC]. Scroll to the bottom of the screen to exit and it should save your setting. To select a specific setting, use the **** to the right to scroll up/down and press to select an option. MAKE SURE YOUR EMERGENCY BRAKE IS DISENGAGED, OTHERWISE YOUR BACKUP CAMERA WILL NOT FUNCTION!
OMG thank you for this! I was testing in the garage with the park brake set... That's all this was. Thank you!
Here are a couple photos of the separated radio boards, and the Joyeauto PCM installed over top of the HD Radio board. Sat unsoldered from HD radio Joyeauto board over HD radio board
Wow...you guys are really getting into it...I don't think its worth it to crack open the PCM 3.1 under warranty at least. After that maybe then have a go at it but if it hurts the rest of the electronics..what is your recourse? Is Car Play worth it??? Just saying...
Wow...you guys are really getting into it...I don't think its worth it to crack open the PCM 3.1 under warranty at least. After that maybe then have a go at it but if it hurts the rest of the electronics..what is your recourse? Is Car Play worth it??? Just saying...
Yes, it's totally worth it!
The process my be invasive but I cannot imagine going back to stock without CarPlay. I have had zero issues.
I�m in the middle of a wireless CarPlay retrofit using the Joyeauto unit - where are you guys hiding the box? I�m thinking I have to take apart the center console and slip it into that space underneath the PCM?
I’m in the middle of a wireless CarPlay retrofit using the Joyeauto unit - where are you guys hiding the box? I’m thinking I have to take apart the center console and slip it into that space underneath the PCM?
It’s a tough fit. You will need to pull the PCM, Climate Control Box, center console trim pieces plus the frame that is supported by six screws. You will need to exercise caution not to bend or pinch the wires. I have read where other members installed the Integration box in the footboard under the carpet on the passenger’s side.
Before you mount the Integration box under the PCM mounting location ensure the wires/harness are moved/relocated to the side in between the metal framing to allow sufficient space for the Integration box. The opening is tight and will require some manipulation on your part. The Int. Box needs to rest as forward as possible, otherwise the Climate Control Box will make contact with the harnesses and likely pinch the wires at the connectors.
Thanks! That's what I needed to do. It was a tight fit, but it works great. Very slick interface. I'll tackle the rearview camera next week.. not looking forward to snaking the wire back to the console
Thanks! That's what I needed to do. It was a tight fit, but it works great. Very slick interface. I'll tackle the rearview camera next week.. not looking forward to snaking the wire back to the console
For me that was the hardest part, but it's so worth it!!
I�m in the middle of a wireless CarPlay retrofit using the Joyeauto unit - where are you guys hiding the box? I�m thinking I have to take apart the center console and slip it into that space underneath the PCM?
Right above the passenger side fuse box. This way all the cables would run neatly and you can also route he USB cable back to left side of the of passenger foot well.
All interested, I am currently working with Nick to see if he will be able to ship his kit's to the U.S. for a group buy situation. He is currently waiting to hear back from his insurers, and if he is able to do so, I'll take a count and names of who is interested having a kit sent here.
All interested, I am currently working with Nick to see if he will be able to ship his kit's to the U.S. for a group buy situation. He is currently waiting to hear back from his insurers, and if he is able to do so, I'll take a count and names of who is interested having a kit sent here.


 06-08-2019, 07:42 PM