When you click on links to various merchants on this site and make a purchase, this can result in this site earning a commission. Affiliate programs and affiliations include, but are not limited to, the eBay Partner Network.
Spent 30 min yesterday installing my new blackvue DR750S-2CH and routing it to the passenger side footwell power outlet. Only installed the front as I�m waiting for my windows to be tinted before installing the rear. Also, just ordered the Celllink-B battery supply so that it can provide up to 24hrs of parking mode recording. Will update this thread to show my rear camera install and backup battery soon. Chose to not hard wire so that I don�t risk draining the battery, even with the kit, as I do not drive my car during the week. The power management kit will cut off when the battery gets to a certain level, but with alarm and entry and drive, it will continue to drain the battery if you don�t drive the car for more that 2-3 days.
Looks like a coupe, so the rear facing camera will be useful. In my case (cabrio) the rear facing camera is just by the rear view mirror, so limited views with the top up.
The hotspot in the car makes it for a nice setup, particularly when you drop the car for service.
Overall I like the cam, but I’ll be investing on a cpl filter to improve the glare from the dashboard. Also, high end 128 sd card as a day in the track will fill the card easily in high res.
Congrats, share how you run the wires from the back cam
I just installed a DR750S-2CH in my car last weekend. Hard-wired into the fuse box with a Power Magic Pro unit. Overall impressed, but one thing not happy about was all the talk about Cloud Enabled I didn't realize that the footage is not loaded in real time from the car's built in Wi-Fi. You have to manually upload the clips you want to save to the cloud.
I’ve had the 650 with the Celllink battery pack for over a year and it’s very good, just make sure you’re using an approved sd card because they’ll overheat and will shut the unit down
I�ve had the 650 with the Celllink battery pack for over a year and it�s very good, just make sure you�re using an approved sd card because they�ll overheat and will shut the unit down
Thanks. I did a lot of research on the micro-sd card and have one on the way from Amazon tomorrow with 64gb. I figure 64gb should be enough to keep 7-10hrs of full HD for 2CH. 128gb will give you 12hrs or so and I rarely drive more than 3 hours at any given sitting.
Where did you end up mounting / placing the Cellink battery? I am considering inside the glove box if there is enough room, haven't seen the actual size yet (should arrive tomorrow).
I just placed it in the glove box and it�s fine there (mine came with Velcro strips but haven�t used them), the only problem is that the battery doesn�t have an ON/OFF switch so I unplug it when it�s in the garage to save Celllink�s battery power.
I just placed it in the glove box and it�s fine there (mine came with Velcro strips but haven�t used them), the only problem is that the battery doesn�t have an ON/OFF switch so I unplug it when it�s in the garage to save Celllink�s battery power.
It looks like the version 2 has a power selector for "off", 5A, or 7A.
By the way, be VERY careful with the SD cards. I suggest some research into brand and models as some super fast cards will overheat the camera, making it restart and also cause pixelated videos
Looks like a coupe, so the rear facing camera will be useful. In my case (cabrio) the rear facing camera is just by the rear view mirror, so limited views with the top up.
The hotspot in the car makes it for a nice setup, particularly when you drop the car for service.
Overall I like the cam, but I’ll be investing on a cpl filter to improve the glare from the dashboard. Also, high end 128 sd card as a day in the track will fill the card easily in high res.
Congrats, share how you run the wires from the back cam
Any pics of your setup, John? I've got a cab, am thinking about a Blackvue, but was only considering a single channel until I read this post.
By the way, be VERY careful with the SD cards. I suggest some research into brand and models as some super fast cards will overheat the camera, making it restart and also cause pixelated videos
Yup thanks. Have been watching lots of YouTube videos on this topic and ordered the two recommended types. The Tesla forums have also beaten the SD card topic to death.
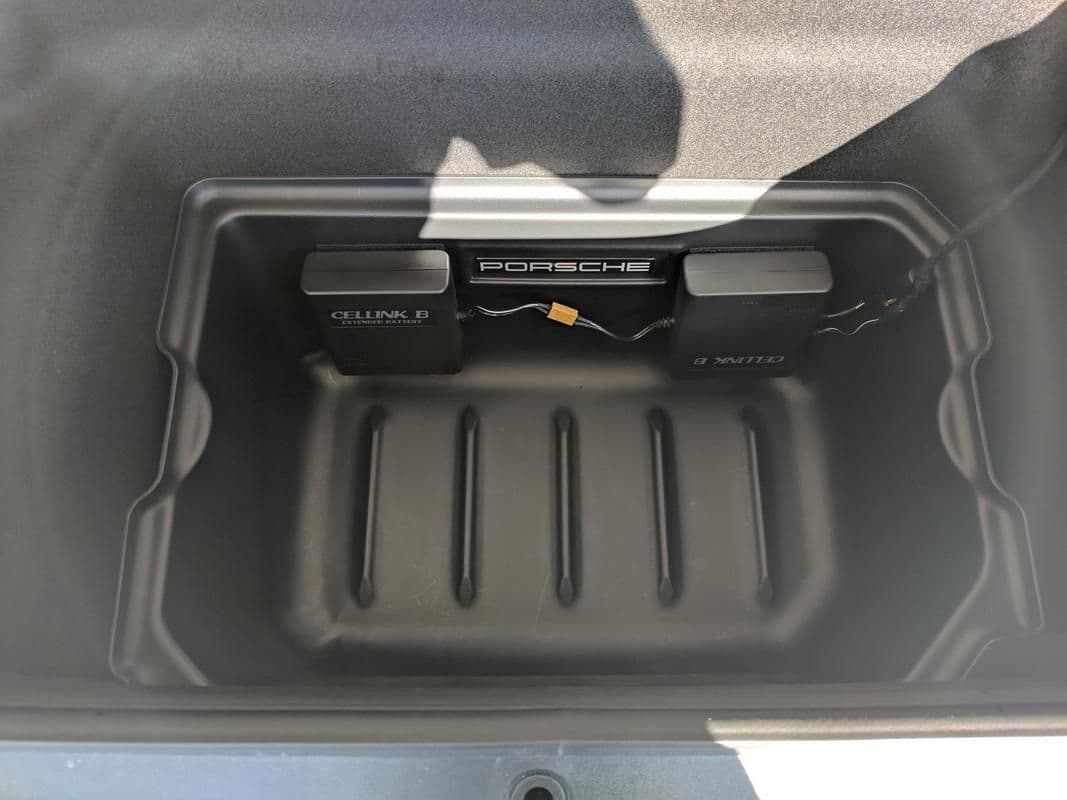
I am using the Cellink B battery packs which I placed in the frunk and they do have an off switch. However, Nick from Musicar NW had wired in a on/of switch for me onto the center console when they put together my radar/laser system. Just waiting for a trigger module from him so that it will be functional. Currently, I just open the frunk and turn it off manually if I know that I won't be using the car for a while. I switch it to 7A when it in normal operation. This will allow the batteries to recharge normally. I switch it to 5A whenever I need to recharge it externally using the AC /cig plug adapter.
I am using the Cellink B battery packs which I placed in the frunk and they do have an off switch. However, Nick from Musicar NW had wired in a on/of switch for me onto the center console when they put together my radar/laser system. Just waiting for a trigger module from him so that it will be functional. Currently, I just open the frunk and turn it off manually if I know that I won't be using the car for a while. I switch it to 7A when it in normal operation. This will allow the batteries to recharge normally. I switch it to 5A whenever I need to recharge it externally using the AC /cig plug adapter.
Pretty cool JW! How did you get the wire into the cabin area?
Any pics of your setup, John? I've got a cab, am thinking about a Blackvue, but was only considering a single channel until I read this post.
The front cam is the same as the OP, the rear I attached to the plastic piece where the top hook comes in, to the right side. That’s the highest and furthest back point that is static related to the top. One could make a bracket between the seats at the rear window height. I thought about it but it would look odd. You can attach to the rear window, but once the top is down so would be the cam. I drive with the top down as much as I can and the setup is ok.
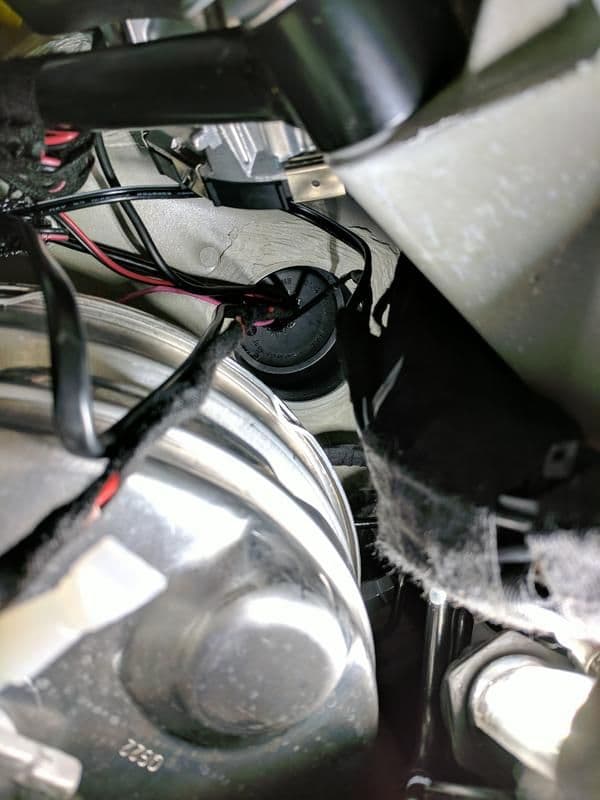
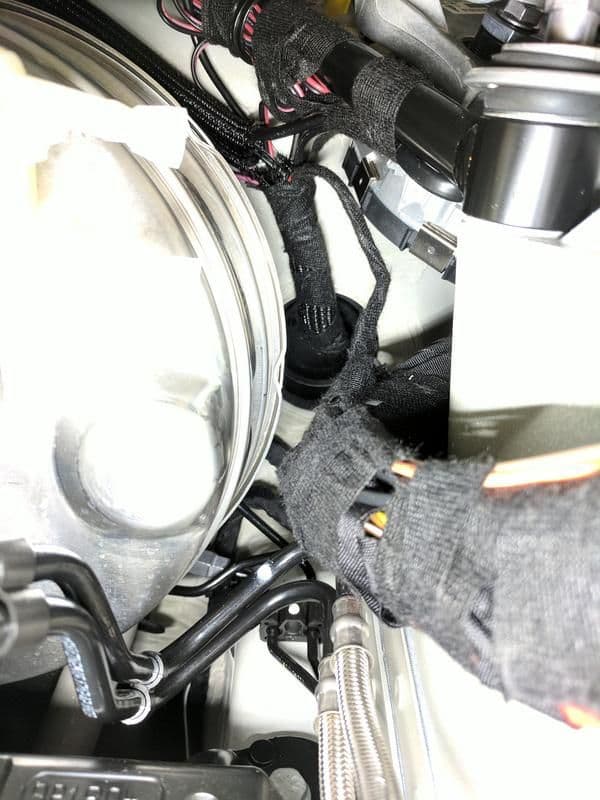
There are a few grommet holes in back of the frunk liner. I fished the wires through the one on the driver's side to go into the space between the frunk and the cabin. Under the brake booster, there is another grommet hole. I just popped out the cover and fished the wired through there and into the cabin.
These pictures show the grommet hole leading into the cabin.
Originally Posted by Porsche_nuts
Pretty cool JW! How did you get the wire into the cabin area?
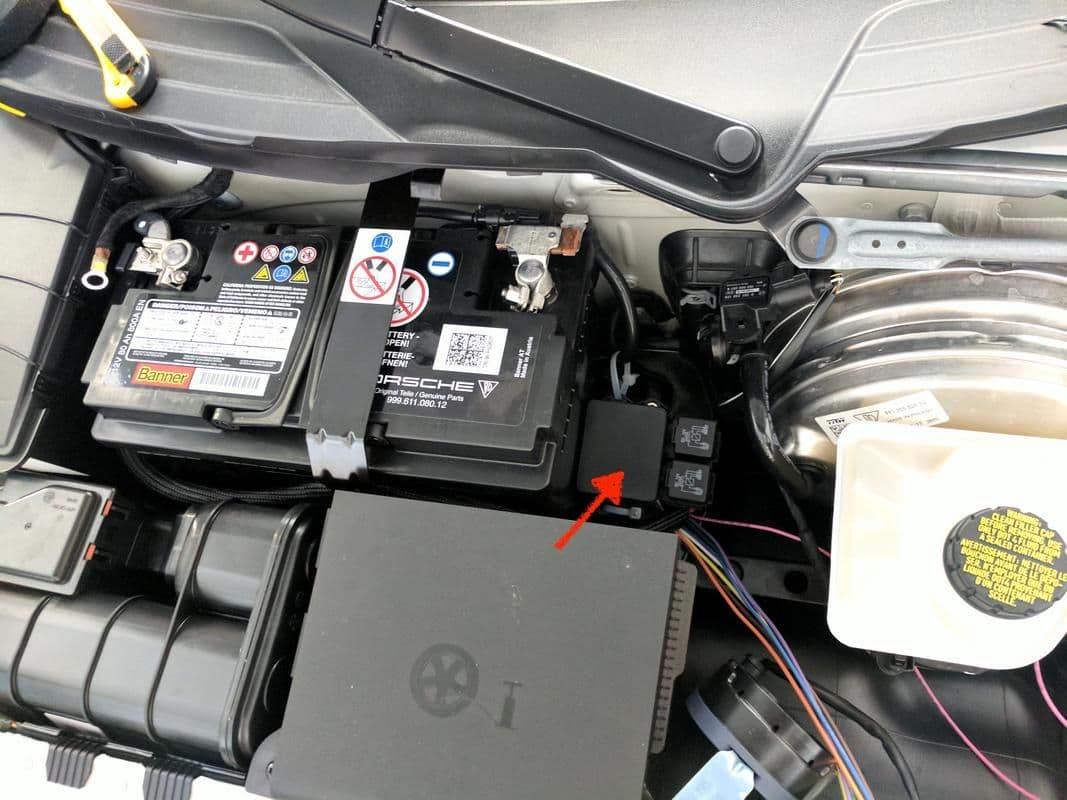
I also installed a Painless aux fuse block so that I don't clutter up the fuse boxes inside the cabin with a bunch of add-a-fuses. There is just one wire coming from the aux fuse block that goes to an ACC fuse location on the passenger side cabin fuse box so that any components I add to the aux fuse block will be on a switched circuit. My radar detector, laser jammers, dash cam, and cellink b all get power from that fuse block.
The fuse block is connected directly to the car's battery.

 10-15-2017, 05:08 PM