When you click on links to various merchants on this site and make a purchase, this can result in this site earning a commission. Affiliate programs and affiliations include, but are not limited to, the eBay Partner Network.
How To Remove The Rear Bumper From a 991 TT (and some exhaust swap hints)
Hey all. I found a few how-to's, and some were more relevant than others. There are also a couple differences between the 991 and the Turbo that merit some discussion.
Tools needed:
3/8" and 1/4" ratchet and extentions
Torx sockets in T20, T25, and T30 size
Optional: Torx wrenches in T20, T25, or T30 size
medium flat blade screwdriver
jack and jackstands OR RaceRamps
Optional: painter's masking tape
13mm socket
towels/rags to rest bumper on
Tools needed to remove/install exhaust:
15mm deep socket
large 5lb rubber mallet
12mm long wrench
optional: 12mm gearwrench
WD40/similar anti-sieze
5mm (I think) allen socket
1. Get the car ready.
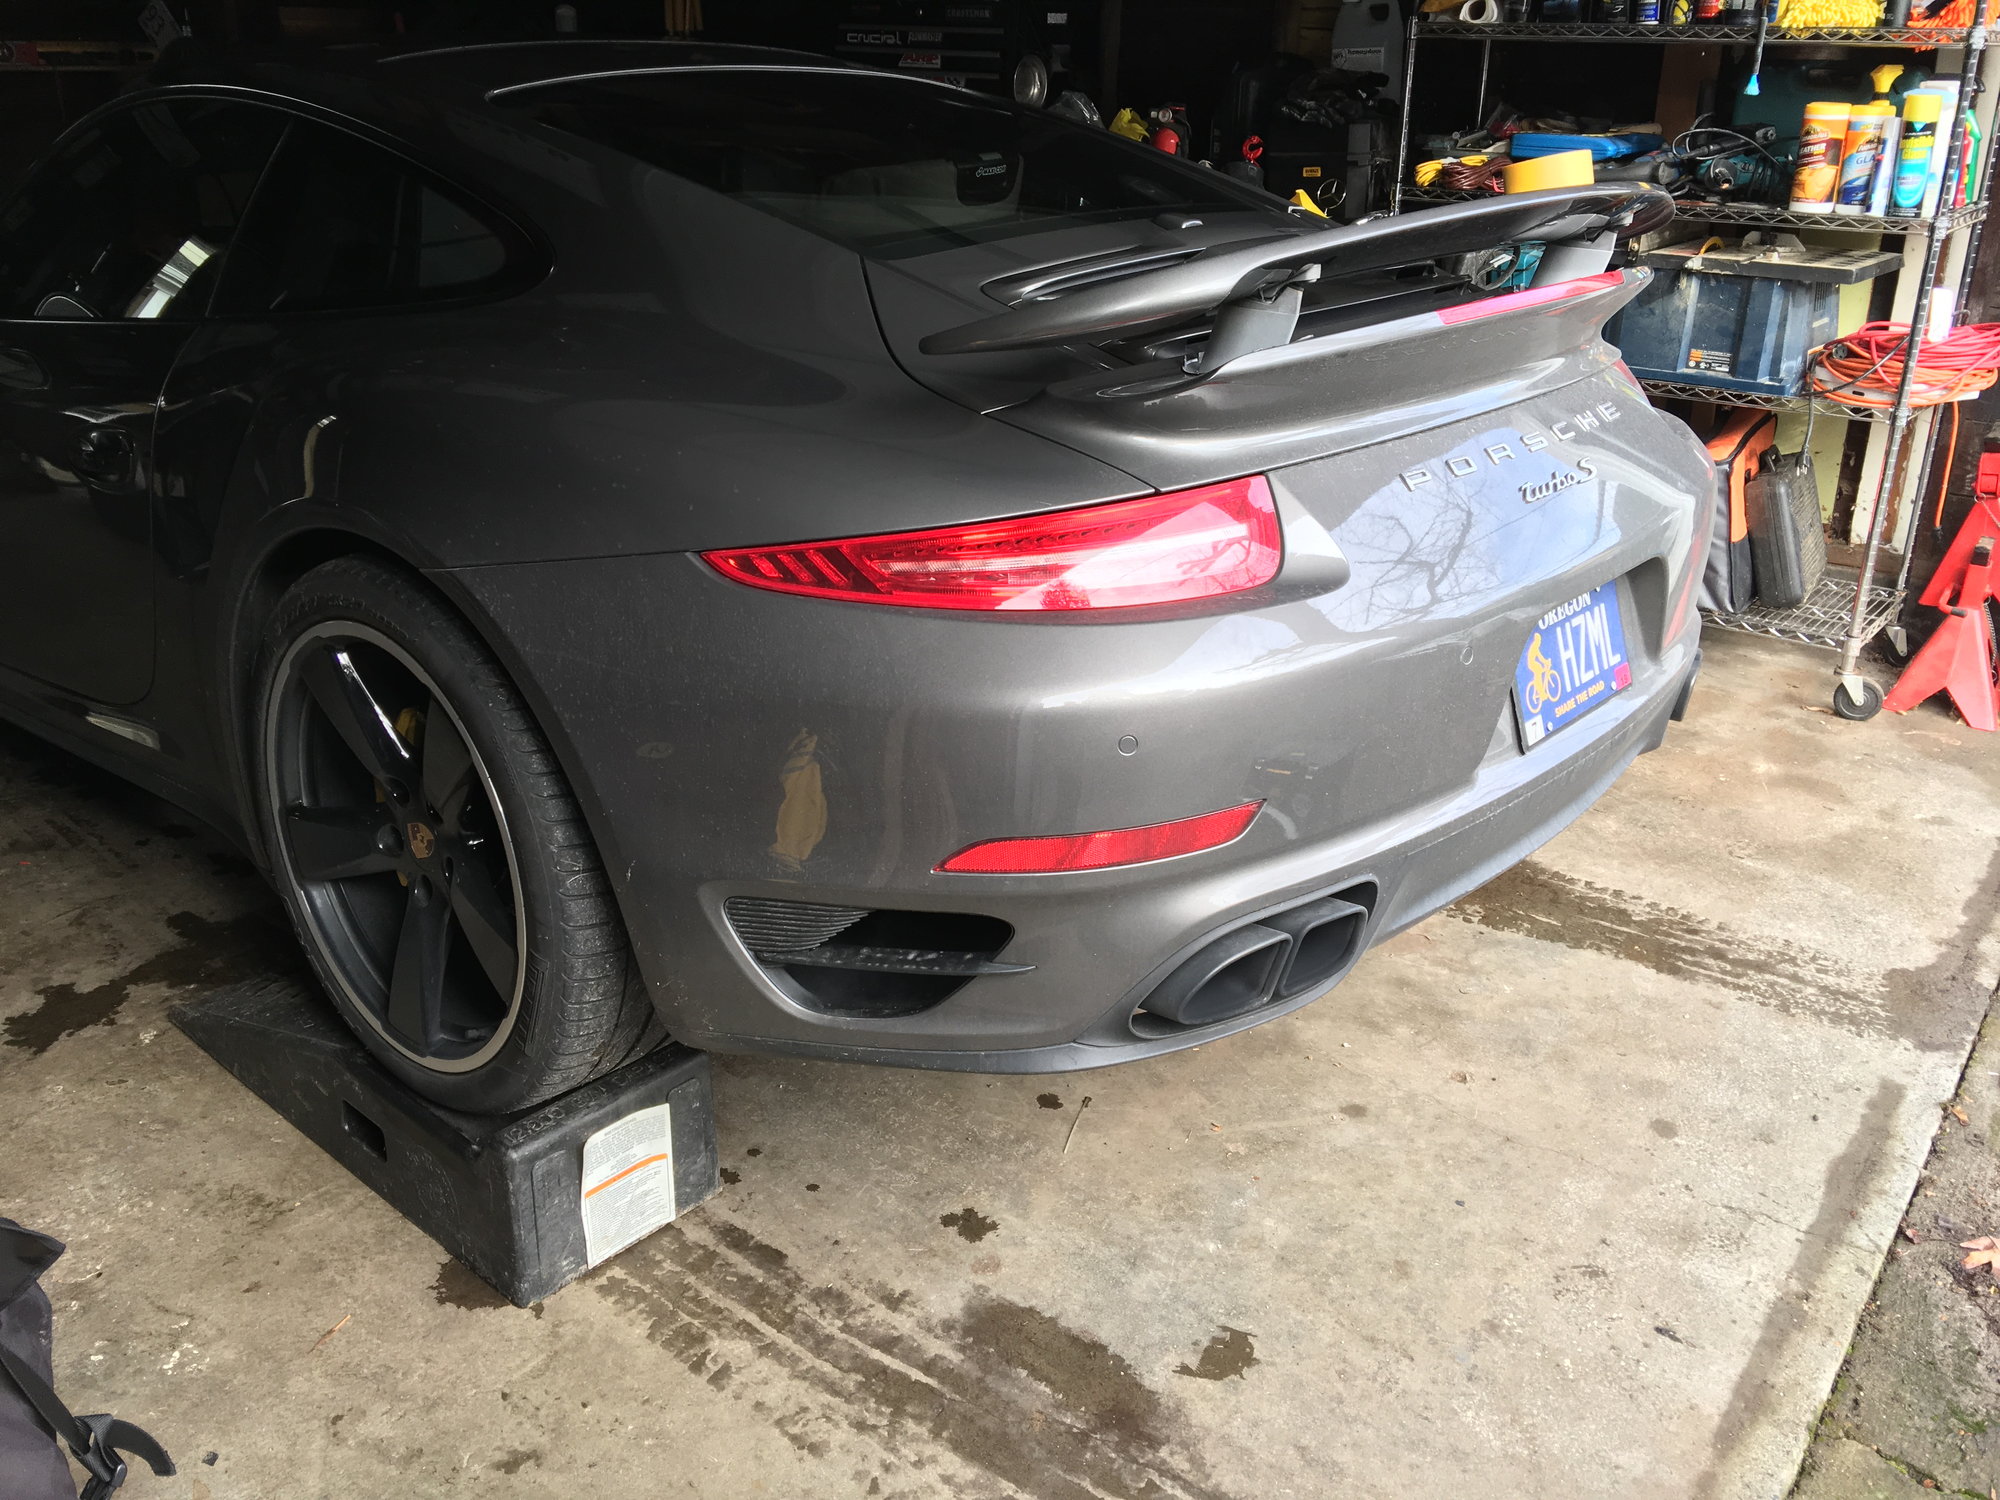
a. First you have to decide if you want to do this the easy way... or the even easier way. The easiest way is to loosen the rear lugnuts, put the back of the car on jackstands, and remove the rear wheels. I did not do this. I backed the car up onto RaceRamps and left the rear wheels on. It wasn't terrible, but my hands are really tired from reaching some of the bolts in the wheels wells with the tire on.
b. Start the car and raise the rear spoiler. It's also a great time to pop the rear hatch. It makes it much easier to remove the wing if you can place the rear wing in Service Mode. From user pyramid...
Originally Posted by pyramid
I think it can be done, I've not personally tried it in the purpose of driving it around that way but I think it is possible.
What you need to do/try is to put the spoiler in "service mode".
This is the mode where one needs to dismantle both top wing and its base.
The top wing will raise higher than in normal non service mode for easier disassembly.
How to enter service mode,
When the car is in stationary, push and hold down the spoiler button (spoiler on its resting position/closed). Continue to hold until rear wing and front apron fully deployed.
Still continue to hold/pressed down spoiler button (this is where you telling the car that you want to enter "service mode"), in some seconds later both rear and front will retract back to its closed position and then ONLY the rear will continue to deploy to its "service height".
Once it reach it maximum height and no longer going up, let go/unhold the button. The rear wings is now at its "service mode".
Now what I think possible is, BEFORE it reached maximum "service height", let go the button at the height you want the rear to be while automatically leaving the front apron fully closed.
I think the only drawback of doing this, the PAA (active aerodynamics) might not work related to speed anymore since the car think your are in service mode.
But it might just work if the car automatically bypass its service mode in the presence of speed reached to "must" deploy the spoiler further for safety.
c. Either back the car up onto the ramps or raise the car and remove the tires as in picture 1:
2. Remove things from above the bumper
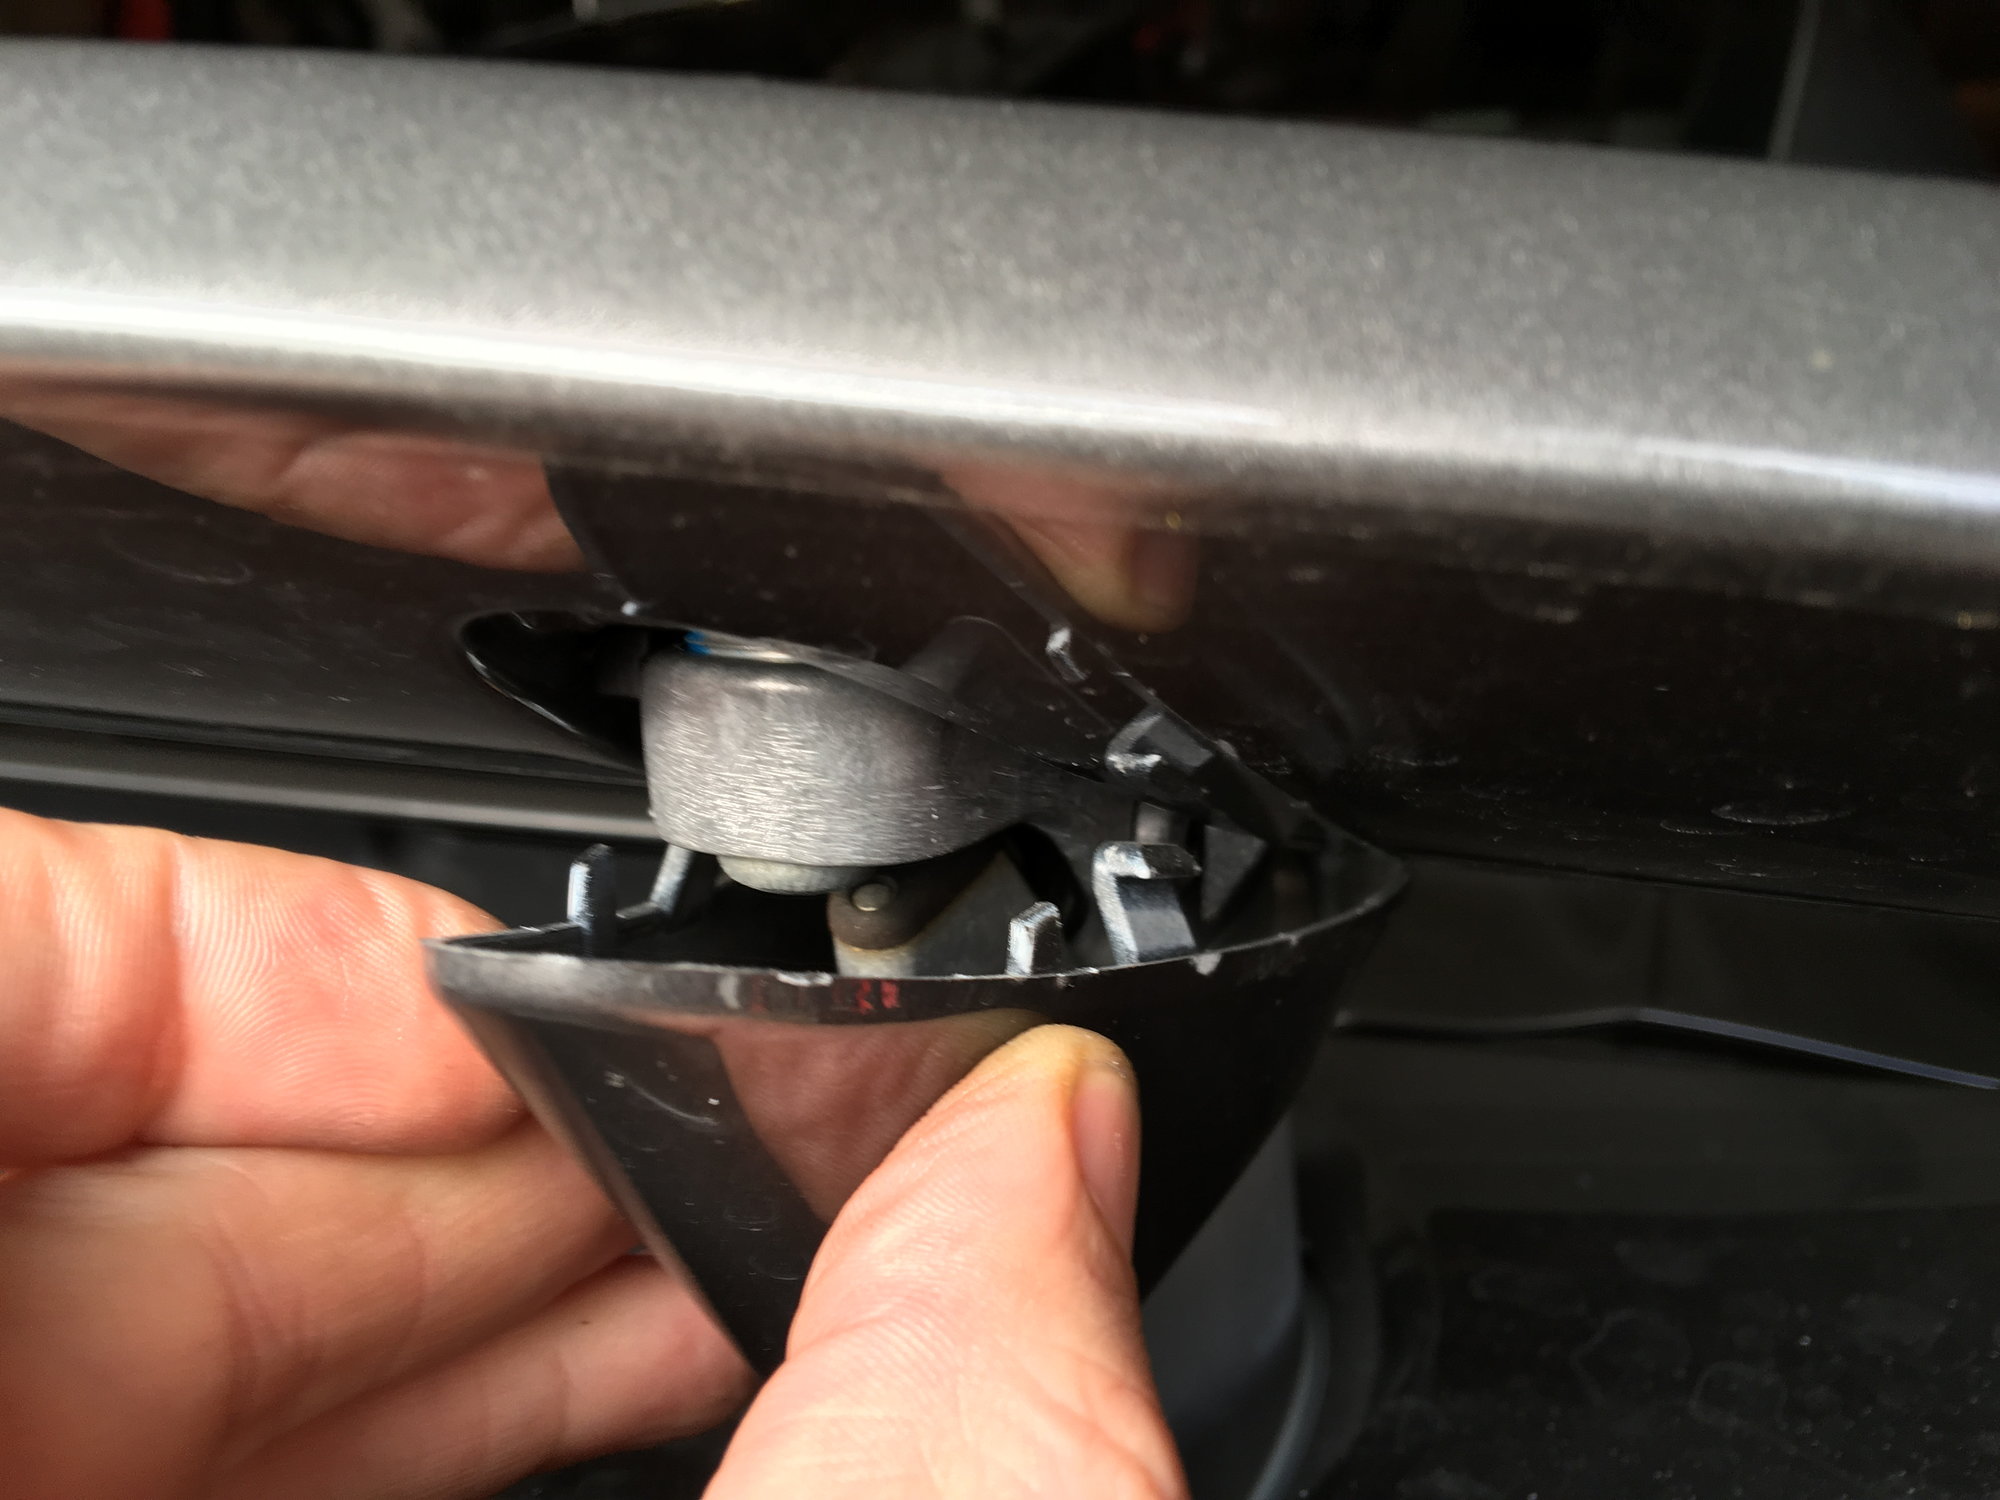
a. Gently pinch and pull down on the plastic body-colored spoiler post surrounds. They will come away from the spoiler relatively easily as in diagram 2. They can be let to fall into the like-shaped slot in the engine cover below.
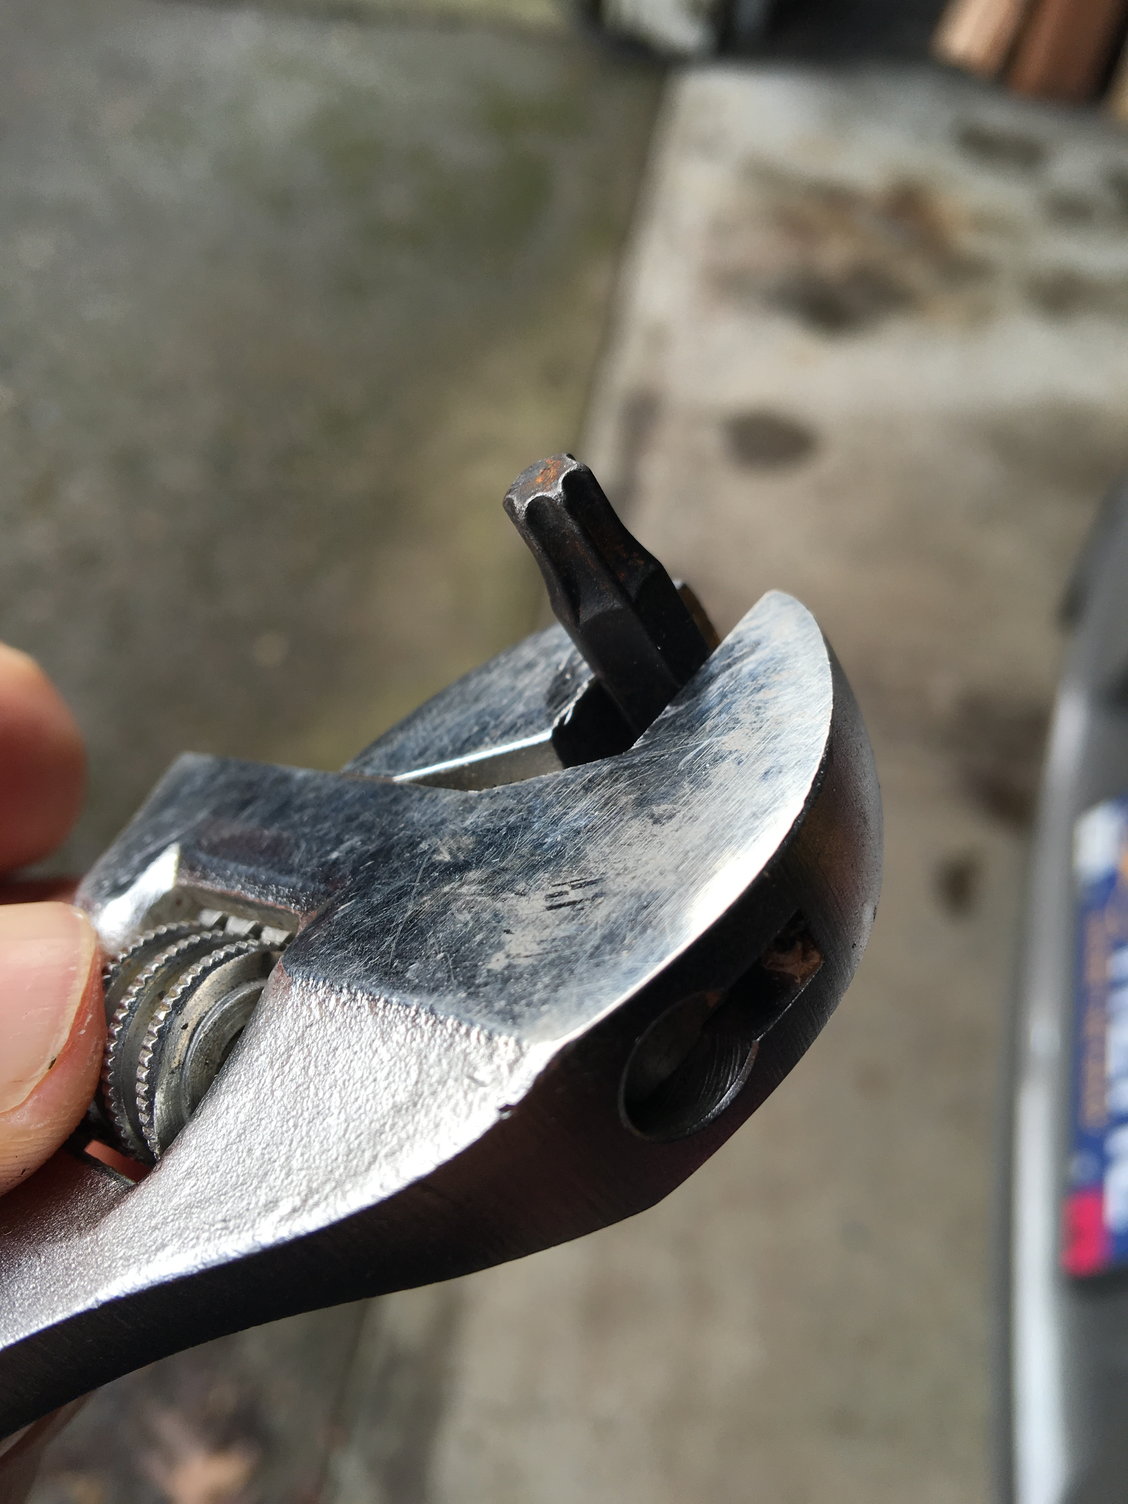
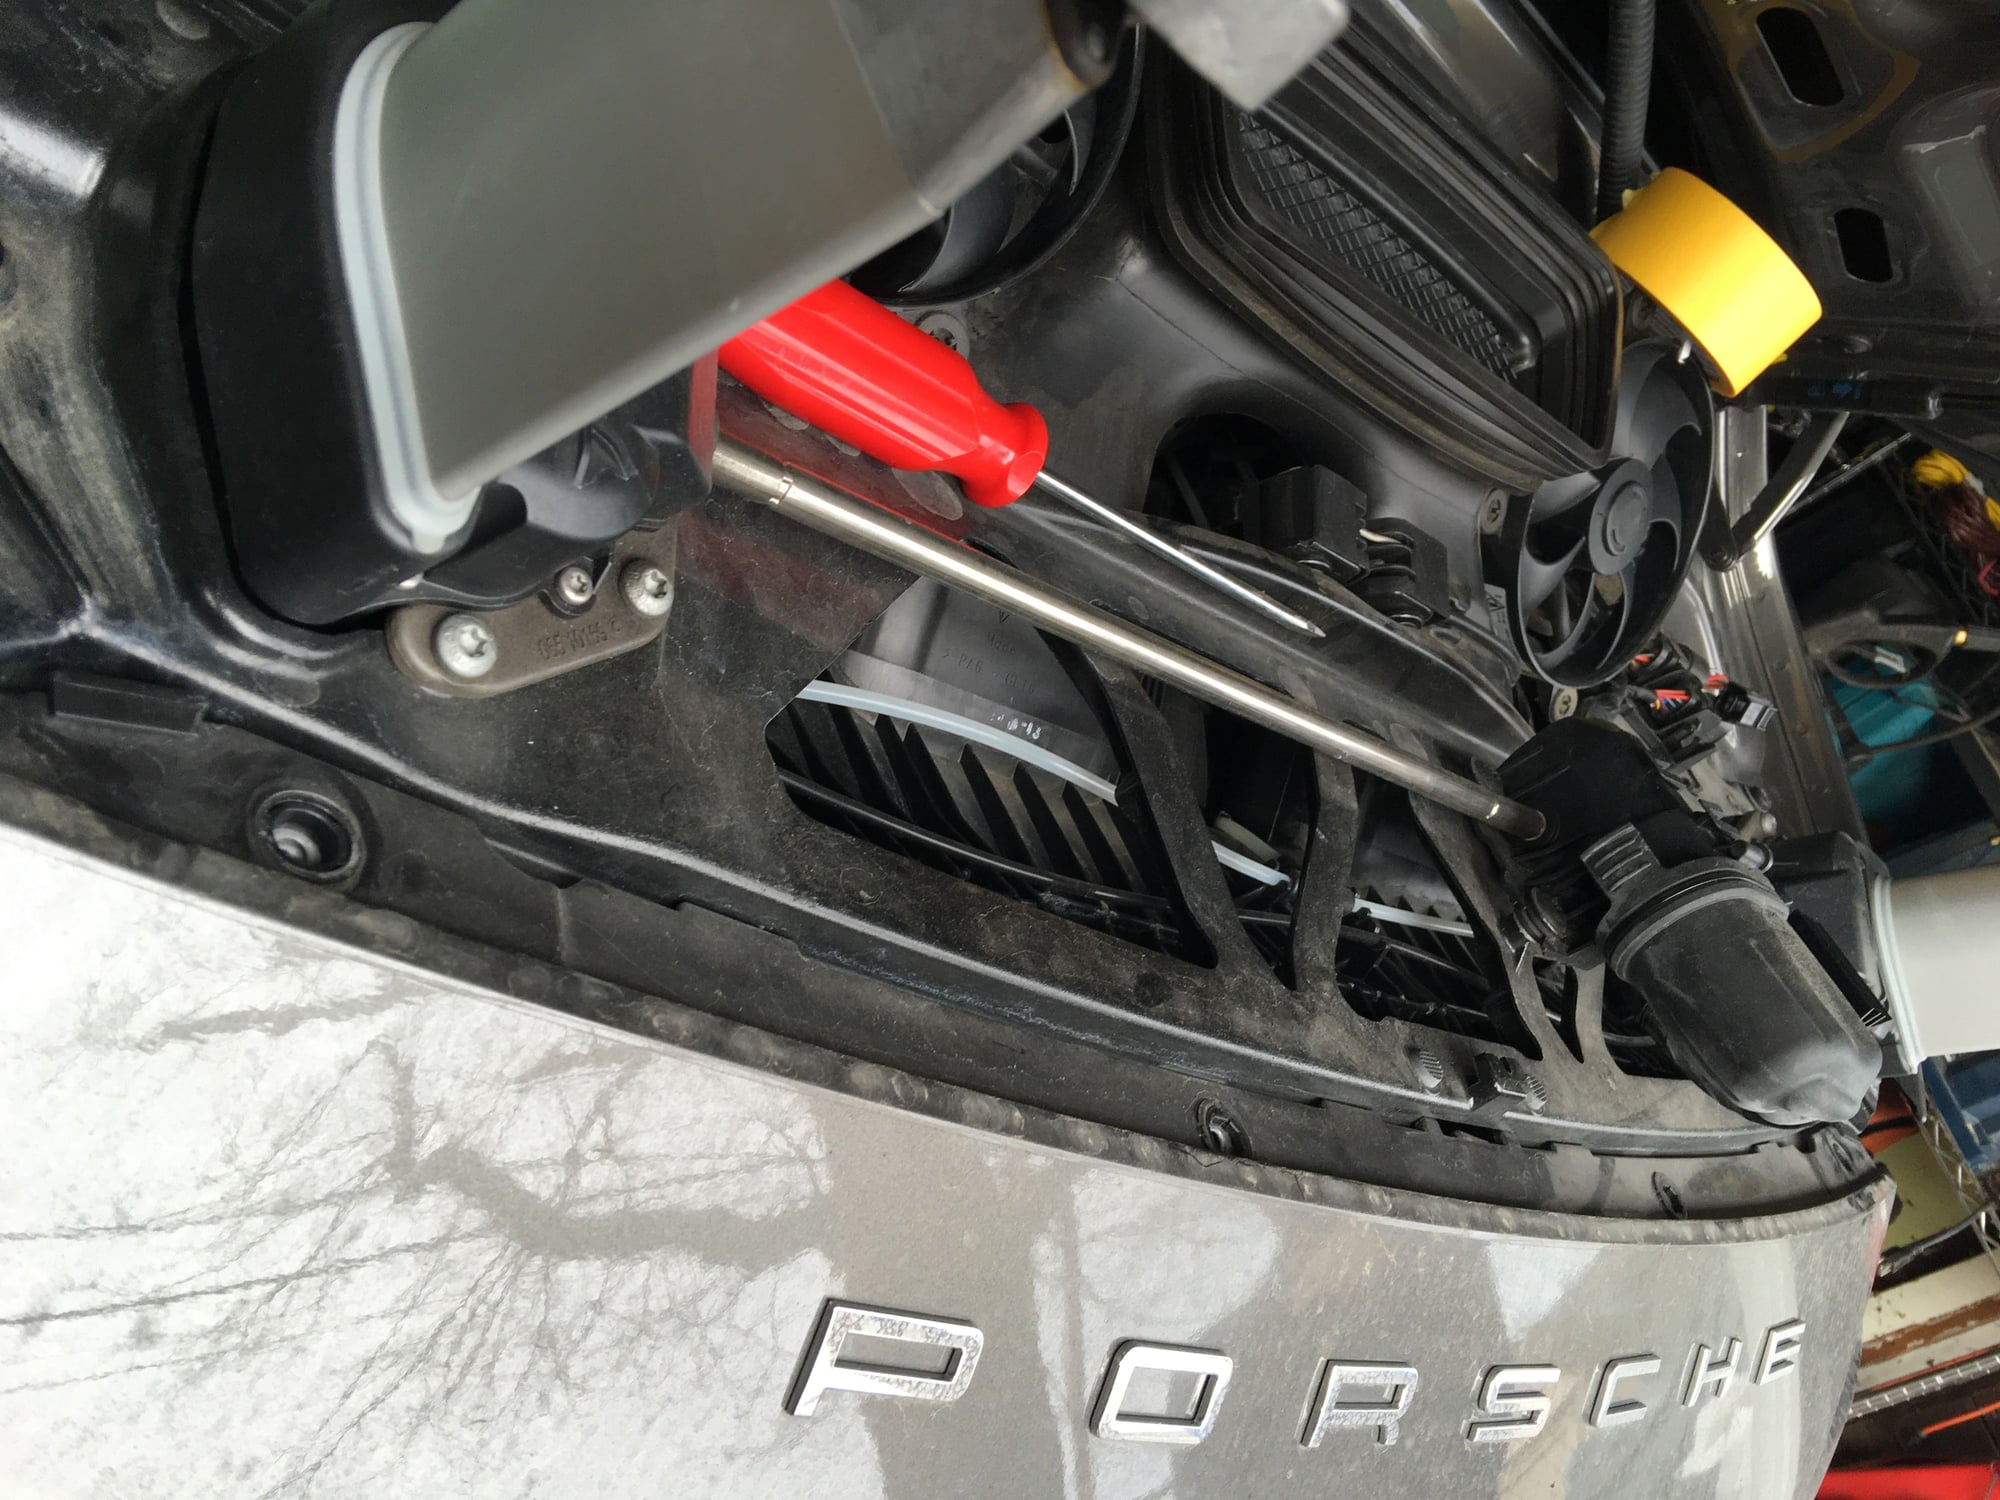
b. Unscrew the T25 bolts on the backside of each spoiler pillar. If you put the rear wing in service mode, then you can use a T25 socket or wrench to remove the two screws. Because I didn't know about the Service Mode, there wasnt access for a full T25 socket and ratchet; so here's the tool I kluged up. It consists of a T25 bit placed in an adjustable wrench. Ugly, but effective:
c. With the two bolts removed and placed in the bolt bucket (I use a magnetic bolt tray from Craftsman), tilt the spoiler forward. The spoiler will tip off of a latch on each pillar. I placed the spoiler in the passenger sear where it wouldn't get hurt. Either leave the two little pillar covers with the spoiler or leave them in the engine cover that we'll remove next.
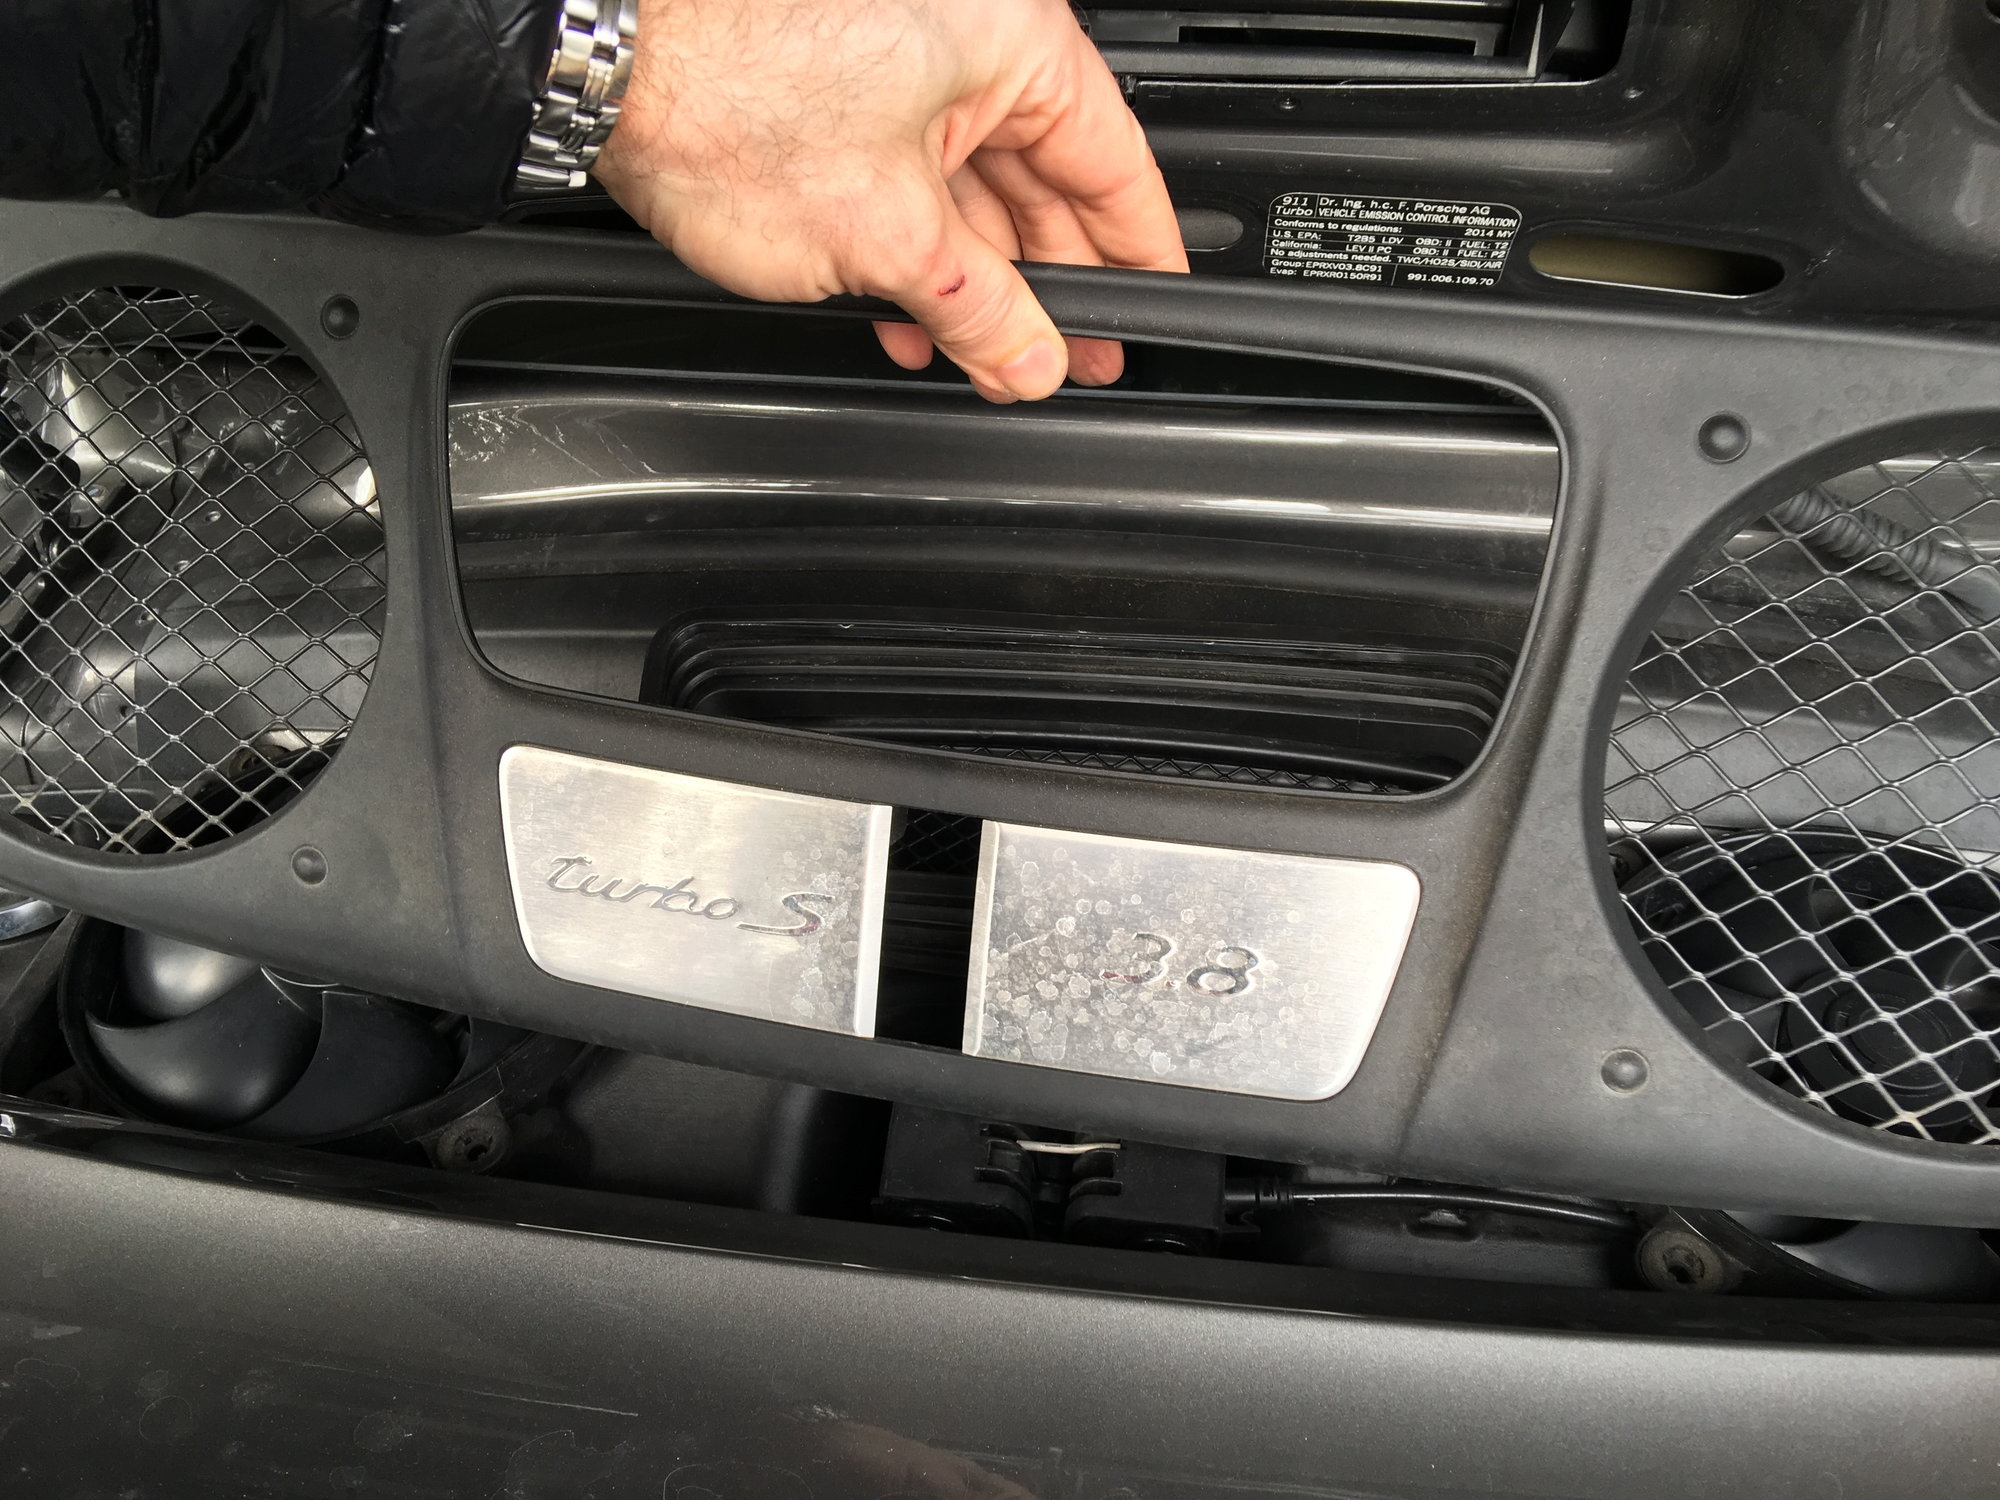
d. Next, place your hand under the large black plastic "turbo 3.8" engine cover and pull up. The cover will unseat and gently come off. You might have to push the air intake rubber sleeve through the engine cover, but that's fine:
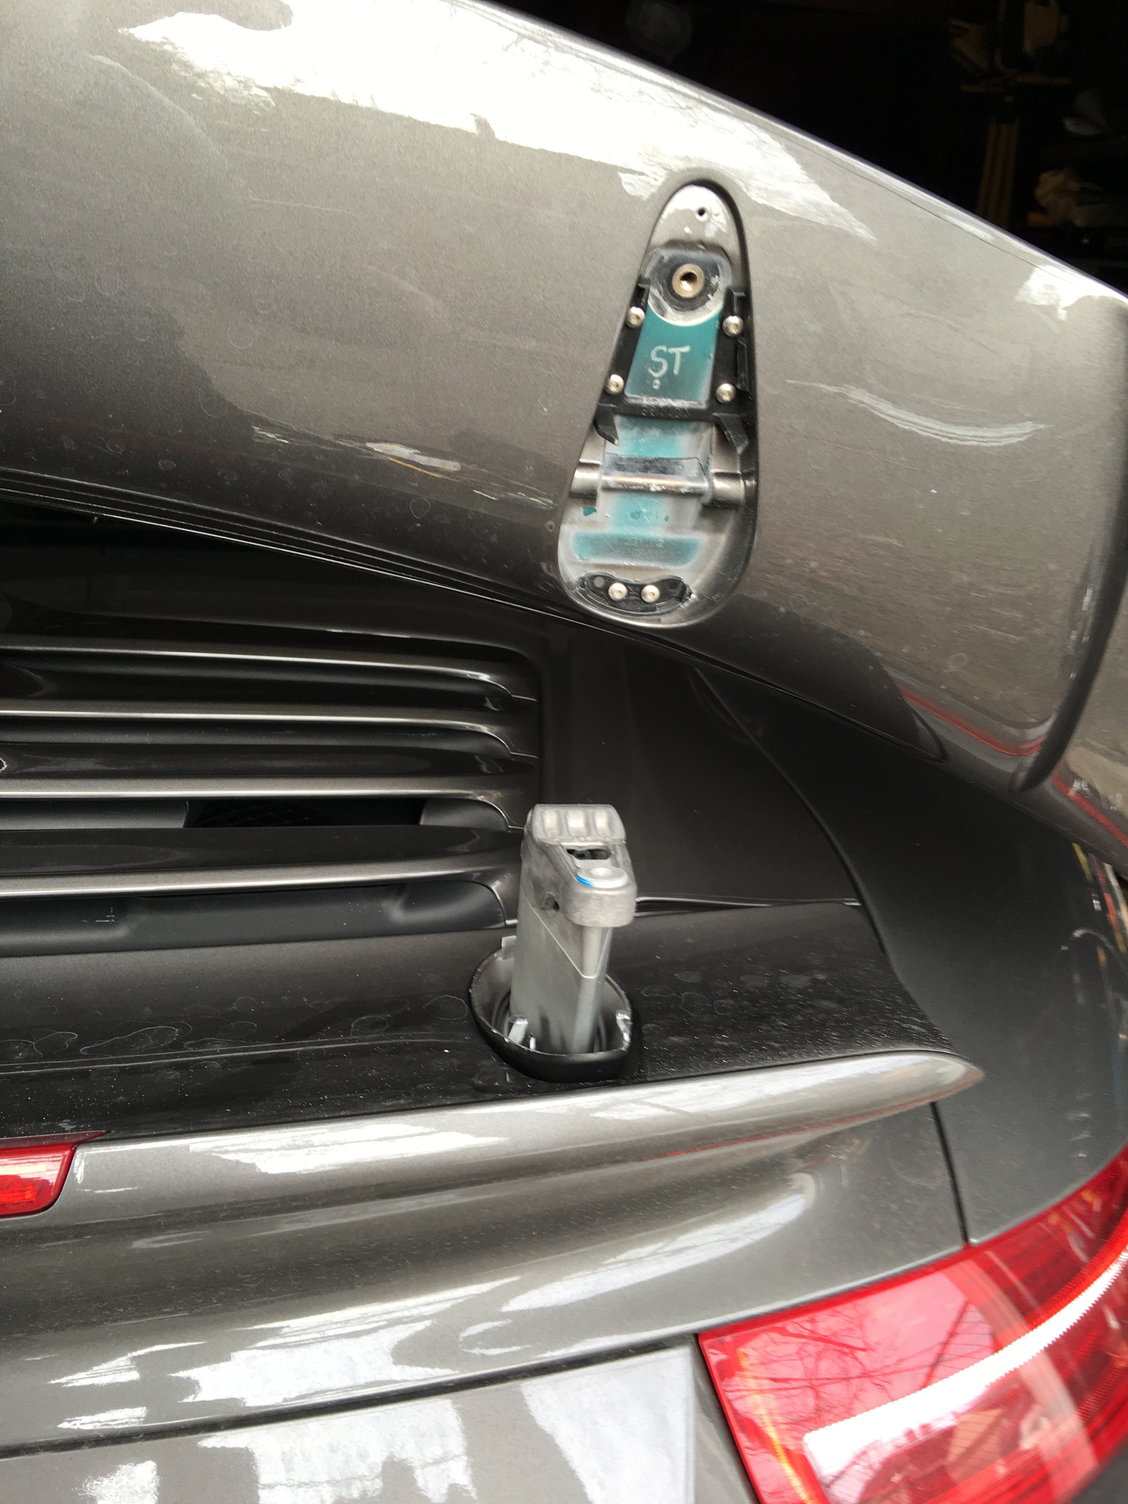
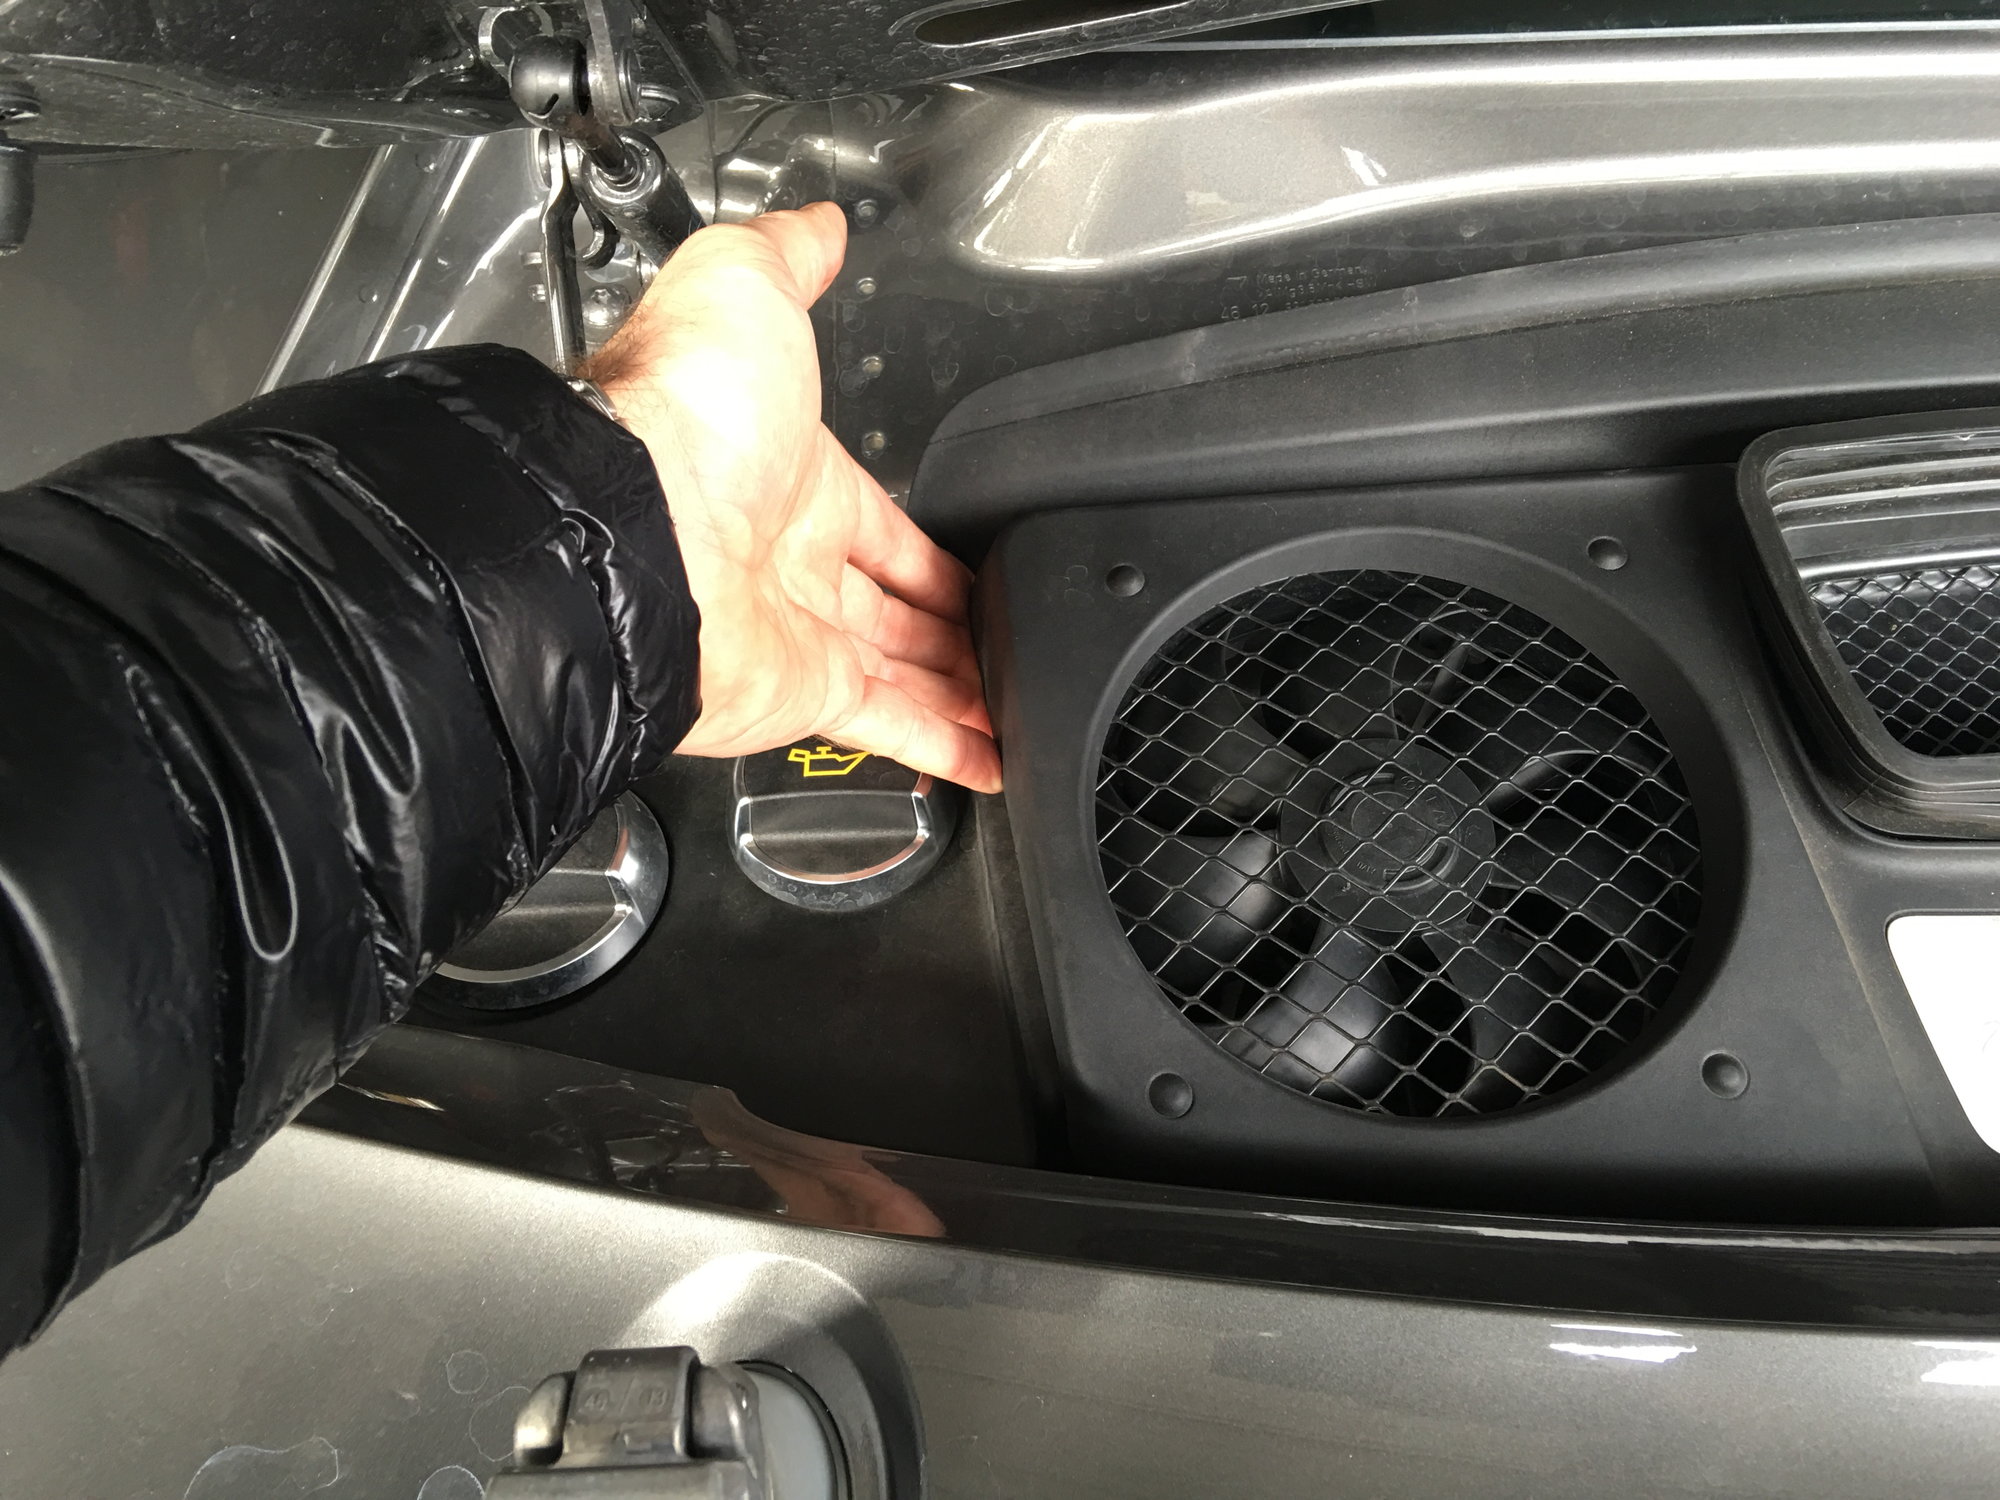
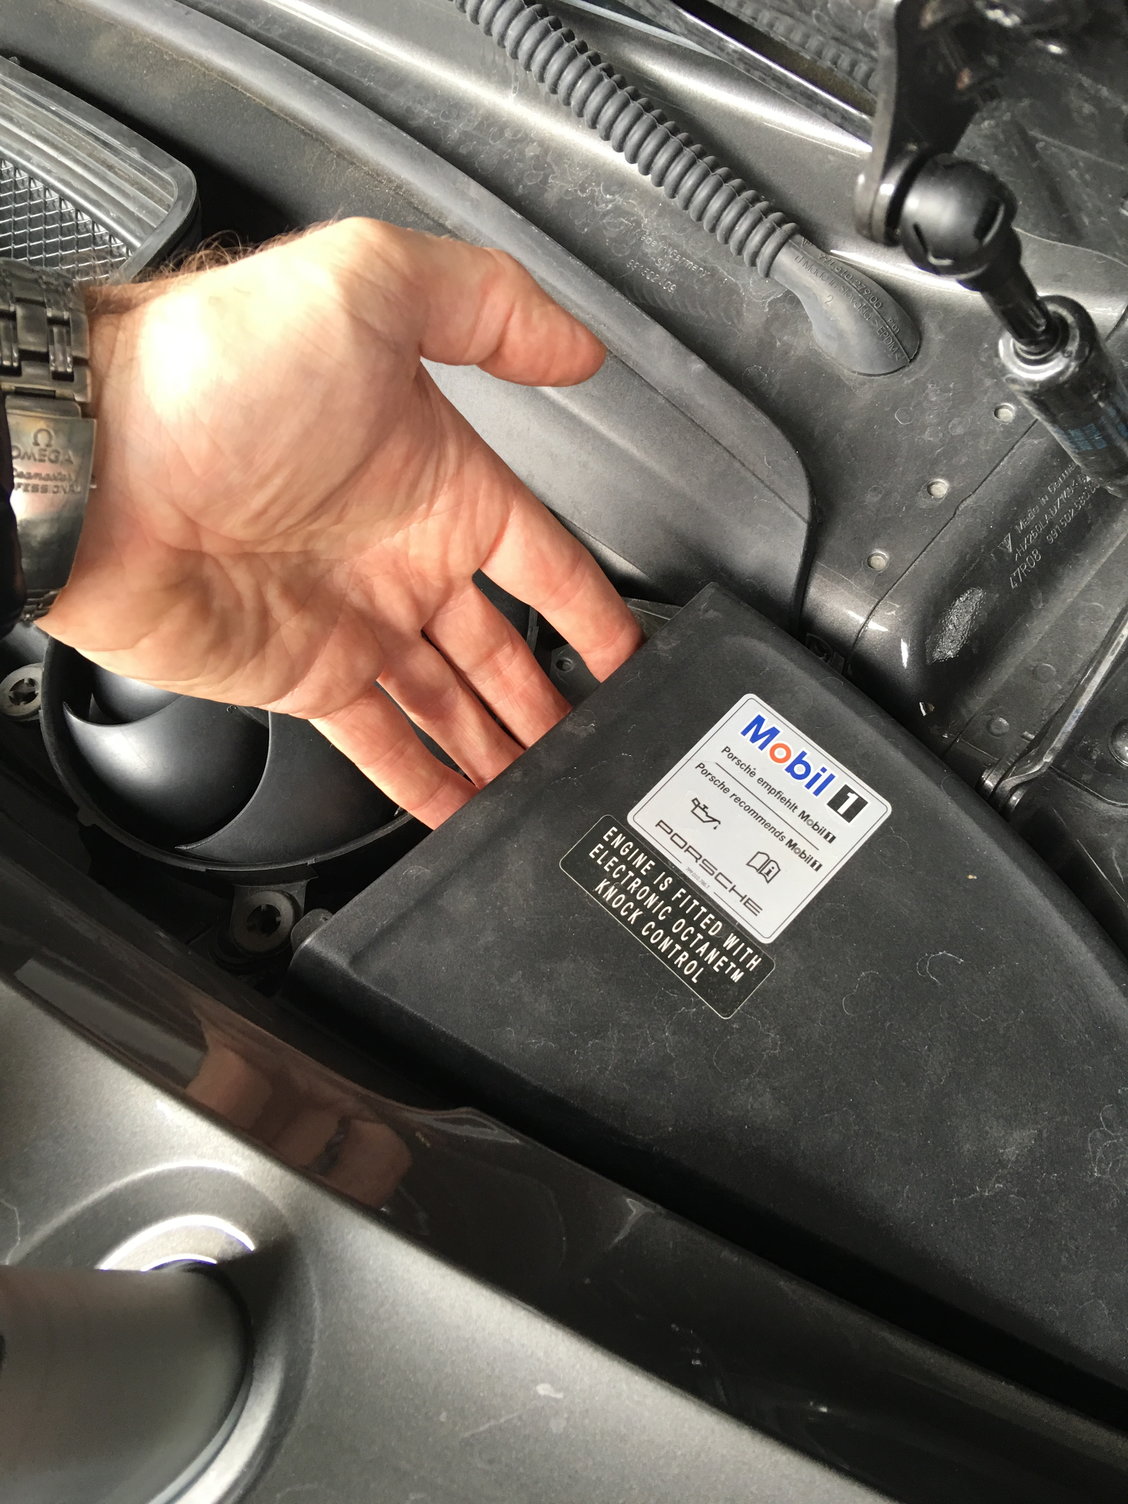
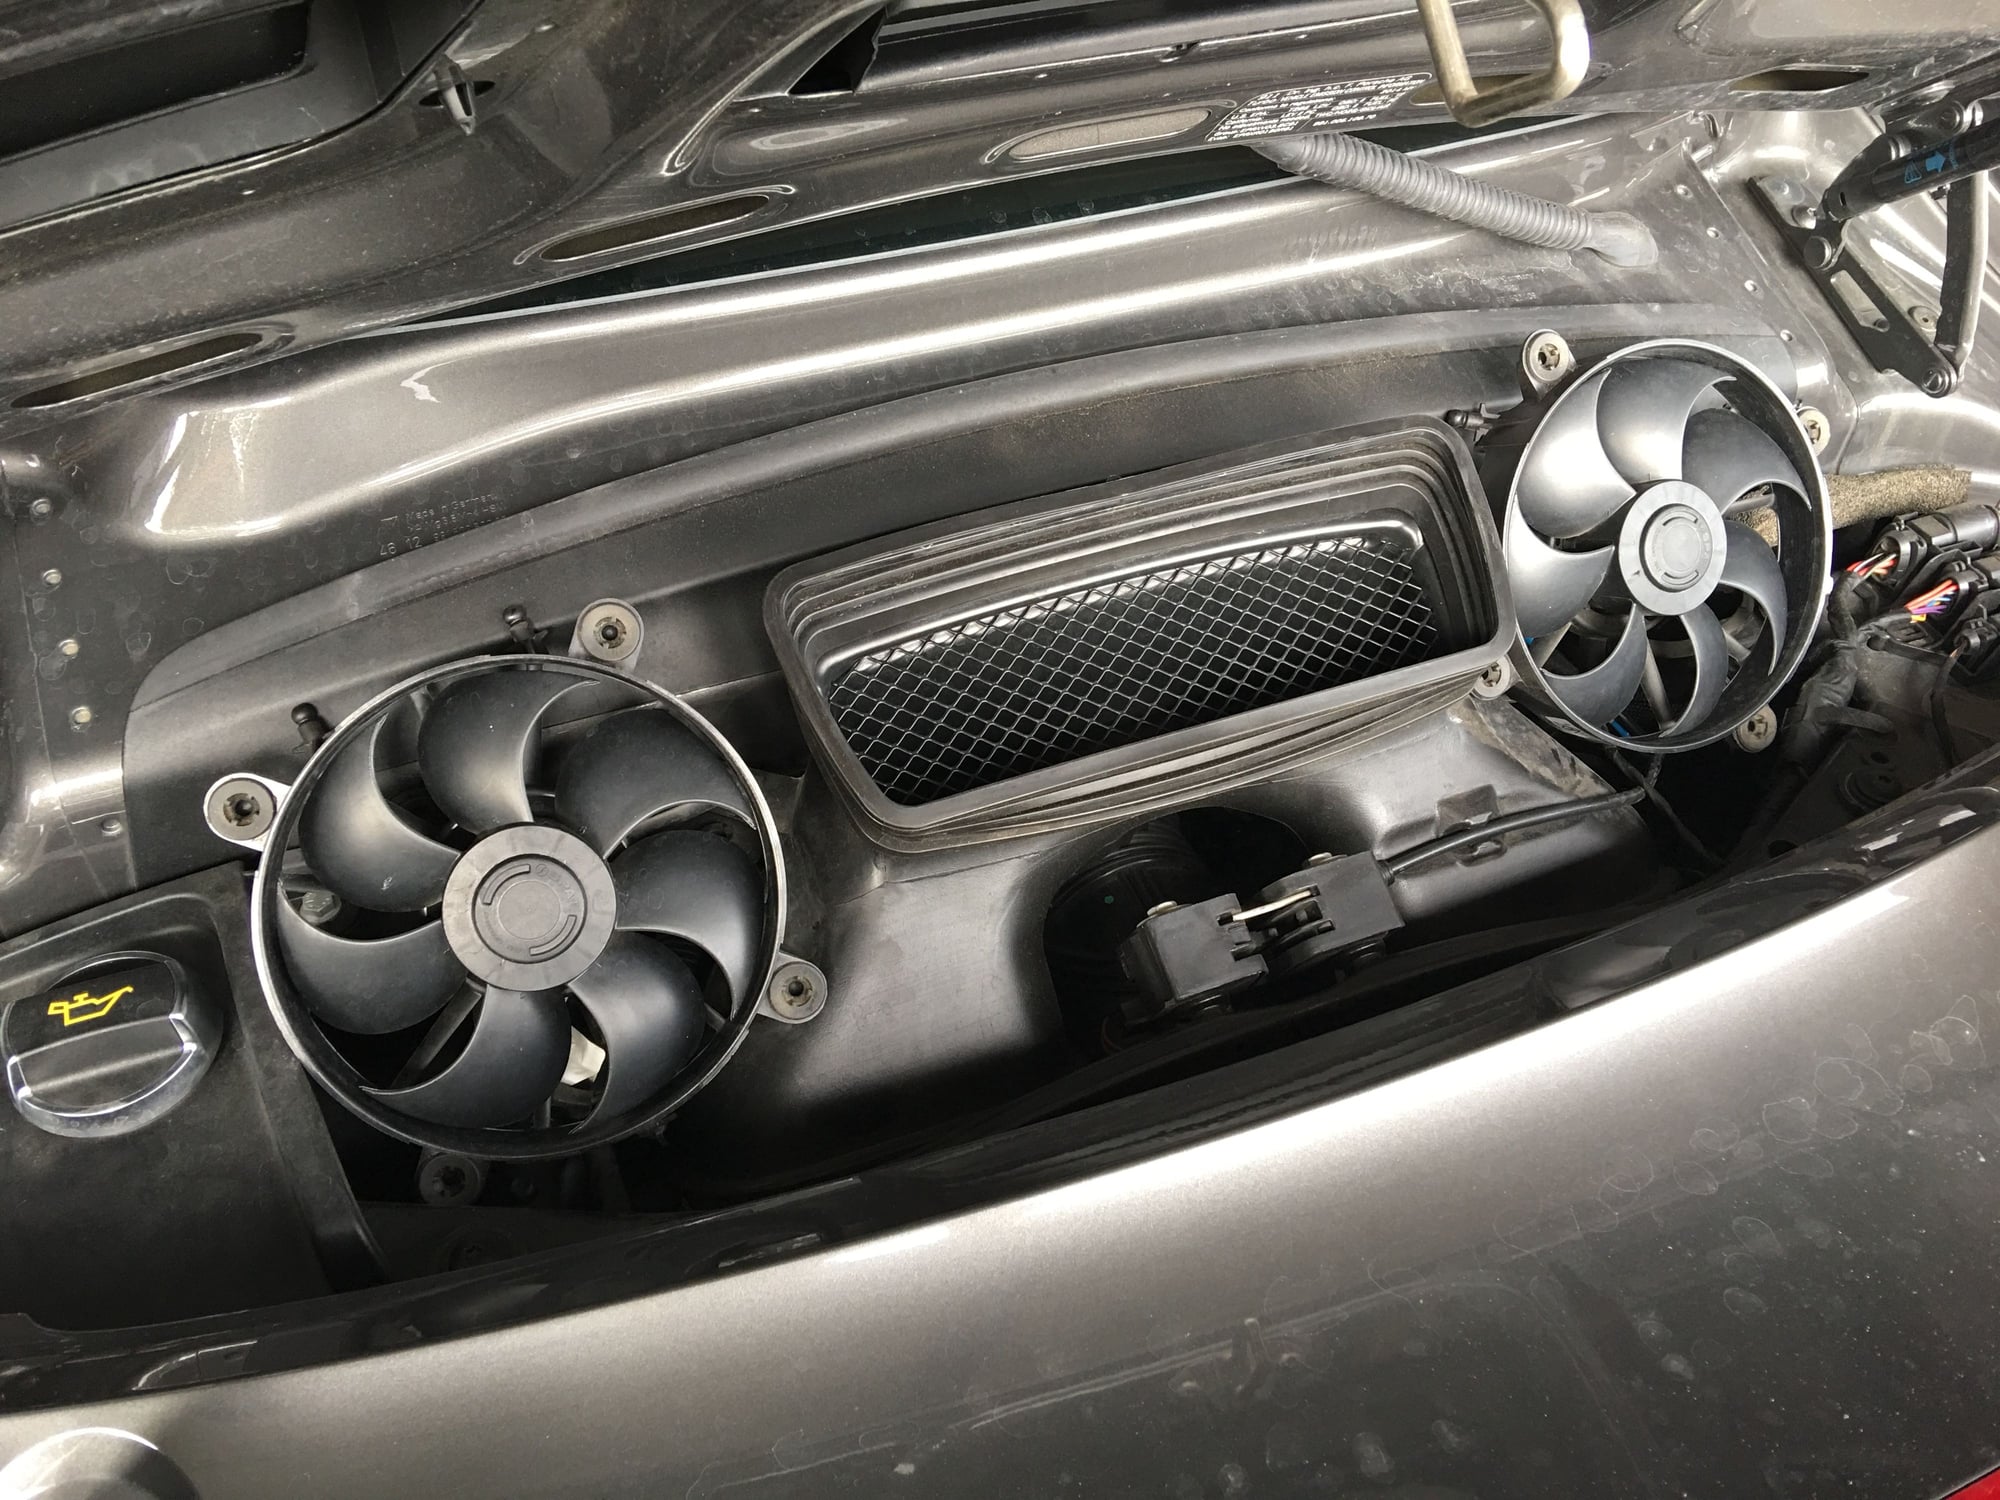
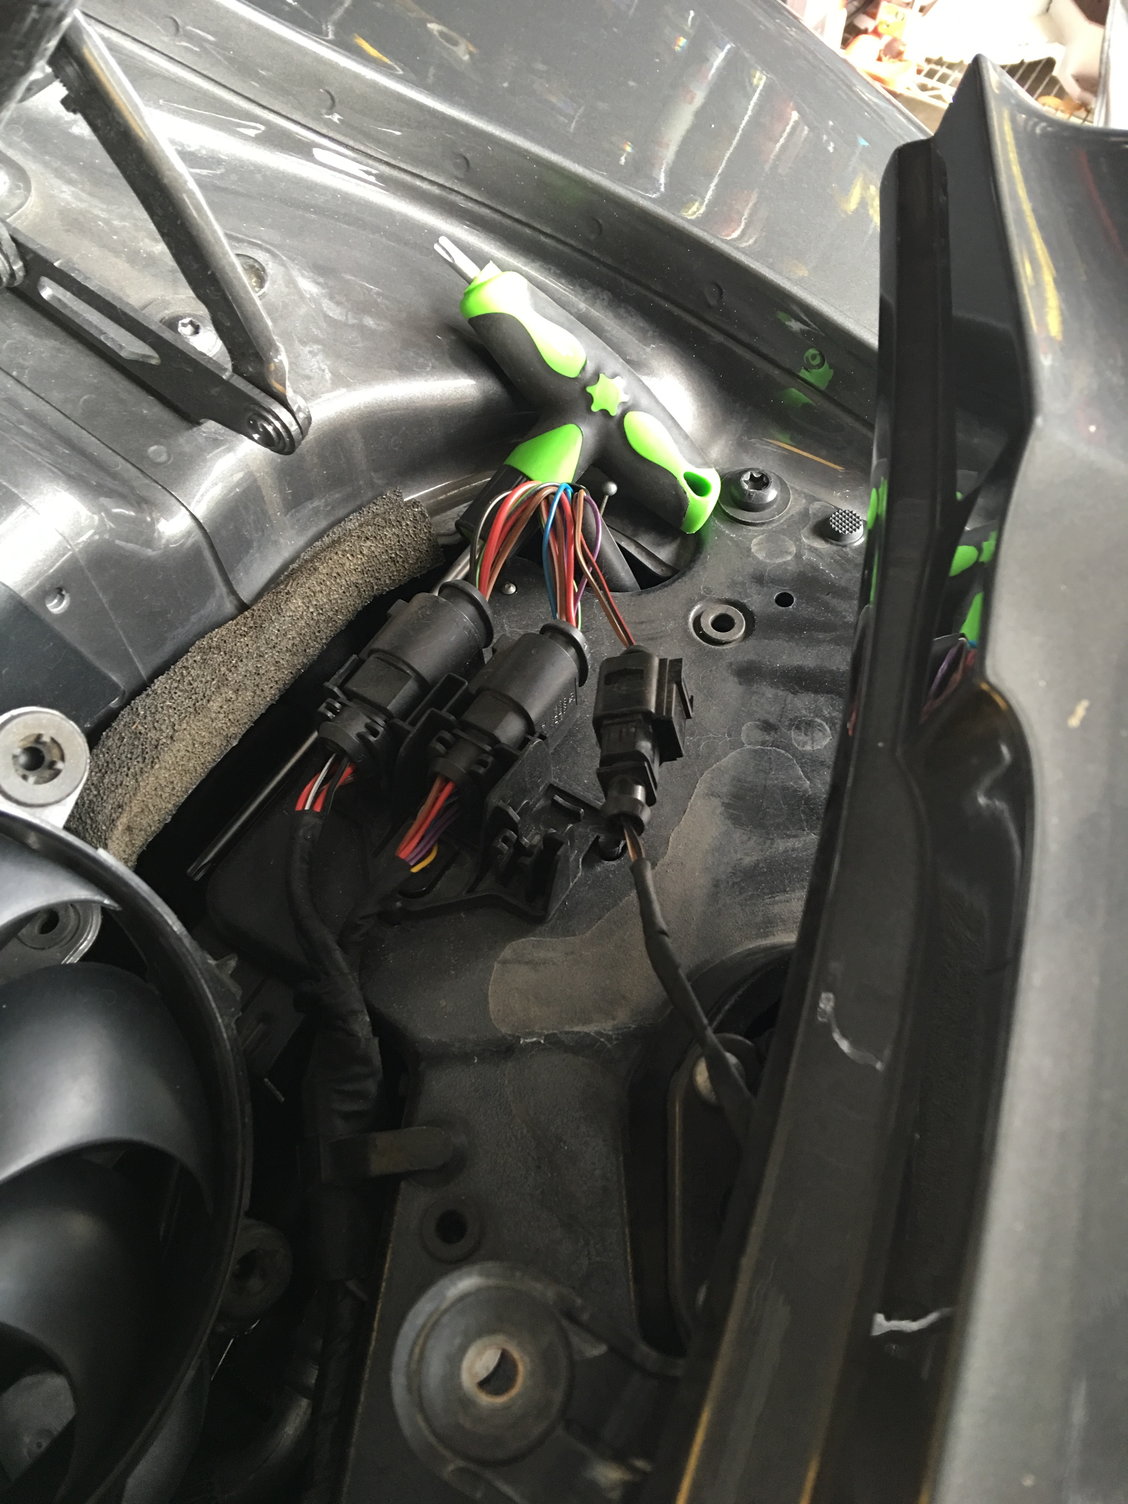
e. Remove the black triangular panel on the right (passenger) side of the "engine bay". This hides a couple electrical connections we'll need to access in a few steps. Its will just pull up and can be put aside.
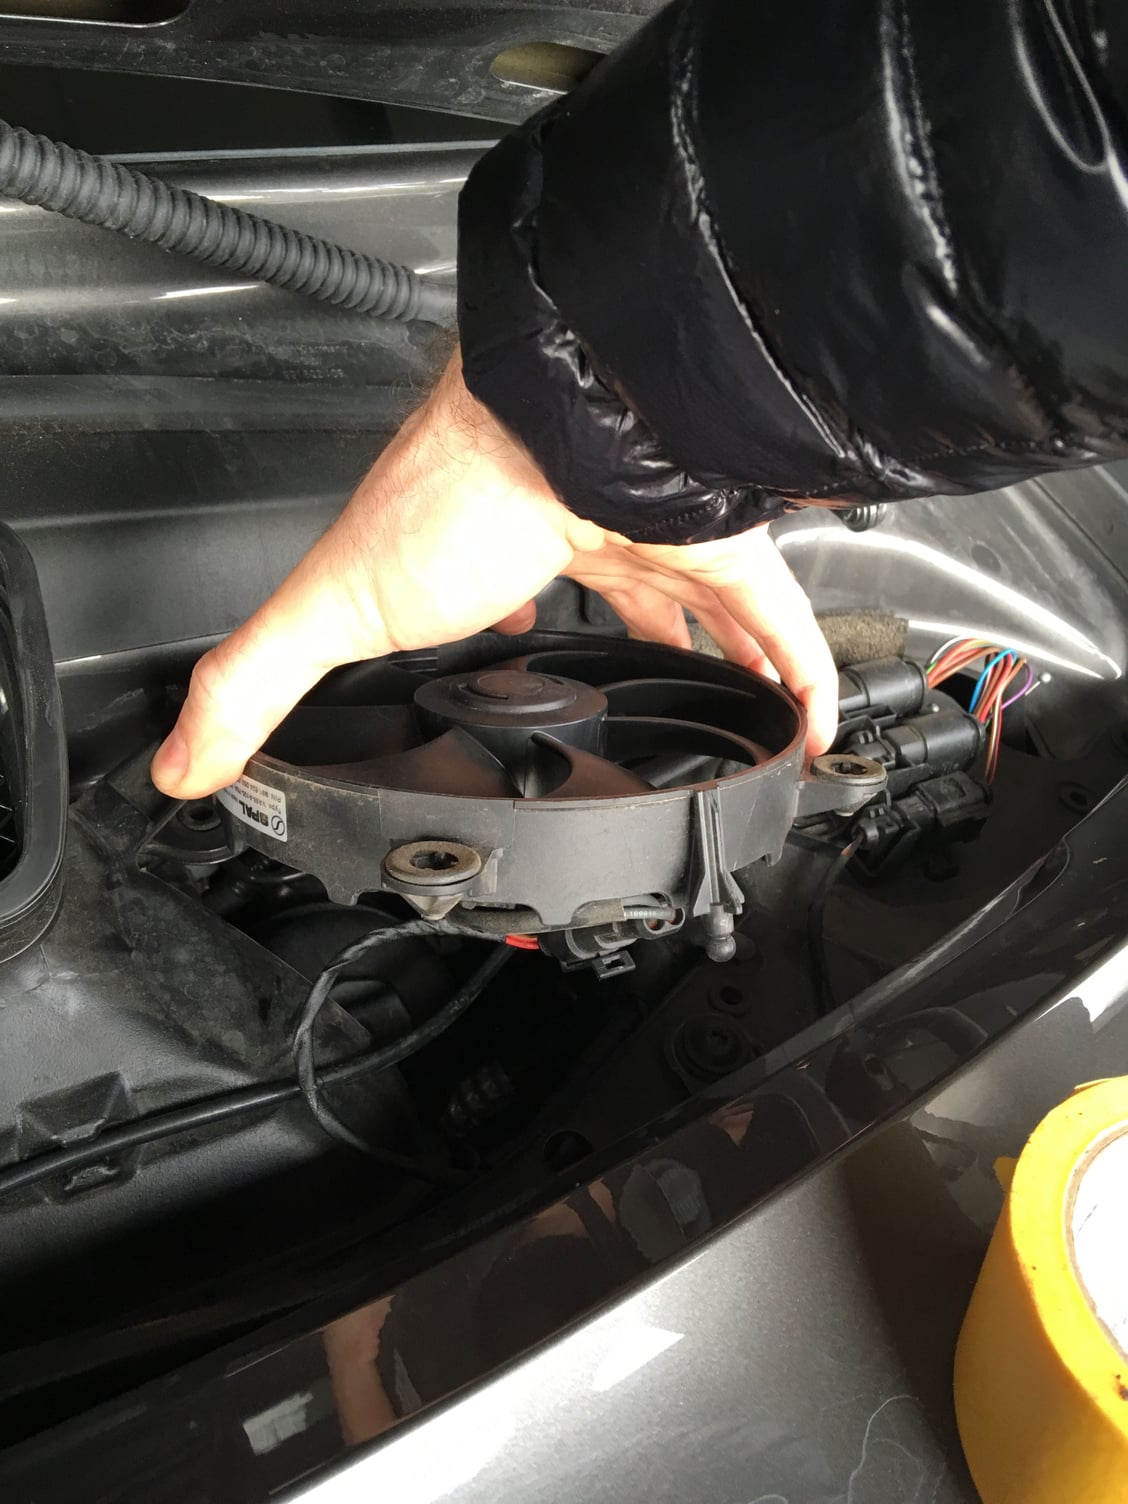
f. Move the two fans by pulling them rear-ward and then resting them against the front of the "engine bay" so that we can access a couple of bolts in a sec.
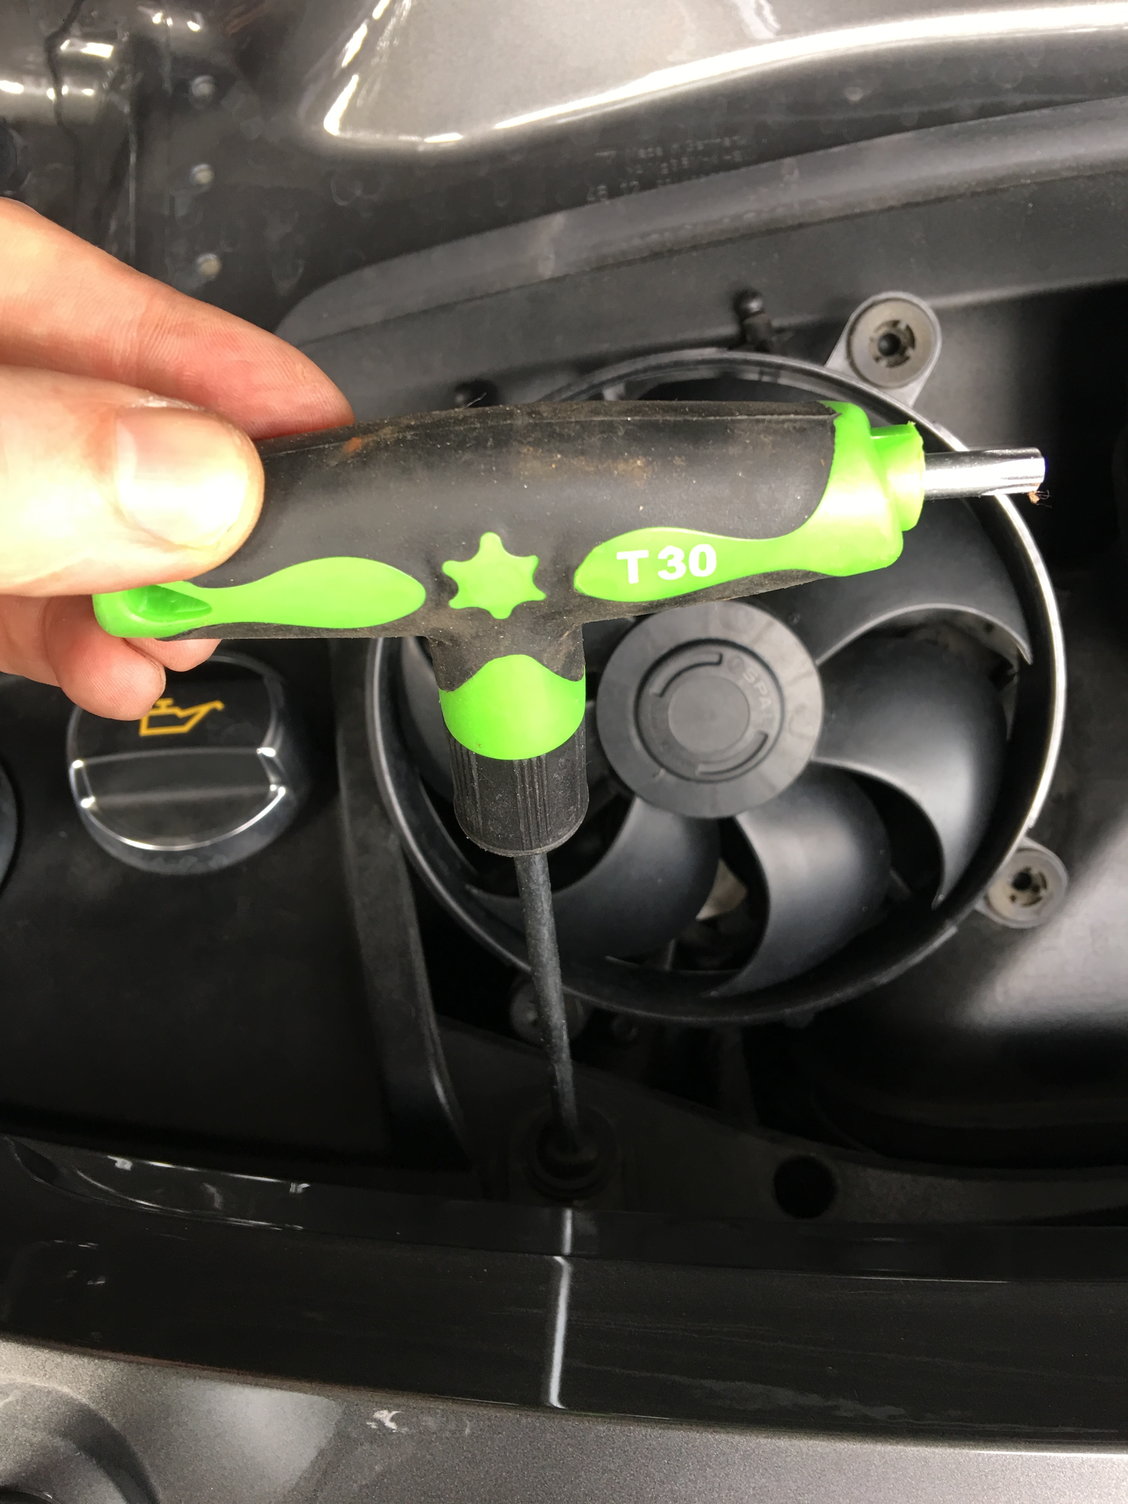
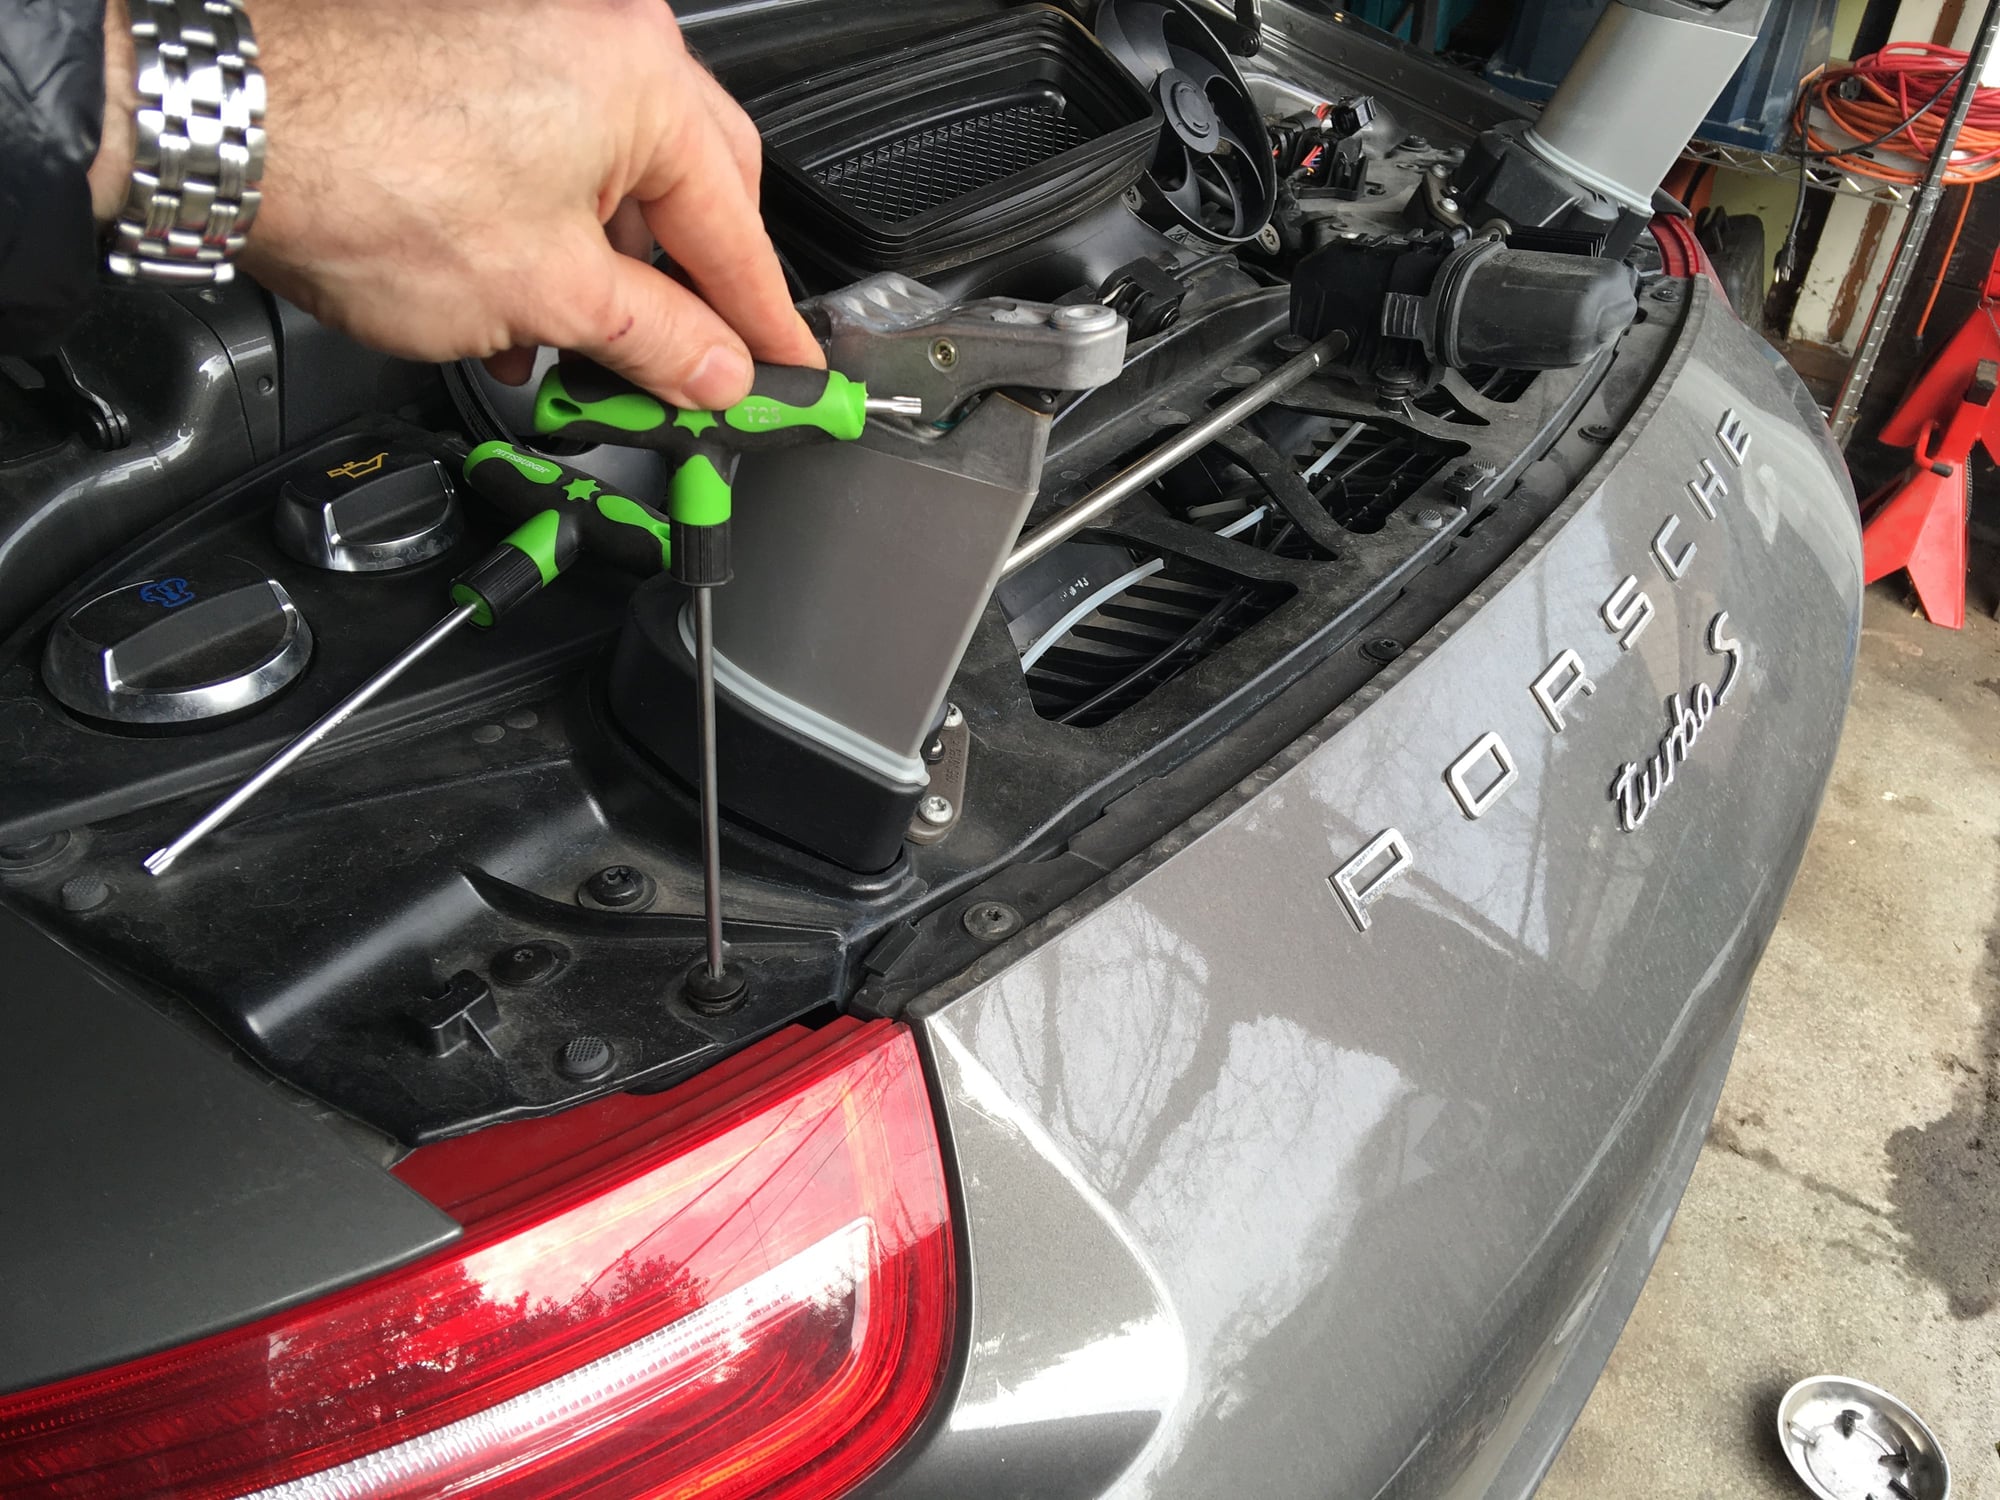
g. Remove the rear engine cover/spoiler base by first unbolting the two Torx T30 bolts that hold the leading edge of the cover in place. Once the torx bolts are removed, I gently push the cover forward with my hand while lifting the leading edge with the other hand. The cover unclasps and the brake light must be unplugged before the rear cover can be put safely aside.
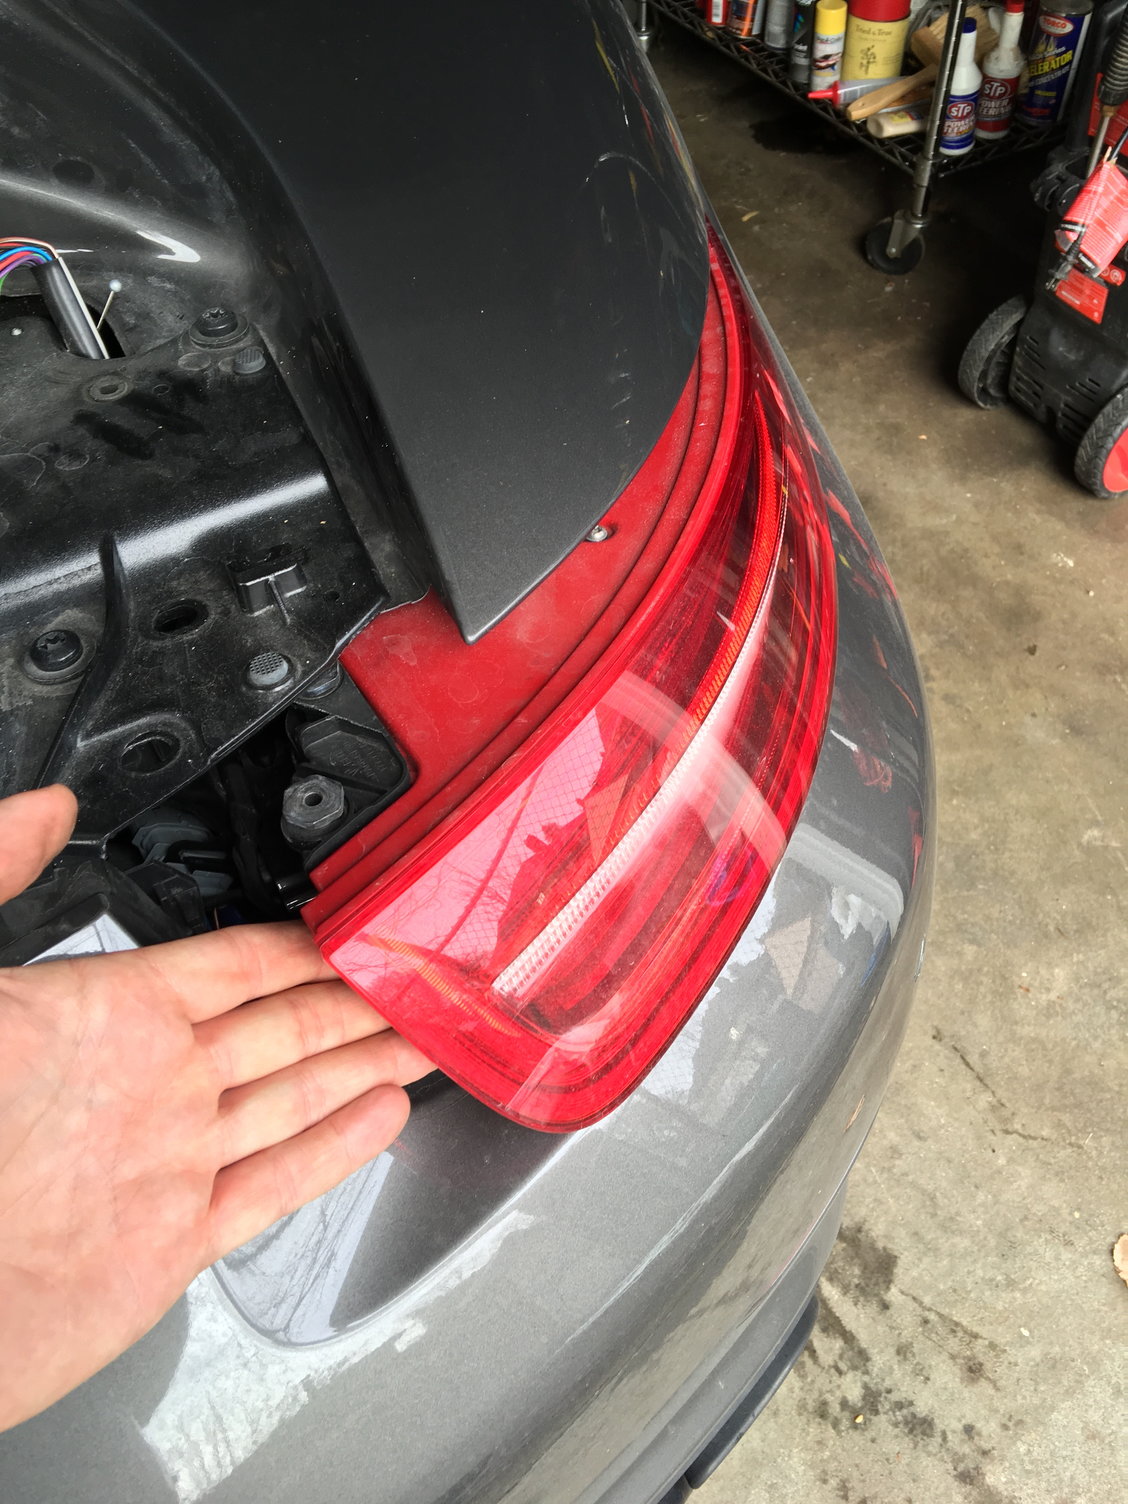
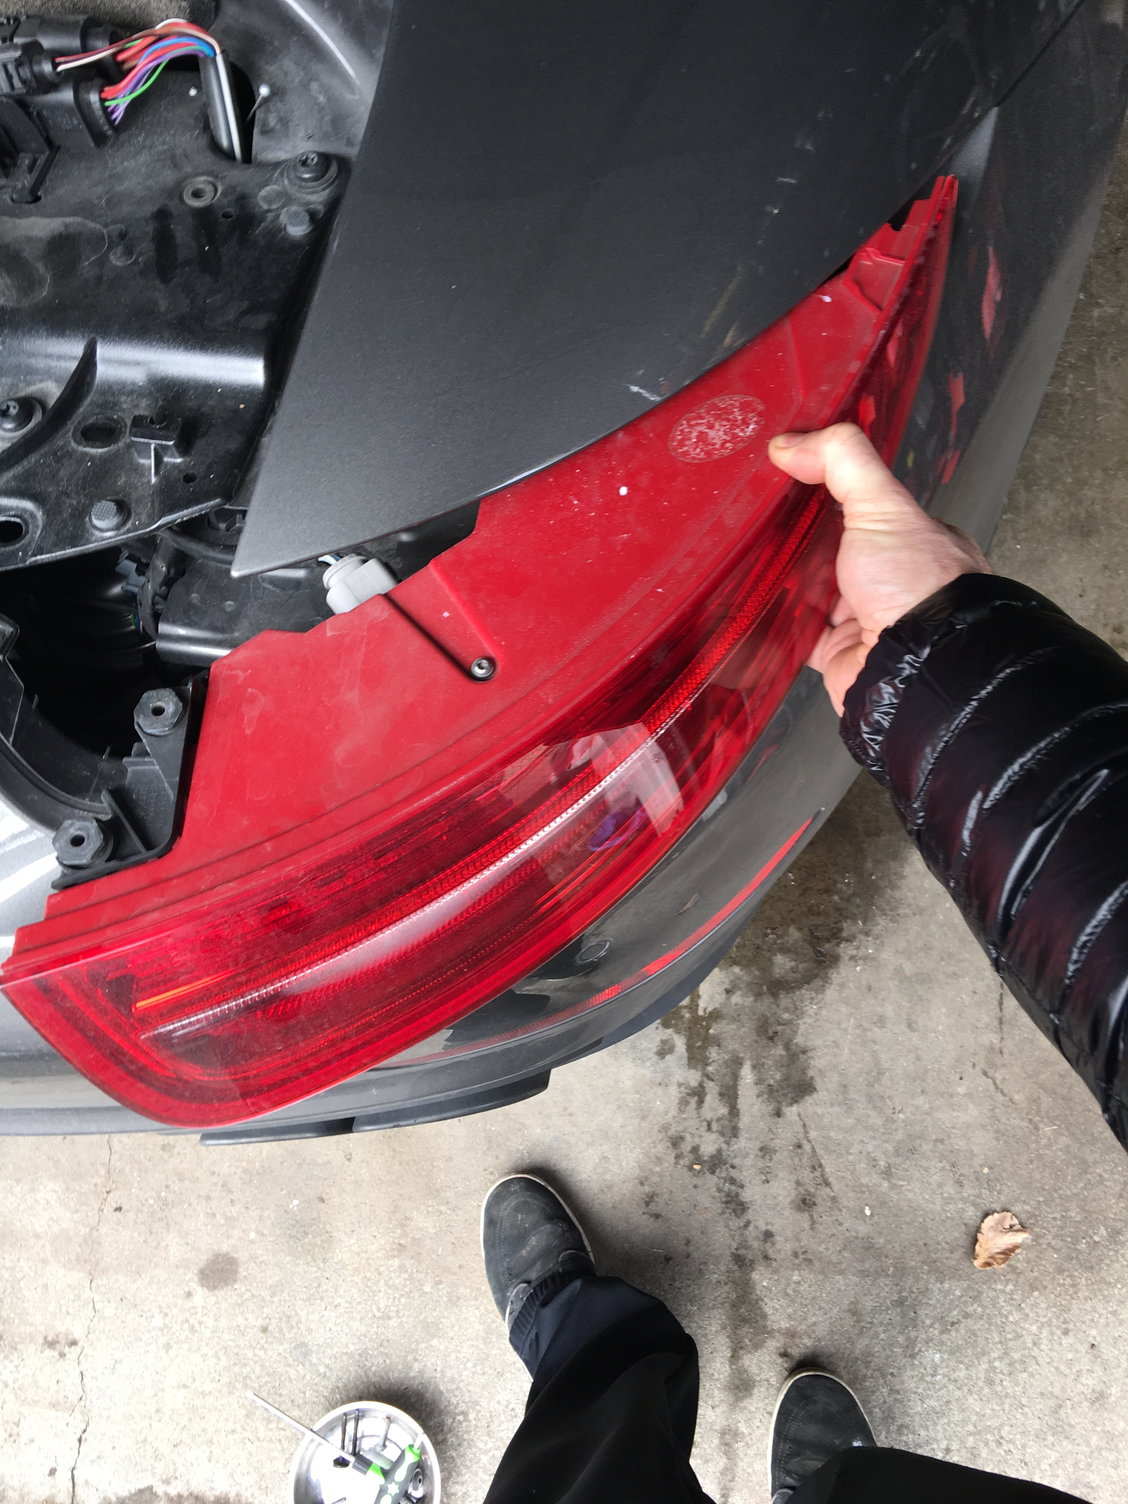
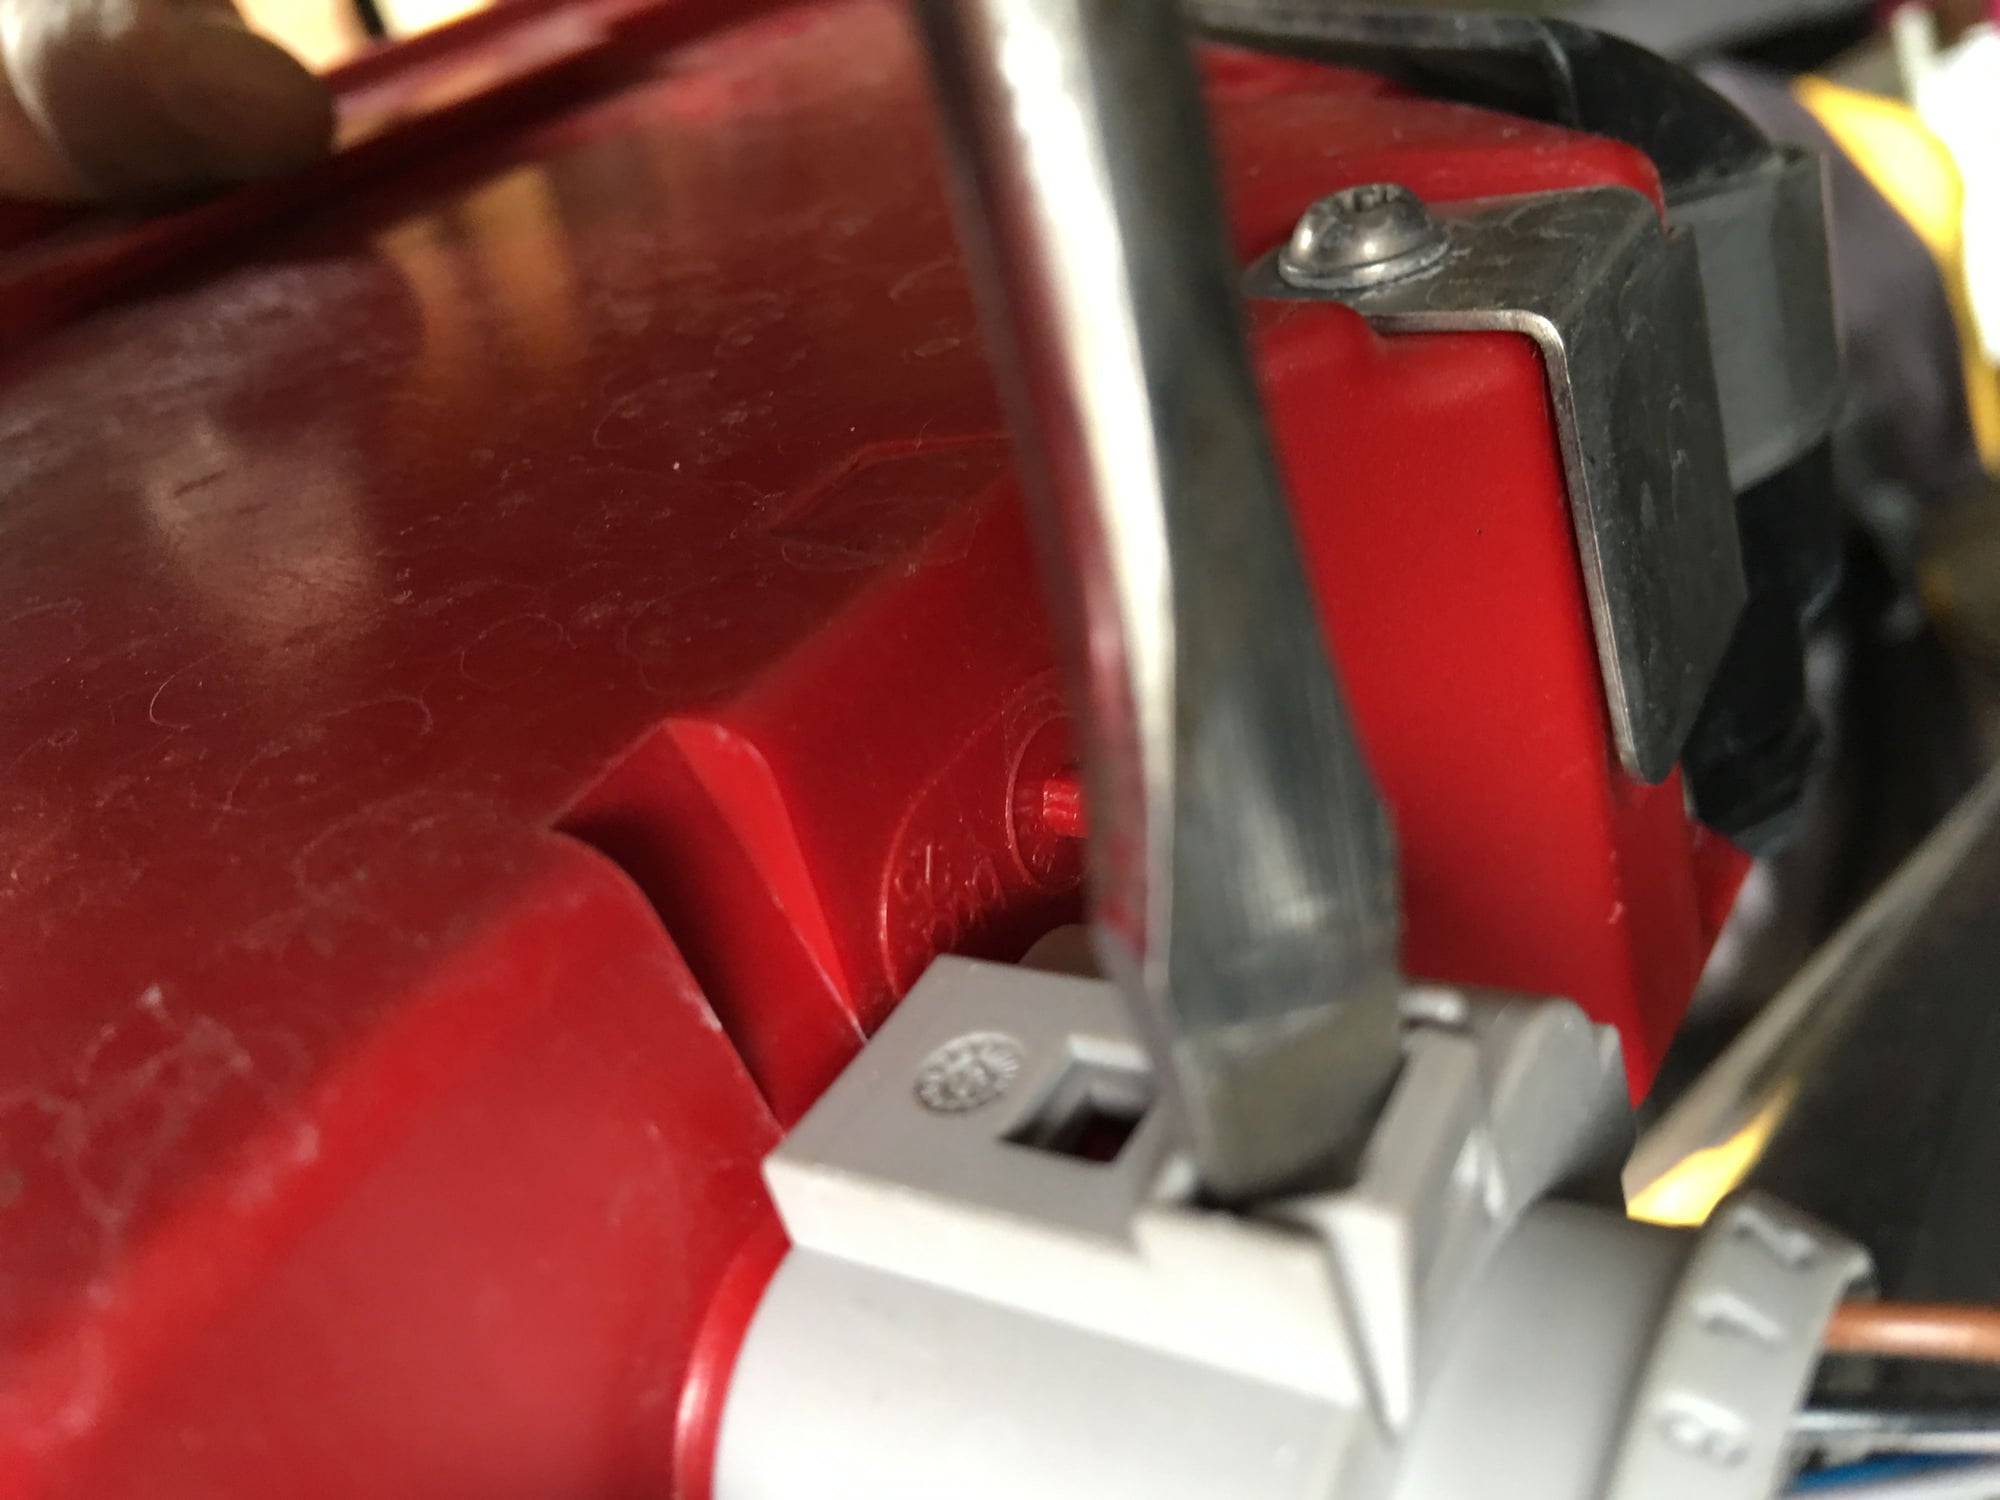
h. Now we remove the tail lights by first unbolting the two T25 bolts holding each tail light in place. After the two bolts are removed, the tail light can be pulled rearward and the connector disconnected. This connector isn't easy to release. I recommend twisting a flathead screwdriver in the latch to release the mail and female. Some may want to protect the paint below the tail light with painter's masking tape, but it wasnt necessary for me, and my whole car is covered in Xpel anyways.
3. Removing the bumper
a. There are bolts that hold the bumper on on the top, bottom, left, and right. We'll do it in order of bottom, sides, then top so that when we release the final top bolts, we can safely hold and remove the bumper.
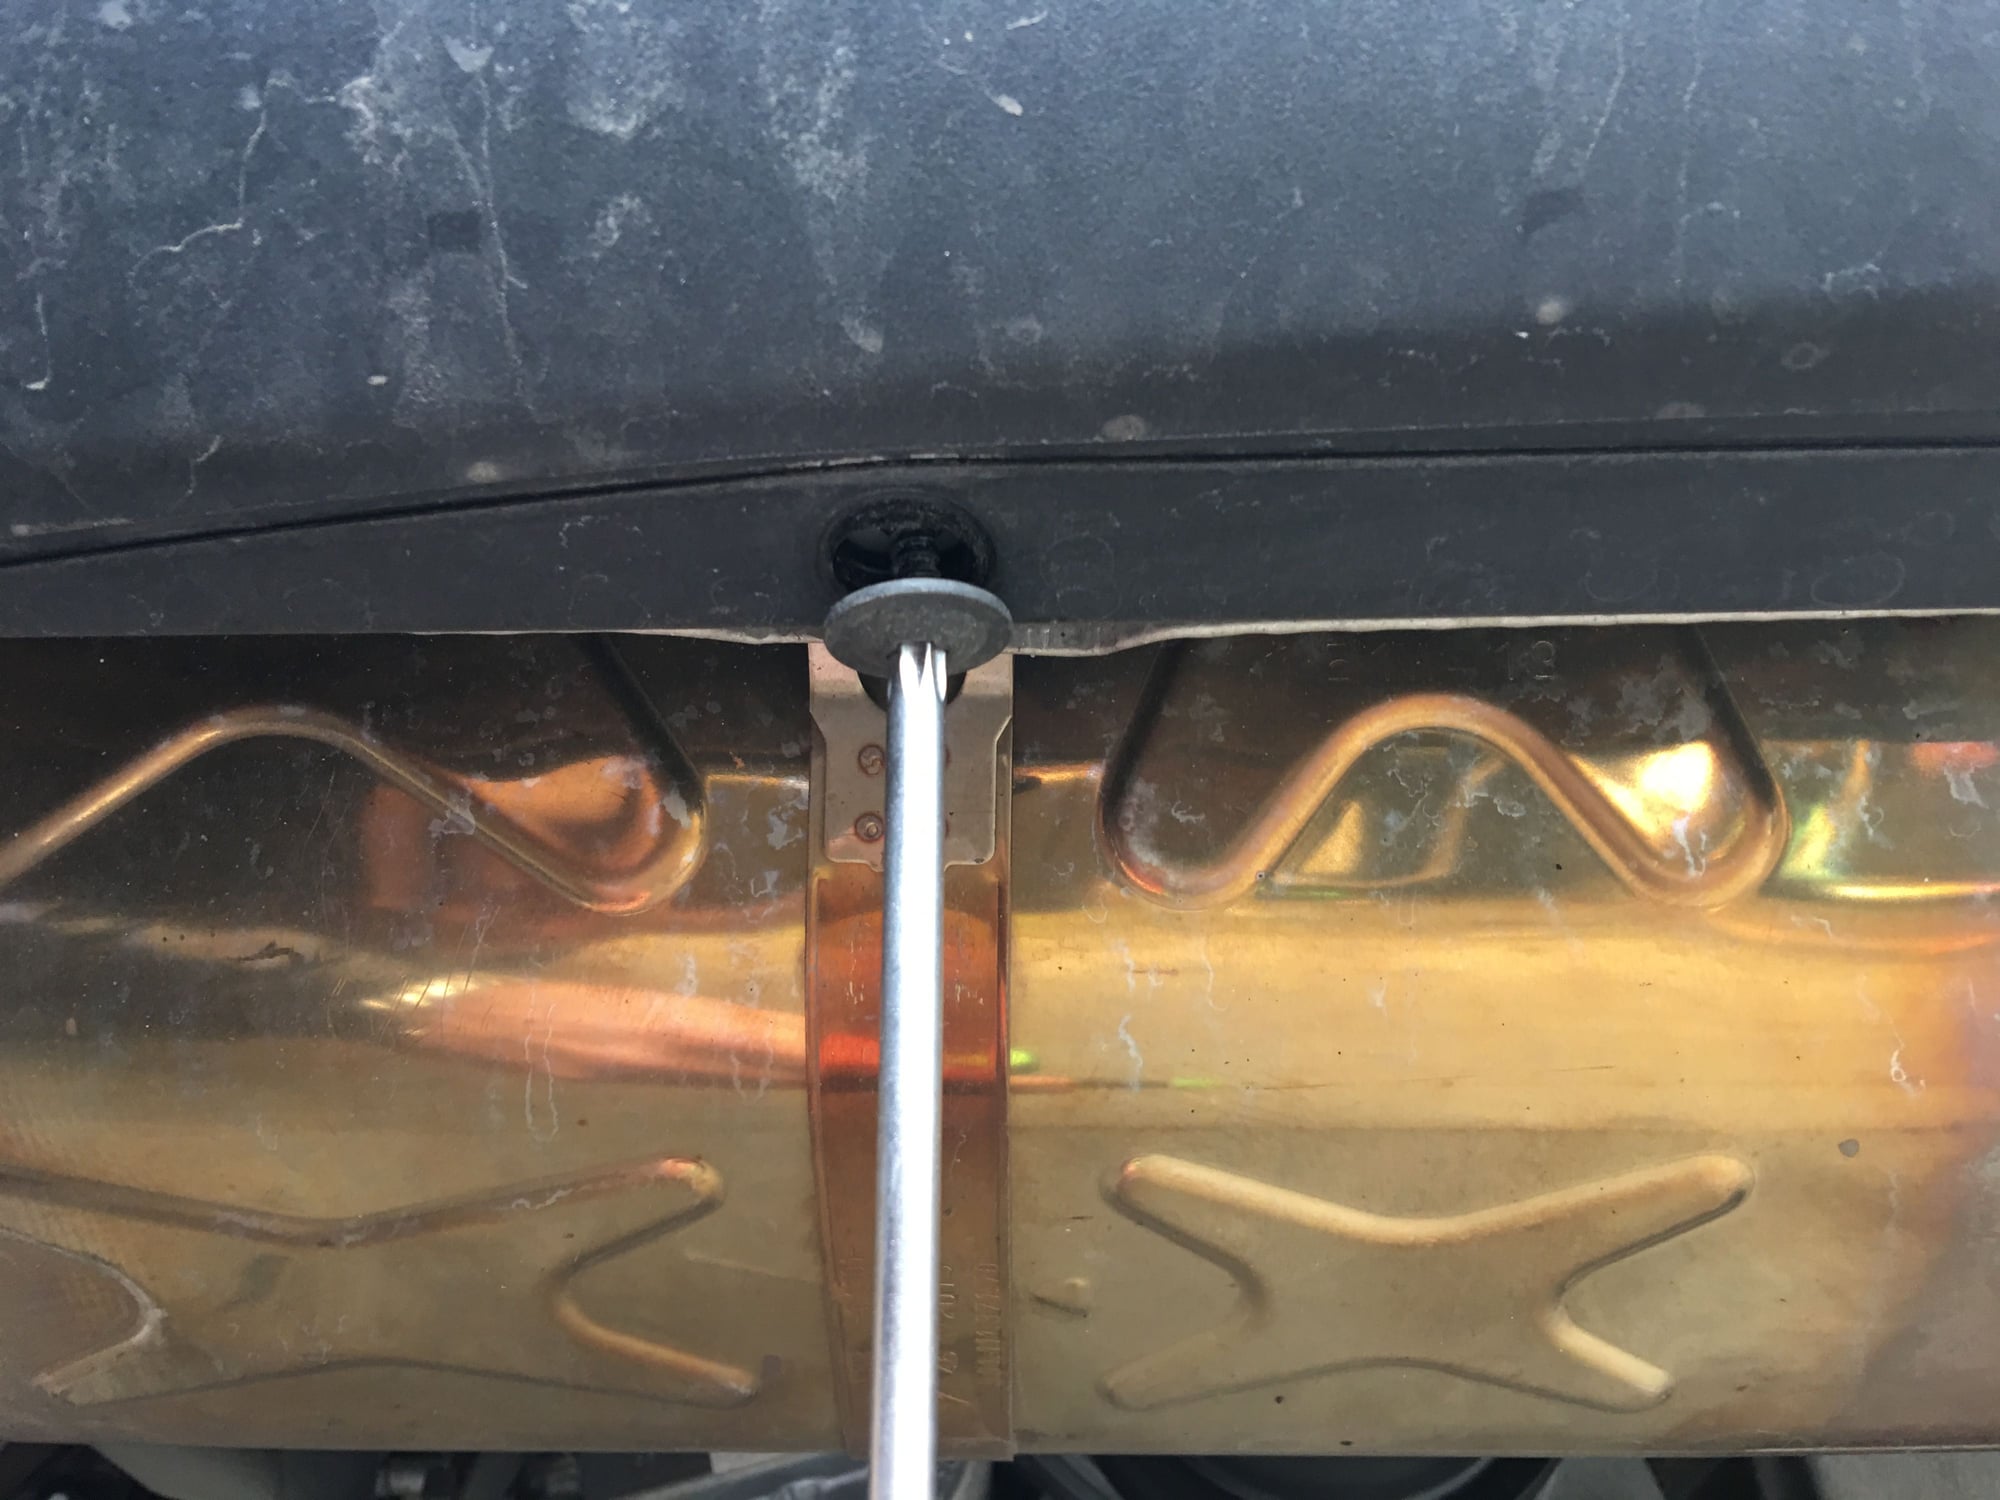
b. The bottom bolts. There are 6 T25 bolts holding the bottom of the bumper on. Two under the back, near the muffler, and two under each side. They are easy to find. They are the same, but worth recognizing before you dump them in the bolt tray.
c. The most annoying part of both the removal and re-install of the bumper are the bolts in and around the wheel well. There is a big T25 silver bolt in the leading corner of the headlight hole. Thats easy. There are 3 T20 bolts holding the rear fenderwell together. Those are easy if the wheel isn't there, annoying if it is (but possible depending on your tools). The really difficult one, if the wheel is still there, is the T25 bolt that's under the fender well holding the forward corner of the bumper in the right place. Take your time. You can't remove the bumper with that last bolt still in the corrner under the fenderwell. I was too annoyed with the fenderwell bolts to photo them. Sorry about that omission.
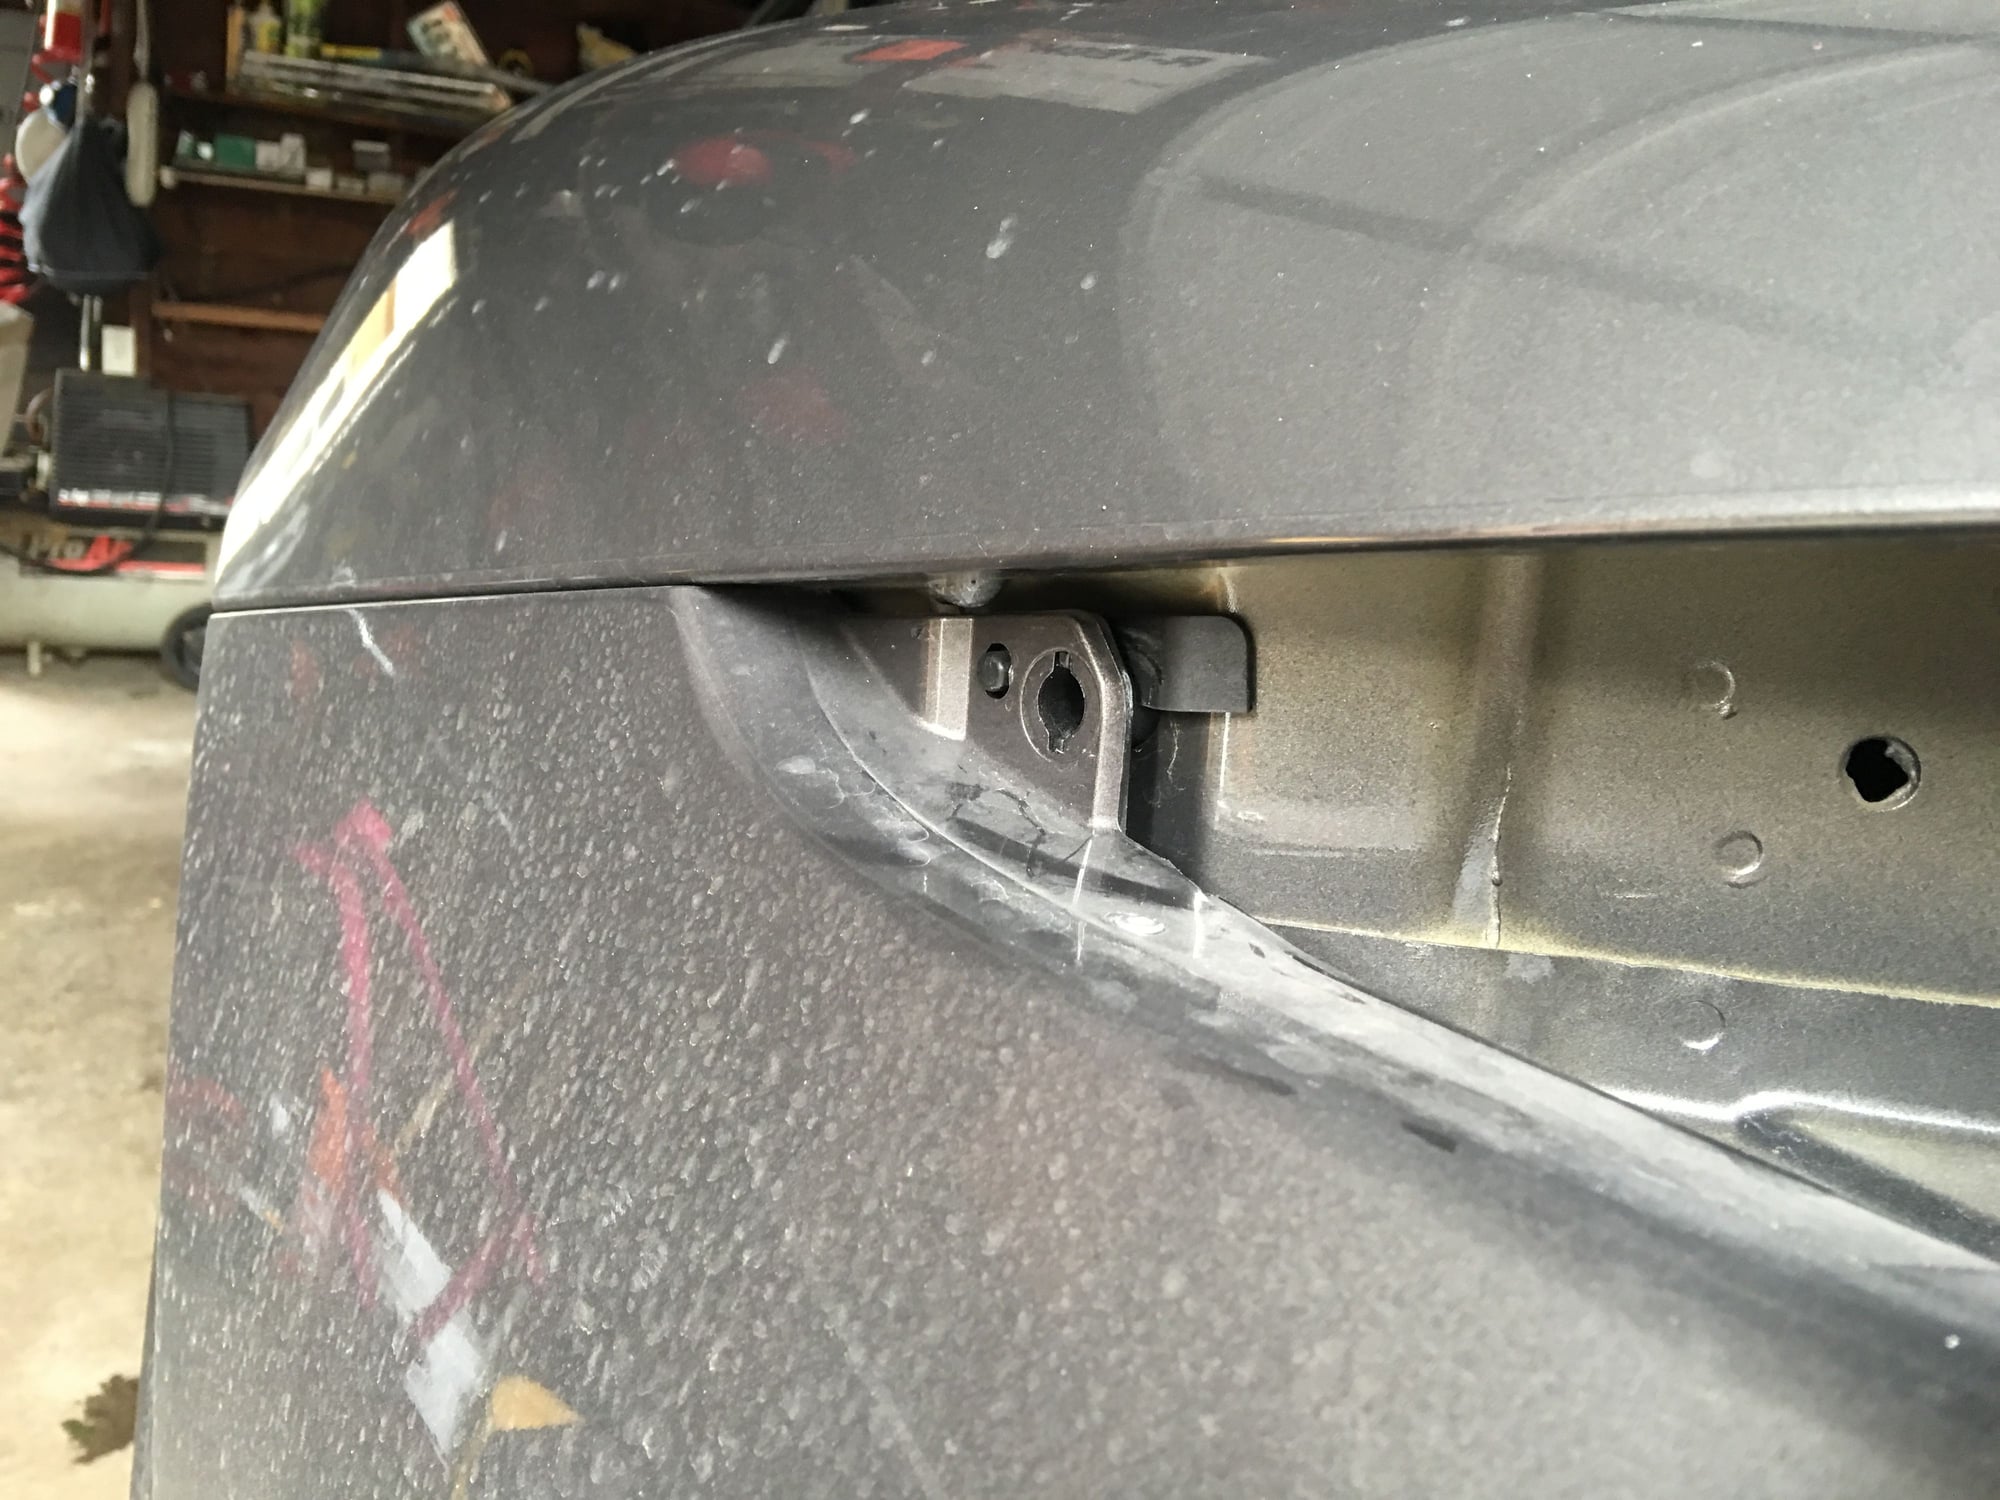
d. Before you remove the top four T25 bolts, arrange friends to help you guide the bumper off the back. Two extra friends mean you can also arrange the towels as they put the bumper down.
The top four T25 bolts are easy to see and to access. I've removed them in this picture.
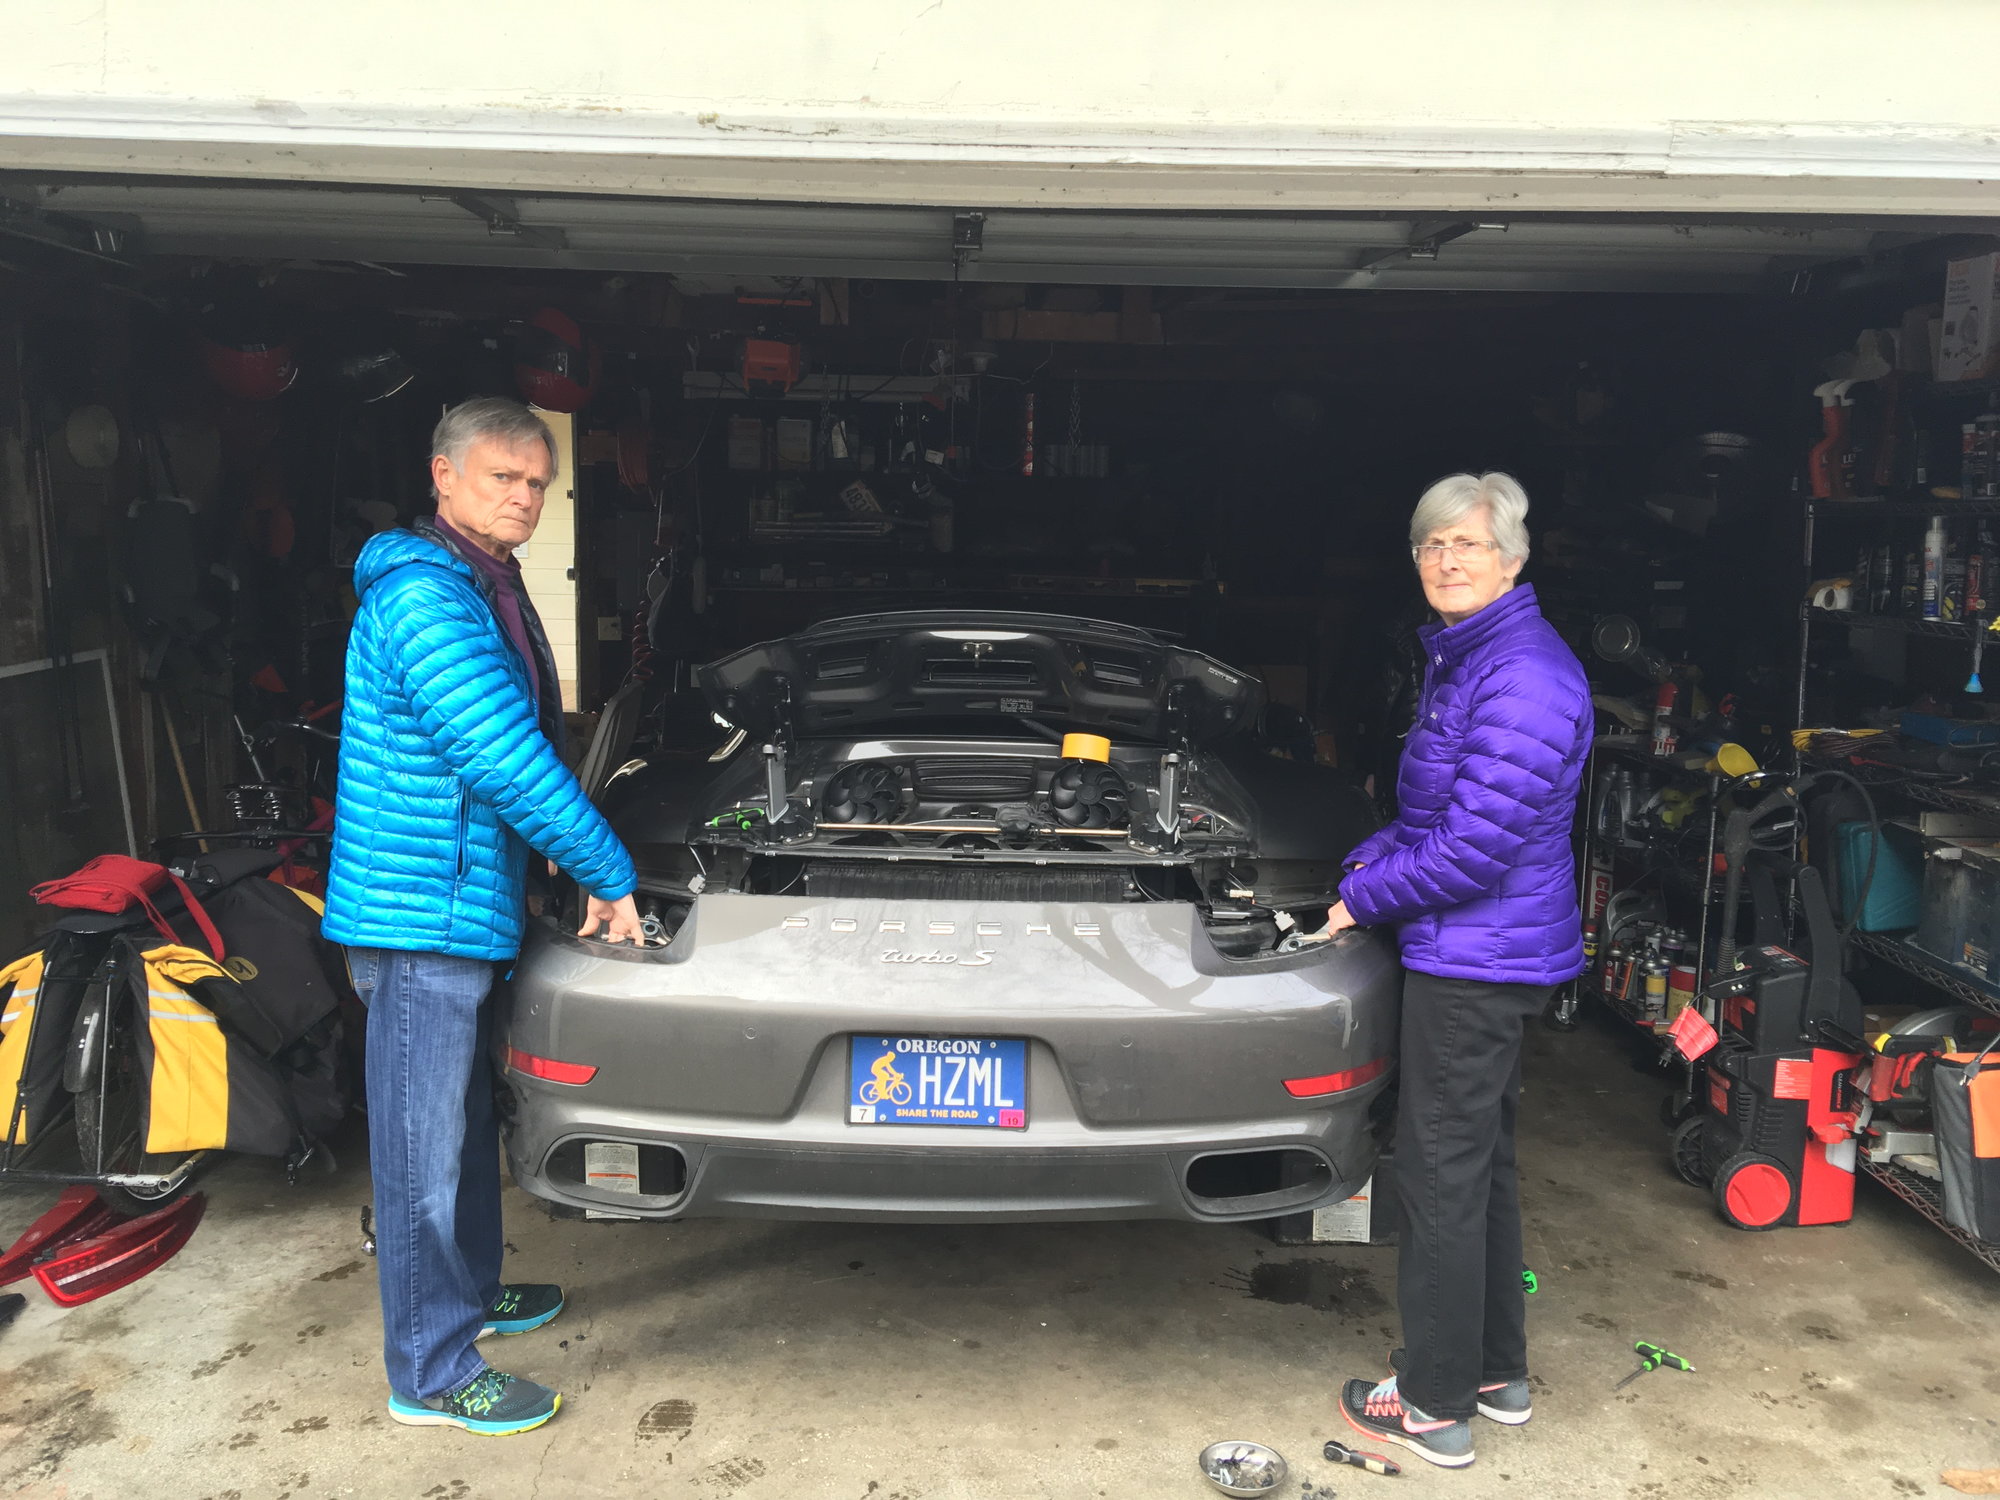
I didn't have two friends handy, but my parents dropped by unannounced (to see their grandkids, they say). I made good use of my parents and put them to work holding my bumper as I guided it off. Even two elderly British people can do it.
Yay! The plastic bumper cover is off. For completeness, let's also get the actual bumper off. This is really easy with a 13mm socket, a ratchet, and an extension. I recommend removing the bottom two bolts on each side and then the top on each side. The bumper is actually really light.
Yay! It's off. installation is the exact opposite of removal.
In my next post, I'll tell the story of swapping the exhaust
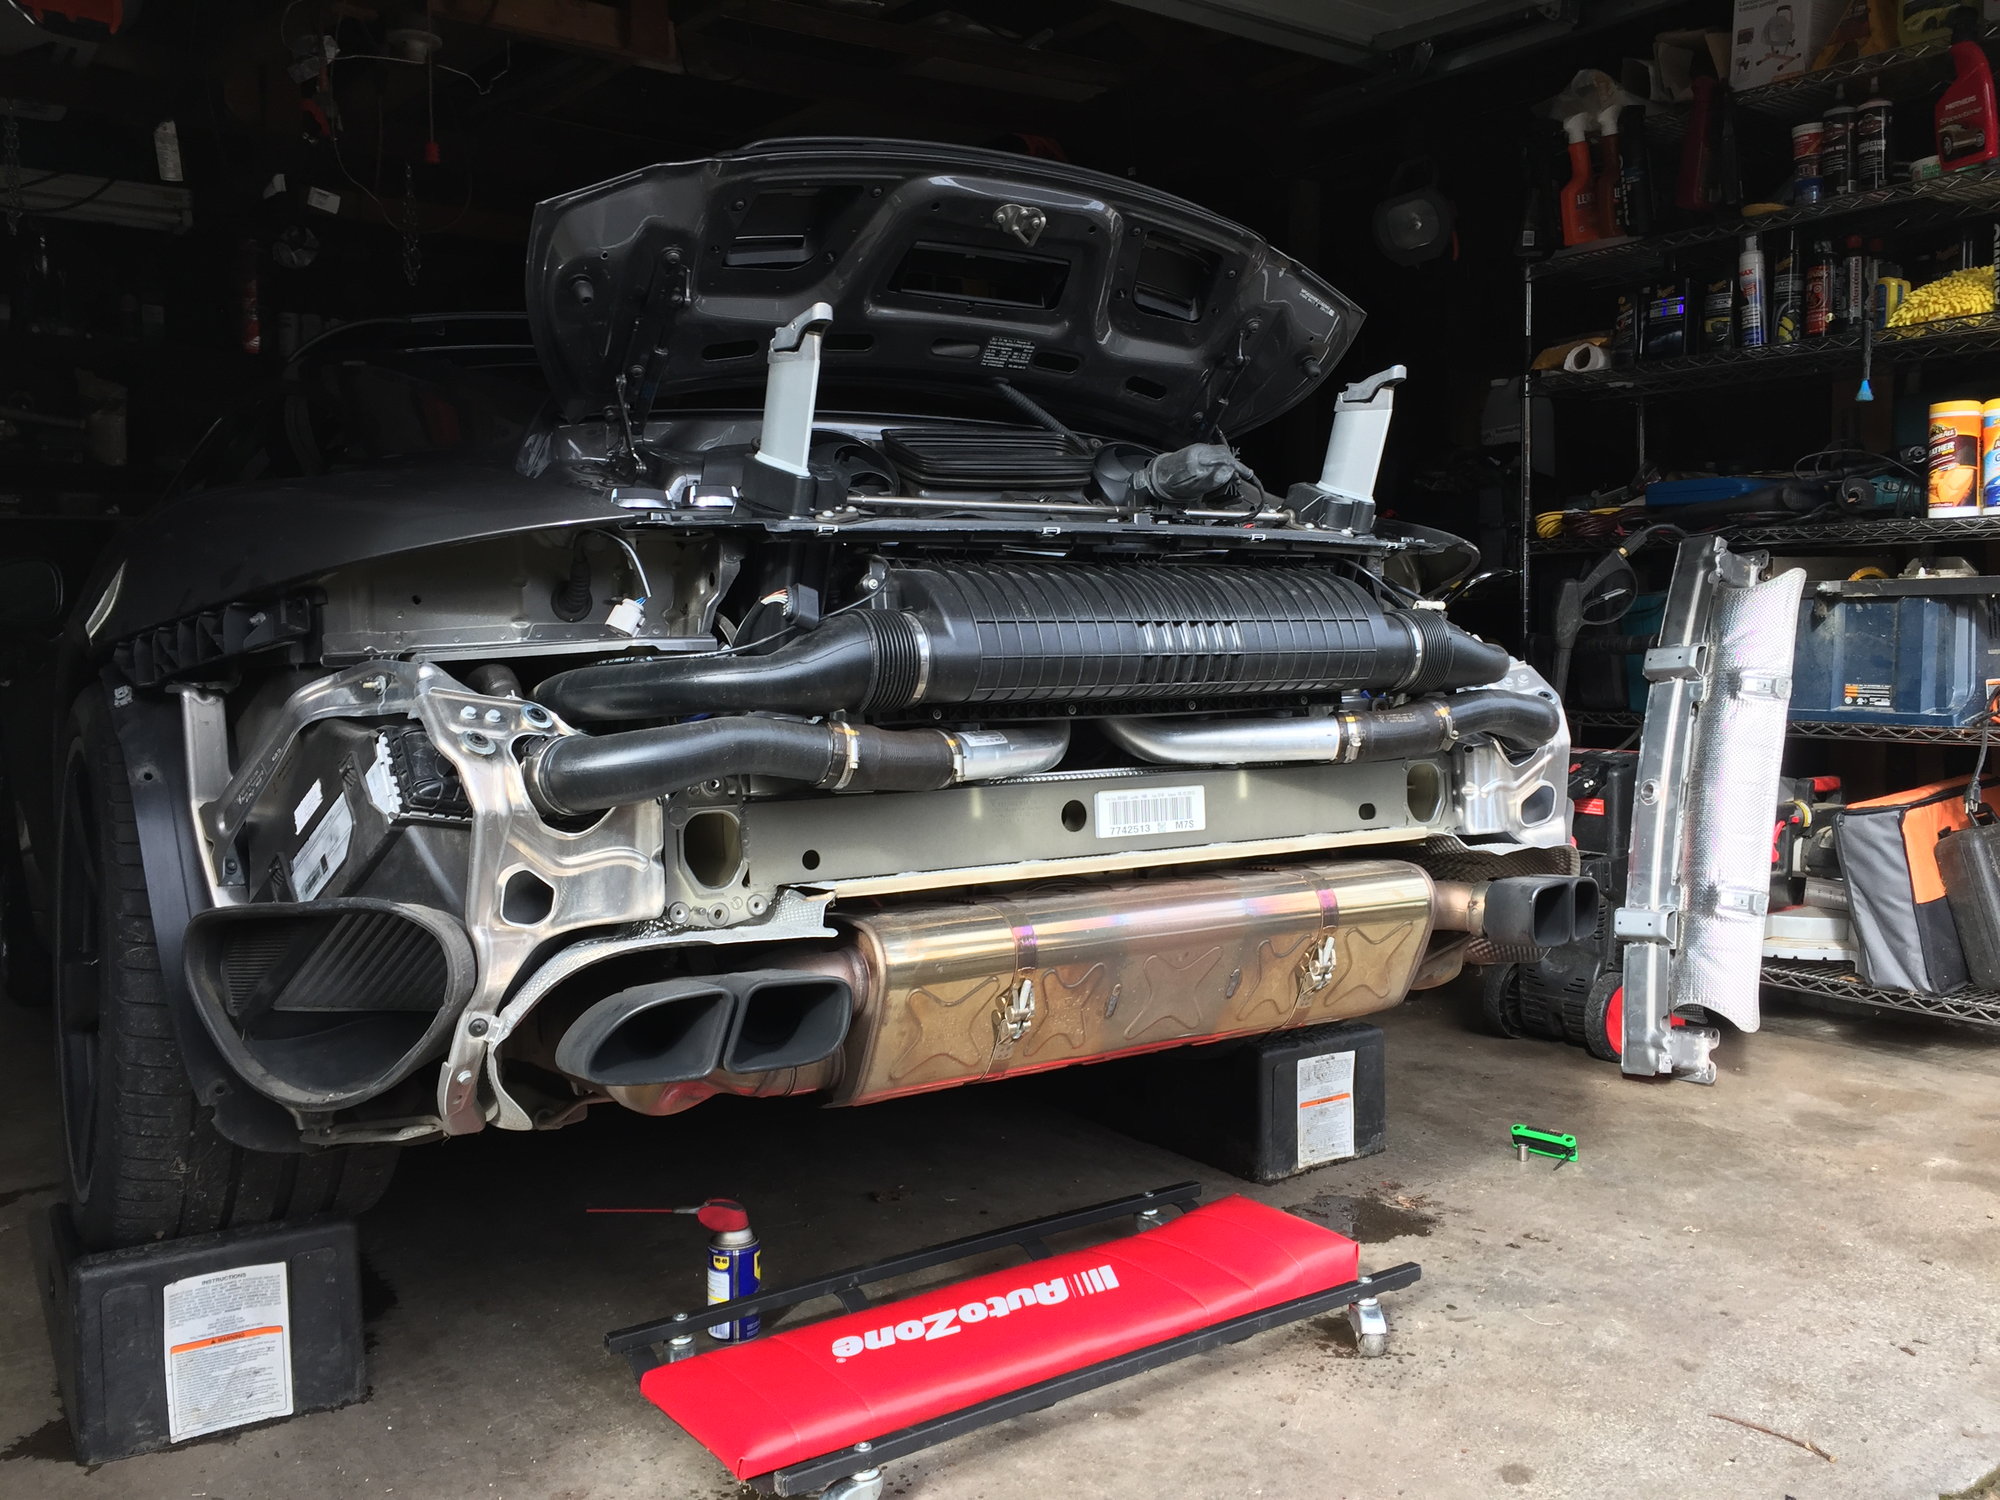
I don't have pictures of the exhaust swap, but I can describe the way that worked well for me. I swapped the stock muffler for a Sharkwerks set of pipes (more on that in another post, they may be too loud for me, but they were really cheap.) The cat's "capture" the center muffler much like a Chinese Finger Trap, so it seemed easiest to remove the exhaust by removing the cat that was easiest (the right side).
1. Spray some WD40 or similar penetrant onto the two bolts that tighten the two band clamps holding the exhaust to the catalytic converters.
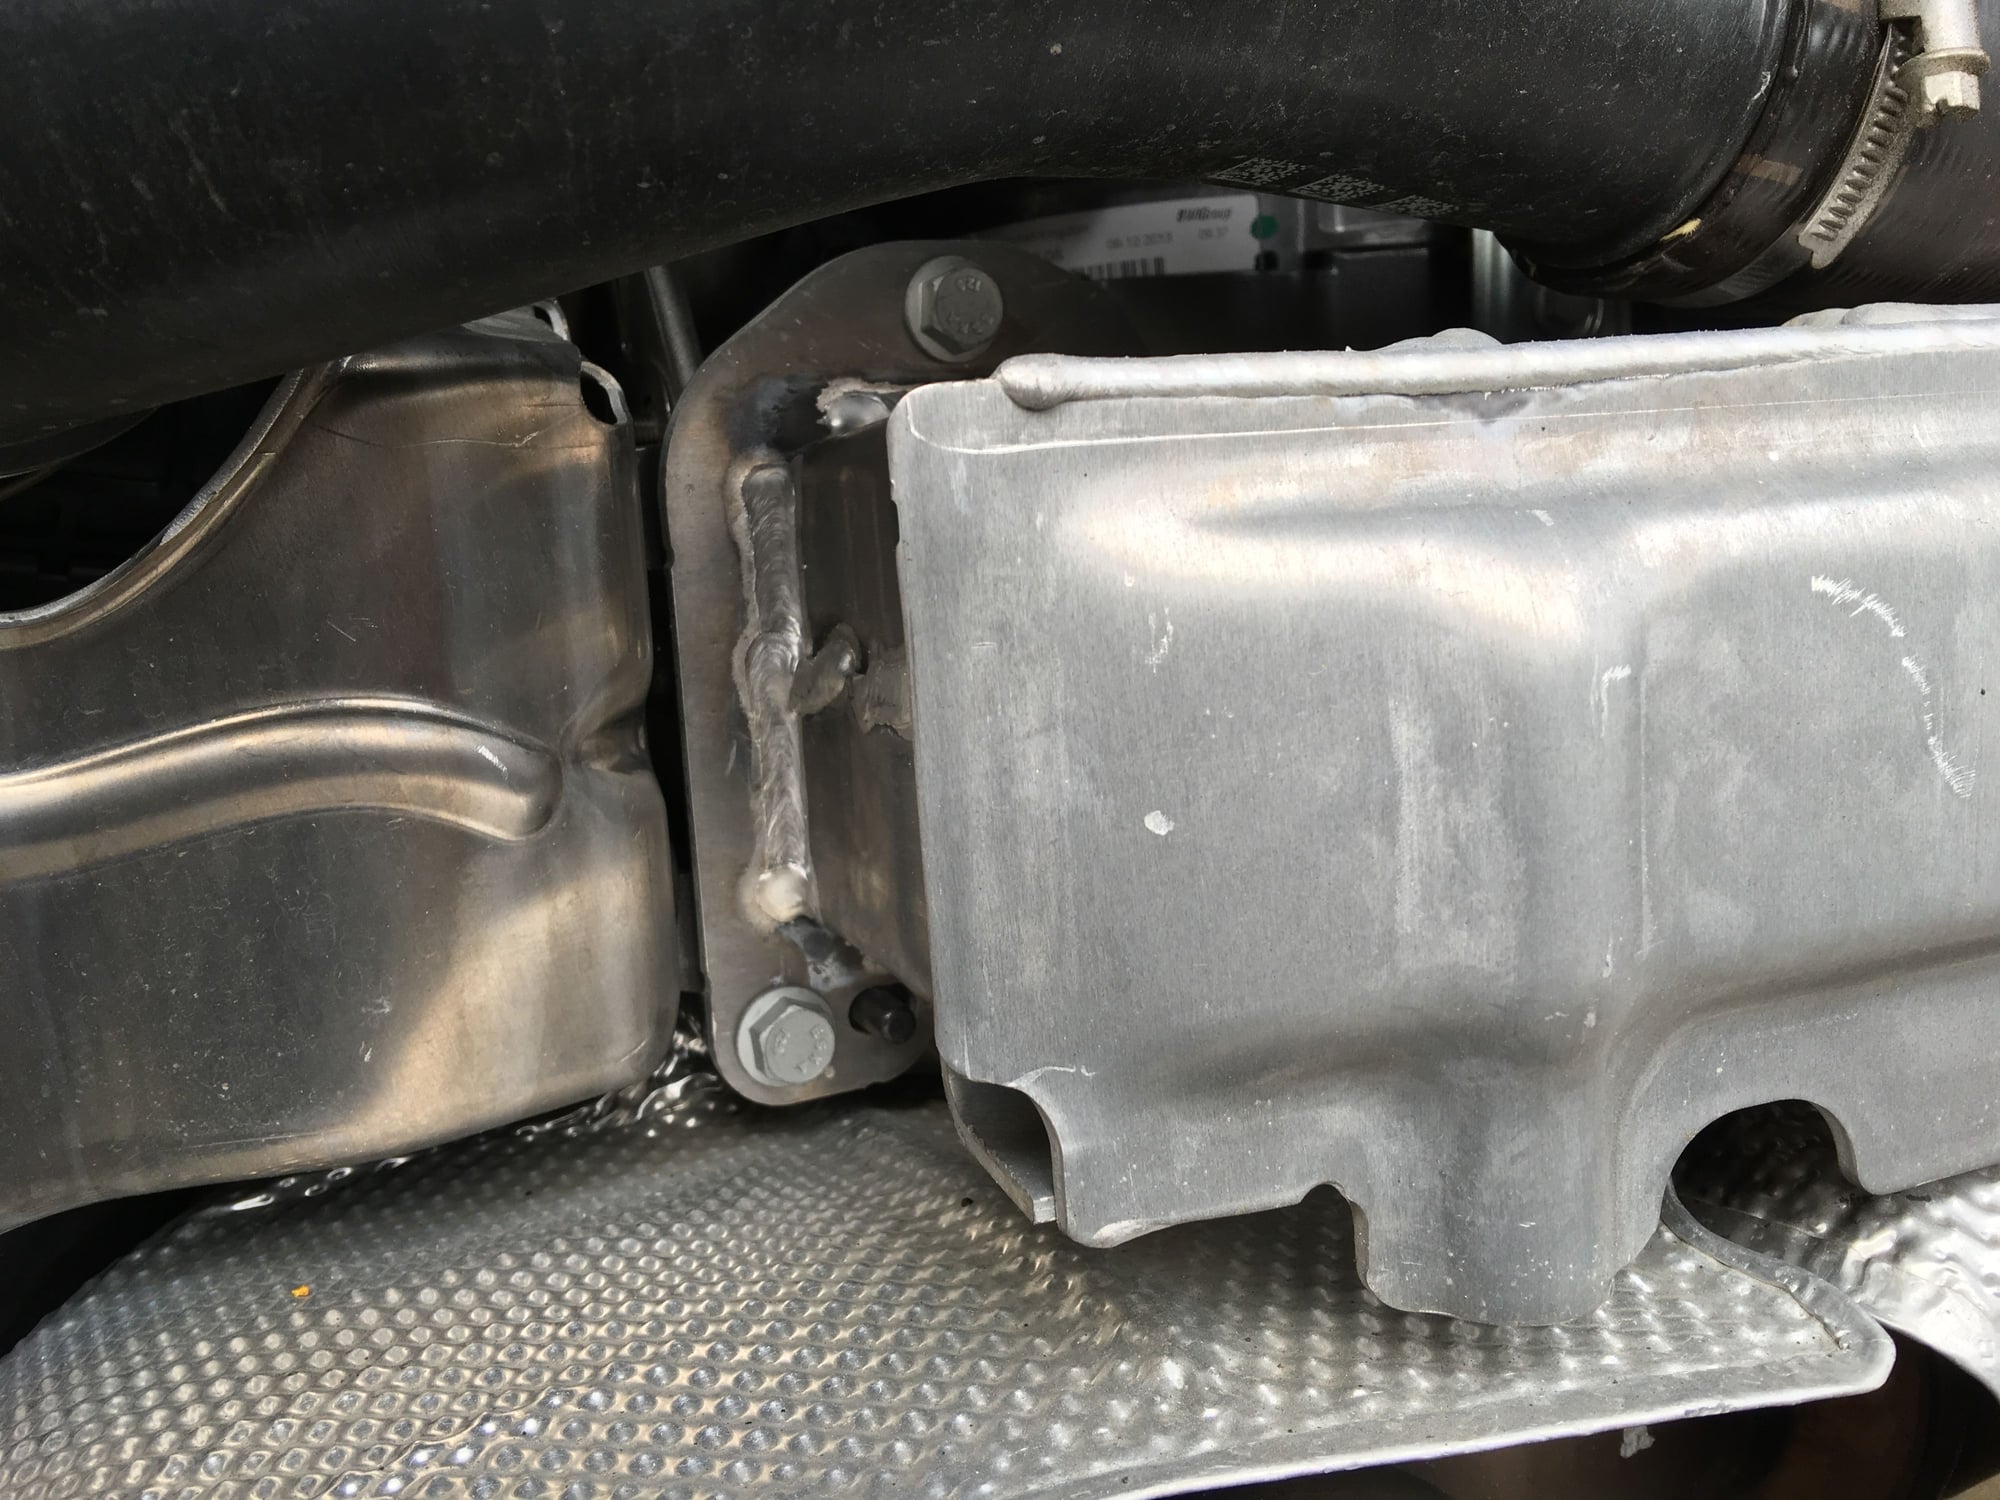
2. Using a 5mm allen socket, remove the two large band clamps holding the muffler to the engine. Fish them through and set them aside. Using a 12mm long box wrench, reach up and loosen amd then remove the four nuts holding the right (passenger side) catalytic converter to the turbo. Using a 3/16" 12 point socket, undo the bolt holder the turbo heat shield to the fluid housing.
3. Using a 15mm deep socket, undo the band clamps holding the catalytic converters to the center muffler. You may need to hit the band clamps with the 5lb rubber mallet to get them to pop open even after they've been loosened.
4. Wrestle, mallet, and twist the right catalytic converter from the muffler and from the turbocharger and heat shield. The 5lb mallet really helps.
5. Once it's loose, if you are also swapping out the cats, undo the two O2 sensors using an O2 sensor socket or a 5-sided wrench of the correct size (I don't recall what that is since I didn't swap the cats yet.)
6. By moving the exhaust to the right with wriggling and twisting, it will eventually come loose. Be careful that you are not under it when it finally comes loose as its actually surprisingly heavy.
7. Using a combination of 12mm short, long, and gearwrenches, you can remove the left cat if necessary and then undo the O2 sensors
8. I don't recall the exact size, but a 12-point socket (3/8"?) fit best for me to remove the exhaust tips. Once the single bolt is loosened, a clamp holding the tips on the larger of the two pipes releases.
9. installation of the new exhaust will depend a good bit on the exhaust itself, but it is probably not complicated once you've reached this point. Everything slipped on pretty easily for me with a little help from the 5lb rubber mallet.
Ouch. Nothing worse than a fruitless exercise. Know that feeling too well... (exhausts)....but don't give up. This car can sound amazing!
It certainly wasn't a fruitless exercise. I have recently been doing a lot of sound recording and wanted some good material for frequency analysis inside the car during driving. I not only chose what I thought might be the loudest cat-back on purpose, but also found the exhaust for a great deal.
The exhaust does quiet down considerably once underway, but I haven't taken the car far. I'll know more after some more in depth in-car recording today. I plan on measuring a few different exhausts, and I'll wait for the right deal on each so that I know I can sell them without a loss.
Firstly, nice review on the install. I certainly didn't wish to diminish your efforts there so sorry if any confusion. I meant fruitless in the sense of spending all that time and effort doing the job only to find the end result not up to personal scratch. It can happen - been in that same situation myself. Best case scenario is to get the right result first up! Dollars and savings are usually a consideration in these types of exercises - but the end result is never guaranteed.
I will say that the cold start phase on the 991tt becomes significantly noisier and harsher with an AM system, but thankfully that phase is very short lived (@ 60 sec) where the tone/volume becomes unobtrusive on idle - similar to stock where it then comes down to the tonality of the system under throttle and whether it is too raw for the nature of the car. I'm personally not convinced any non muffled system can deliver a better sound than a muffled system however I see even guys with certain brand muffled systems are evidently finding problems they feel they need to improve upon.
Here is another case. See post 2 (Review reserved for some odd reason) so not sure what the deal breaker was with that one, but the love affair was very short lived, and for a lot more dollars spent than what you have.
Thank you for posting a detailed & well described "DIY" bumper removal on the turbo!
This is a fair bit of work & really appreciate your commentary on the frustrating parts.
I installed a GMG exhaust with high flow cats on my car & didn't remove the bumper. I had access to a lift though which made it fairly straightforward, & you're right in that the stock exhaust is quite heavy. It was awkward & a bit of a trick taking off the stock system with the bumper on, I wouldn't suggest this unless a lift if utilized.
Since you're likely going to a different system & next time you take things apart, I'd recommend using a product called Permatex copper anti-seize on all the cats & exhaust bolts. As you're in Oregon & there's now shortage of moisture, this will really prevent corrosion & make removal or maintenance much easier in the future. A Porsche tech friend told me about it & I was impressed how well the bolts & fittings tightened up.
Just wanted to thank you for posting this. I installed Kline exhaust on my car last week and found the pics and advice very helpful! Glad this community doesn't seem scared of a little DIY.

 02-07-2016, 01:41 AM