When you click on links to various merchants on this site and make a purchase, this can result in this site earning a commission. Affiliate programs and affiliations include, but are not limited to, the eBay Partner Network.
You are SO hired! Great detailed write-up Remember when you first fire it up there's the initial cold start to warm the cats up so it idles higher. Try it under boost
Visceral - thanks so much for this uber-helpful write-up! My first time bumper-cover removal today went smooth as silk by following this. I'd like to add a couple tidbits to the thread.
No noteworthy differences on my 991.2 car, unless they used different sized Torx bolts, which seems unlikely. On my car, the 2 spoiler pillar bolts, all bolts on top and bottom of bumper, and the two bolts under the front of the tail lights, are all T30, as opposed to T25 noted above. The 3 bolts on each fender lip holding the fender liner, are T25, as opposed to T20.
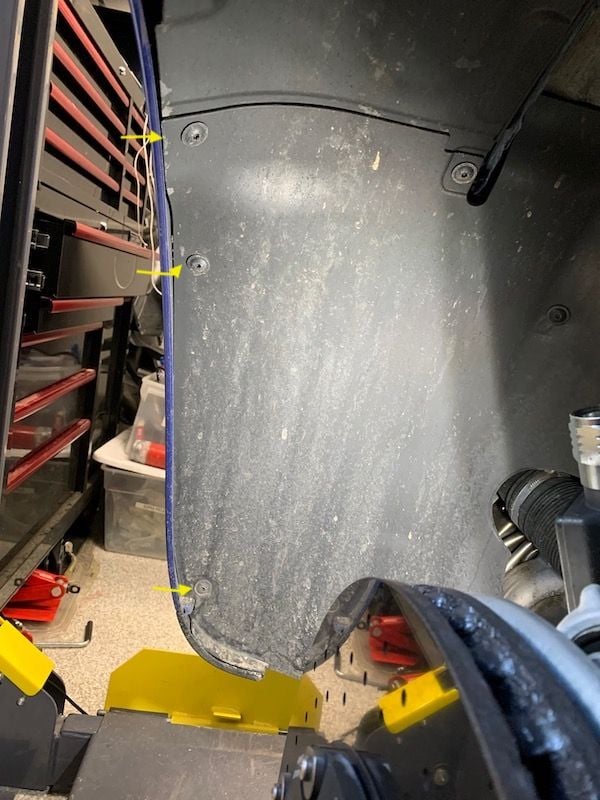
Here is a pic of the three bolts you remove from the fender lip in the wheel well. The final bolt is accessed by pulling apart the two plastic fender liner pieces at the seam seen above the highest of the three bolts. I was happy about having my wheels off for this part.
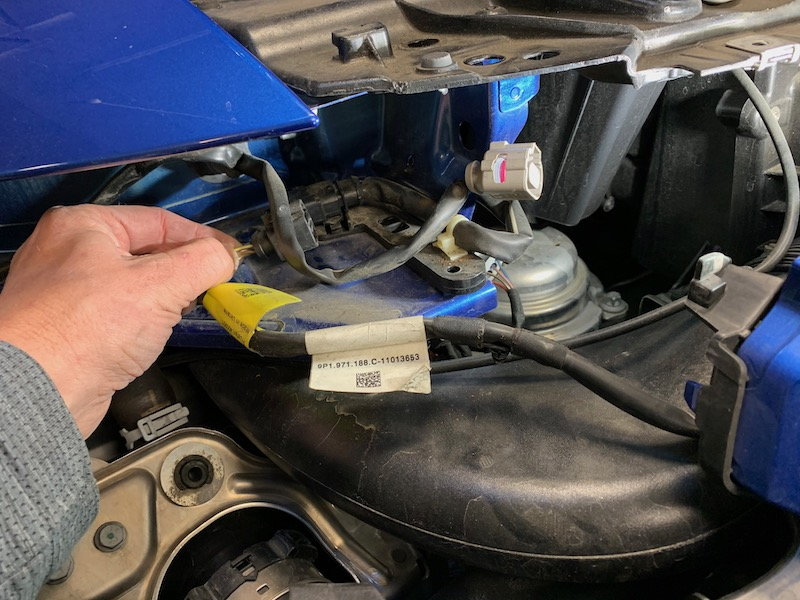
As a final step right before lifting the bumper cover off, I had wiring connectors behind the tail light area to unclip on both sides. Appeared to serve parking sensors and license plate light. Here's a view of the driver side. The more prominent cream colored connector was released much earlier from the back of the taillight, the black one in my hand is the one to release as a final step.
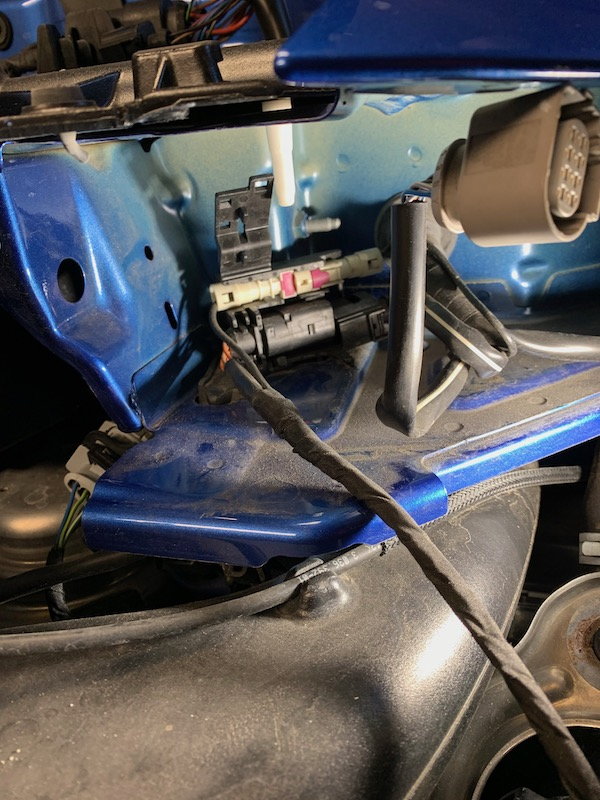
The final step to free up the passenger side. It has a sort of latching hood to open up, in addition to unplugging two connectors.
Here is a pic of the three bolts you remove from the fender lip in the wheel well. The final bolt is accessed by pulling apart the two plastic fender liner pieces at the seam seen above the highest of the three bolts. I was happy about having my wheels off for this part.
I pulled my rear fender with the rear wheels on, but definitely remember that last torx screw being a bit of a pain to get to...
A tool similar to this makes getting to some of those torx screws a bit easier if you don't have a lot of clearance:
You can actually save a couple steps and not remove the plastic body-colored spoiler post surrounds or the tail. The bottom deck lid can be lifted about 4" to give you access to the screws underneath that need to be removed. (You would need a ratchet that is 90 degrees for this however.) Make sure you electrically raise the spoiler before you start the project.

 03-03-2016, 03:19 PM
 Great detailed write-up
 Remember when you first fire it up there's the initial cold start to warm the cats up so it idles higher. Try it under boost