When you click on links to various merchants on this site and make a purchase, this can result in this site earning a commission. Affiliate programs and affiliations include, but are not limited to, the eBay Partner Network.
I second this question. Also, can you post a pic of how large the screws you used are? And do you recommend attaching it to the plastic liner while the liner is out, or is there a good "rule" to use if screwing the screws into the liner while it's attached to the car (without puncturing anything).
Thanks for the pictures!
It's possible to do without taking the wheels off, but I did anyways on the first install and I just used the screws that came with the kit. On the second install in my current GT3 my PPF guy in Leipzig put them on- he didn't take the wheels off but did a great job anyways.
It's possible to do without taking the wheels off, but I did anyways on the first install and I just used the screws that came with the kit. On the second install in my current GT3 my PPF guy in Leipzig put them on- he didn't take the wheels off but did a great job anyways.
Awesome, thank you. My kit came with only two screws per each side. Do you think that would be sufficient? They're not too long but fairly long (probably as long as yours). Any "for dummies" tips on how to avoid puncturing anything? You stated you did it by hand (through the liner) so I figure that's a good way to feel out whether you've pushed up against something. Also, do you feel the screws ridges by themselves (since obviously you can't secure it from the other side) will withstand wind pressure, etc. and not deteriorate the liner (i.e eventually loosen up and come undone)?
Awesome, thank you. My kit came with only two screws per each side. Do you think that would be sufficient? They're not too long but fairly long (probably as long as yours). Any "for dummies" tips on how to avoid puncturing anything? You stated you did it by hand (through the liner) so I figure that's a good way to feel out whether you've pushed up against something. Also, do you feel the screws ridges by themselves (since obviously you can't secure it from the other side) will withstand wind pressure, etc. and not deteriorate the liner (i.e eventually loosen up and come undone)?
Thanks again for all your help here.
Two are marginal- I used four per side. And no problem so far- they have held up on both cars with no issues except one track day where they broke. My latest have survived the Autobahn at 140mph+ so I think you are safe on US roads. Just be carful screwing them in if you can find short screws it's obviously better.
Two are marginal- I used four per side. And no problem so far- they have held up on both cars with no issues except one track day where they broke. My latest have survived the Autobahn at 140mph+ so I think you are safe on US roads. Just be carful screwing them in if you can find short screws it's obviously better.
Sweet, thanks again. And finally, it seems like zmon pierced through both (the mud flap and well liner) using his hand(?) Do you think a drill is necessary? The material seems too hard to pierce with my hand (maybe I'm not hulk enough) but then again didn't try. Maybe hammering it in would do the trick.
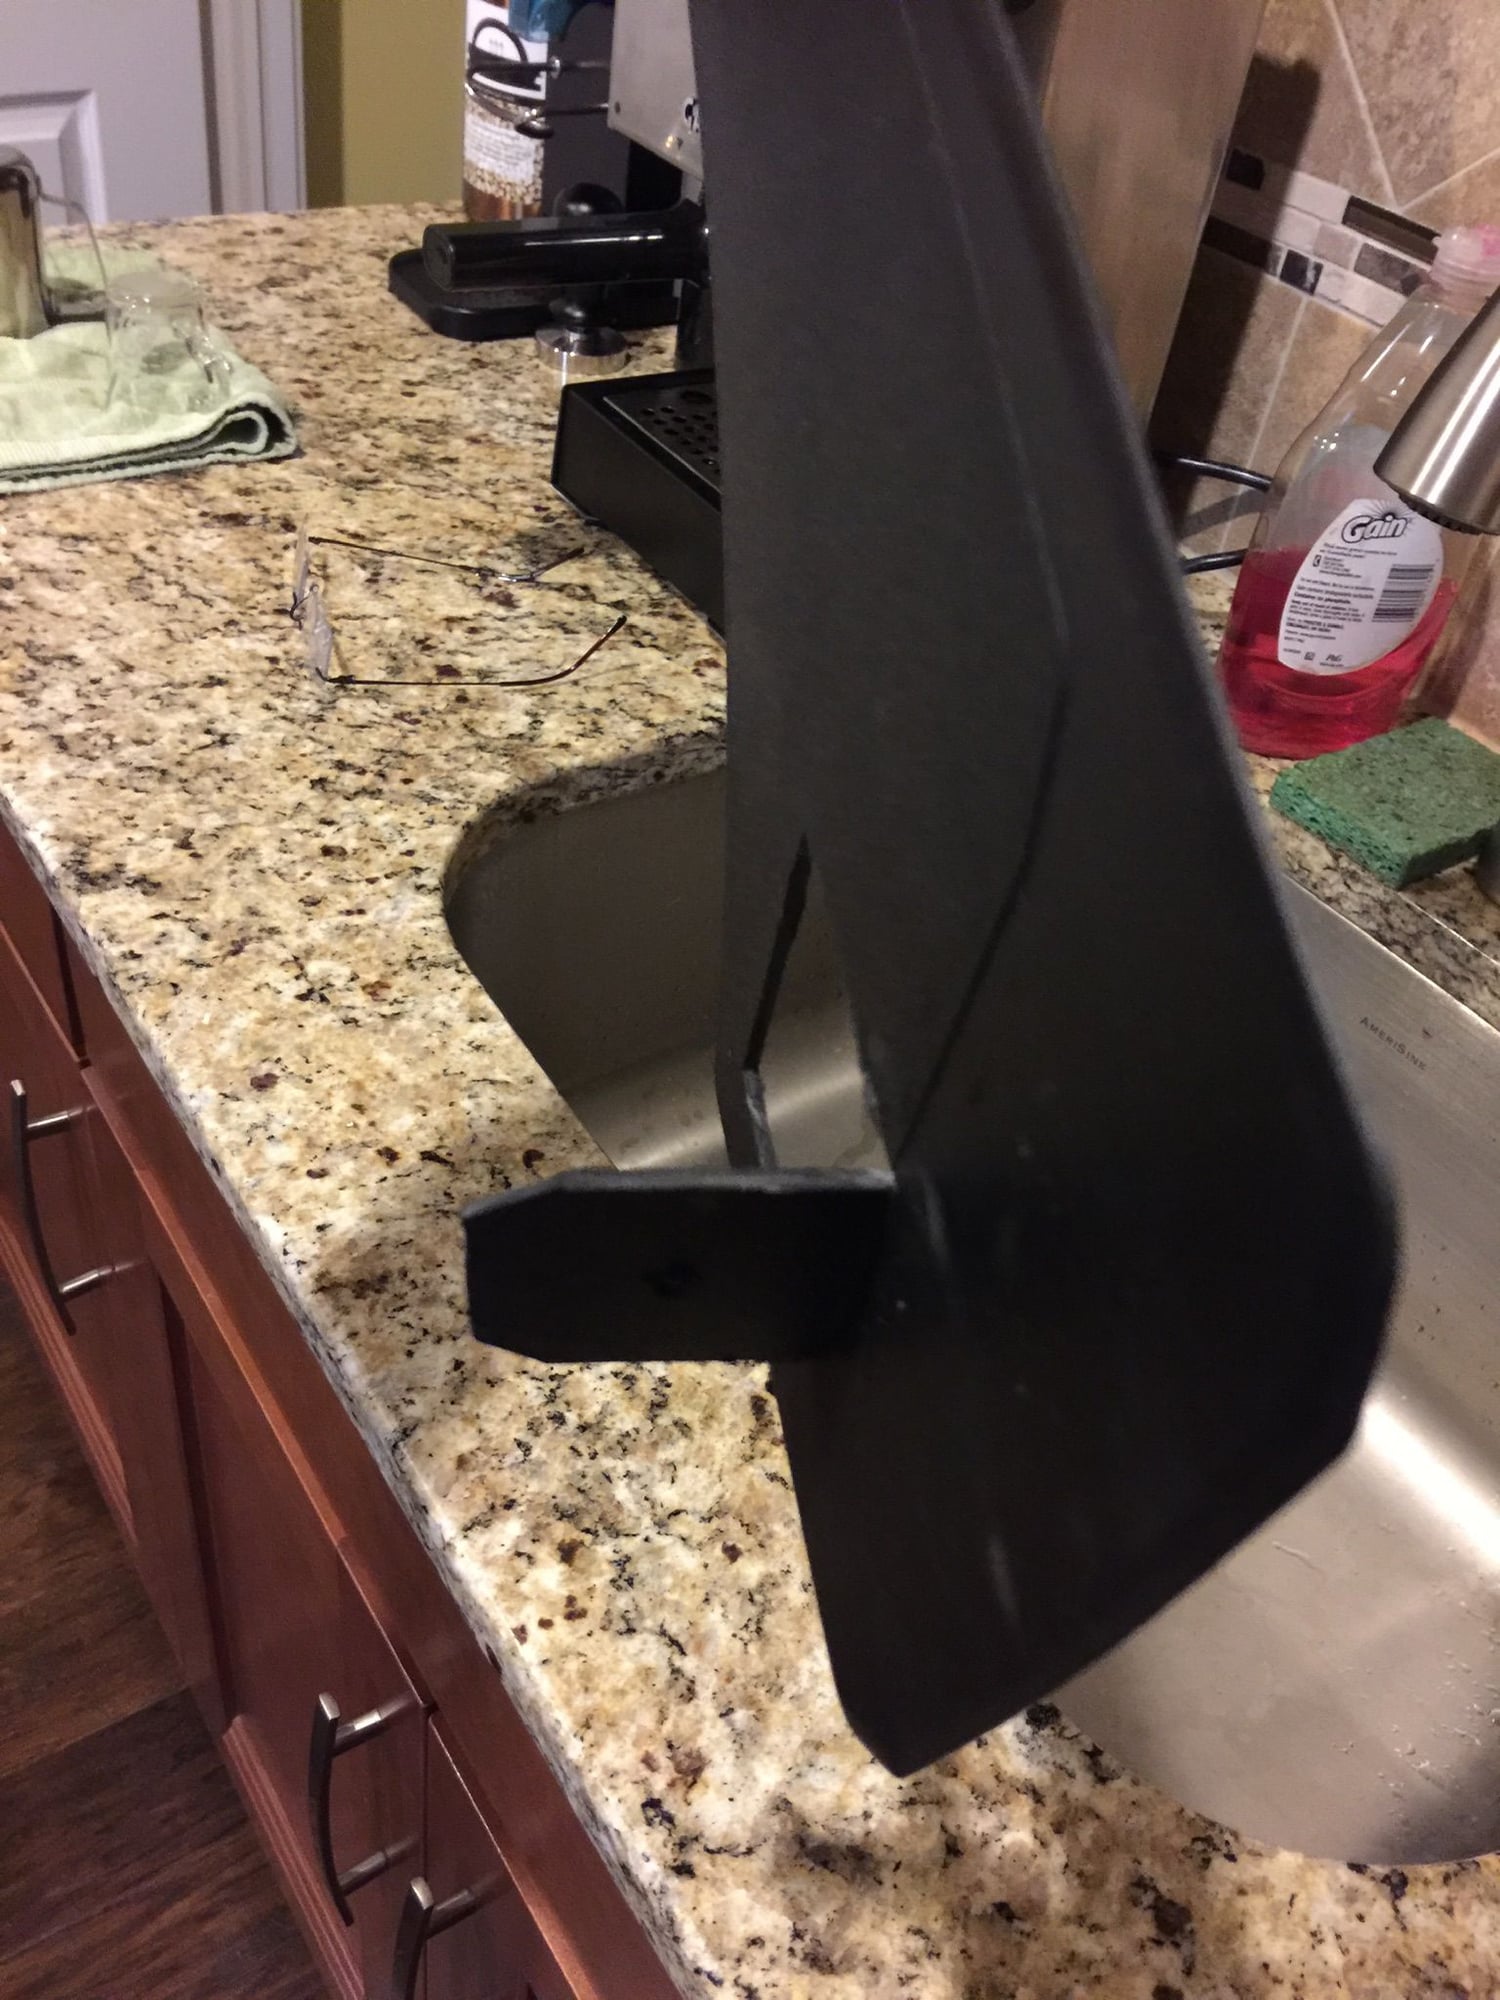
K-A - if i had a small battery drill handy or smaller tool i would have used it.. i used a combo of a screw about 5/8" and another that was probably a bit closer to 3/4-1" (sorry i dont have them in front of me at the moment) and i found it helpful to hand start a hold in the flap for the first one, and then put it up to the liner and get it to bite in the liner.. thats the point where you could finish it by drill or other. and for most of the holes i used the longer screw to start as it was easier to get it through the flap and then to bite and start the hole in the liner. i would then remove the large screw and use the smaller one as it would then be long enough to grab the liner in the hole i just started.. if you put your screws in the neighborhood of where i put mine and they are short enough you will not hit anything. for piece of mind take off and put back on the liner to check first..
i saw the question of installing while the liner is out... i thought about this when my first liner was out and then decided against it. one reason being that the liner sits inside of the fender edge and thus it sits back just under 1/4" so to get the liner back in, you would have to work the liner inside the fender lip and the flap on the outside of the fender lip. maybe it was just me, but i thought that would be challenging plus i would not have gotten as precise of a fit against the fender. which was the most important thing for me, making sure it started flush and worked its way outboard as we got down to the lower edge of the flap and fender..
oh and it would have been WAY challenging with the wheel on. it would just be in your way unless you had really compact tools and im sure you could also maybe turn it one way or the other to free up some space... (i was also excited to use my new fancy precision instruments torque wrench.)
hope this helps.
zach
Thanks so much! I�m gonna try it by hand and screwdriver and without the wheel off and see how it goes. Unless you think it�ll just be impossible. I assume piercing the liner is pretty easy?
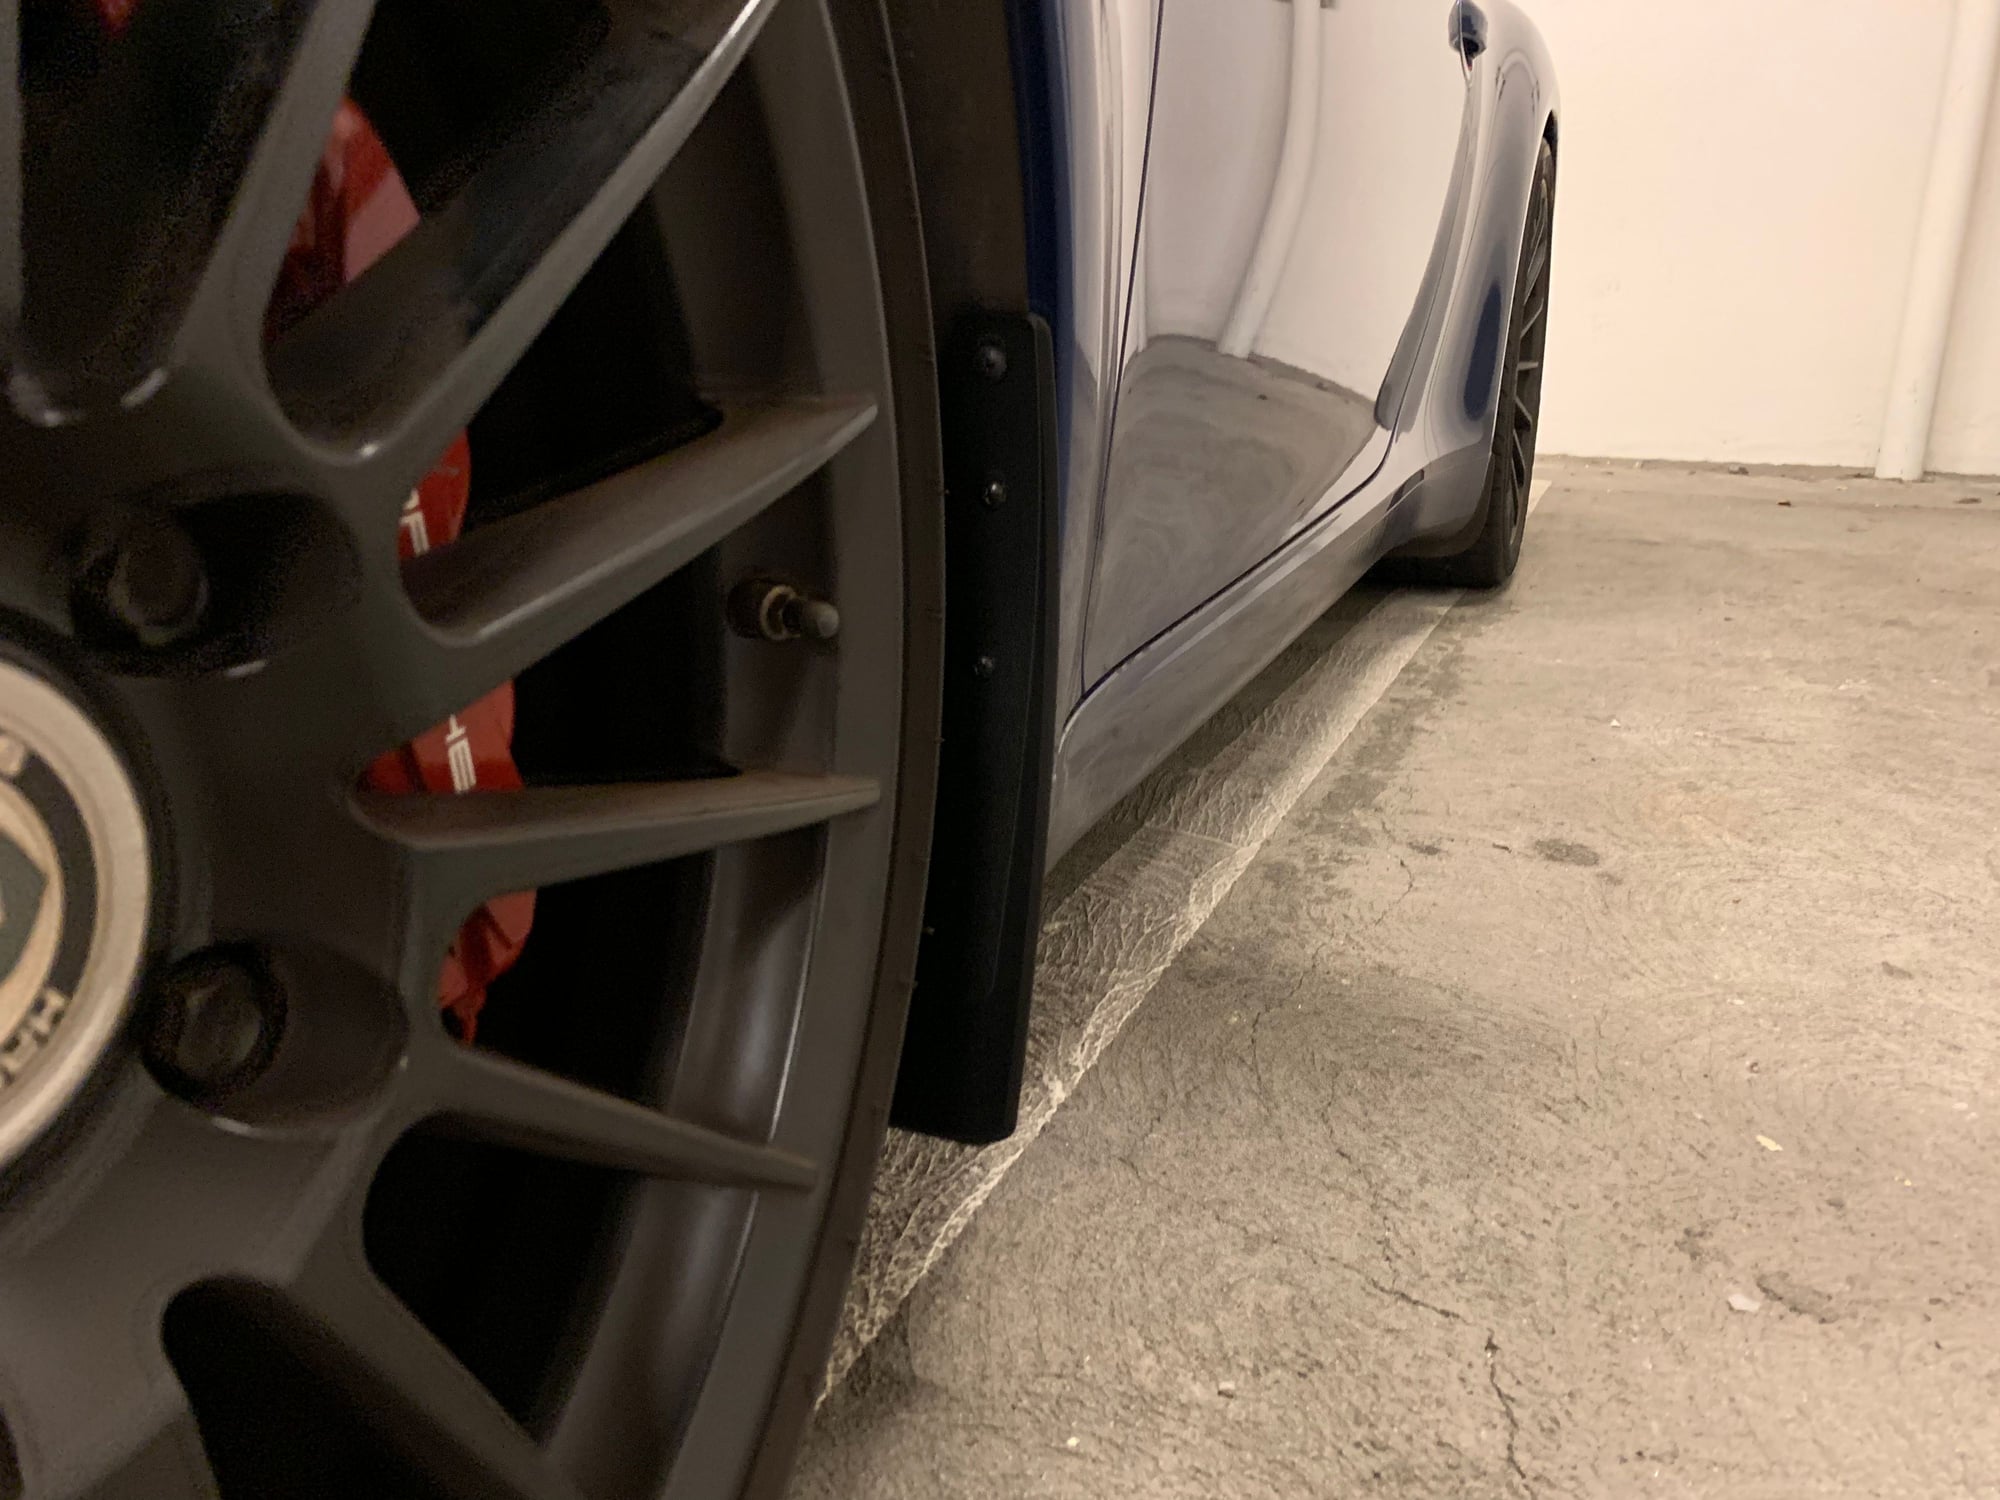
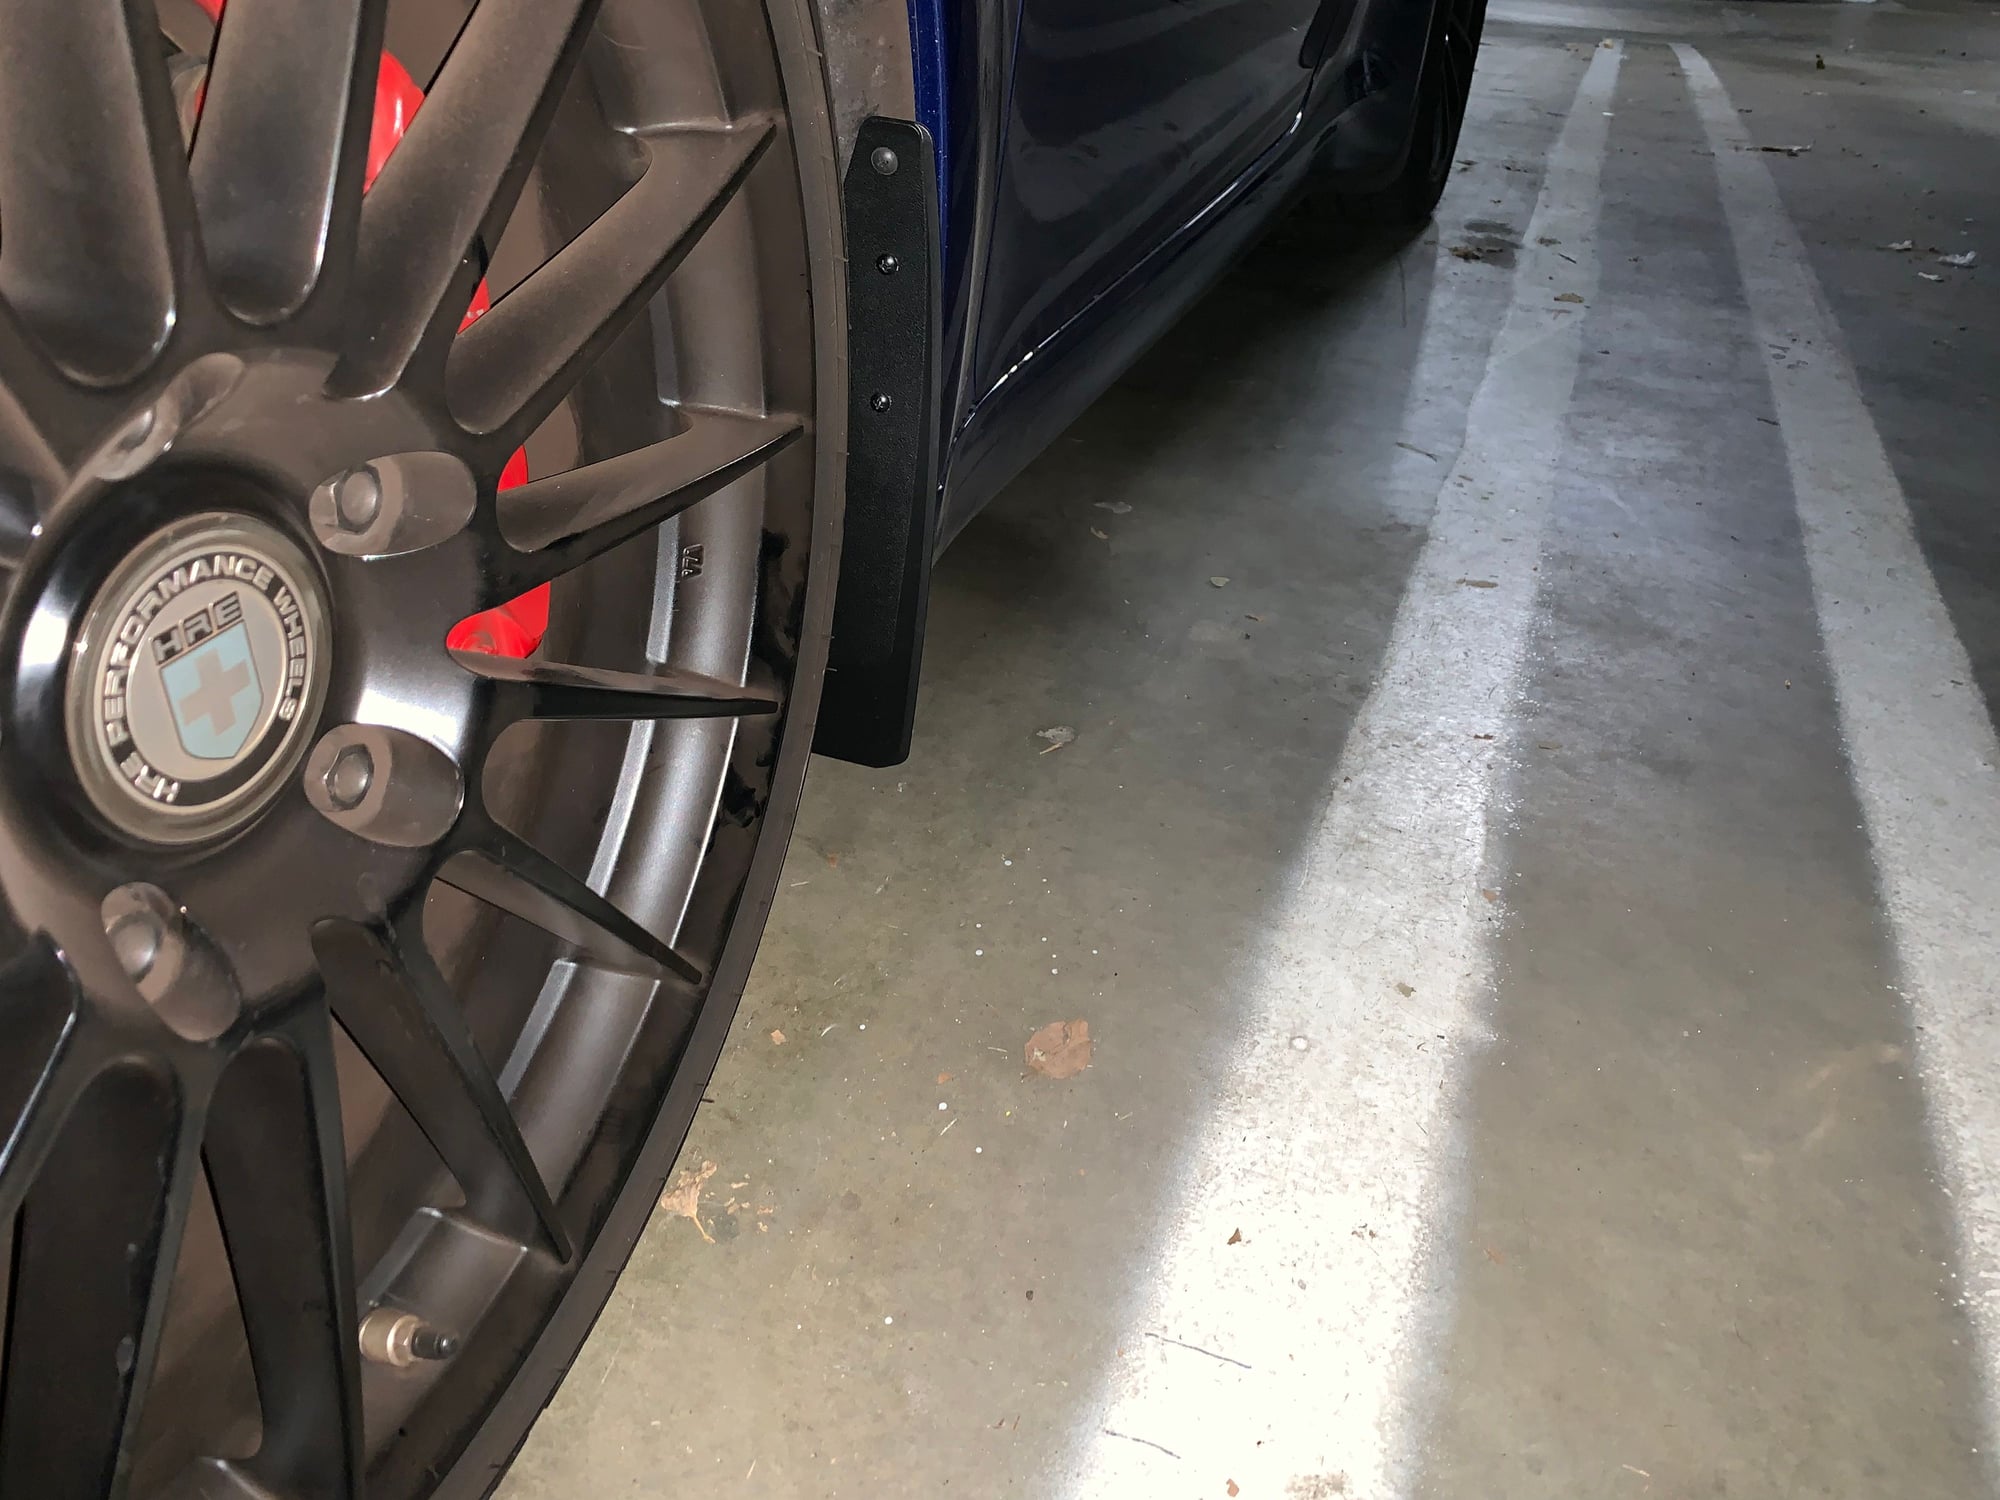
Also, does this seem like an appropriate size?
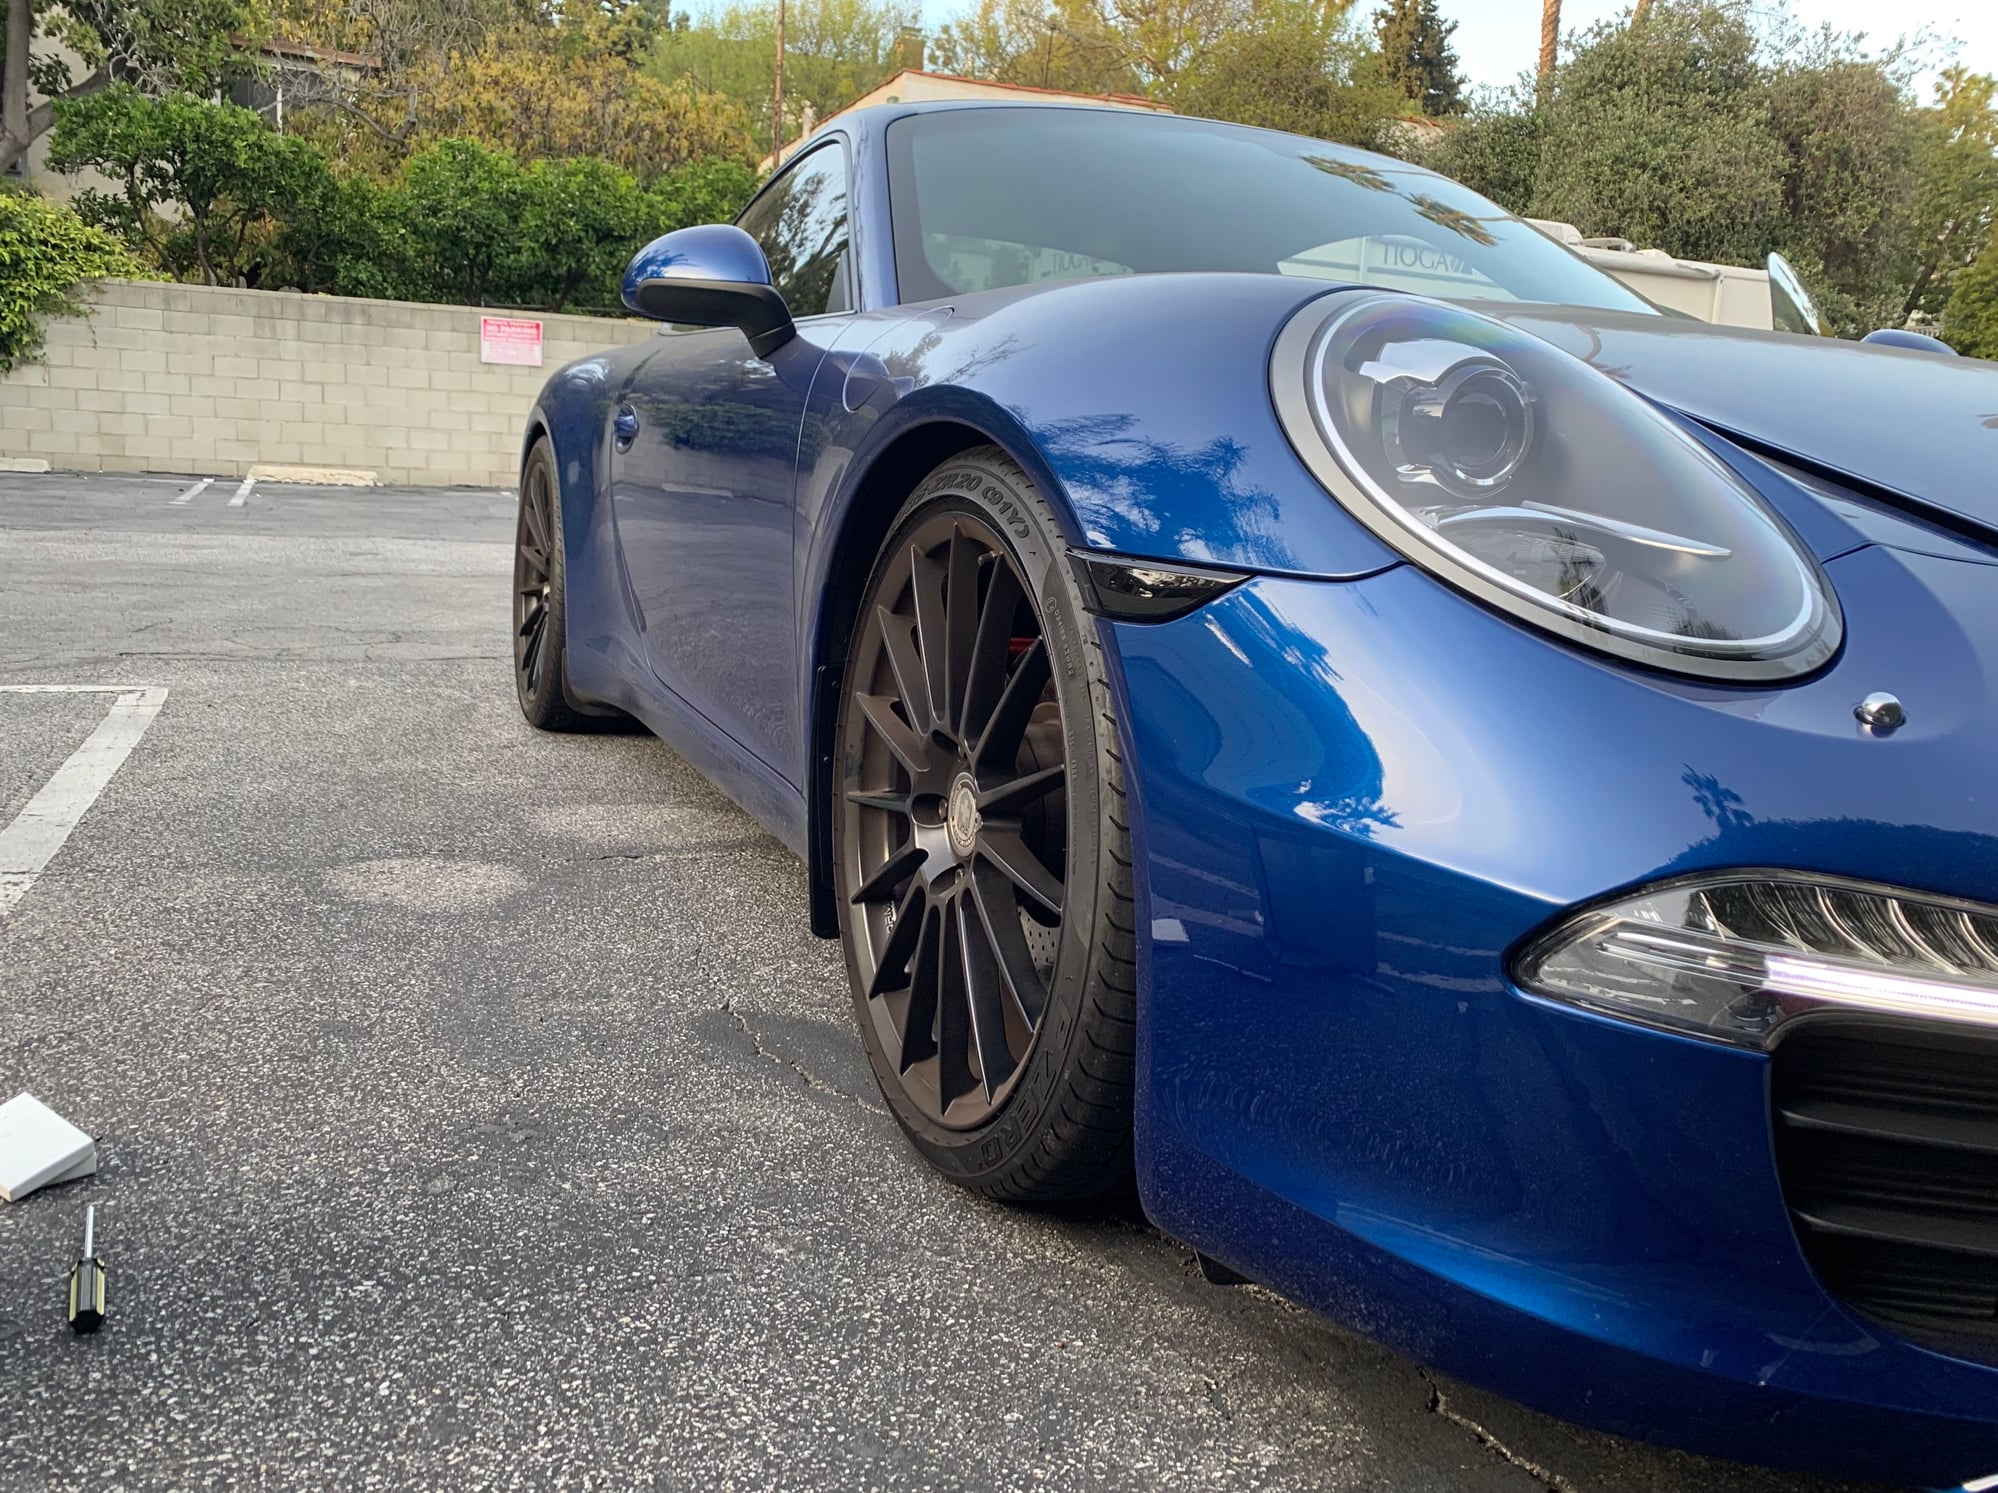
Tired or worrying about rocks being kicked up from my HRE�s with aggressive offset. Figure I just need to do it.
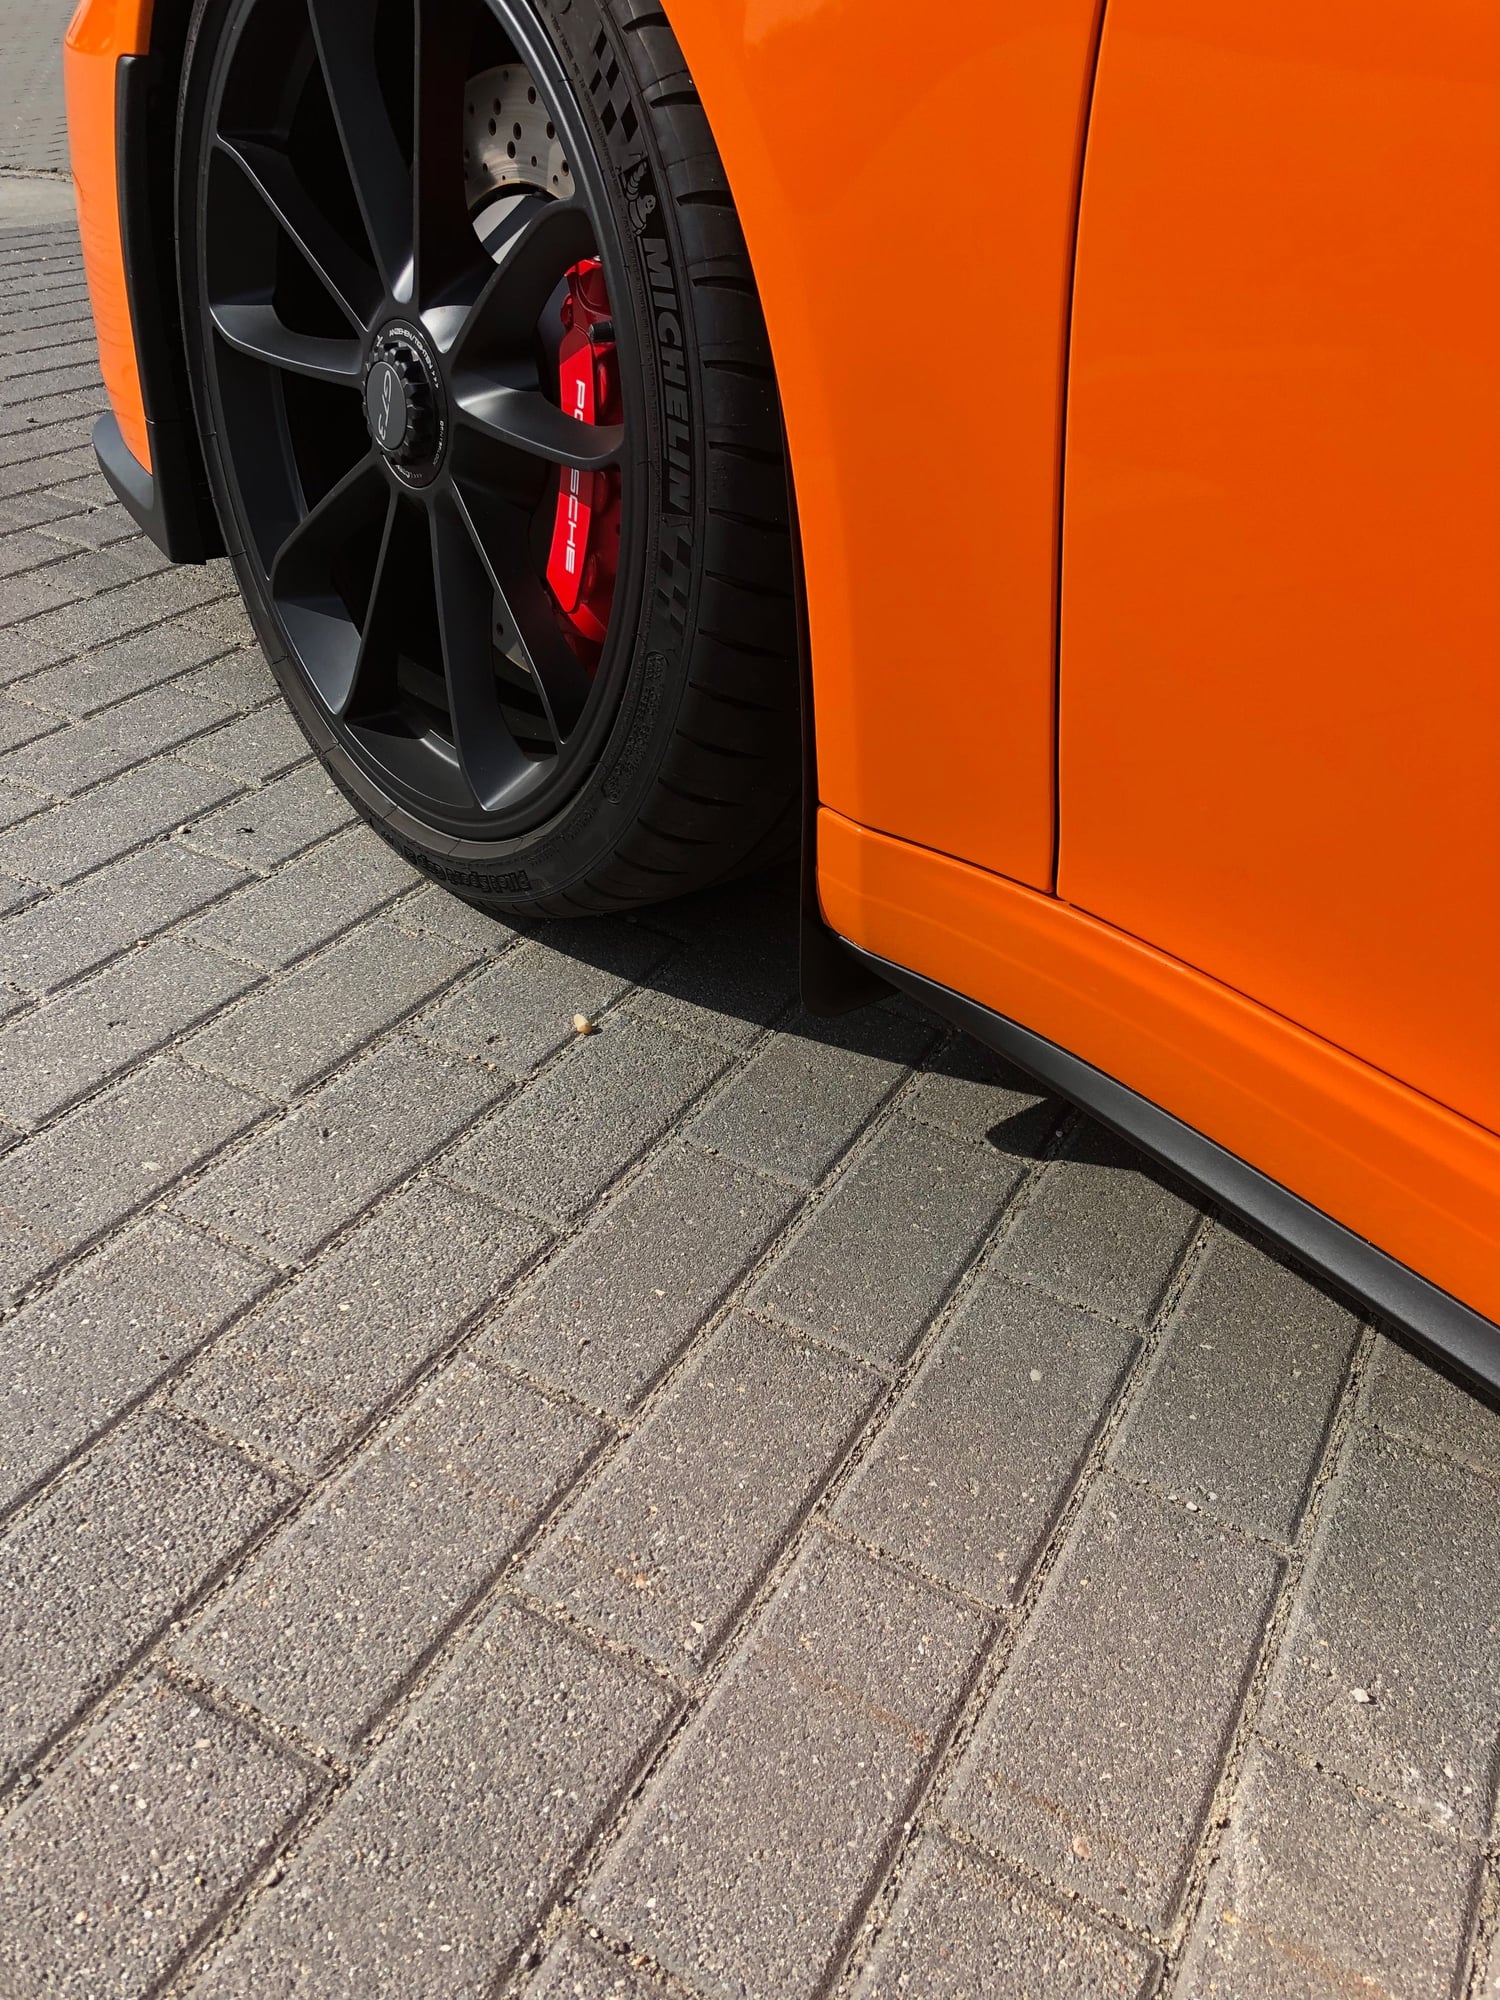
Officially a member of the #FlapGang! Did it today and I�m not much of a �handyman� type of person, so kinda proud of myself. Didn�t take the wheel off, and no power drill, all by hand. Just need enough screws to use for different piercing methods, and a screwdriver.
I didn�t get both sides exactly alike (later had the epiphany that I could have just placed the second one backwards on top of the first one and drilled the new holes exactly the same way which would have also saved a ton of time. Oh well) and the driver side hangs a little lower than the passenger side. It kind of bugs me that maybe I set them too low hanging and they�re not precisely exact with each other, but then I think �if you�re gonna go for it, go for it� and wanted to ensure protection which letting them �hang� a bit will do.
When I told my wife I was doing this, she said �mud flaps, like a truck?� hahaha. To some people the view of some black flaps and exposed screws (that part bugs me on a Porsche, but not too much.... yet. Kind of a �durable� look I guess) is worse a bunch of tiny rock chips. But my aggressive offset HRE�s kick up so many rocks to my precious Aqua Blue paint, me and my OCD touch up paint applications to extremely small dots with toothpick tips reached its breaking point. Hopefully this alleviates that.
The way the fender now kind of �flares� at the bottom even kind of looks cool in its way.
Feel free to let me know how you guys feel the positioning is.
Anyone tried just using double sided tape instead of screws? Considering Porsche uses double sided tape for aero bits, guessing it should be strong enough.
Anyone tried just using double sided tape instead of screws? Considering Porsche uses double sided tape for aero bits, guessing it should be strong enough.
Thought about it. No way do I think it could adhere to the liner well enough.
Anyone tried just using double sided tape instead of screws? Considering Porsche uses double sided tape for aero bits, guessing it should be strong enough.
That's what I was thinking. I am going to try this soon and would love to use only tape if that works. If not, maybe a combination of tape and only a couple of screws as insurance.
That's what I was thinking. I am going to try this soon and would love to use only tape if that works. If not, maybe a combination of tape and only a couple of screws as insurance.
I did some search and looks like 3M #5952 automotive double sided tape https://smile.amazon.com/gp/product/B00MAT2WZU/ is what car manufacturers use to stick the aero bits on. So hoping that works.
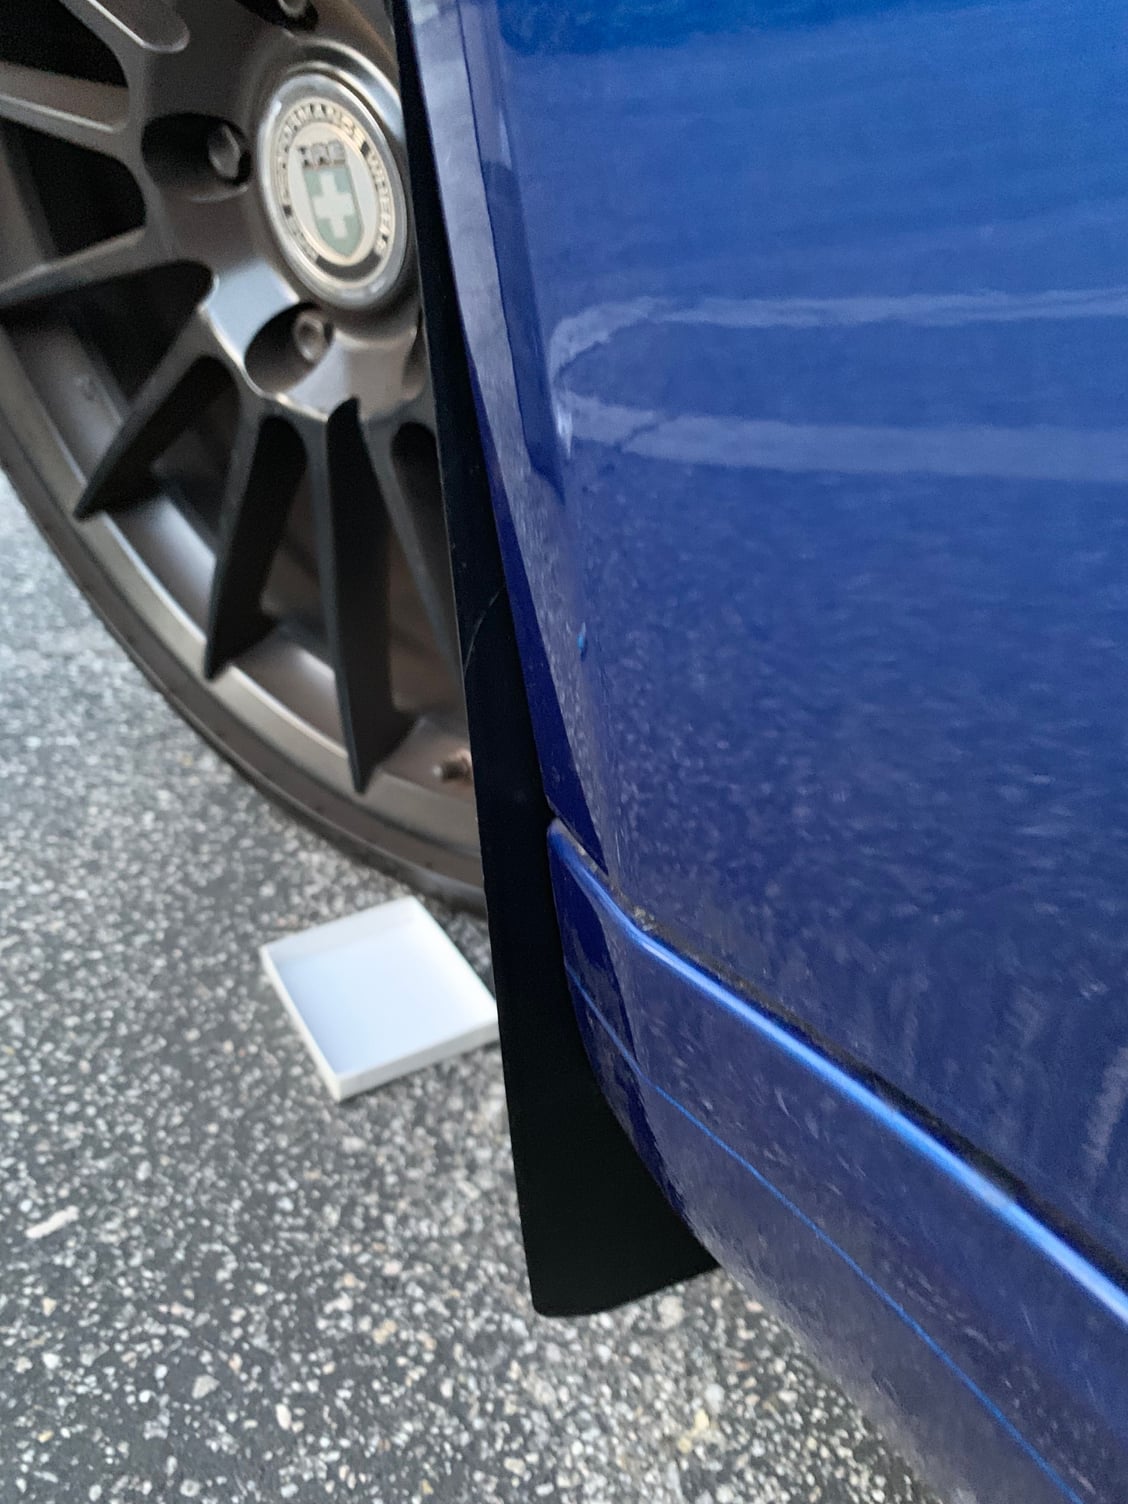
Wow, that washer fluid reservoir is RIGHT behind that fender liner. It seems even with those short screws, it'll still touch.
How much space do you actually have behind that fender liner? 1cm? Or is the reservoir actually touching the fender liner on the other side?
Surprisingly with even medium screws you�ll be alright (but still go short to be safe). You can press the liner back and see just how much space is behind there. I had zero problems with it touching anything.
Originally Posted by mfonseca
That's what I was thinking. I am going to try this soon and would love to use only tape if that works. If not, maybe a combination of tape and only a couple of screws as insurance.
Maybe it�s because my liner is too dirty, but no way do I see 3M tape properly adhering to the surface. If you do it I�d definitely recommend a couple of screws as insurance.
So far I�m really loving them btw. Don�t even notice them on the car anymore, and driving, especially spirited driving is a more enjoyable, less stress experience as I�m not constantly cringing at the sounds of pebbles slapping paint. So far, I haven�t heard that dreaded �rock>paint� sound since I�ve had them on yet, and judging by the residue marks on the part that lips out on the side of the fenders, you can see how much stuff it catches. Highly recommended so far.
Anyone tried just using double sided tape instead of screws? Considering Porsche uses double sided tape for aero bits, guessing it should be strong enough.
3M VHB tape (Very High Bonding strength) is commonly used for exterior badges on cars and has amazing strength.
If you had very clean surfaces I would try Weldwood contact cement, that stuff really holds.
Apply to both item and car body, let dry to tack and press together.
Either way, short sheet metal screws are the easiest solution and you don't need a clean surface to mount. To change back to stock, the Holes can probably be filled in with your fav ABS cement
I
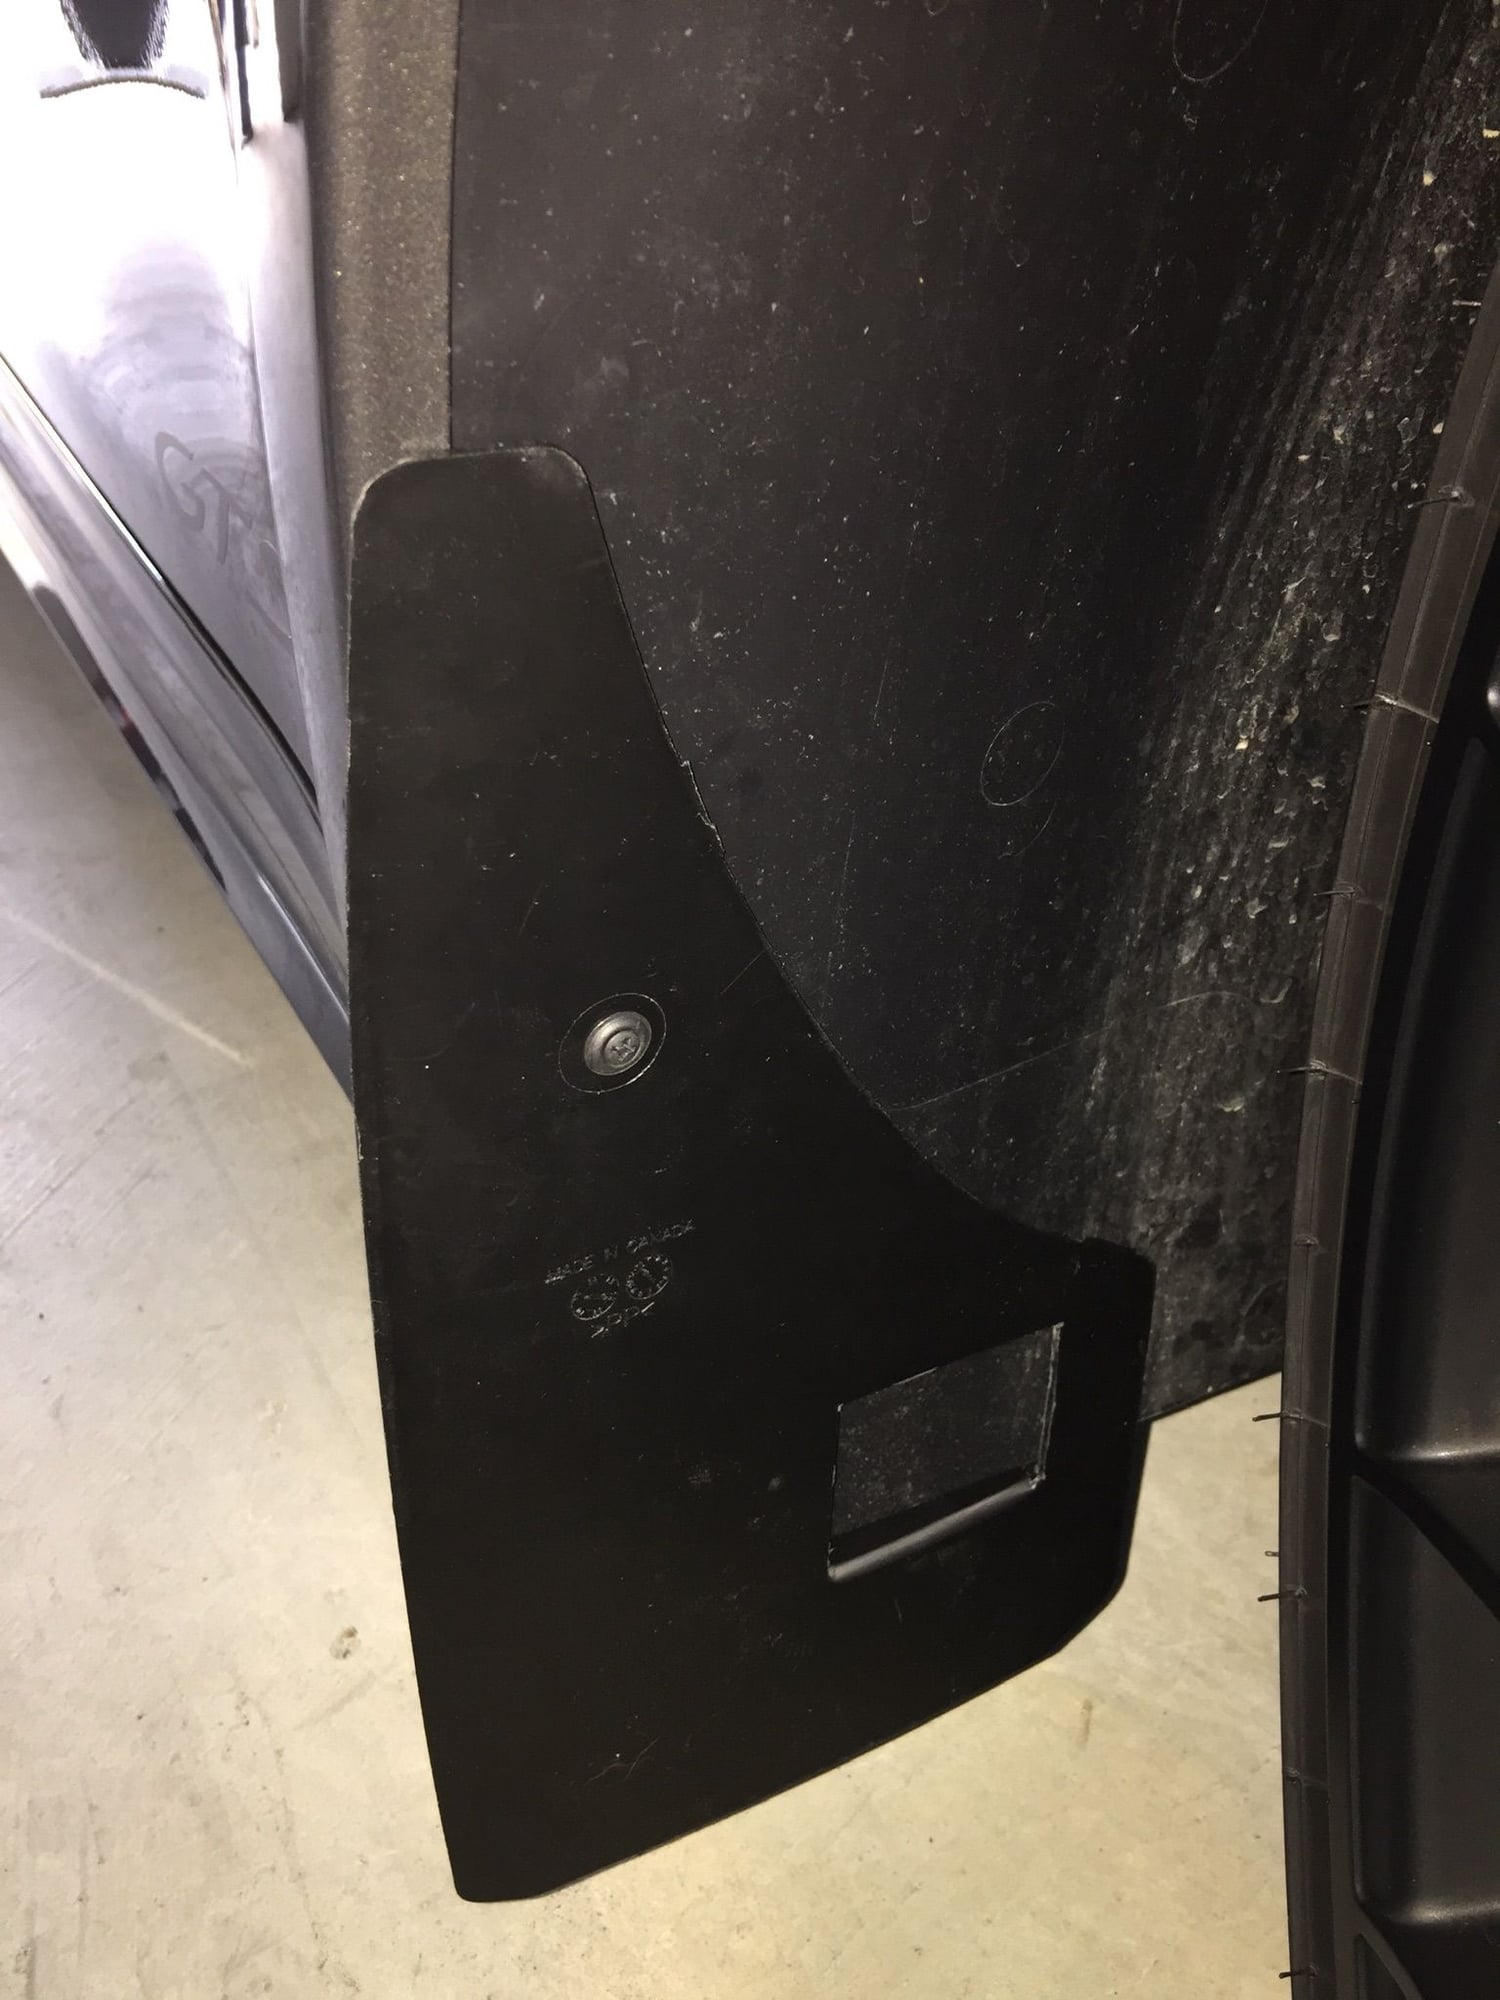
Ok, I was trying not to go this route, but even with additional PPF in the rear of the car, living in a community with lots of new home construction was taking its toll. I managed to secure them with only one additional screw on each side and they have not moved in the two weeks they have been installed. I essentially cut a flap to use to secure it at the bottom of the car with an existing screw and then added one more screw in the void area shown on post #41 (right below the washer fluid reservoir). If you get the mud flaps someone linked to amazon, there is actually a dimple we’re there sure should go.
I initially tried just the pre-existing bottom screw with double sided tape at the top, but that did not hold.
 03-26-2019, 12:24 AM