When you click on links to various merchants on this site and make a purchase, this can result in this site earning a commission. Affiliate programs and affiliations include, but are not limited to, the eBay Partner Network.
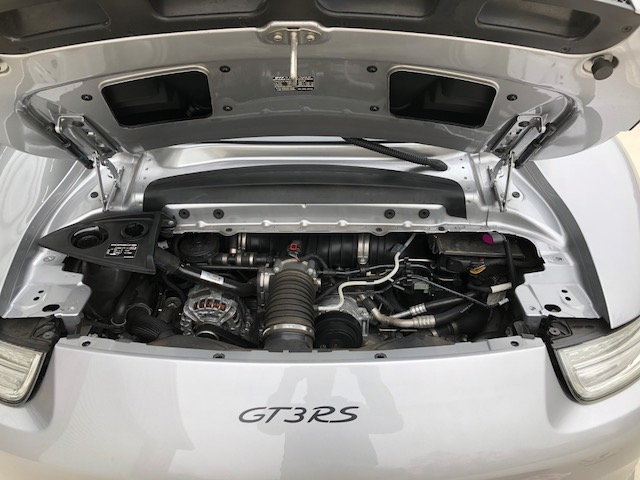
How to install GPS-based PSE (exhaust) valve controller on a 991 GT3RS
I am taking my 991 GT3RS to Laguna Seca soon and I did not want to be black flagged or install an ungainly looking exhaust mod. So after reading these threads
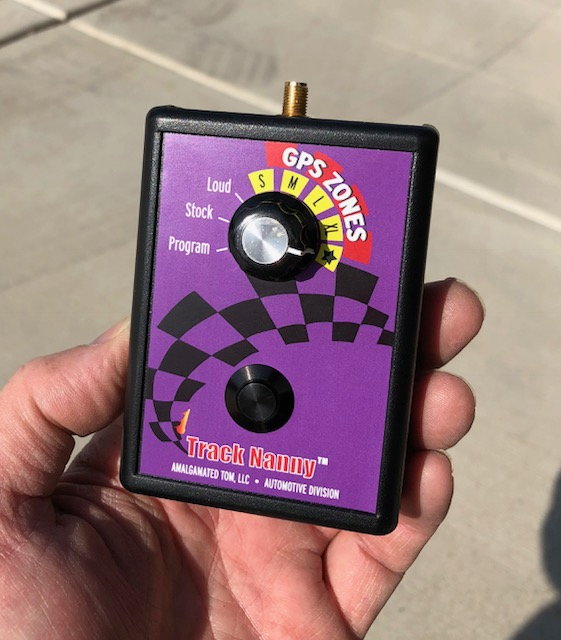
(credit to Mech33 for his innovation), I contacted Amalgamated Tom and he built his GPS-based PSE controller called Track Nanny. Tom can explain the specific on what it does and how it works. This is the first one Tom made for a 991 GT3RS, so we carefully reviewed the parts manual to confirm it uses the same solenoid as the standard 991 GT3 and then confirmed that the wiring appears the same. Still, the process is a little different, so I have a few photos below walking through the process for others. The unit works, but I have yet to confirm if I will pass sound check at Laguna Seca.
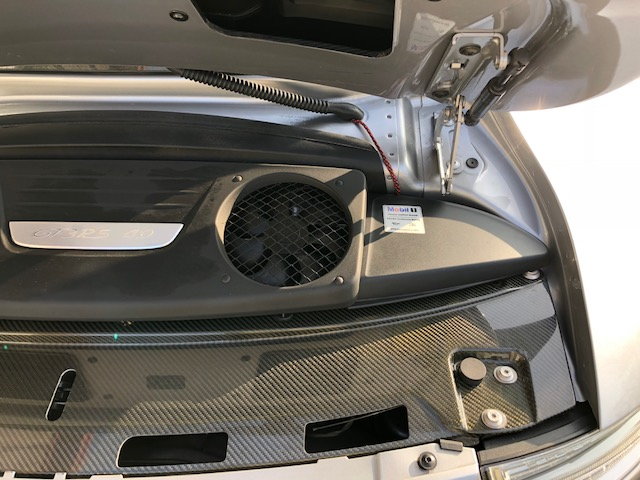
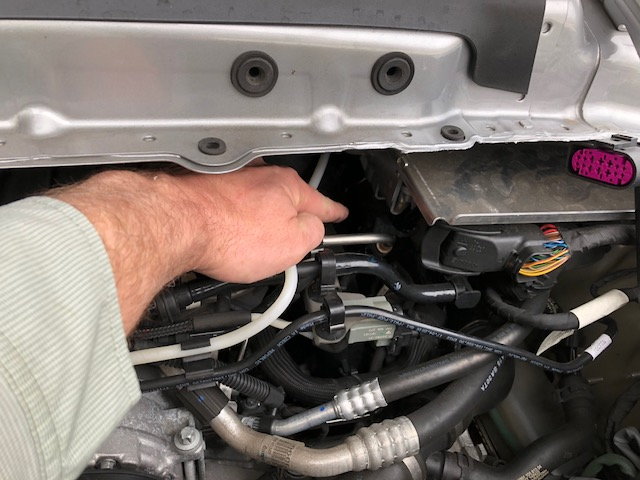
Step 1--remove the fans, fan shroud, and right cover. These pop off. The left cover has a 10mm bolt to undo and wiggle off after removing the add water and add oil caps.
This is a photo (took it after so you can see the wire already there).
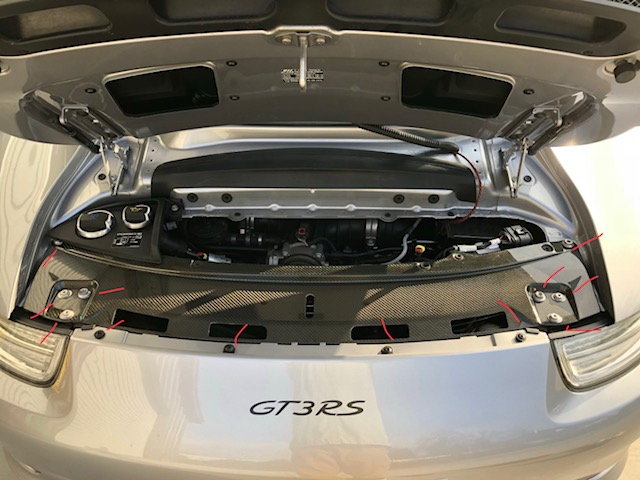
Step 2--remove the carbon fiber cover. You really need the extra access. All the tori bolts are marked in red, and note that two hide under rubber pads and one hides under the edge of the cover by the water fill.
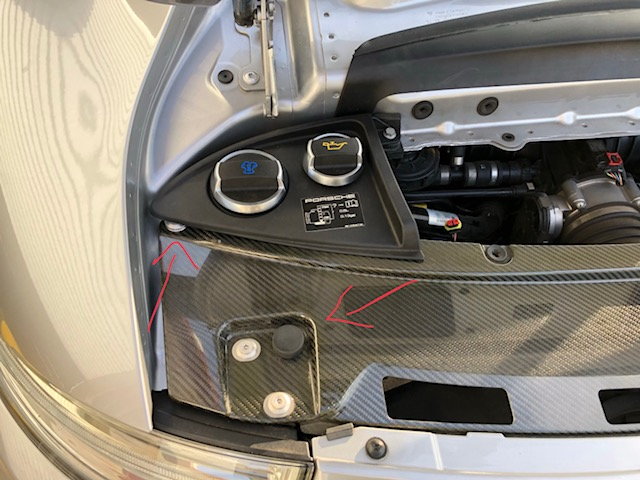
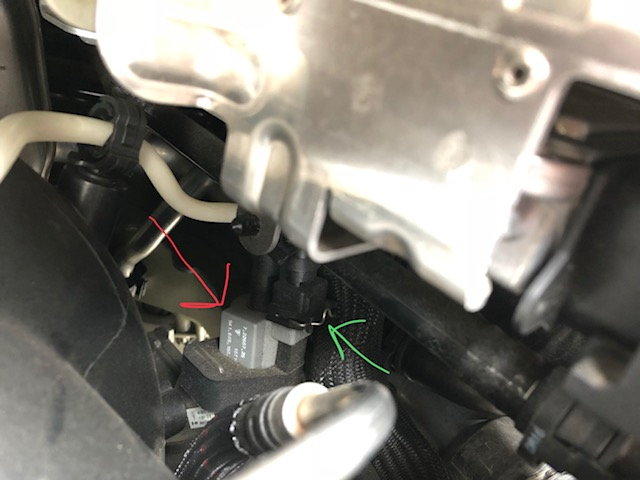
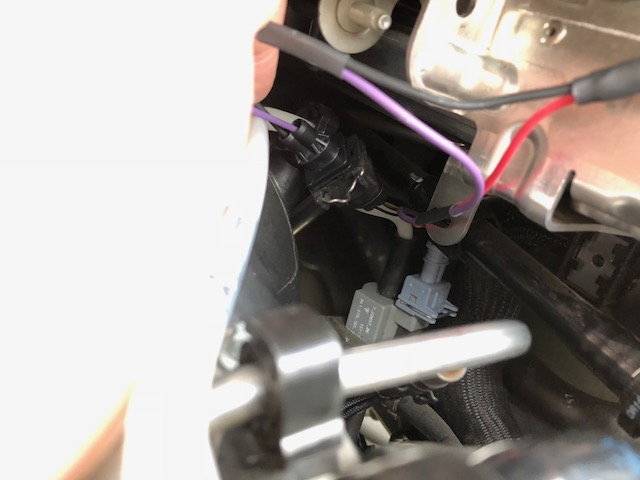
Step 4--Remove the 10mm nuts on either side of the ECU bracket so that you can slide the bracket to the right an inch or so--you need the space unless your hands are very small. The red arrow shows the left nut removed and the bracket slid off and to the right. Note that the right nut cannot be visualized but can be felt and removed easily with a socket extension.
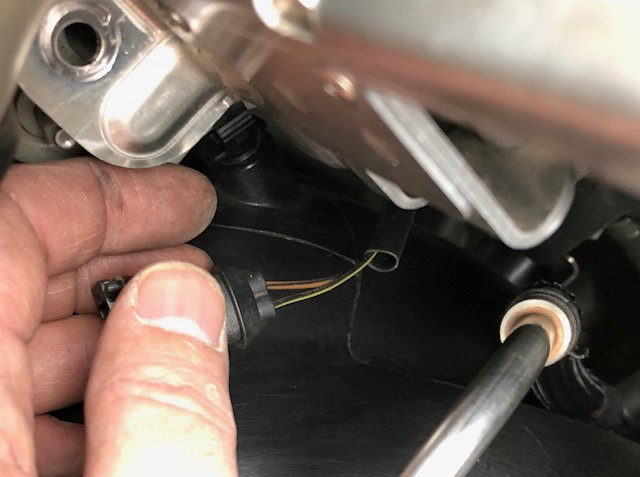
Now you can unplug the connector from the solenoid. Confirm the wire look the same (991 GT3 and 991 GT3RS should look like this, while GT4 and 997s are different, I believe)--black with yellow stripe and brownish with black stripe.
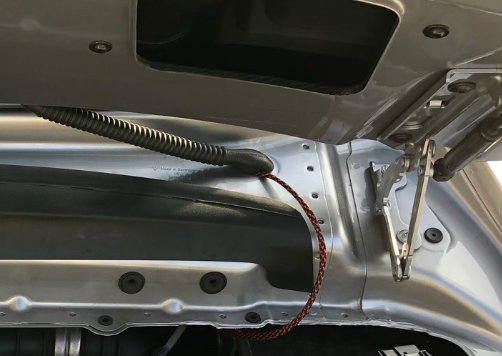
Step 5--plug in the wiring harness; one side goes to the solenoid and the other receives the connector you just unplugged. Difficult to photograph, but here it is plugged in.
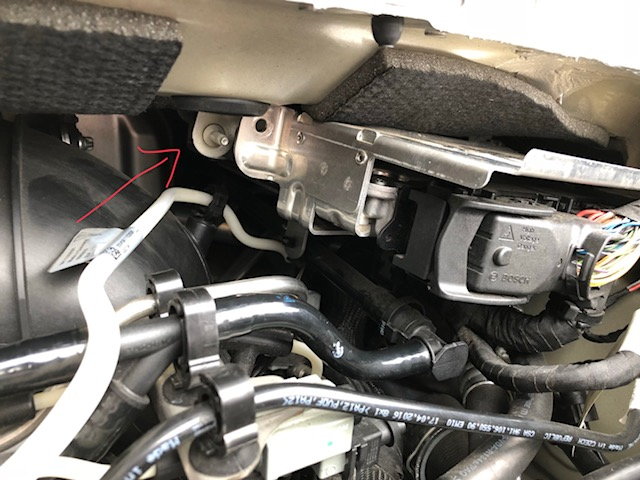
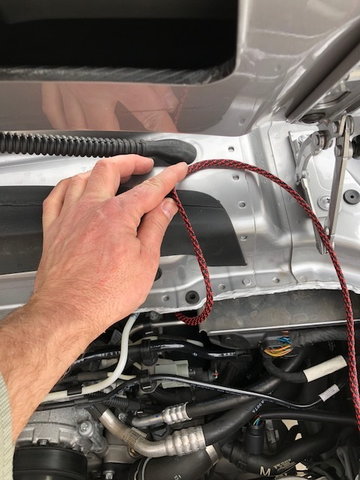
Step 6--Pull out the rubber grommet/sleeve here as the place to feed the wiring harness into the interior.
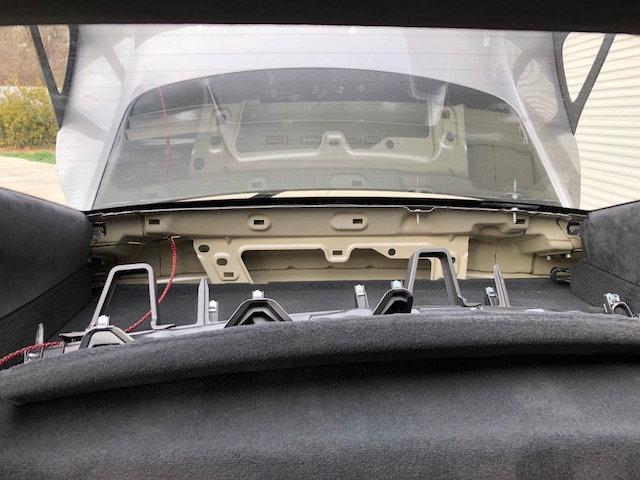
Remove the panel above the rear shelf inside the car. You will grasp the edge firmly and pull directly out as the clips disengage. Note that I have the full carbon buckets, so rear access is a challenge. By putting one seat all the way forward and the other all the way back, taking off my shoes...I was able to climb to the back. If I did yoga and was not 6'1" tall, it would have been easier. You can then pull the wire through easily. The wiring harness is visible with the red sheath. You can then feed it down through the vent in the panel before pushing it back into place.
Replace the rubber; you may notch it if desire for a better fit.
Step 7--Put the ECU back in place, Replace the engine covers, fan shroud, etc.
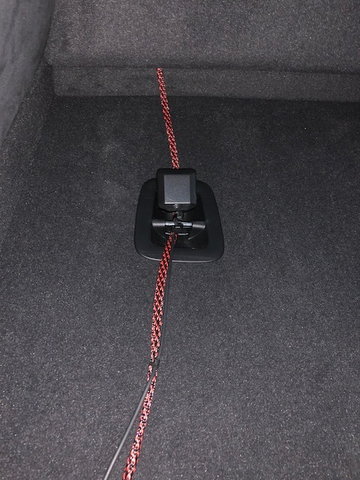
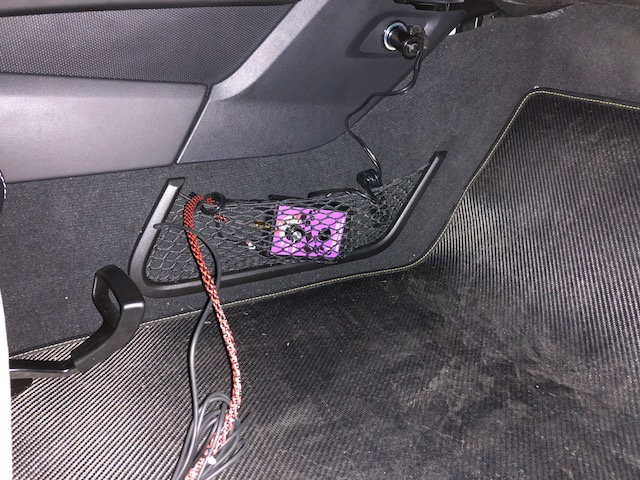
Connect up the controller; Amalgamated Tom provides instructions. Although the unit can work without the GPS antenna, I wanted to use it to make sure I had the best fix. I zip tied it along with the harness to the child seat latch then ran it forward. This antenna location gives a good "view" of the sky. Power is via the 12V in the passenger footwell, and I store the unit there. I did not want to alter my interior by mounting it. I may tidy up the wiring more later, but it is not obtrusive.
I used the Track Nanny GPS PSE controller today for the first time at Laguna Seca. My 991 GT3 RS has a stock exhaust with no turndown pipes. It was a 90dB day. On sound test, driving normally without lifting, I was 89.6dB. I drove the rest of the day normally and never got black flagged. I really could not hear much difference through the test zone with my helmet on, but obviously it worked well. Another GT3 RS with stock exhaust was there despite upshifting through the sound booth zone was black flagged for about 96 dB.
Great write-up (and cars) -- thank you so much for taking the time to do that!
I had someone cancel their order recently, so I have one Track Nanny ready to go right now if anyone wants one without the normal lead time.
Hi there,
I�m interested in the track nanny, is it still available? Please PM me
I met ejpoulsen today at Laguna and he was extremely friendly and helpful in explaining how the gps works. I was running stock exhaust and even upshifting to 4th with slight throttle I was flagged out for 96db.
Thanks for the great write up. My hands are small enough that I can get in there without removing a lot of stuff but I can't for the life of me get that little metal pin out that keeps the solenoid in place. Does the pin just pull out?
Thanks for the great write up. My hands are small enough that I can get in there without removing a lot of stuff but I can't for the life of me get that little metal pin out that keeps the solenoid in place. Does the pin just pull out?
Pin? You mean the thing the green arrow is pointing to in post #4 above? If so, you press (squeeze down) on that to pull the connector off... On the old Junior Timer connectors, you had to remove the clip, but not on the new spring-loaded versions. Or am I missing your question?
Pin? You mean the thing the green arrow is pointing to in post #4 above? If so, you press (squeeze down) on that to pull the connector off... On the old Junior Timer connectors, you had to remove the clip, but not on the new spring-loaded versions. Or am I missing your question?
I just bought a Track Nanny (unopened) from a friend who wound up selling his 991.2 GT3 before ever using it. I want to install it in my 997.2 GT3. The instructions included in the box say that there are different wiring harnesses for 997 vs. 991 GT3s. Do you have ready-made 997 GT3 wiring harnesses? Hoping to get one by next Wednesday if at all possible (going to Laguna on Thursday). Thanks!
 01-13-2018, 11:12 PM