When you click on links to various merchants on this site and make a purchase, this can result in this site earning a commission. Affiliate programs and affiliations include, but are not limited to, the eBay Partner Network.
Sharkwerks Bypass Exhaust install DIY on 991.2 GT3
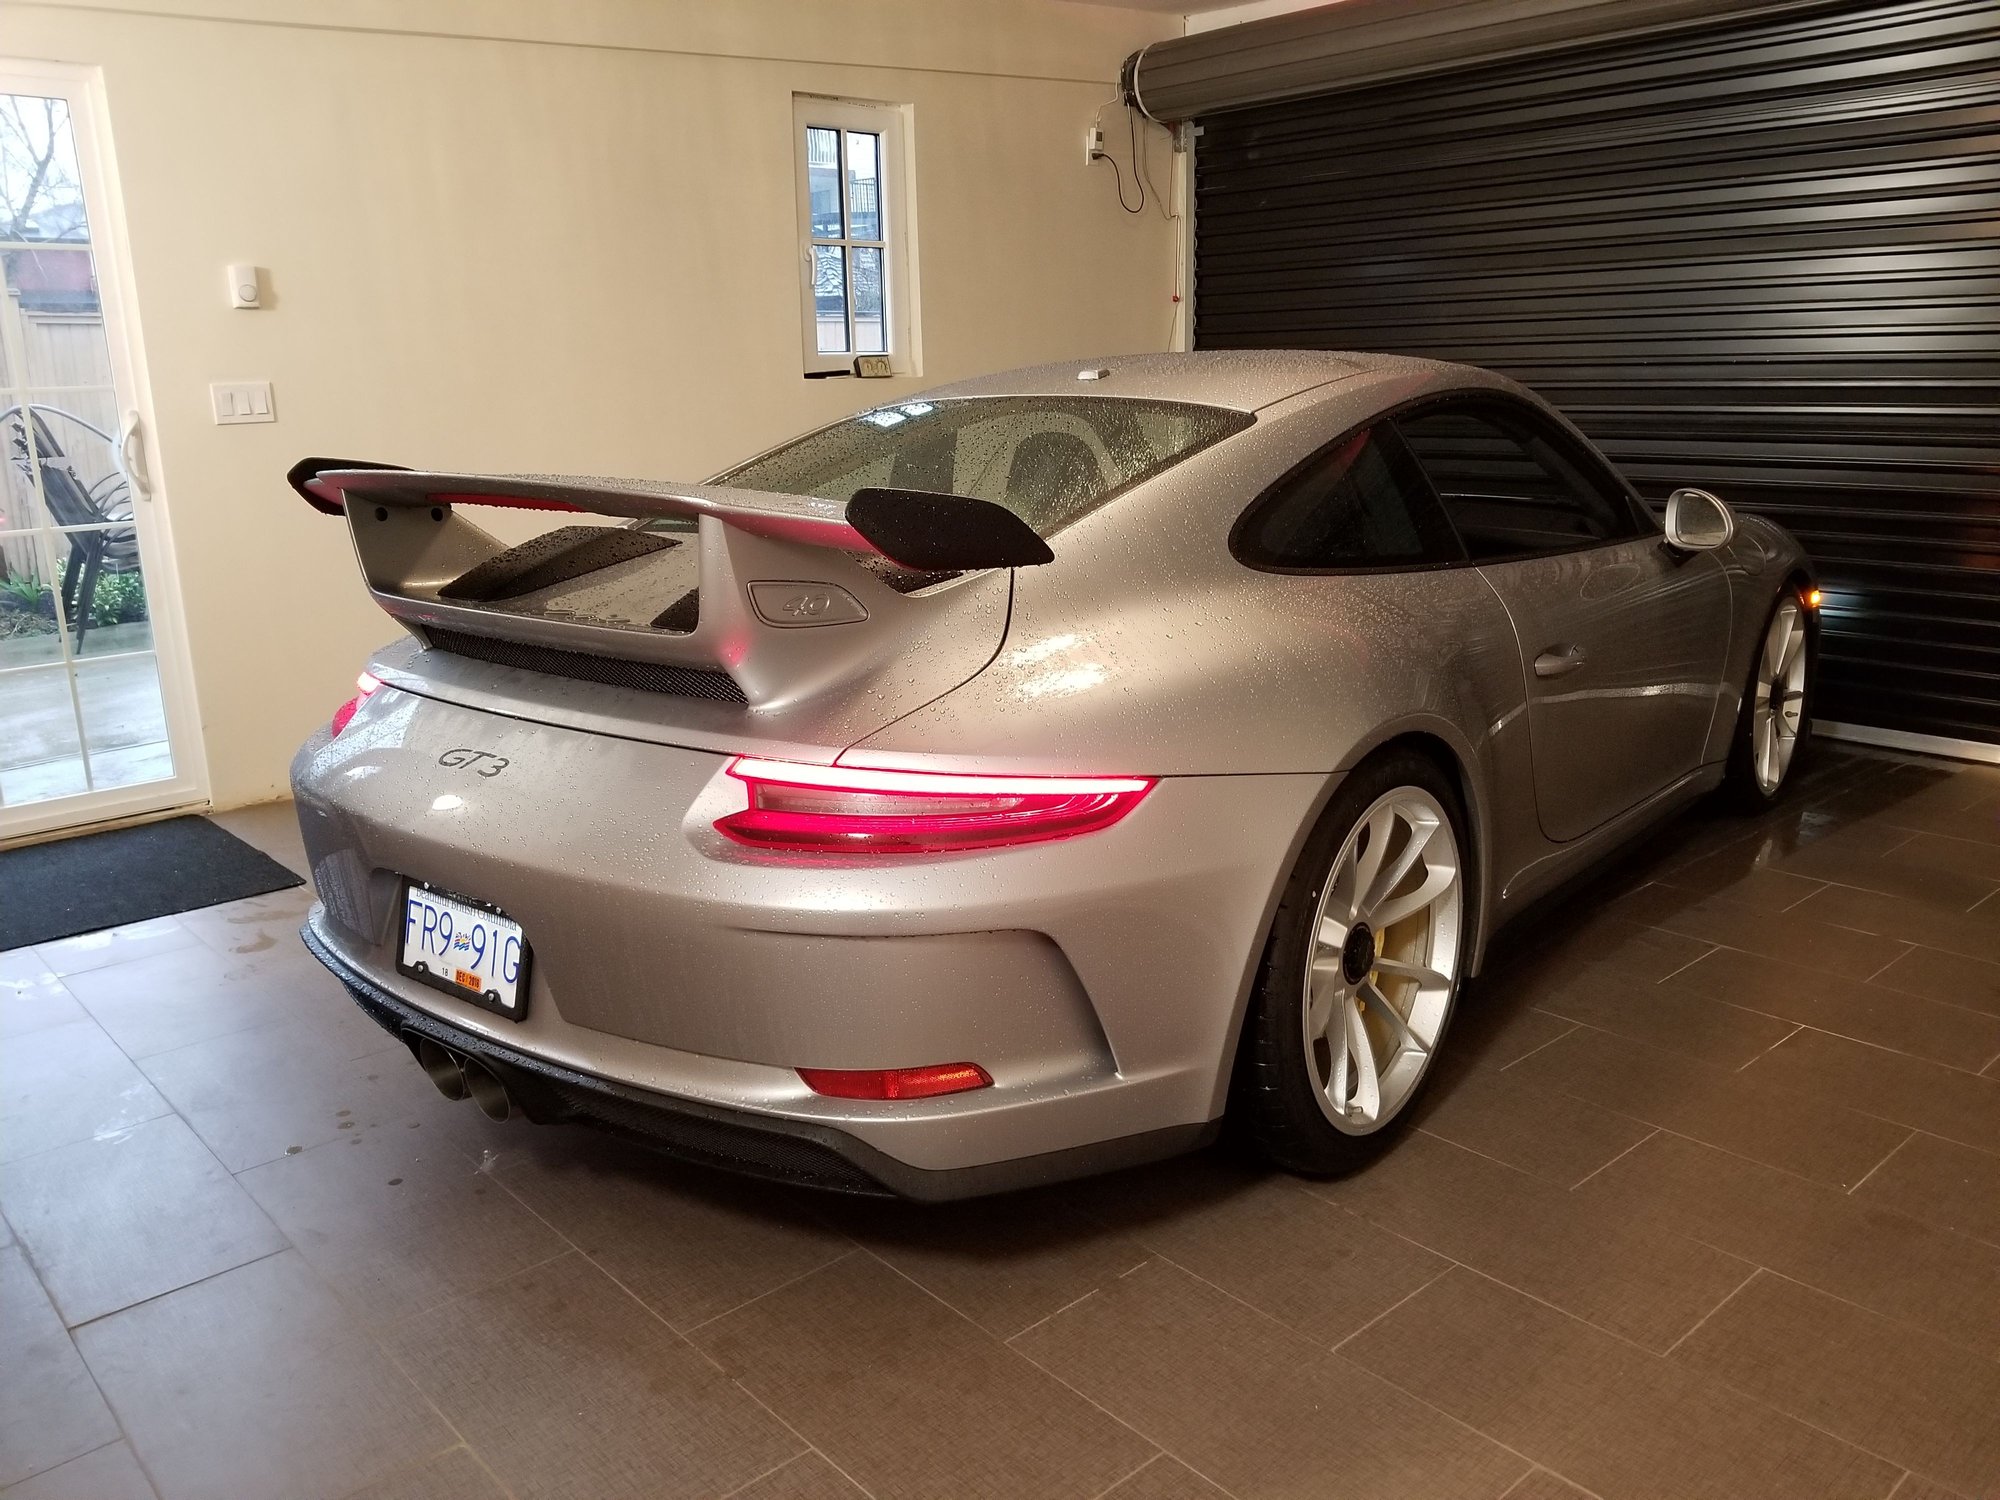
Finally got a chance to install the Sharkwerks bypass yesterday and though I would do a quick write-up on the install process since I took a bunch of photos. This is my first time posting a DIY so bear with me.
Overall the install was straight forward (as expected) with some small hand tools and it took me about 2.5 hours - I took my time and took photos in between each steps.
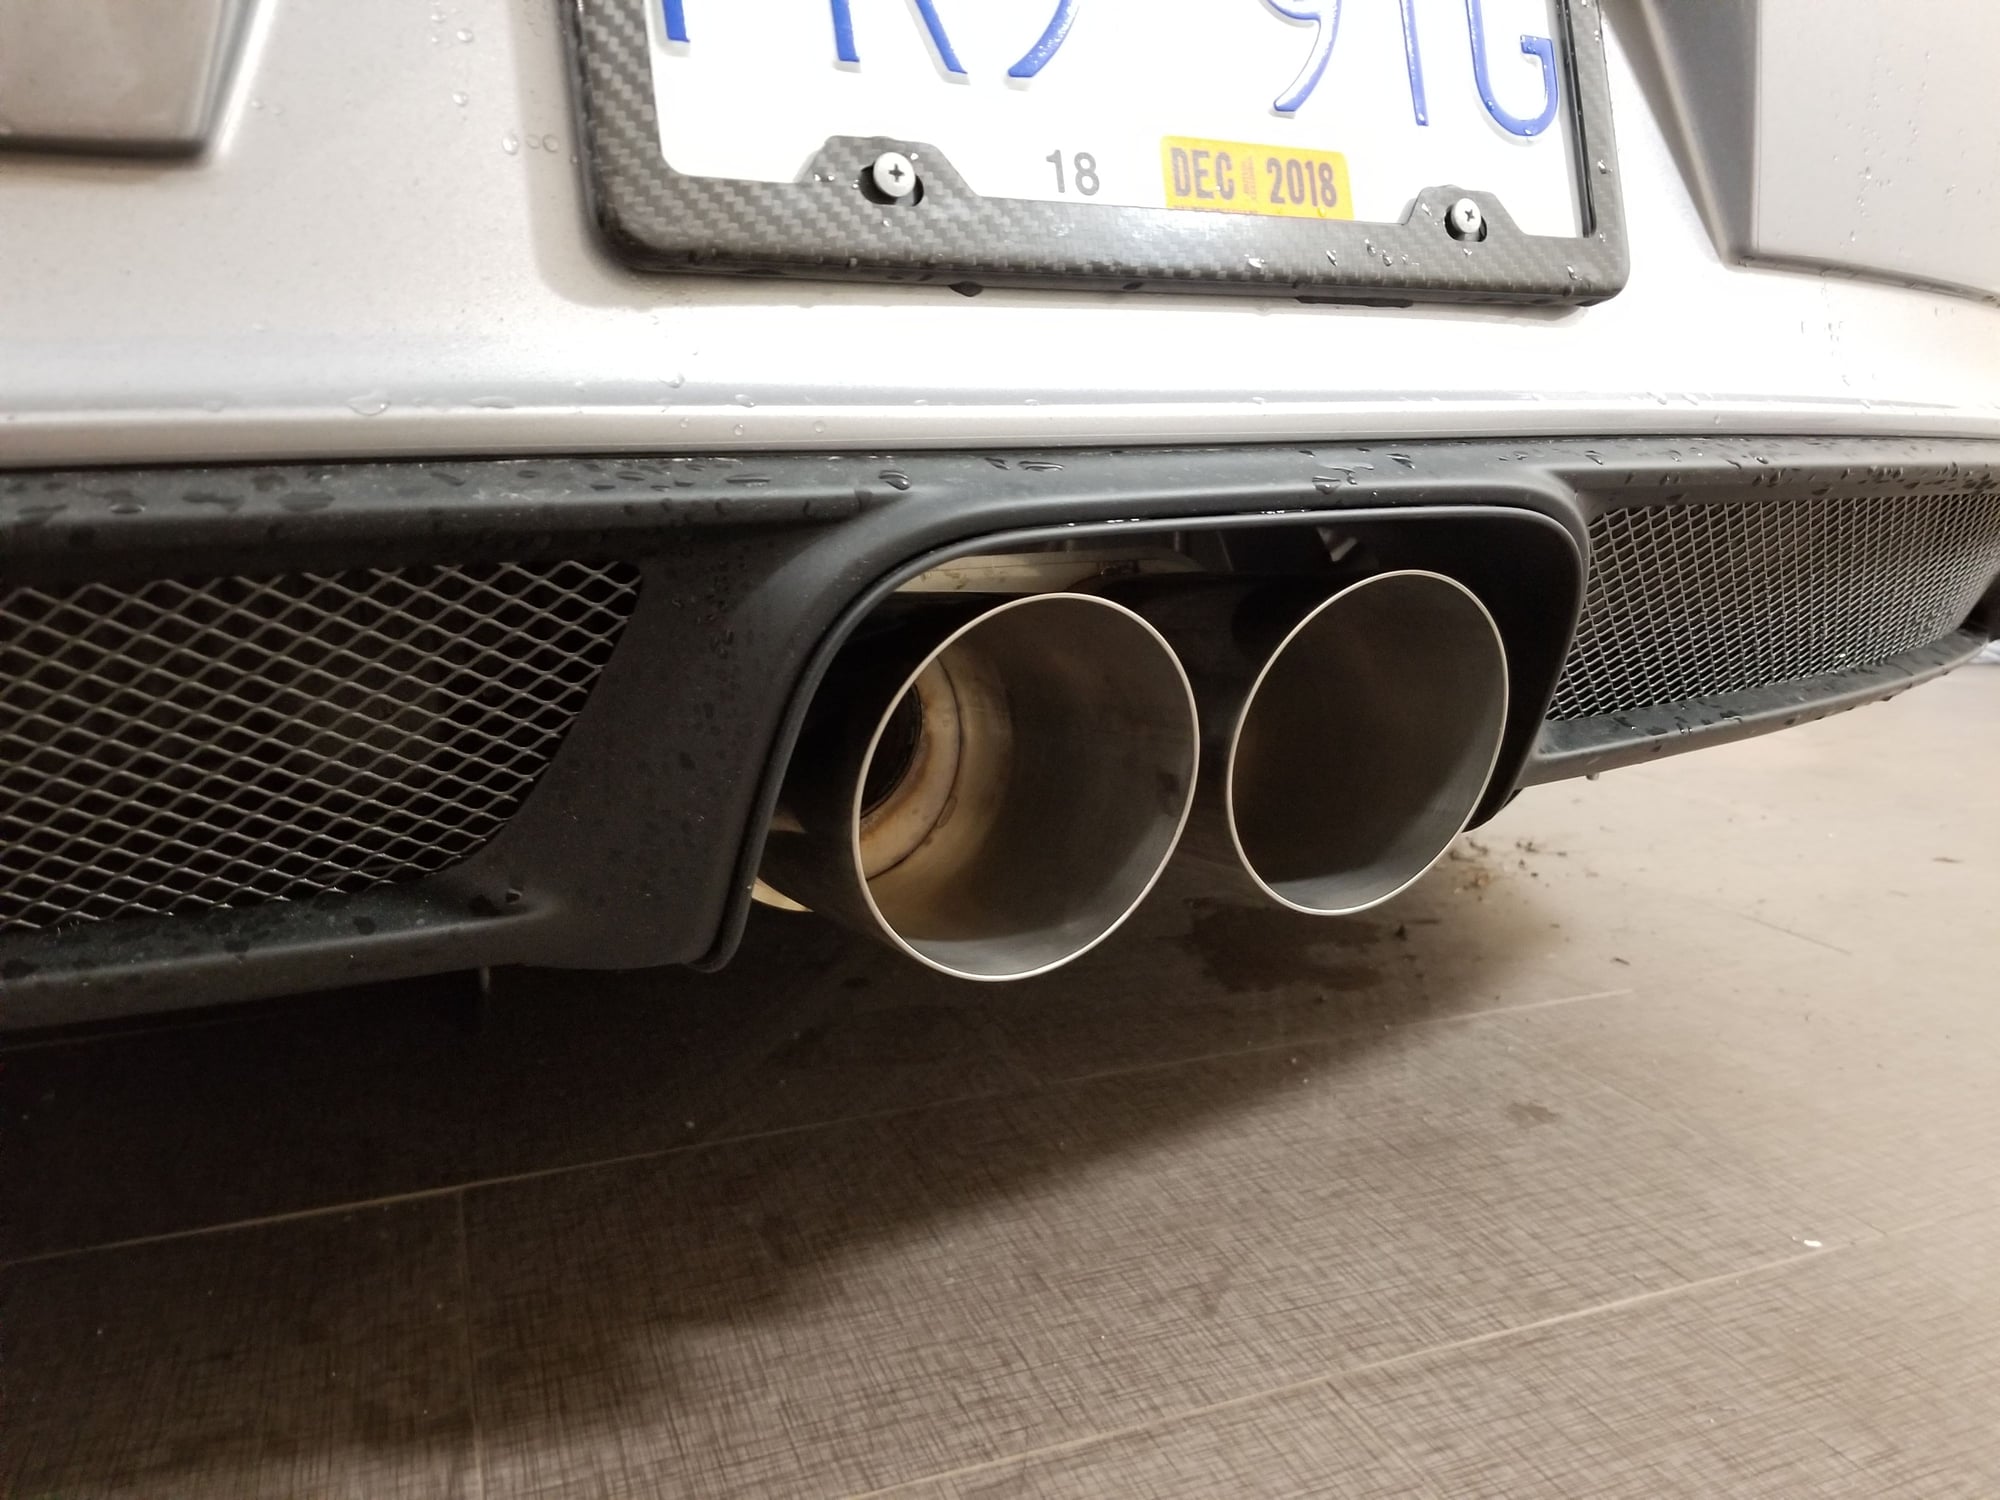
I purchased the Sharkwerks bypass along with the 100mm exhaust tips in raw metal. Decision on the Sharkwerks was simple, I installed their bypass on my 997.1 GT3 and I was really happy with the product. Here is a photo of the 100mm tips installed on the OEM exhaust.
The first step is to remove the exhaust tip - there are total of 3 13mm nuts. I used 13mm socket and extension to remove the center nut.
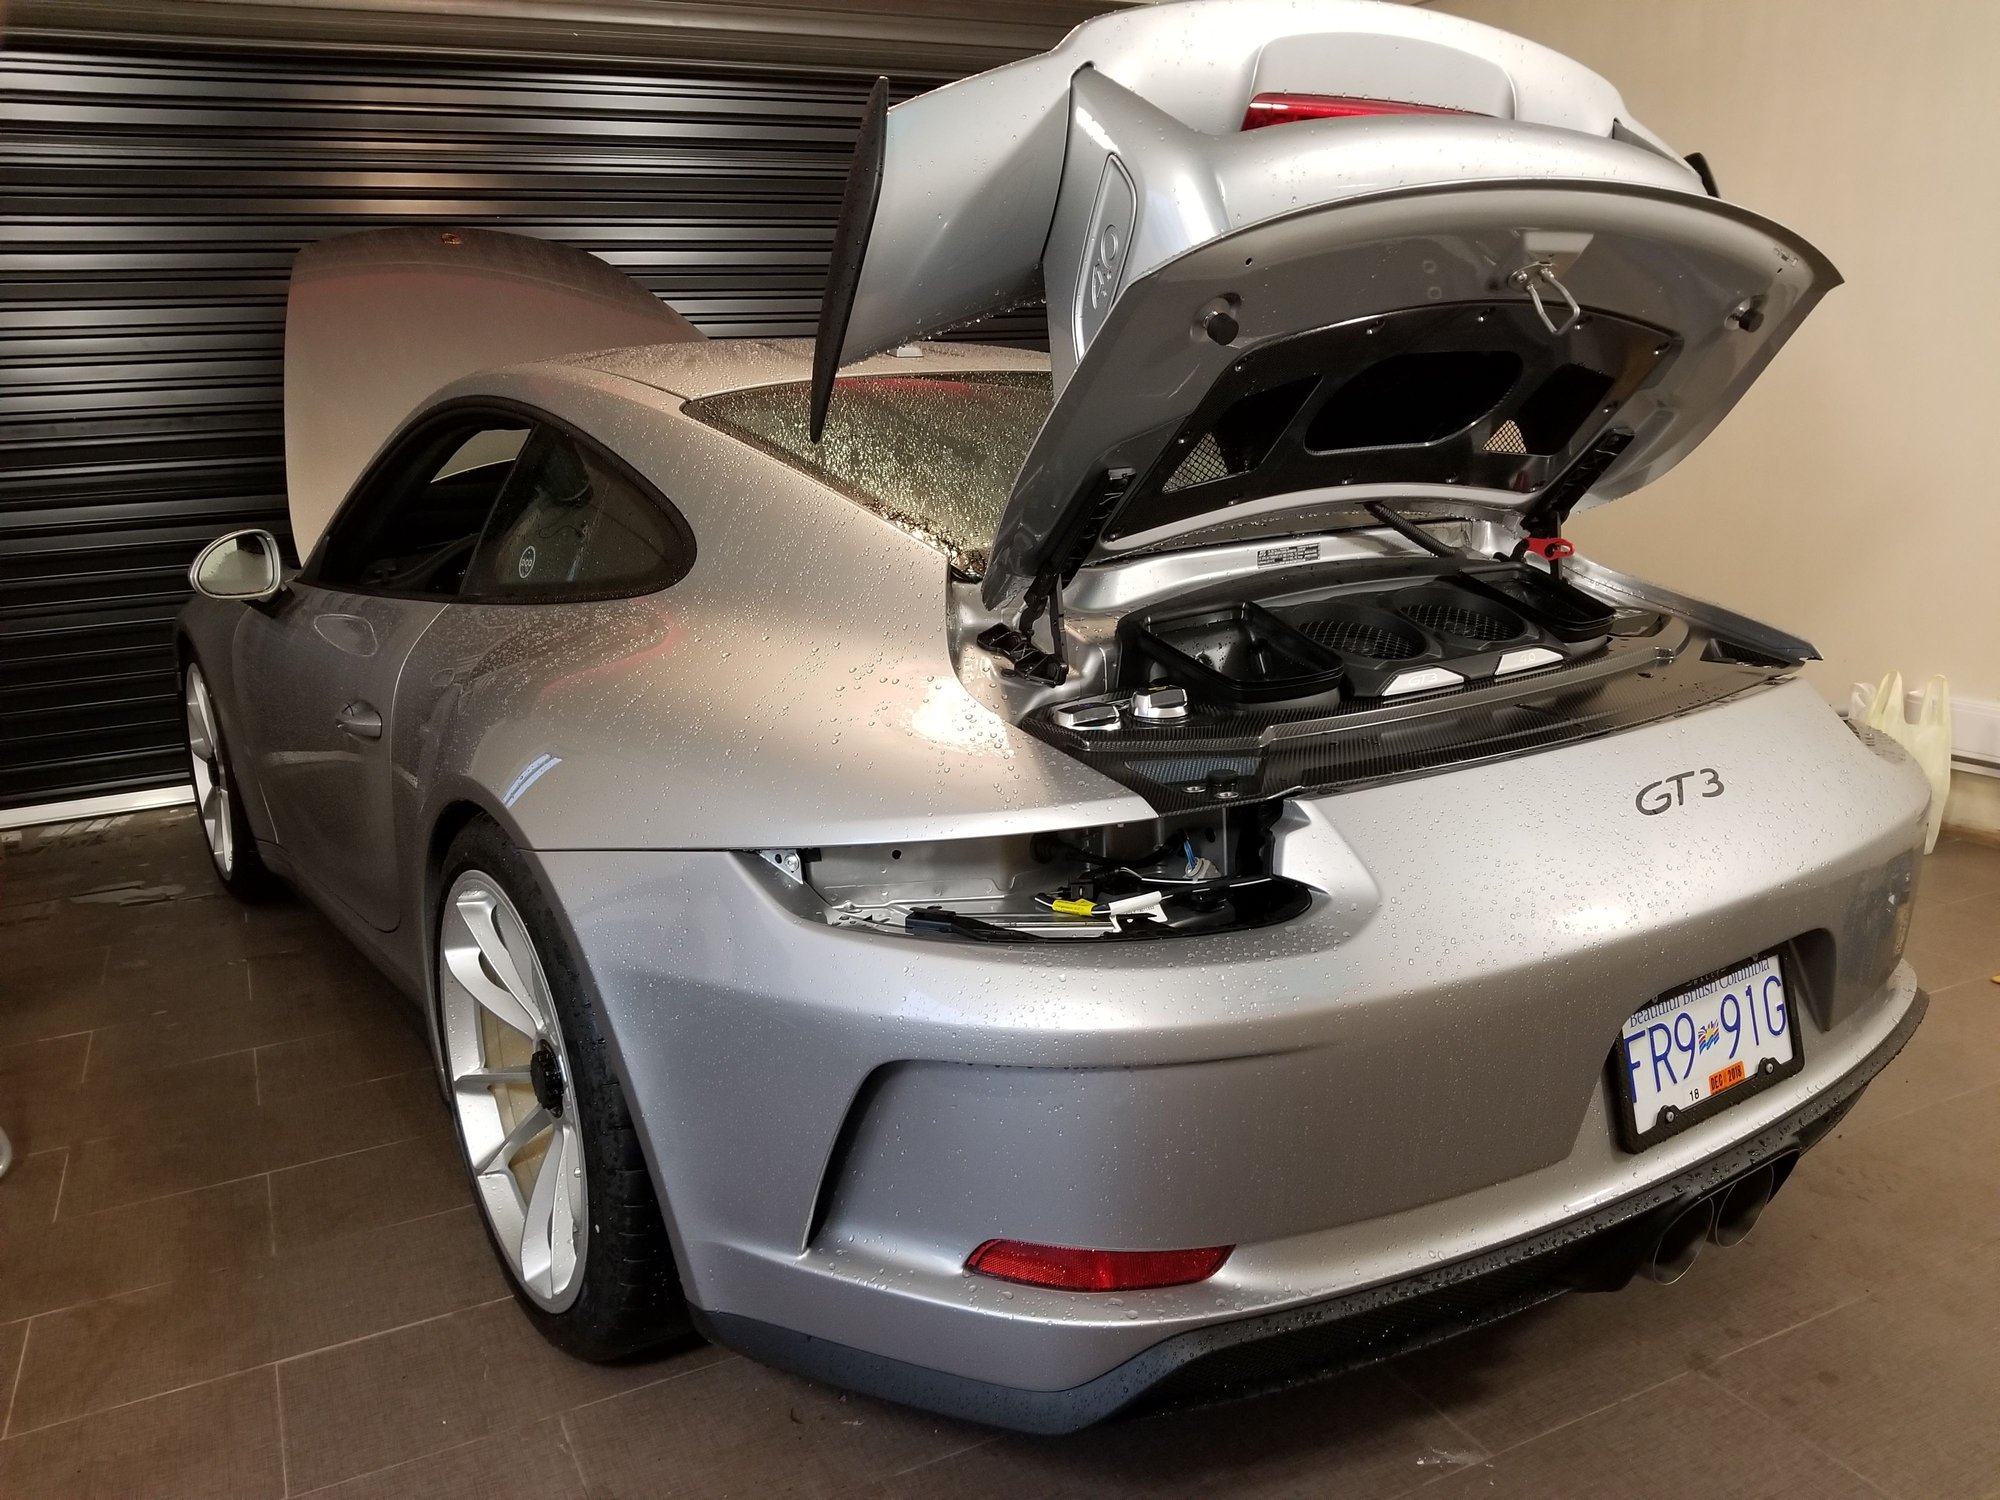
Next step was popping the engine lid and removing the 2 T25 bolts on each taillights. Also, remove the 4 T25 bolts attached to the rear bumper.
Slide the taillights out.
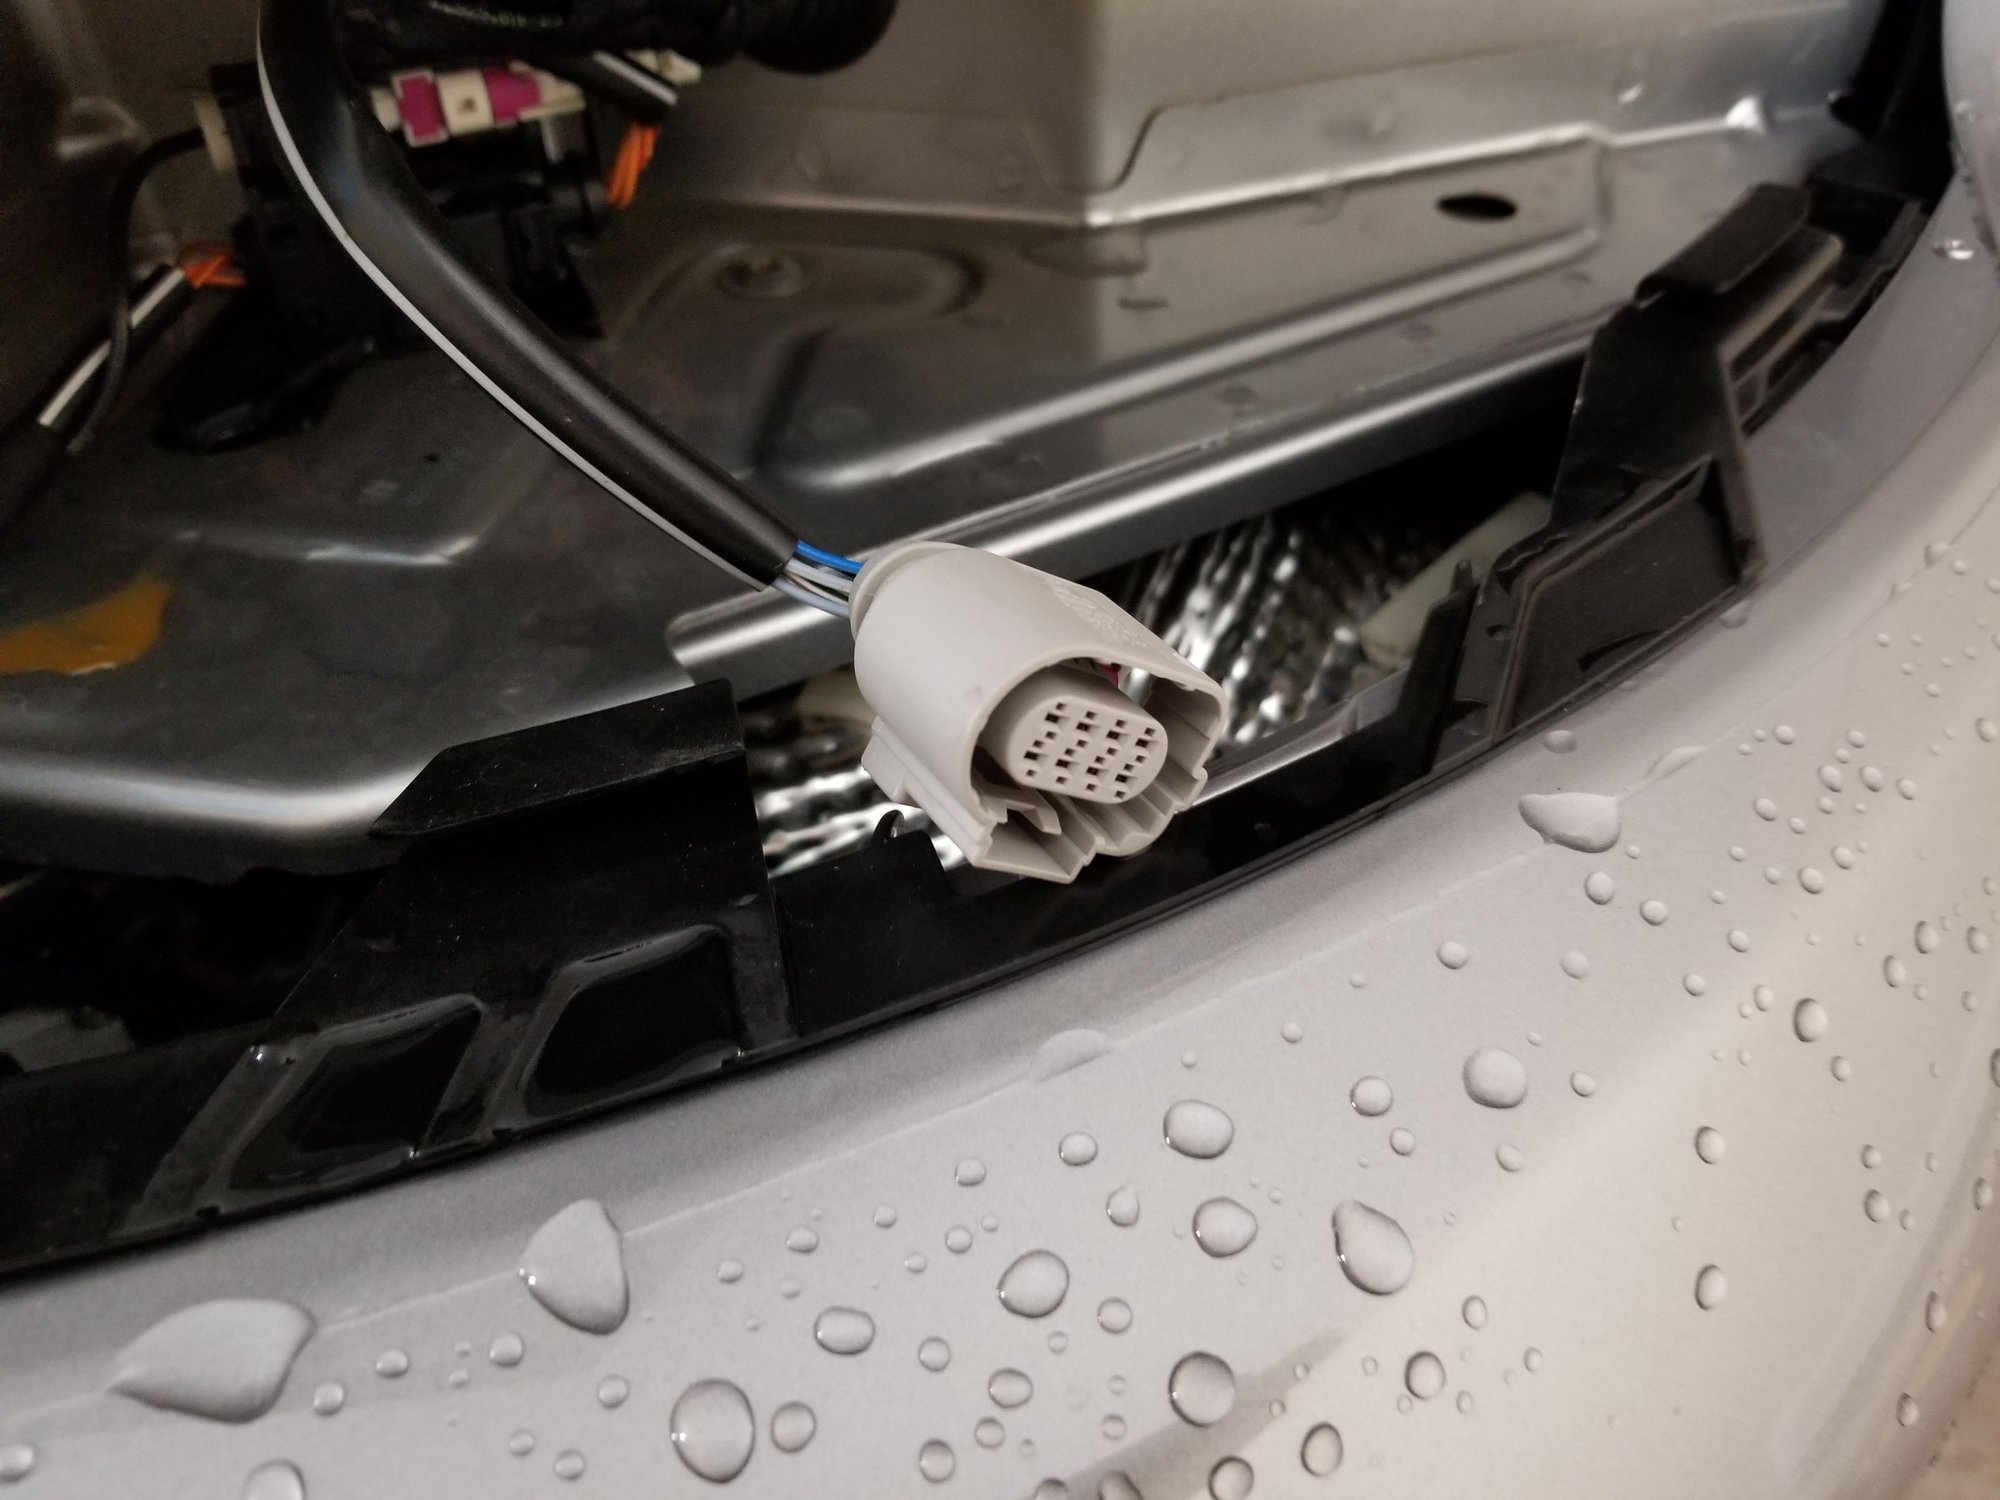
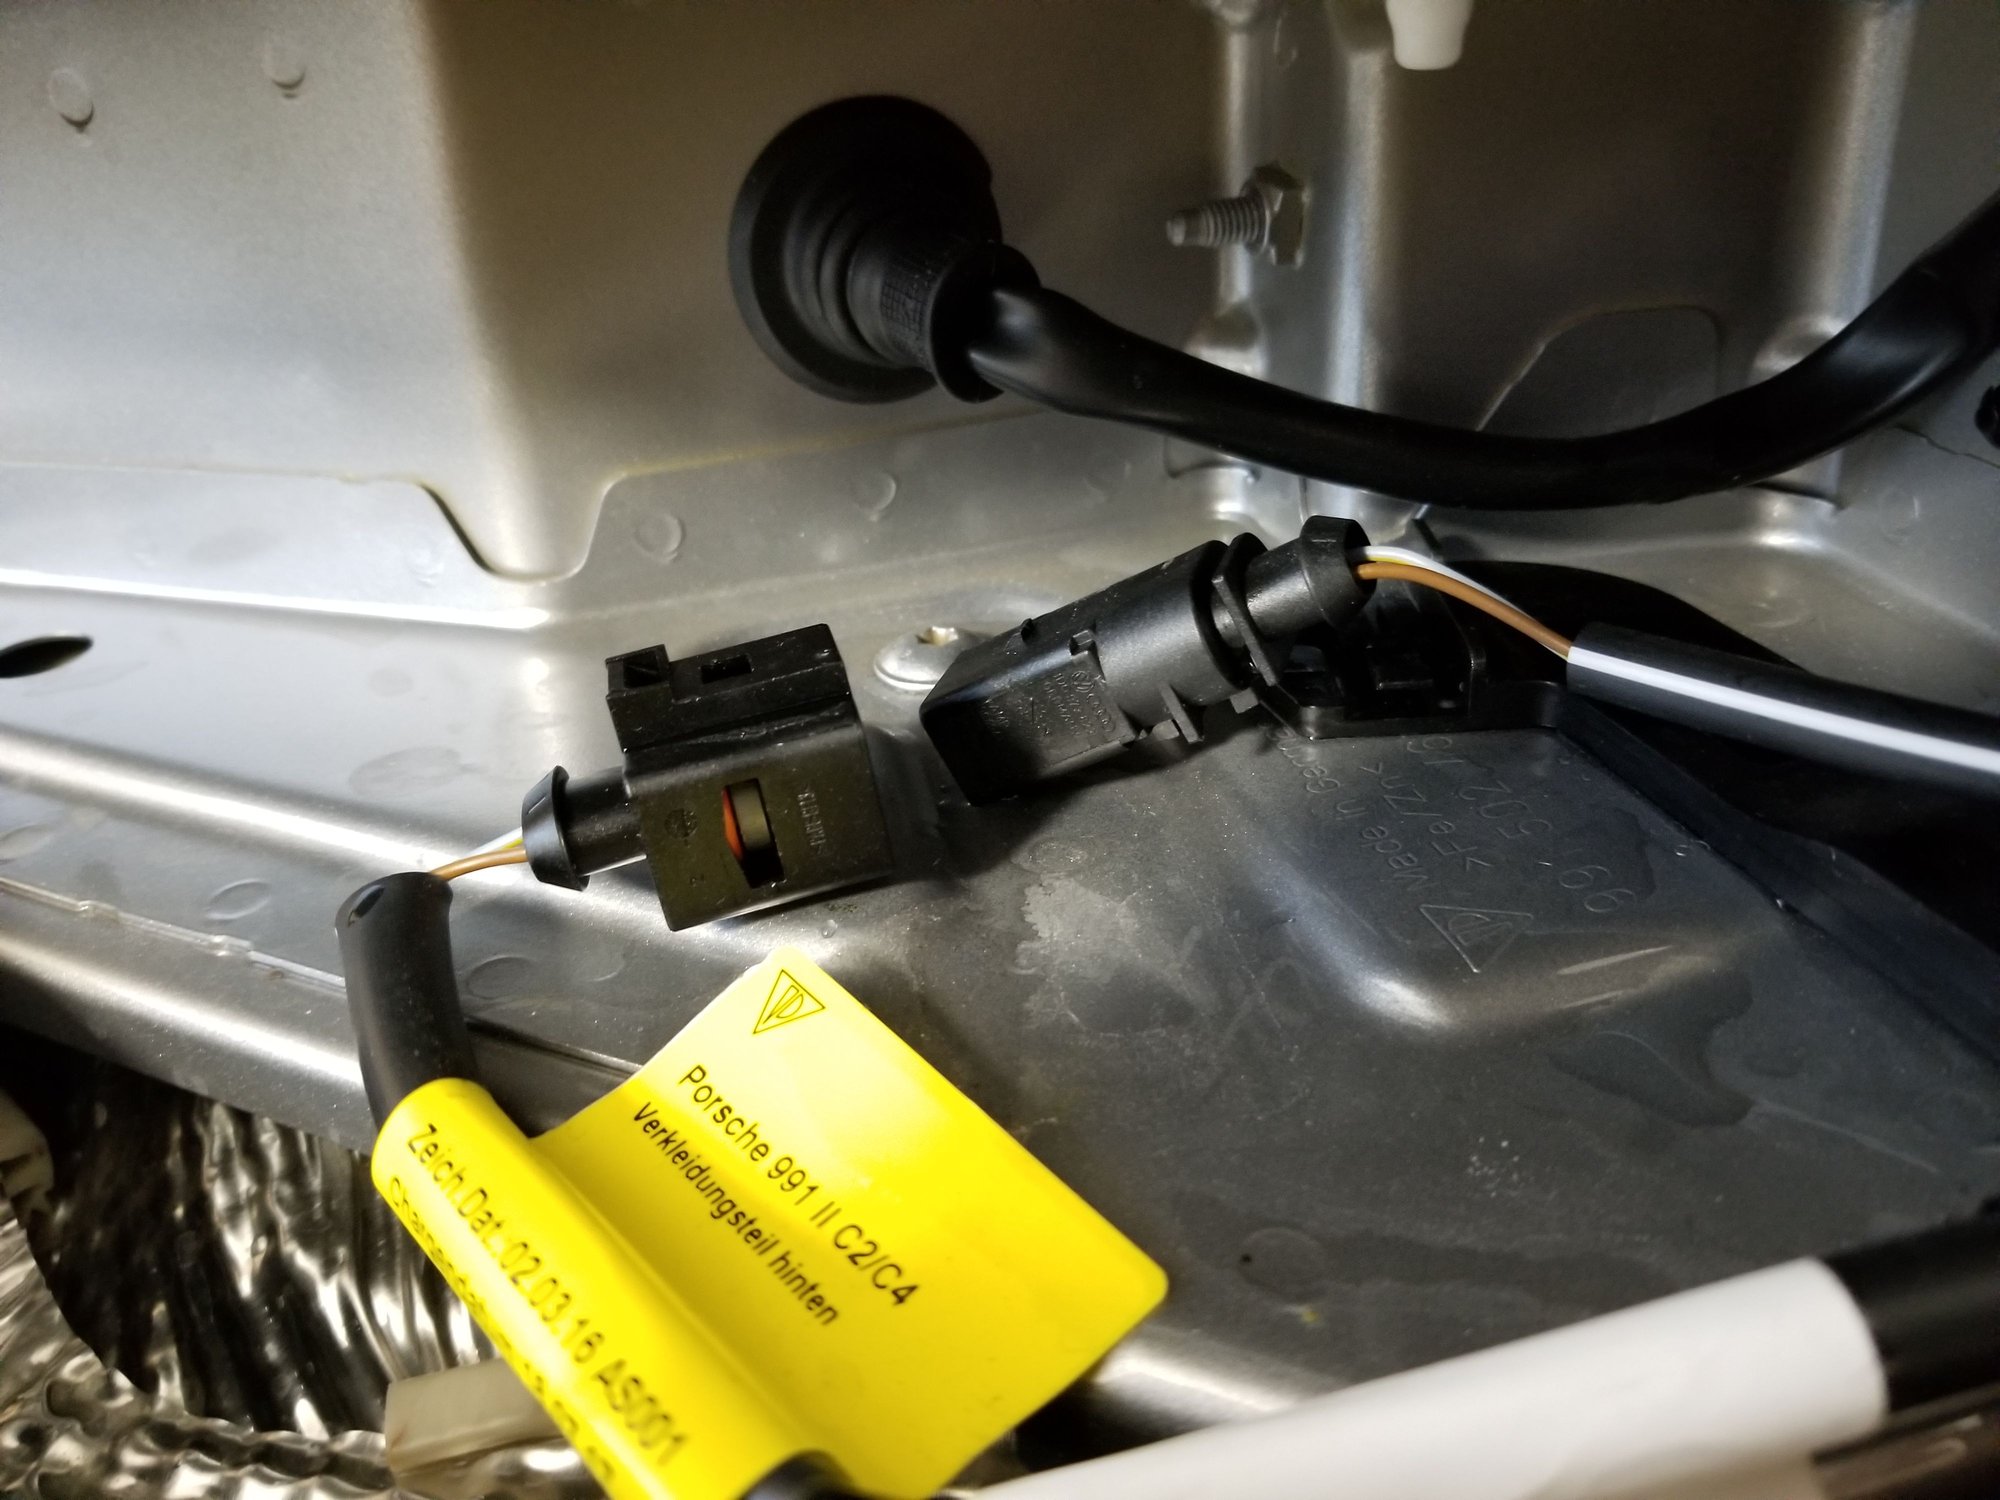
Unplug the electrical plugs on the taillights.
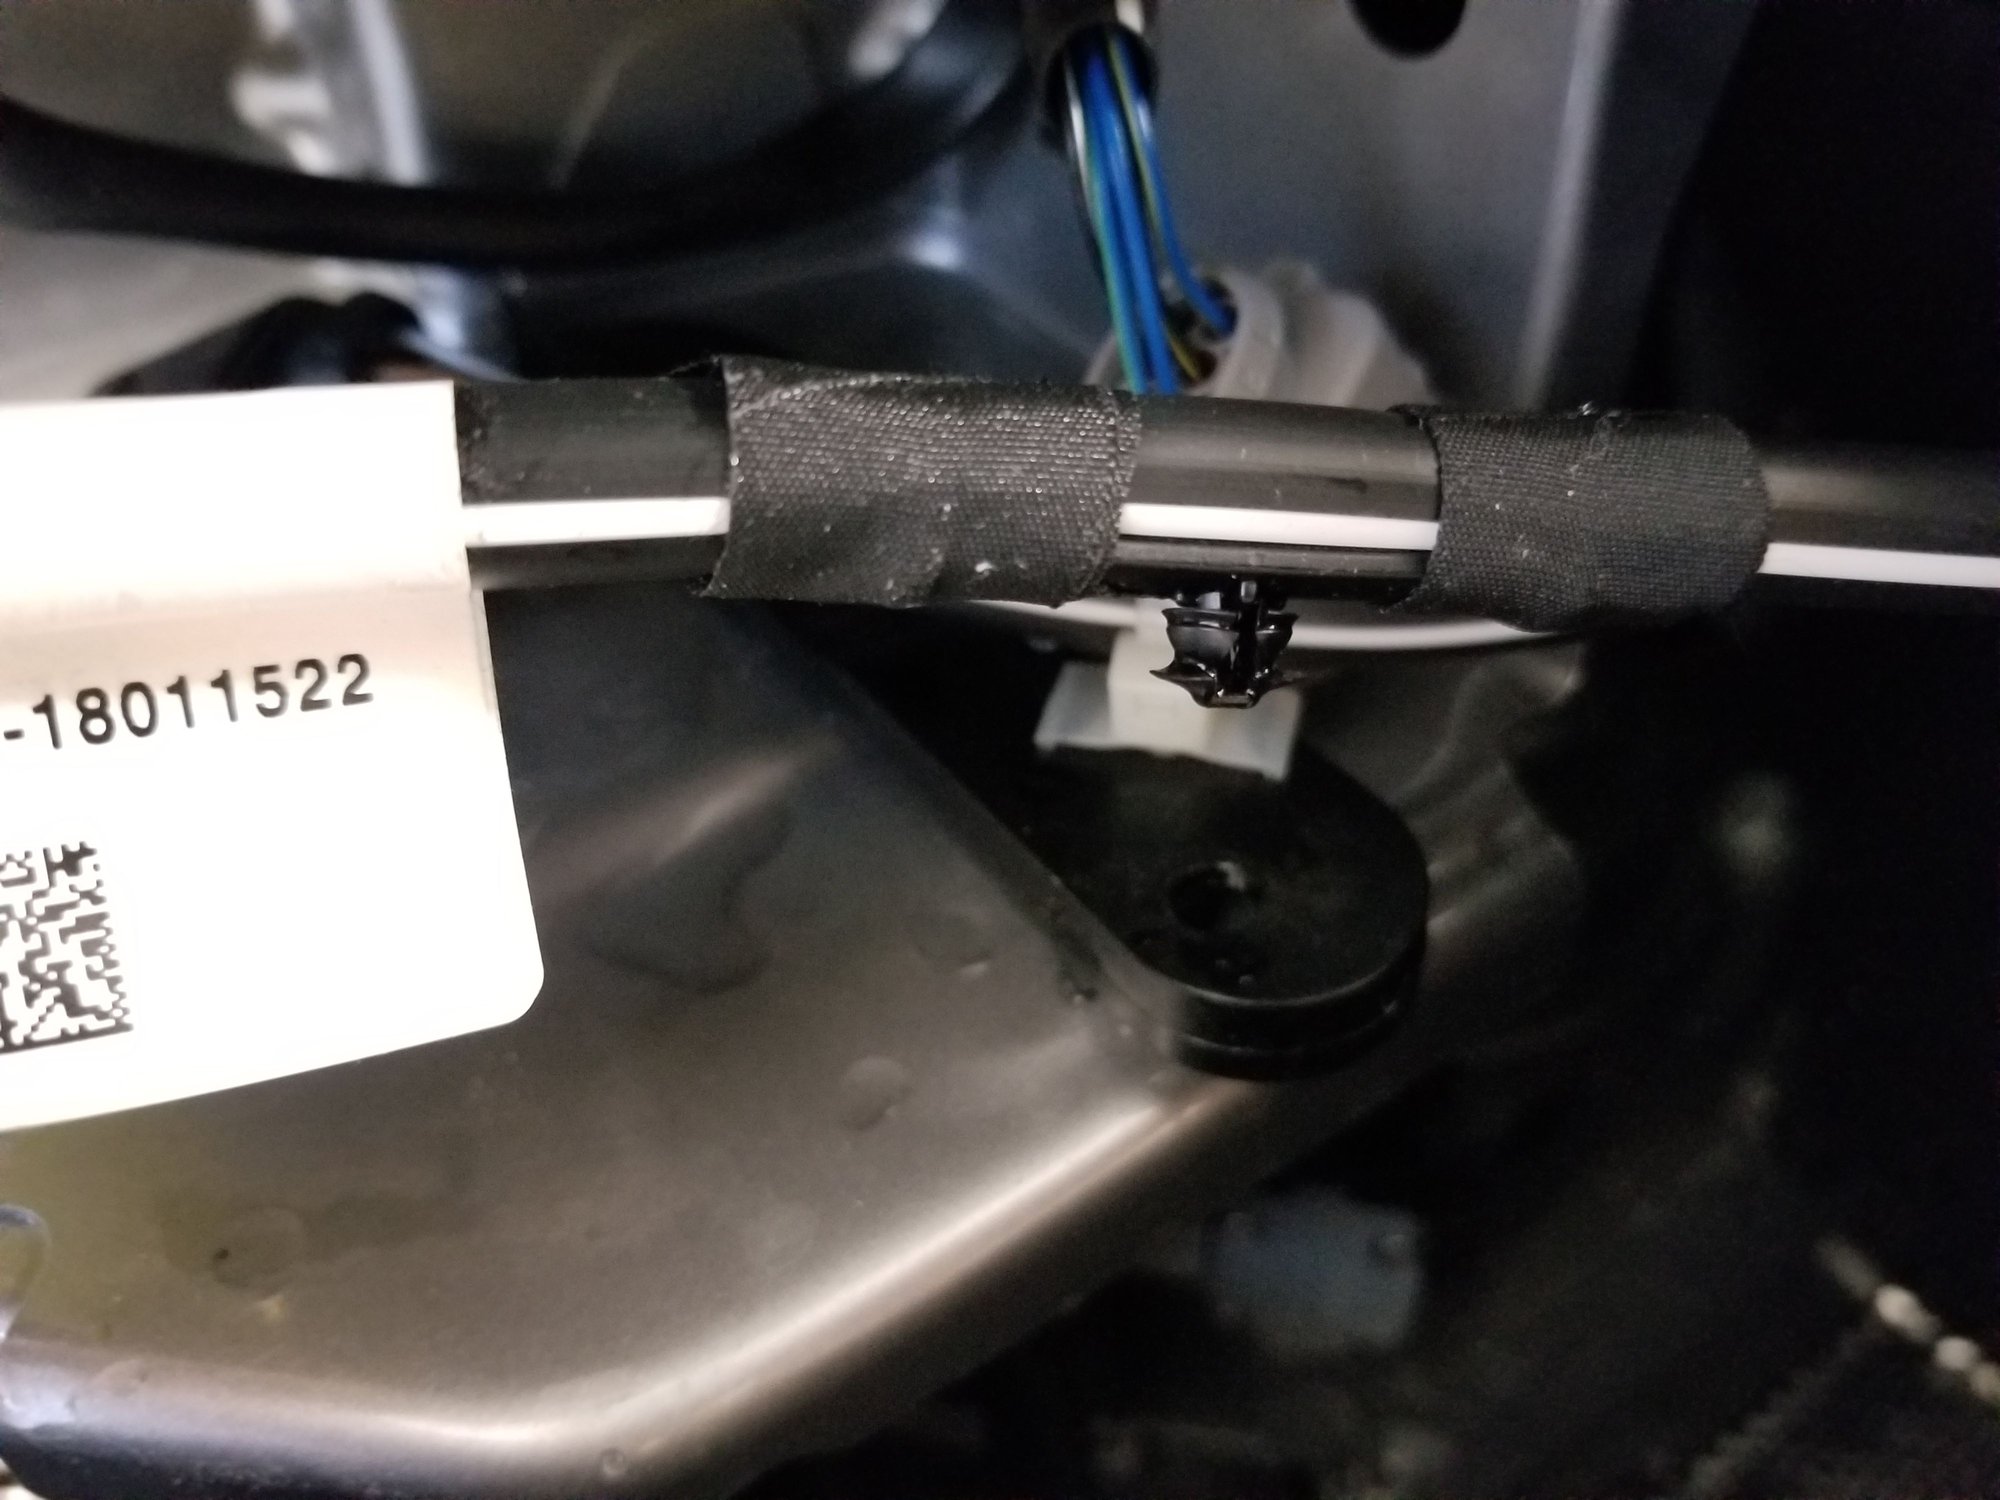
Unplug the license plate lights on the driver side.
Pop out the license plate light electrical wire from the mount on the driver side.
Unplug the rearview camera plugs from the passenger side.
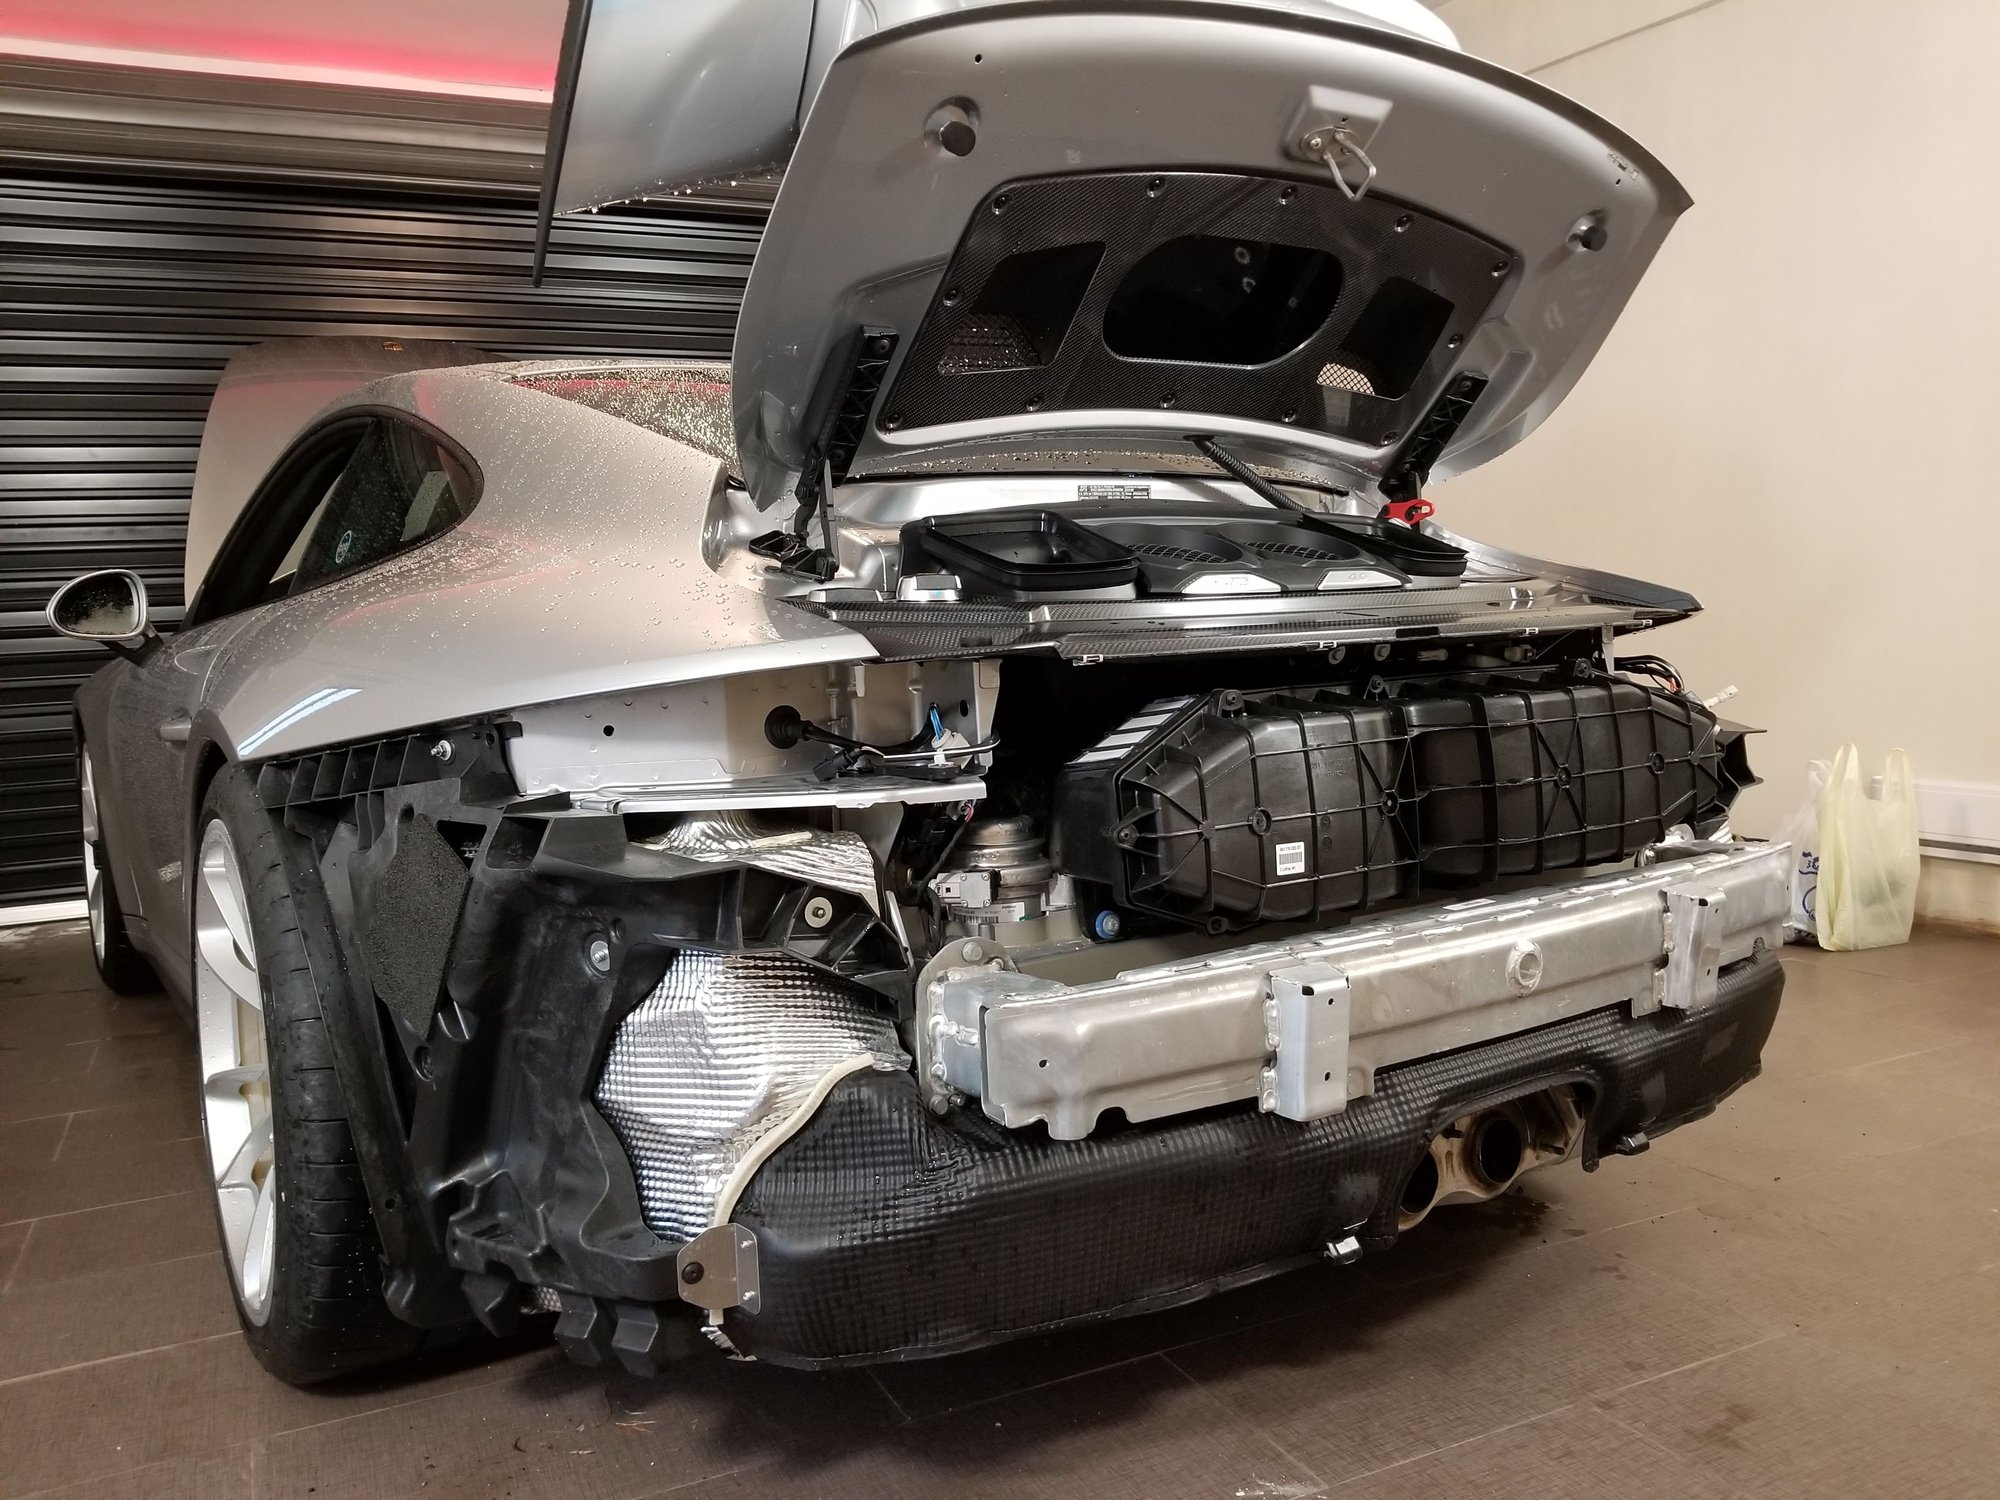
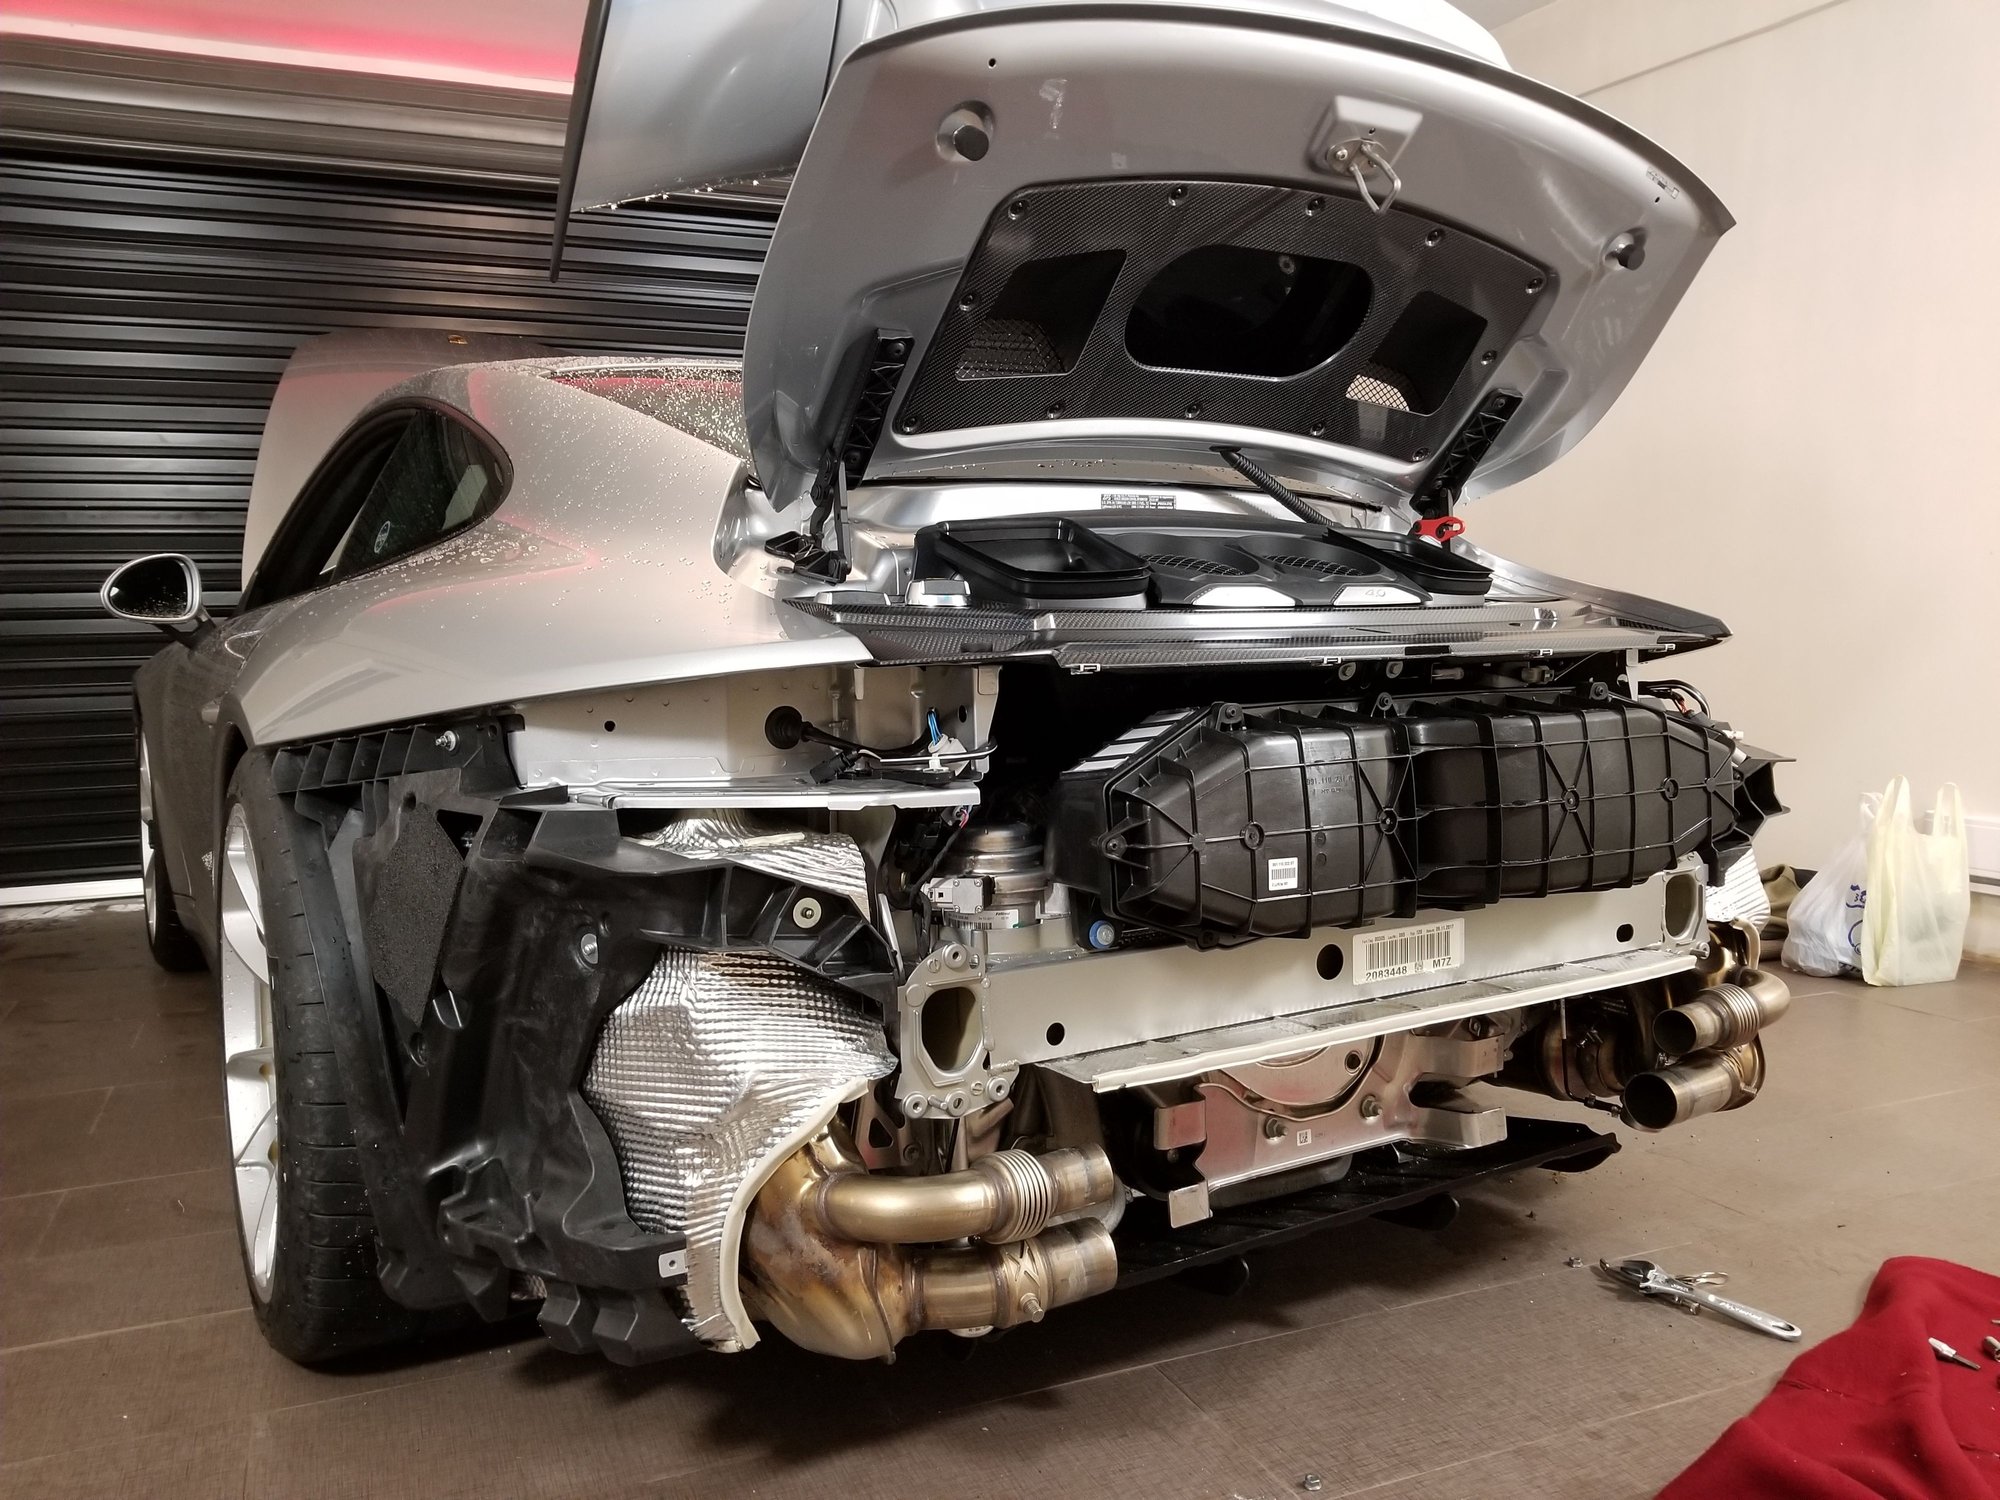
There were 3 T25 bolts to be removed behind the rear wheel arch on the bumper, and then 6 T25 bolts at the bottom of the bumper. And there are 2 more T30 bolts at the taillight tip location. Gently pull each side of the rear bumper from the car and you can now slide the bumper out.
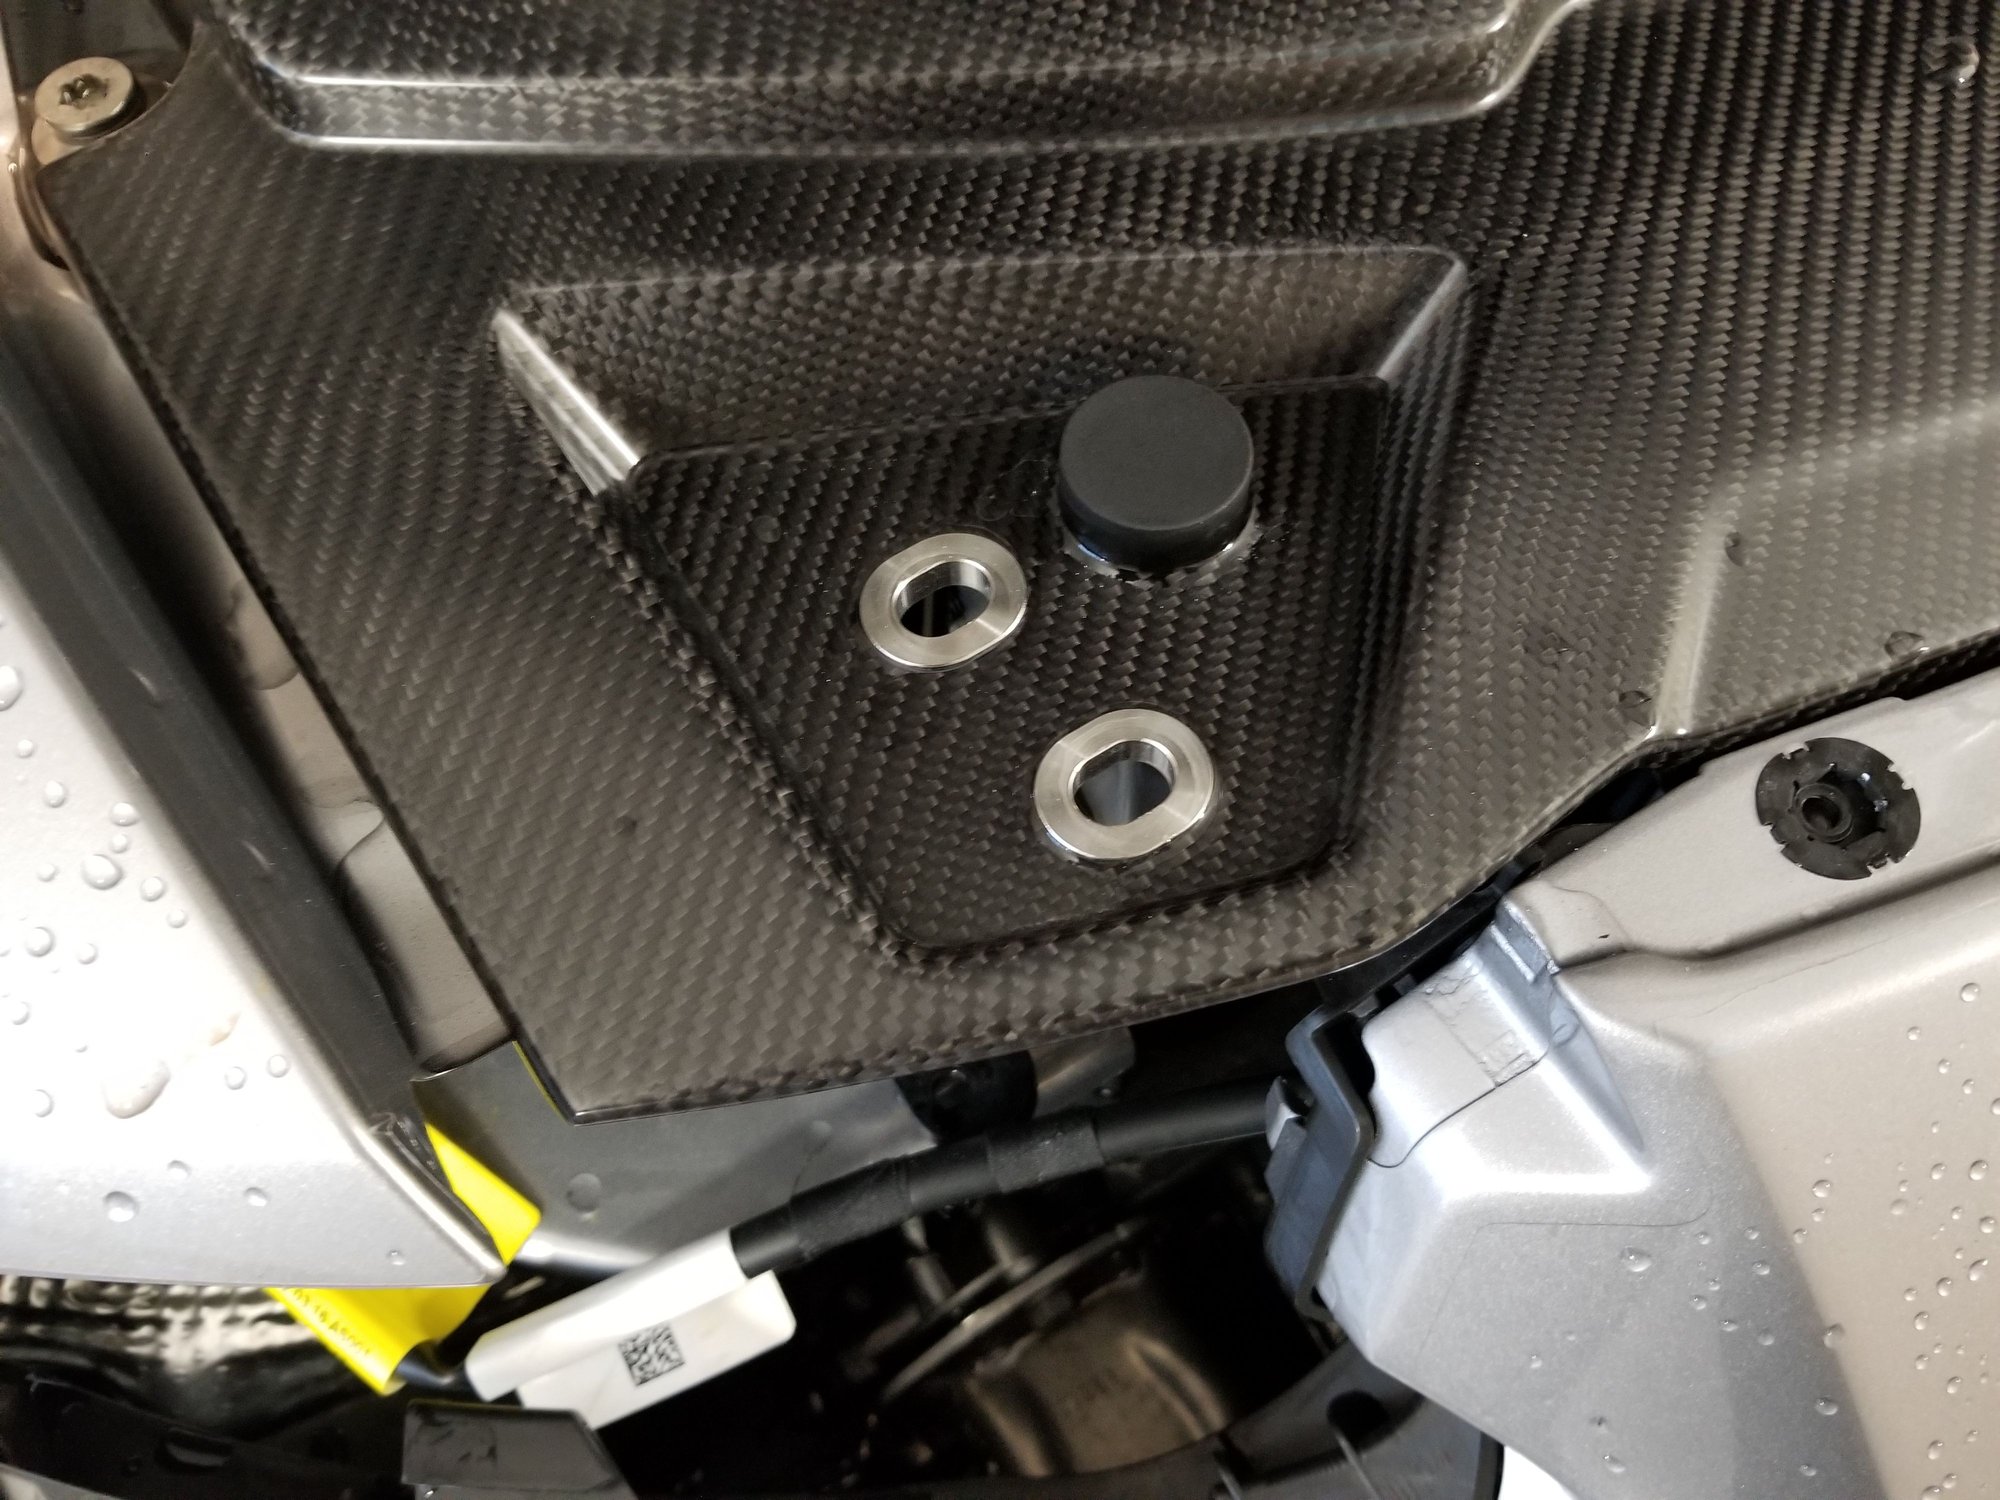
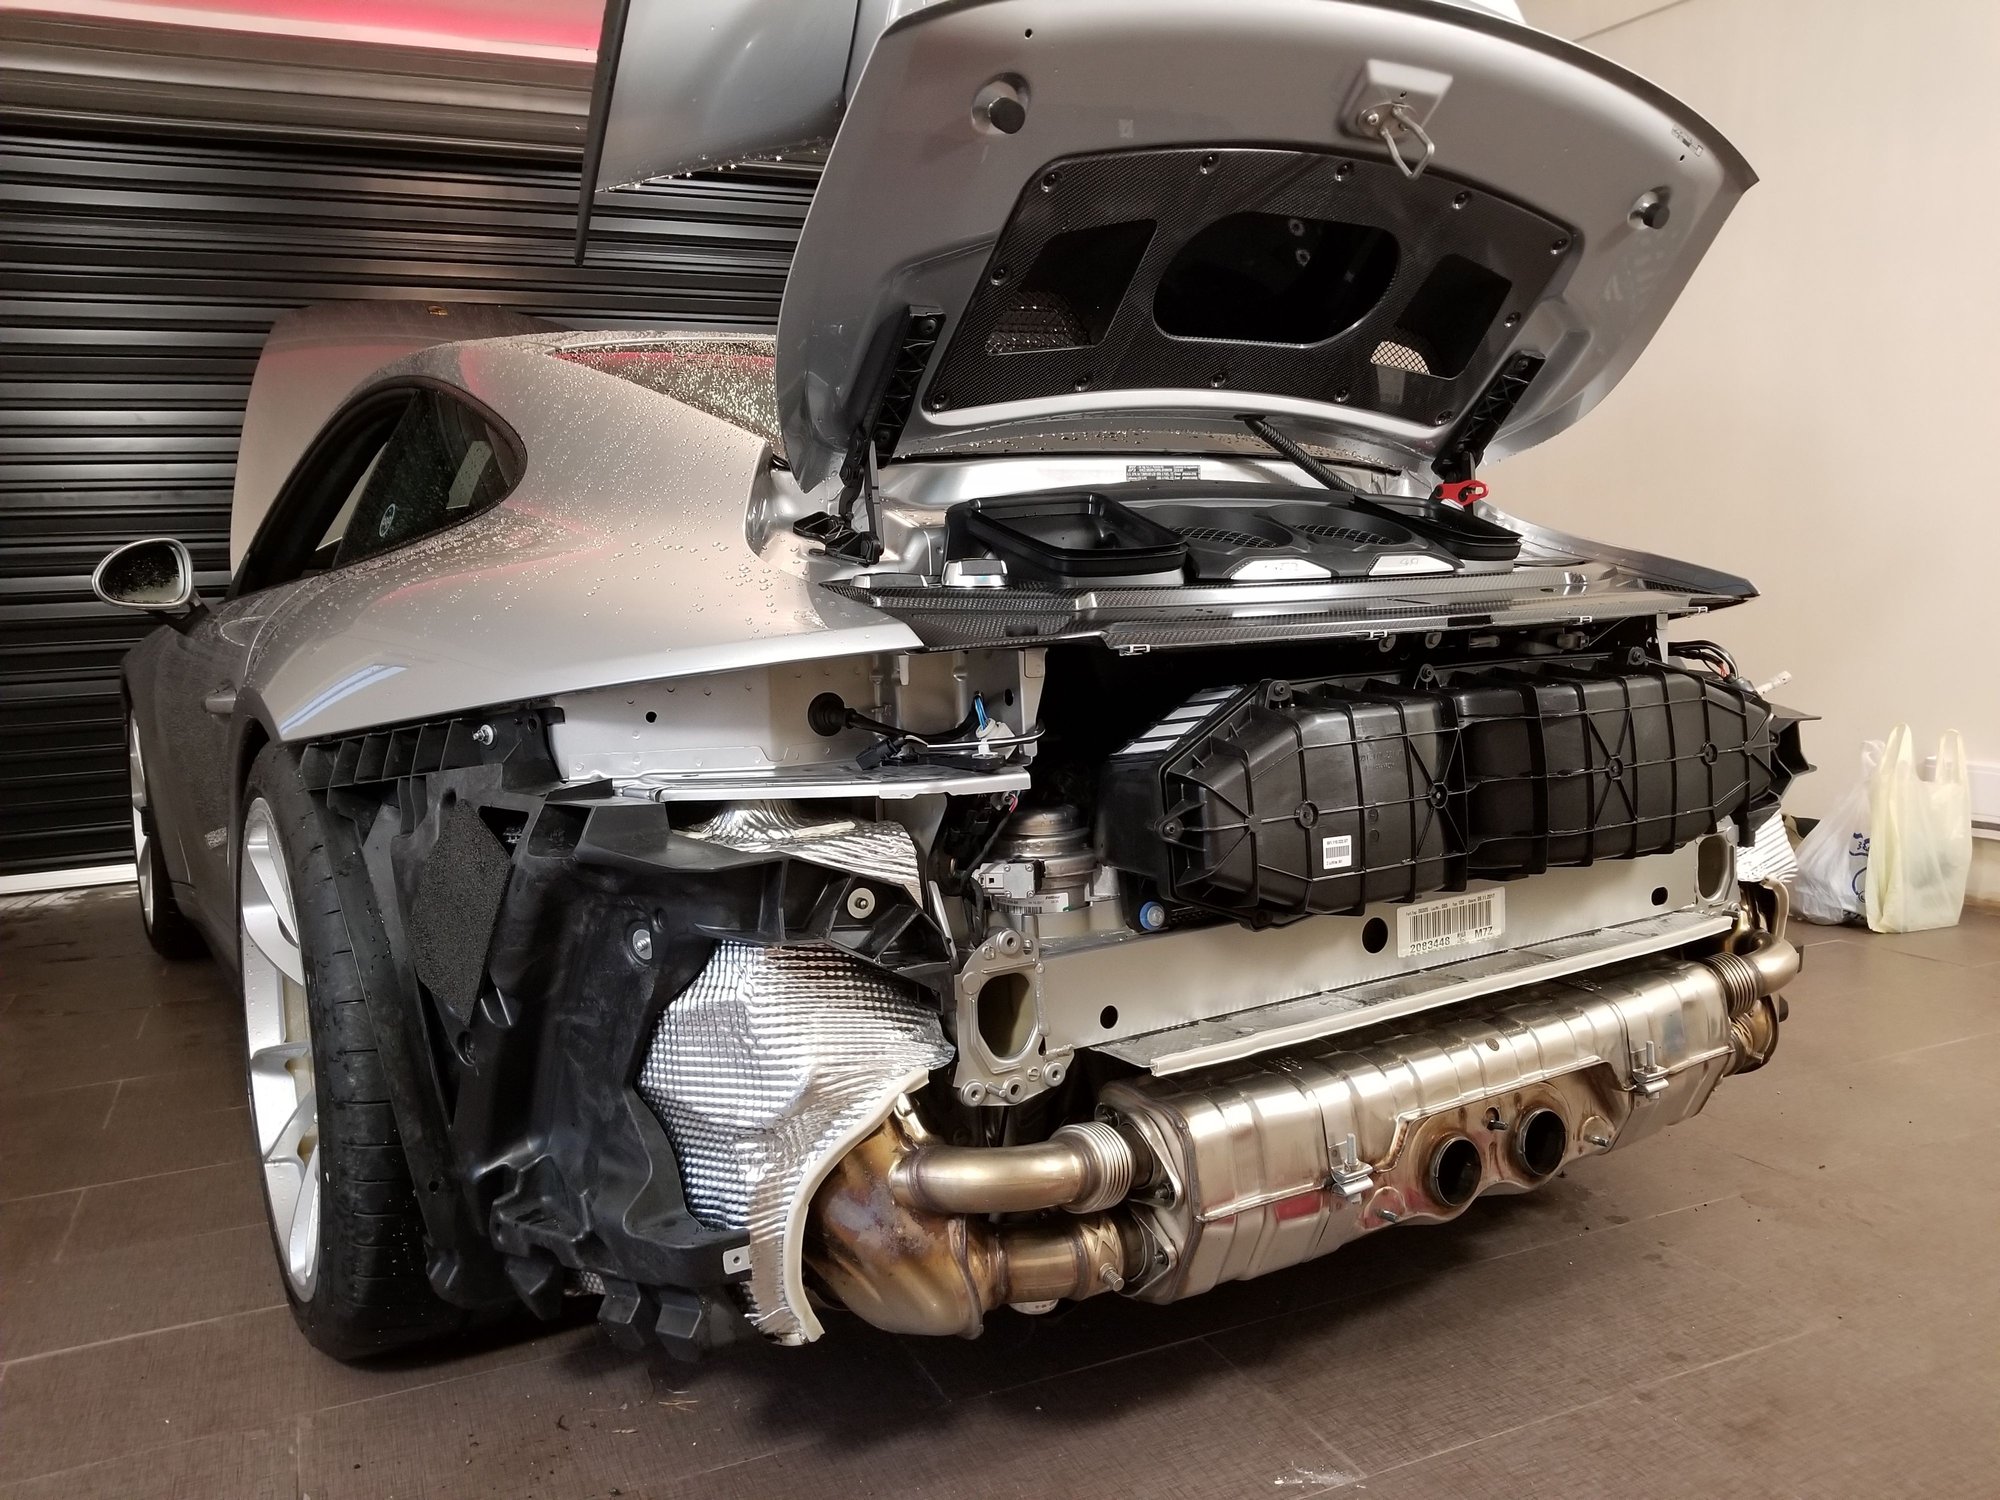
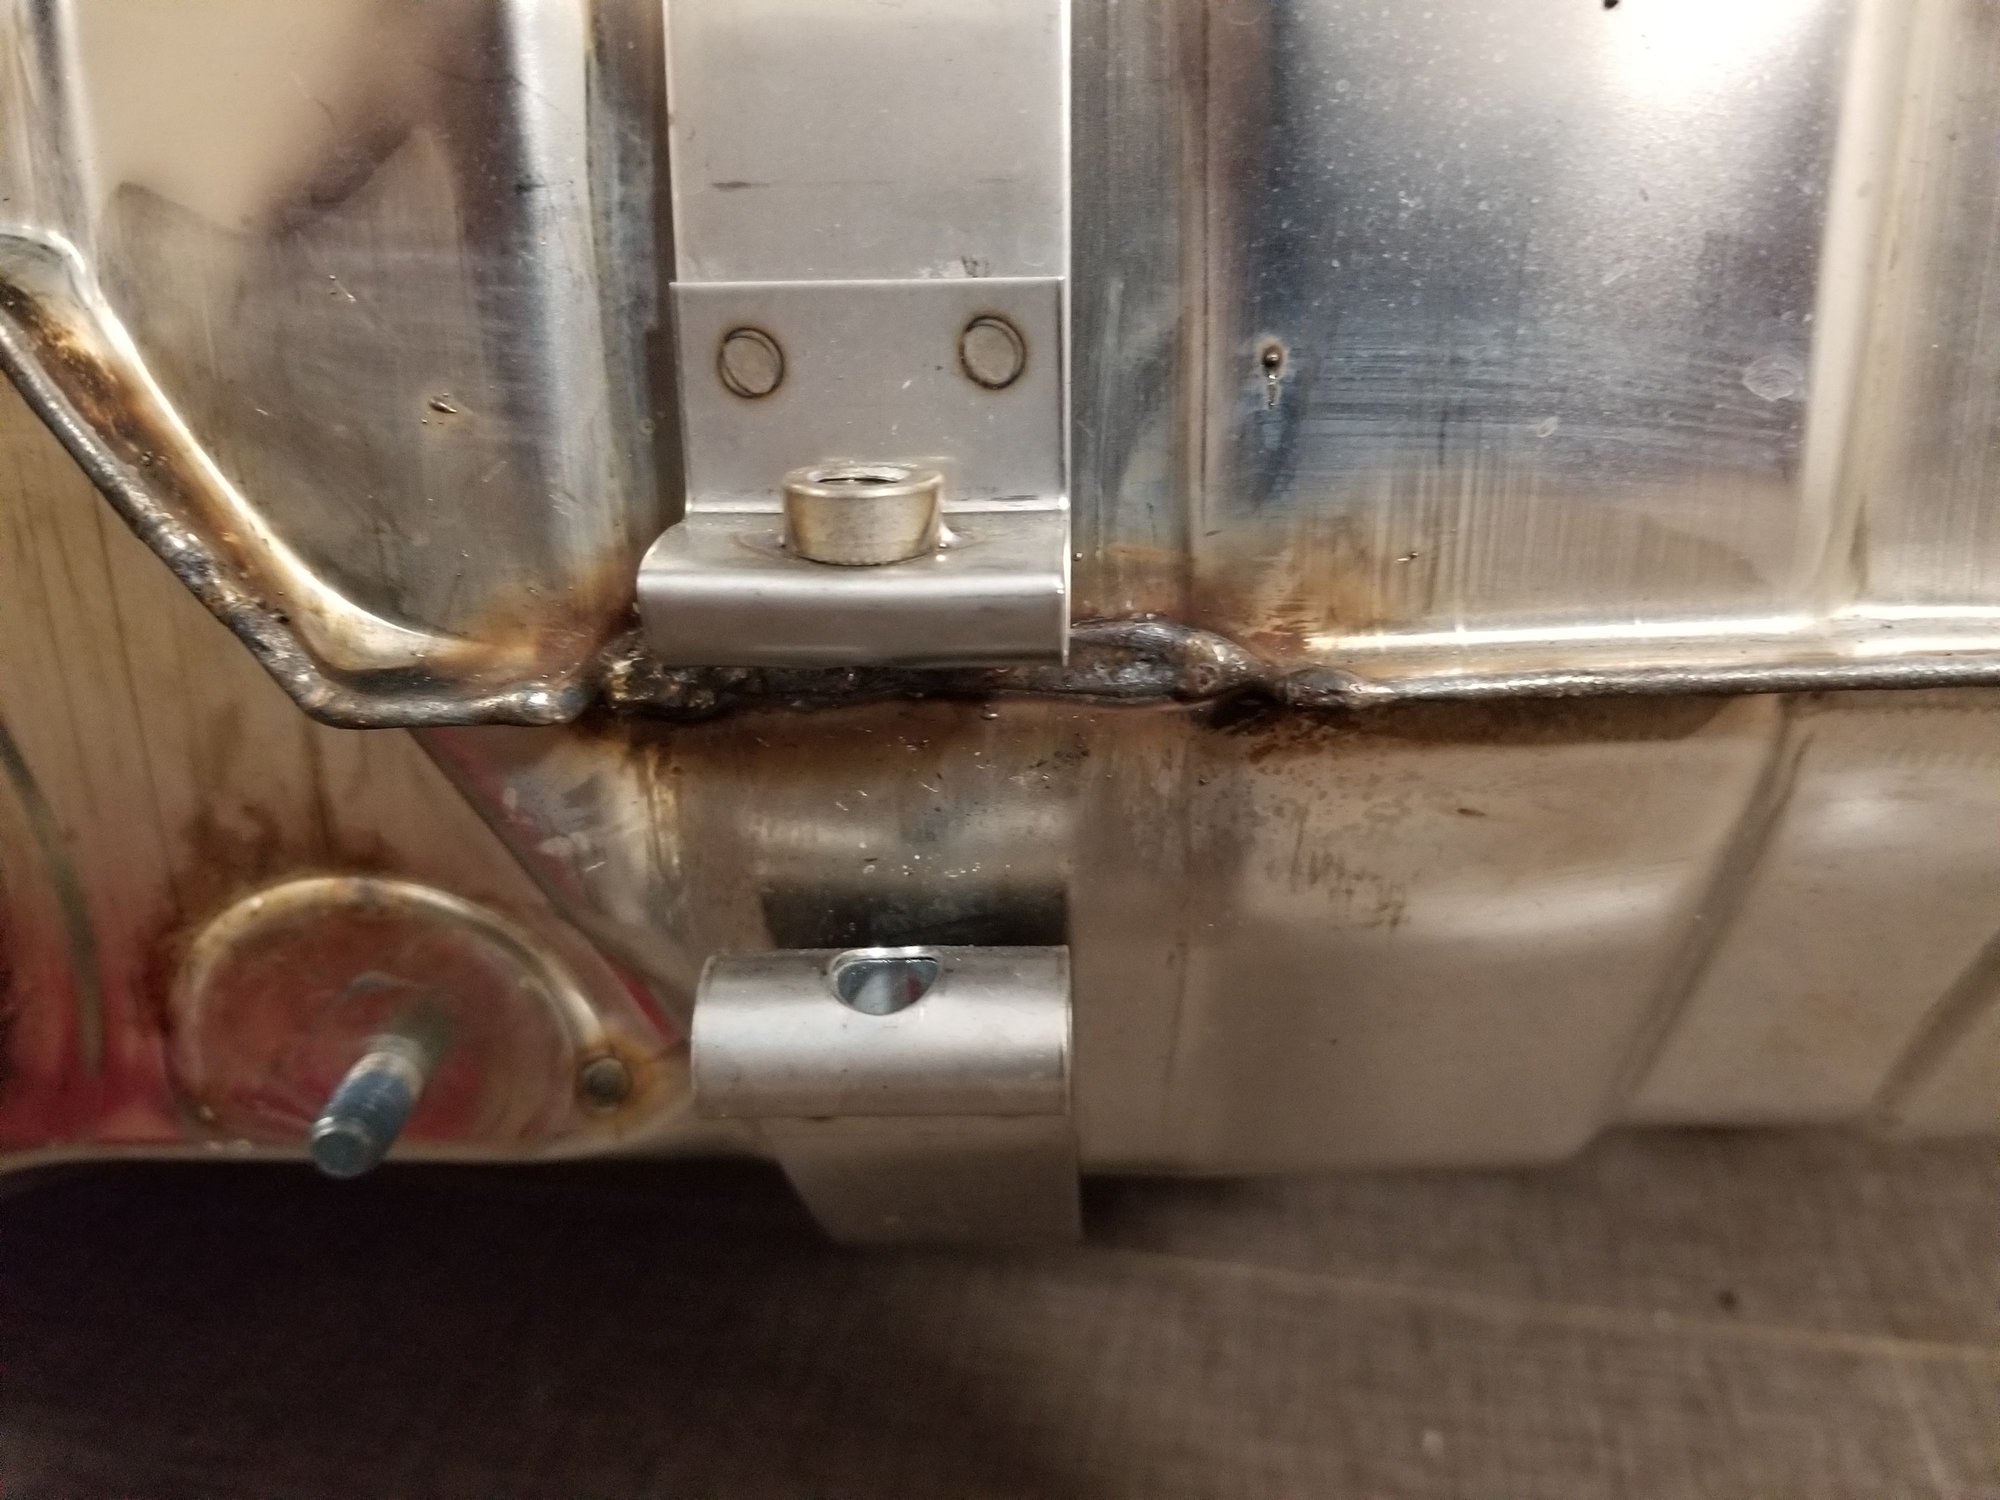
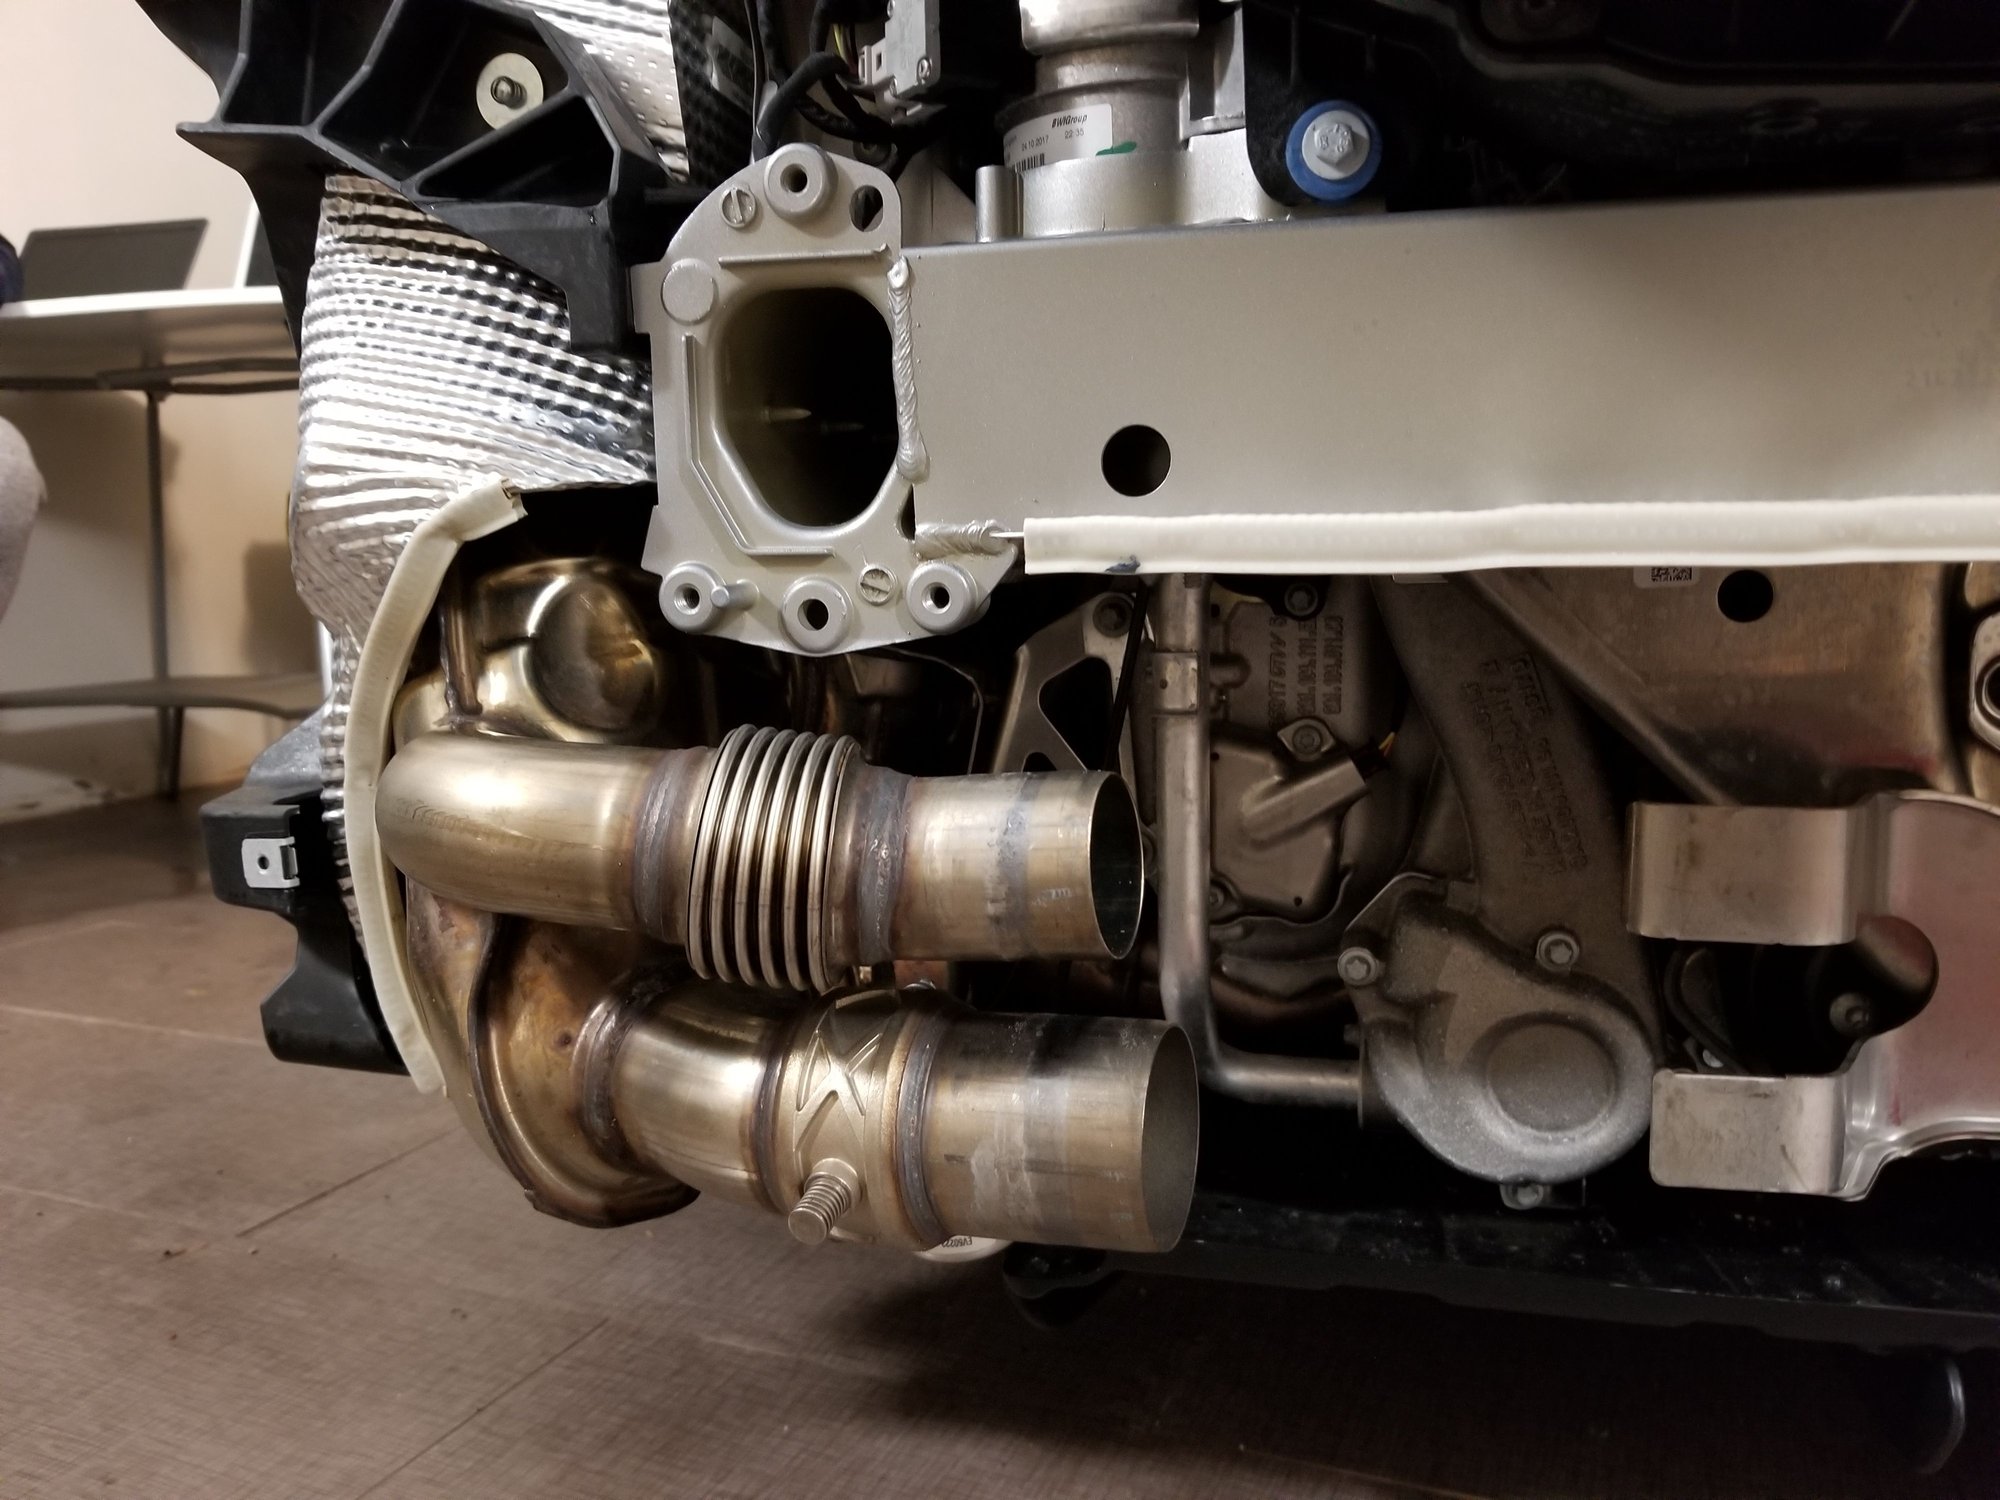
Remove 2 T25 bolts on each side of the heat shield first, then 3 11mm bolts on each side of the rear crash structure. Remove the crash structure to expose the rear exhaust.
Remove the M6 sized hex bolts on the exhaust clamps, and remove the clamps from the exhaust.
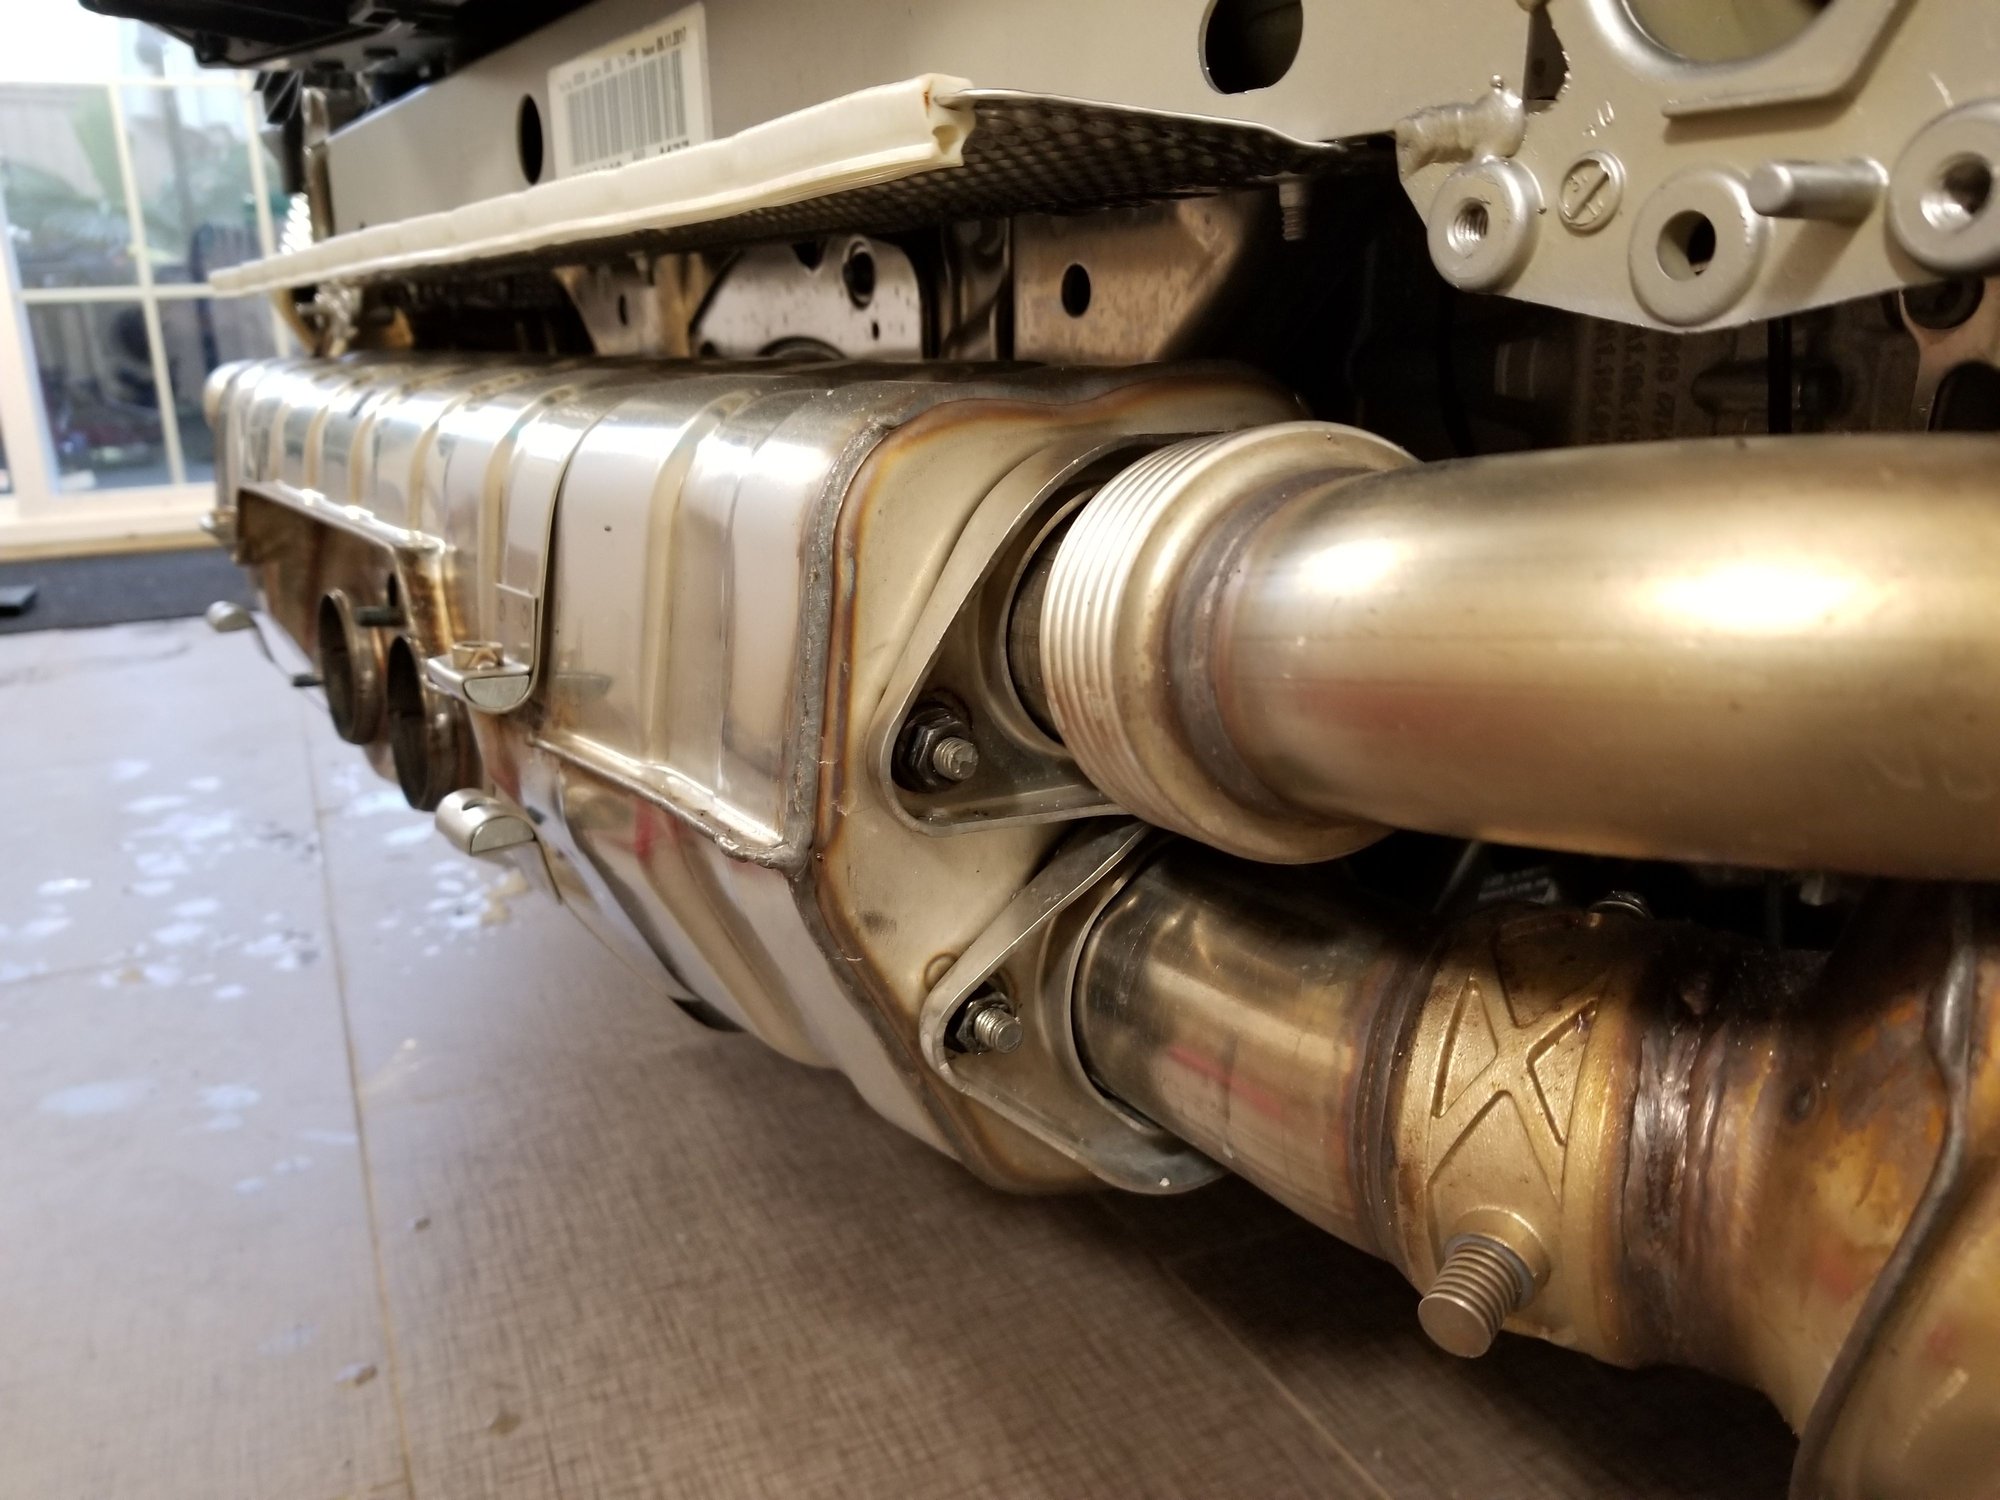
There are 4 flanges in total. Remove 10 13mm nuts that are on the flanges that hold the center muffler to the side mufflers.
Loosen the M6 sized bolts on the band clamps that holds the header to the side muffler on each side.
Remove 2 13mm nuts that attached the side mufflers to the brackets. Now the side mufflers can swing out to give room for the center exhaust to come out.
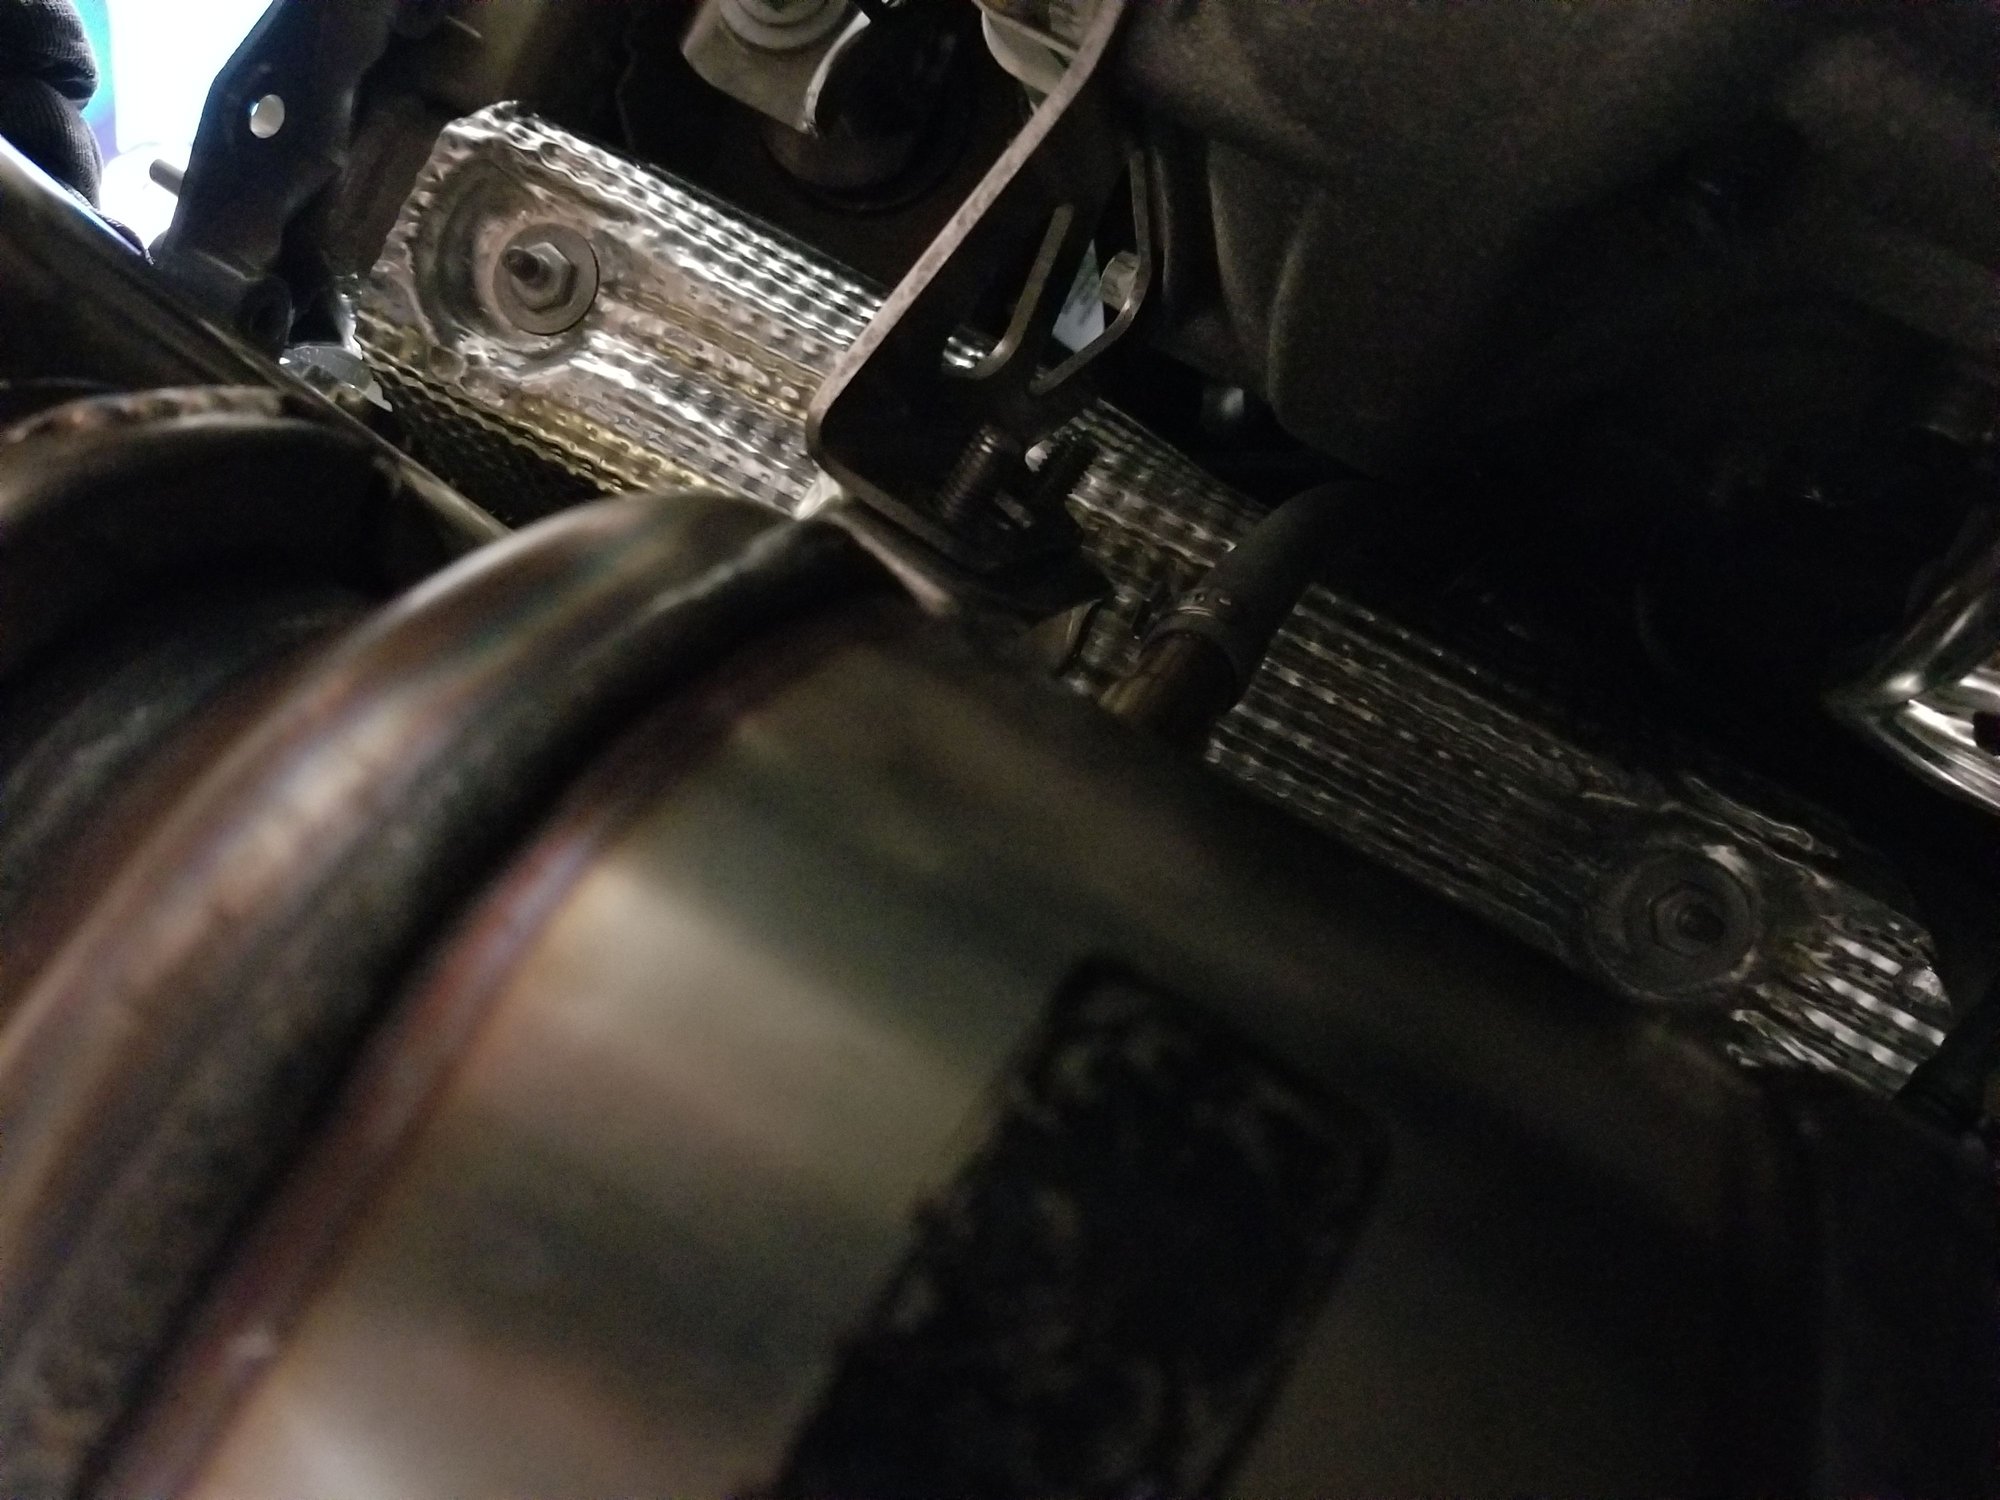
View from the bottom, the 13mm nuts are out.
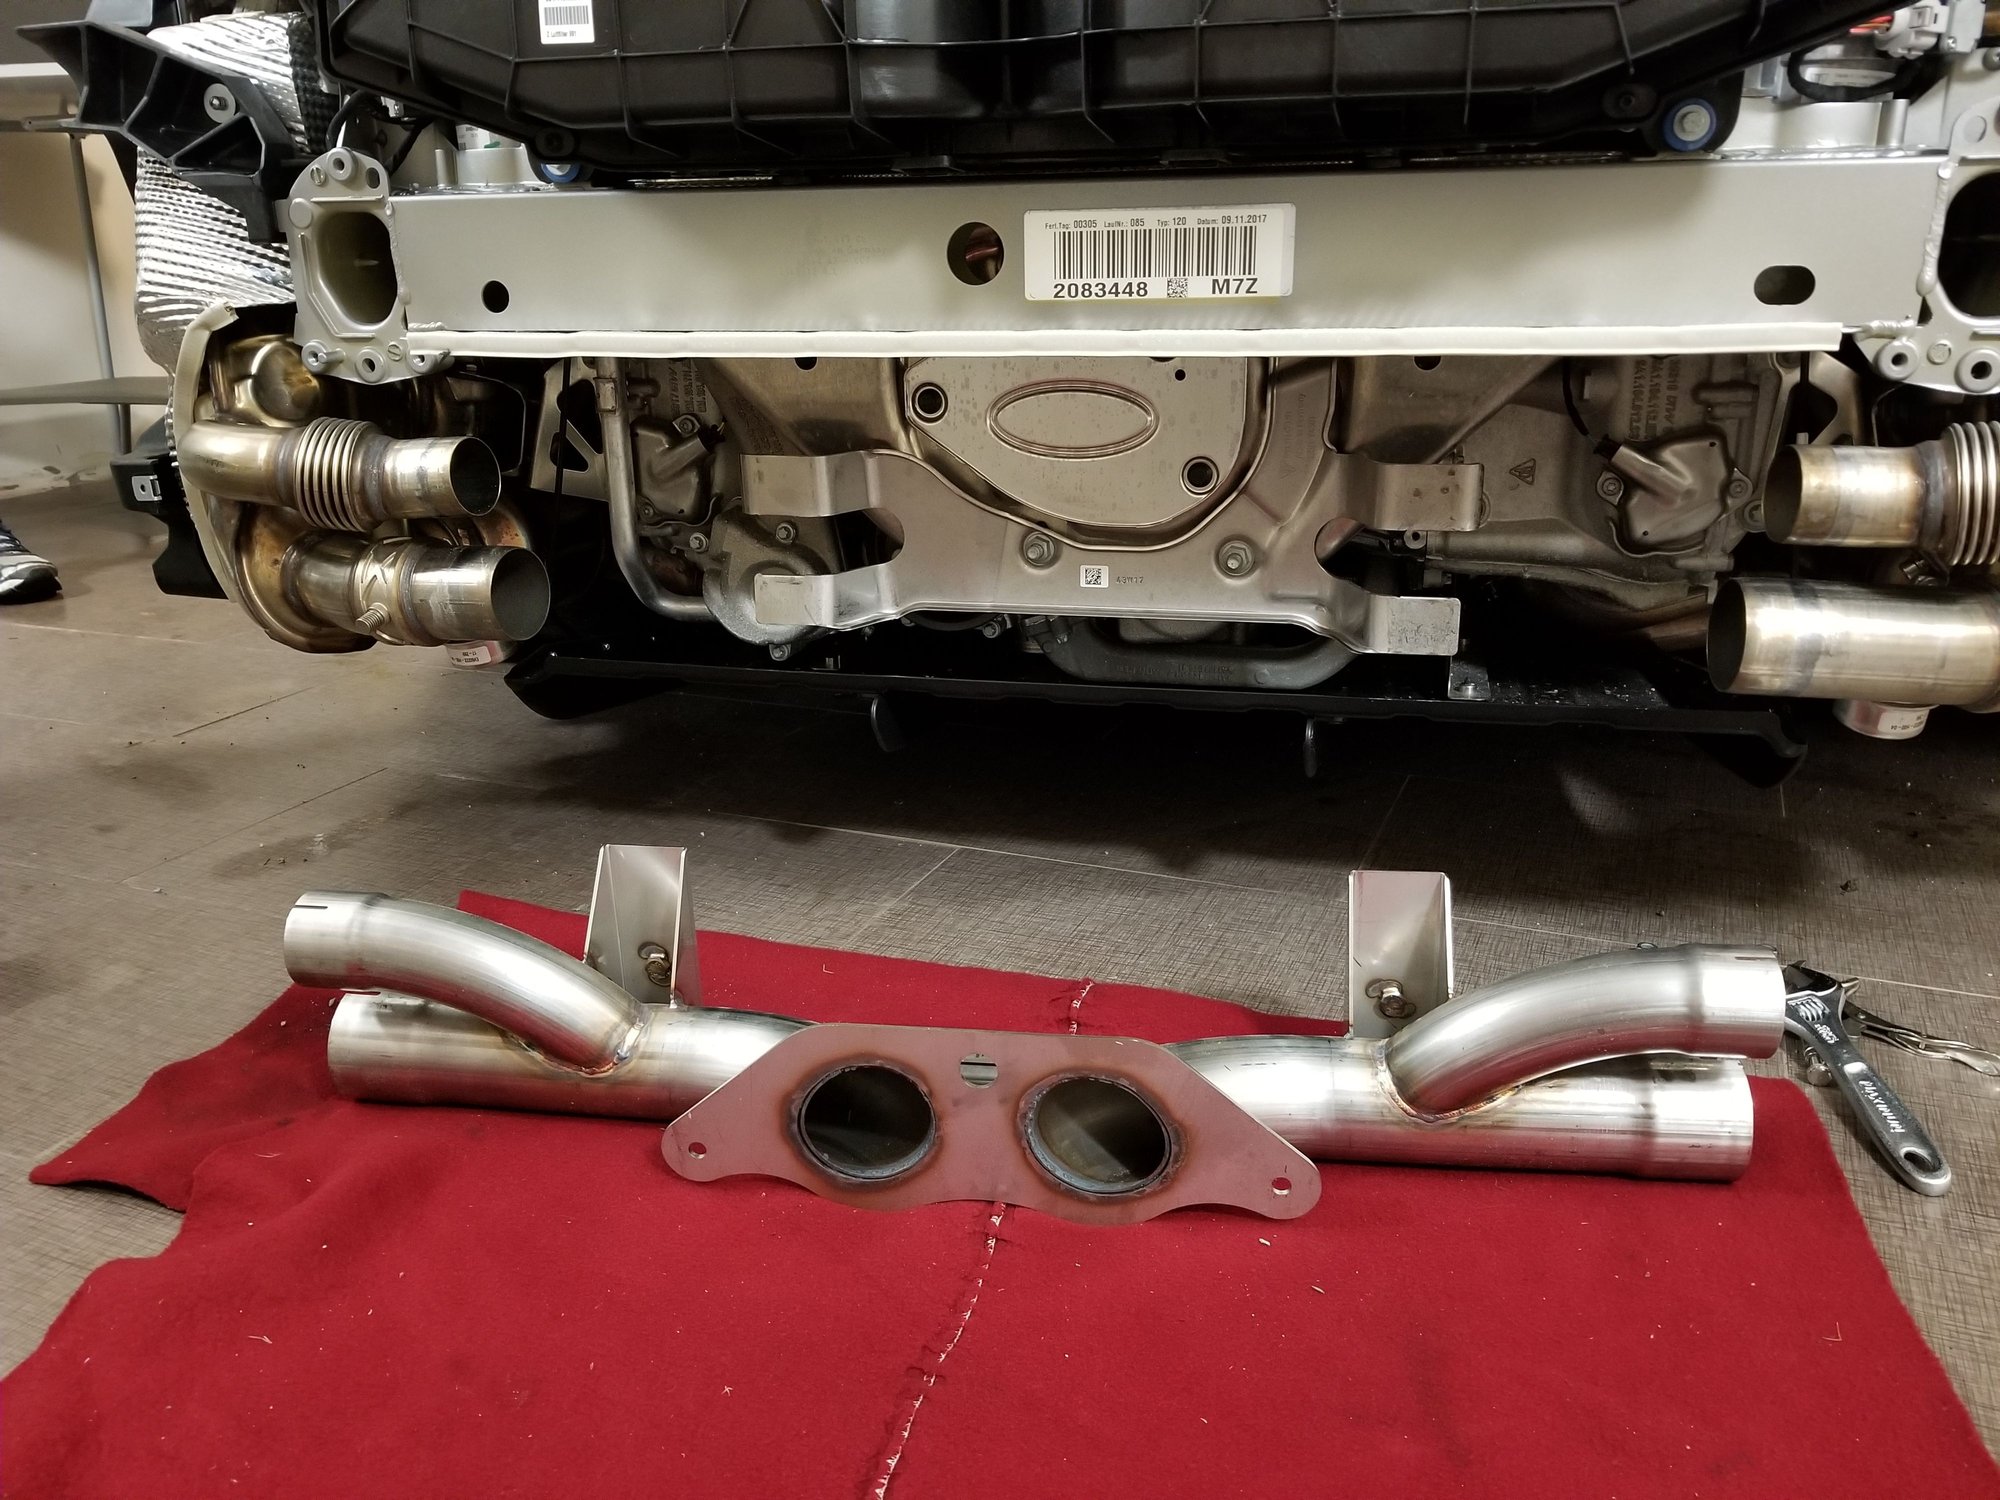
The center exhaust is removed.
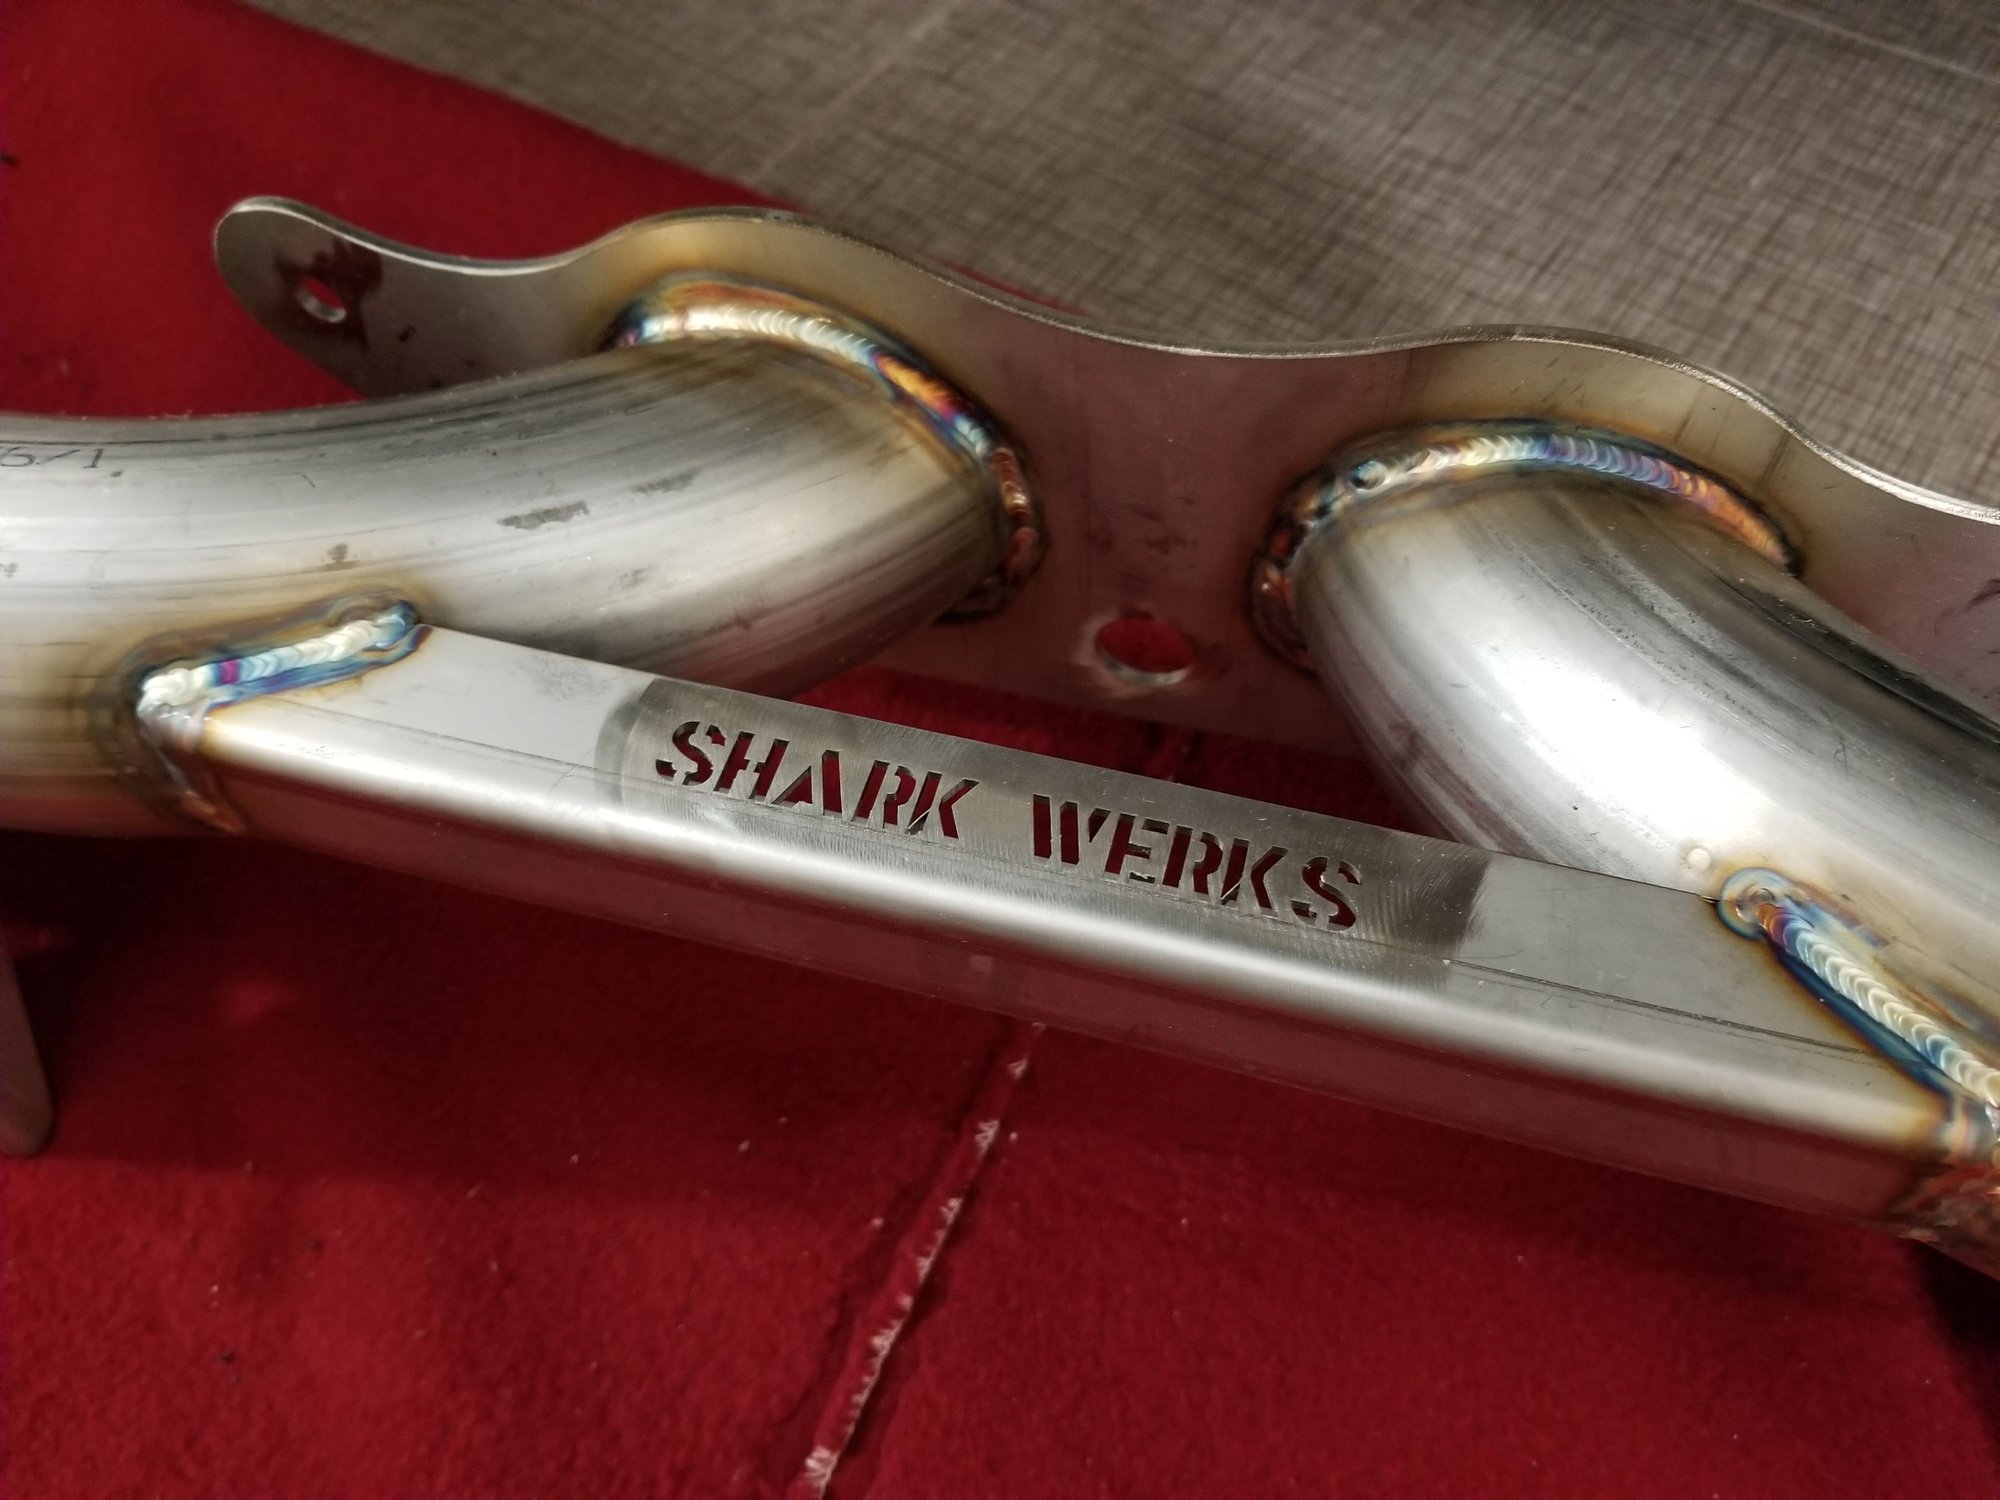
SHARKWERKS Sport Exhaust ready to be installed
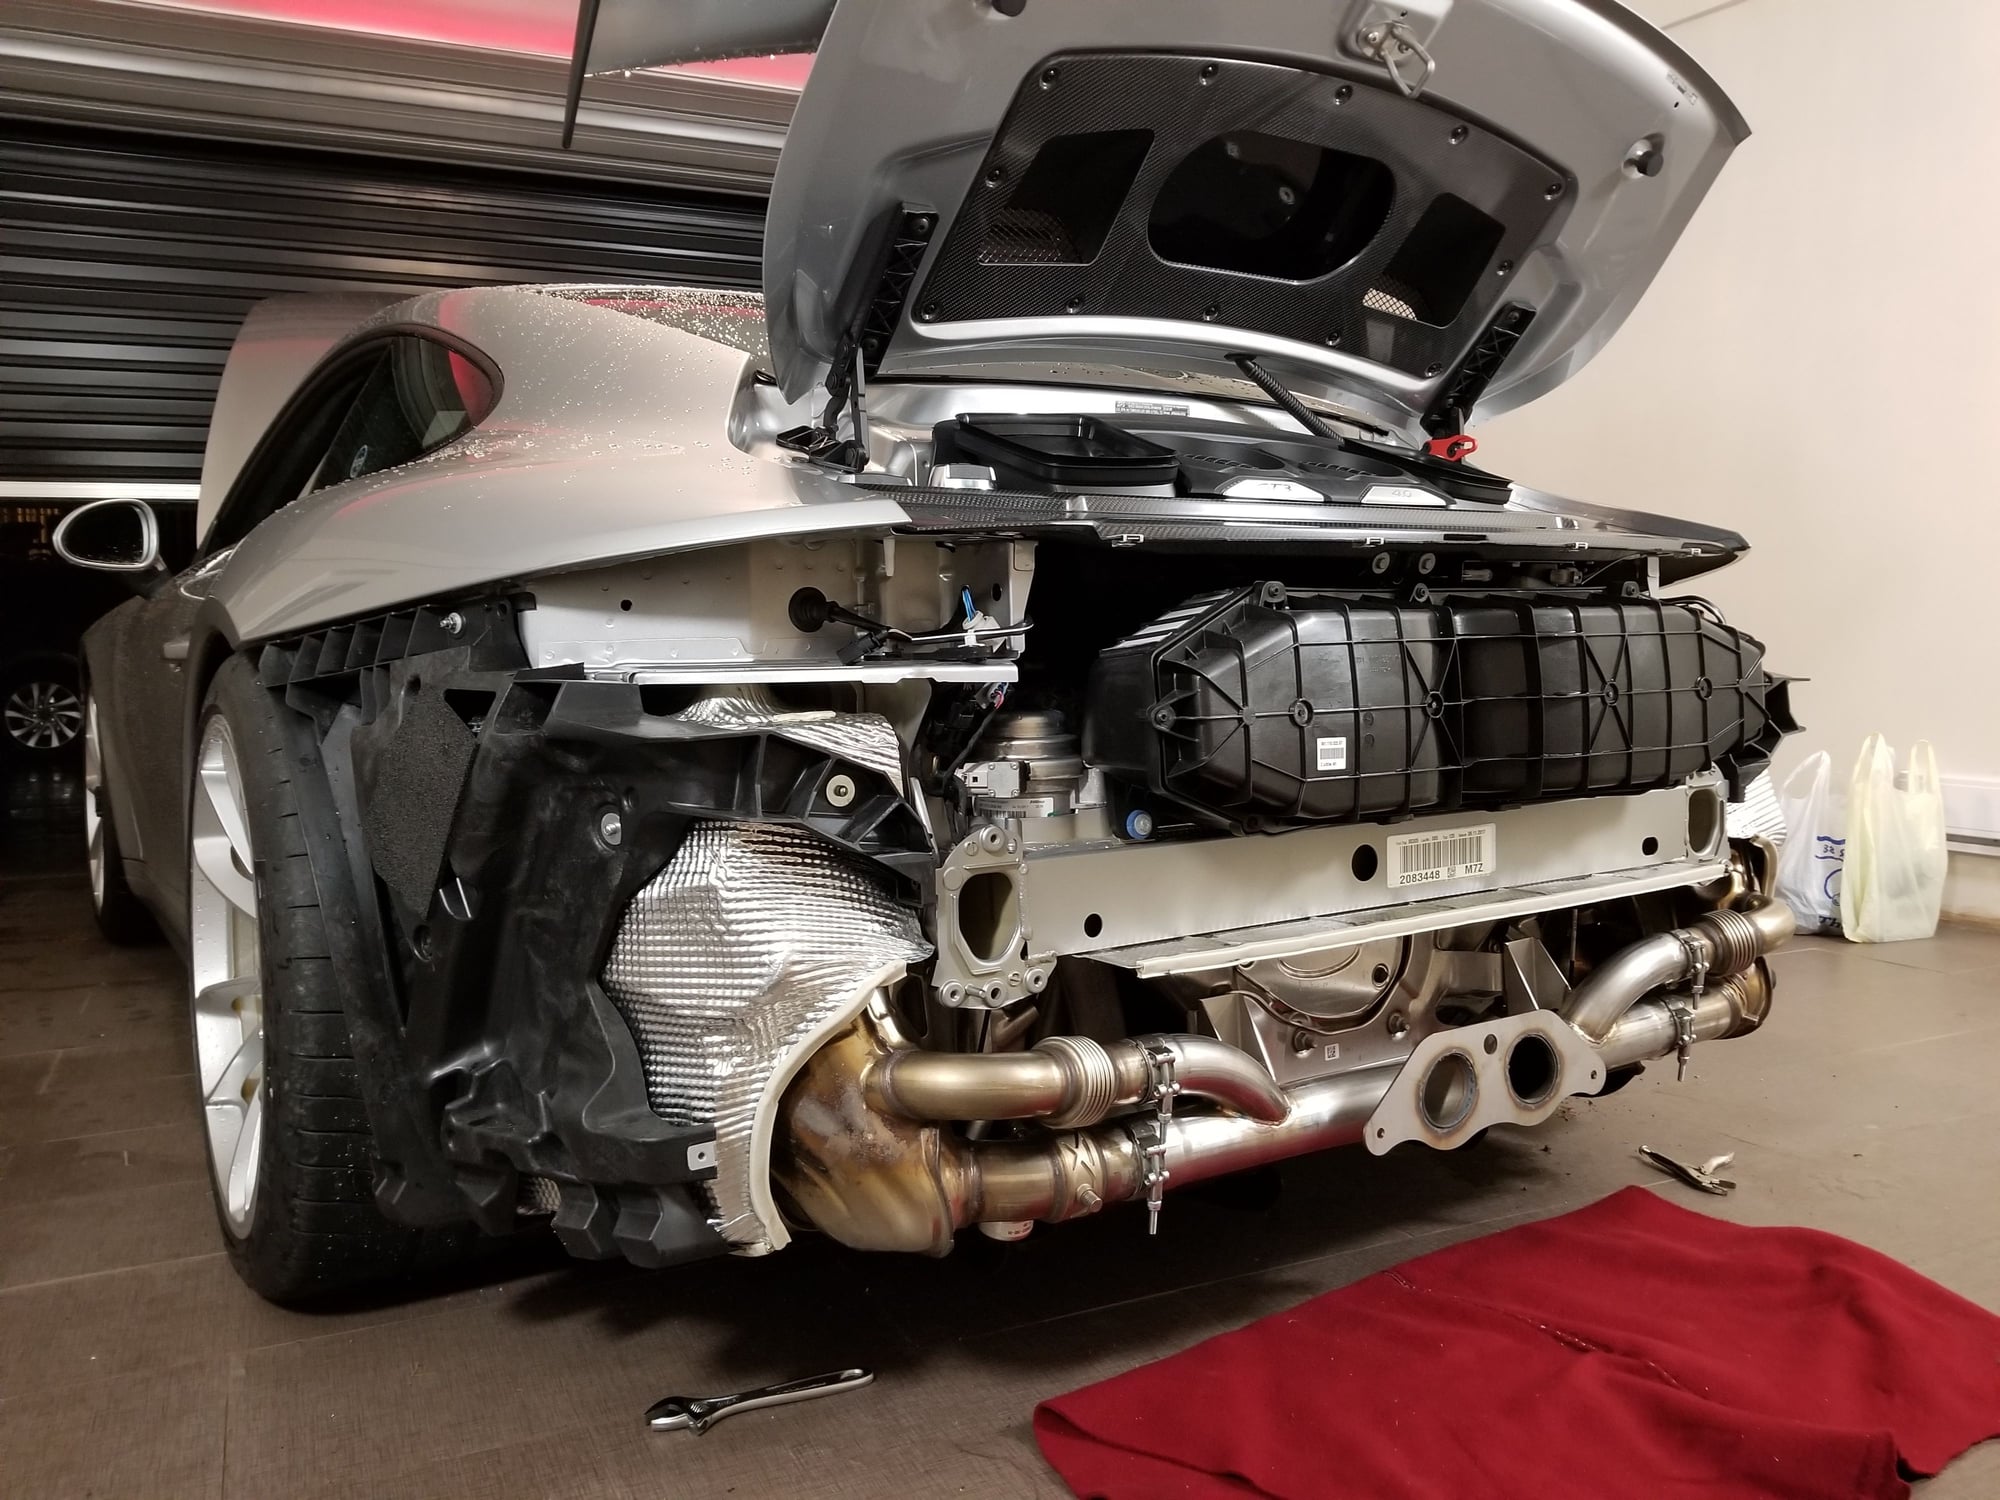
Slide the 2000M Clamps and 250M clamps on the exhaust, install the exhaust onto the side mufflers. Install the mounting plates behind the exhaust with the provided hardware (do not tighten yet). Make sure the side mufflers are connected into the exhaust the further they will go. Tighten the T- Bolt clamps down before tightening on the mounting plate at the back.
Go back and reinstall the side muffler nuts to the brackets and tighten the clamps on the connection to the headers. Start the car to make sure there is no leaks.
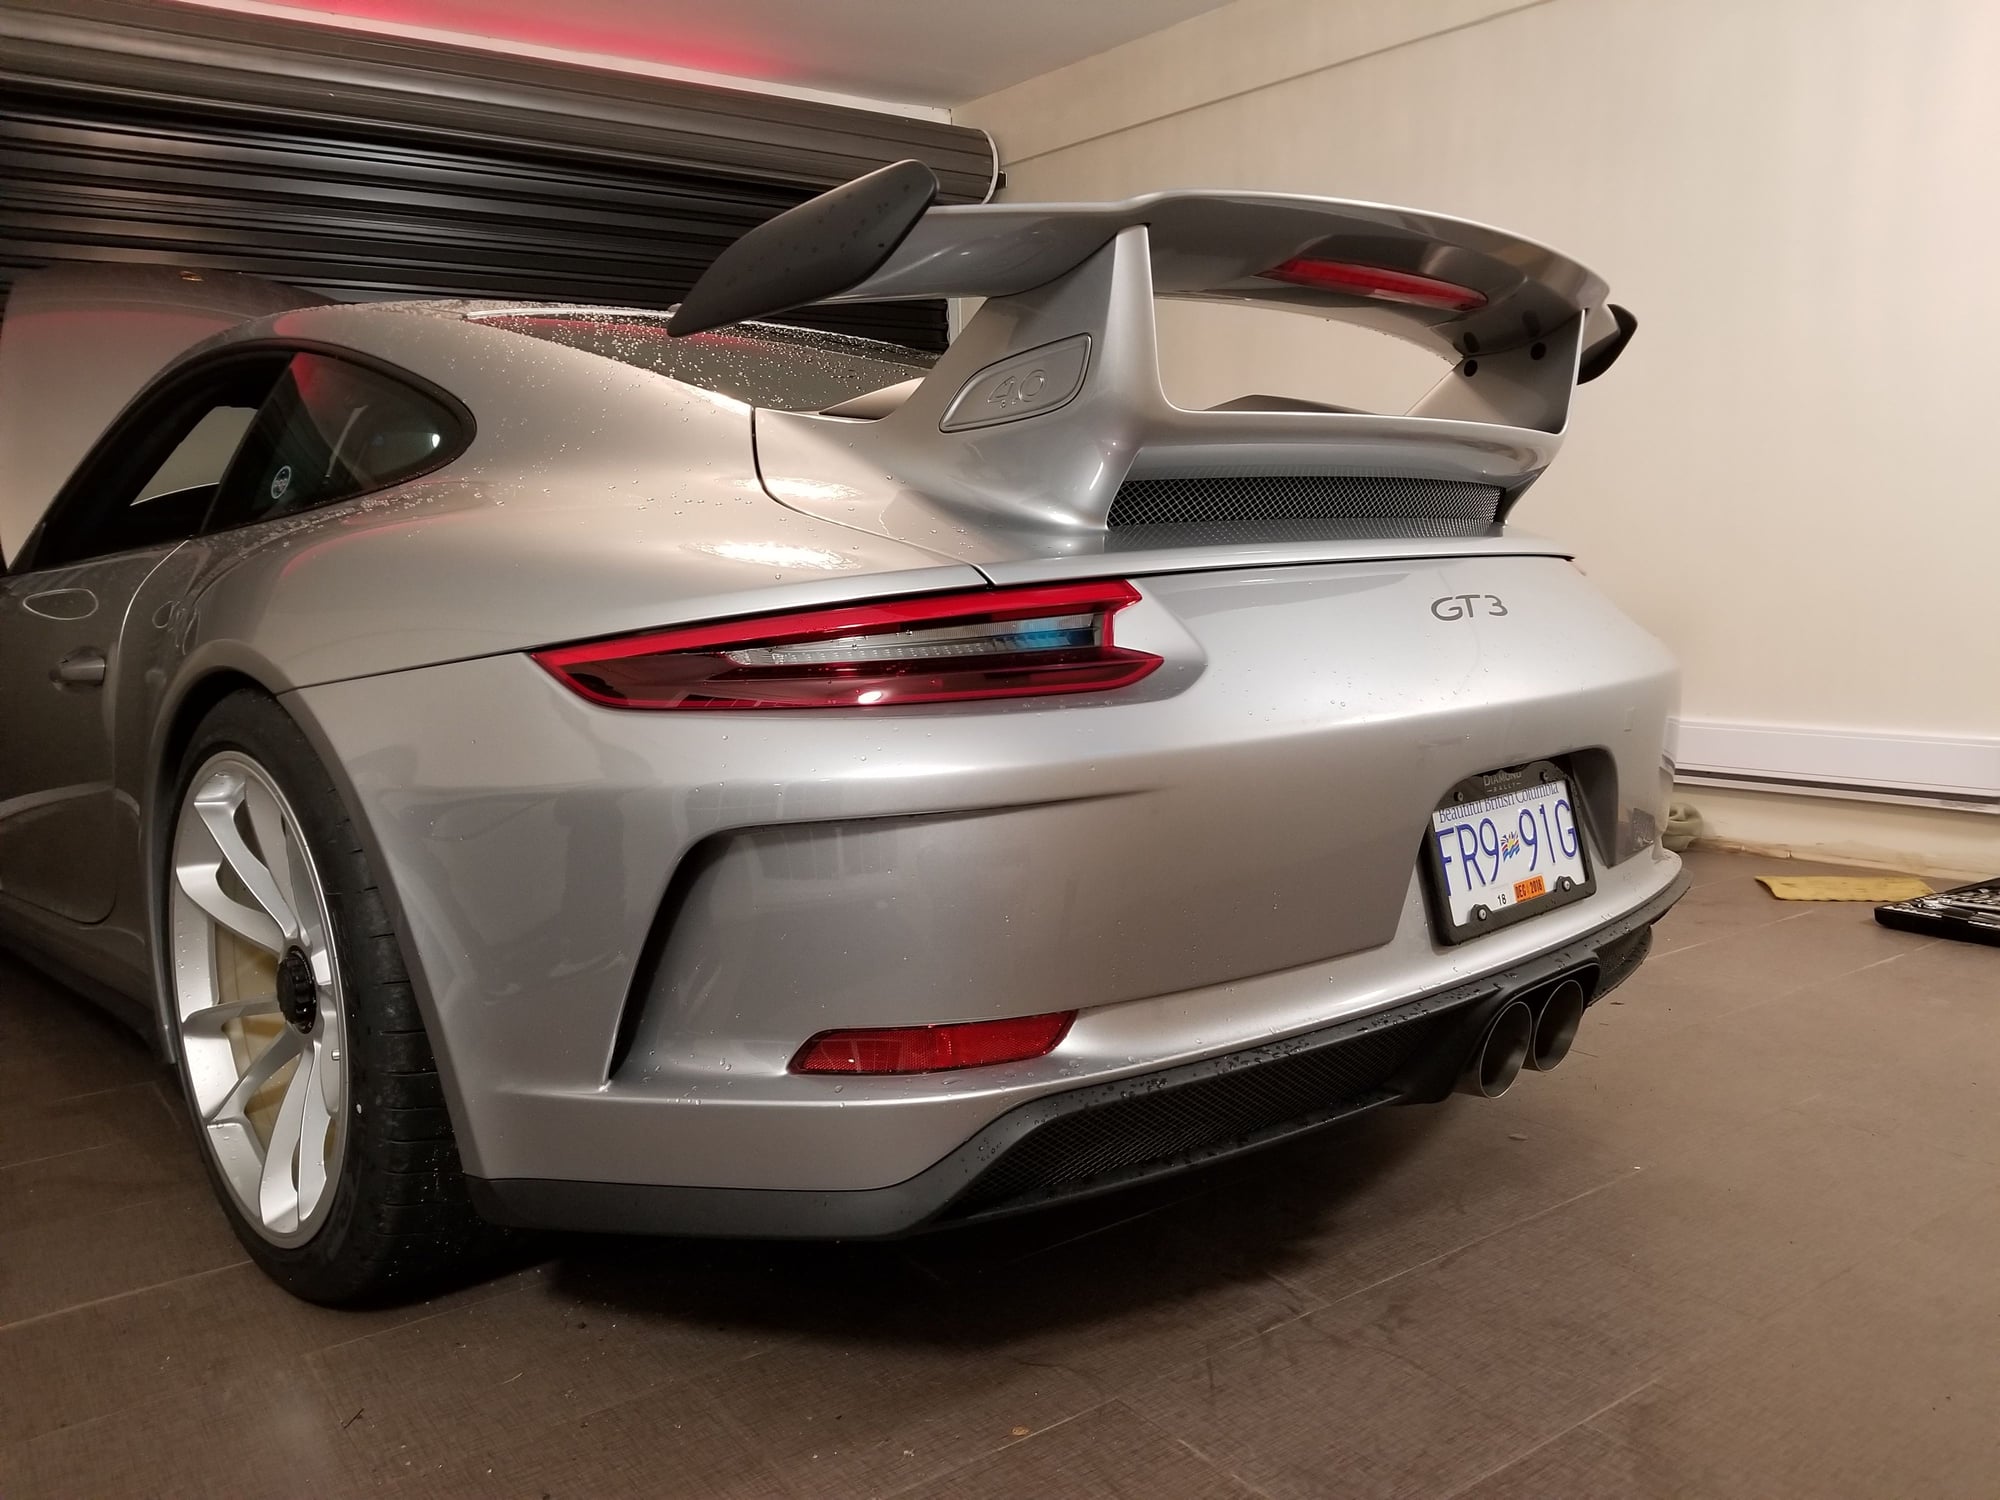
Reinstall bumper and taillights. Reinstall tip of your choice - I choose the Sharkwerks 100mm tips.
Really happy with the install as no adjustment was required to center or aligning the exhaust. Everything bolted on how it should and the exhaust/tip is dead center on the bumper. The exhaust has a deeper note compare to the OEM but I will have to break the motor in (Still at 200kms) until I can hear it scream.
I will post a video of the sound in the very near future
congratulations on car and exhaust
one thing to add. I did mine on .1 GT3 without removing bumper so that step will save you some time , though removing bumper certainly allows more wiggle room
Nice write up and result. I was just posting my findings at the same time. Curious, did you specifically order for the .2? as your tips definitely align and the receiving pipe is drilled differently to the .1 pipe.
Congratulations!
Nice write up and result. I was just posting my findings at the same time. Curious, did you specifically order for the .2? as your tips definitely align and the receiving pipe is drilled differently to the .1 pipe.
Congratulations!
Thank you for the compliment! I am not sure if there are any difference between the .1 and .2. I called up Alex at Sharkwerks and requested the .2 by-pass exhaust.
congratulations on car and exhaust
one thing to add. I did mine on .1 GT3 without removing bumper so that step will save you some time , though removing bumper certainly allows more wiggle room
Thanks! Unfortunately I do not have a 4 post lift and I prefer to work on it without the bumper.
Cheers!
Well done - thanks for taking the time to detail all of this and for the photos. You made it seem easy, haven't done much DIY myself either but will likely be doing this exact same install come summer time so I have this bookmarked
Were there any peculiar or specific tools needed for the job? Might be nice to have that in the original post if you don't mind, admittedly all I have right now is a monkey wrench, hammer, and drill gun
Thanks! No special tools required. The only hard to get to T25 bolts are those 3 (each side) on the rear wheel arch mounting the bumper. I use combination of these bits to make it work.
Great write up and thanks for posting/sharing!! 2.5 hrs sounds quite good, I'll benchmark this when I have either Porsche or my indie swap my exhaust back to EOM due to sound restriction at Limerock (I've been told that the GMG exhaust won't pass)! Thanks
Well done - thanks for taking the time to detail all of this and for the photos. You made it seem easy, haven't done much DIY myself either but will likely be doing this exact same install come summer time so I have this bookmarked
Were there any peculiar or specific tools needed for the job? Might be nice to have that in the original post if you don't mind, admittedly all I have right now is a monkey wrench, hammer, and drill gun
Here is a good video to see how the rear bumper and exhaust comes off of a GT3, .1 or .2(same setup).
I have a suggestion, check and see if a T27 Torx will fit. The T27 is a common metric size and used throughout the car. The T25 will work but over time will strip the head out.
nicely done!
Quick question, did you delete the Porsche on the rear? I wanted to only have GT3 back there but that wasn't an option when I placed the order.
nicely done!
Quick question, did you delete the Porsche on the rear? I wanted to only have GT3 back there but that wasn't an option when I placed the order.
Just get a little fishing line and peel off the Porsche.

 01-06-2018, 09:08 PM