When you click on links to various merchants on this site and make a purchase, this can result in this site earning a commission. Affiliate programs and affiliations include, but are not limited to, the eBay Partner Network.
Great write up so far, awew911! I installed the Techquipment rollbar on my 996, trimmed the carpet and cut the quarter panel to do so. Thinking about doing the Cantrell roll bar on my incoming 991.2GT3 myself, but I'm a little intimidated. I see you are very very well equipped, more so than I am, and probably more handy, too. Would you say the Cantrell roll bar install can be done by a reasonably handy average gear head, or is it best left to the pros?
Great write up so far, awew911! I installed the Techquipment rollbar on my 996, trimmed the carpet and cut the quarter panel to do so. Thinking about doing the Cantrell roll bar on my incoming 991.2GT3 myself, but I'm a little intimidated. I see you are very very well equipped, more so than I am, and probably more handy, too. Would you say the Cantrell roll bar install can be done by a reasonably handy average gear head, or is it best left to the pros?
Good questions.
I followed the instructions provided.
There are a couple of areas that require attention.
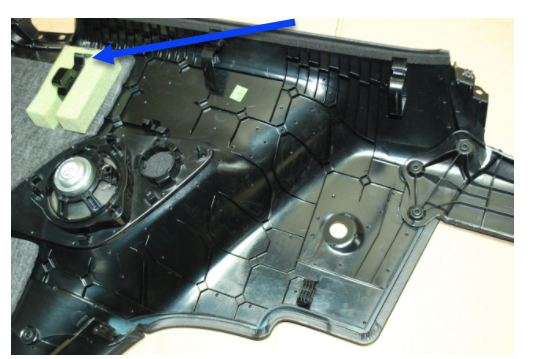
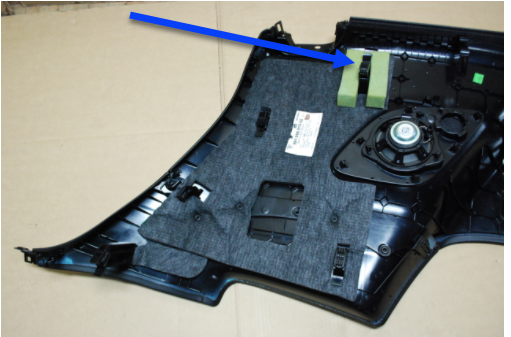
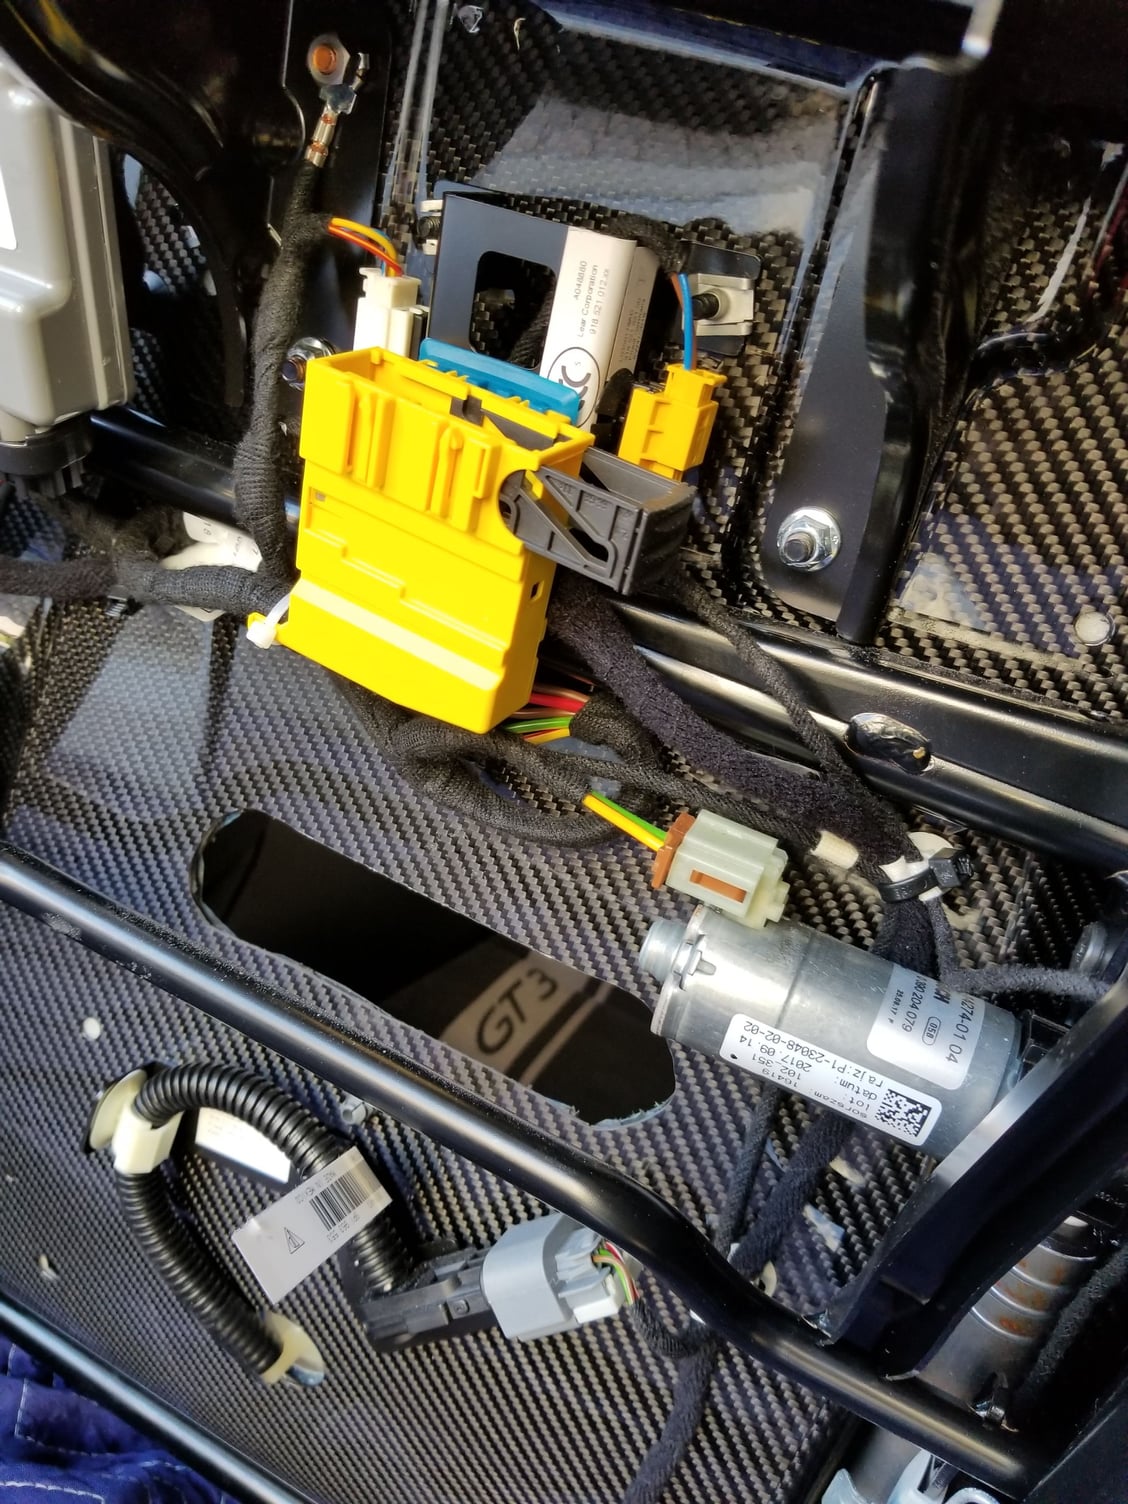
1) It's a bit unnerving to pull on some of the panels to detach them from the clips. You have to make sure all the rubber pieces come off properly. Best is to compare both sides after removal and verify that there are no discrepancies. Then check all the mount points and surroundings for rubber pieces that may have fallen off.
2) On the 991.2, there's an additional screw on the B-pillar behind the 'Airbag' designator.
4) You'll need a 90 degree pick for removing the B-pillar component. It's a pain to release the inner clip through a small hole, but once you figure it out on one side, the other is quick and easy. Get this:
5) When lifting the side panel, there is a catch that will keep the panel from coming off. Cover your interior window and using a tool to depress the plastic hook using an interior tool. Also, patience and a bunch of WTF's later, you'll get it off. You'll need the pick to release some of the connectors from the panel. I had three... two for the speakers, one for the lighting package. Move slow. Move deliberately.
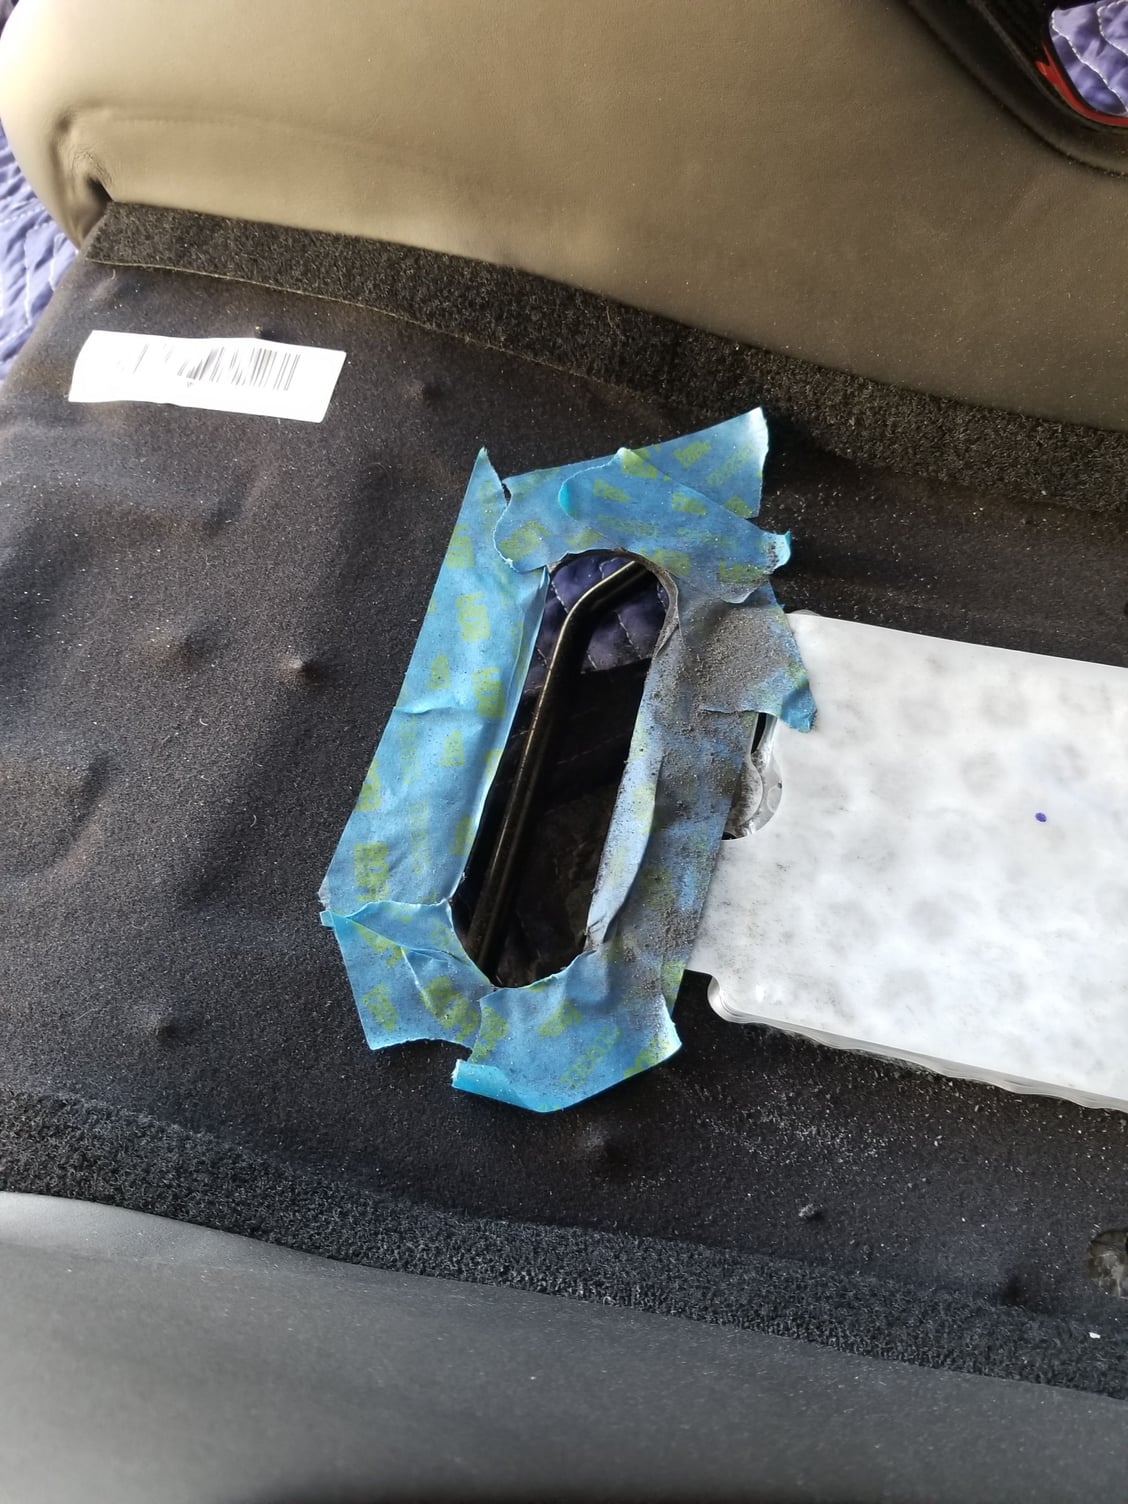
4) Use a good quality 1 7/8" hole saw to cut the plastic. I used this:
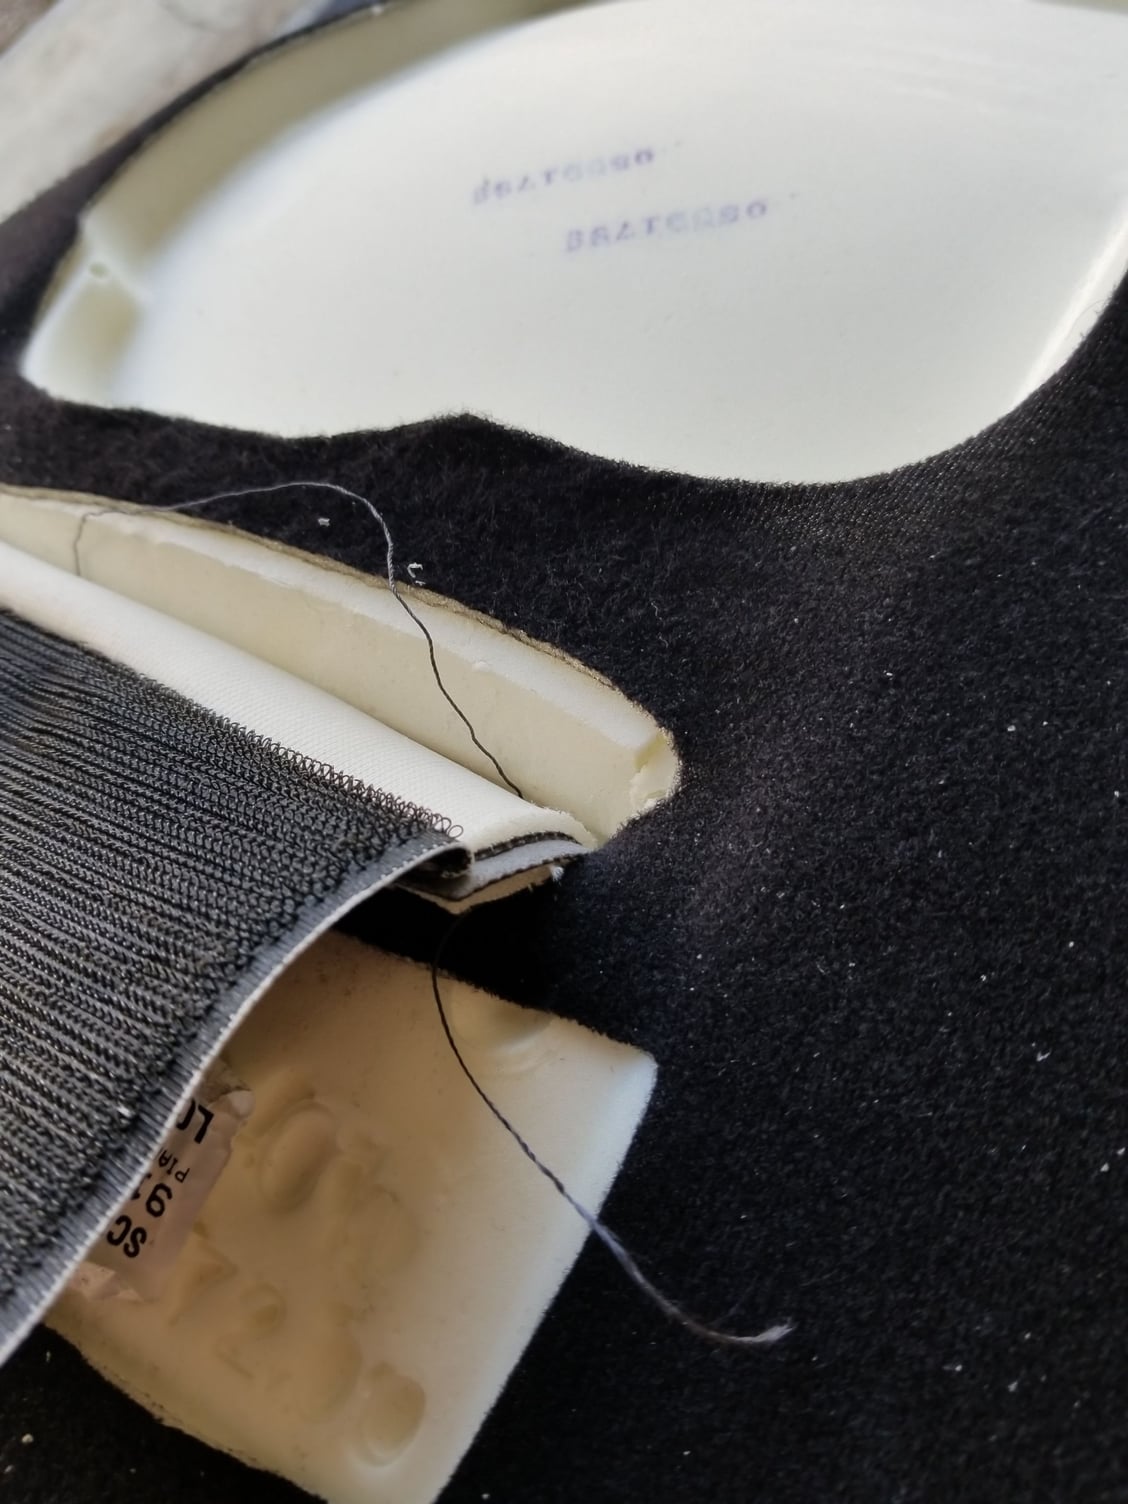
Reinstalling the upholstery is easier - just put the trim piece vertical and push it down towards the seat center and it will catch on the hooks - once you do it, you'll understand.
If you are mechanically inclined and have a patience and attention to detail, it's not difficult at all. Measure 2 times (sometimes 4 times) - cut once.
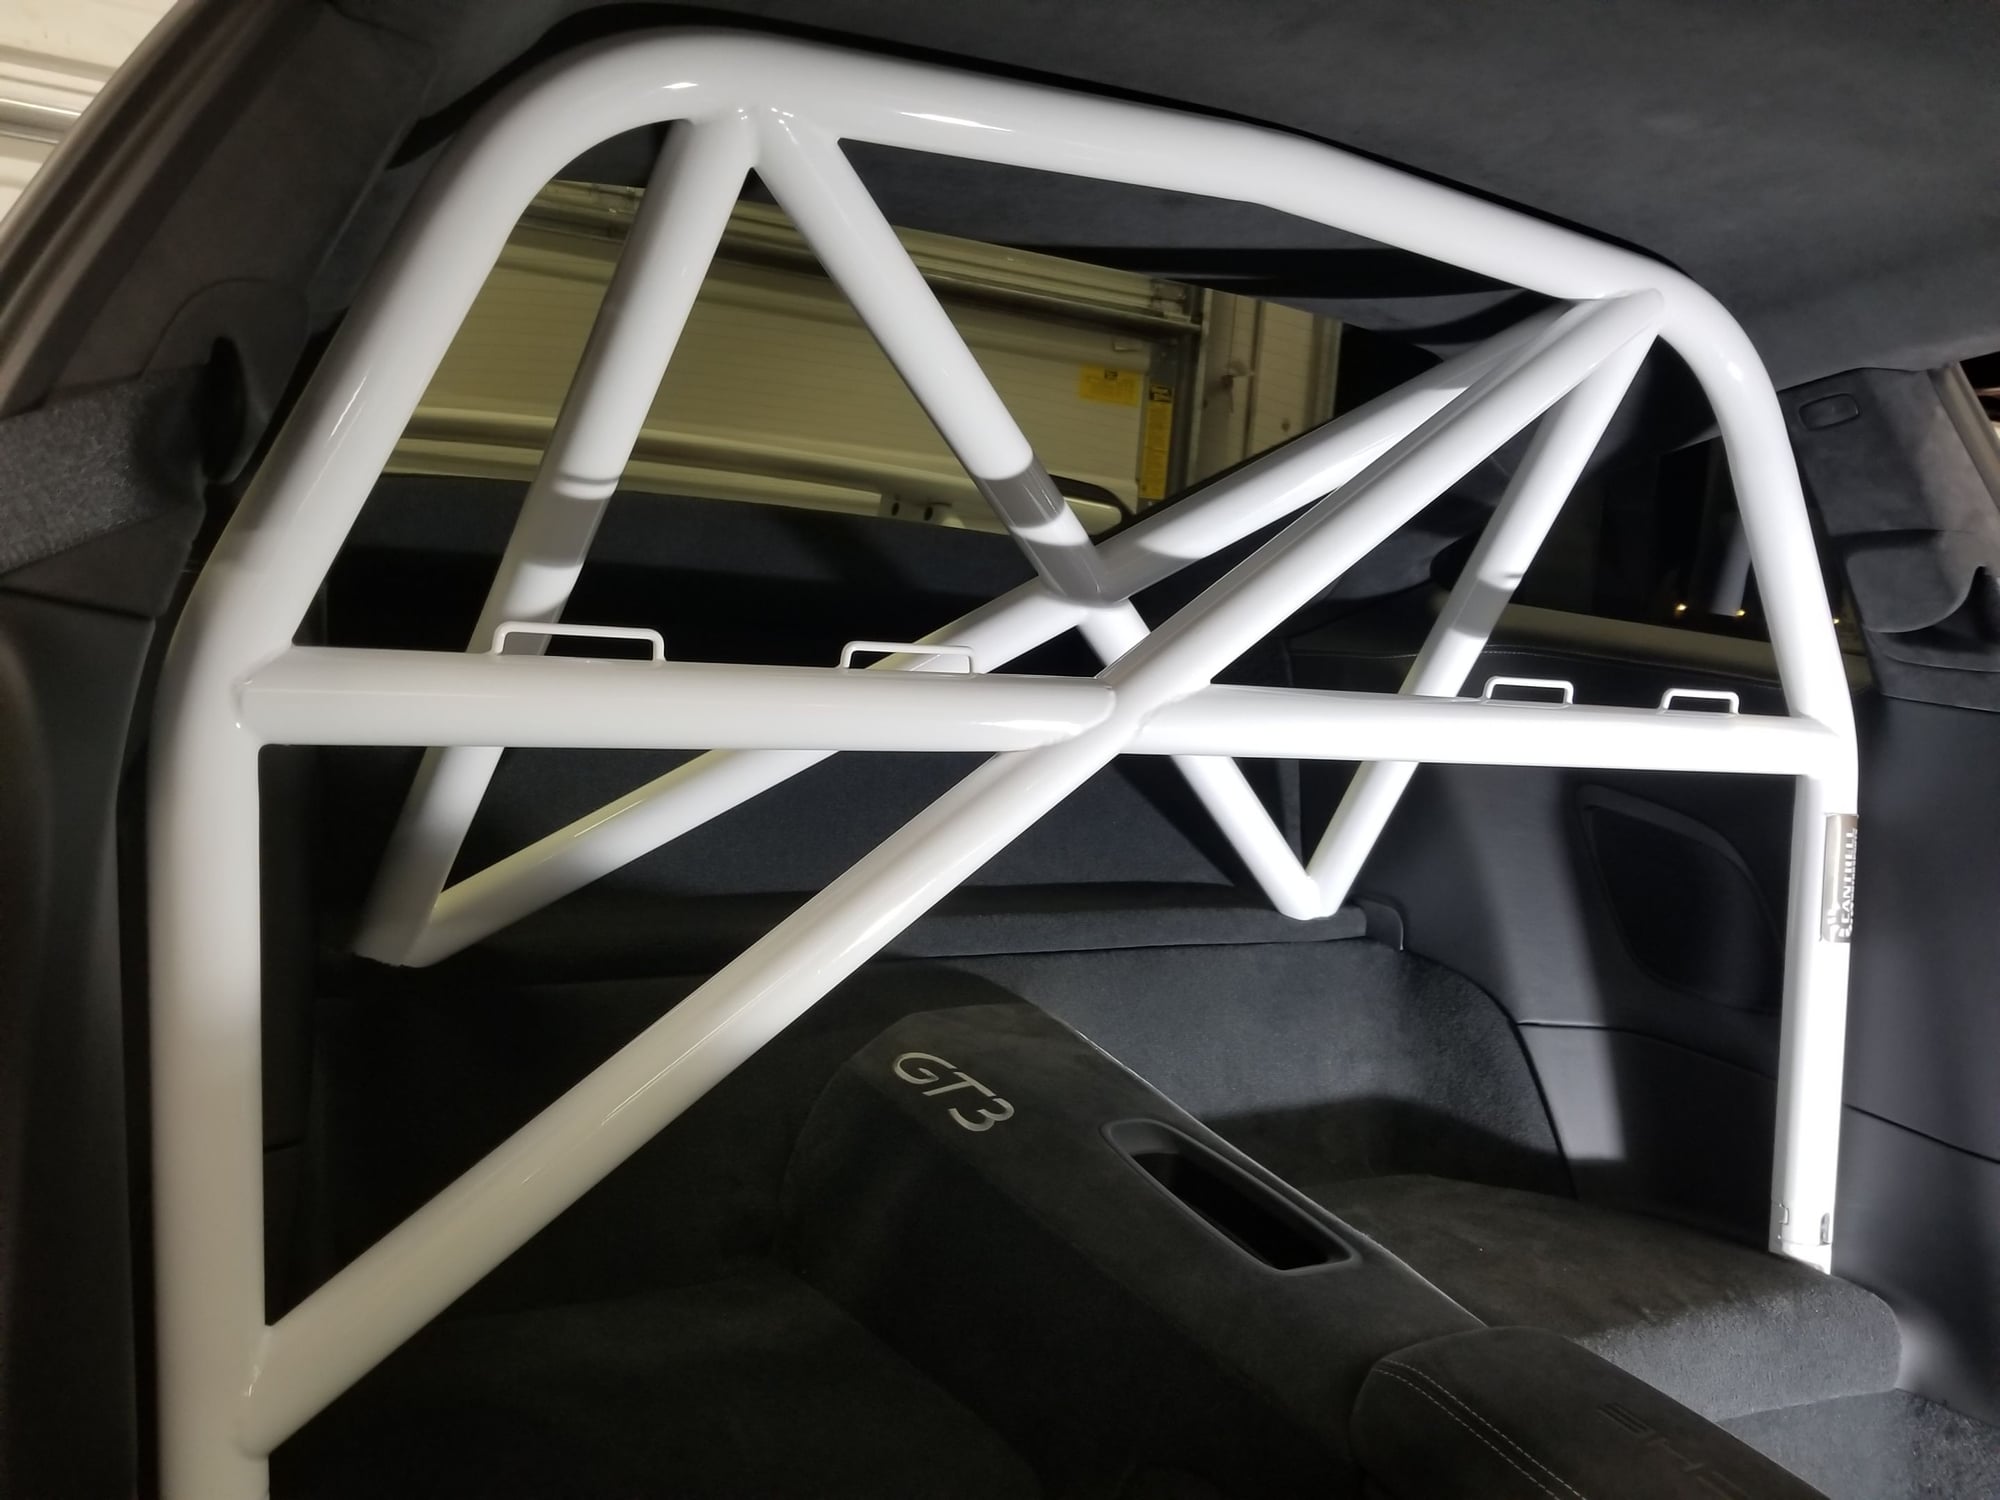
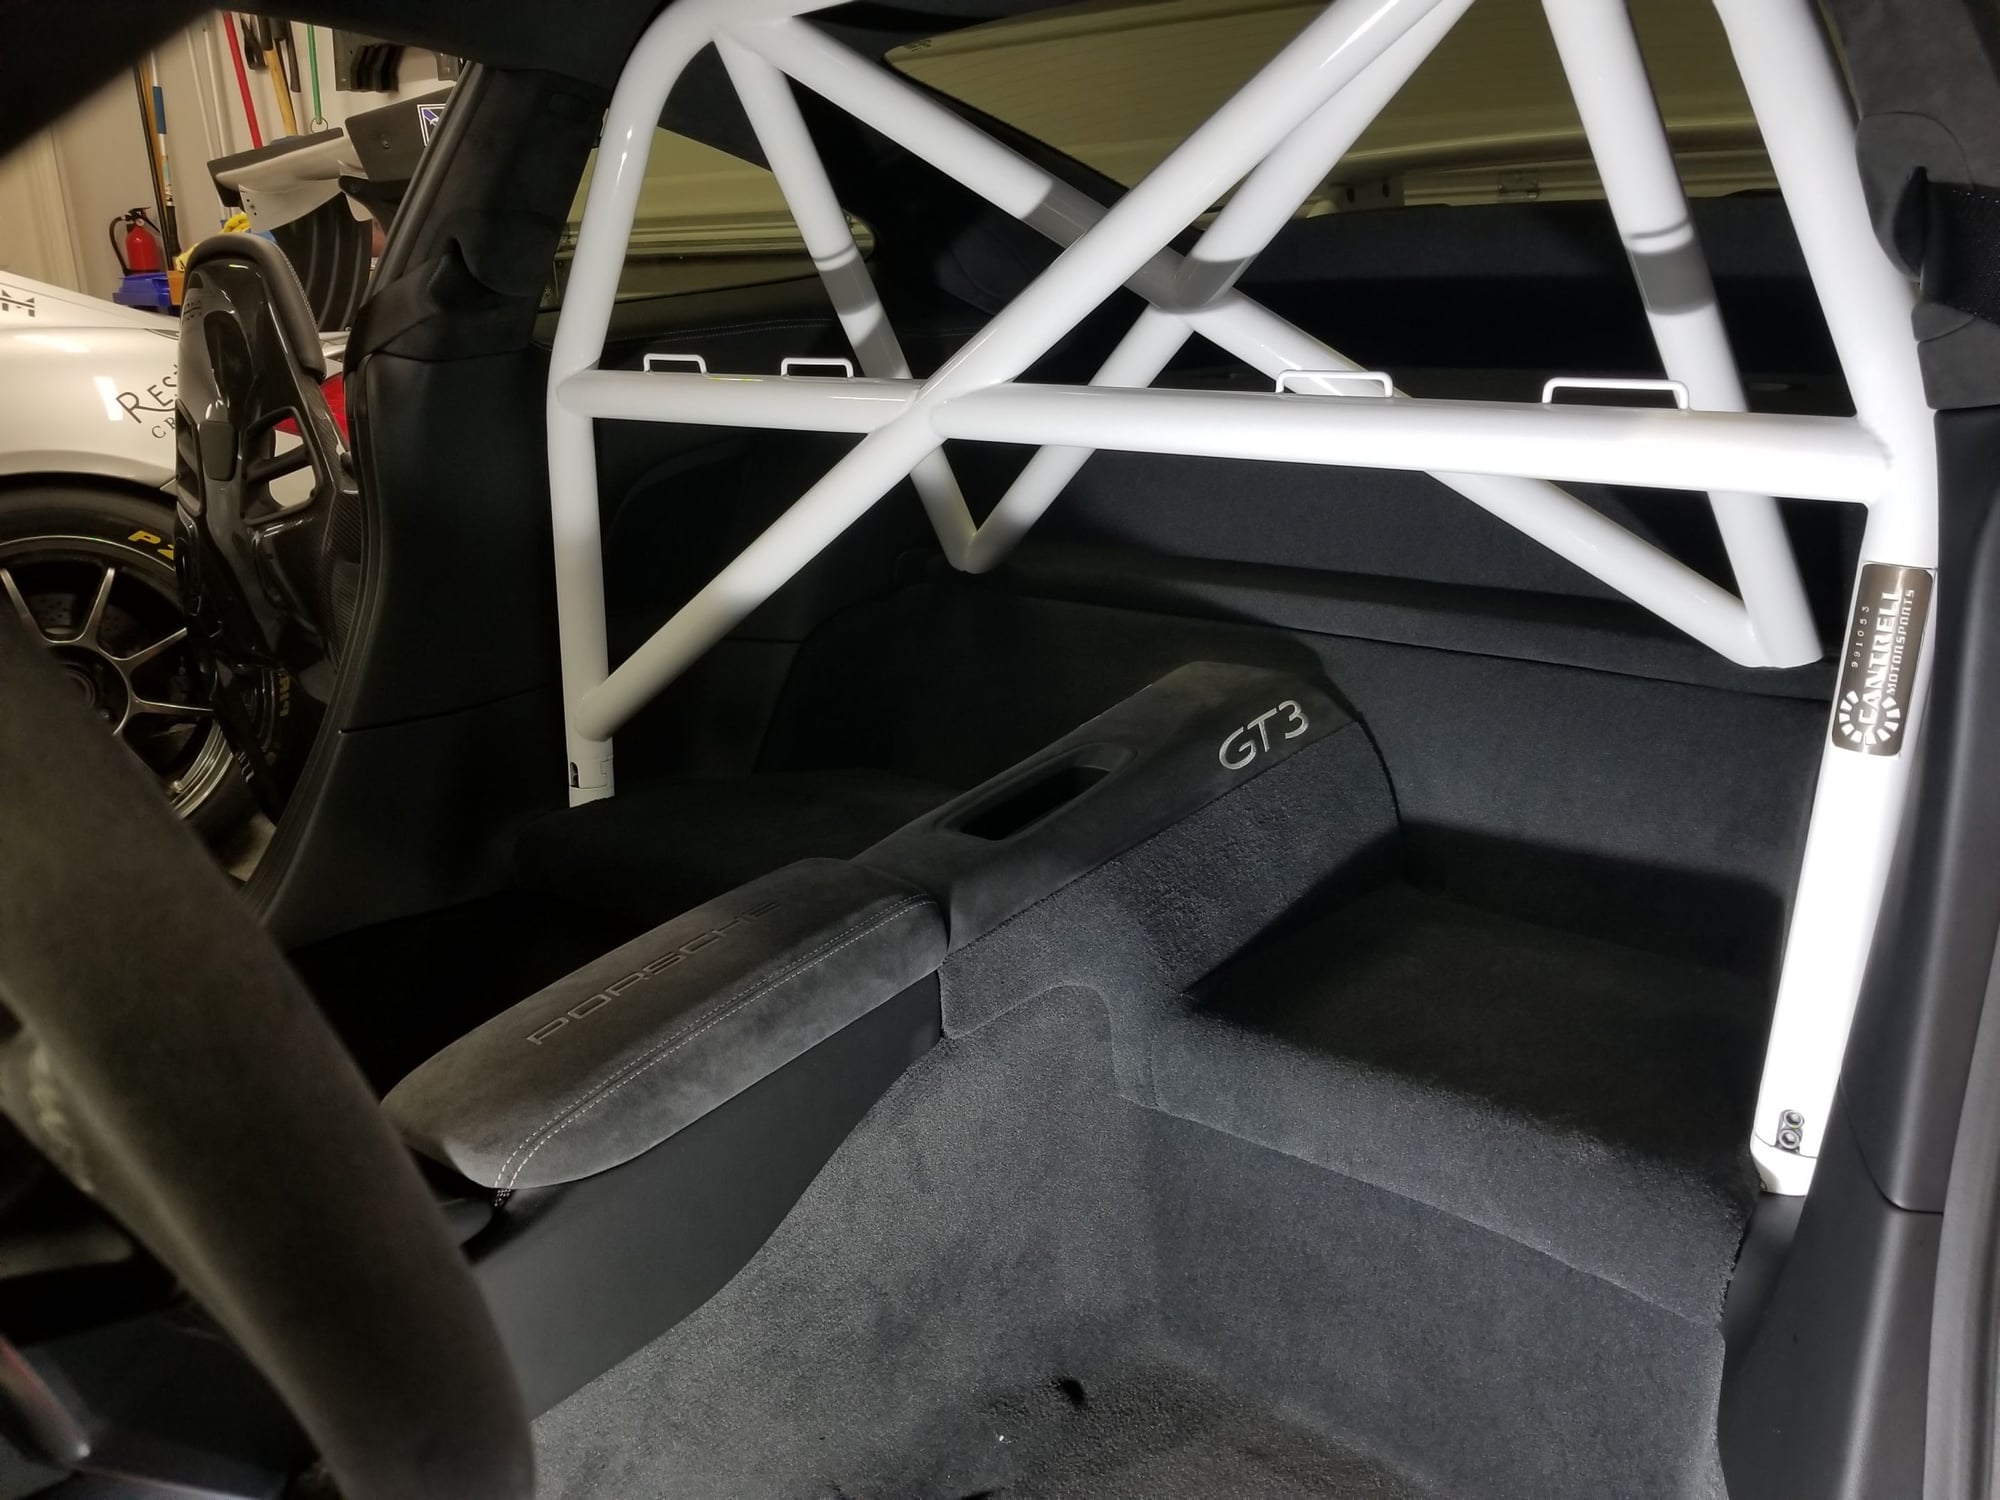
I installed this bar once before on my 991.1 GT3. Solid bar. Believe it or not, the 1.75" DOM steel looks much more beefy than the 1.65" DOM used on other bars.
If you decide to do it, and you get to a point where you are not sure how to proceed, feel free to DM me or call. I'm happy to help.
Loving this.
What's your secret for disassembly of "snap-fit" parts that you've never seen the inside of. i.e. How do you know when you've undone all the fasteners and you just need to put a little effort into getting it off, or you need to search around some more?
I've taken apart (and broken) enough plastic parts that I'd be pretty shy about taking apart my brand new GT3 without instructions.
The only risk item is the when lifting the side panels. There is this one clip that is a pain... I don't know how important it is as it's just a spring of sorts.
I don't assume that any connection point is arbitrary or unnecessary...
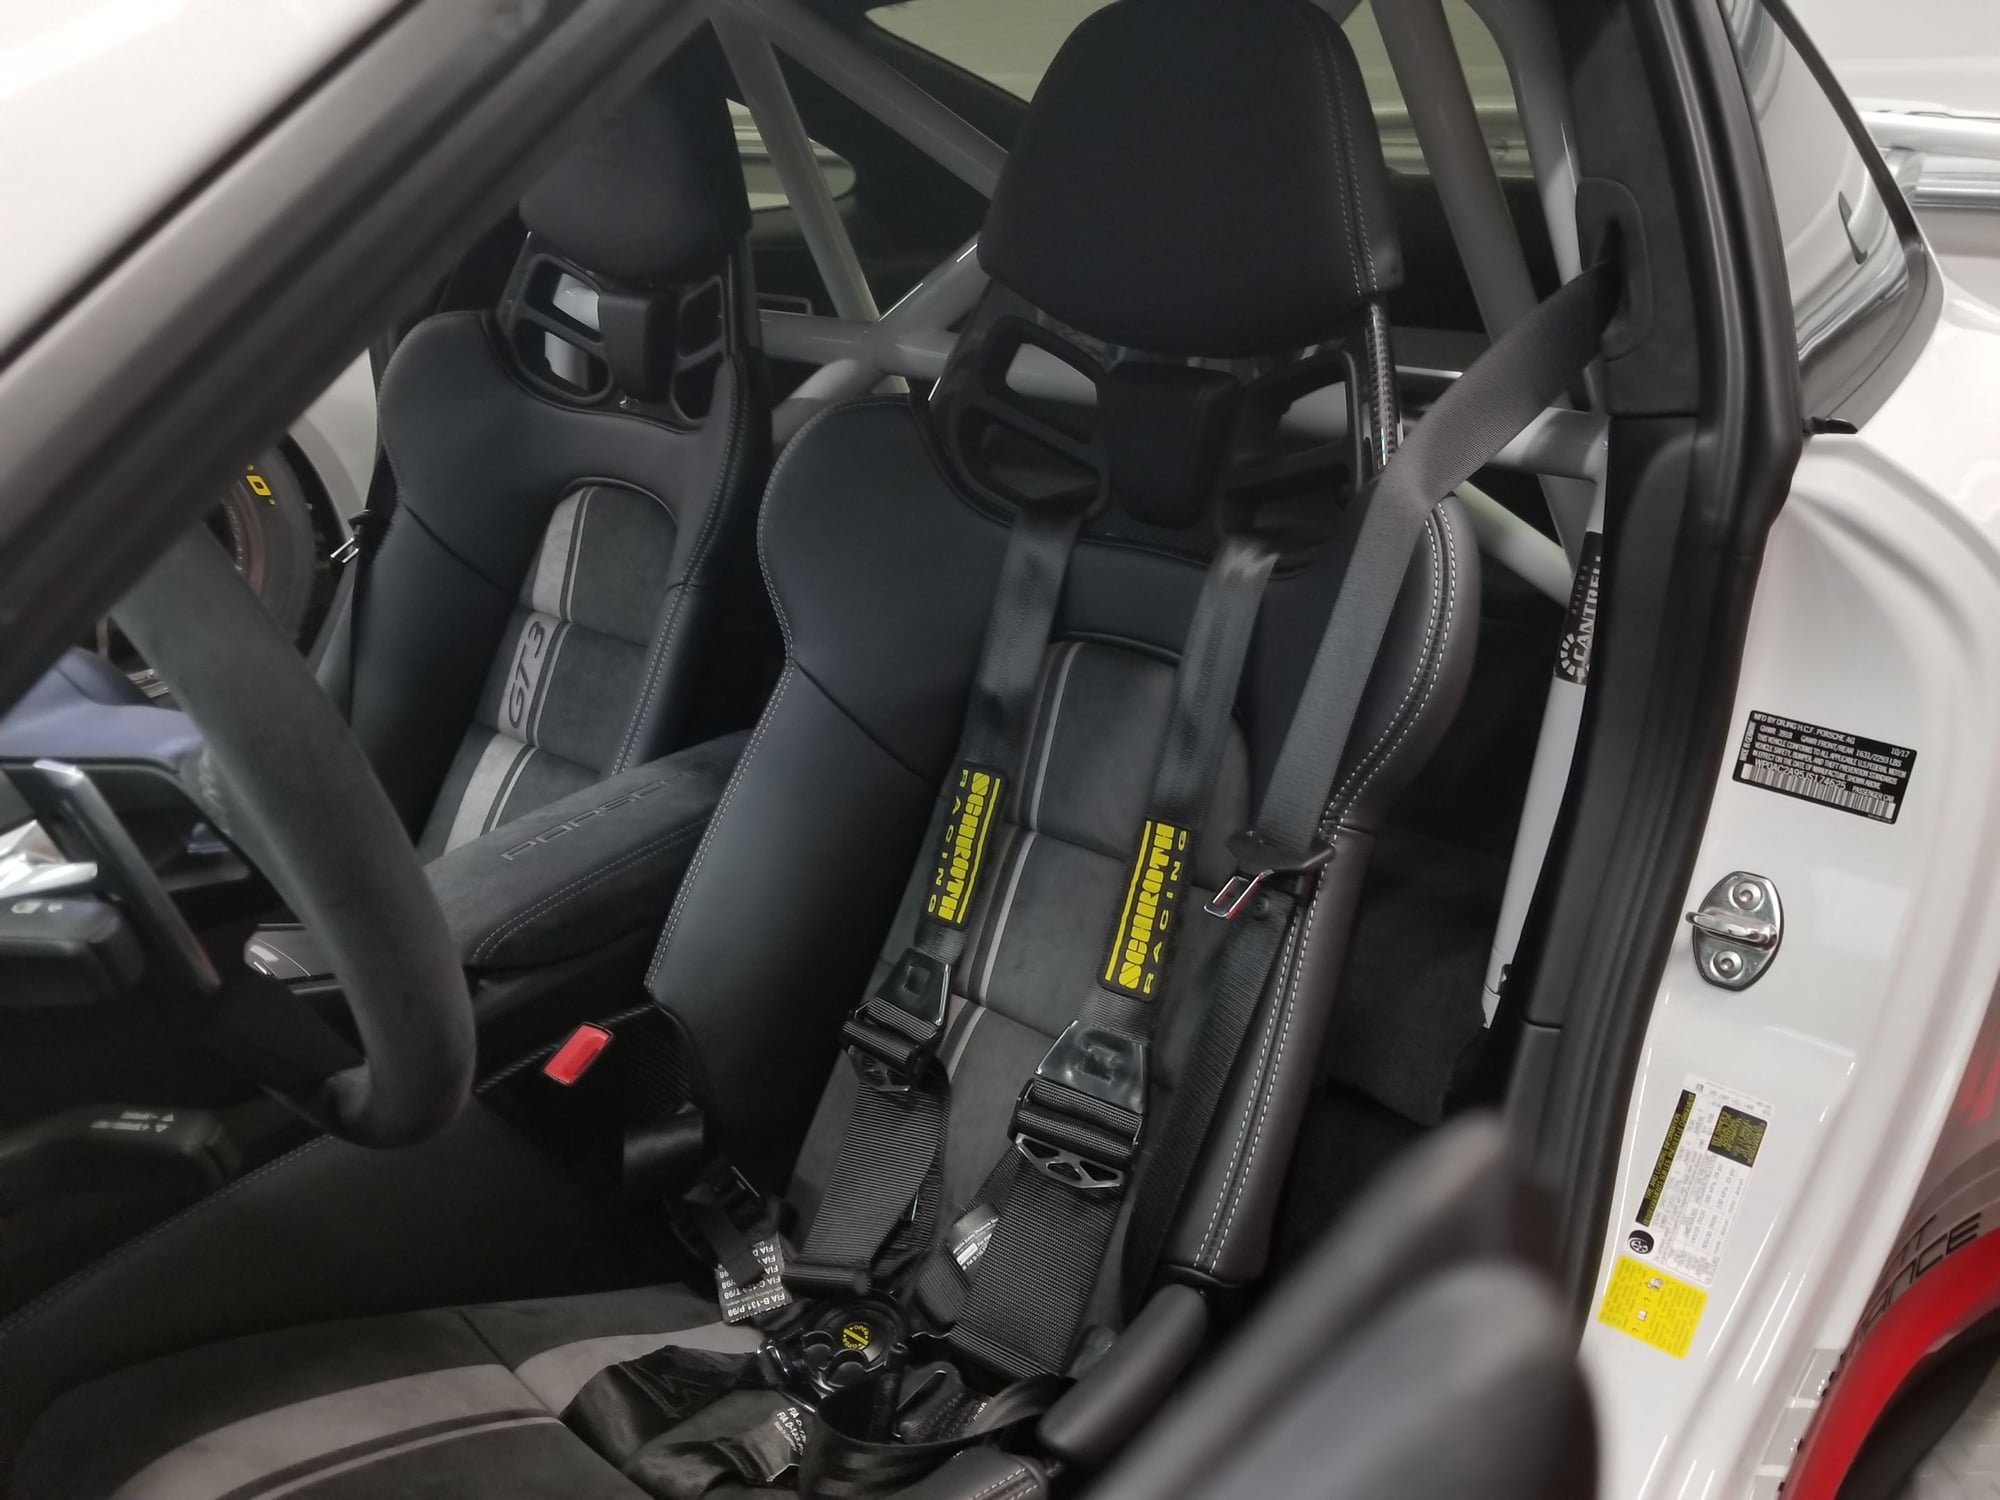
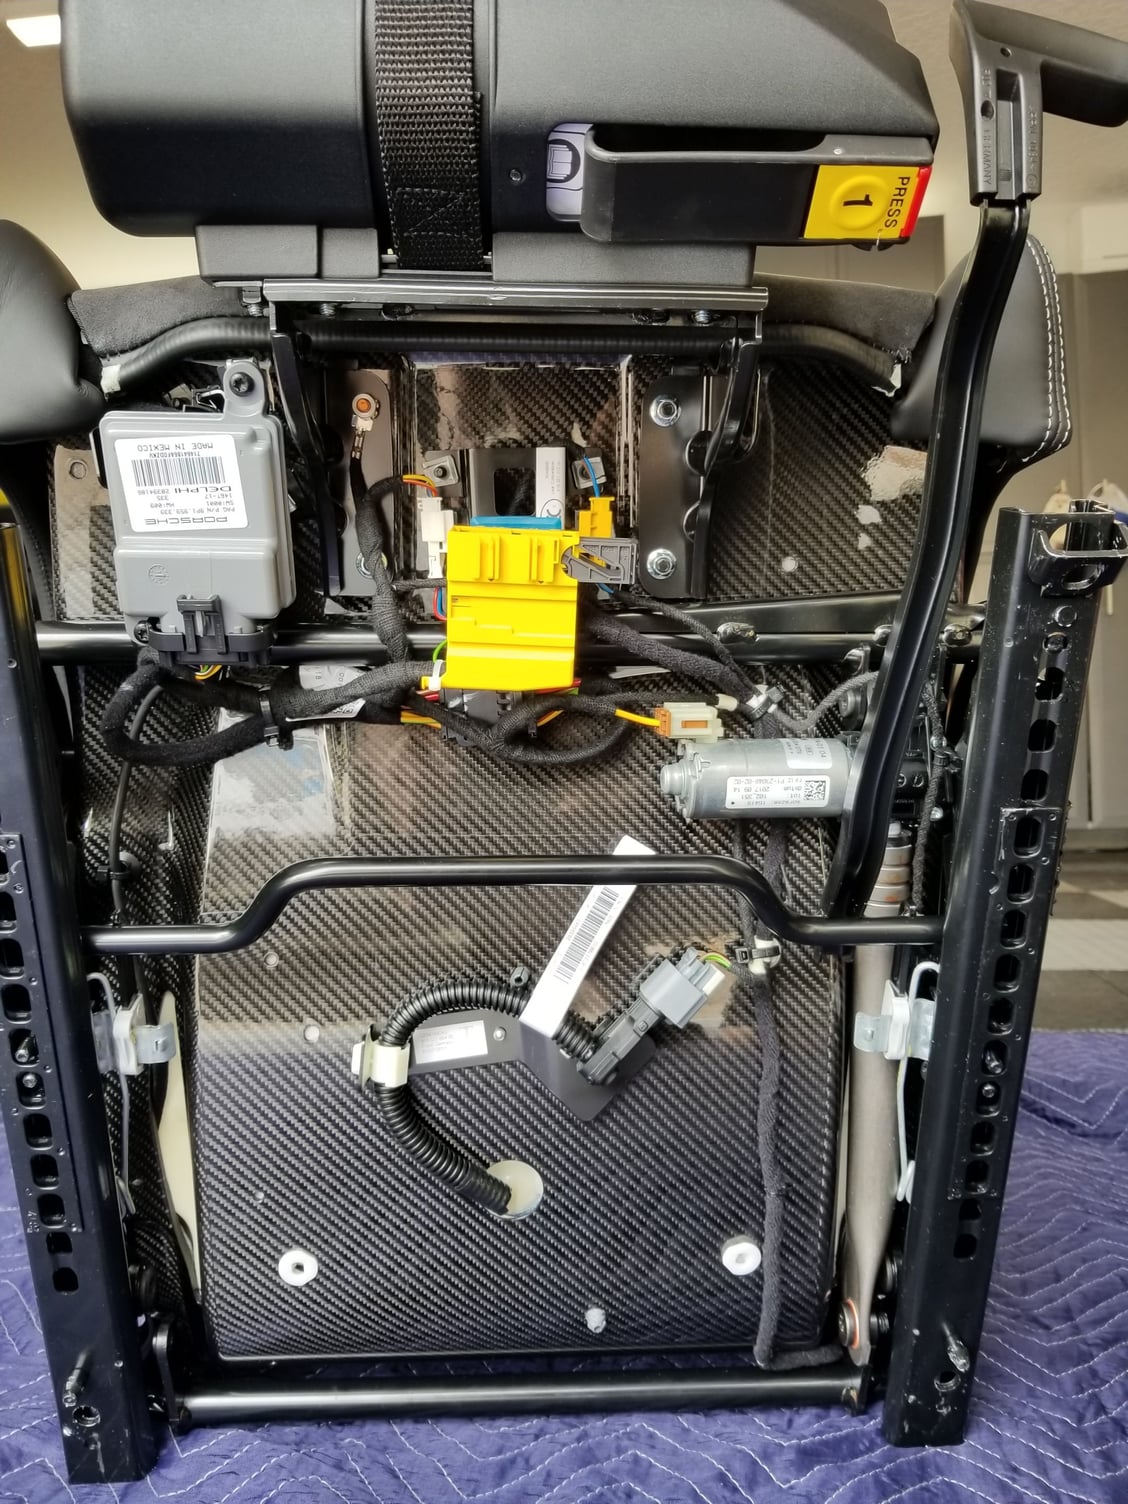
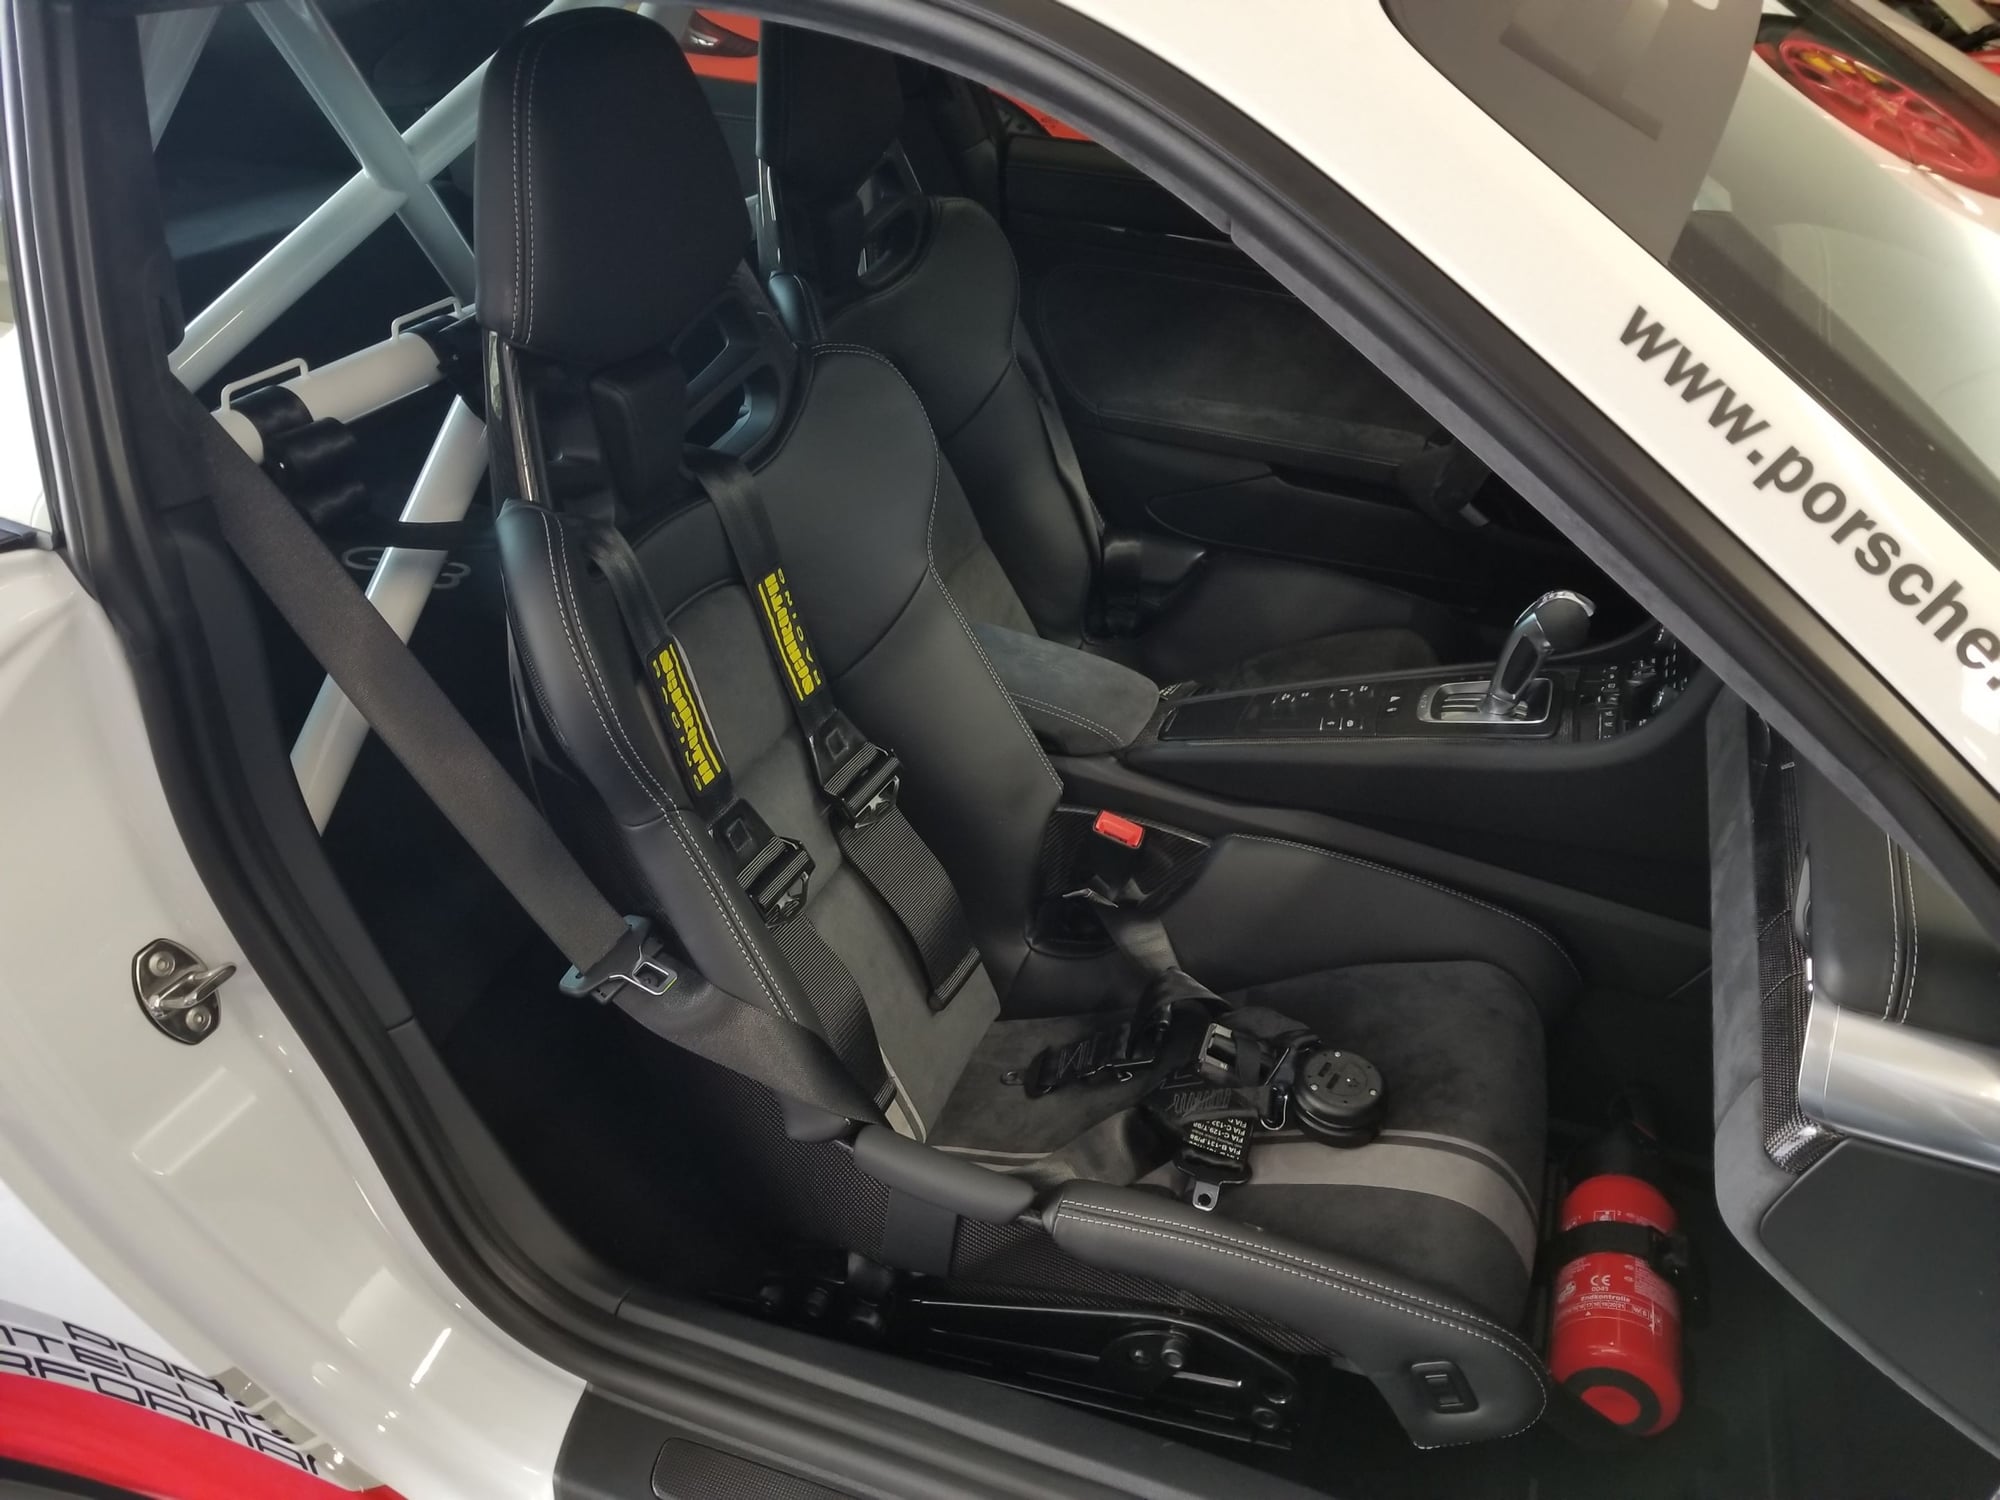
Carpet is installed and driver side harnesses complete using the Cantrell sub bar.
the passenger side is a little bit trickier than the .1. I'm afraid if you cut through the threads, you will expose the insude of the cushion. I will wait until someone verifies, knows a shop that can do it, or source replacement seat cushions to play with.
next up... giro disc steel replacements. Will have to wait a couple weeks for that...
You sir, are very talented. I appreciate your attention to detail and not being afraid to do the work yourself. Also, your choices in vehicles... of course!
You sir, are very talented. I appreciate your attention to detail and not being afraid to do the work yourself. Also, your choices in vehicles... of course!
Thank you... all started when I was 16... no fear.
I used my trust Delrin centerlock alignment tool and removed the wheel. What a work of art.
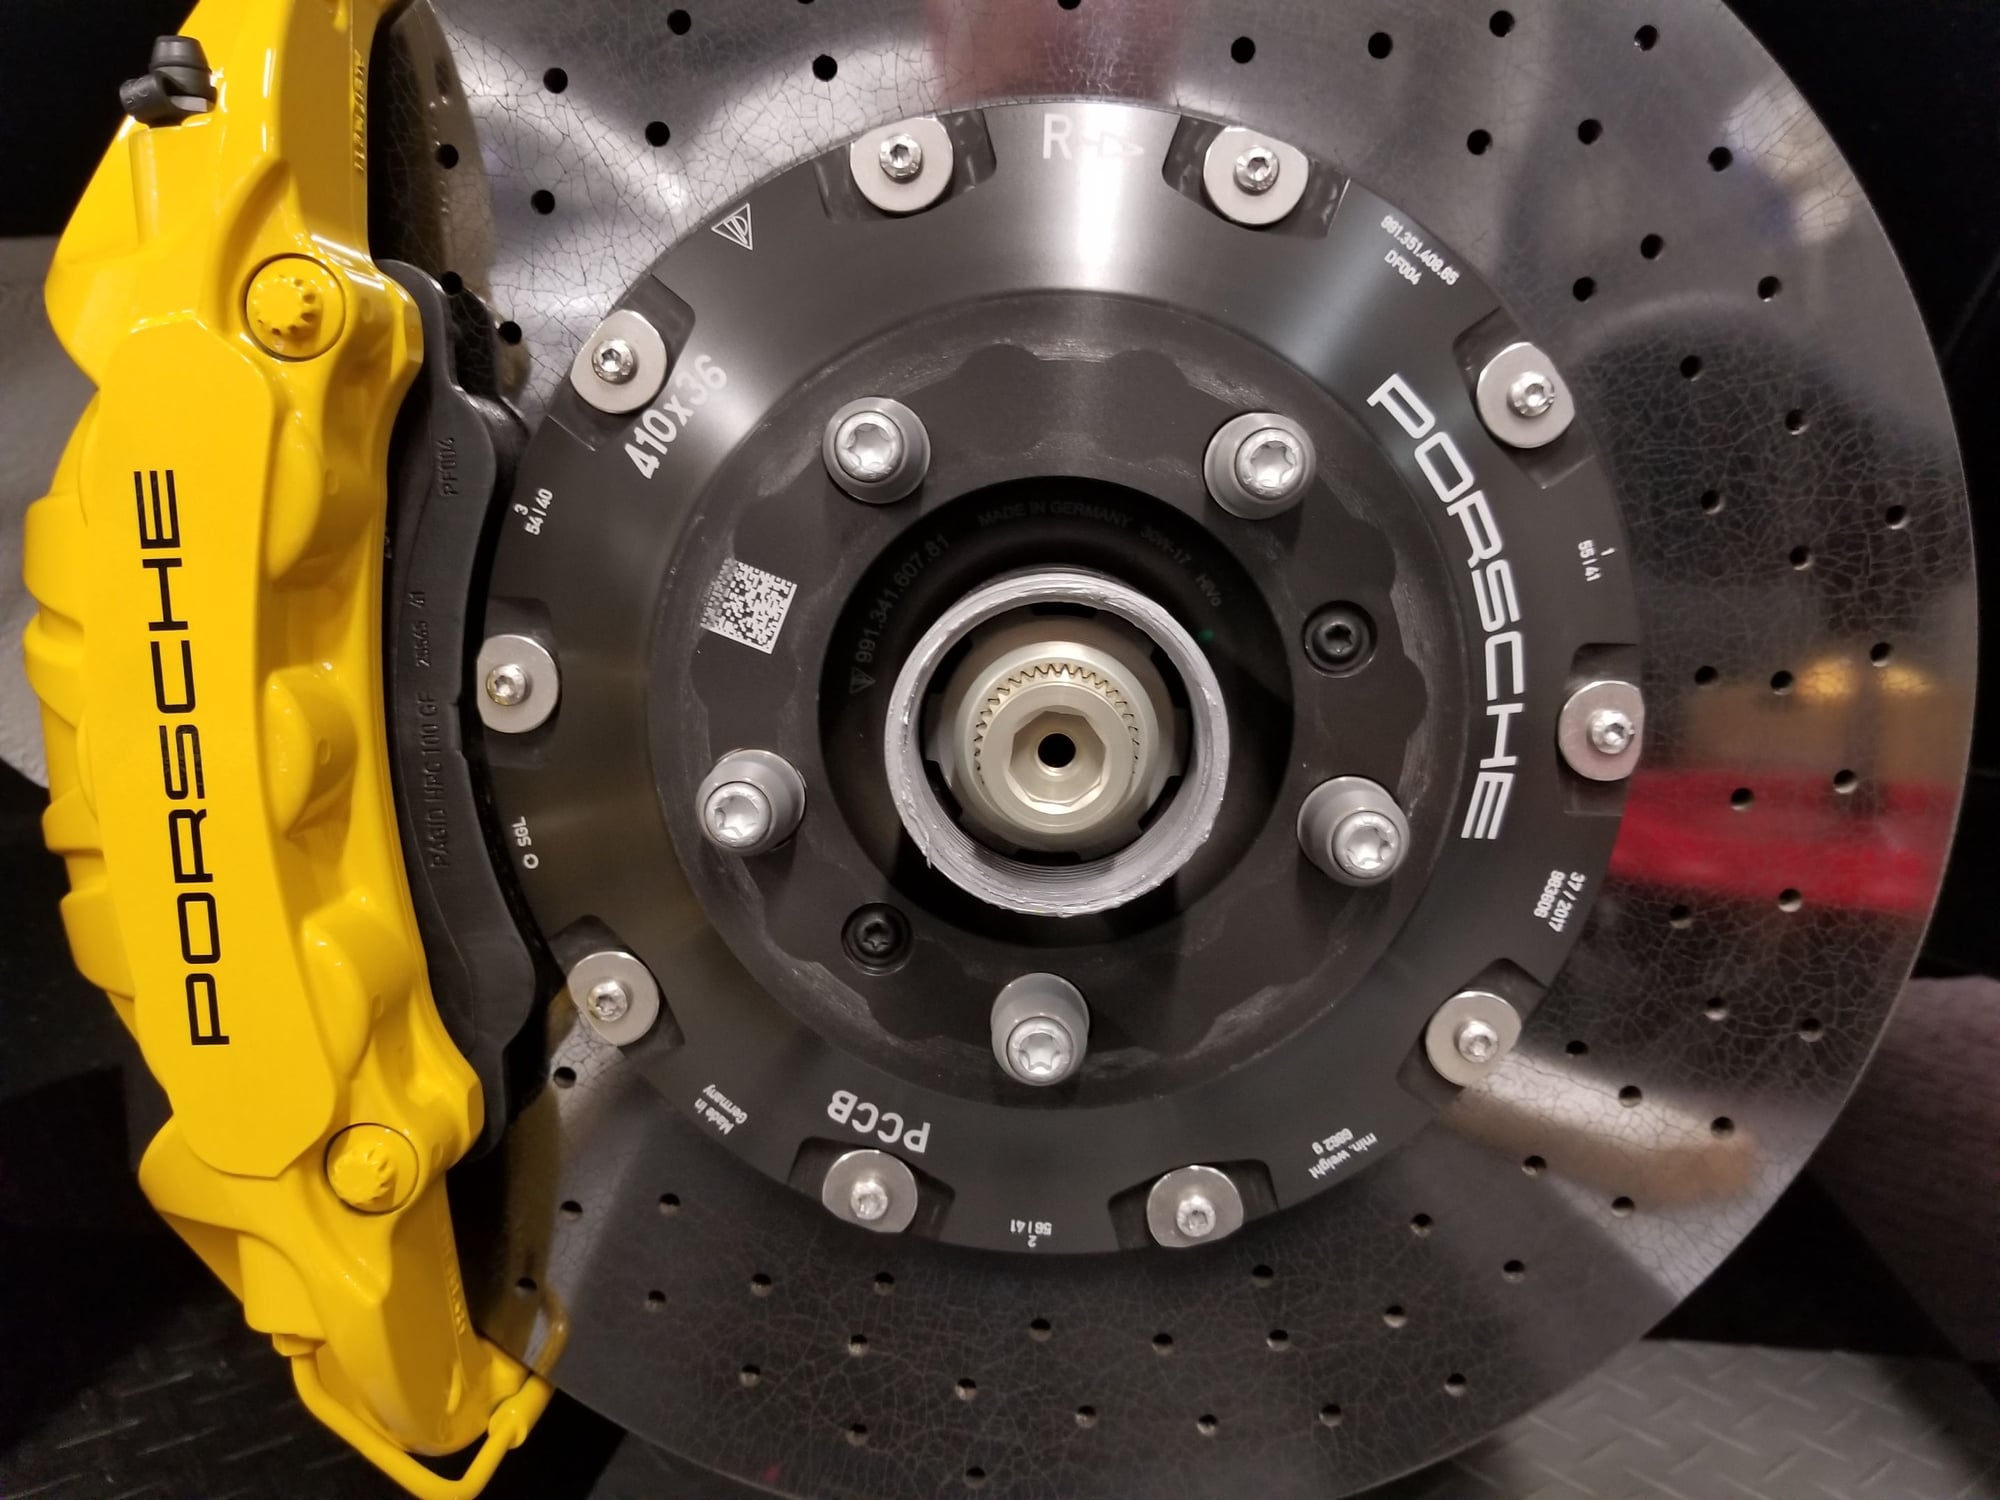
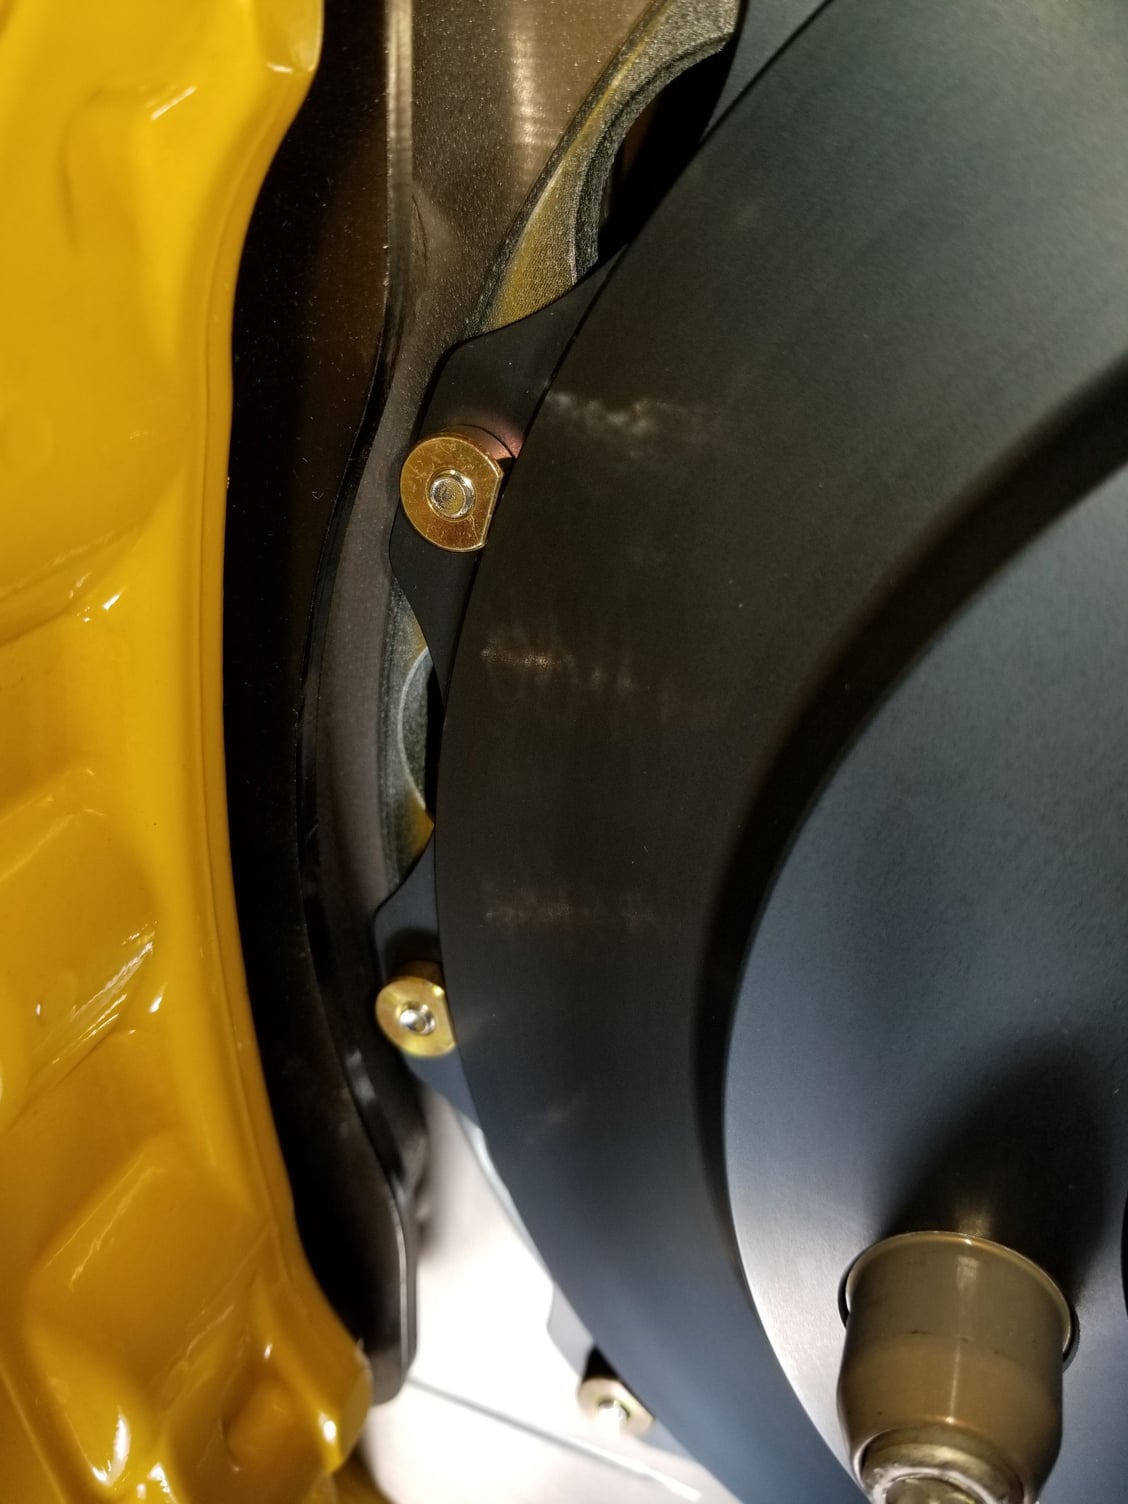
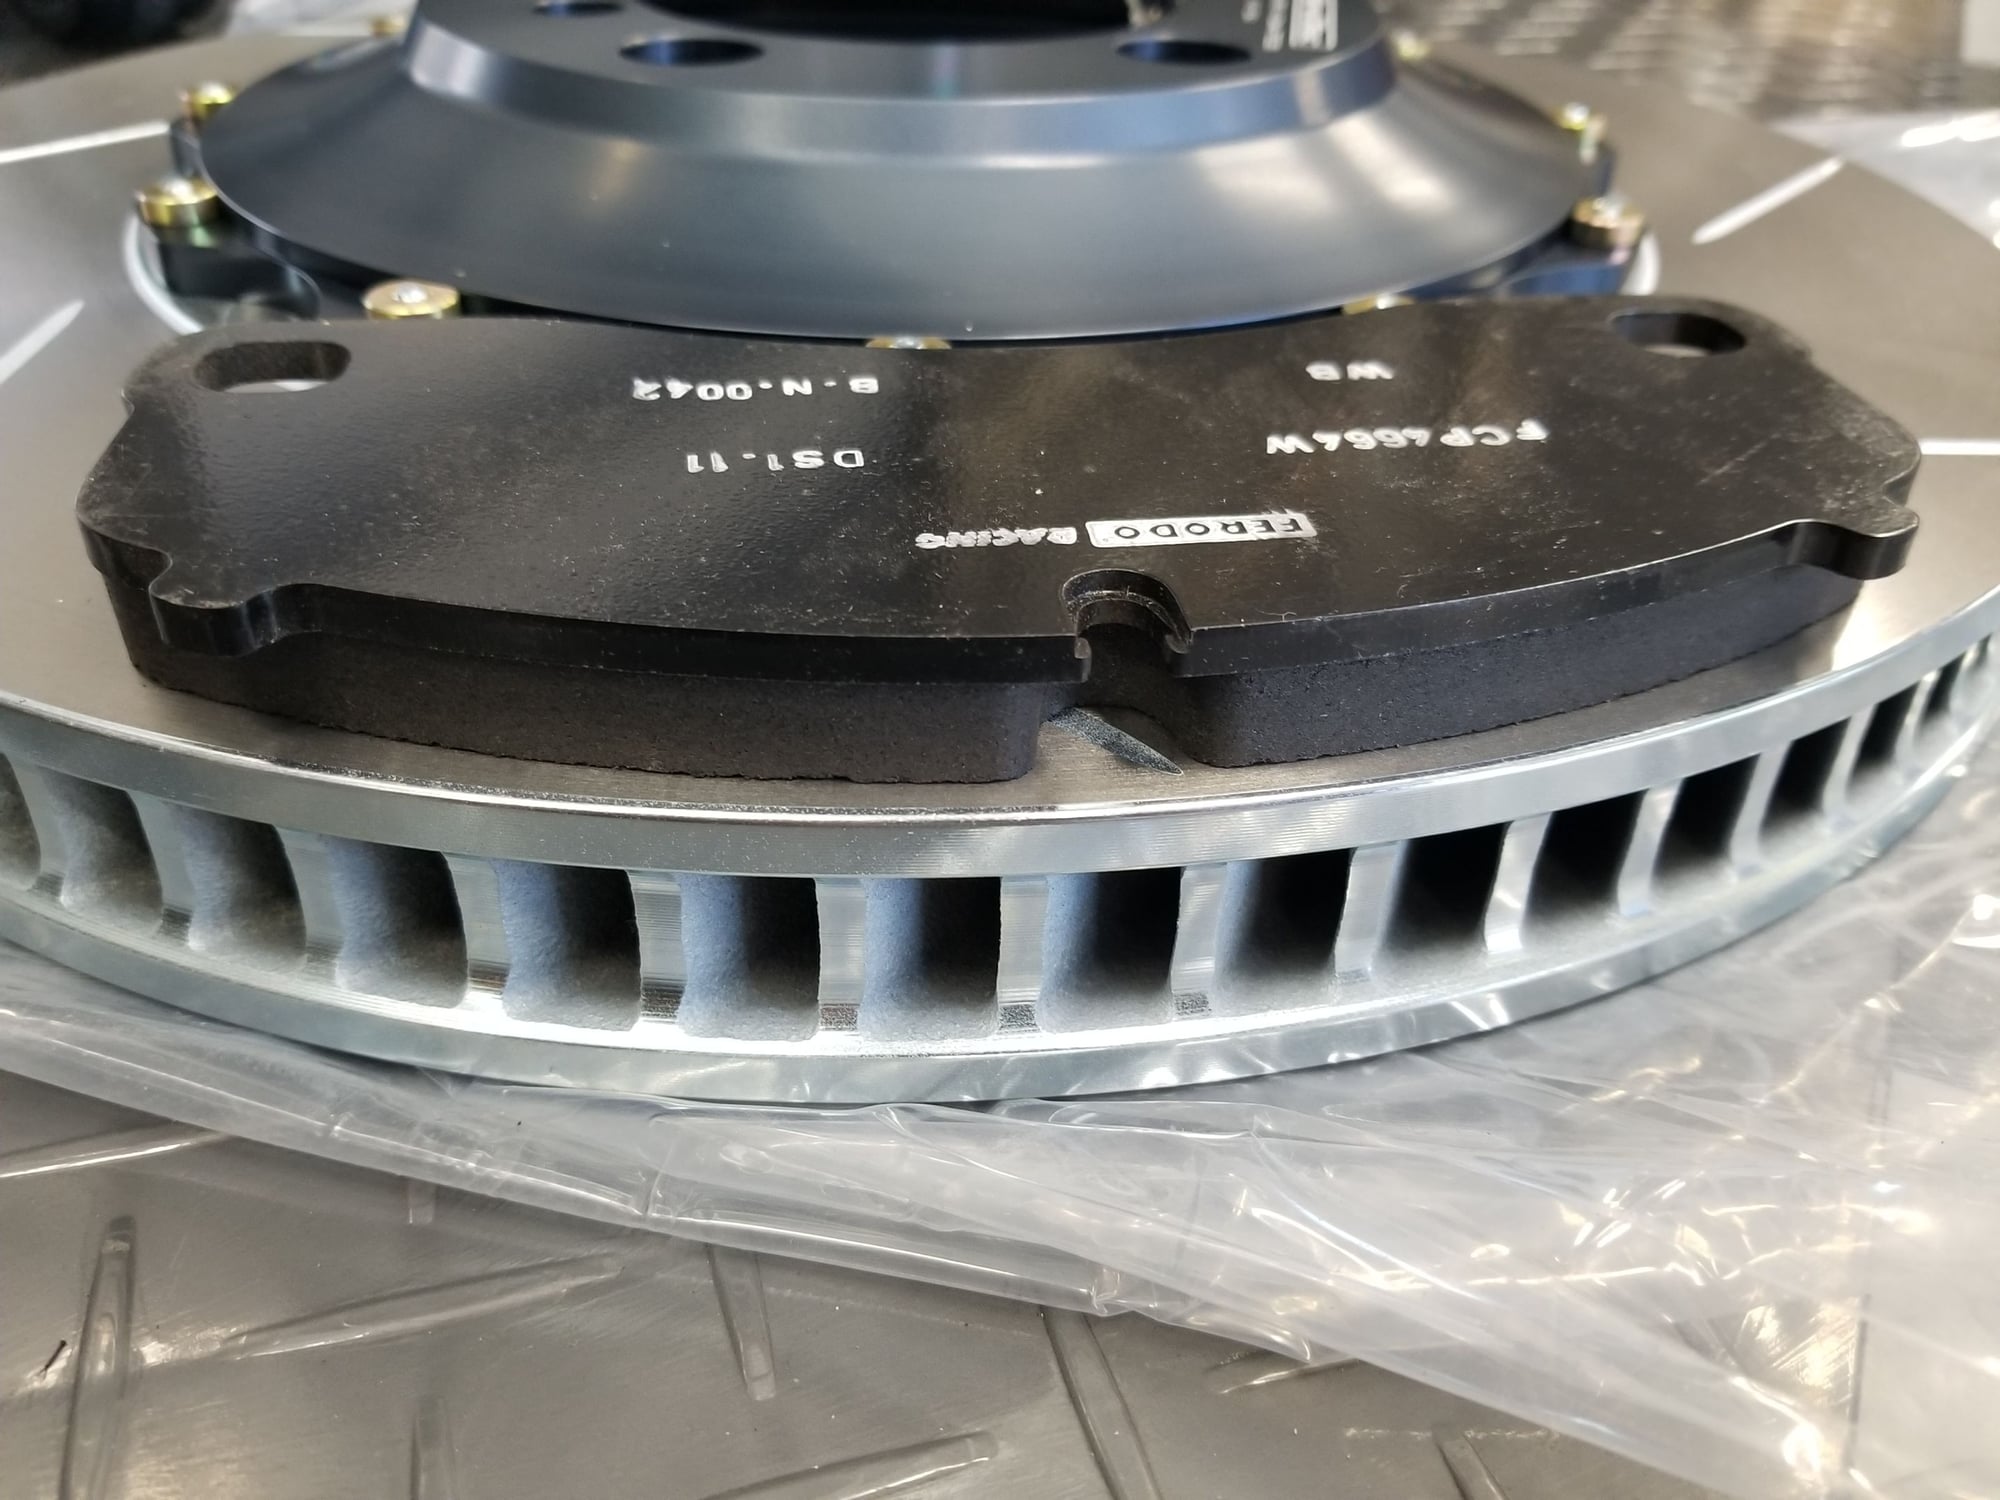
removed the caliper and brake line bracket. Installed the tarett brake line bracket studs as well as the 62mm caliper studs. Installed the rotor and new pagid pads fcp4664w (ds1.11)
something didn't look right from the start. The new pads looked narrow. A quick search indicates that the pads are for a 380mm disc.
so I removed the girodisc rotor and reinstalled the pccb rotor/pads.
waiting for Clark to advise and send correct pads to fit the 410mm rotors.
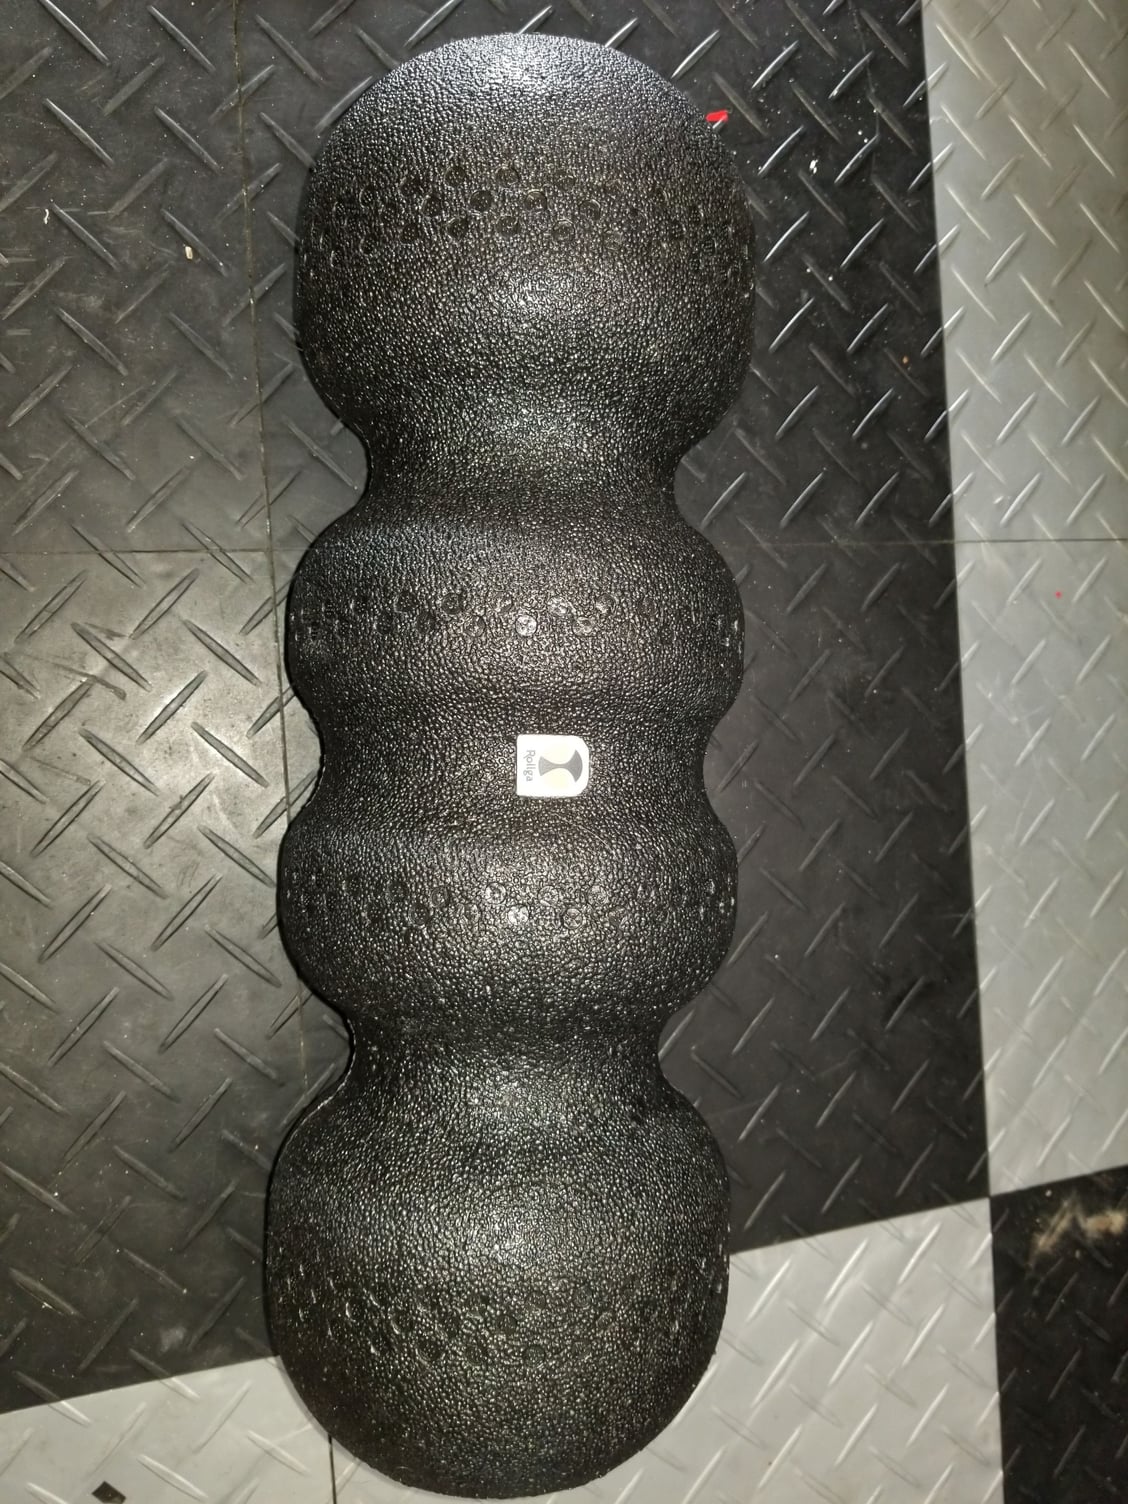
in the mean time, here is a cool little tool you can use to apply the brakes (with engine running) In order to torque down the wheel... don't damage seat.
It's called a rollga and is a hard foam roller. Just the right length to wedge between seat and brake peddle.
One question: Did the chassis have pre-drilled holes for bolting in the roll cage, or did you have to drill the holes yourself, or even weld the cage in? Thanks again!
One question: Did the chassis have pre-drilled holes for bolting in the roll cage, or did you have to drill the holes yourself, or even weld the cage in? Thanks again!
no drilling Into body. Most roll bar manufactures build around existing mount points. For an idea of installation, checkout Cantrell. He has the install Instructions posted.
Looks awesome, how did you make out w the passenger seat pass thru
No progress yet. Ordered stitch cutter, some nylon thread and will likely tackle that next weekend.
Biggest concern is that the pads that fit and work on a 991.1 GT3 RS with PCCB don't fit on the 991.2 GT3 with PCCB. Not sure what's going on. Working with Clark to figure it out.
This is what it looks like on the 991.1 GT3 RS with the 410x36 front rotors:
This is what it looks like on the 991.2 GT3 w/PCCB 410x36 front rotors:
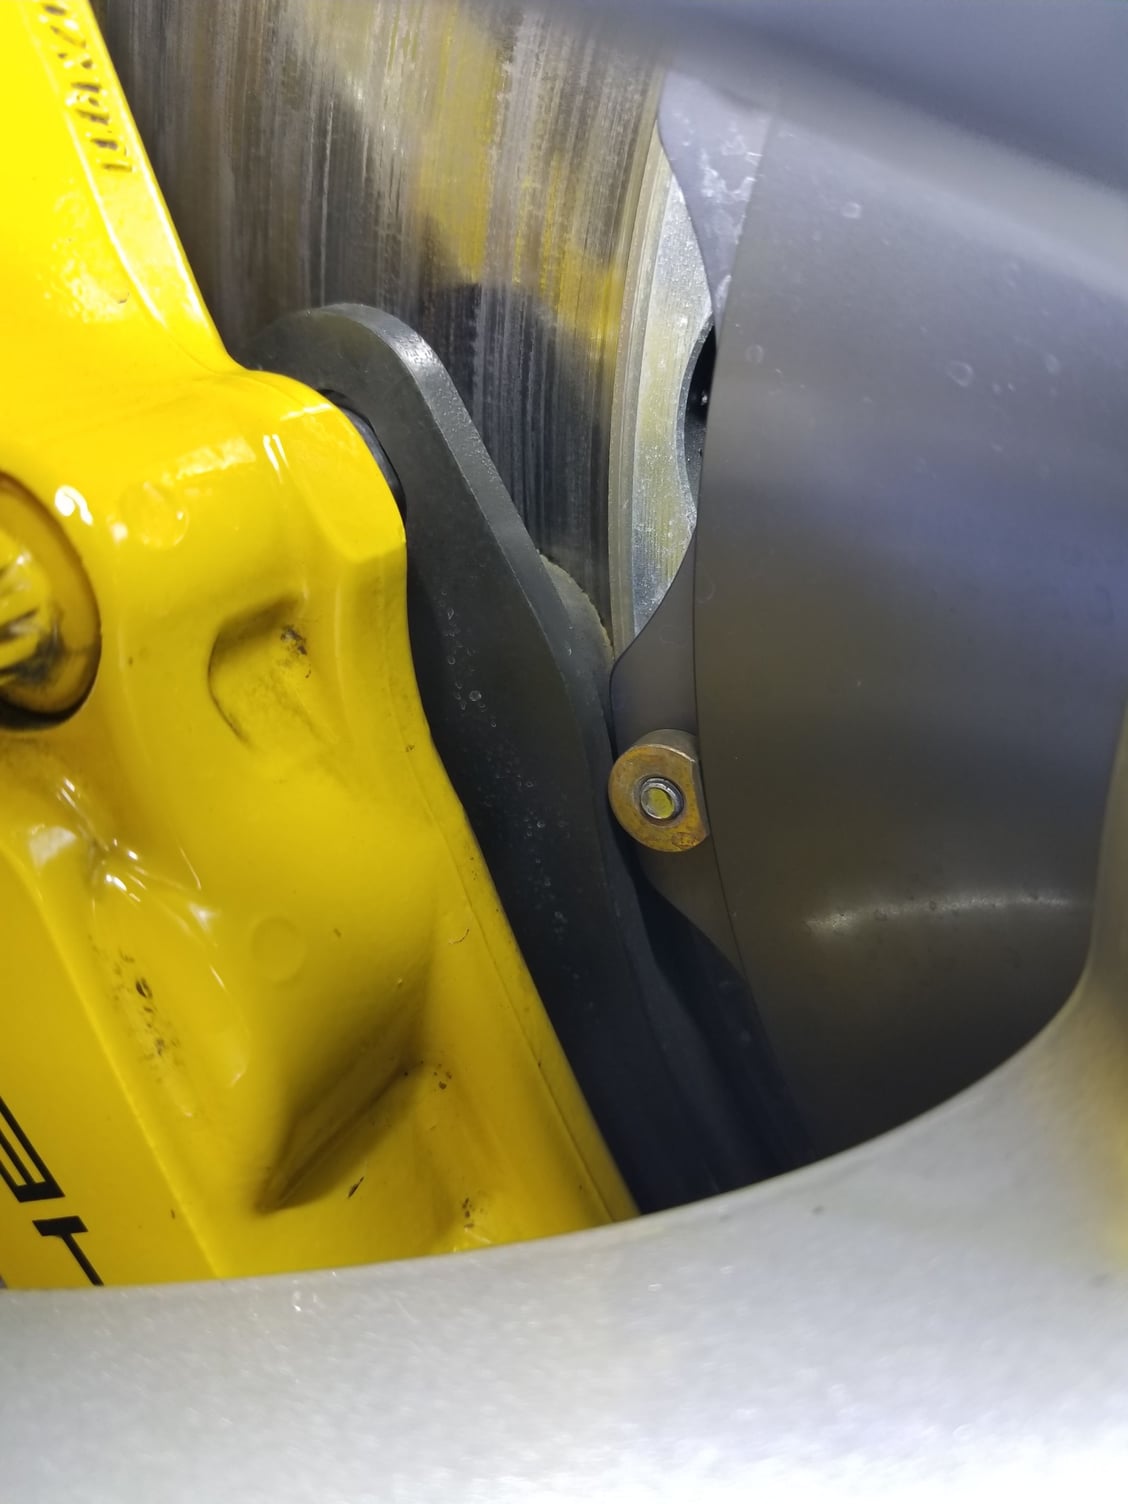
Laying the pads down on the rotor, one can see that they are not correct. Something is amiss...
Even though the pads are labeled FCP4664W, they are not correct. The rotors on the 991.1 GT3 RS are the same exact Girodisc rotors and pads cover the entire rotor surface.
Maybe the pads were mislabeled. Clark is working with me to figure it out. I have until Jan 27/28 Sebring to resolve.
Anyone else do the PCCB --> Steel Girodisc conversion yet on the 991.2 GT3?
Nice install.
Does the rear seat delete panel (the big top carpet piece that says "GT3") have to be cut to fit the legs?
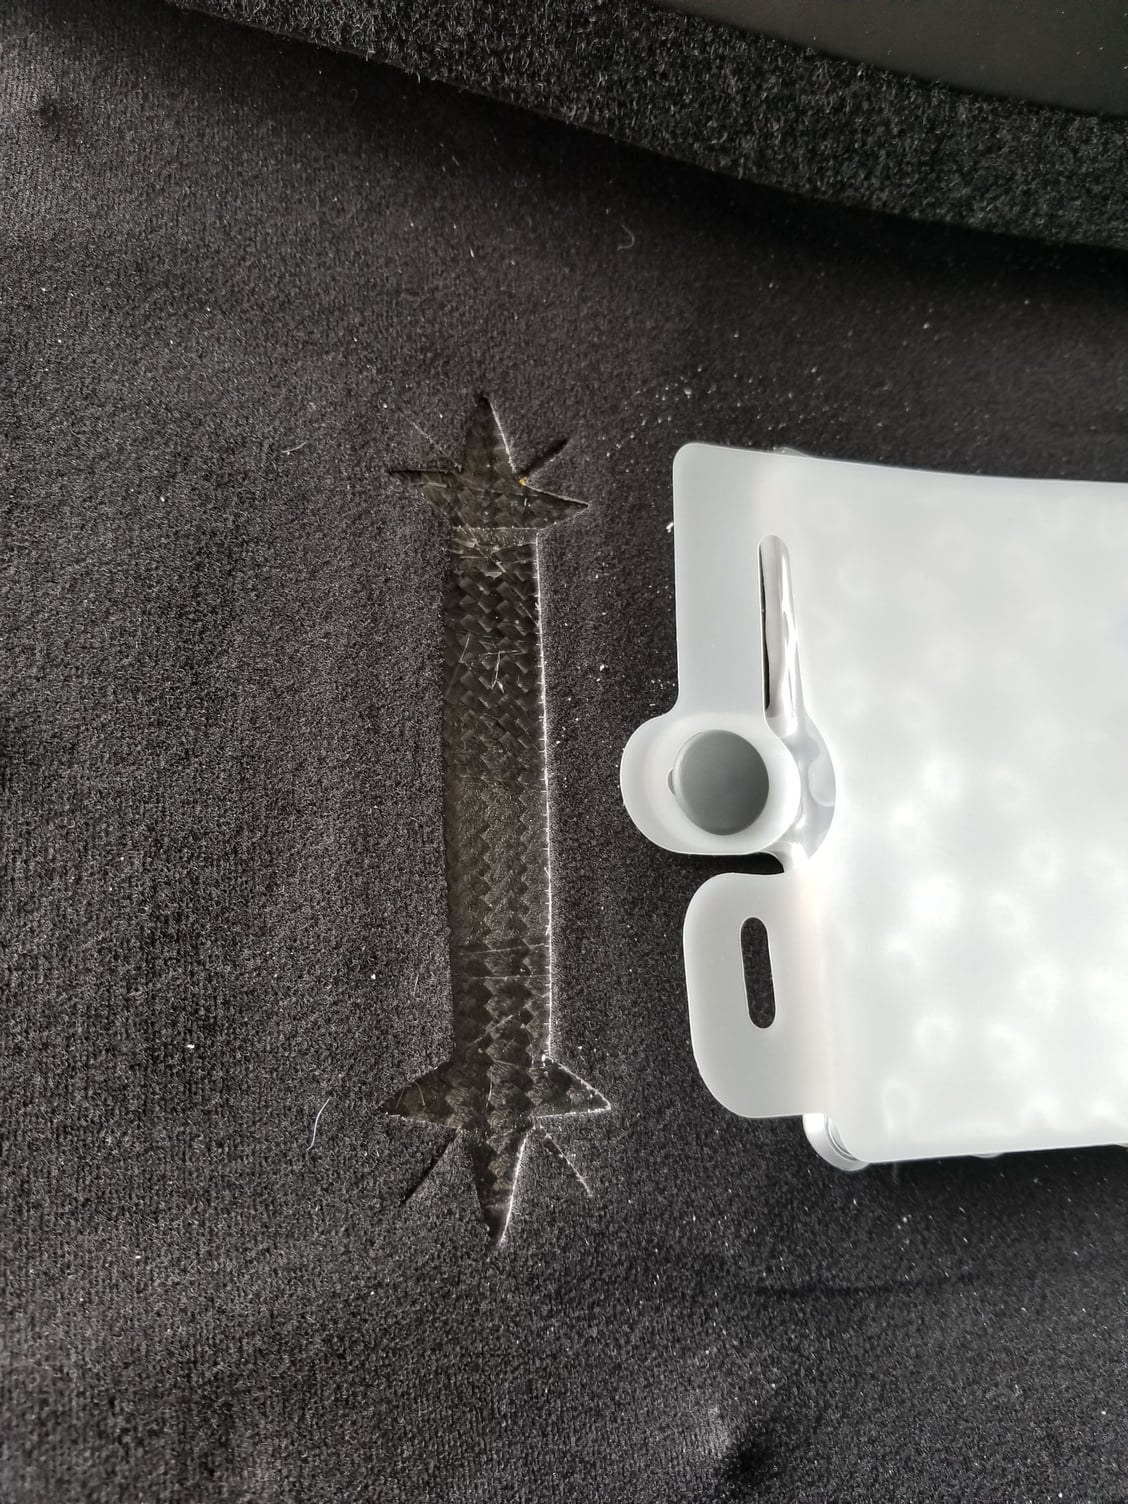
For Cantrell, you have to pull off some of the carpeting from the shell, dremel out some relief, then reapply the carpet. Pretty easy and of you do remove the bar you won't notice that part. You may see the cutout on the panel, but that is hidden if you place some black carpeting material under it.
 12-04-2017, 11:58 AM