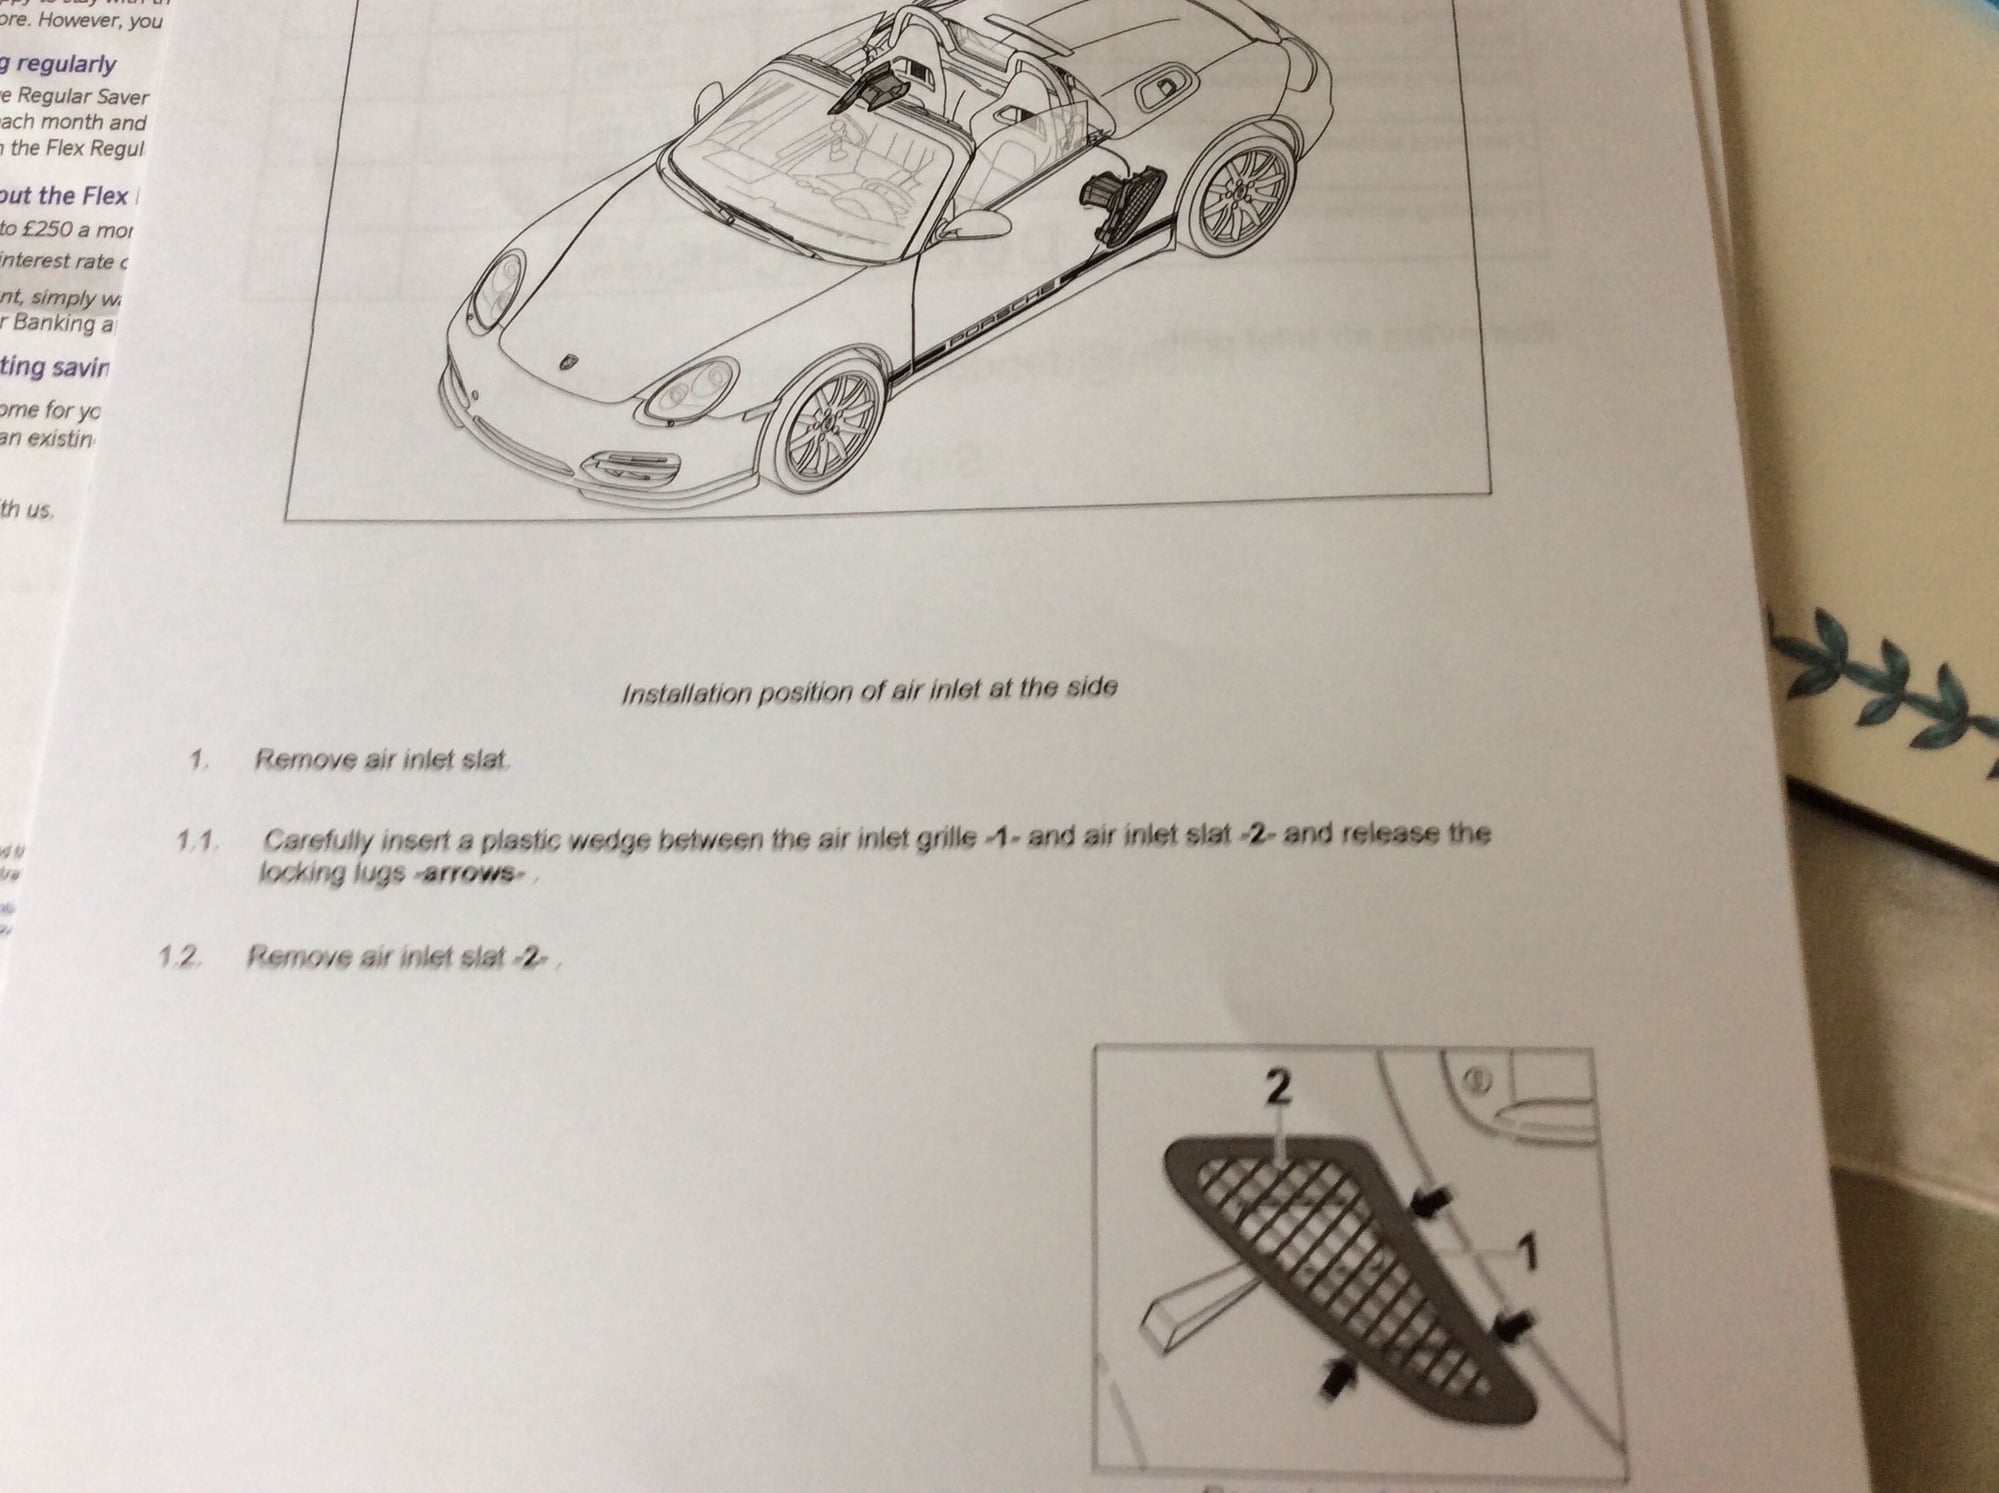
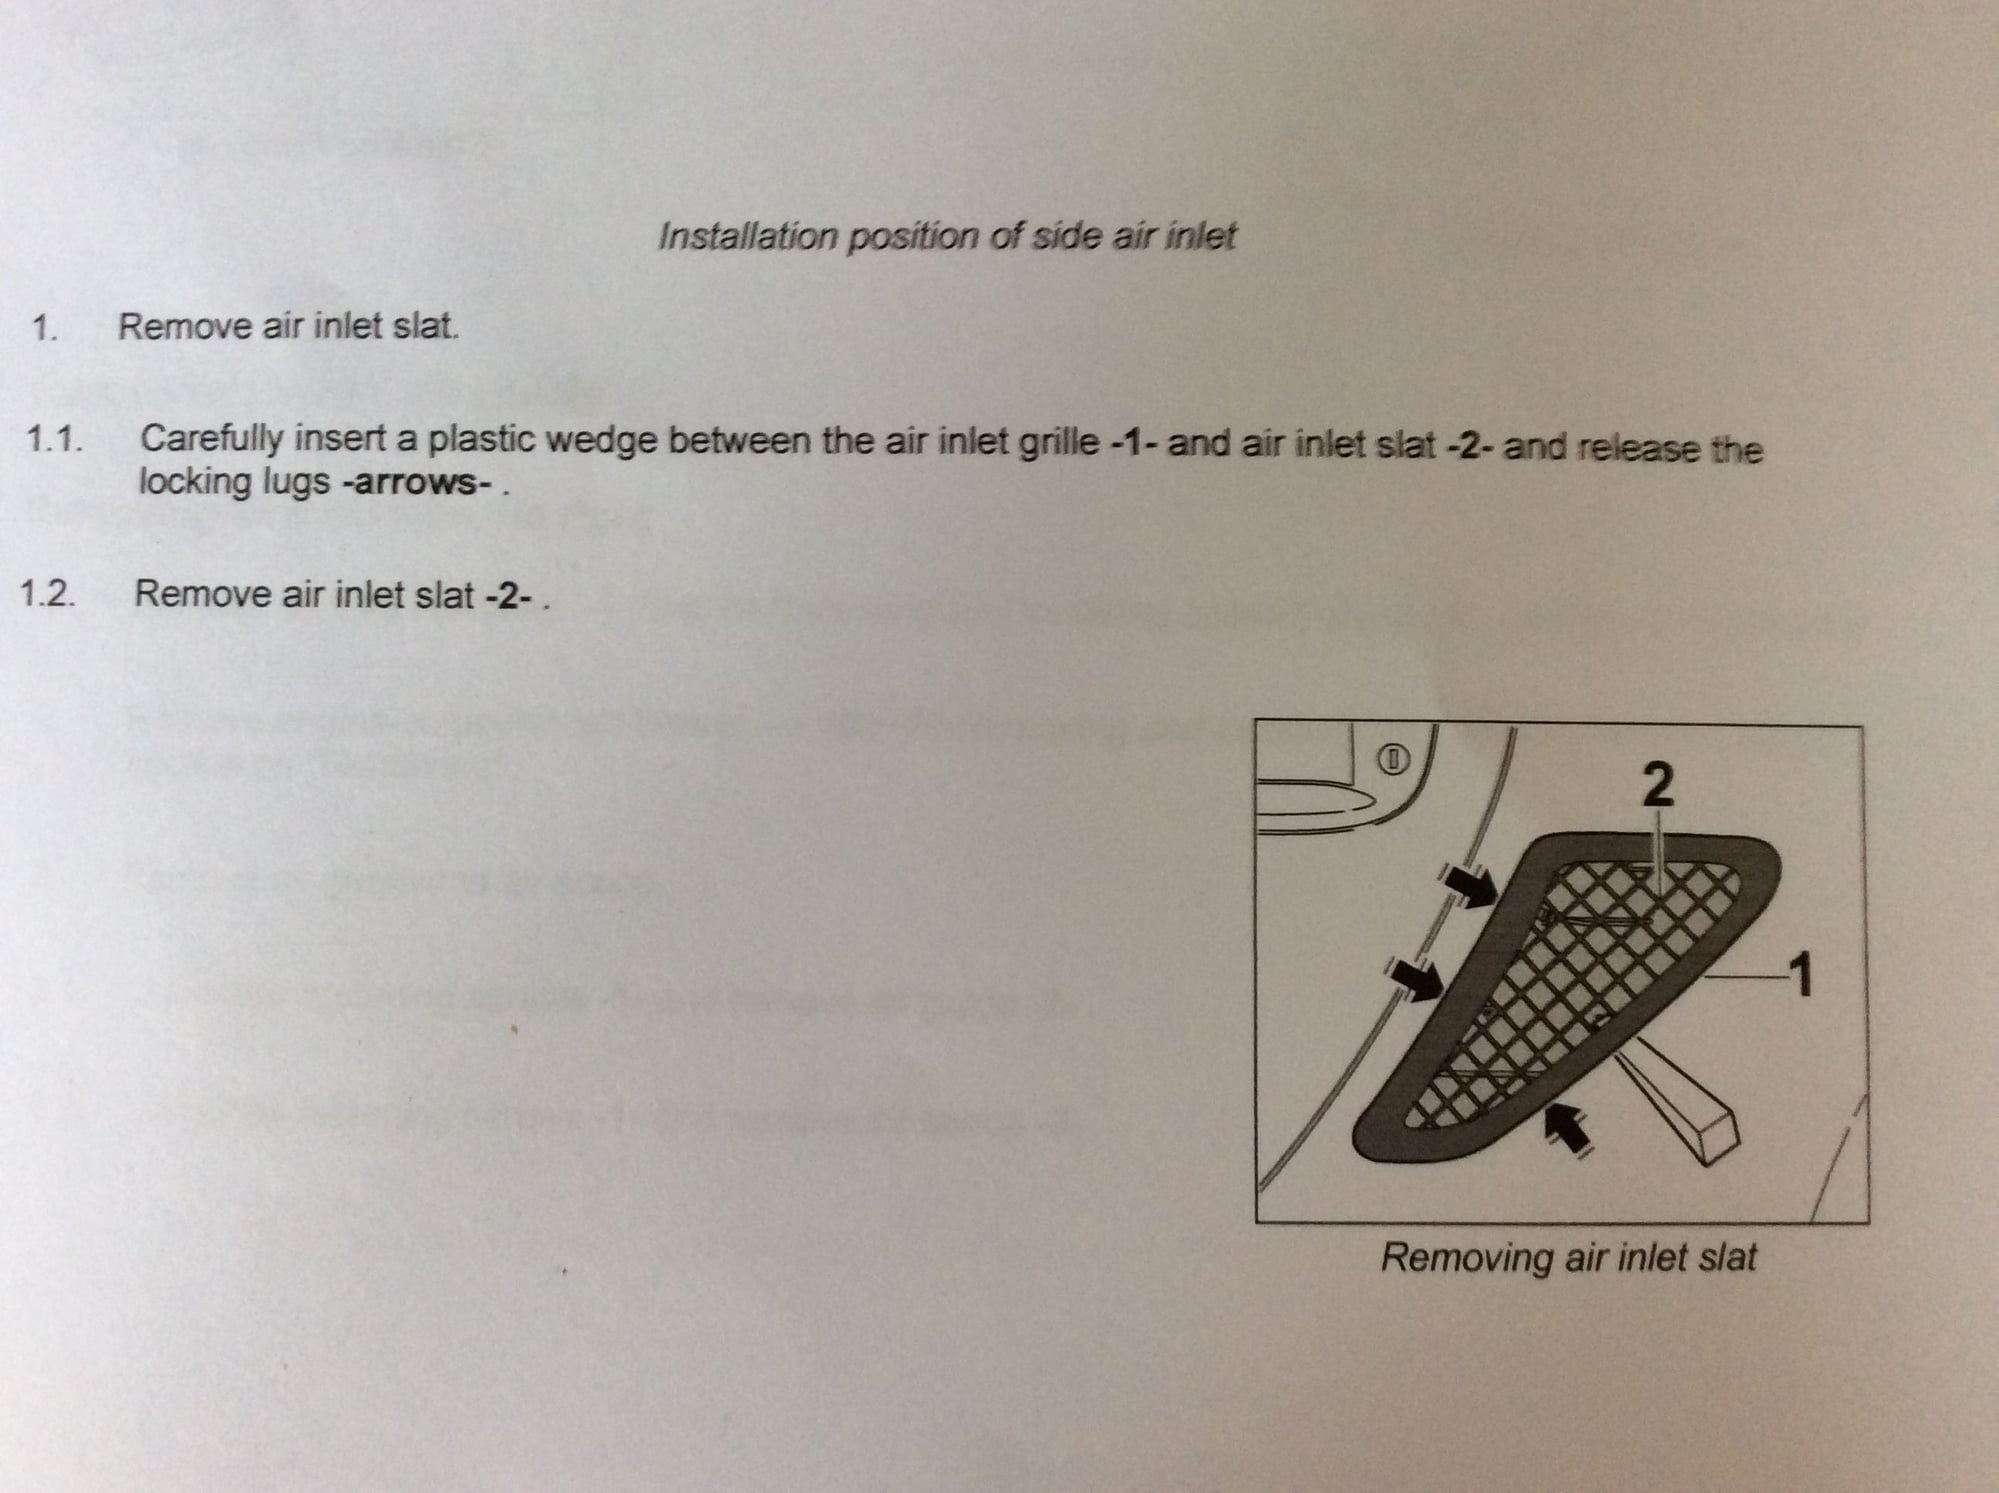
987 Spyder vent frame removal
#1
Rennlist Member
Thread Starter
My red Spyder came with titanium side vent and front intake frames.
As these are different to regular 987 they are not available to buy in any other colour , so i want to remove them to wrap.
Anyone know the procedure as the search didnt come up with anything ?
As these are different to regular 987 they are not available to buy in any other colour , so i want to remove them to wrap.
Anyone know the procedure as the search didnt come up with anything ?
#2
Addict
Rennlist Member
Rennlist Member
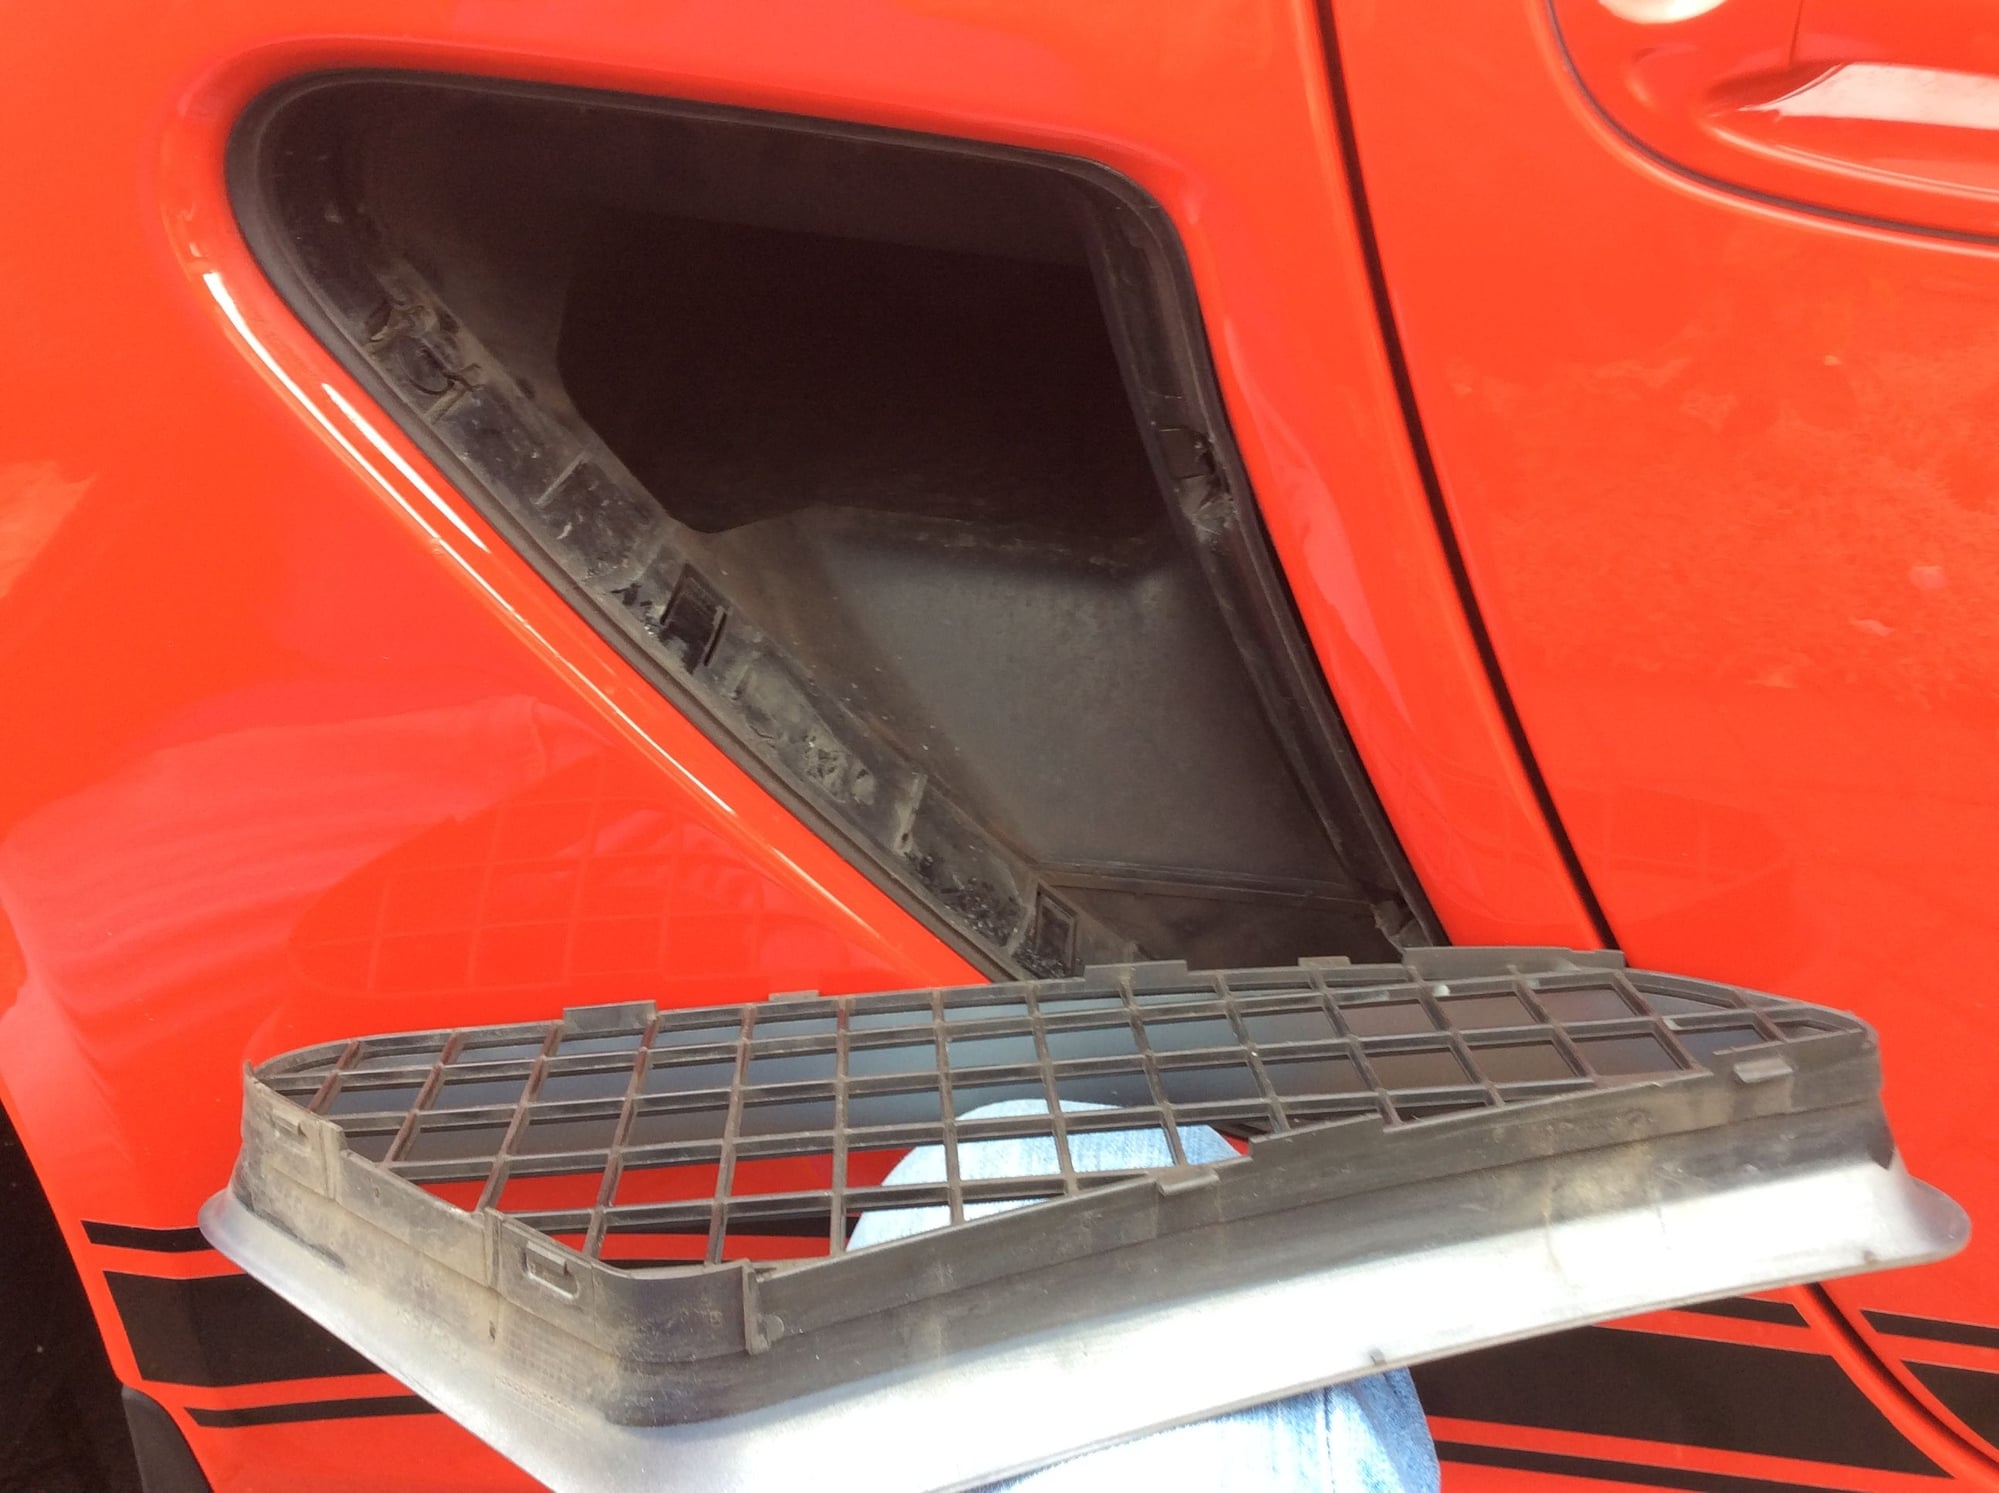
I have pulled the passenger side out without any issues, just gently tug at the silver frame working your way around it and they come out. For some reason the drivers side won’t budge, I would also be interested in how to safely remove it. Hopefully someone here has done it.
#4
Rennlist Member
100% agree that BP’s color matched grilles da schnitz. These are frankly a delicate PITA to R&R. Patience,plastic trim removal tools a must. Installed Cayman grilles on my .2 BS—great improvement.
#5
Rennlist Member
Thread Starter

Also need a flat screwdriver and a light to help ease the first 2 tabs loose. After these it just wiggles loose.
Ok folks, its easy when you know how !
#6
Rennlist Member
Thread Starter


A good time to touch up any small stone chips around the edges
#7
Addict
Rennlist Member
Rennlist Member
Awesome, thank you for posting this! I’ve been wanting to get into mine to clean it up. Looks like a perfect project for Thanksgiving along with detailing the engine bay.
Trending Topics
#8
I had carbon fiber vents made for my Spyder. When I replaced the old ones, I didn’t have the directions, but found a butter knife worked better than a screw driver (more delicate and a little flex) and inserted the narrow end of a book of matches when I unsnapped the clip (instead of the plastic wedge) worked great. BTW, I wanted to get rid of all the silver plastic so I also removed the front grills/vents and rear diffusers and replaced them with CF parts I had made. Good Luck! ...
#10
Im traveling but would be happy to take pics and post later in the week if you are interested.
Last edited by Masergss; 09-04-2018 at 11:26 PM. Reason: Hit the wrong button
#11
Rennlist Member
Thread Starter
Also did you remove the front frames easily ? I read its a recommended bumper off job
#12
It took a little patience to coax them off but I did not need to take off the bumper.
#13
Rennlist Member
Thread Starter
Thanks. I just did it and it was easier than the side vents. Just remove the 3 screws that hold the black light cover and its clear from there
how to get the frame off. Also a good idea to do this now for everyone and have a clean up. The fixings are rusting and could be trouble to remove later.
how to get the frame off. Also a good idea to do this now for everyone and have a clean up. The fixings are rusting and could be trouble to remove later.
#14
Addict
Rennlist Member
Rennlist Member
I also removed the front trim to clean in/around the area and yes they are much easier to remove. I bought a spare set of the silver trim so when mine get really tired I have a backup.
#15
Rennlist Member
Thread Starter

Just been to my trusted paintshop with the trim for an estimate. Guards red or black equally possible. I am thinking red for the side vents but not sure about the front yet. Any thoughts ? Estimate was very reasonable and the side vents look hard to wrap.

