Egan's 2011 Boxster Spyder
 04-01-2017, 03:15 PM
#16
Advanced
Thread Starter
Some updates:
First oil change (for me) complete. That filter housing was an absolute biatch to get off - will have to look into a screw on filter adapter.
Car aligned at the dealer after the new tires and wheels.
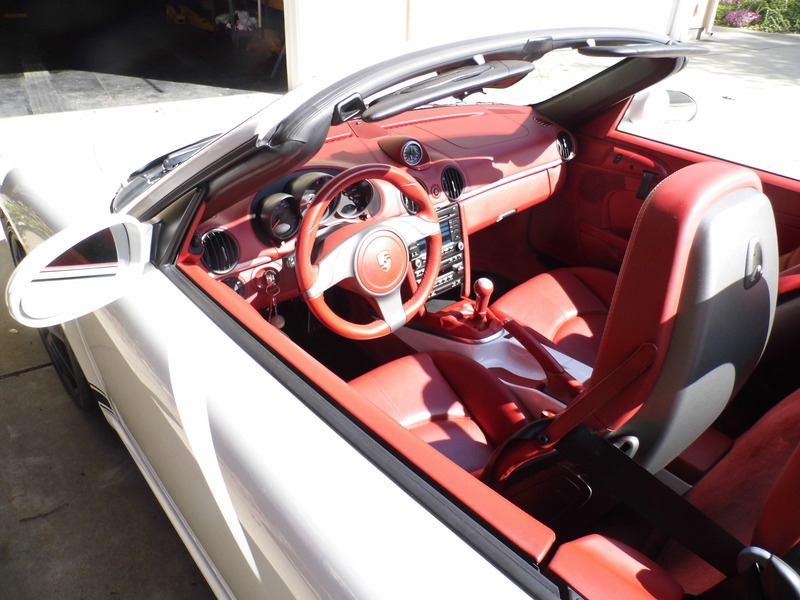
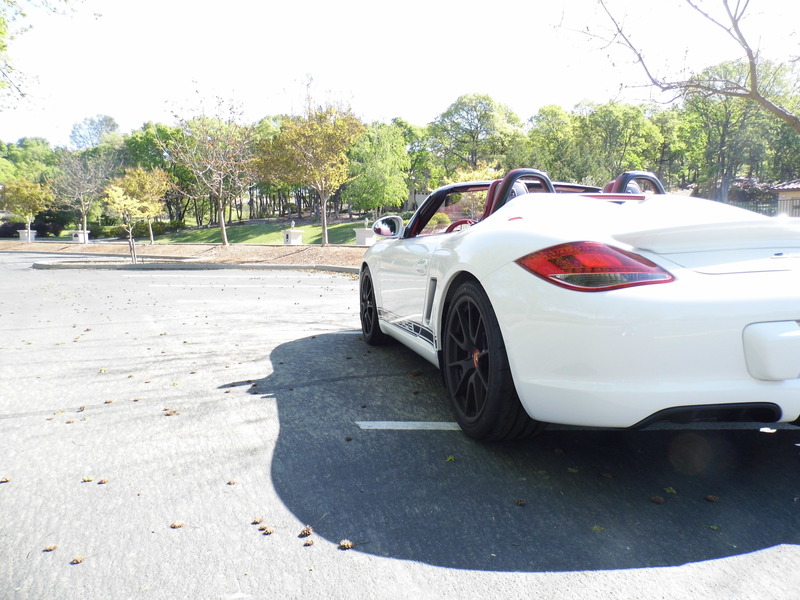
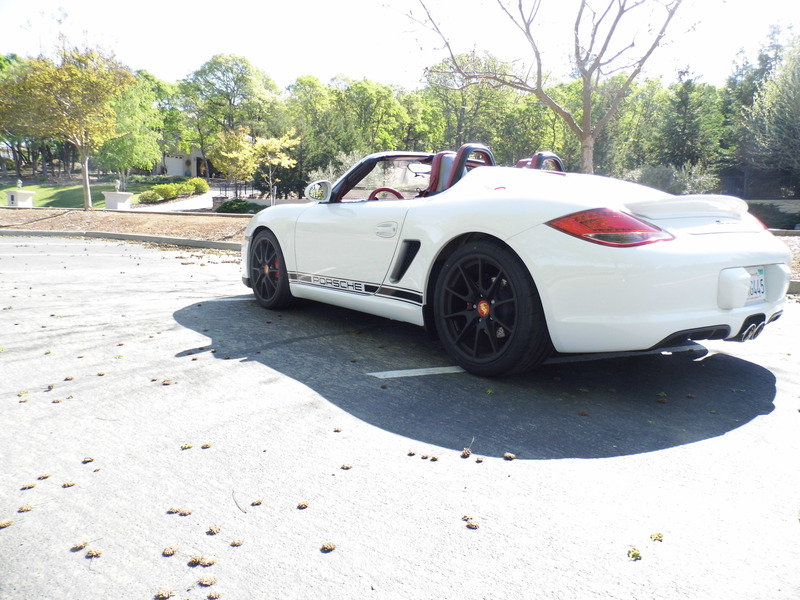
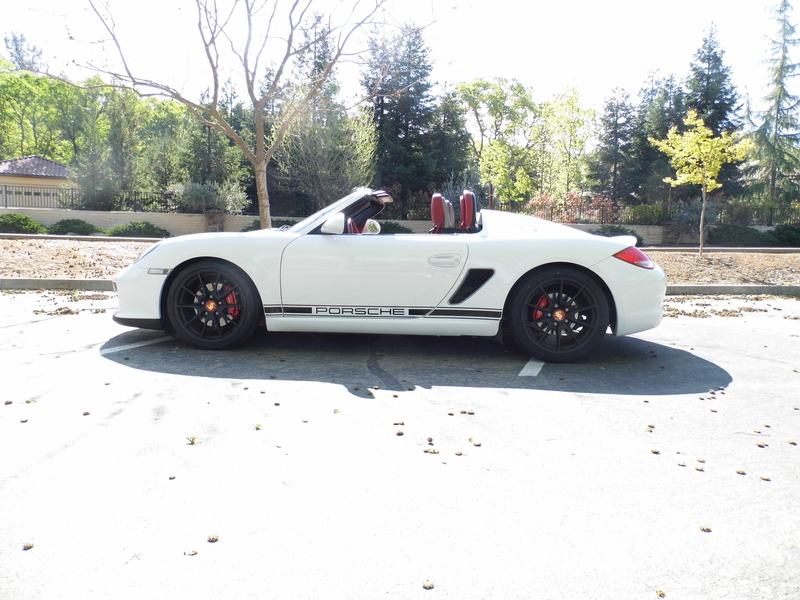
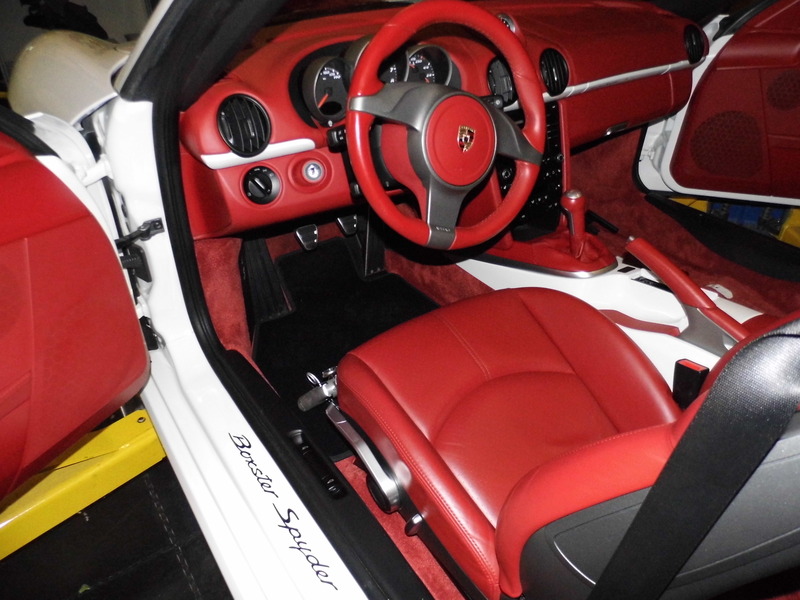
Paint correction, ceramic coating, detailing in and out, stripes on, and rear badge on.
Swapped red floor mats for new black ones.
Took out the wind deflector and the hoop mesh.
She now looks the way I wanted her to.
Took the top off to remove the deflector this morning and decided to drive with the top down. I love it.
First oil change (for me) complete. That filter housing was an absolute biatch to get off - will have to look into a screw on filter adapter.
Car aligned at the dealer after the new tires and wheels.
Paint correction, ceramic coating, detailing in and out, stripes on, and rear badge on.
Swapped red floor mats for new black ones.
Took out the wind deflector and the hoop mesh.
She now looks the way I wanted her to.
Took the top off to remove the deflector this morning and decided to drive with the top down. I love it.


 04-01-2017, 03:33 PM
#17
Addict
Rennlist Member
Rennlist Member
Beautiful! I never really thought to remove the roll hoop mesh, it looks great. So how much more wind buffeting do you get with/without the mesh and the screen?
No doubt they are absolutely amazing cars to drive, it's still the best aspect of the car. The looks aren't find behind though.
No doubt they are absolutely amazing cars to drive, it's still the best aspect of the car. The looks aren't find behind though.
04-01-2017, 07:31 PM
#18
Advanced
Thread Starter
I hadn't driven it with the top off before taking the mesh out so I don't really know. I never got over 68mph on the backroads I went down, but there was no noticeable buffeting.
04-01-2017, 10:39 PM
#19
Looks great! I was going to say and ask the same thing about the hoop mesh. Also, I've been thinking about the ceramic coating, do you mind sharing which one you used and how much for exterior application? Enjoy! Can't wait to get mine out of hibernation.
04-02-2017, 11:47 AM
#20
Advanced
Thread Starter
It's Ceramic Pro and I got the gold package which is 4 layers of 9H and 1 layer of Light with a lifetime warranty. They have 2 and 5 year warranty packages which are a bit cheaper. But at the end of the day, the difference between 5 year and lifetime was less than $500.
I'm not sure how much just the coating was. They spent 16 hours on paint correction (previous owner must have gone through car washes with all of the swirls in the paint) plus they treated the interior and the windows/windshield, put on the stripes and rear emblem, and are coming back to do the wheels and calipers once the coating cures. All of that was $2900. It seemed a lot to spend on "cleaning", but the paint looks brand new. Pictures don't do it justice.

I'm not sure how much just the coating was. They spent 16 hours on paint correction (previous owner must have gone through car washes with all of the swirls in the paint) plus they treated the interior and the windows/windshield, put on the stripes and rear emblem, and are coming back to do the wheels and calipers once the coating cures. All of that was $2900. It seemed a lot to spend on "cleaning", but the paint looks brand new. Pictures don't do it justice.
04-02-2017, 12:24 PM
#21
Wow! I'd love to see the end result in person. Still looks great in the pictures! Thanks for the details, contemplating having correction done and would only make sense to have the coating done. Sounds like you are planning on keeping it a while...as am I. Thanks!
04-02-2017, 01:06 PM
#22
Addict
Rennlist Member
Rennlist Member
Paint swirls really can make or break the appearance of a car in my opinion. If the paint has been neglected or washed using the wrong tools and products it will definitely have swirls. The results look amazing!
Remember that paint correction removes a layer of clear coat so once you have it done the key is to use proper technique and equipment afterwards so you don't have to have it polished again.
I think what Egan had done makes a ton of sense, get the car looking great and protect it. Personally I would have used a clear bra for protection instead of the ceramic but that's just me and not everyone can tolerate the look of a bra on paint.
04-02-2017, 07:32 PM
#23
Advanced
Thread Starter
Paint swirls really can make or break the appearance of a car in my opinion. If the paint has been neglected or washed using the wrong tools and products it will definitely have swirls. The results look amazing!
Remember that paint correction removes a layer of clear coat so once you have it done the key is to use proper technique and equipment afterwards so you don't have to have it polished again.
I think what Egan had done makes a ton of sense, get the car looking great and protect it. Personally I would have used a clear bra for protection instead of the ceramic but that's just me and not everyone can tolerate the look of a bra on paint.
Remember that paint correction removes a layer of clear coat so once you have it done the key is to use proper technique and equipment afterwards so you don't have to have it polished again.
I think what Egan had done makes a ton of sense, get the car looking great and protect it. Personally I would have used a clear bra for protection instead of the ceramic but that's just me and not everyone can tolerate the look of a bra on paint.
But a clear bra is great to prevent rock chips and small dings.
04-02-2017, 08:28 PM
#24

When I bought my porter cable polisher the video said wax should be applied in the same direction that air flows over the vehicle in a straight path. I don't make swirls with the wax applicator if using hand technique and one should frequently change the applicator, microfiber bonnets and hand towels. Same with the wash mitt, change it annually and NEVER use the same one for wheels as the paint. Automatic car wash? #notmyspyder
04-03-2017, 07:33 AM
#25
Racer

The new Boxster will be done with Opti-coat pro+ as soon as it's off the boat to avoid the need (and cost) of extensive paint correction.
We don't seem to have the stone chip problem here so bras are not popular at all.
Greg
04-04-2017, 08:18 PM
#26
Thanks Greg would love to,see pics of both!
04-05-2017, 10:02 AM
#27
Racer
The Subaru is gone--so no pics of that--but try and stop me showing pics of the Racing Yellow Boxster!
(I'll try and remember to take some before and after coating.)
Greg
(I'll try and remember to take some before and after coating.)
Greg
04-23-2017, 12:23 PM
#28
Advanced
Thread Starter
A couple of more maintenance items taken care of: air filter and cabin filter. Both were super easy.
Car sounds like a ticking time bomb from the passenger side of the engine though. All of my searches said it was normal injector ticking. Maybe I just hadn't noticed it before. Maybe it was louder because of what was next to the car. I'll keep an eye on it.
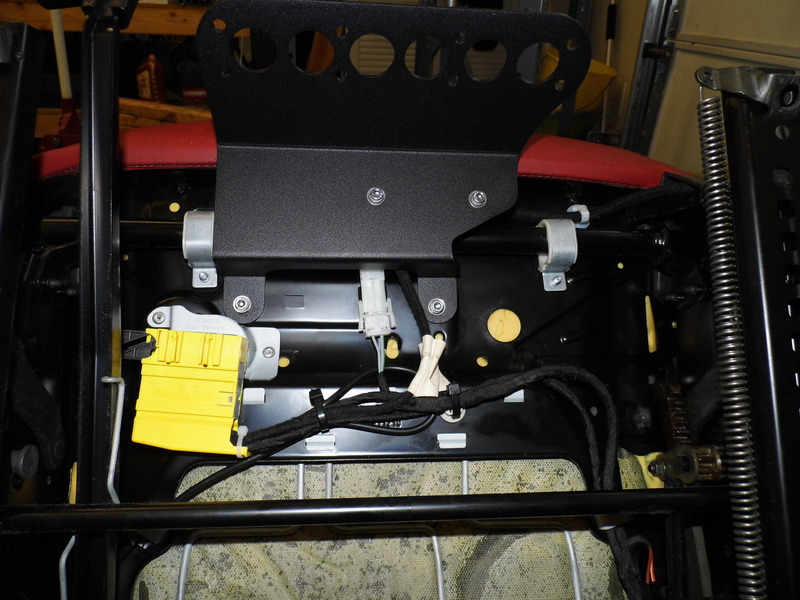
Also, Rennline was having a 10% off sale so I picked up one of their fire extinguisher mounts. I had a great 2.5lb Halotron extinguisher from previous cars and track days and this mount mates perfectly to the Hal Guard bracket. This extinguisher is bigger than what Rennline expects you to use so I did have to offset the bracket one set of holes.
http://www.rennline.com/Rennline-Fir...fo/FE04/BLACK/
I thought I would be clever and mount it to the passenger seat since that one is occupied less of the time, but the bolt holes are completely different under there. But at least I got practice taking both seats out. I did learn that an external/female torx exists and had to buy a socket set.
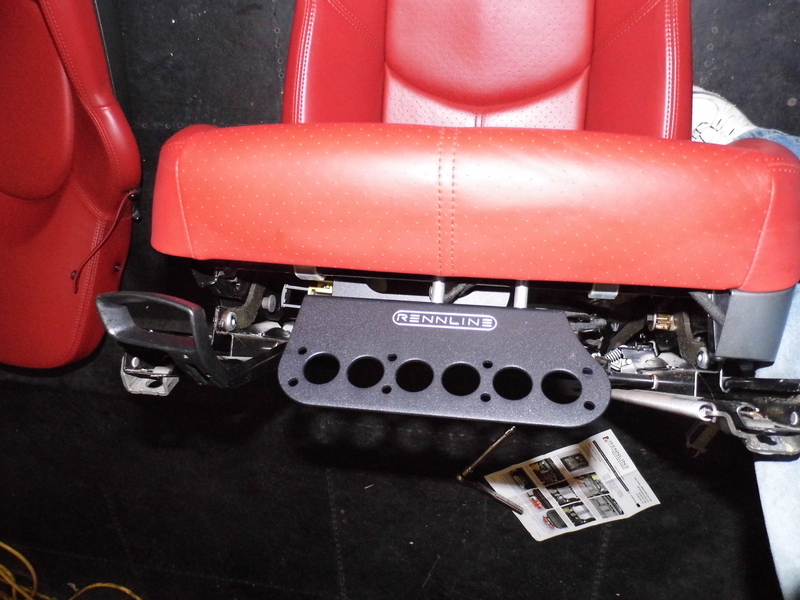
Rennline bracket installed to the driver's seat:
Front view:
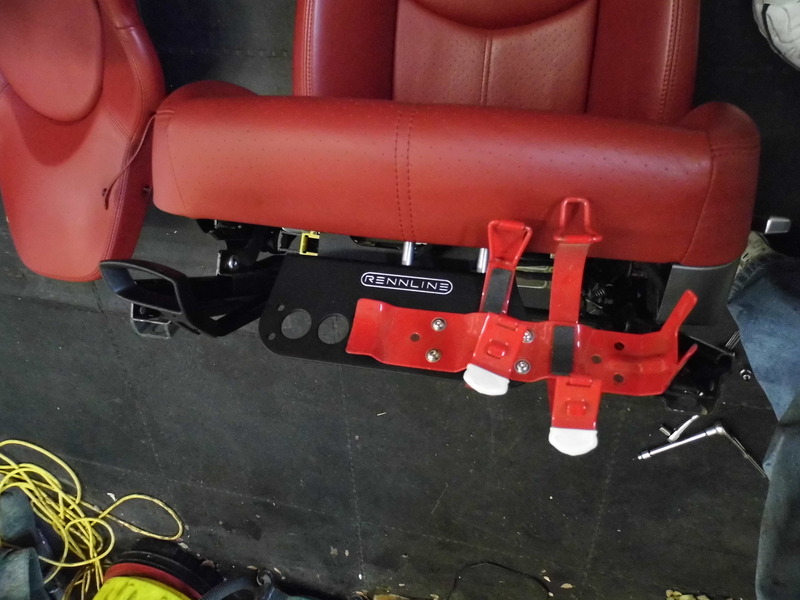
Bracket attached to mount:
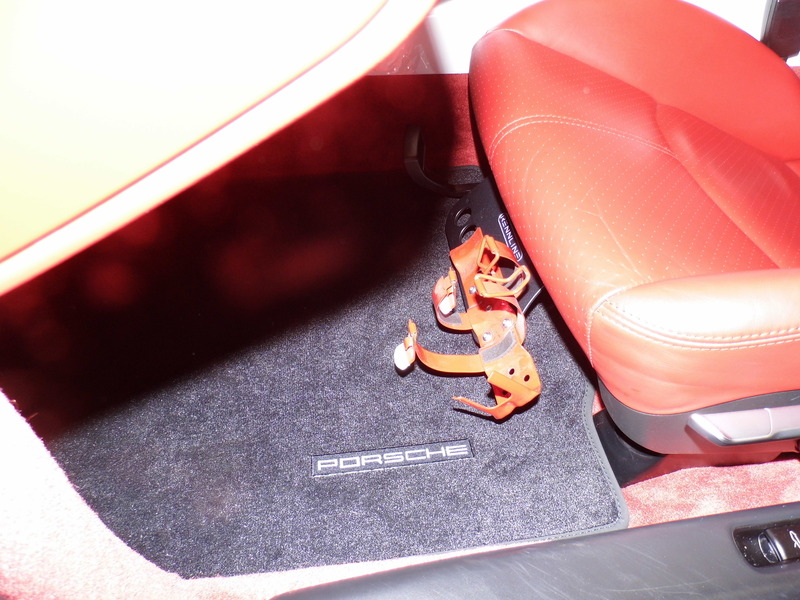
Fire extinguisher in:

From outside you can hardly see it. Does not interfere at all with getting in and out and does not cause any discomfort while driving. It does make getting the floor mats in and out a bit tougher.
Car sounds like a ticking time bomb from the passenger side of the engine though. All of my searches said it was normal injector ticking. Maybe I just hadn't noticed it before. Maybe it was louder because of what was next to the car. I'll keep an eye on it.
Also, Rennline was having a 10% off sale so I picked up one of their fire extinguisher mounts. I had a great 2.5lb Halotron extinguisher from previous cars and track days and this mount mates perfectly to the Hal Guard bracket. This extinguisher is bigger than what Rennline expects you to use so I did have to offset the bracket one set of holes.
http://www.rennline.com/Rennline-Fir...fo/FE04/BLACK/
I thought I would be clever and mount it to the passenger seat since that one is occupied less of the time, but the bolt holes are completely different under there. But at least I got practice taking both seats out.
I did learn that an external/female torx exists and had to buy a socket set.Rennline bracket installed to the driver's seat:

Front view:

Bracket attached to mount:


Fire extinguisher in:

From outside you can hardly see it. Does not interfere at all with getting in and out and does not cause any discomfort while driving. It does make getting the floor mats in and out a bit tougher.

Last edited by Egan70; 04-24-2017 at 01:20 AM. Reason: wrong link for mount
04-23-2017, 12:30 PM
#29
Advanced
Thread Starter
Also got my Valetine One installed. I've had this thing forever and switch it back and forth between the Spyder and my H2. I used a blendmount bracket. I've had great success with these in other cars, but it wasn't so great in the Spyder. It's really hard to get it set up right and tightened because of the mount/mirror design. But eventually I got it working.
I thought I could mount the power splitter box (main/acc) up in the map lights and tap power there. No luck - unit won't fit and there is no switched power in there (all constant +12V). So I ran the power wire down the a-pillar to the fuse box and added a fuse and fuse tap to one of the empty slots (lots of empty slots in the Spyder) that was switched +12V. Of course I didn't figure out that I couldn't mount the splitter box in the headliner until after I ran the power, so I just mounted the splitter to the back of the mirror. I can't see it, but I know it's there and I might move down to the fuse box area once I get a longer v1 cord. Speaking of which, the V1 coiled cord is too long now that the splitter is out of the headliner. I'll swap that over to the 1' model for the time being.
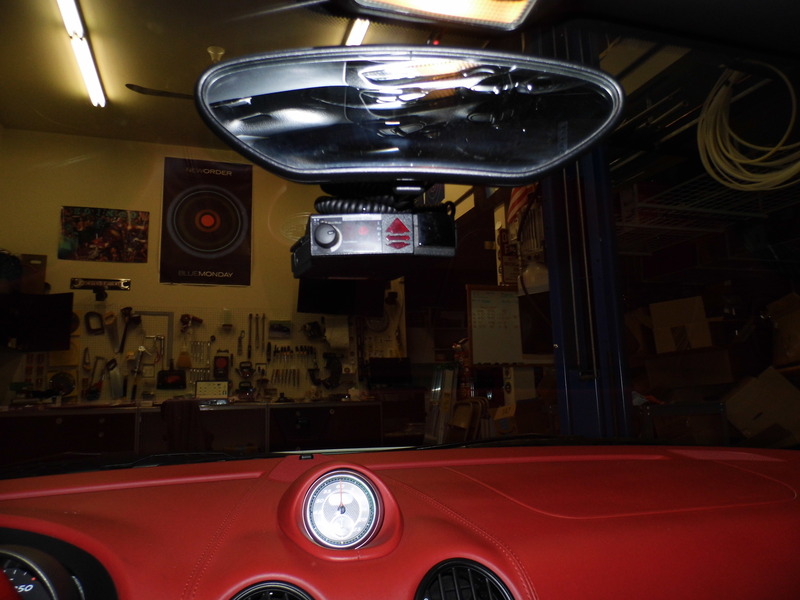
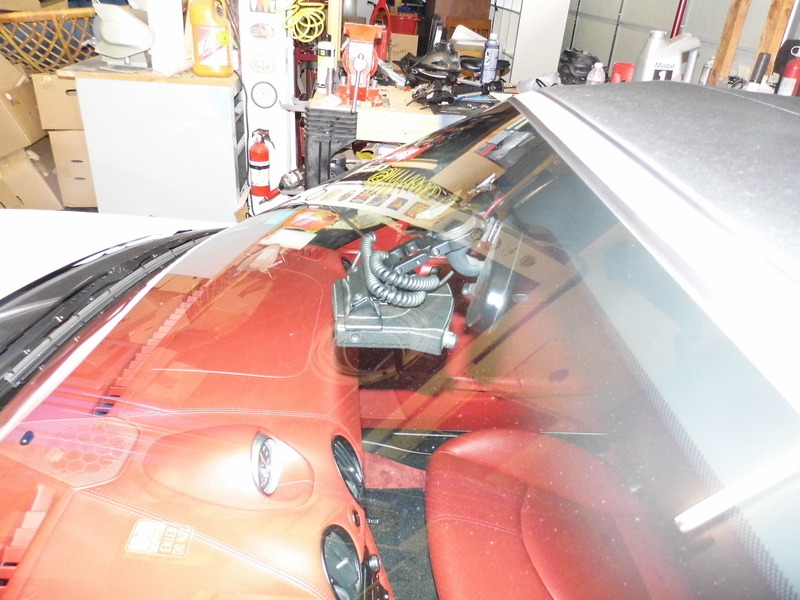
I thought I could mount the power splitter box (main/acc) up in the map lights and tap power there. No luck - unit won't fit and there is no switched power in there (all constant +12V). So I ran the power wire down the a-pillar to the fuse box and added a fuse and fuse tap to one of the empty slots (lots of empty slots in the Spyder) that was switched +12V. Of course I didn't figure out that I couldn't mount the splitter box in the headliner until after I ran the power, so I just mounted the splitter to the back of the mirror. I can't see it, but I know it's there and I might move down to the fuse box area once I get a longer v1 cord. Speaking of which, the V1 coiled cord is too long now that the splitter is out of the headliner. I'll swap that over to the 1' model for the time being.

 04-23-2017, 02:13 PM
#30
Thanks for the updates. Car is coming along great. I think i'm going to have to get that mount for the fire extinguisher. You've inspired me! Which part number did you order? Oh and I can hear that injector ticking as well. Seems to be mostly gone after the car is warmed up. I brought the car in for normal maintenance a couple weeks ago and of course it wasn't ticking for the dealer.
Last edited by Marvinta; 04-23-2017 at 02:56 PM.