
964 Cab Rear Lights "Wrap" Kit-Rear Light(s) Removal
 07-23-2016, 03:06 PM
#1
AutoX
Thread Starter

Join Date: Dec 2013
Posts: 10
Likes: 0
Received 0 Likes
on
0 Posts
I purchased Gus' rear light "wrap" kit and will be installing it soon.
Want to do this on my workbench (where it's air conditioned! )
)
Anyone here offering tutorial on how to remove these units from the car?
Any help would be greatly Appreciated!
Best Regards,
Tony
Want to do this on my workbench (where it's air conditioned!
)Anyone here offering tutorial on how to remove these units from the car?
Any help would be greatly Appreciated!
Best Regards,
Tony
 07-24-2016, 01:21 AM
#2
Burning Brakes
Join Date: Aug 2009
Posts: 1,209
Likes: 0
Received 0 Likes
on
0 Posts
Get a Philips screwdriver and for the small side light units undo the one screw on each unit. Disconnect the bulb connectors and you are done. Once done you will see how easy it is hence why the rear rights are sometimes stolen in England from street parked 964s at night.
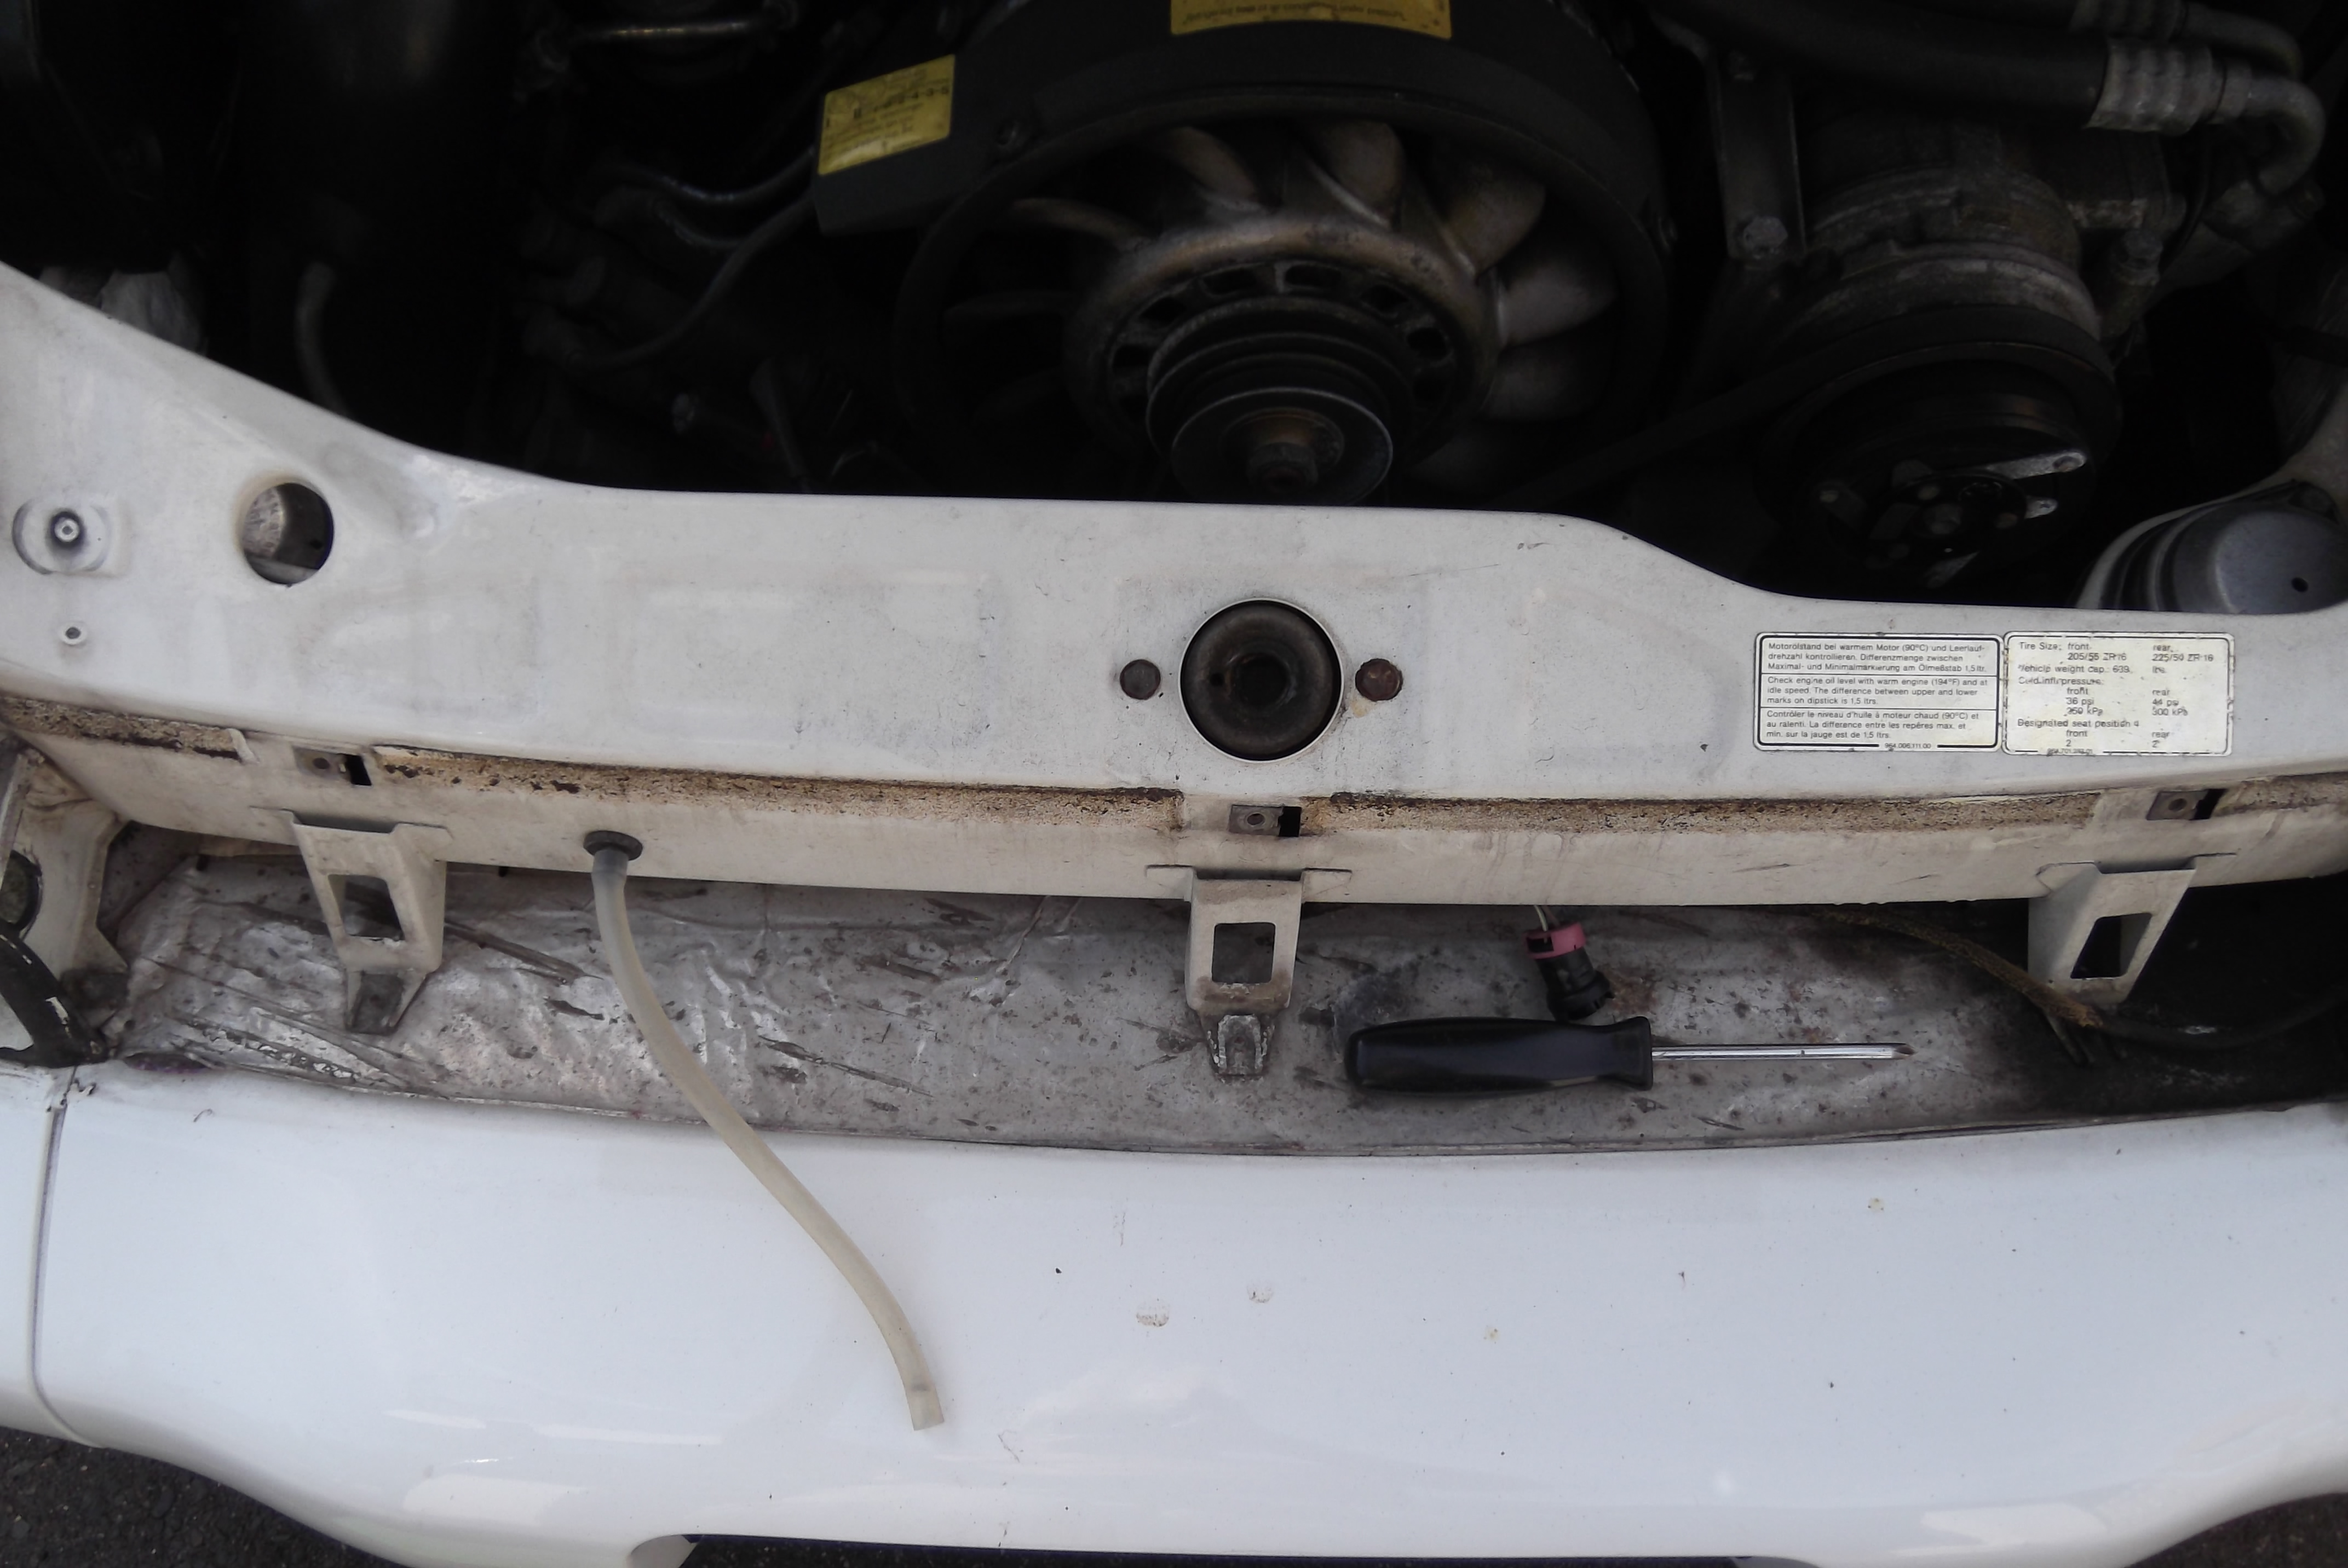
For the big centre light unit open the engine cover and remove the 3 screws and then disconnect the electrical connector. When refitting this unit be careful that you do not over tighten the 3 screws as the plastic screw surround part it easy to crack and break if too much pressure is applied.
For the big centre light unit open the engine cover and remove the 3 screws and then disconnect the electrical connector. When refitting this unit be careful that you do not over tighten the 3 screws as the plastic screw surround part it easy to crack and break if too much pressure is applied.
07-24-2016, 12:43 PM
#3
AutoX
Thread Starter
Join Date: Dec 2013
Posts: 10
Likes: 0
Received 0 Likes
on
0 Posts
Get a Philips screwdriver and for the small side light units undo the one screw on each unit. Disconnect the bulb connectors and you are done. Once done you will see how easy it is hence why the rear rights are sometimes stolen in England from street parked 964s at night.
For the big centre light unit open the engine cover and remove the 3 screws and then disconnect the electrical connector. When refitting this unit be careful that you do not over tighten the 3 screws as the plastic screw surround part it easy to crack and break if too much pressure is applied.
For the big centre light unit open the engine cover and remove the 3 screws and then disconnect the electrical connector. When refitting this unit be careful that you do not over tighten the 3 screws as the plastic screw surround part it easy to crack and break if too much pressure is applied.
So-Are you saying that if I remove that ONE SCREW, the WHOLE light housing/assembly will come out? I thought that screw only held the lens on!

We'll give it a go and see what happens.
Thanks Again, g60pops!
Best Regards,
Tony
07-24-2016, 01:25 PM
#4
Rennlist Member
Join Date: Jul 2003
Location: Peachtree City, Ga
Posts: 1,940
Likes: 0
Received 60 Likes
on
50 Posts
Yes - one screw on the side of each tail light, there are tangs at the rear of the light that fit into the body that hold the back section in place - Three screws across the top of center section.
When you install film on tail lights make sure you have cleaned the recess area in the screw hole. Then cut an "X" pattern just across the hole and push the film into the hole with a small round dowel or tool. Make sure that it is dry or film will not stick until it is. You can take a small square section of film ( from extra if cut off ) and cover the hole with it. should not be that visible.
When you install film on tail lights make sure you have cleaned the recess area in the screw hole. Then cut an "X" pattern just across the hole and push the film into the hole with a small round dowel or tool. Make sure that it is dry or film will not stick until it is. You can take a small square section of film ( from extra if cut off ) and cover the hole with it. should not be that visible.
07-24-2016, 04:03 PM
#5
AutoX
Thread Starter
Join Date: Dec 2013
Posts: 10
Likes: 0
Received 0 Likes
on
0 Posts
Yes - one screw on the side of each tail light, there are tangs at the rear of the light that fit into the body that hold the back section in place - Three screws across the top of center section.
When you install film on tail lights make sure you have cleaned the recess area in the screw hole. Then cut an "X" pattern just across the hole and push the film into the hole with a small round dowel or tool. Make sure that it is dry or film will not stick until it is. You can take a small square section of film ( from extra if cut off ) and cover the hole with it. should not be that visible.
When you install film on tail lights make sure you have cleaned the recess area in the screw hole. Then cut an "X" pattern just across the hole and push the film into the hole with a small round dowel or tool. Make sure that it is dry or film will not stick until it is. You can take a small square section of film ( from extra if cut off ) and cover the hole with it. should not be that visible.

Thank You both for this info-Although it's obviously elementary to long time 964 owners, it's not to me!

Will get back with a follow-up when it cools down up here! (101' F Today)
Best Regards,
Tony
07-24-2016, 05:10 PM
#6
Rennlist Member
Join Date: Jul 2003
Location: Peachtree City, Ga
Posts: 1,940
Likes: 0
Received 60 Likes
on
50 Posts
Tony - we all stated in the same place you feel you are today. Read, scan Rennlist for informational post and learn by doing. Folks are here (Rennlist) to learn and help each other as best they can. Search is your friend. But, just reading daily post will fast fill your data banks and require more RAM in your cranium.
07-24-2016, 05:35 PM
#7
AutoX
Thread Starter
Join Date: Dec 2013
Posts: 10
Likes: 0
Received 0 Likes
on
0 Posts
Tony - we all stated in the same place you feel you are today. Read, scan Rennlist for informational post and learn by doing. Folks are here (Rennlist) to learn and help each other as best they can. Search is your friend. But, just reading daily post will fast fill your data banks and require more RAM in your cranium.
etc. Not only here Brother but also on a bunch of other forum pages.
Fortunately for me I got the attention of two attentive individuals that got the attention of my post!
lolI got the light assemblies out-THANK YOU! - some pics here...
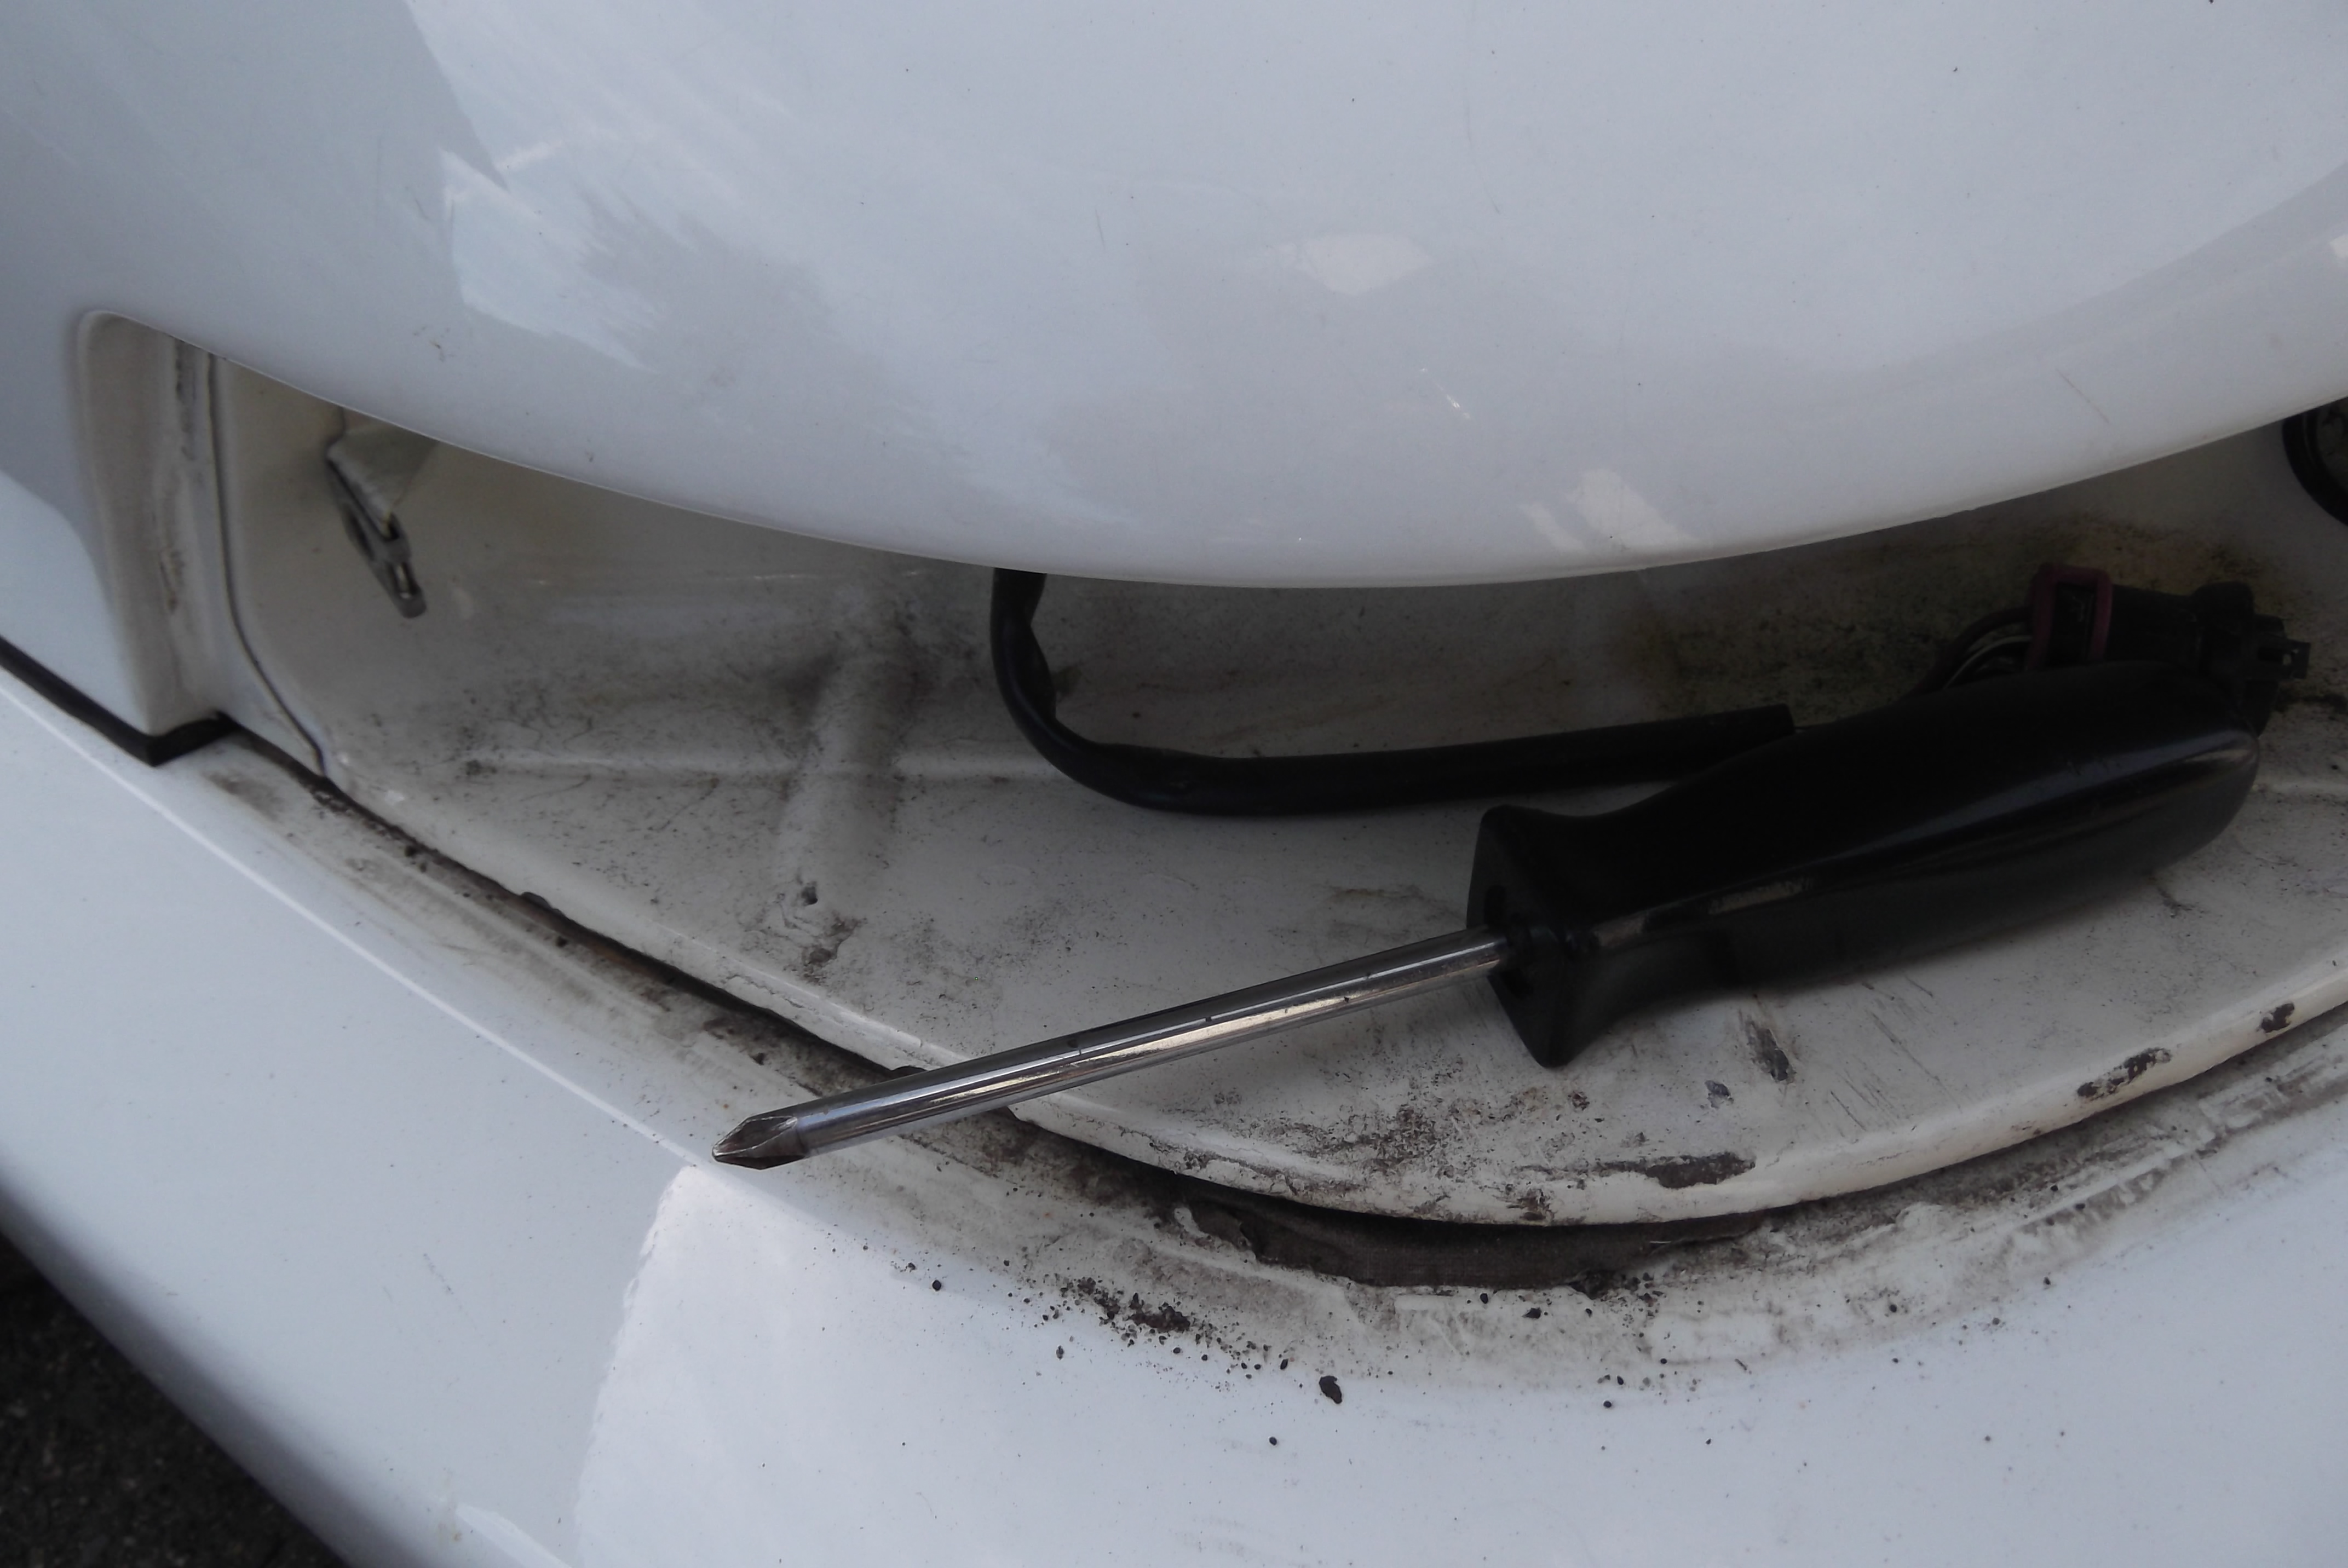
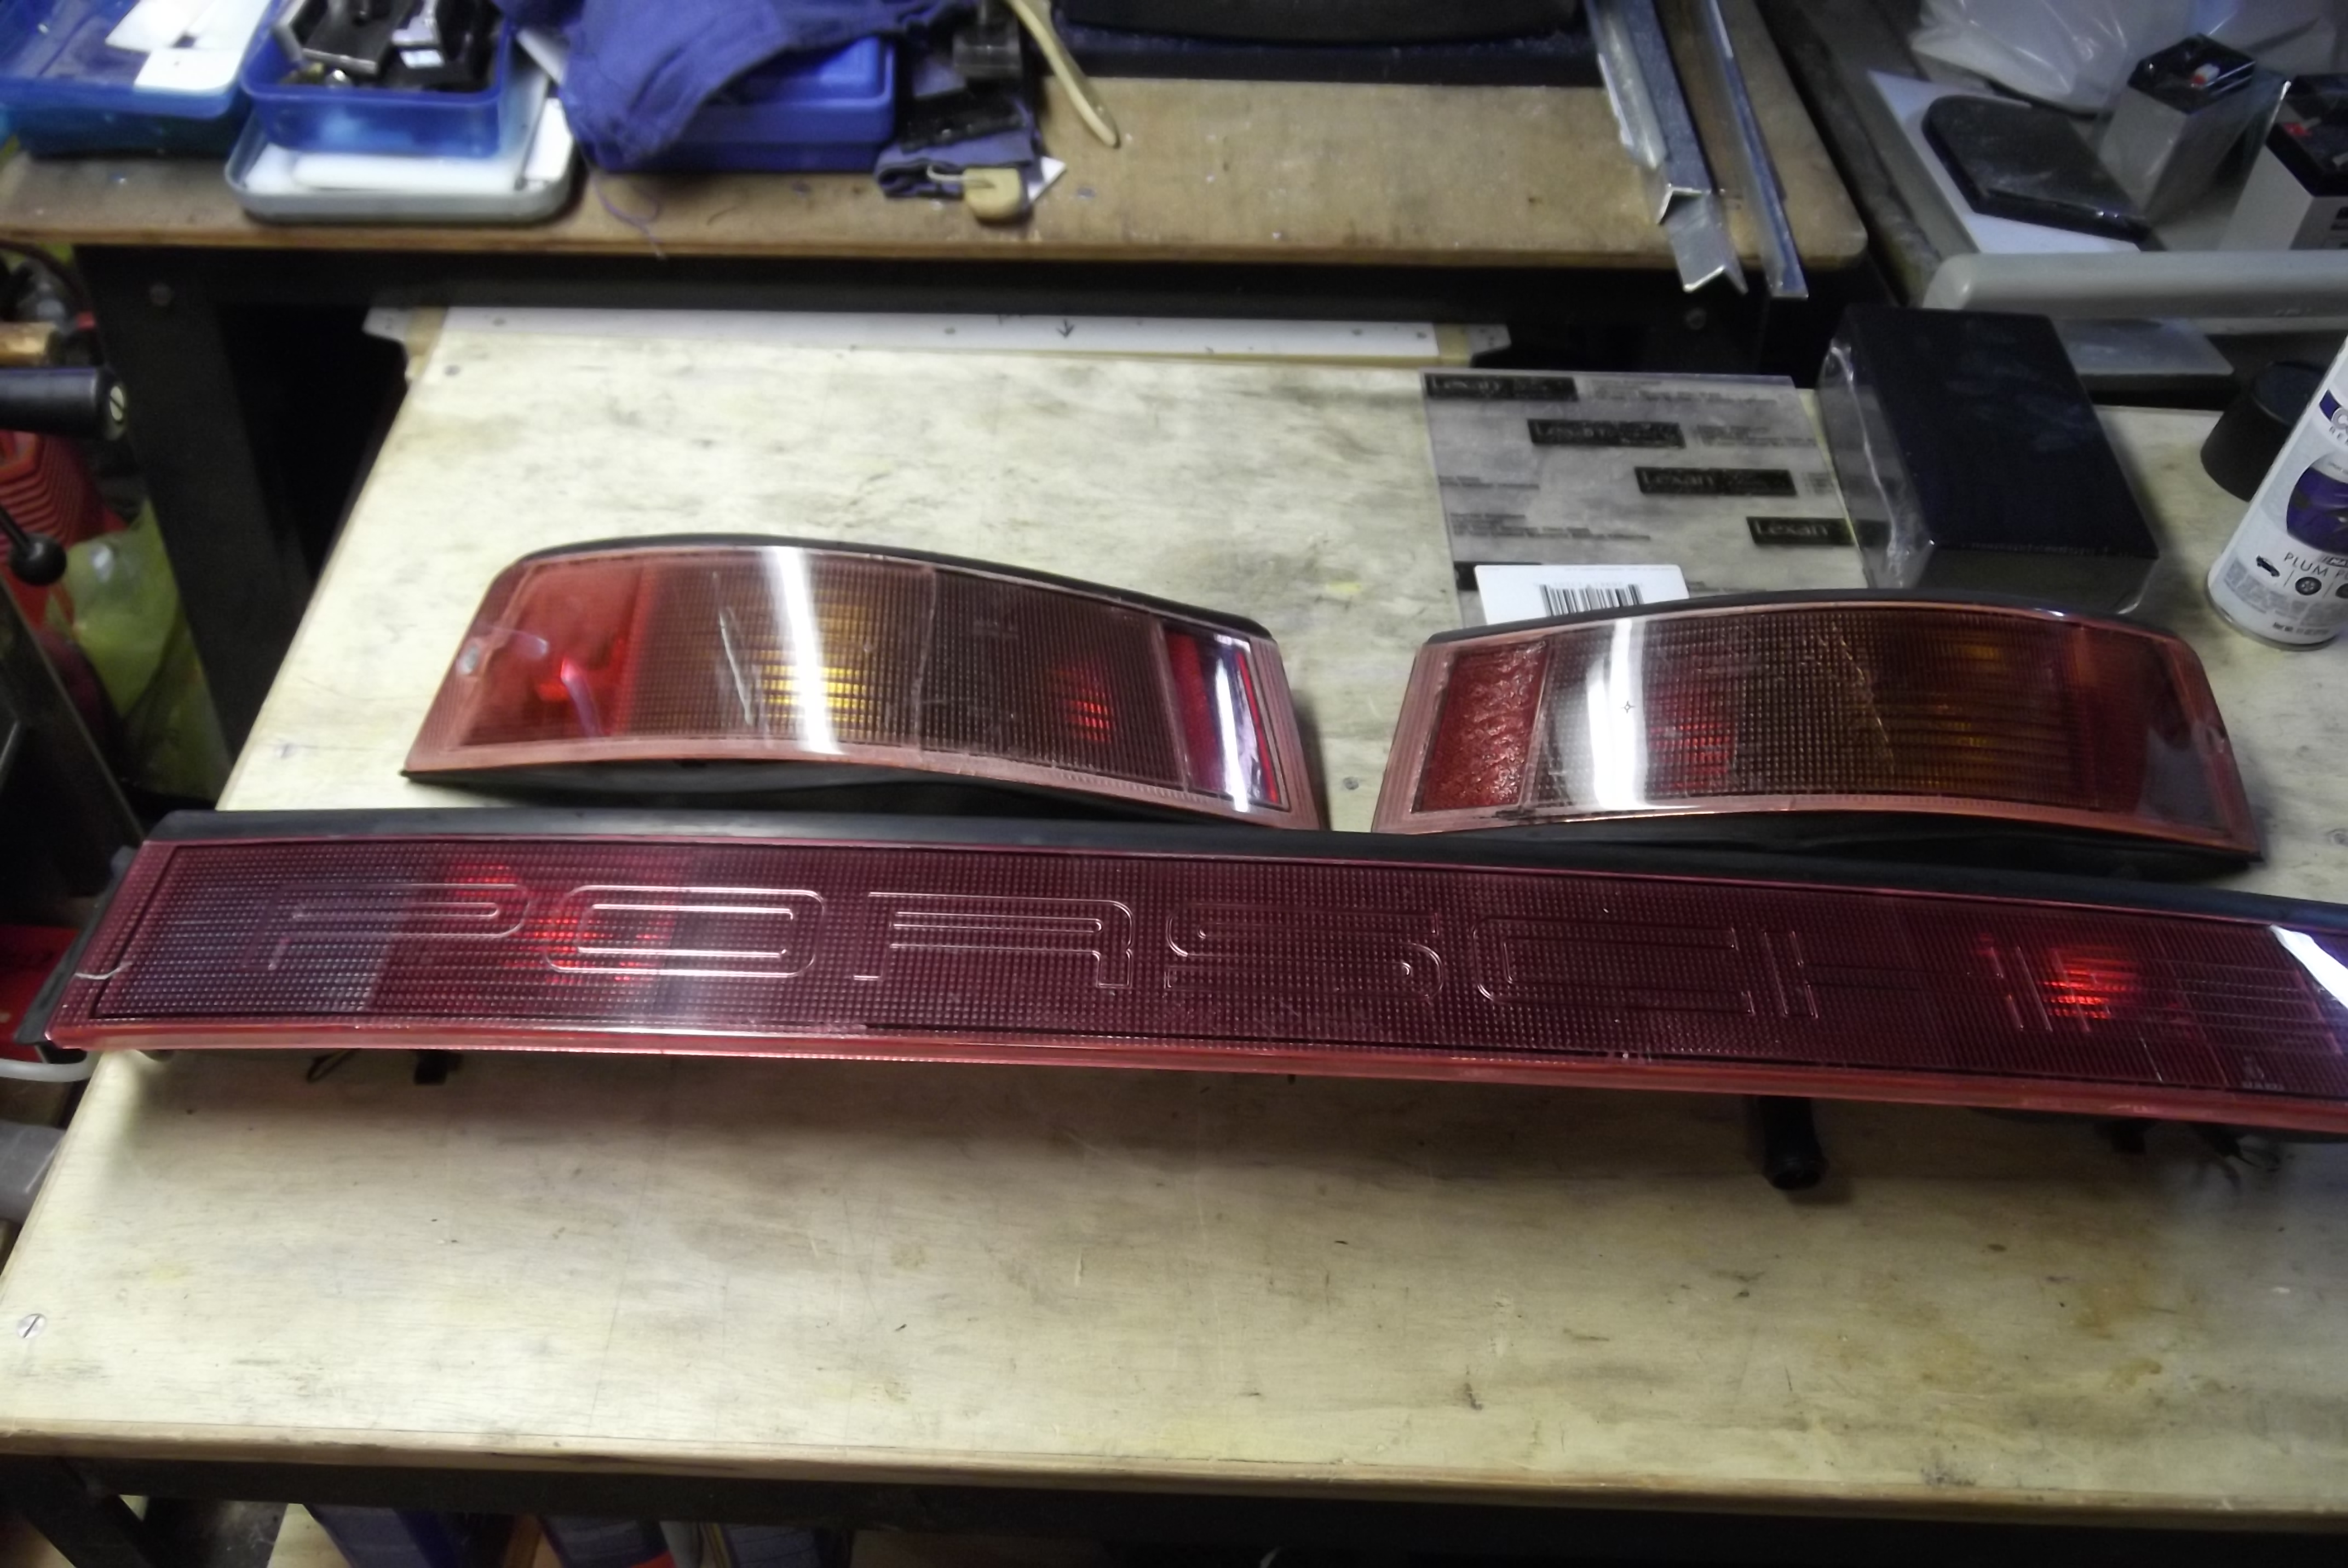
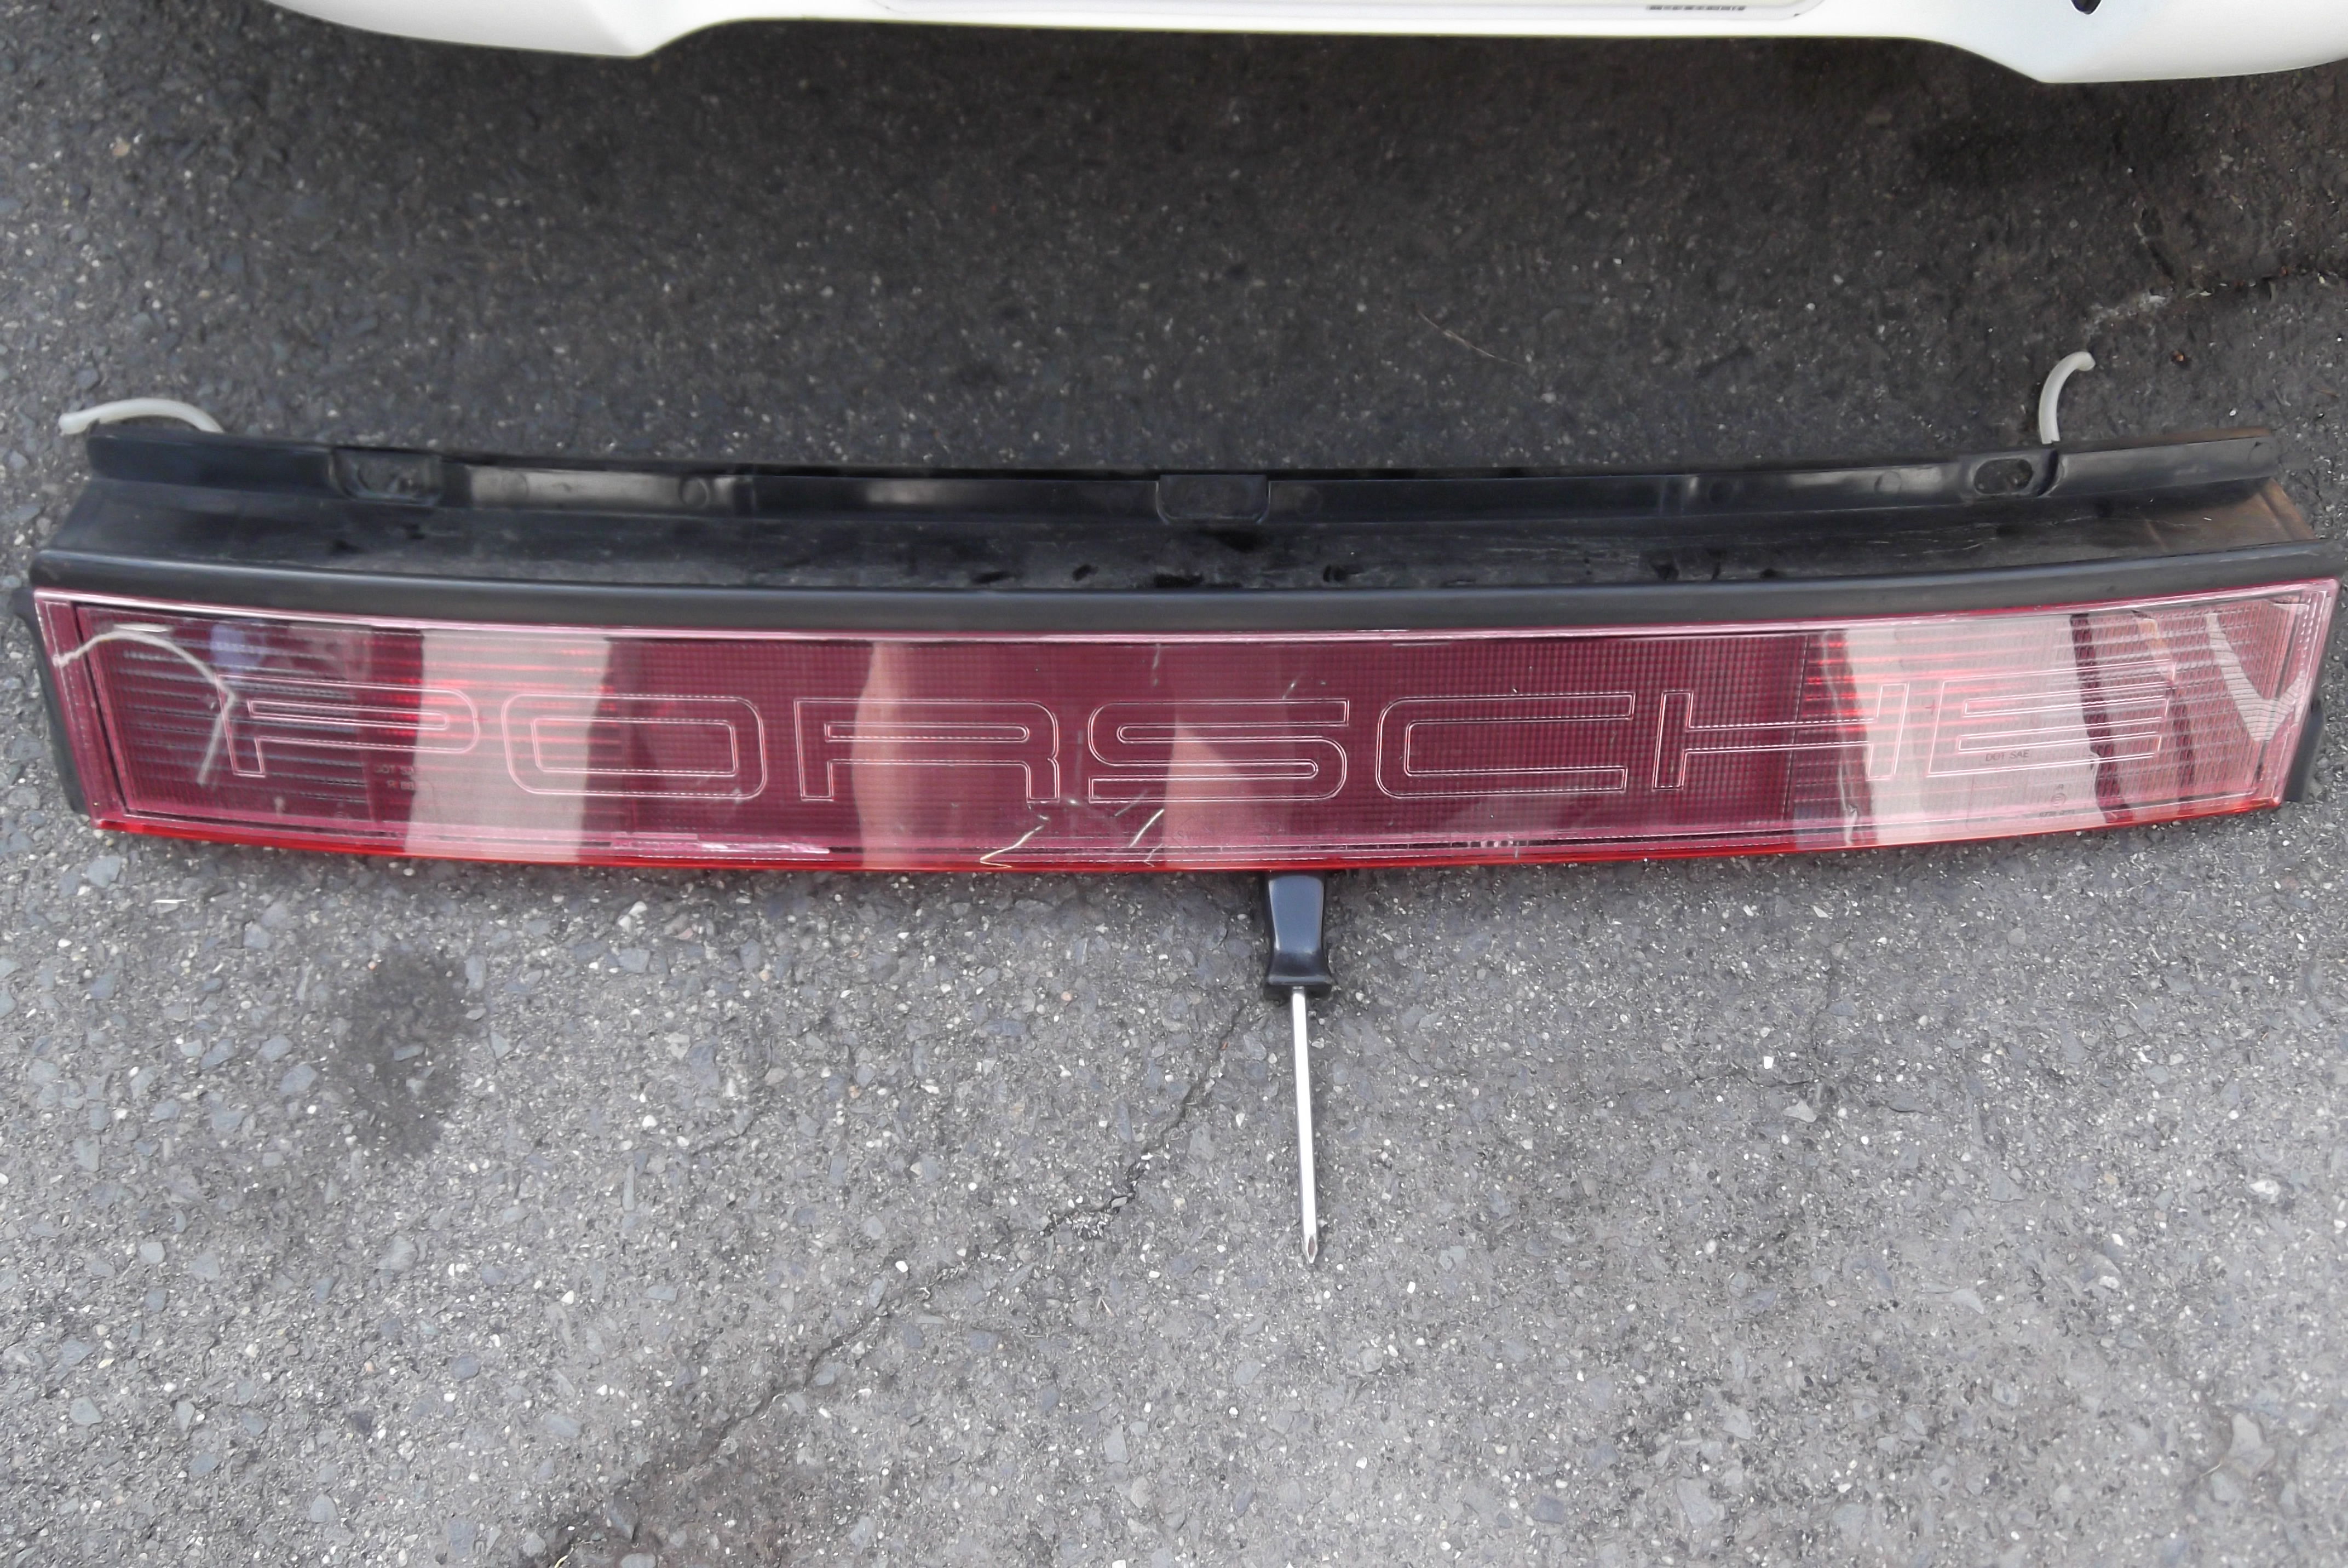
One more thing...I would imagine that removing all the gaskets from around the lens/housings would be advisable, Eh?
Thank Again for Your Help, Fellas!
Best Regards,
Tony


