

Teardown begins. Suspension madness...
 10-08-2016, 09:41 AM
#991
Race Car
Thread Starter
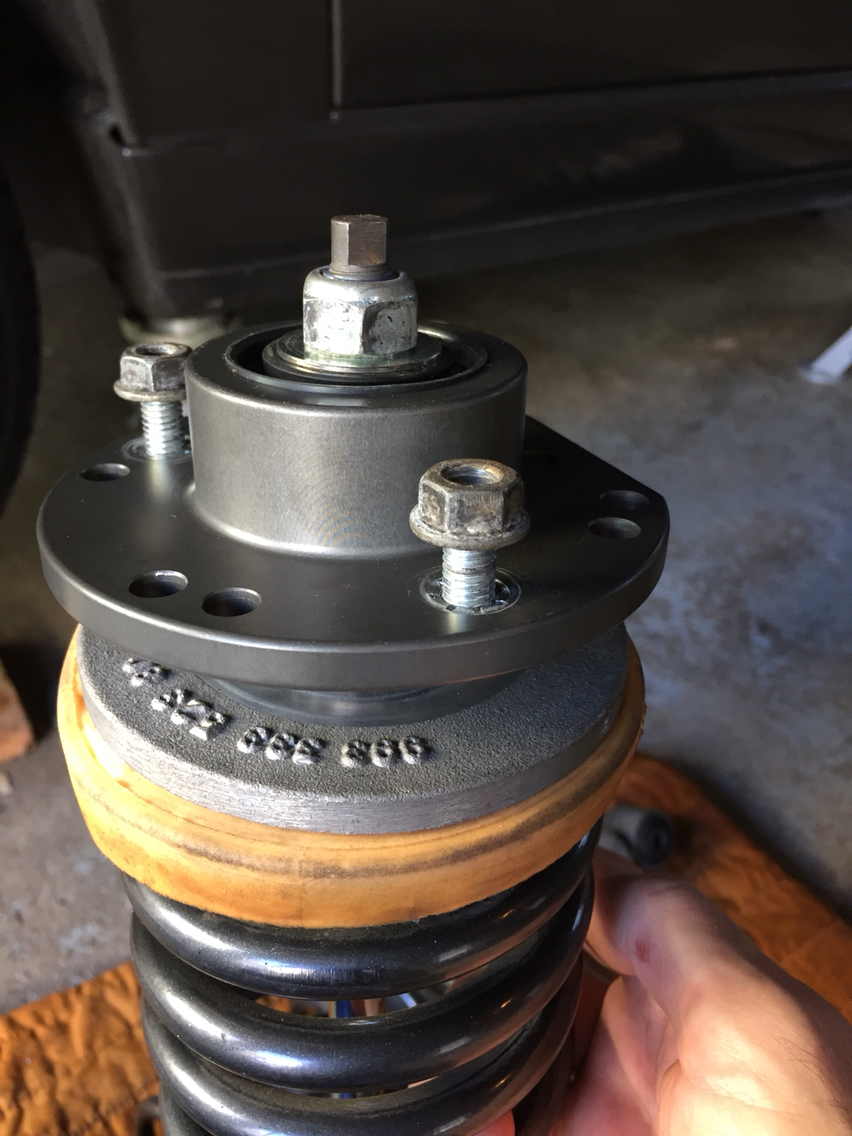
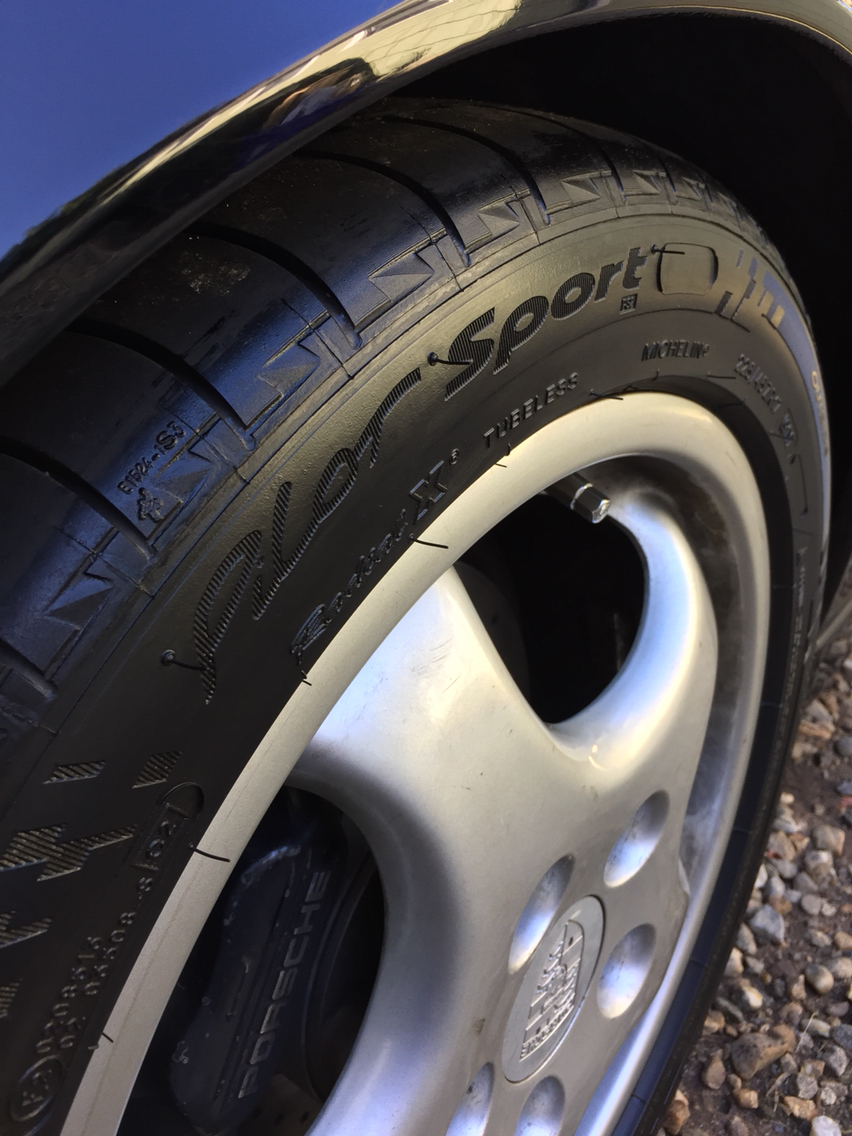
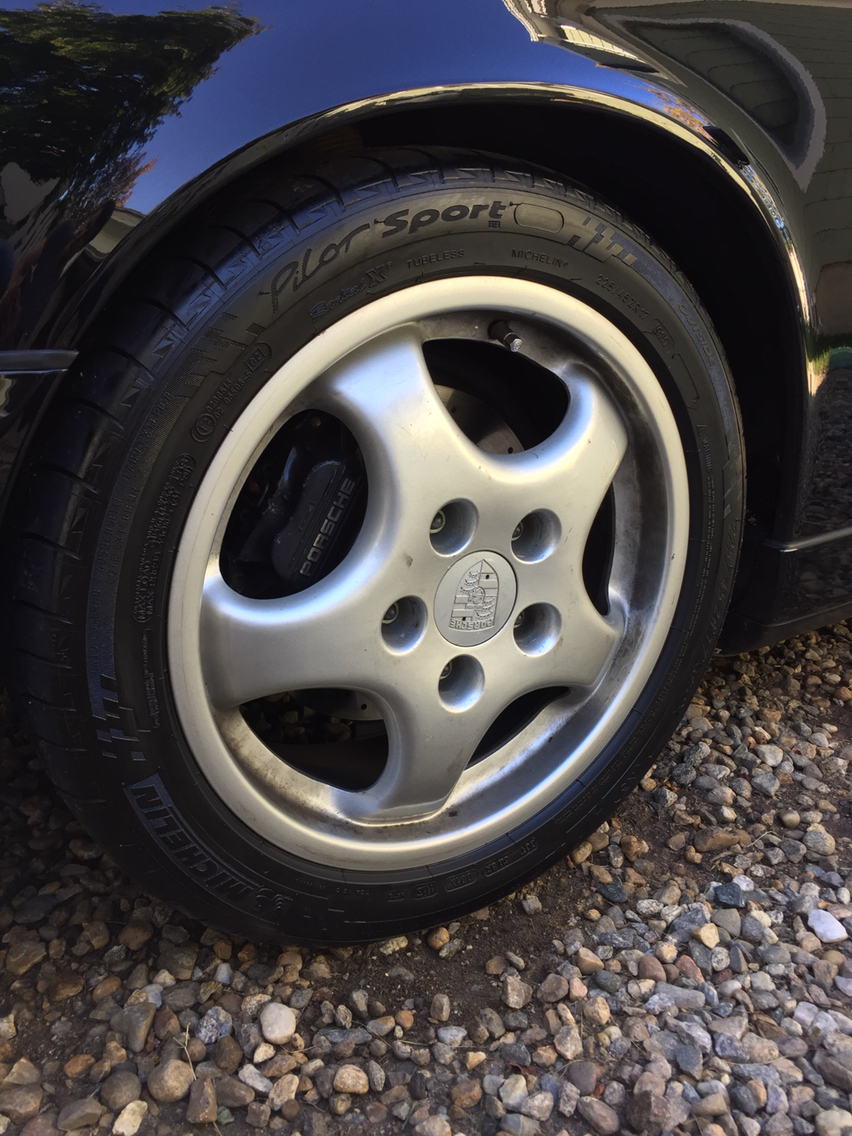
Now...word to the wise...we had ordered these upper top hats from elephant racing last year...effectively one year ago this project began. Elephant sent us the top hats, and then supplied the original upper perches in the following photo...and instructed us to build them as we had. Thy worked great, but made noise - what we found out was that elephant pressed in the studs to the top hats upside down. And that we needed to mount a proper upper perch, that we purchased through sunset, along with the foam separators. I made the 17mm spacers out of oem wheel lock lug nuts.
Take a look at the difference after the studs are re-pressed into the hats the right way round:
Before:
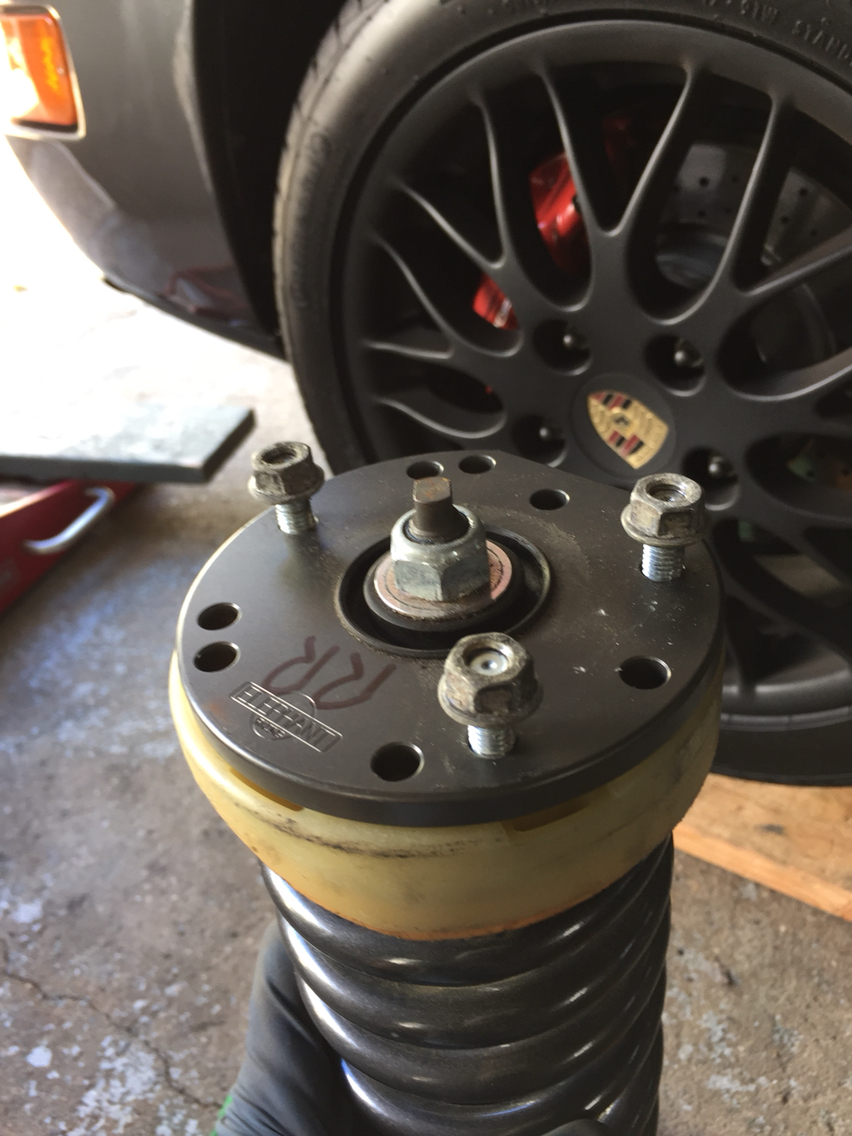
After:
Take a look at the difference after the studs are re-pressed into the hats the right way round:
Before:
After:


 10-08-2016, 10:06 AM
#995
Race Car
Thread Starter
Ok...getting to the end of my updates...
No pics to show, but last night I rebuilt my original 964 pedal box and re-installed that in place of the 993 box I put in last year. I gave up on the hanging clutch pedal for the moment. I haven't spent any time working on it in a while...and I have too many things to do to think I'll get to it anytime soon.
I hate the 964 box. The 993 box was perfect with the exception of that clutch pedal not returning all the way until the pressure pump turned on....
So it'll sit in a box in my attic. Until I get back to figuring it out.
If anyone wants it- in the meantime I'll sell it if someone wants to buy me out flat...700 buys it. That's my cost, with the box, all new bushings, new kinematic lever plus the original, plus all the other bits that were replaced. Not including labor. As-is, it's bolt in ready.
Best thing about the 993 box, aside from significantly better pedal feel, is the clutch is SO much lighter. The kinematic lever is longer, so it's way easier to depress the clutch, so made traffic significantly easier to deal with.
But- I want it back for the pedal feel. Metal bushing and heavier build quality make it overall much nicer.
10-08-2016, 10:09 AM
#996
Race Car
Thread Starter
And today: I'll be doing my 993 coil conversion...
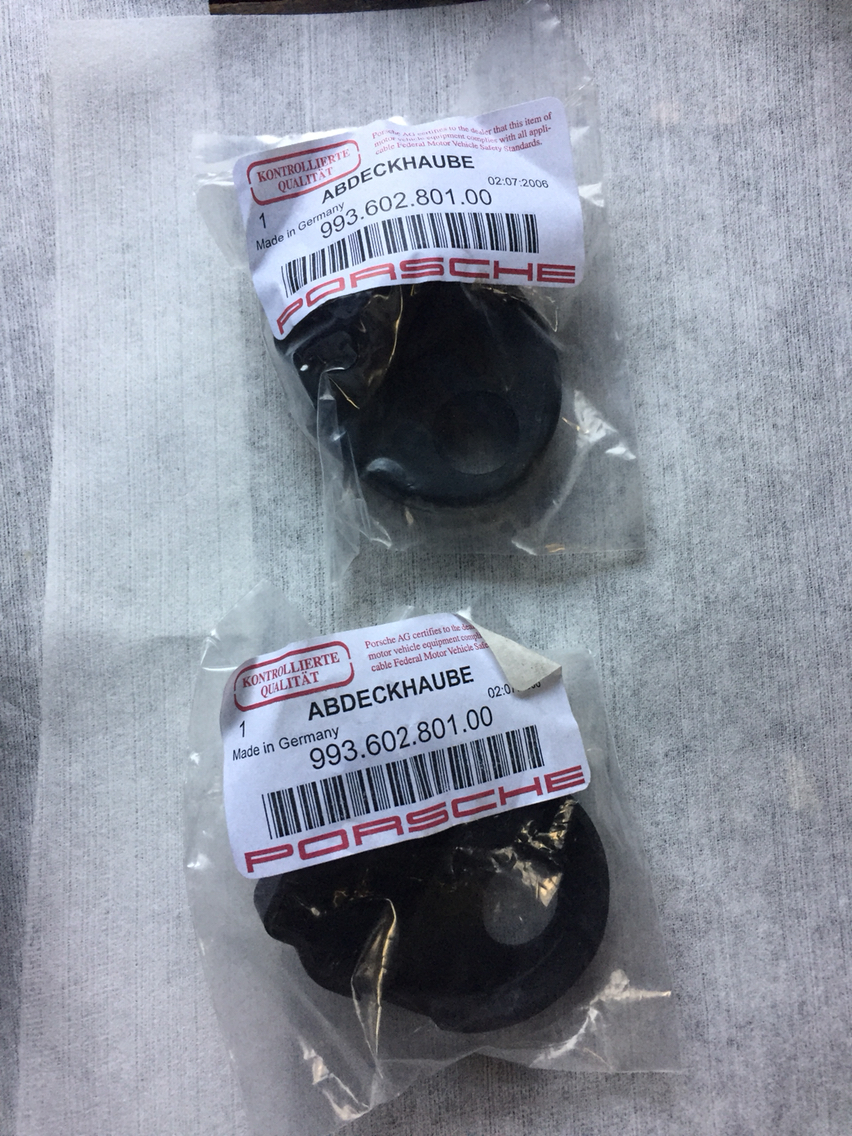
Here are the bits I have. Need to make a bracket per Daves post way back when on this thread.

If we need another DIY on this...ask and if I've taken pics, I'll write another step by step.
Here are the bits I have. Need to make a bracket per Daves post way back when on this thread.
If we need another DIY on this...ask and if I've taken pics, I'll write another step by step.
10-08-2016, 10:23 AM
#997
Race Car
Thread Starter
Lastly and then I'm getting to work...
This is the car I helped build at The Third Garage...I have no affiliation with this sale...I was helping them sort it out prior to getting it posted for sale. They are straight honest sellers...so call them if you are looking for a guards red c4. This is a very honest car. The most impressive thing was to see zero rust other than the inevitable rust on the engine tins...looks like this car never saw water...the underside is crazy clean and rust free. I think iirc, he is offered too low for the car in the mid forties. I say that only because i know the car well enough to know not much money needs to go in post purchase...whereas most of the less honest c4 I see for sale need a ton of money post purchase. All of these cars need something. When I buy, I always look at price plus "what else"....
If I had the funds today, this car would have already been mine. I want a second in a good color. And guards red is back. Looks awesome.

Car has tons of new stuff- new front windshield new tail lights new seals all around...new new new. Scott wanted to get it properly sorted prior to selling. He did it right. So like I said, you guys looking for a C4, I keep seeing people get hosed on cars. This one is an easy choice. Make sure you get it leaked down prior to purchase, as I have no specs on the internals of the motor. But for all intents and purposes, the third garage in new Milford, CT spent the last few weeks spending all the money you won't have to spend sorting this car out, and there isn't much left to do...so you are ahead of the game with this one. Plus I had a ton of fun putting it together wth them...
This is the car I helped build at The Third Garage...I have no affiliation with this sale...I was helping them sort it out prior to getting it posted for sale. They are straight honest sellers...so call them if you are looking for a guards red c4. This is a very honest car. The most impressive thing was to see zero rust other than the inevitable rust on the engine tins...looks like this car never saw water...the underside is crazy clean and rust free. I think iirc, he is offered too low for the car in the mid forties. I say that only because i know the car well enough to know not much money needs to go in post purchase...whereas most of the less honest c4 I see for sale need a ton of money post purchase. All of these cars need something. When I buy, I always look at price plus "what else"....
If I had the funds today, this car would have already been mine. I want a second in a good color. And guards red is back. Looks awesome.
Car has tons of new stuff- new front windshield new tail lights new seals all around...new new new. Scott wanted to get it properly sorted prior to selling. He did it right. So like I said, you guys looking for a C4, I keep seeing people get hosed on cars. This one is an easy choice. Make sure you get it leaked down prior to purchase, as I have no specs on the internals of the motor. But for all intents and purposes, the third garage in new Milford, CT spent the last few weeks spending all the money you won't have to spend sorting this car out, and there isn't much left to do...so you are ahead of the game with this one. Plus I had a ton of fun putting it together wth them...
10-08-2016, 11:05 AM
#998
Racer
Originally Posted by Goughary
And today: I'll be doing my 993 coil conversion...
Here are the bits I have. Need to make a bracket per Daves post way back when on this thread.
Attachment 1096799Attachment 1096800Attachment 1096798Attachment 1096797Attachment 1096796Attachment 1096801
If we need another DIY on this...ask and if I've taken pics, I'll write another step by step.
Here are the bits I have. Need to make a bracket per Daves post way back when on this thread.
Attachment 1096799Attachment 1096800Attachment 1096798Attachment 1096797Attachment 1096796Attachment 1096801
If we need another DIY on this...ask and if I've taken pics, I'll write another step by step.
10-08-2016, 02:45 PM
#999
Technical Guru
Rennlist Member
Rennlist Member
10-08-2016, 07:32 PM
#1001
Race Car
Thread Starter
993 coil swap...this was covered, but I did a couple of things different, making the whole thing a bolt in assembly. Will make swapping coils easier later. Well the only real difference is now I unbolt the bracket itself, whereas the way we did daves, you unbolt the coil from the bracket- the bracket stays in the car. Maybe his is simpler...who knows. Regardless, here we go. I'll try to get this organized step by step....
First - make a bracket. The angles on this one will get way tighter.

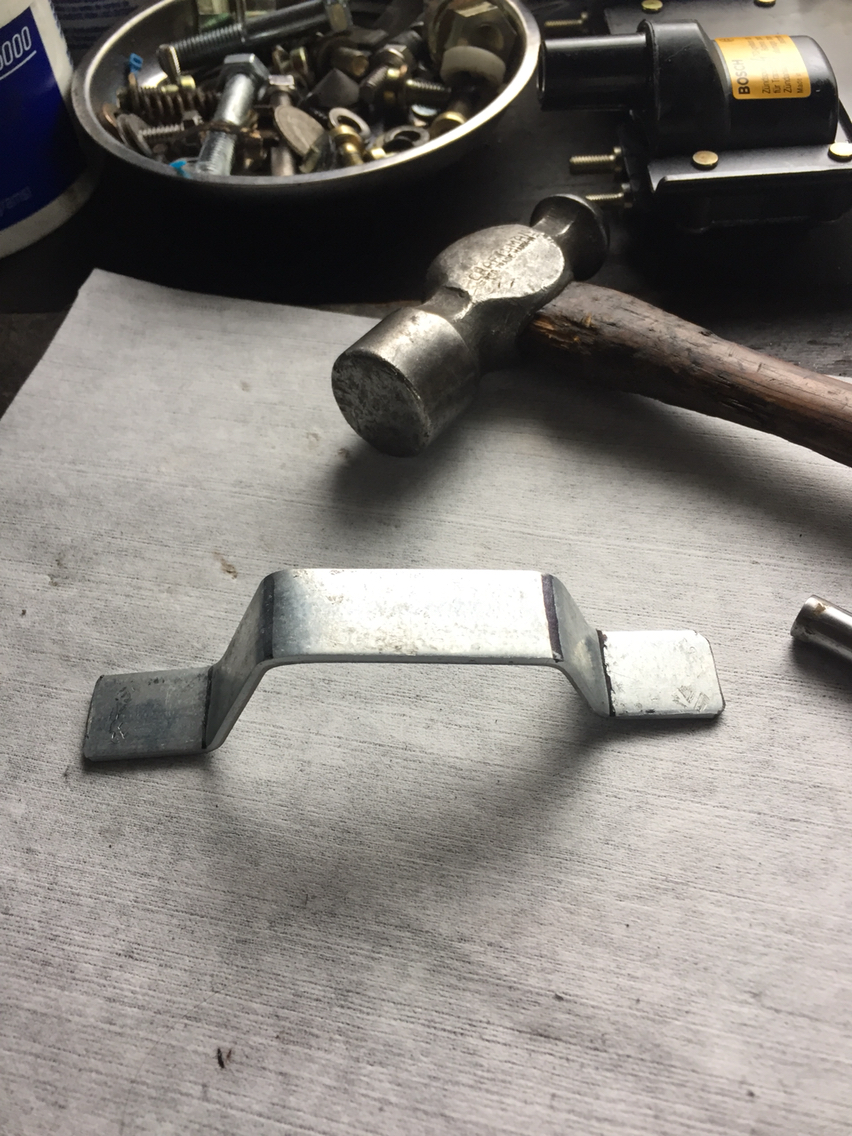
First - make a bracket. The angles on this one will get way tighter.
10-08-2016, 08:18 PM
#1002
Race Car
Thread Starter
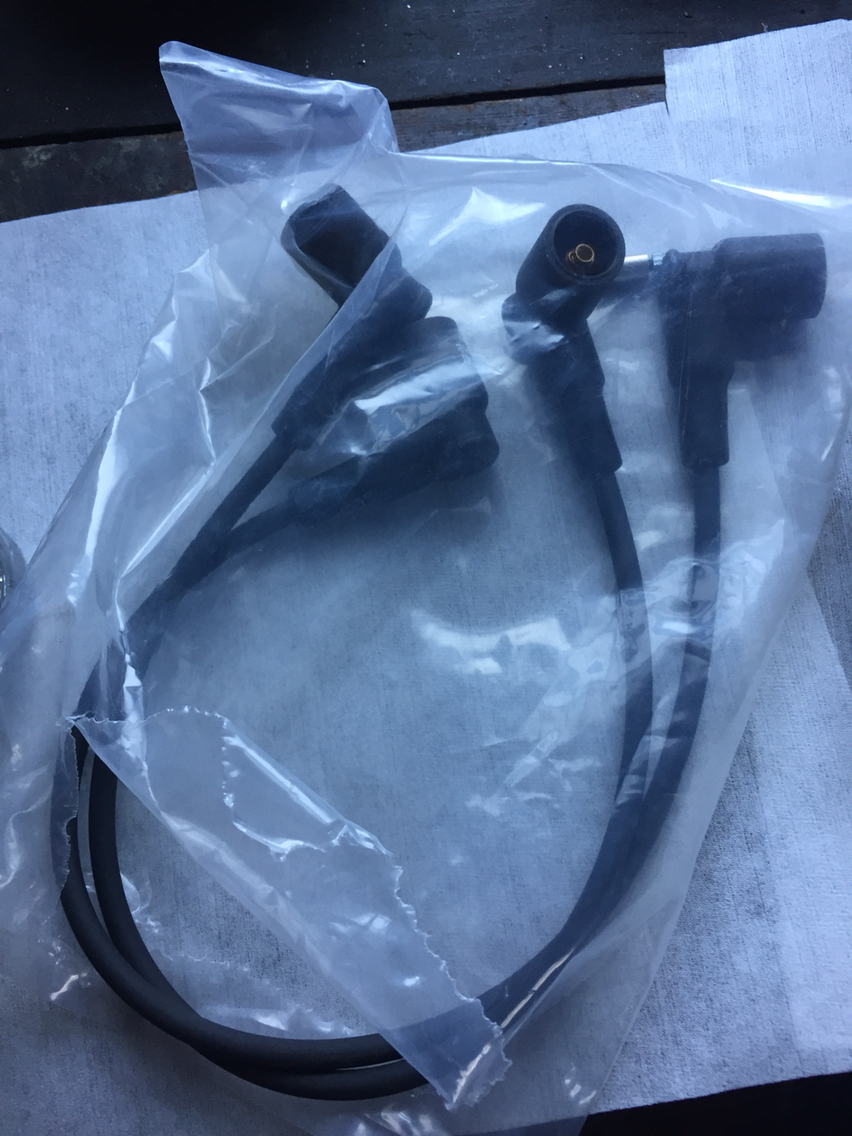
And here is all the stuff that has to come out...
Heater blower motor, the pipe, and the cover for the fuse box. And then you have the space to work on the coil assembly.
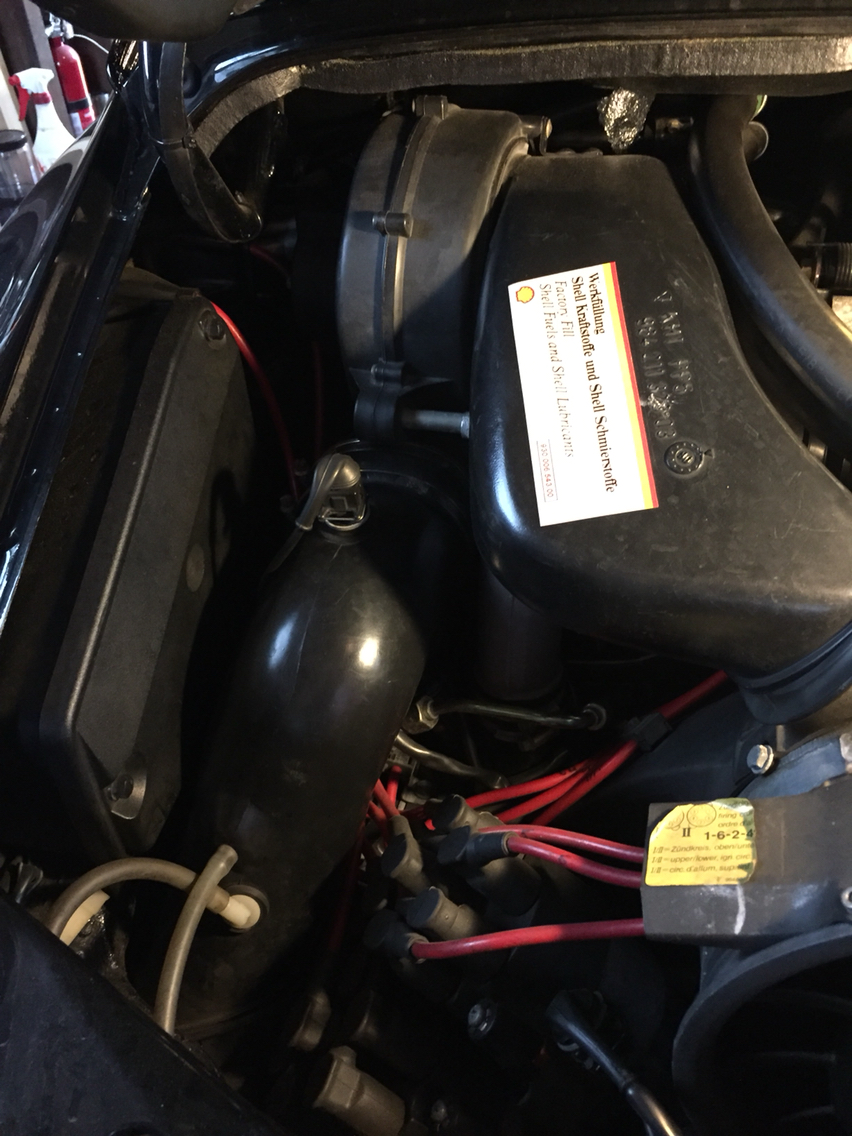
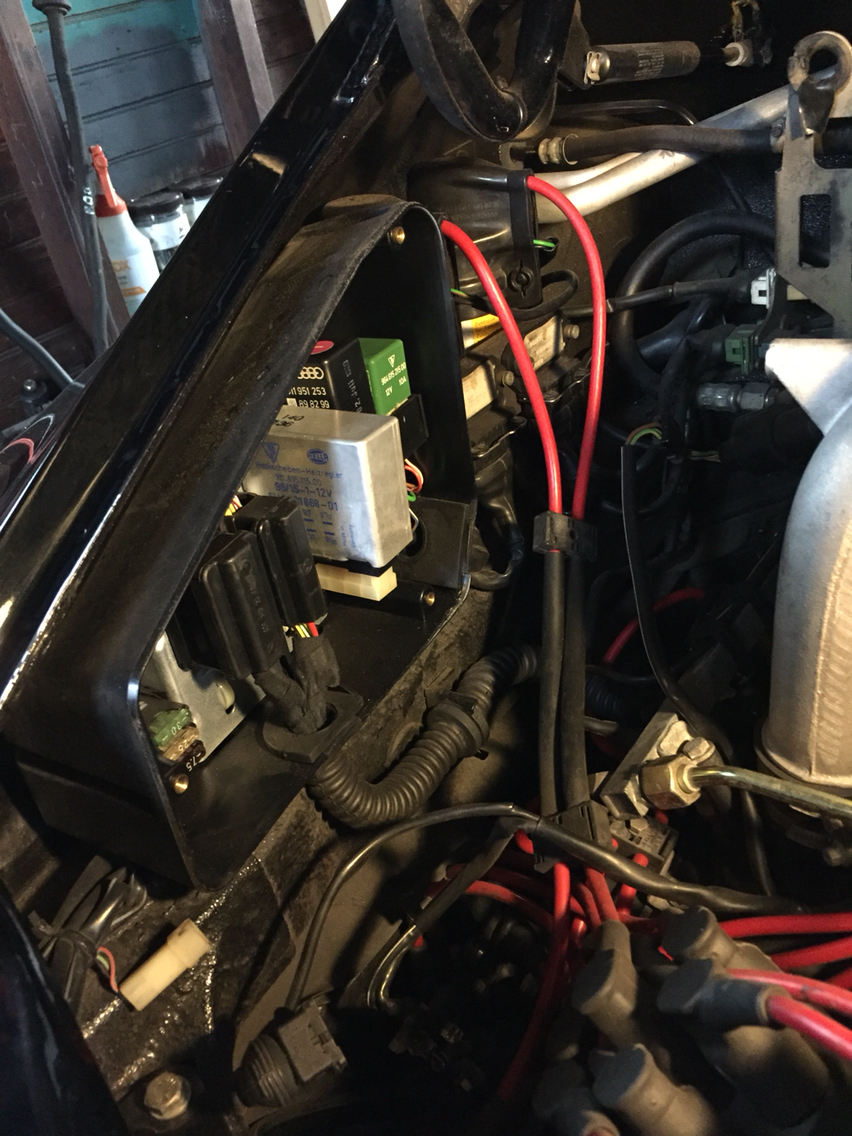
Heater blower motor, the pipe, and the cover for the fuse box. And then you have the space to work on the coil assembly.
10-08-2016, 08:24 PM
#1003
Race Car
Thread Starter
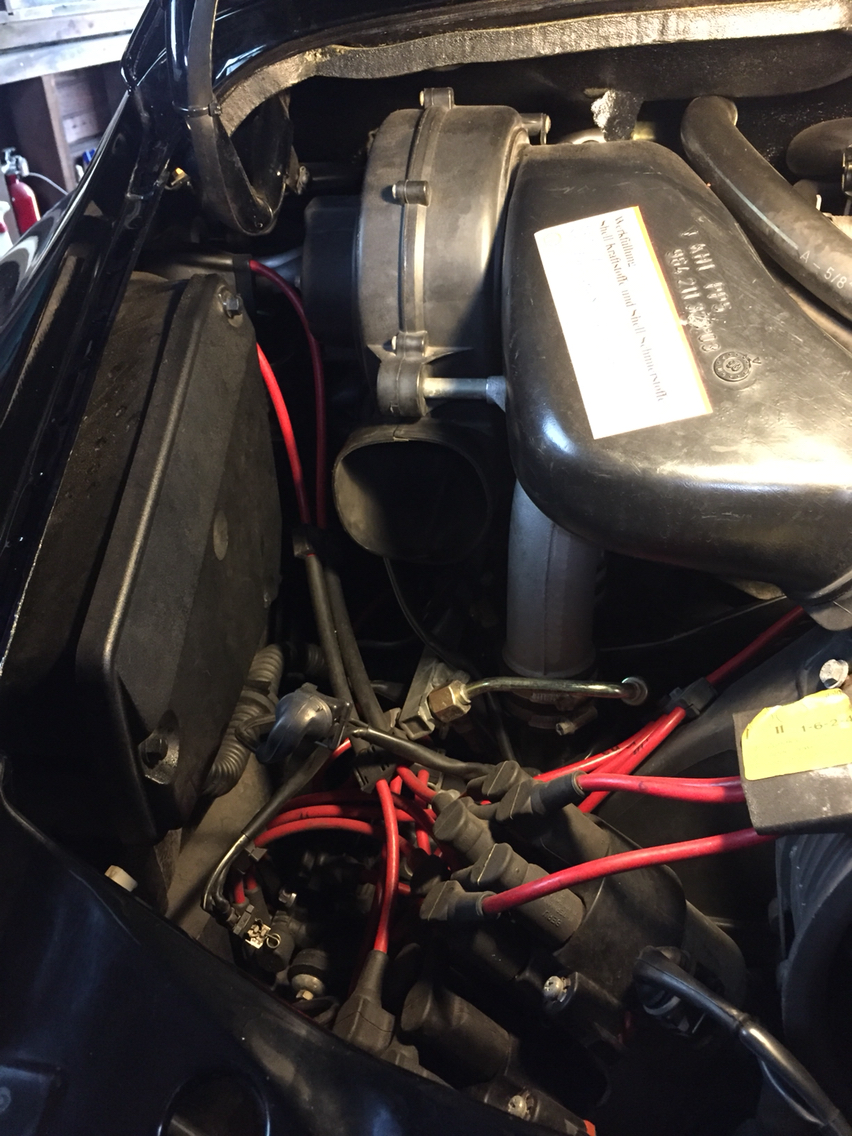
Next up, take out the coils and the existing coil bracket.
Make sure you have disconnected your battery.
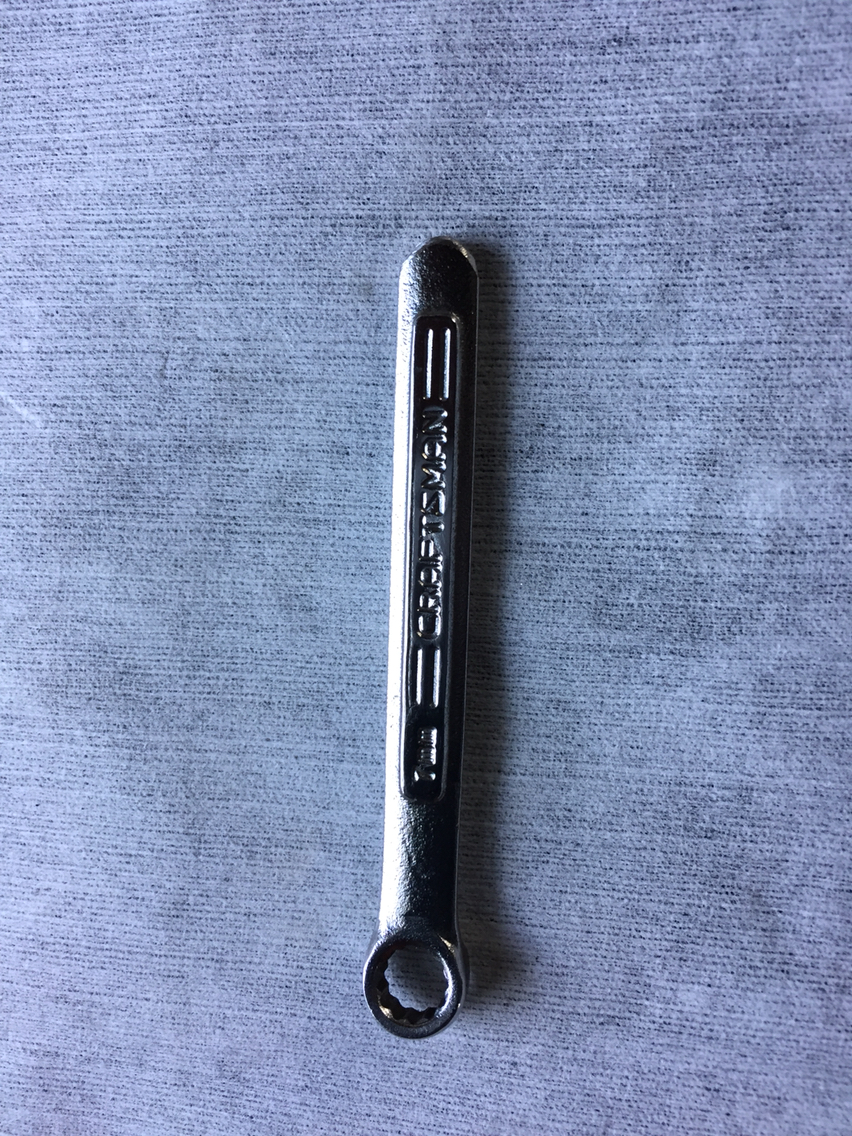
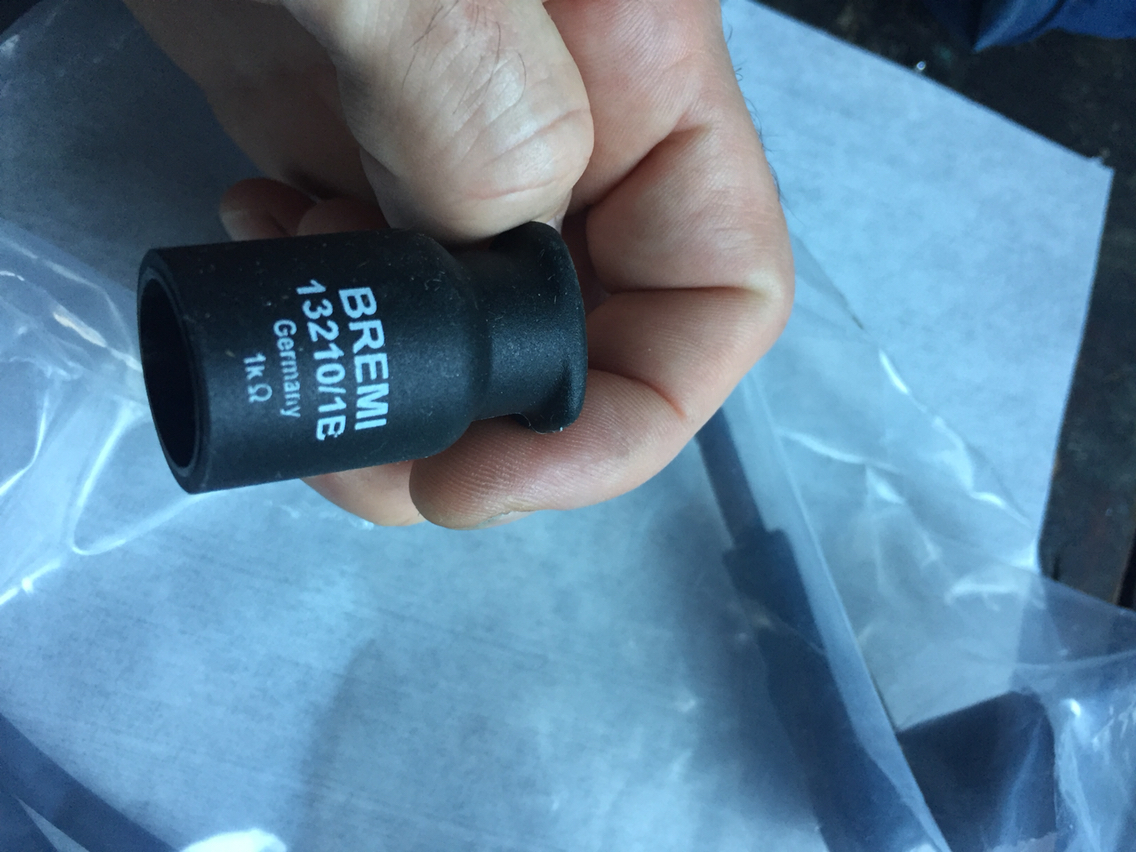
Taking it all out is straight forward, unclip the ignition control modules, unbolt the wires from the coils, unbolt the ground, and unbolt the coil bracket from the car. You'll need a long Allen socket for this...
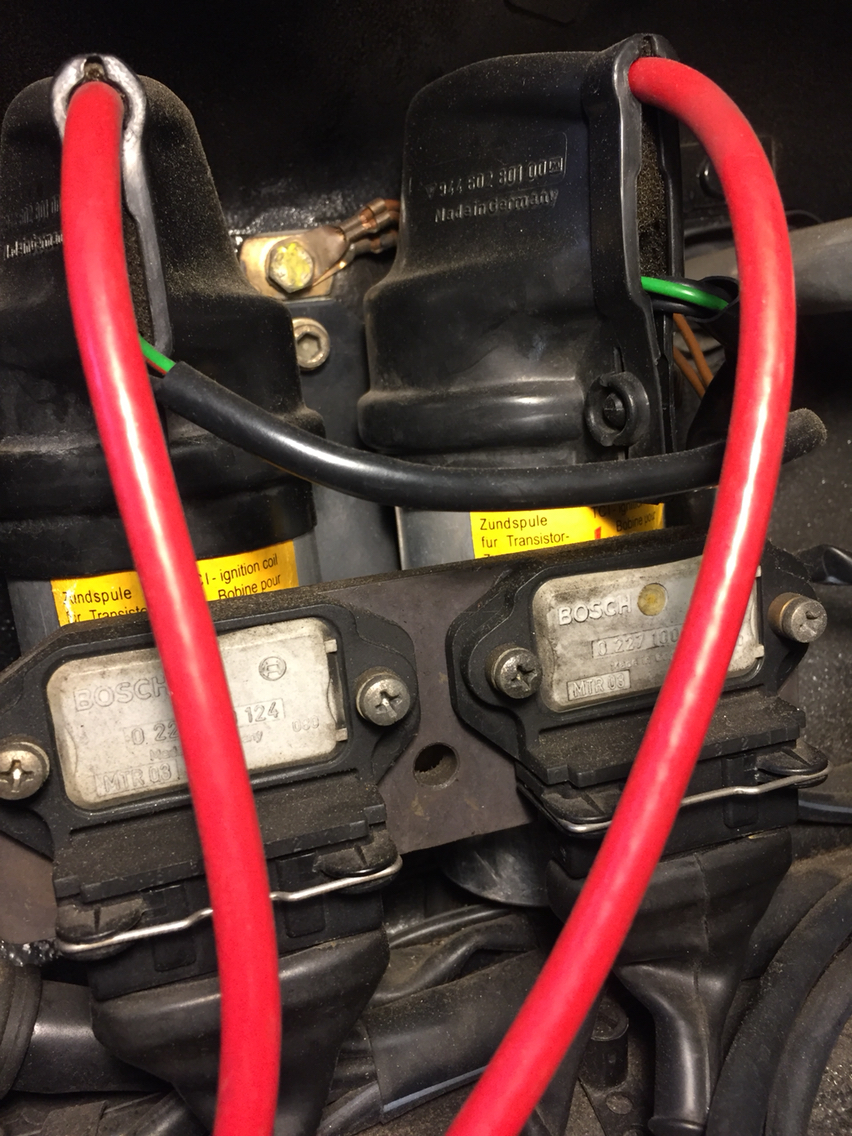
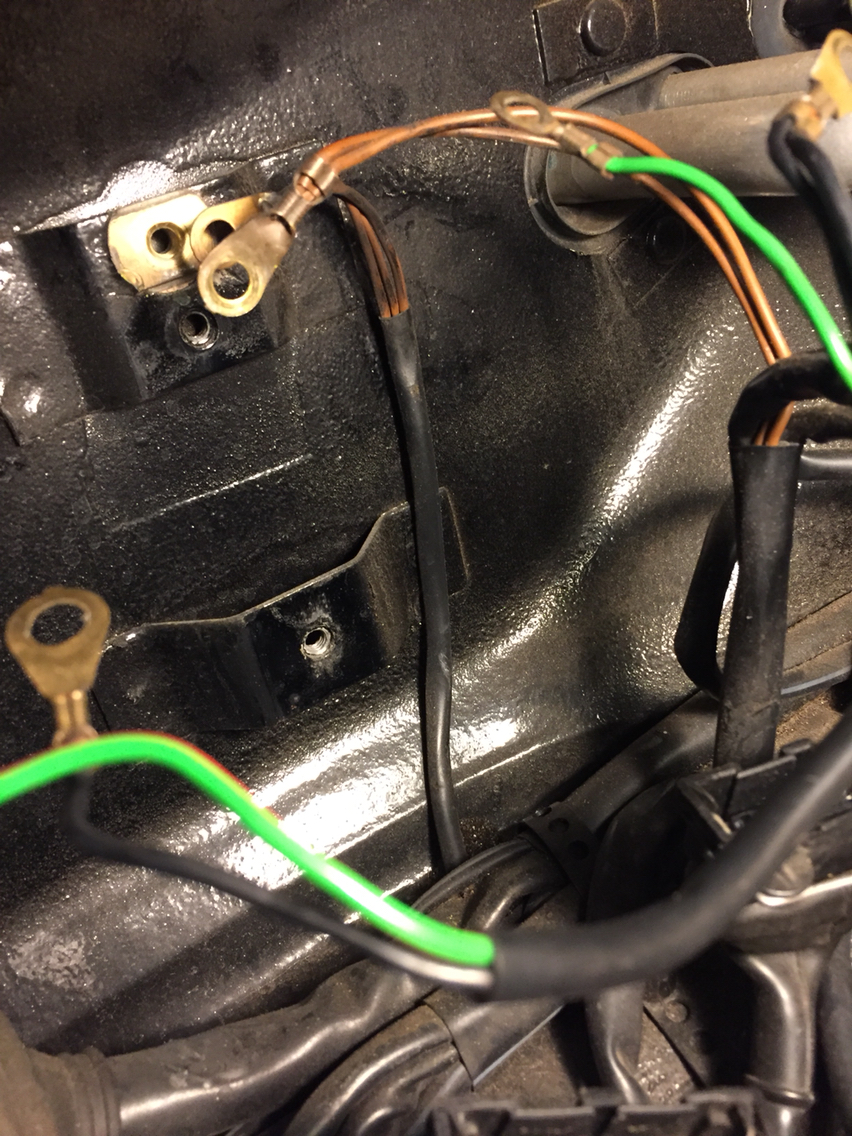
Make sure you have disconnected your battery.
Taking it all out is straight forward, unclip the ignition control modules, unbolt the wires from the coils, unbolt the ground, and unbolt the coil bracket from the car. You'll need a long Allen socket for this...
10-08-2016, 08:28 PM
#1004
Race Car
Thread Starter
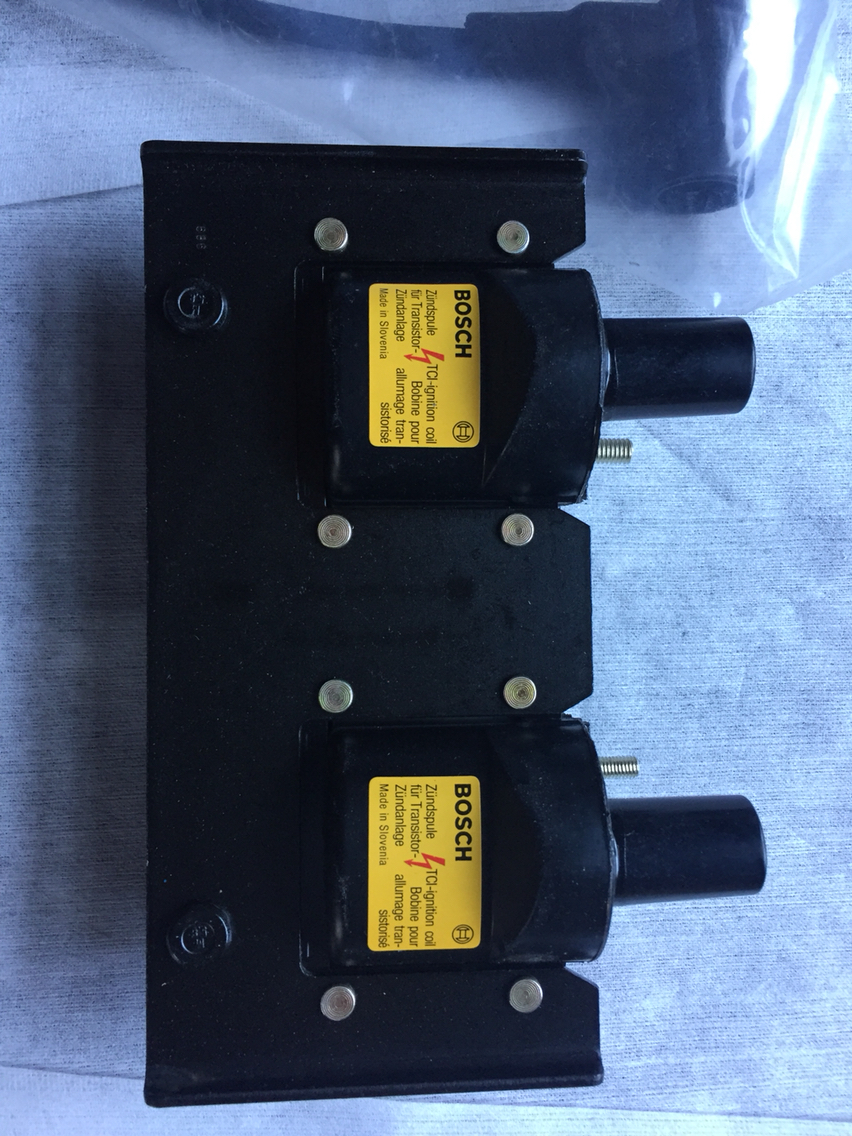
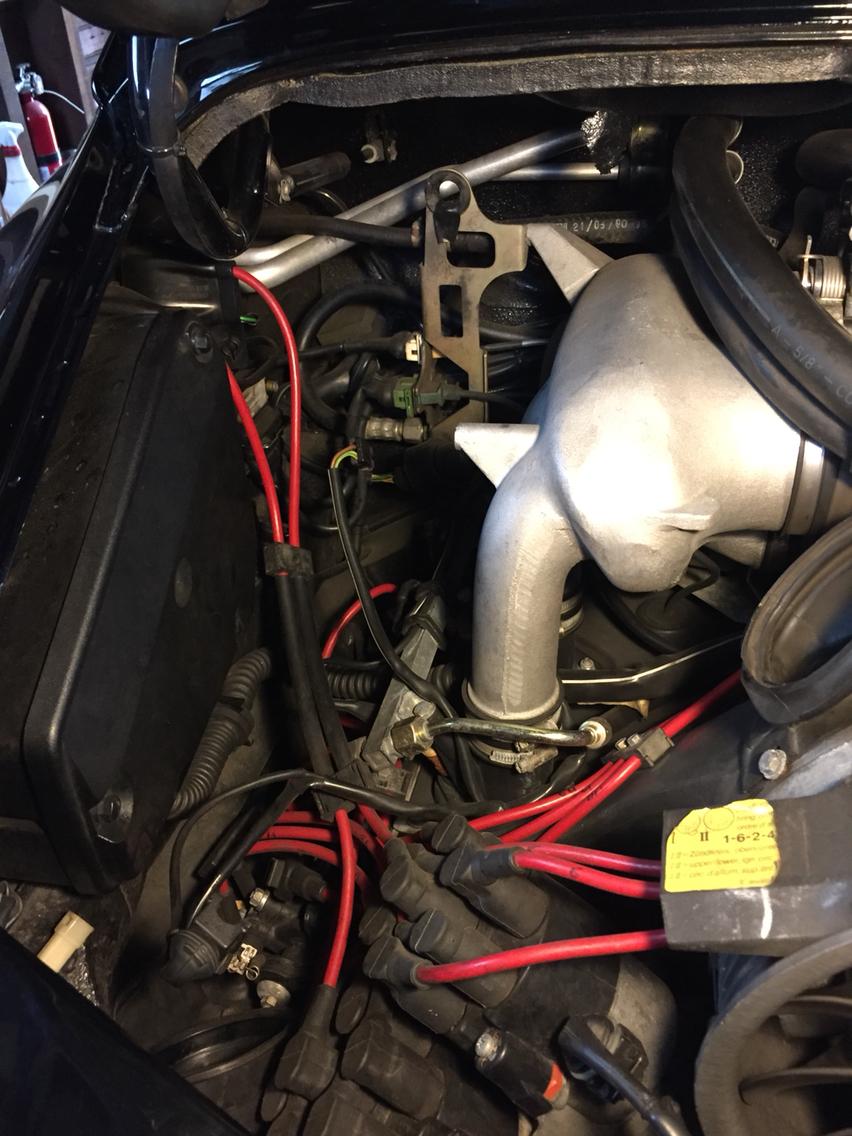
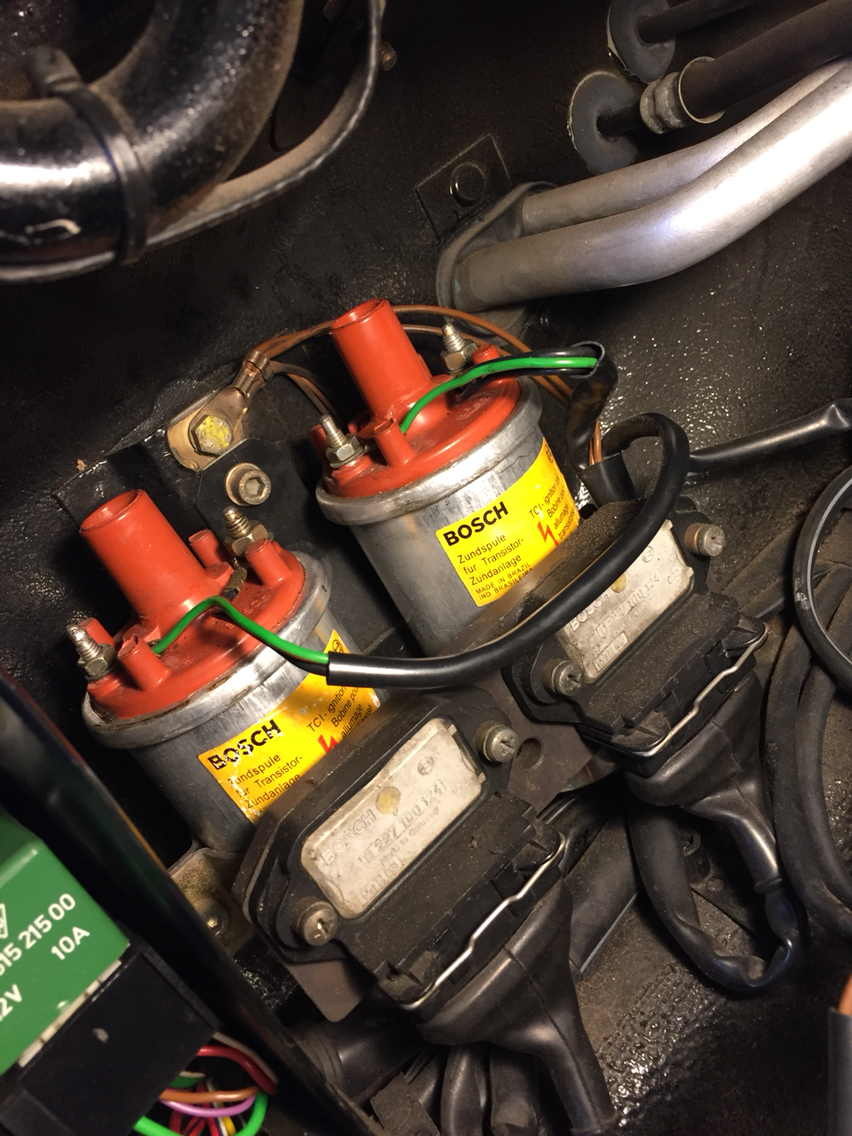
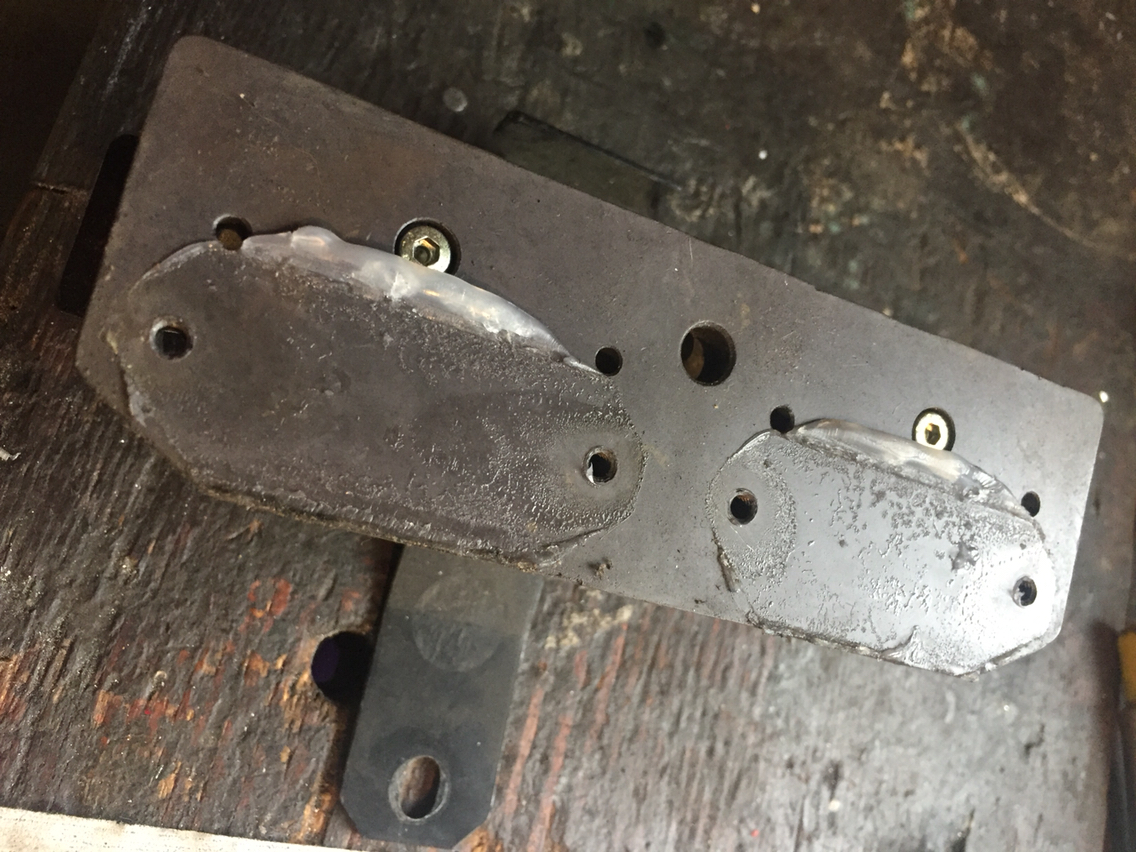
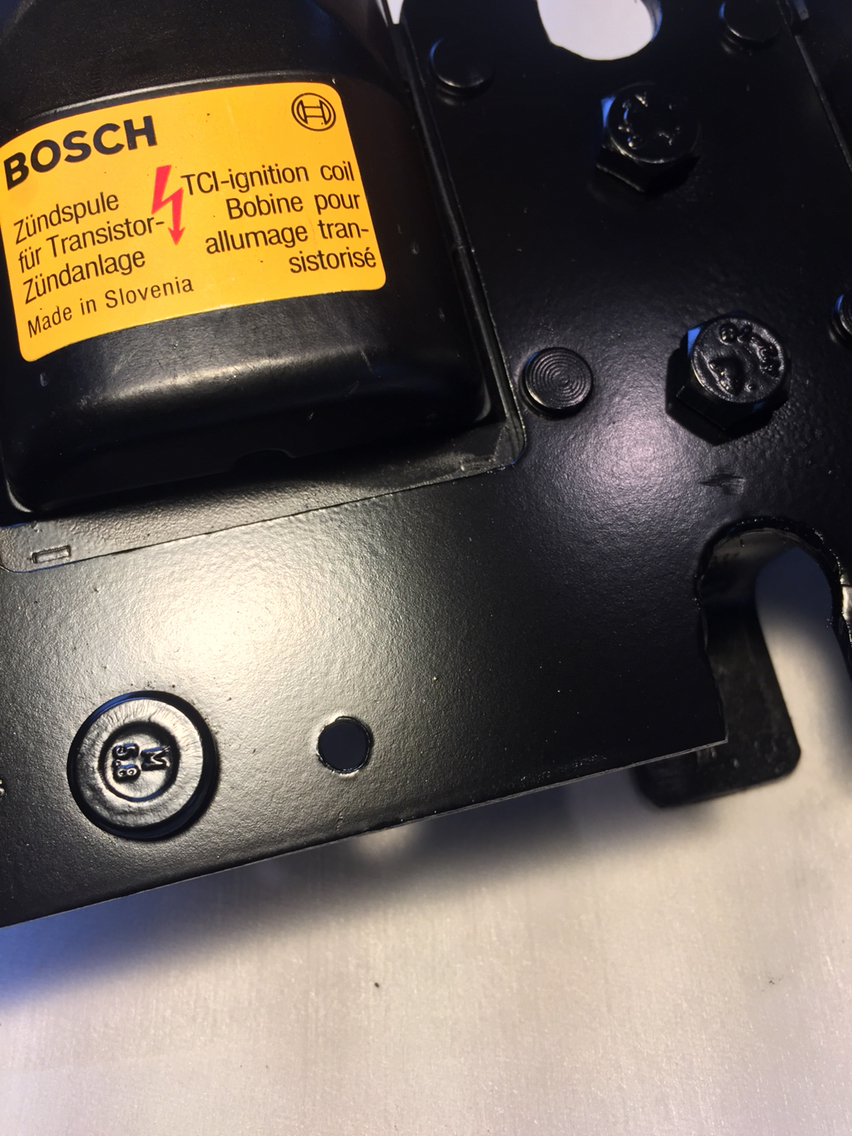
Once you've unscrewed the ignition control modules, note there is dialectric grease between the modules and the heat sink. So replace that when you reassemble. Unscrew the heat sink from the 964 bracket. That oem 964 bracket can be put aside, along with the old coils.
10-08-2016, 08:40 PM
#1005
Race Car
Thread Starter
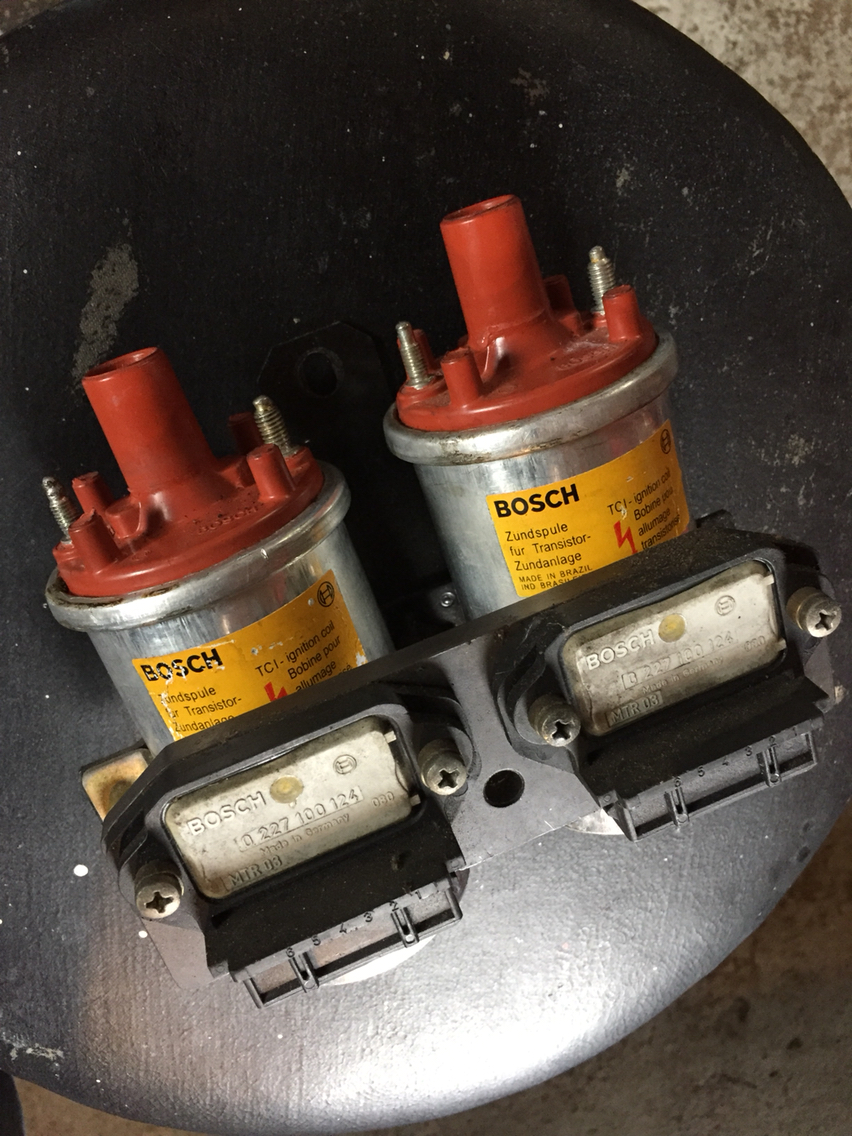
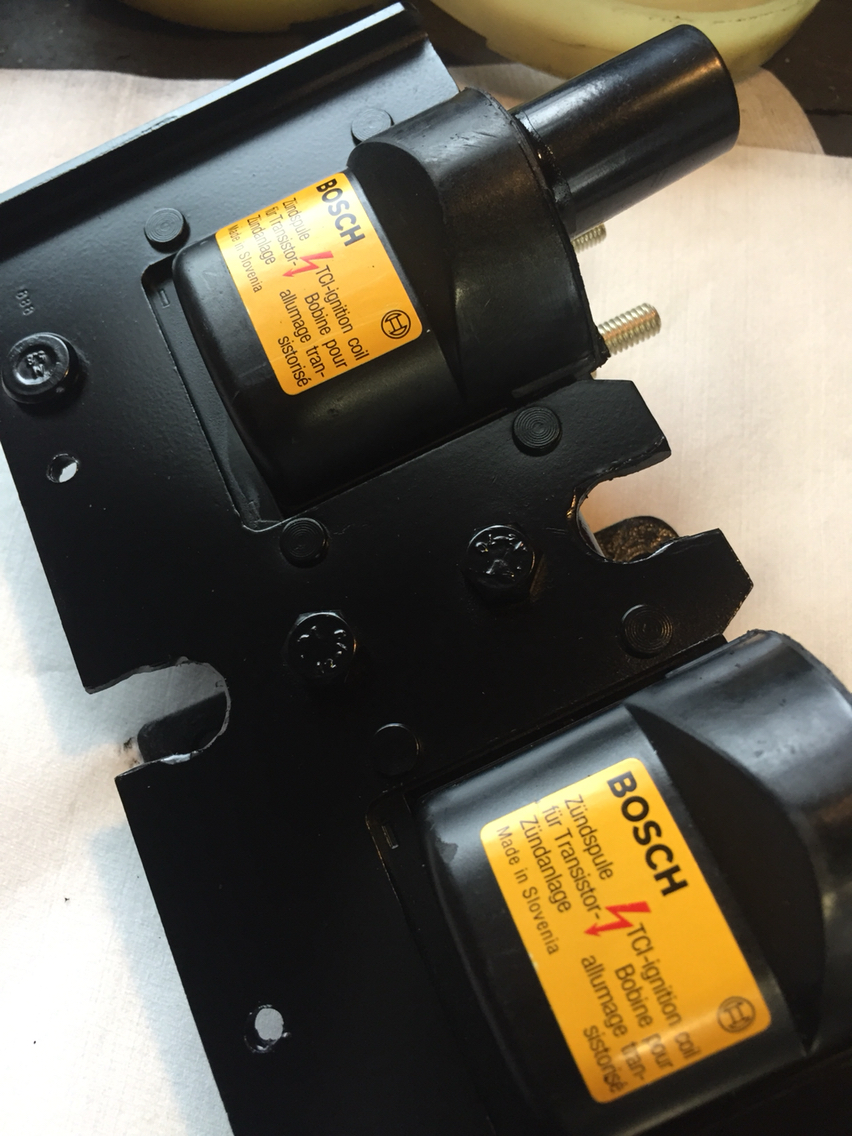
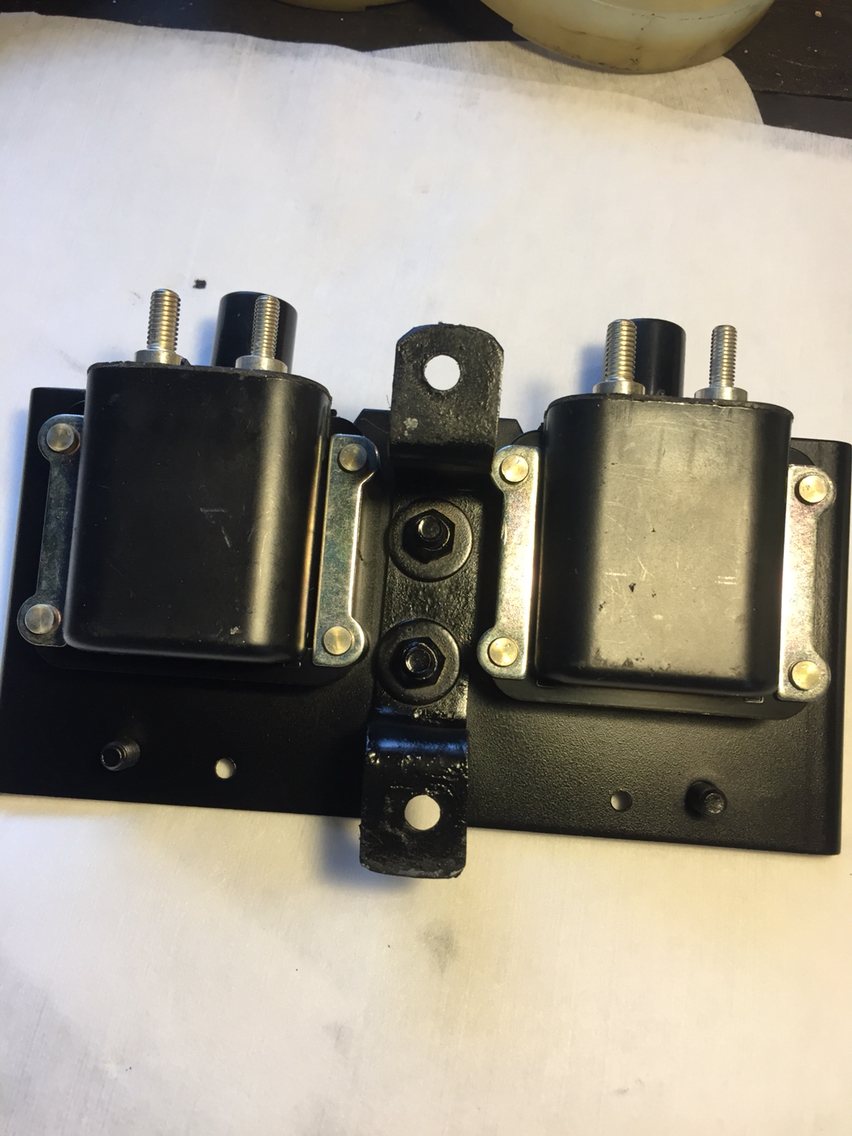
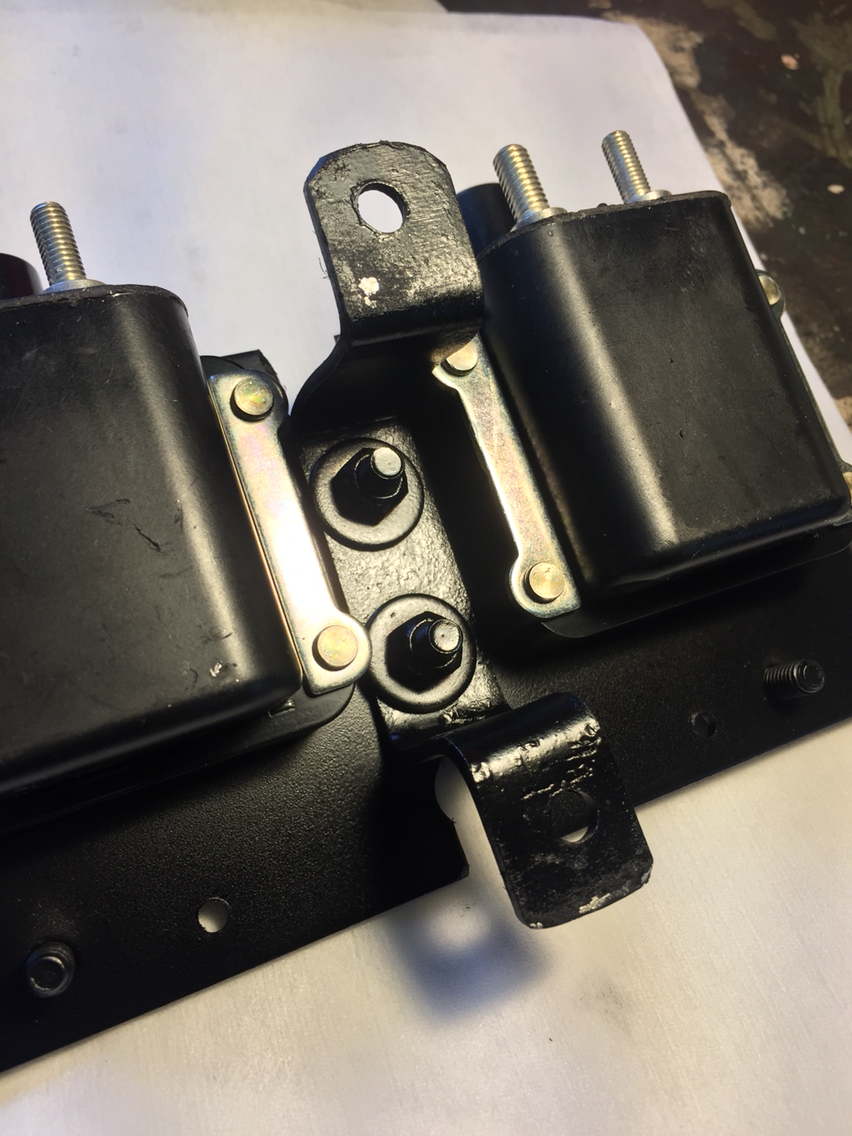
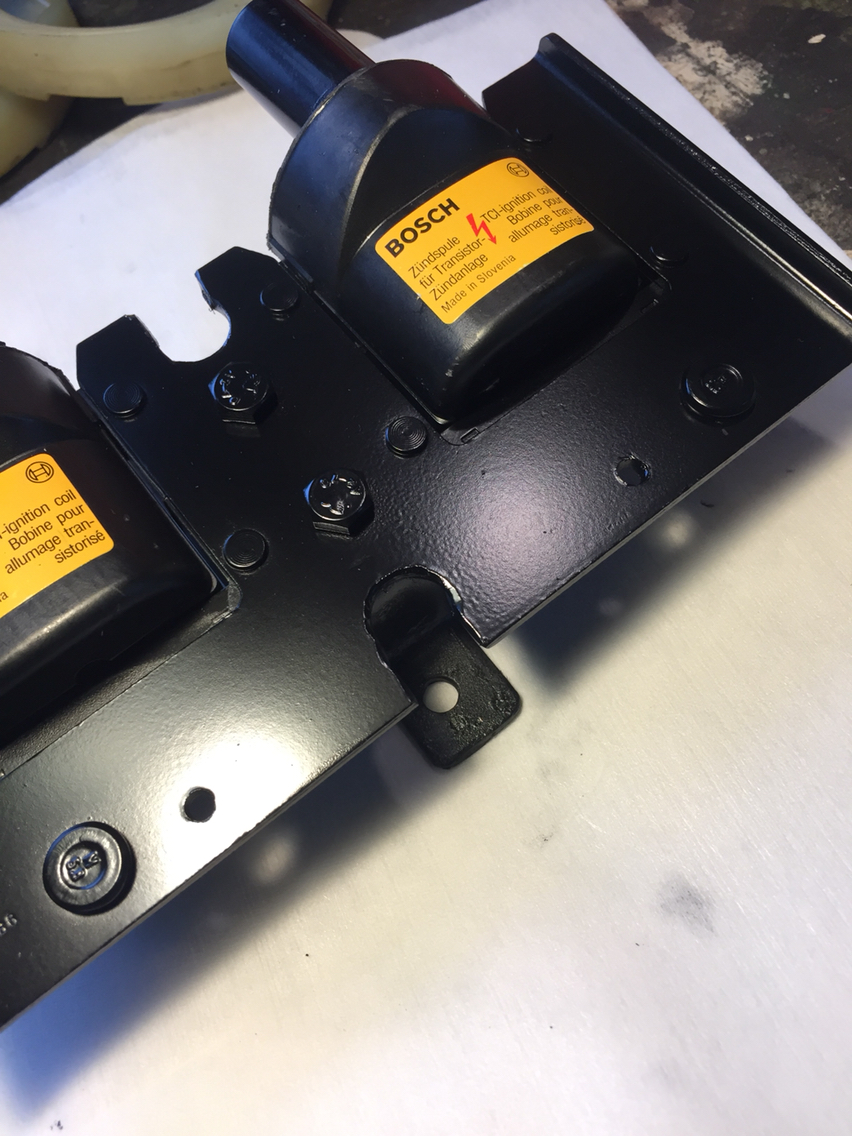
Jumping forward. You should have already checked that your bracket fits the car. Drilled holes for the m6 cap screws that are going to bolt it to the oem 964 bracket holes inside the engine bay. Same ones the old bracket bolted to.
Then, and you'll see this in the pics below...drill two holes through the bracket and the metal plate of the coil, and bolt the bracket to the coil with m6 bolts and nuts.
If you look straight at this assembly, you'll see that the plate of the coil blocks you from screwing it to the car. So you cut notches out of the plate, so that your long Allen socket can run straight to the bolt heads.
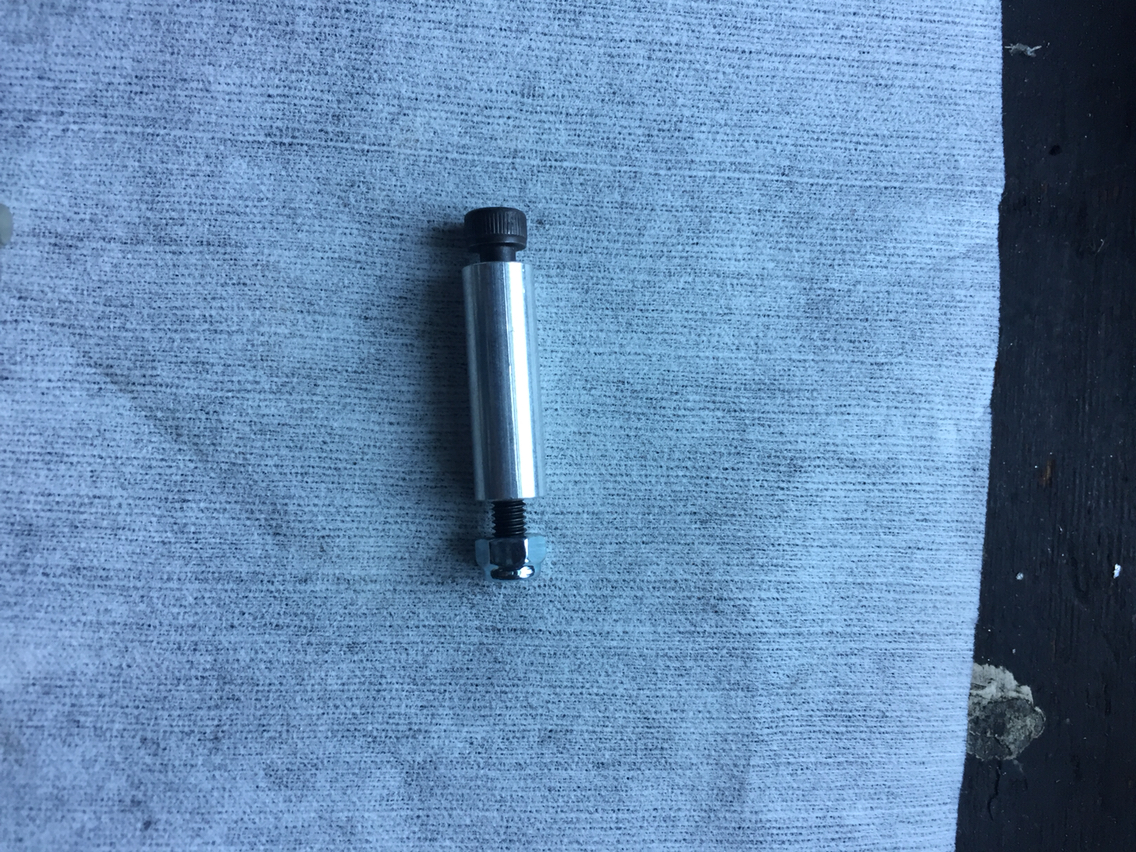
When you mount your heat sink, you also are going to drill holes to use the oem mount holes in the heat sink. Long m4 low profile cap head bolts and 3/4 inch aluminum spacers for this. You'll see in the pics below what that looks like. Be careful to position the heat sink such that your long Allen will run through the center hole of the heat sink, to the head of the bolt to the car....
And there you have it...pics follow:
Then, and you'll see this in the pics below...drill two holes through the bracket and the metal plate of the coil, and bolt the bracket to the coil with m6 bolts and nuts.
If you look straight at this assembly, you'll see that the plate of the coil blocks you from screwing it to the car. So you cut notches out of the plate, so that your long Allen socket can run straight to the bolt heads.
When you mount your heat sink, you also are going to drill holes to use the oem mount holes in the heat sink. Long m4 low profile cap head bolts and 3/4 inch aluminum spacers for this. You'll see in the pics below what that looks like. Be careful to position the heat sink such that your long Allen will run through the center hole of the heat sink, to the head of the bolt to the car....
And there you have it...pics follow: