
onceovers long overdue introduction (long)
 07-11-2015, 02:26 PM
#16
Pro
Thread Starter
I didn't even take the bumper off when I pulled mine out. Just drop the motor a little and wiggle it out. It would be a perfect opportunity to add the reinforcement.
 07-22-2015, 12:00 PM
#17
Pro
Thread Starter
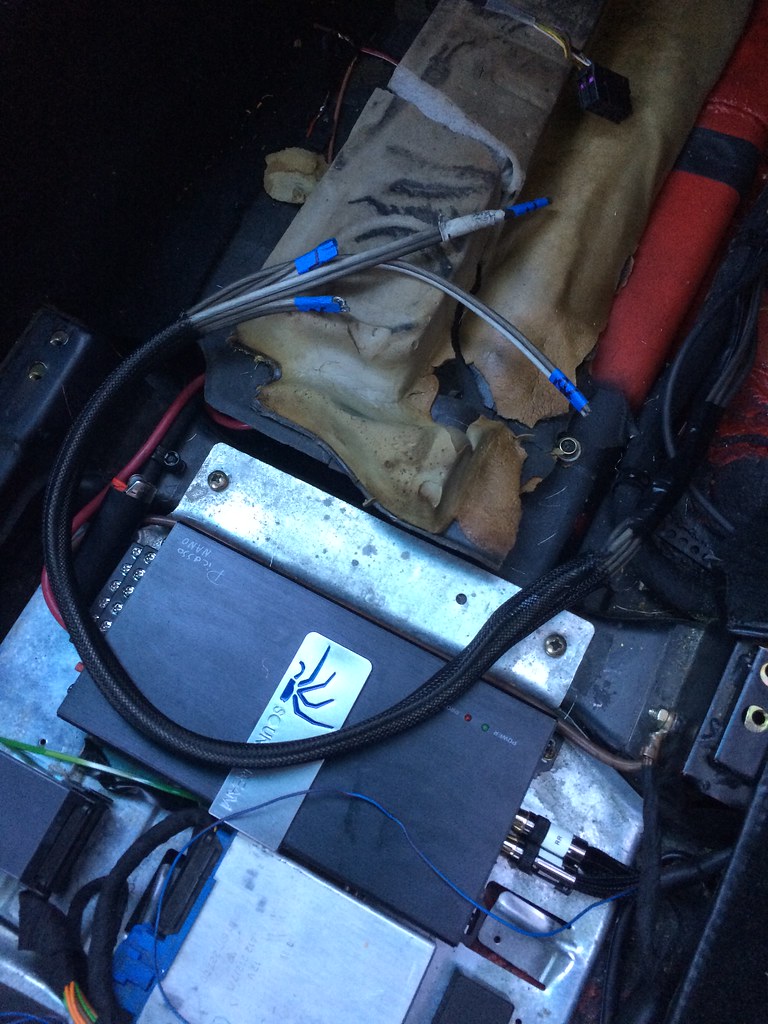
Time for some more work! The car came with 2 rockford fosgate amps that were essentially thrown in the trunk and allowed to bounce around. 1 amp powered the 2 subwoofers which I promptly removed, and the other powered the front speakers. The deck was also a flashy Kenwood one with a huge screen, which didn't suit the 964 interior at all.
My plan is to install a CD-210 from a 993 and a Soundstream Picasso Nano amp under the seat where the original amp used to be. The new amp is capable of 520w versus the measly 80w of the blaupunkt amp. I've read good things about it, and the best part is that it comes in a extremely small form factor
Prepping to pull the seats out

Seat out, time to dig in!
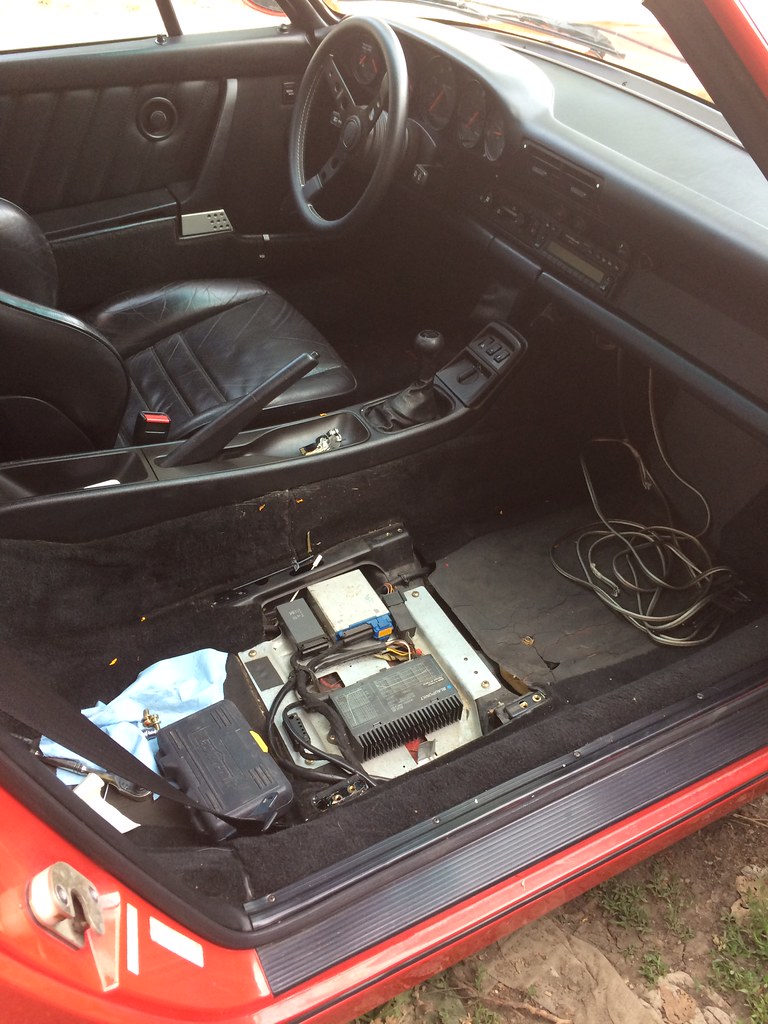
It appears as though there have been a few radios in the car in the past. The original blaupunkt amp is still installed, but the speakers wires are disconnected from it. After more investigation the harness was cut under the floor board. Makes it easy to pull that out!

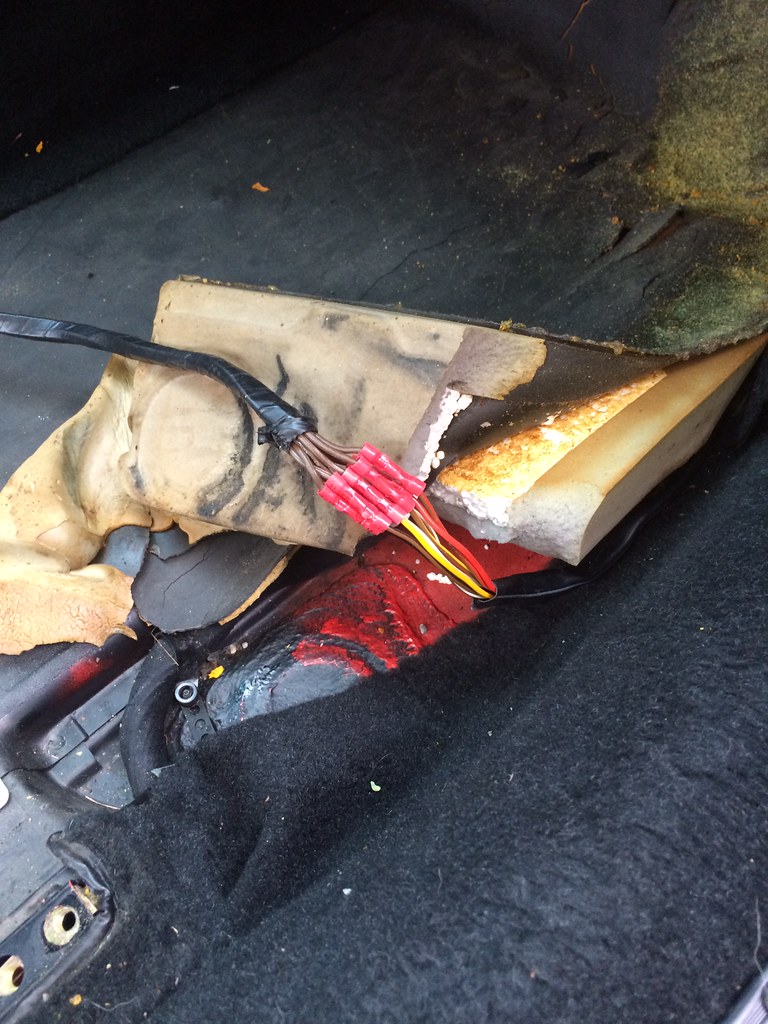
The reason the harness was cut. Wires were extended so that they could be attached to what I assume was an aftermarket deck in the 90s. The two rear speaker wires were still connected to the Kenwood deck when I removed it. The previous owner I bought the car from ran new speaker wire (grey and black wires in the footwell in previous pictures) from the front speakers into the frunk for the amp and left the old front speaker wires disconnected.
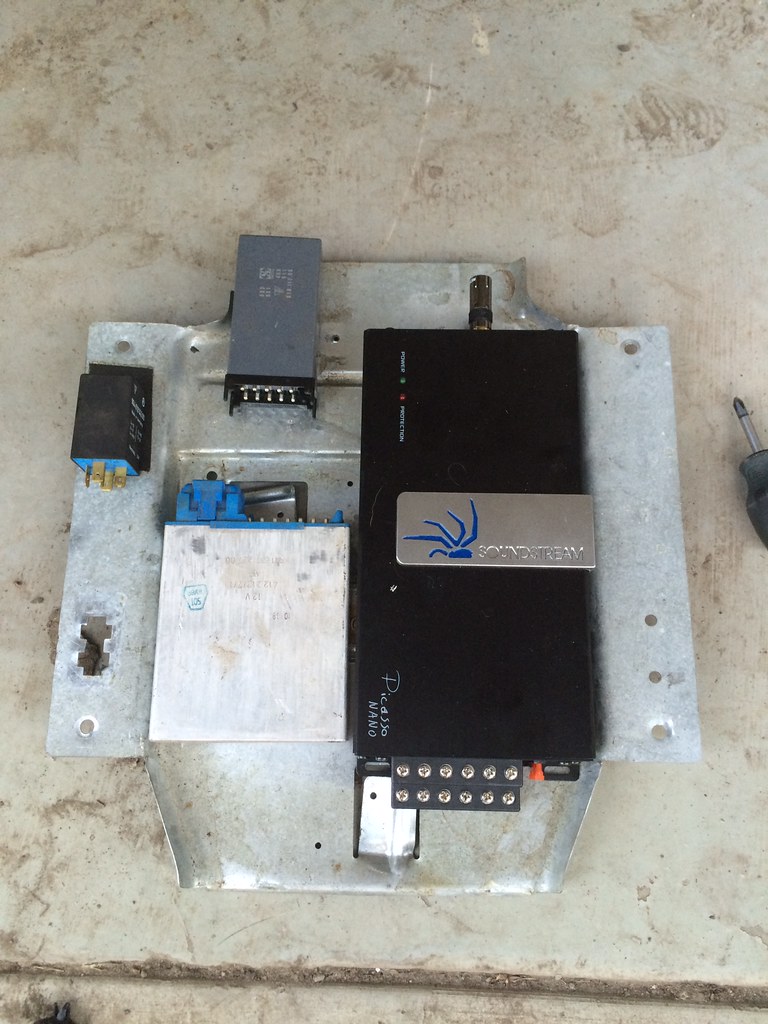
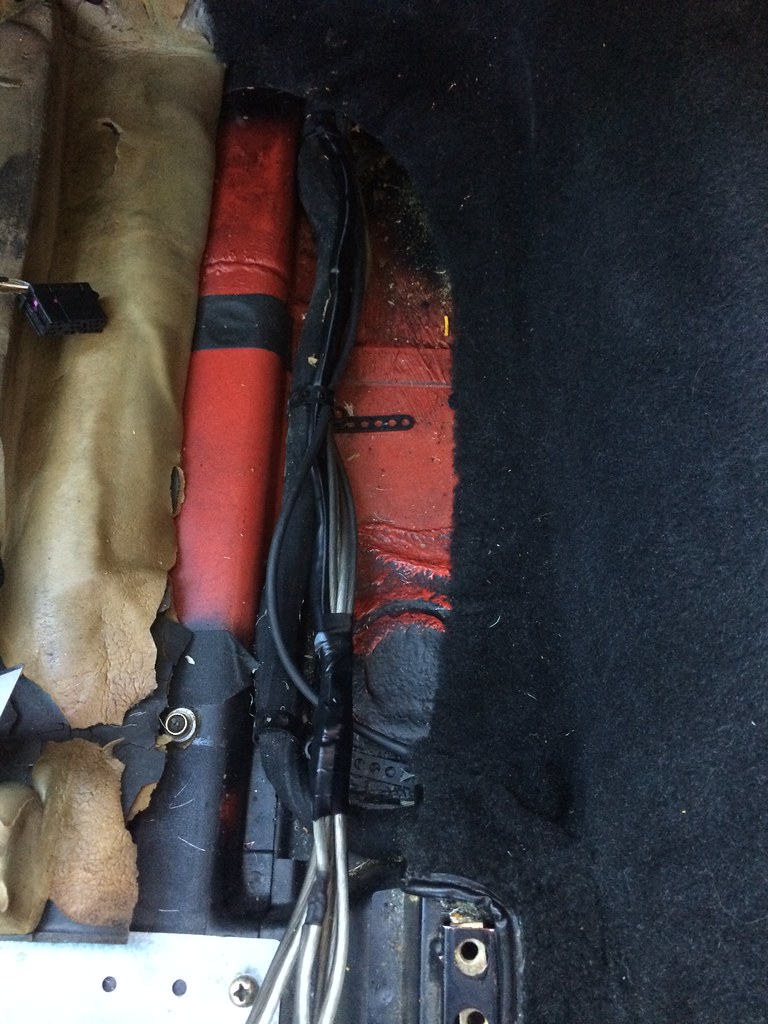
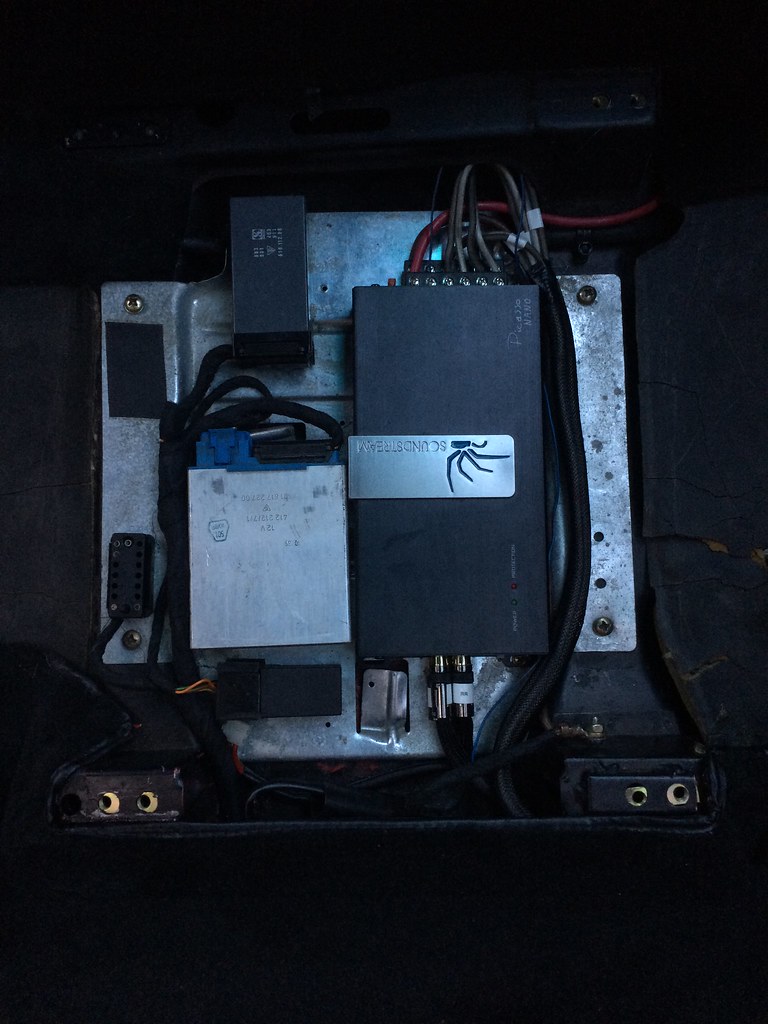
The new amp is a little bigger than the old one and wasn't fitting how I hoped in the original location. Time to re-organize all the modules and re-mount them to the plate
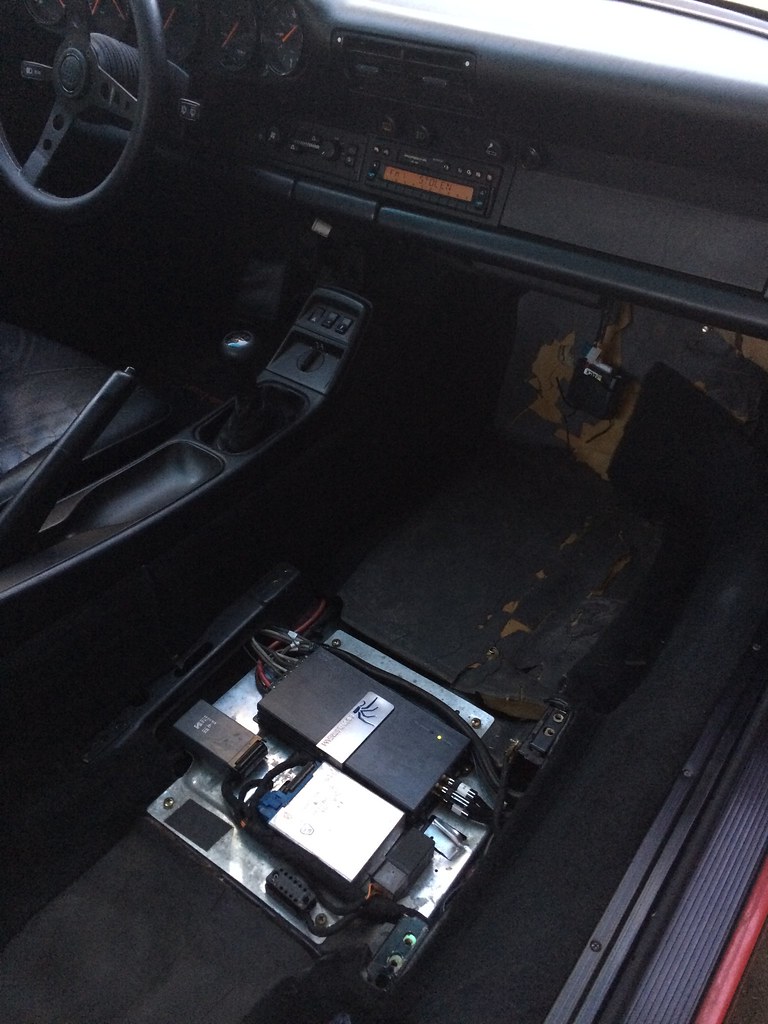
And installed in the car with wiring harness attached. Looks cleaner than before in my opinion!
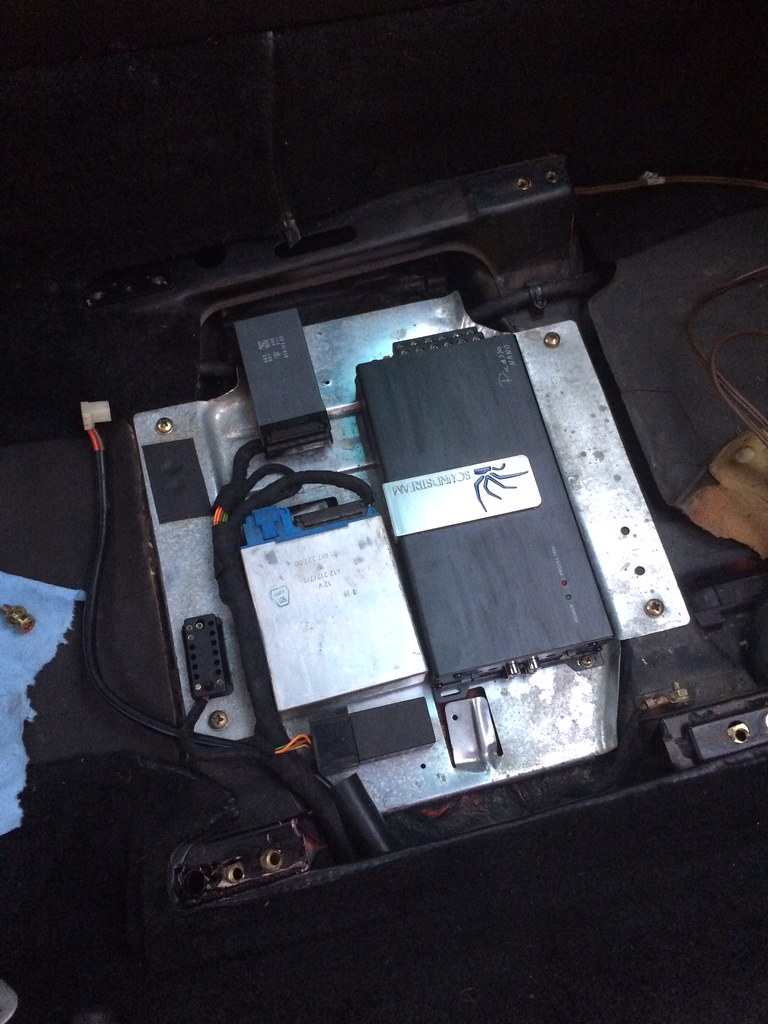
That's all I managed to get done last night. More to come.
Now for a question: whats the easiest way to run a power wire from the battery into the cabin to attach to the amp?
My plan is to install a CD-210 from a 993 and a Soundstream Picasso Nano amp under the seat where the original amp used to be. The new amp is capable of 520w versus the measly 80w of the blaupunkt amp. I've read good things about it, and the best part is that it comes in a extremely small form factor
Prepping to pull the seats out
Seat out, time to dig in!
It appears as though there have been a few radios in the car in the past. The original blaupunkt amp is still installed, but the speakers wires are disconnected from it. After more investigation the harness was cut under the floor board. Makes it easy to pull that out!
The reason the harness was cut. Wires were extended so that they could be attached to what I assume was an aftermarket deck in the 90s. The two rear speaker wires were still connected to the Kenwood deck when I removed it. The previous owner I bought the car from ran new speaker wire (grey and black wires in the footwell in previous pictures) from the front speakers into the frunk for the amp and left the old front speaker wires disconnected.
The new amp is a little bigger than the old one and wasn't fitting how I hoped in the original location. Time to re-organize all the modules and re-mount them to the plate
And installed in the car with wiring harness attached. Looks cleaner than before in my opinion!
That's all I managed to get done last night. More to come.
Now for a question: whats the easiest way to run a power wire from the battery into the cabin to attach to the amp?
Last edited by onceover; 07-22-2015 at 08:20 PM.
08-05-2015, 12:16 PM
#20
Pro
Thread Starter
Finished this up a week ago or so. Still waiting on my bluetooth adapter.
Custom built harness in progress. This will allow me to connect from the CD-210 low level output from the mini-ISO connector directly to the RCA inputs on the amp. Also carries the remote signal to turn the amp on.
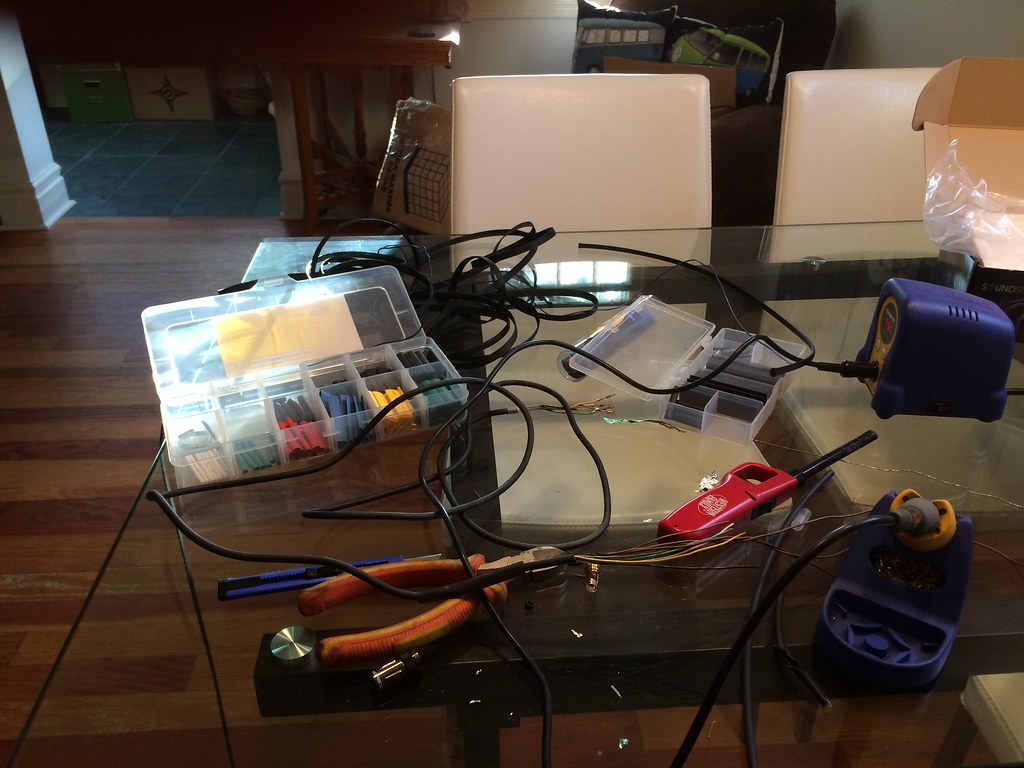

Final product:
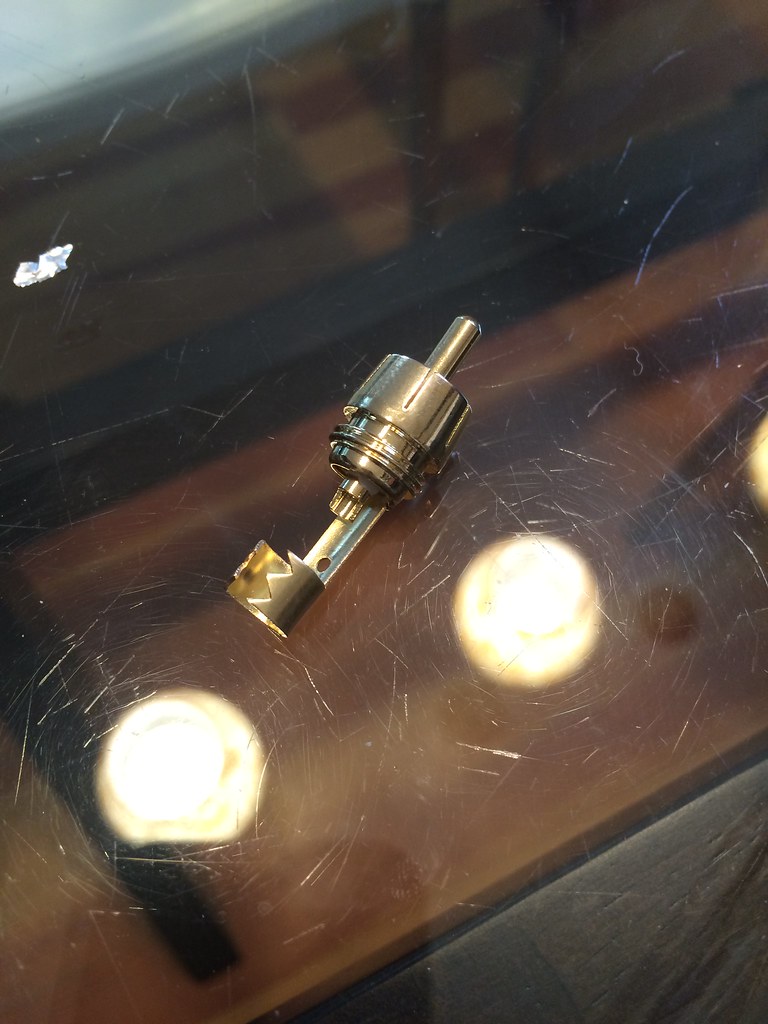
Now to clip off those awful crimps on the wiring harness and solder some new ones on. Will only be using the OEM rear wires. The fronts have new ones ran directly from the speakers:

Much better:
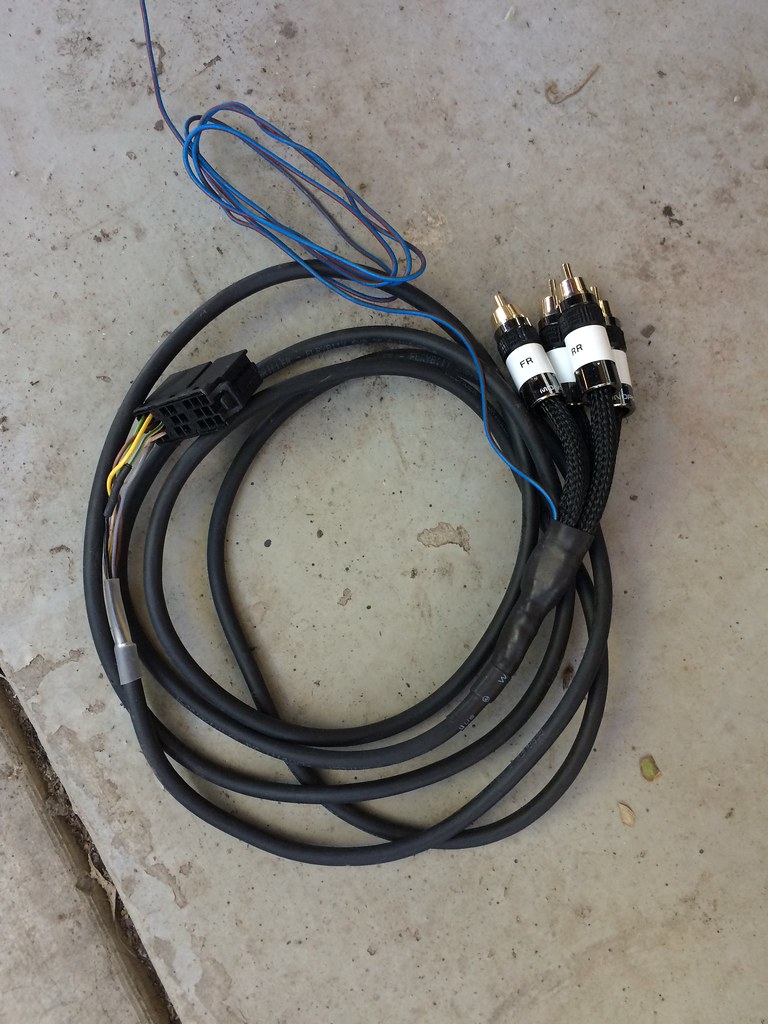
And wrapped in tech-flex:
All wired up:
Success!

Custom built harness in progress. This will allow me to connect from the CD-210 low level output from the mini-ISO connector directly to the RCA inputs on the amp. Also carries the remote signal to turn the amp on.
Final product:
Now to clip off those awful crimps on the wiring harness and solder some new ones on. Will only be using the OEM rear wires. The fronts have new ones ran directly from the speakers:
Much better:
And wrapped in tech-flex:
All wired up:
Success!
09-10-2015, 11:50 AM
#22
Pro
Thread Starter
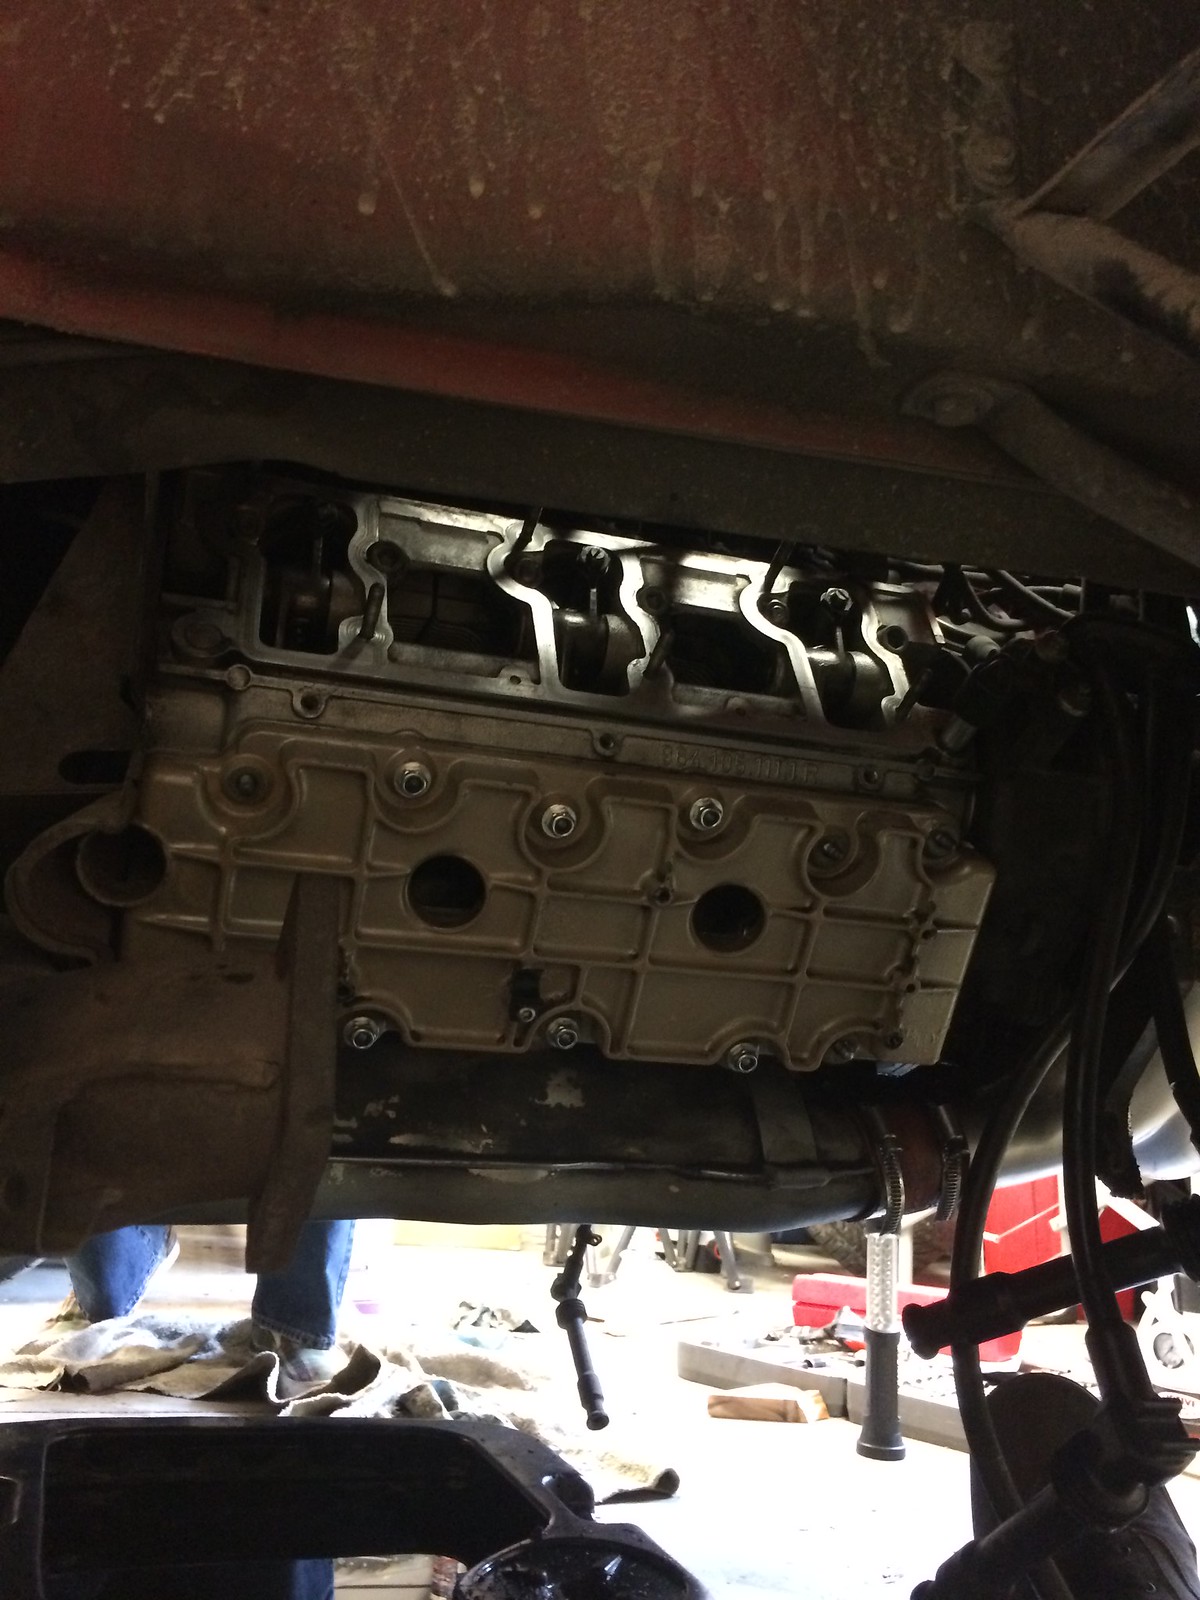
Doing some maintenance before heading on our honeymoon to Rennsport Reunion V in Monterey!
3 weeks and 5800km of driving ahead of us!
Valve adjustment, oil change and EVO air intake going in. About 1/2 the valves were out of spec. Wasn't nearly as difficult as I was imagining.
Wanted to powdercoat the valve covers but I wont have enough time to do it. A good cleaning will have to suffice for now.
10-31-2015, 01:17 AM
#23
Pro
Thread Starter
Long overdue update!
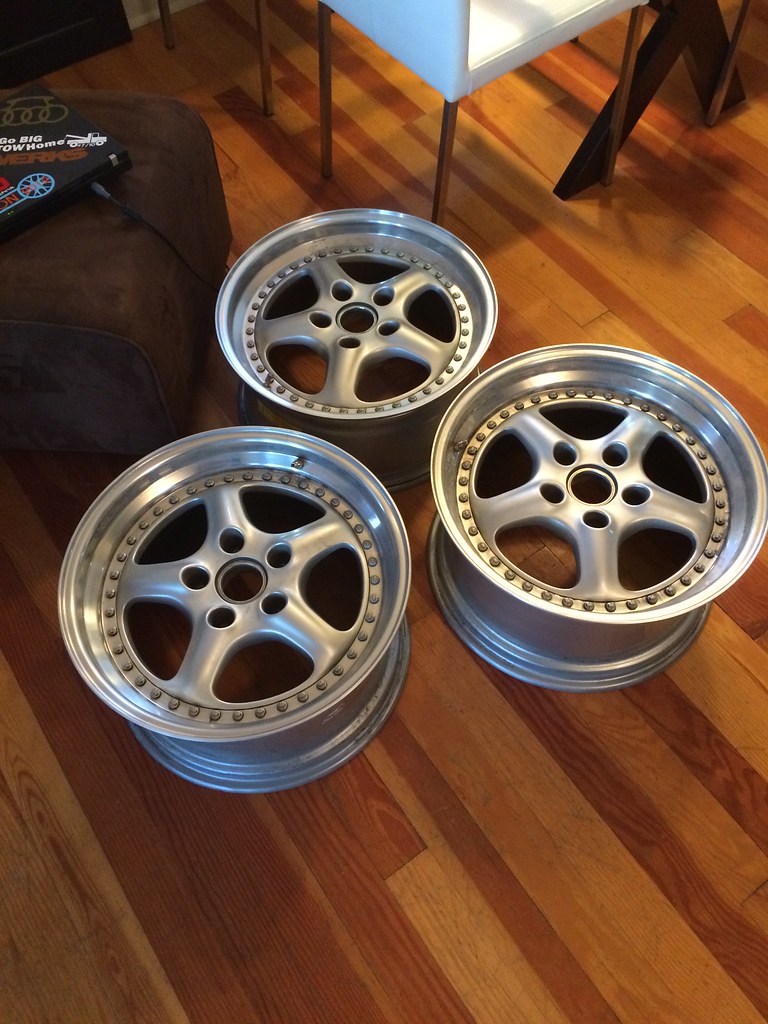
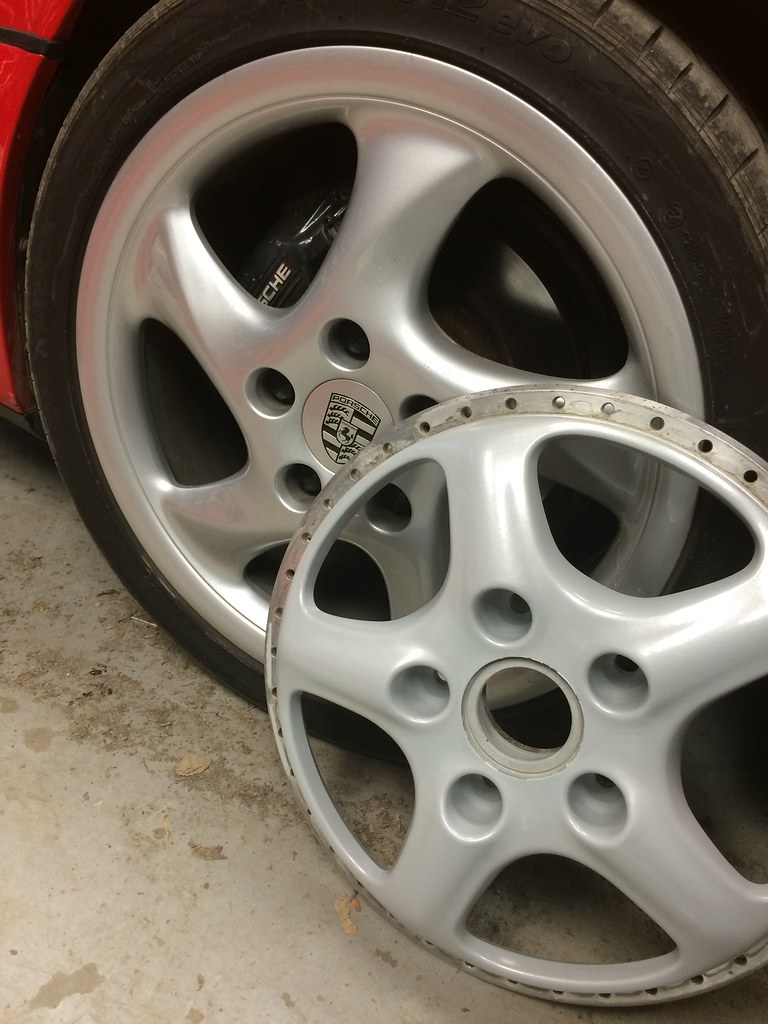
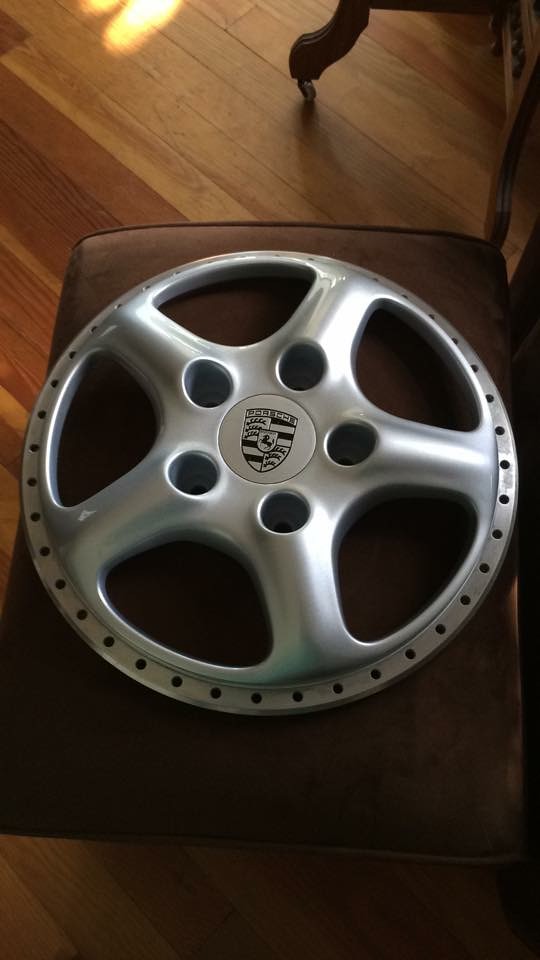
I mentioned the Techart Daytona made by Speedline wheels I picked up a while ago. I finished rebuilding them a couple months ago, just been too lazy to post anything about it.
When I first got them:
 Untitled by Patrick Derkacz, on Flickr
When I picked them up they were in a pretty sorry state. Clearcoat was cracking on the lips and faces, the barrels had cracks and bents, etc. Lots of TLC was needed.
 Wheel build by Patrick Derkacz, on Flickr
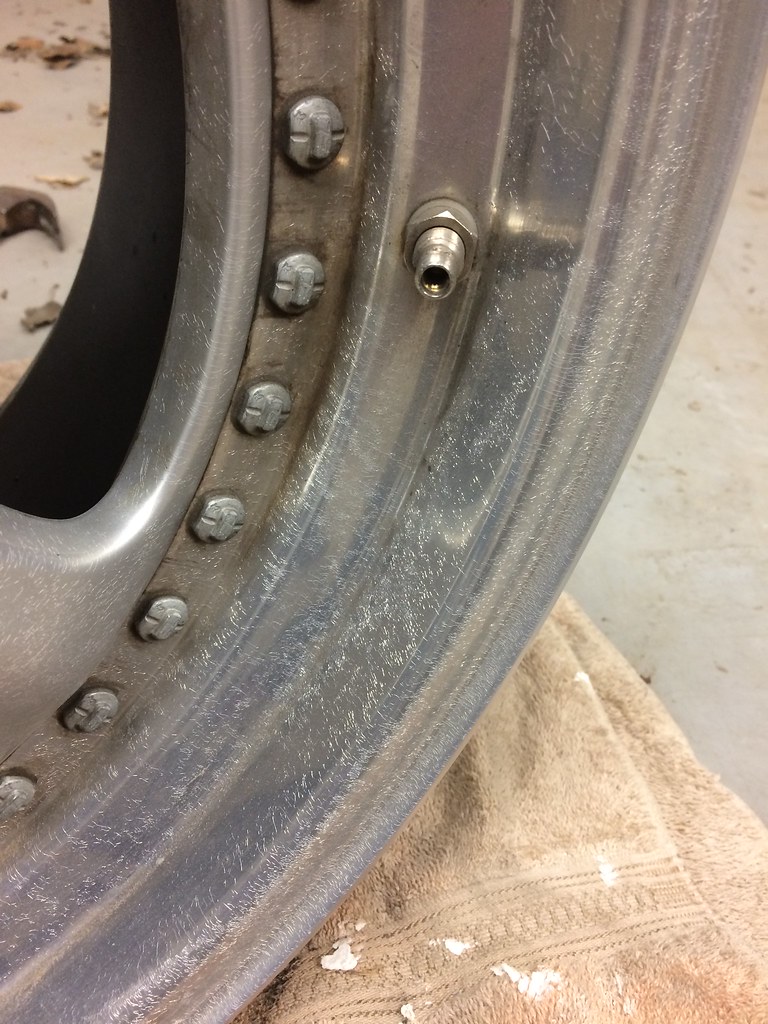
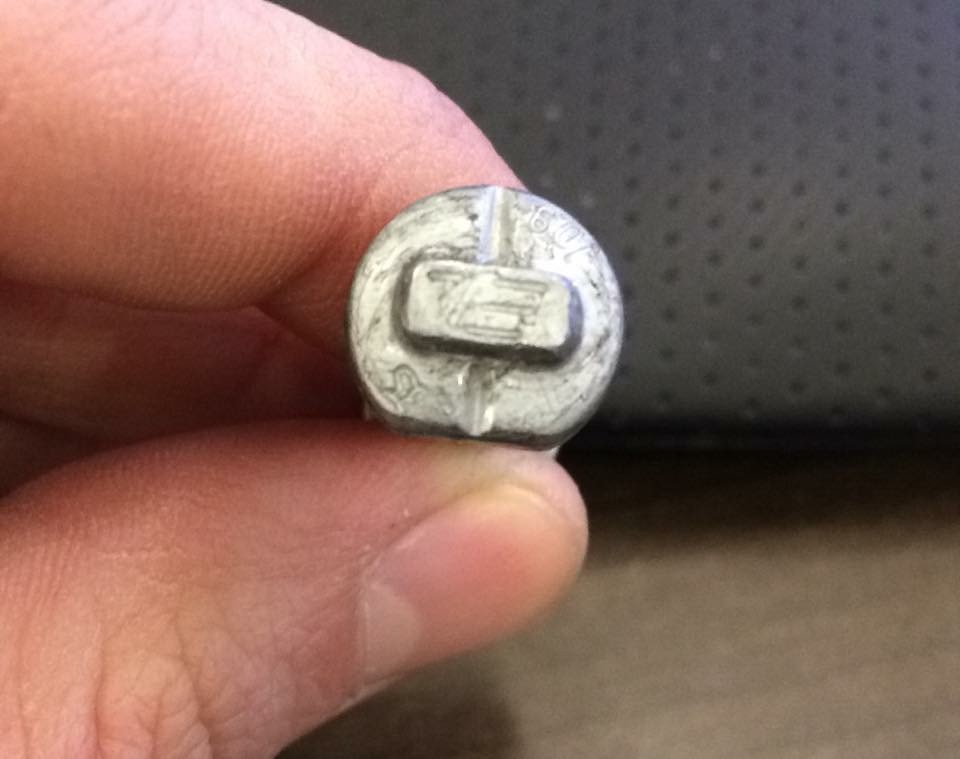
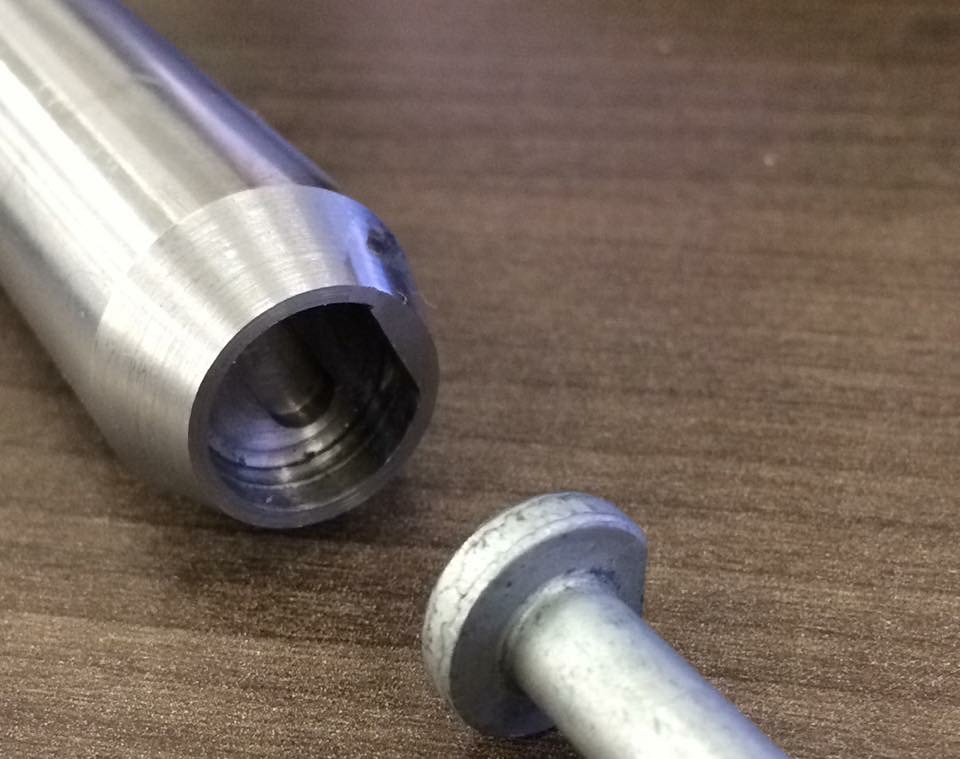
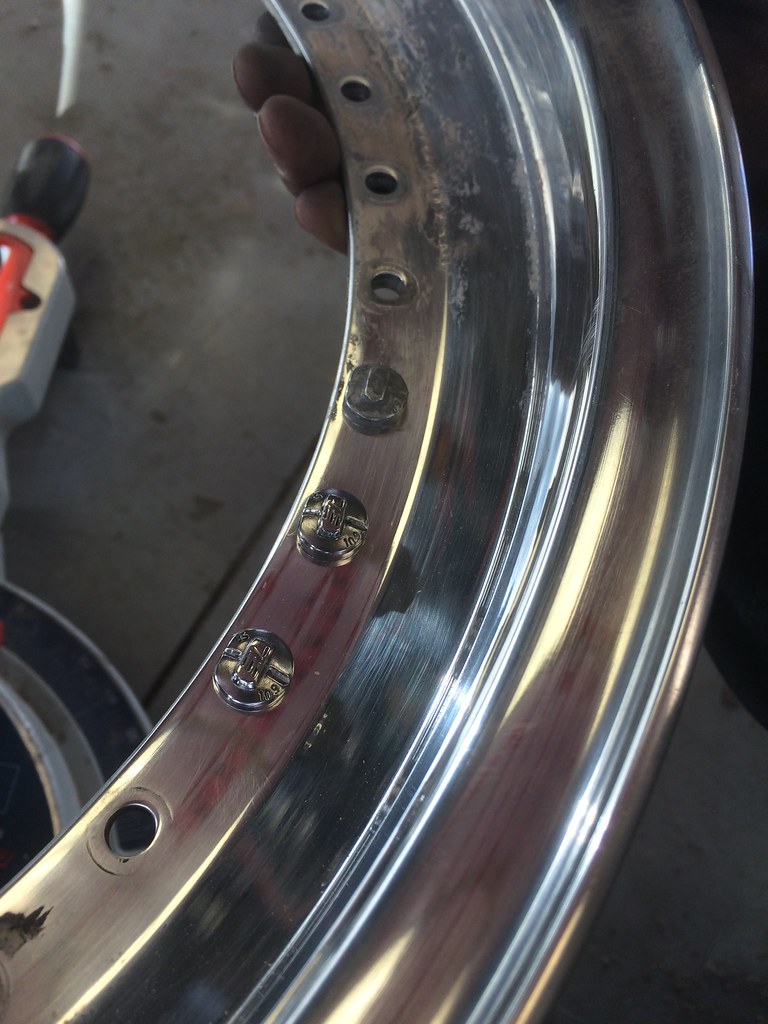
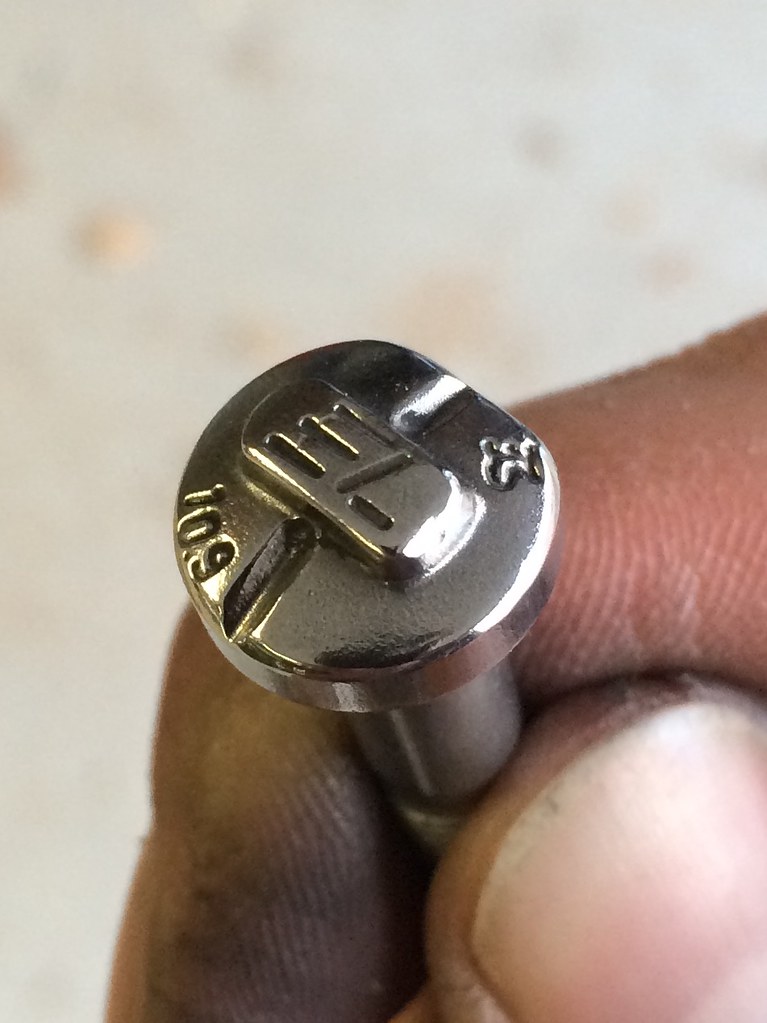
If you look at the bolts, you'll notice they're not even close to a standard head. I had to get a machinist friend of mine to make a tool so that I could tear them apart.
A picture of the head close up
 Wheel build by Patrick Derkacz, on Flickr
And the tool that he came up with
 Wheel build by Patrick Derkacz, on Flickr
Fits like a glove!
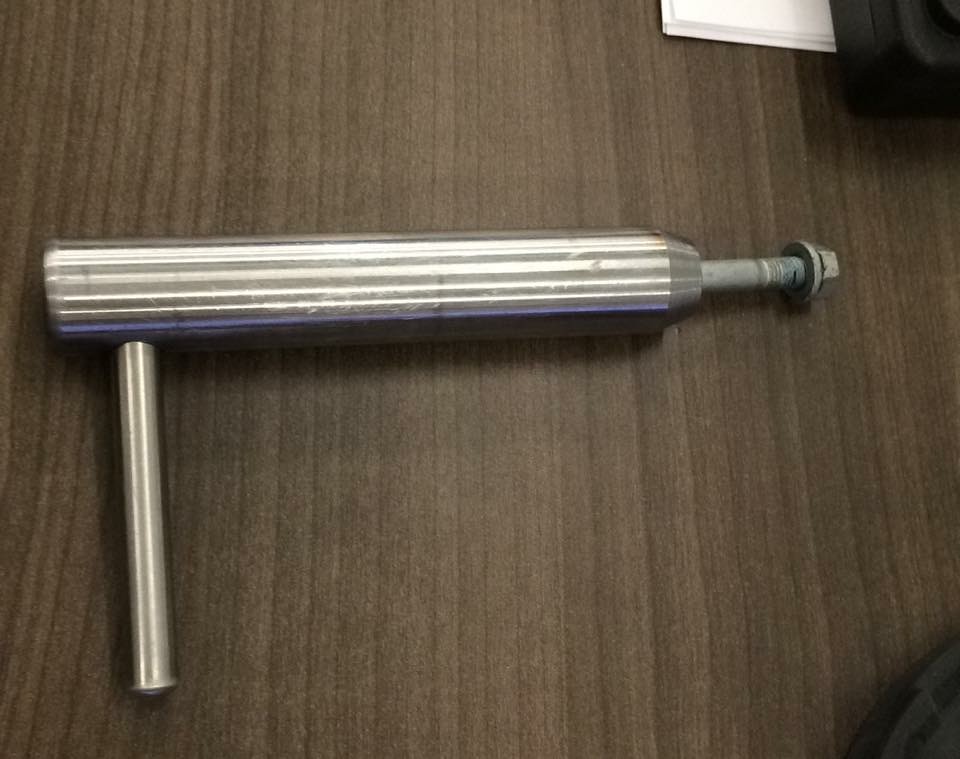 Wheel build by Patrick Derkacz, on Flickr
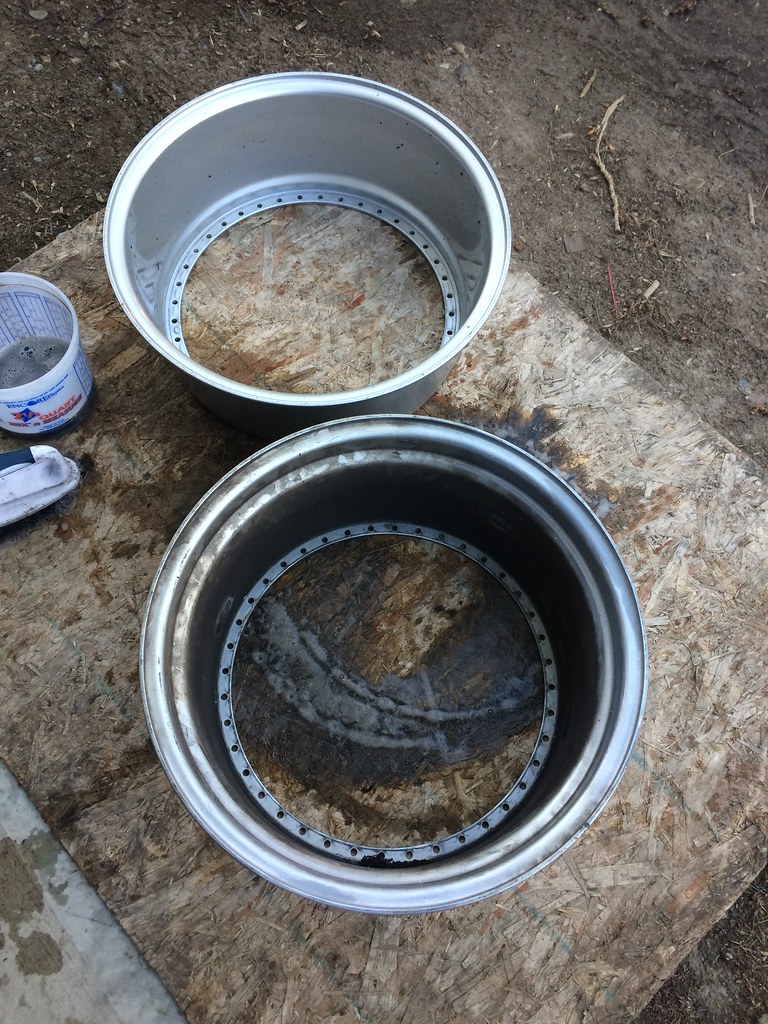
Let the teardown begin!
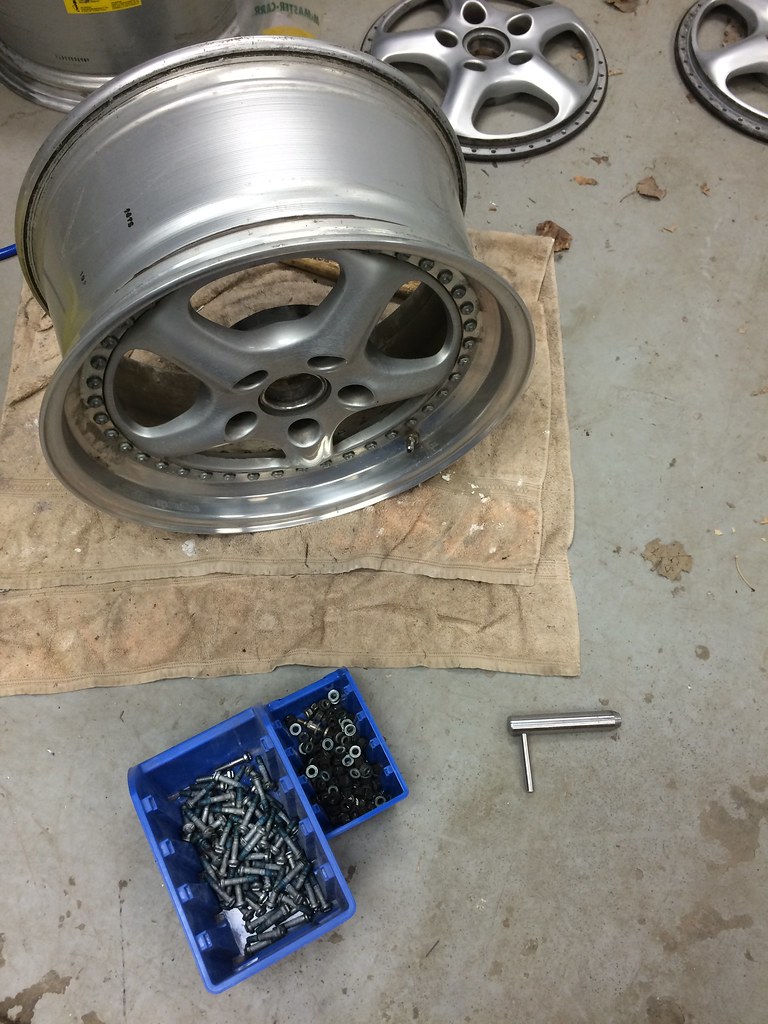 Wheel build by Patrick Derkacz, on Flickr
What was probably decade old loctite made for some sore hands after all this, but eventually they came apart. To my surprise there was a 4th piece to the wheels, a small spacer ring between the lip and the barrel
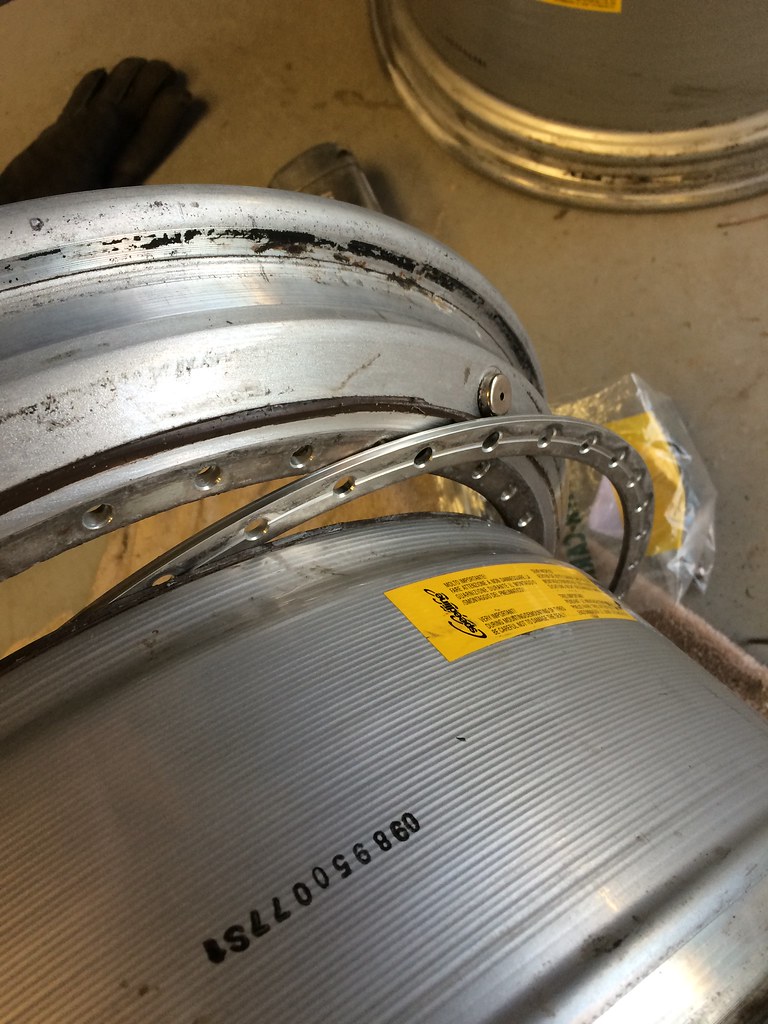 Wheel build by Patrick Derkacz, on Flickr
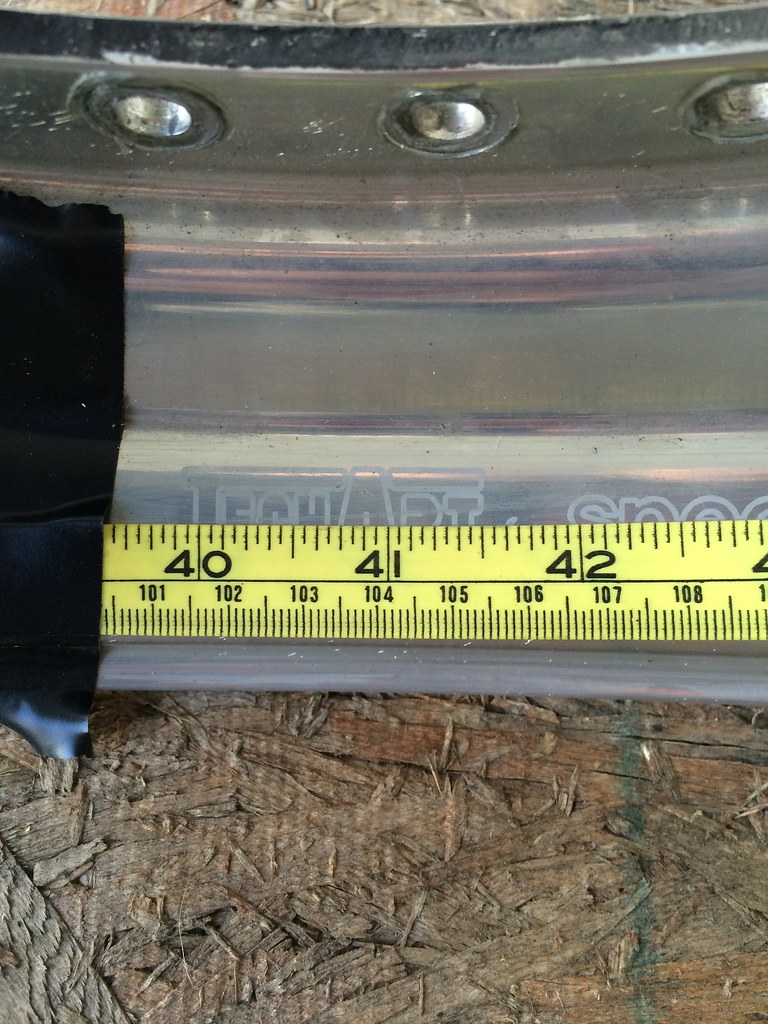
I wanted to take some photos of the laser etching on the lips before I started stripping the clearcoat off in case I wanted to get it re-done later down the road. These are photos of the measurements I took to help position the logos
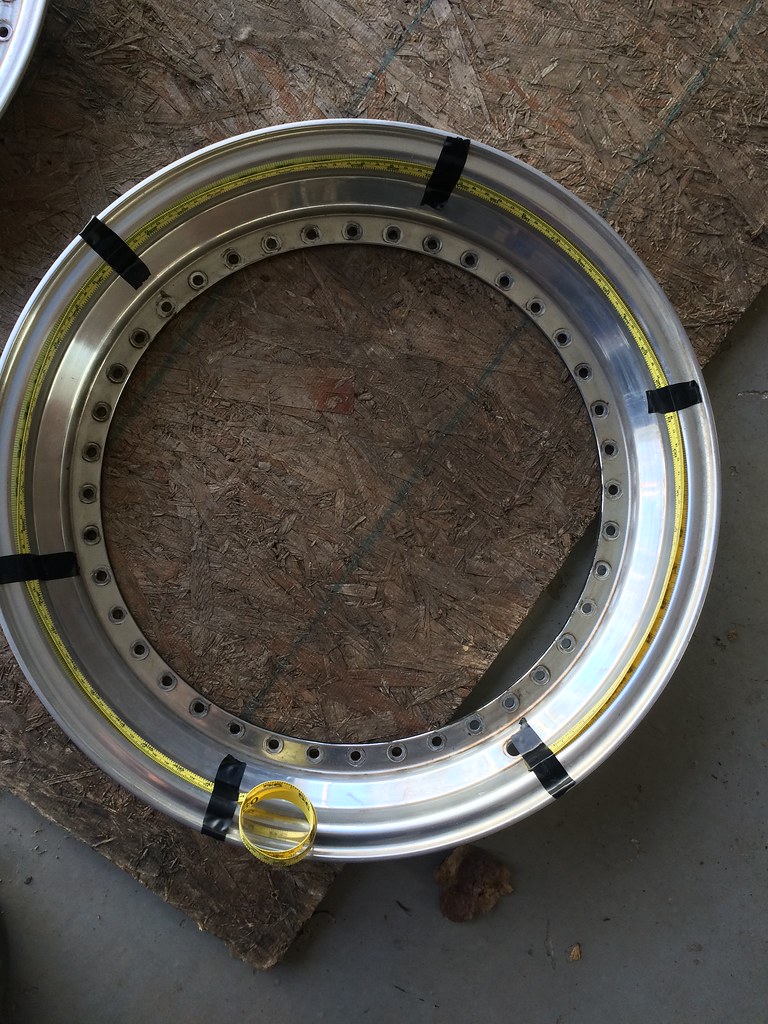 Wheel build by Patrick Derkacz, on Flickr
 Wheel build by Patrick Derkacz, on Flickr
Sample of the high resolution photos I took of the logos to make a vector from:
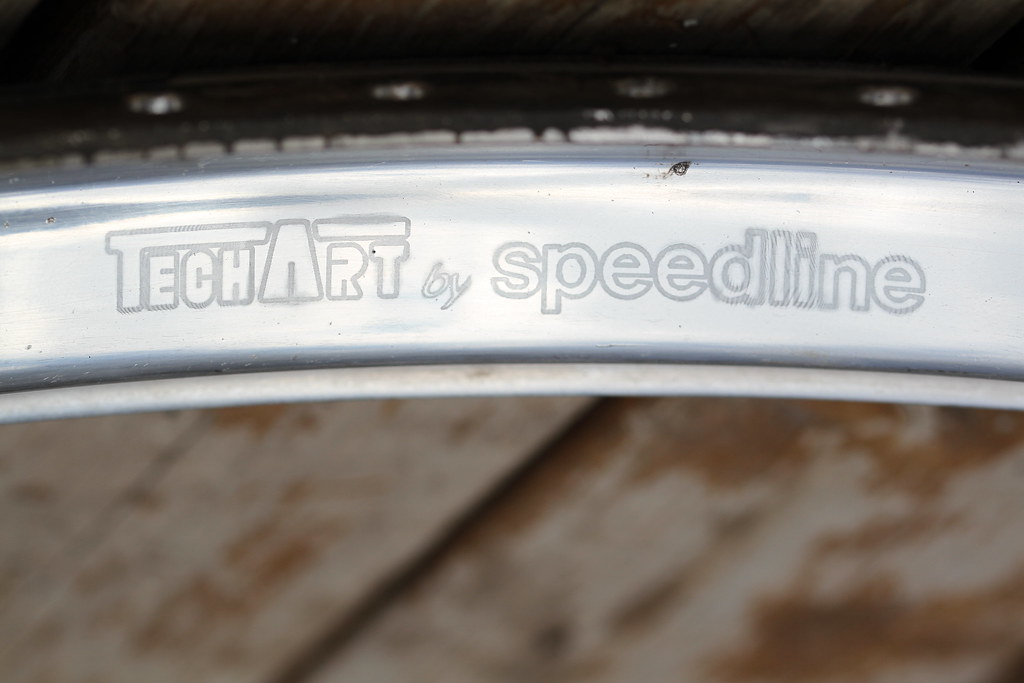 IMG_4215 by Patrick Derkacz, on Flickr
With that out of the way, I began stripping the clearcoat off the lips using aircraft stripper (no photos of this, too busy wearing a mask and gloves). After this, sanding with 800, 1000 and 2000 grit sandpaper before hitting the buffer
This is after about 2 hours of stripping, 2 hours of sanding and 20-30 minutes of buffing
 Untitled by Patrick Derkacz, on Flickr
And all 4 completed. This took far longer than expected.
 Untitled by Patrick Derkacz, on Flickr
Now off to the bolts. I let them soak in aircraft stripper for 30 minutes or so before rinsing with water. After this I started cleaning them up with a wire wheel on a bench grinder, and then moved on to the buffer.
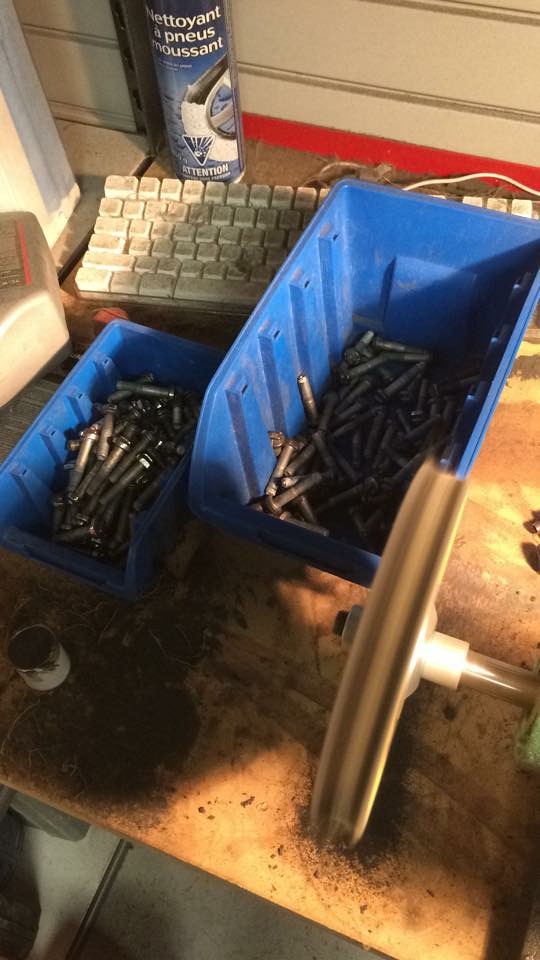 Wheel build by Patrick Derkacz, on Flickr
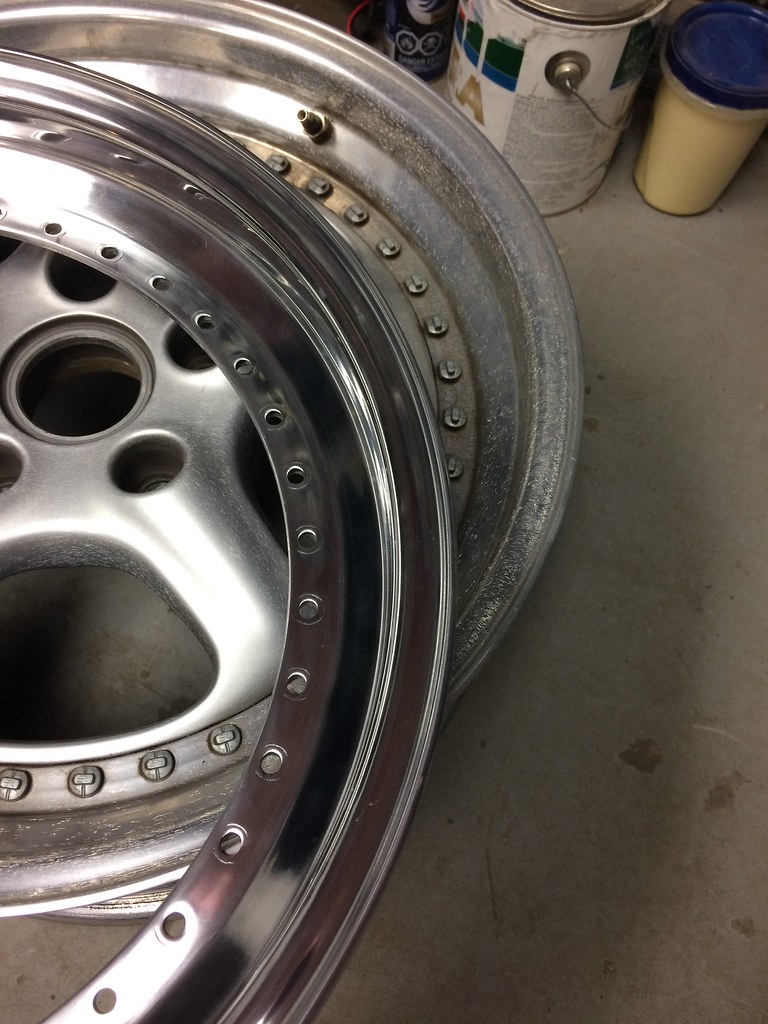
Buffed (first two) vs stripped (far)
 Wheel build by Patrick Derkacz, on Flickr
Closeup:
 Untitled by Patrick Derkacz, on Flickr
I was hoping this would be sufficient, but then it occurred to me that these were made of steel and would rust if not protected. They weren't as bright as I had hoped either, and didnt quite match the polished aluminum, so I sent them off to get chromed for a nice bright shine and corrosion protection.
With that out of the way, lets turn our attention to the faces. Originally I sent them off to get powdercoated, but the color and finish didn't come out anywhere near what I wanted.
Way too much grey, not enough silver. Terrible orange peel.
 Wheel build by Patrick Derkacz, on Flickr
 Untitled by Patrick Derkacz, on Flickr
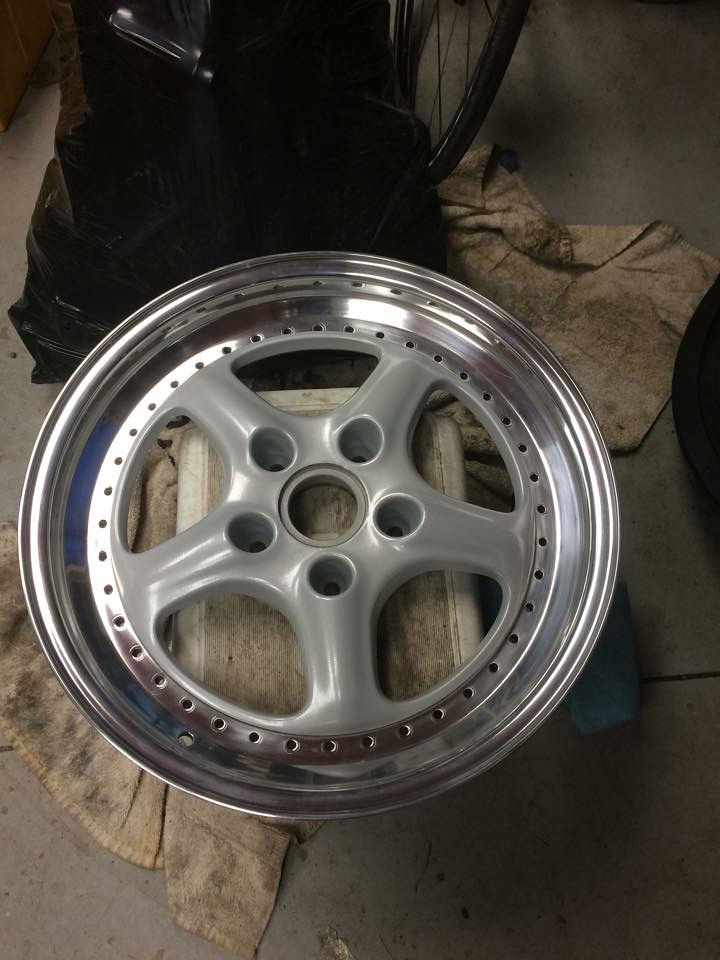
So I sanded everything down by hand and sent them off to get painted professionally.
Much better, but still not a perfect match to the OEM silver color. At this point I was fed up and just wanted to get the wheels put back together.
 Wheel build by Patrick Derkacz, on Flickr
With that done, I gave the barrels a thorough clean
 Untitled by Patrick Derkacz, on Flickr
And finally, time for assembly!
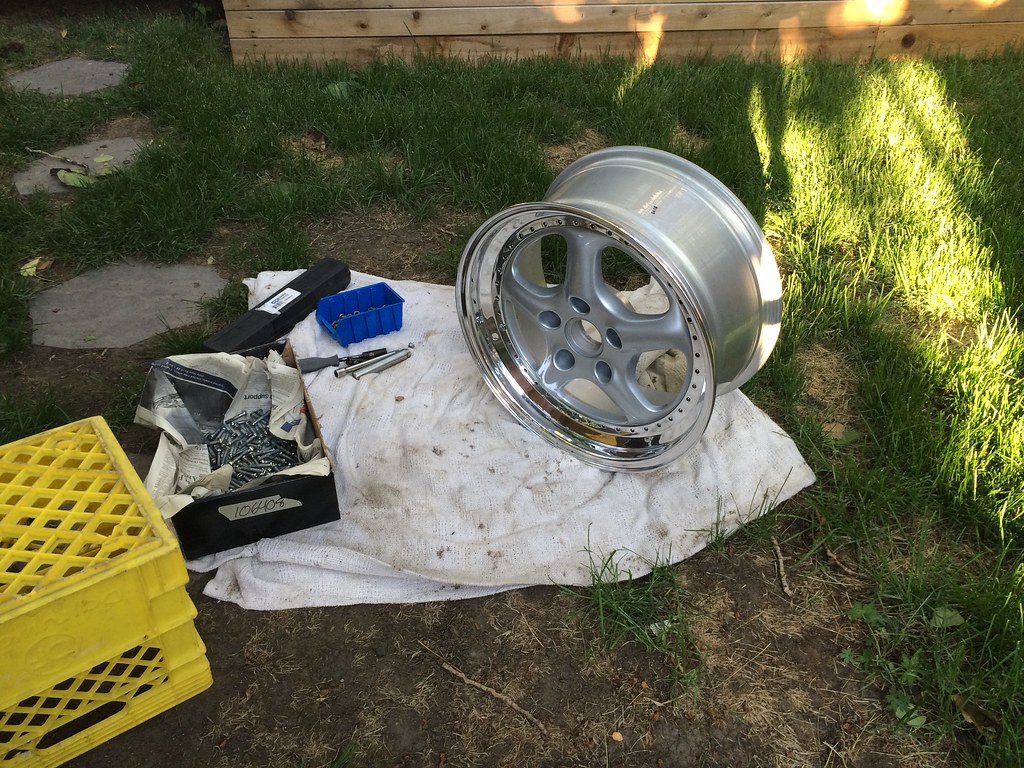 Untitled by Patrick Derkacz, on Flickr
Success!
 Untitled by Patrick Derkacz, on Flickr
Next I sealed the barrel and lip by taping about 1/2" from the seam on each edge and ran GE Silicone II around, followed by a wet finger to smooth everything over. Remove the tape after smoothing and let cure for 24 hours.
Tires mounted. All 4 held air without any issues.
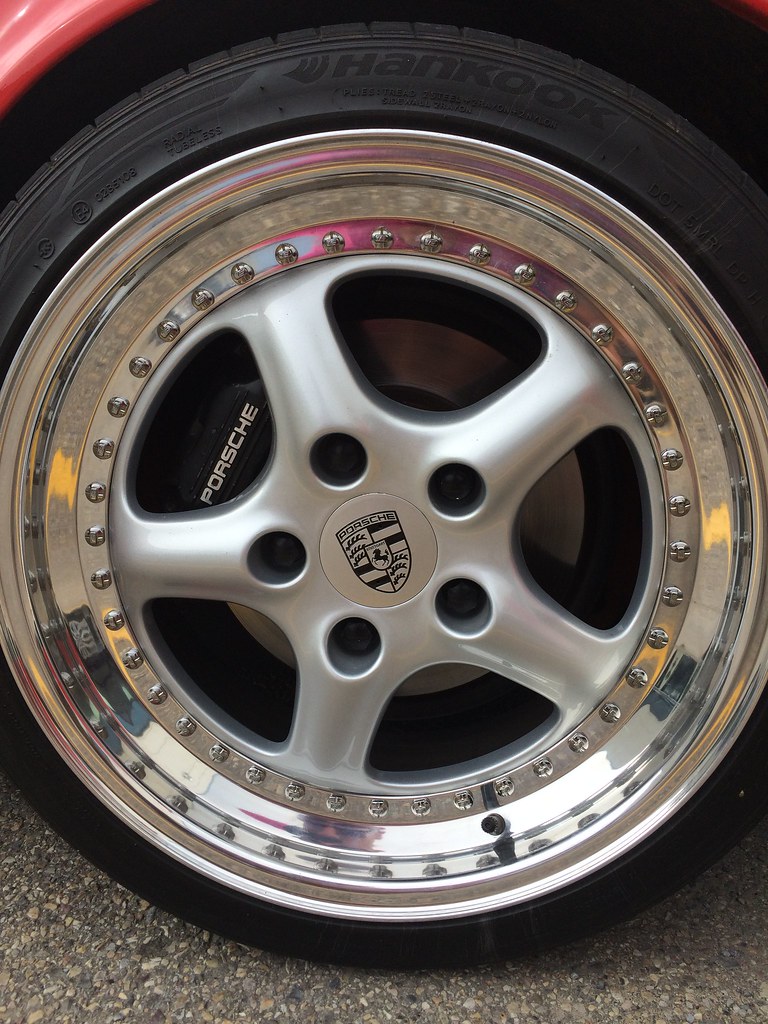 Wheel build by Patrick Derkacz, on Flickr
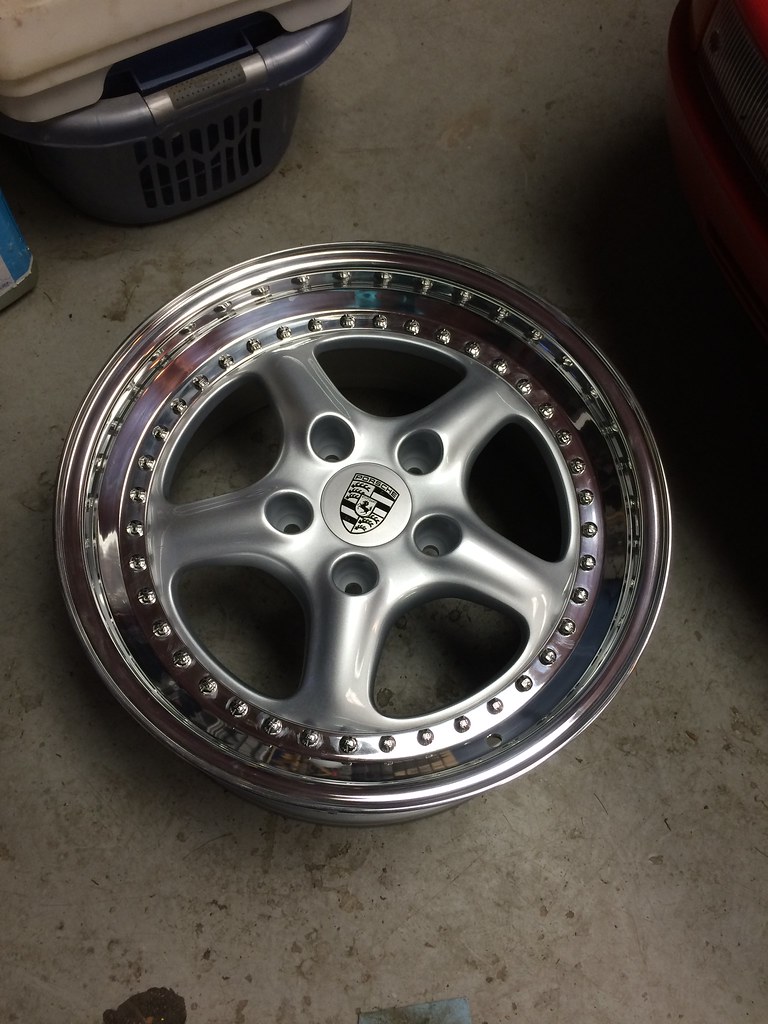
And the final product!
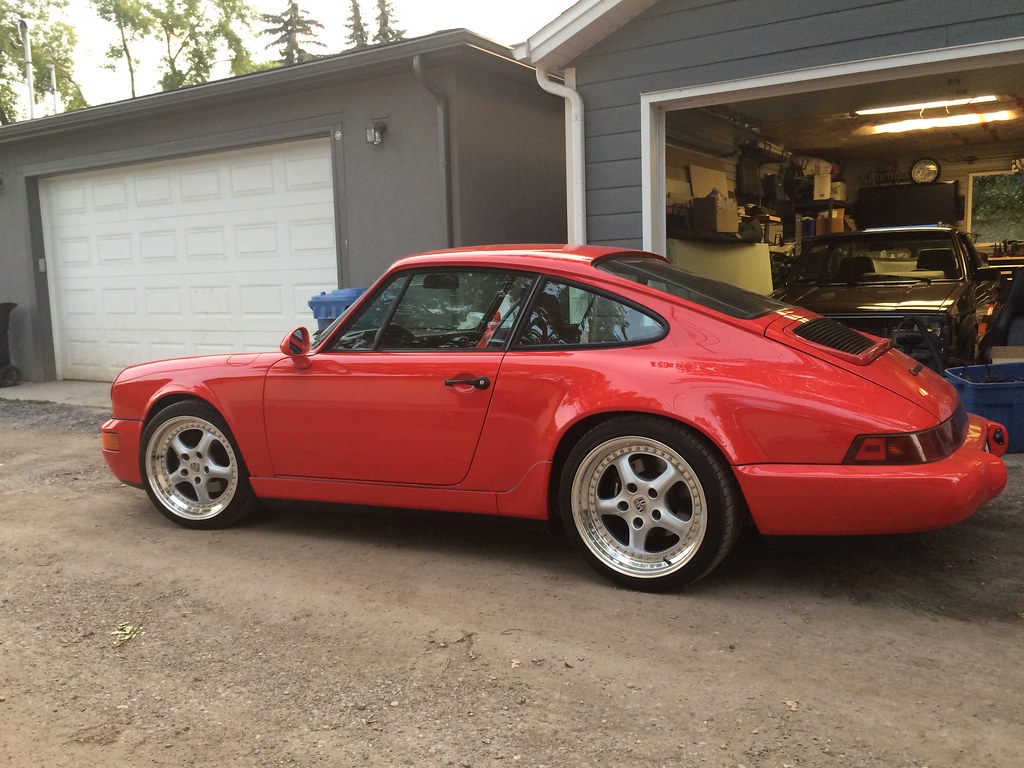 Wheel build by Patrick Derkacz, on Flickr
The full refurb process took easily over 100 man hours of labor over the course of 2-3 months. I doubt I'll ever rebuild another set of wheels again, it's incredibly labor intensive!
I mentioned the Techart Daytona made by Speedline wheels I picked up a while ago. I finished rebuilding them a couple months ago, just been too lazy to post anything about it.
When I first got them:
Untitled by Patrick Derkacz, on FlickrWhen I picked them up they were in a pretty sorry state. Clearcoat was cracking on the lips and faces, the barrels had cracks and bents, etc. Lots of TLC was needed.
Wheel build by Patrick Derkacz, on FlickrIf you look at the bolts, you'll notice they're not even close to a standard head. I had to get a machinist friend of mine to make a tool so that I could tear them apart.
A picture of the head close up
Wheel build by Patrick Derkacz, on FlickrAnd the tool that he came up with
Wheel build by Patrick Derkacz, on FlickrFits like a glove!
Wheel build by Patrick Derkacz, on FlickrLet the teardown begin!
Wheel build by Patrick Derkacz, on FlickrWhat was probably decade old loctite made for some sore hands after all this, but eventually they came apart. To my surprise there was a 4th piece to the wheels, a small spacer ring between the lip and the barrel
Wheel build by Patrick Derkacz, on FlickrI wanted to take some photos of the laser etching on the lips before I started stripping the clearcoat off in case I wanted to get it re-done later down the road. These are photos of the measurements I took to help position the logos
Wheel build by Patrick Derkacz, on FlickrWheel build by Patrick Derkacz, on FlickrSample of the high resolution photos I took of the logos to make a vector from:
IMG_4215 by Patrick Derkacz, on FlickrWith that out of the way, I began stripping the clearcoat off the lips using aircraft stripper (no photos of this, too busy wearing a mask and gloves). After this, sanding with 800, 1000 and 2000 grit sandpaper before hitting the buffer
This is after about 2 hours of stripping, 2 hours of sanding and 20-30 minutes of buffing
Untitled by Patrick Derkacz, on FlickrAnd all 4 completed. This took far longer than expected.
Untitled by Patrick Derkacz, on FlickrNow off to the bolts. I let them soak in aircraft stripper for 30 minutes or so before rinsing with water. After this I started cleaning them up with a wire wheel on a bench grinder, and then moved on to the buffer.
Wheel build by Patrick Derkacz, on FlickrBuffed (first two) vs stripped (far)
Wheel build by Patrick Derkacz, on FlickrCloseup:
Untitled by Patrick Derkacz, on FlickrI was hoping this would be sufficient, but then it occurred to me that these were made of steel and would rust if not protected. They weren't as bright as I had hoped either, and didnt quite match the polished aluminum, so I sent them off to get chromed for a nice bright shine and corrosion protection.
With that out of the way, lets turn our attention to the faces. Originally I sent them off to get powdercoated, but the color and finish didn't come out anywhere near what I wanted.
Way too much grey, not enough silver. Terrible orange peel.
Wheel build by Patrick Derkacz, on FlickrUntitled by Patrick Derkacz, on FlickrSo I sanded everything down by hand and sent them off to get painted professionally.
Much better, but still not a perfect match to the OEM silver color. At this point I was fed up and just wanted to get the wheels put back together.
Wheel build by Patrick Derkacz, on FlickrWith that done, I gave the barrels a thorough clean
Untitled by Patrick Derkacz, on FlickrAnd finally, time for assembly!
Untitled by Patrick Derkacz, on FlickrSuccess!
Untitled by Patrick Derkacz, on FlickrNext I sealed the barrel and lip by taping about 1/2" from the seam on each edge and ran GE Silicone II around, followed by a wet finger to smooth everything over. Remove the tape after smoothing and let cure for 24 hours.
Tires mounted. All 4 held air without any issues.
Wheel build by Patrick Derkacz, on FlickrAnd the final product!
Wheel build by Patrick Derkacz, on FlickrThe full refurb process took easily over 100 man hours of labor over the course of 2-3 months. I doubt I'll ever rebuild another set of wheels again, it's incredibly labor intensive!
05-05-2016, 03:47 PM
#25
Pro
Thread Starter
Spring has sprung! Back to work!
Front bumper and hood respray. Shaved the headlight washers while I was at it. Finally took the time to install my Cult Werk RS Ducts too.
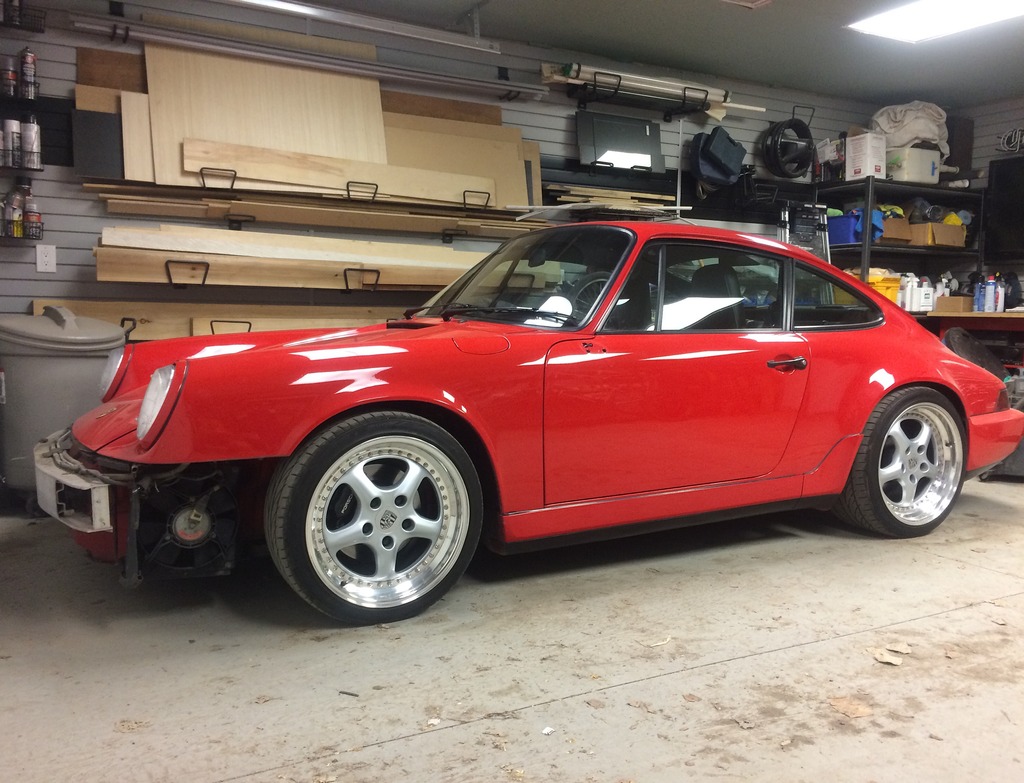
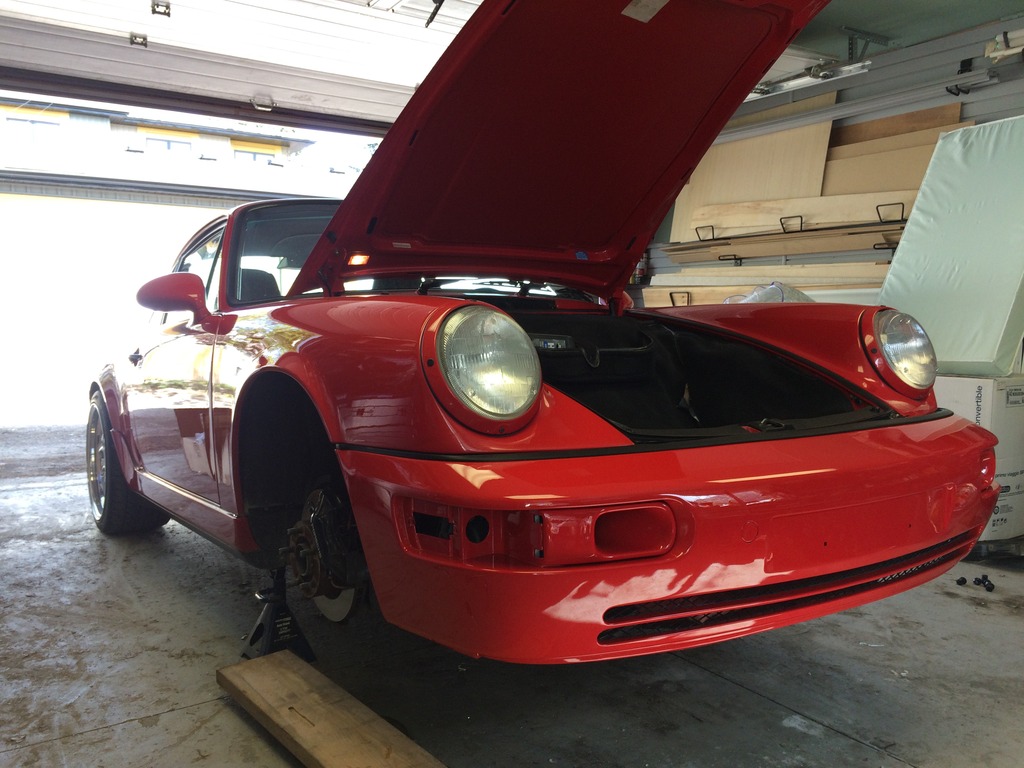
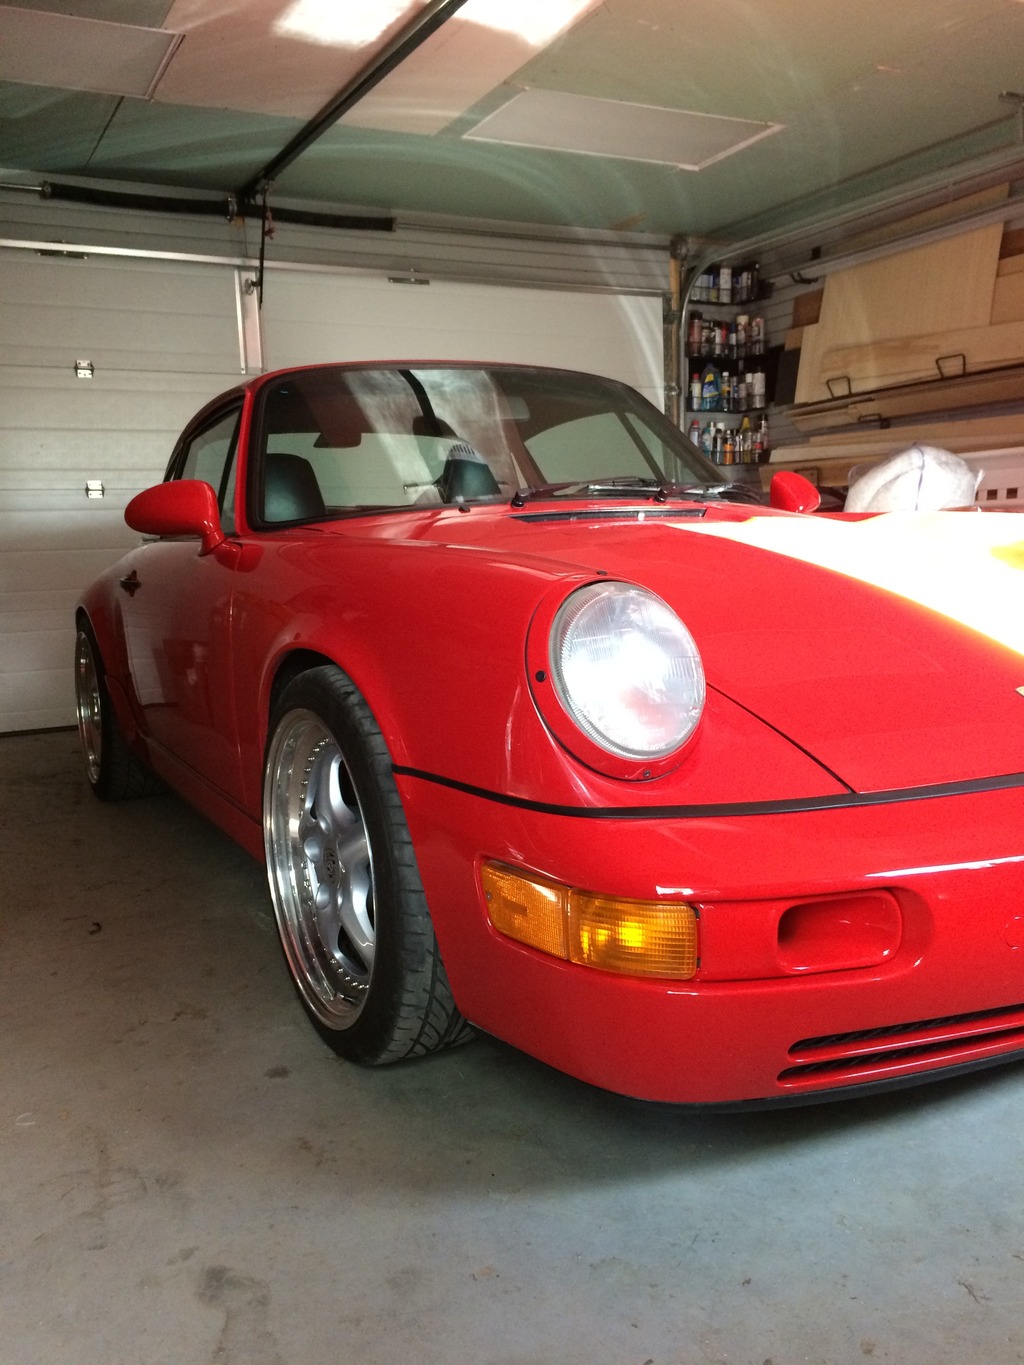
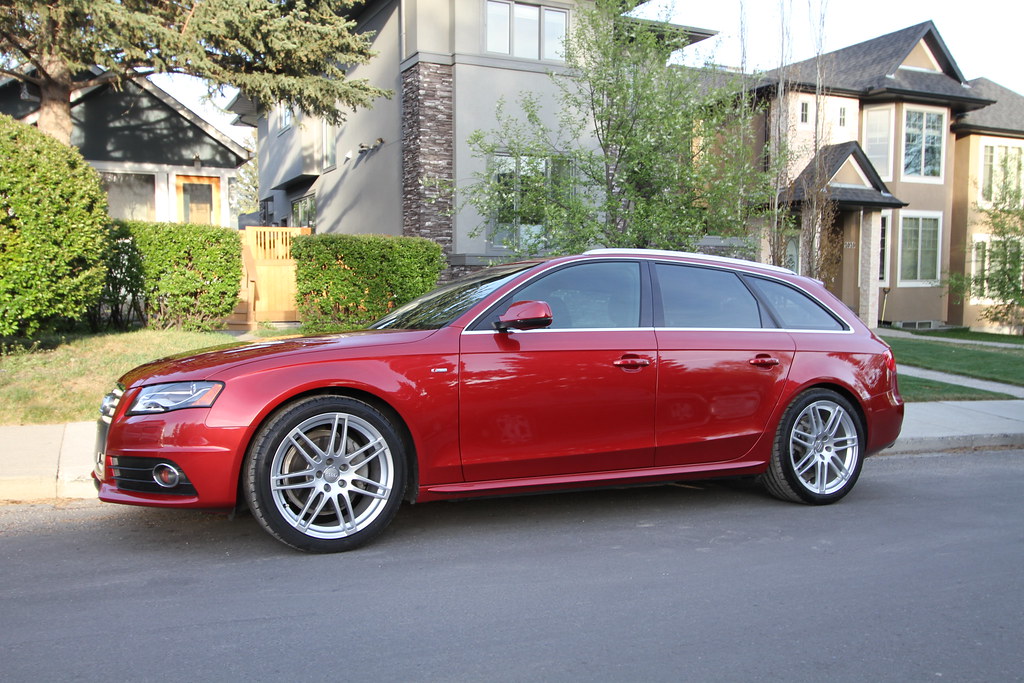
Also picked up an Avant to keep the 911 company
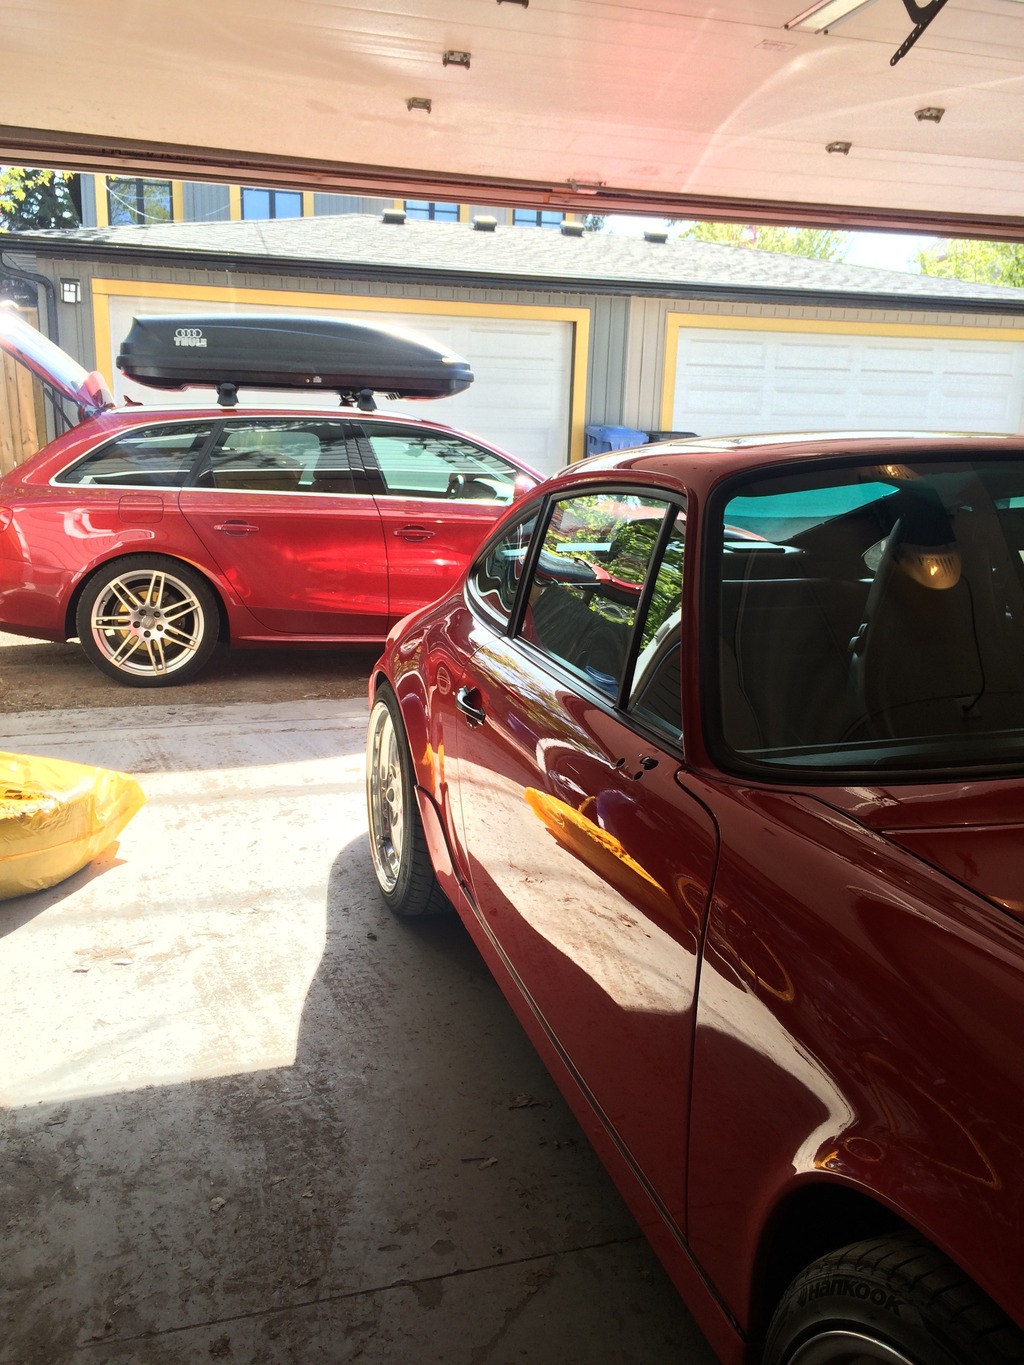
Front bumper and hood respray. Shaved the headlight washers while I was at it. Finally took the time to install my Cult Werk RS Ducts too.
Also picked up an Avant to keep the 911 company