
Middle of RS ducts install, have question.
 08-23-2014, 01:35 PM
#1
Three Wheelin'
Thread Starter
So the removal of the bumper was pretty straight forward. However, I seem to have missed the part where the bumper needs to be cut for these ducts to fit. Does everyone cut? It seems that if you cut to much you won't be able to fit fogs ever again.
All I thought was necessary was to drill out the bumperette rivet and drill one screw mounting hole.
All I thought was necessary was to drill out the bumperette rivet and drill one screw mounting hole.
 08-23-2014, 02:09 PM
#2
Nordschleife Master
 08-23-2014, 02:56 PM
#3
Which ones did you get? I have the rennspeed, and I just cut an oval behind them to match the opening of the duct. I left the fog light mounting points intact, just in case. I just bought FVD ones to replace mine and they also fit no problem.
 08-23-2014, 09:44 PM
#5
Three Wheelin'
Thread Starter


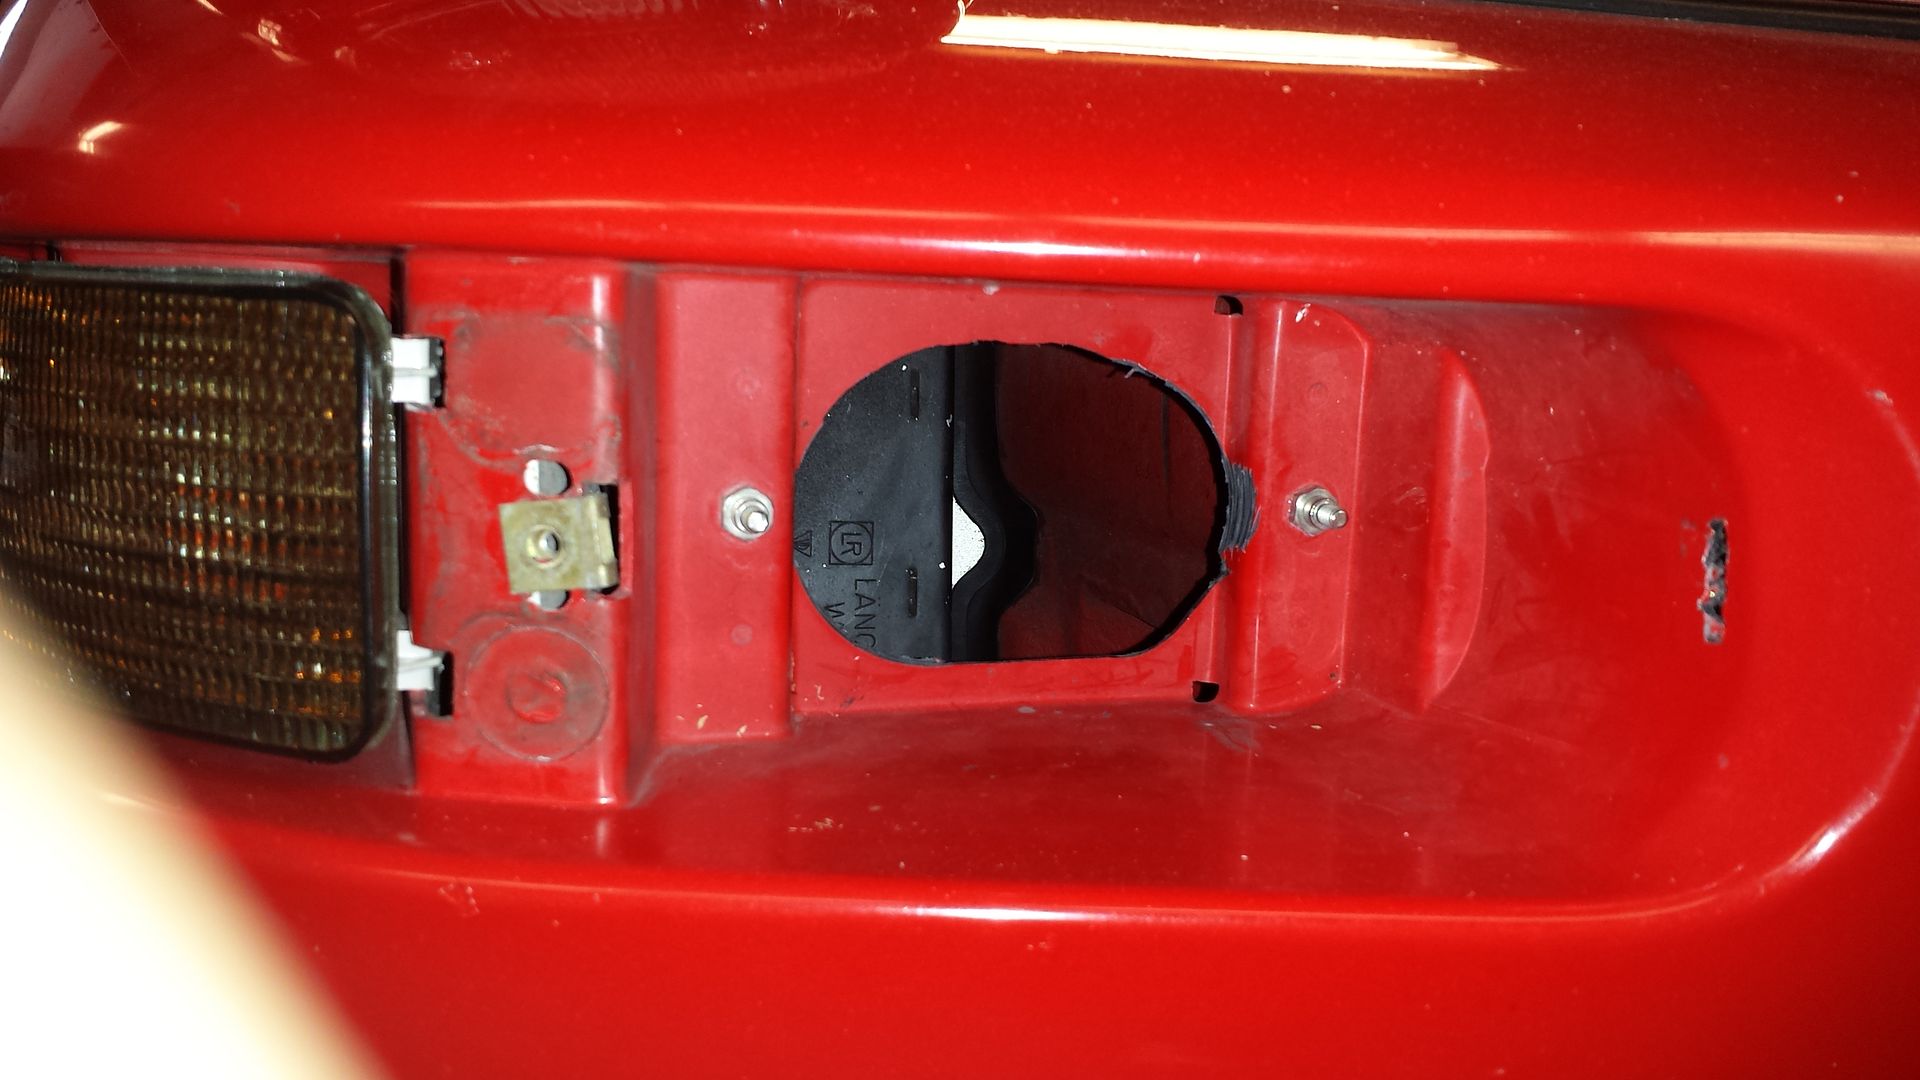
Crappy cell phone picture.
08-24-2014, 07:21 PM
#7
Three Wheelin'
Thread Starter
Its actually much easier than I thought, I just followed this picture. The only somewhat tricky part was lining up the hole to drill for the inner mounting point.
Order I'd do is:
Lights >Fender Liners > Under Trays > Three mounting bolts on each side > lastly the 4 screws under bonnet. Just don't forget that when you pull it off the fog light connections are still in tact. I had two boxes on each side to support the bumper while I unplugged them.
Order I'd do is:
Lights >Fender Liners > Under Trays > Three mounting bolts on each side > lastly the 4 screws under bonnet. Just don't forget that when you pull it off the fog light connections are still in tact. I had two boxes on each side to support the bumper while I unplugged them.
Trending Topics
08-24-2014, 09:23 PM
#8
Rennlist Member
Thanks but that looks horrible to me  I've never taken the wheel liners of either. I'm also imagining that all my screws and bolts heads will be rusted away.
Might be a step too far I thought you would just remove the lights and stick them in
My biggest issue is single garage is very tight so I'll have problems getting at the sides or even jacking it up.
It's not something I'm going to be able to start in winter and pick at
Hhmmm
I've never taken the wheel liners of either. I'm also imagining that all my screws and bolts heads will be rusted away.Might be a step too far I thought you would just remove the lights and stick them in
My biggest issue is single garage is very tight so I'll have problems getting at the sides or even jacking it up.
It's not something I'm going to be able to start in winter and pick at
Hhmmm
08-24-2014, 11:13 PM
#9
Three Wheelin'
Thread Starter
I used a wide plank of wood and jacked under the tub; then I just placed some small 2 ton jack stands at the front points. I'm a newby DIY guy, and I was putting this off for the longest, but I had the bumper down within an hour. None of the bolts came me trouble however.
08-25-2014, 02:17 PM
#13
Three Wheelin'
Thread Starter
Just as Vandit said. If your car is lowered though, I'd suggest driving the front wheels on some planks also, to give you enough clearance for jack with the plank on it.