
Speedster windshield glass replacement
 06-25-2014, 12:43 PM
#1
Nordschleife Master
Thread Starter
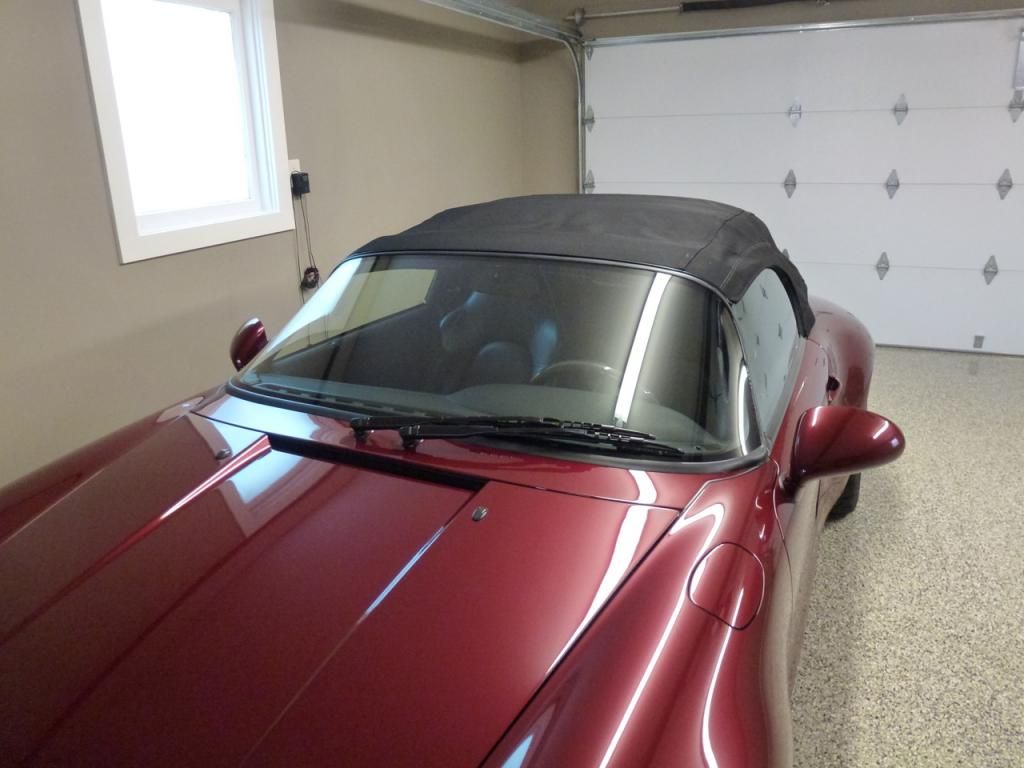
My 993 Speedster uses a factory 964 Speedster windshield assembly which I bought along with all the other Speedster unique bits when I had 9m build the car back in 2011.
The parts were used and all came off the same car with 47K miles on it and the windshield glass needed replacement. I couldn't do that during the build for budget reasons, so it's been on my 'to do' list since getting the car back and I finally was able to do it this year. Back in 2011 and up until recently, Porsche had several windshield 'assemblies' on the shelf .. frame, glass and gaskets all put together at the factory ... for $3300 my cost at Sunset and I always figured I'd go that route because the glass was $1700 (back then ..) and the gaskets were almost $600 .. so for another $1000 they threw in the frame and labor and supplies to put it together. About 8 months ago .. I went to order one and was told they were no longer available from Porsche. Period. However, I could buy the glass for $2300 and the two gaskets for $586+$25 ... so that's what I did finally.
I've been looking for a shop or individual in the Bay Area of California since I got the car back in 2011 who had experience replacing the windshield assembly to no avail let alone replacing the glass and gaskets in an existing frame so I started looking for a specialist/craftsman that I could trust and work with to figure out how to do it. Porsche has no information or TSB's on it and the workshop manual just shows how to bolt on an assembly I was on my own.
Fortunately, I met a local glass shop owner (Don/Redwood Glass Co.) when I had some glazing replaced in windows on my home. I chose him because my house was built in 1949 and I wanted to restore the original sashes and glazing .. everyone else wanted to tear out the original redwood (!) and put in aluminum .
.
When I visited his shop in Petaluma .. only 10 miles south of me ... I noticed several older sports car windshields and frames in the rafters. He told me he did a lot of the local hot rod custom glass work, especially the 'chopped top' stuff where he had to custom cut and shape glass and gaskets and had replaced factory glass in 356 Speedsters and Roadsters, 50's Corvette's and T-birds and lot's of British and Italian sports cars. I brought my car down to him to look at and he said .. 'sure, no problem .. I can do it'. It was the best lead I had .. well it was the ONLY lead I had, so I bought the parts and had them shipped to Don's shop two weeks ago.
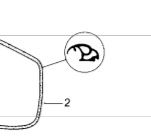
My install appointment was set for June 24th (yesterday) so last weekend I took to removing all the parts I thought would be in the way .. windshield wipers, defroster vent cover, windshield bolt covers etc. and then I tried to carefully remove the large rubber gasket that goes all the way around the windshield glass. It's really complex when you start looking at it and along the sides and top, it really IS the frame for the most part as it wraps completely around the steel and glass leaving only a bit of metal running along the bottom edge. As far as I could tell from lifting the edges of the gasket, it seemed to only be secured in place by pressure using no adhesives. Looking at the PET cross section picture of the rubber, you can see the single small 'tang' sticking down at the top left .. I thought that might be the only thing securing the gasket between the glass and the frame .. but that was only partially correct.
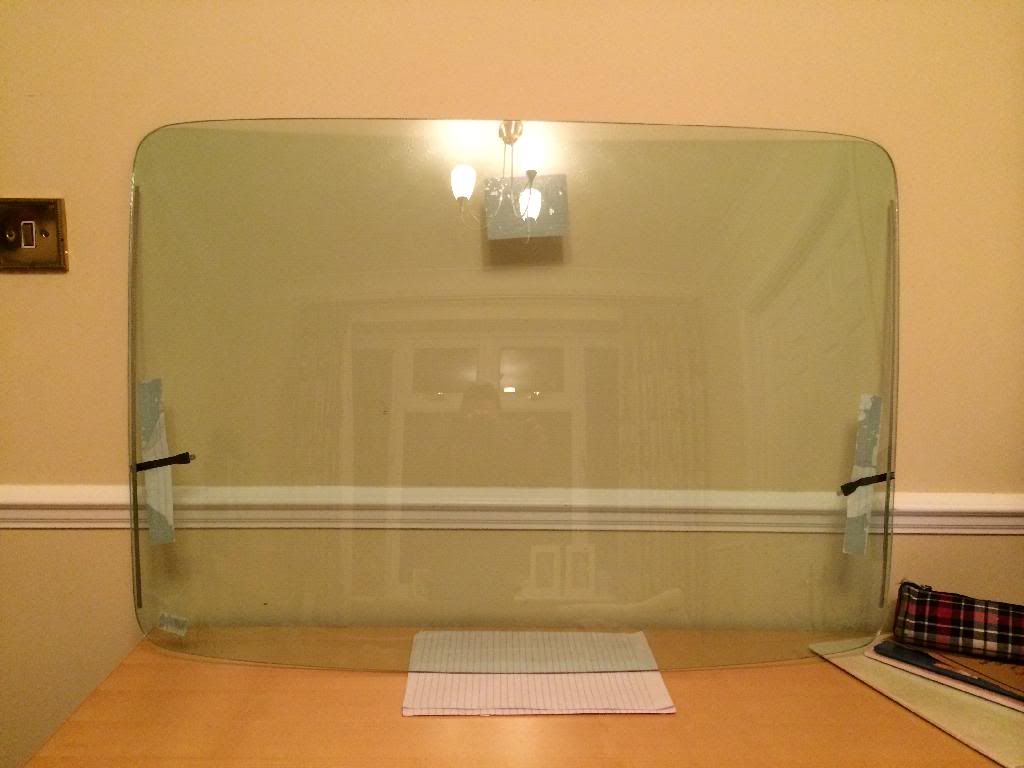
I wanted to remove the gasket intact with minimal, if any, damage to the rubber because I had no idea if the new gasket would match or even be the same quality .. and of course, if you own one of these cars, you KNOW how hard it is to adjust the top and side windows to the windshield and get them aligned and working properly together to create a good seal ... and mine were perfect. I started by spraying 303 Aerospace rubber protectant under the gasket on both sides to make it more pliable and decrease the possibility of tearing it, and started by unwrapping the top section from the aft edge of the frame peeling it forward, working my way down the side, and that was working well. As I suspected, the front edge of the gasket was secured under the glass edge between the glass and the frame (or so I thought) by the 'tang' so I left that for a second operation. Once I got to the middle of the sides, I encountered more resistance, so I stopped there and tried unwrapping on the lower portion along the cowl but found that the 'tang' was the only thing holding that strip down, so I sprayed more 303 along the 'tang' edge ... and went back to the top and started carefully pulling the 'tang' out. I could see it stretching and I thought I might tear it, but at a point it just started popping out and if I was slow and careful, I found I could 'run' it pulling up and away at a steady pace .. until I got to the sides. They were still VERY stuck (!). After I got the bottom run of gasket free I realized that the 'tang' wasn't squeezed into a void between the glass and the frame, but actually .. the entire windshield had an aluminized plastic edging bonded to it ... and at the outer edges of that piece, there was a very thin and tight channel molded into it's cross section that the 'tang' pressed into to secure the gasket to the glass.
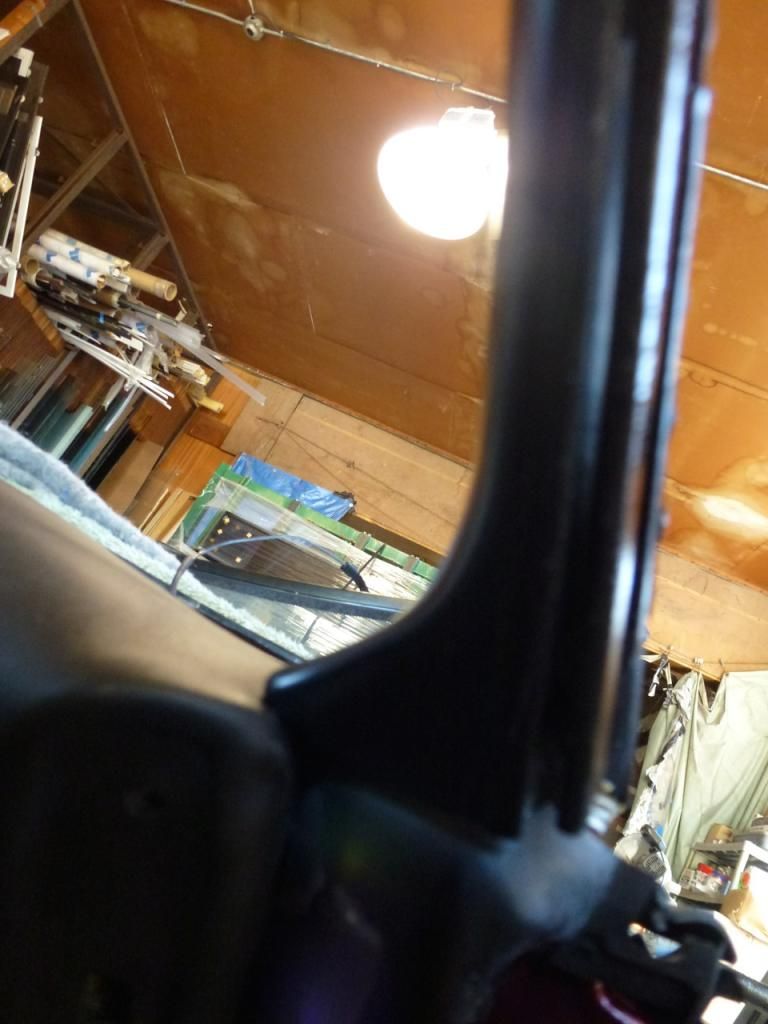
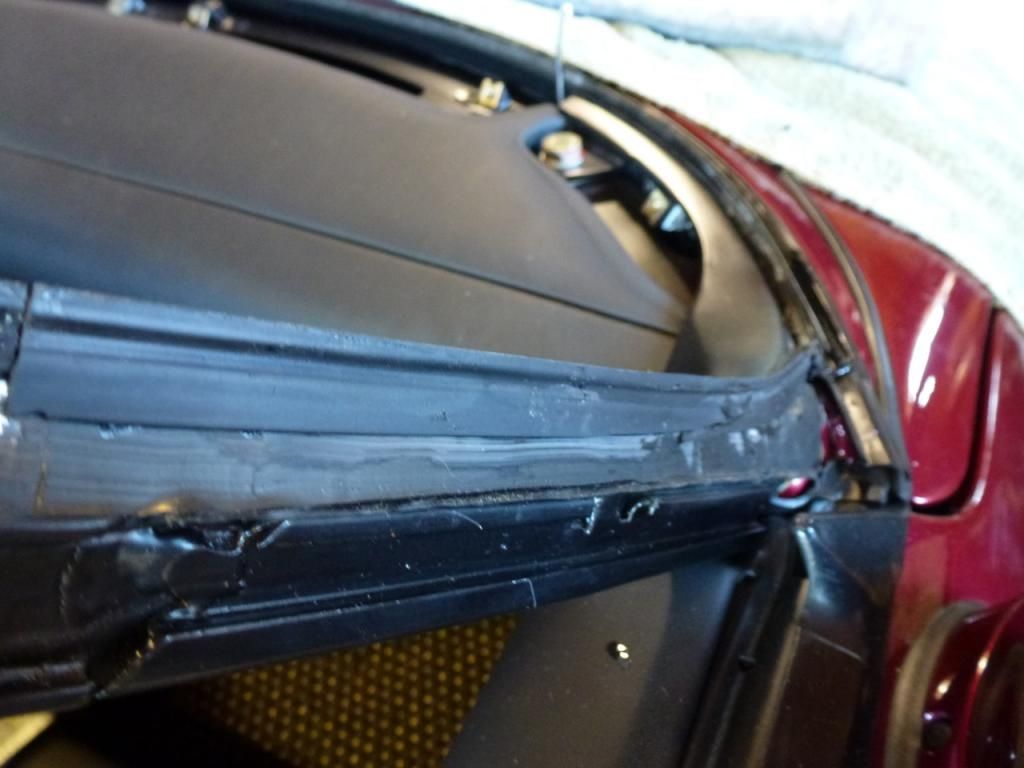
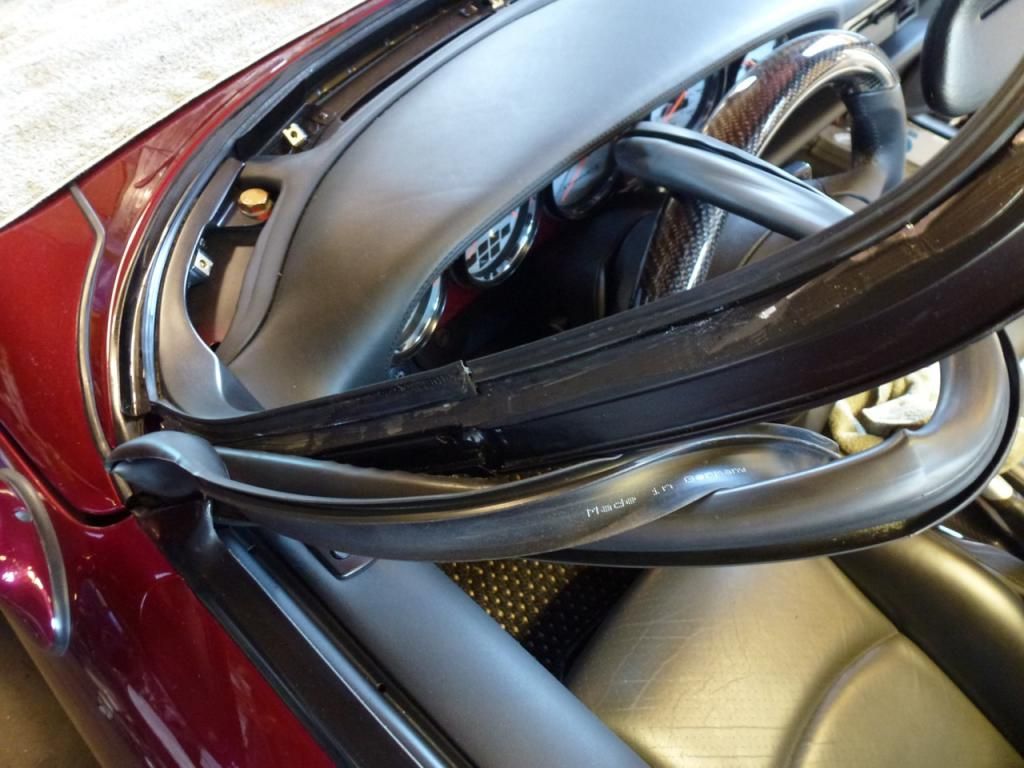
I finally went back to the sides and with a strong light, gave it a good hard look along the inner rubber and frame. There was an aft run of rubber bead that was trapped inside a channel of some sort that was part of the frame itself and when I pulled on the rubber, I could see it would not pop out in that direction, so I grabbed the gasket with both hands and tried pulling up .... no give .. and then down and the gasket slowly slipped down and finally pulled free. Looking at the frame in that area, I could see that there was indeed a 5-6" channel in the frame that flaired at the lower end .. and a parallel flange that was there to capture a 1/8" bead and 1/4" flange of rubber designed into the side runs of the gasket where the side windows seal against the windshield. (sorry about the crappy pictures ...)
Also in that area, there is an internal trough in the gasket that captures water along that edge and that flows into a rubber tube at the bottom that tucks into a void created by a gasket running under the windshield frame and the top of the door seal and forces the water forward and down the forward side of the A pillar and to the ground. Nice German engineering . I wanted to make sure I had some kind of shims that fit snug along the bottom of the glass, between it and the frame to get the new glass positioned the same and found that wooden paint stirring sticks were the perfect fit. Four went in my tool bag.
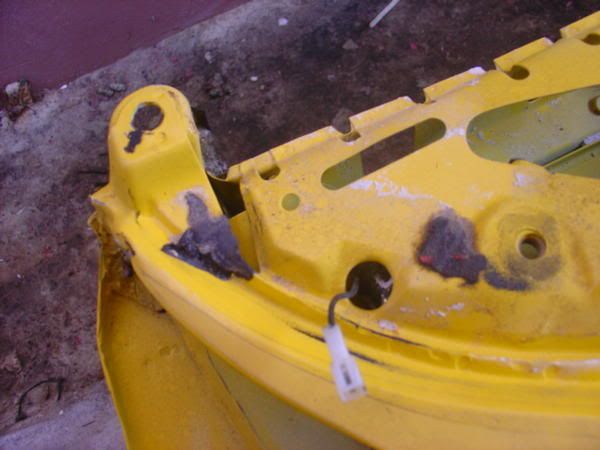
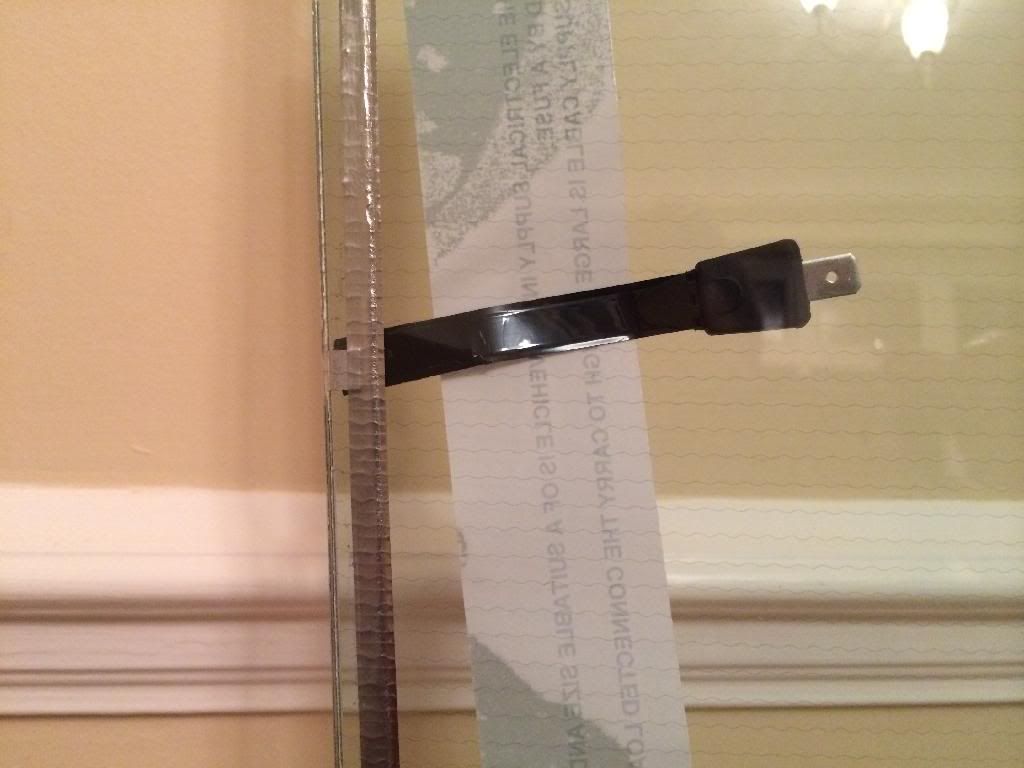
On Tuesday, I drove the car down to Redwood Glass early in the morning .. and Don rolled up his sleeves and got to work. He said it looked like a typical removal, just breaking the seal on the adhesive holding the window to the frame and carefully pulling it free. These windshields have a built in radio antenna wire that runs to an antenna amplifier mounted inside the frunk, under the cowl, so that had to be dealt with as well. Here's the stock 964 connector on the amp side (picture of a donor car .. R.I.P.) .. windshield comes with the mate on about a 10" or so lead. I removed the closeout cowl panel under the trunk lid and unplugged the connector .. luckily it fished out from under the dash cover fairly easily.
Don started with a sharp razor knife with a long handle .. we didn't know it at the time, but it was fortunate that the blade was set at 1/2" protrusion .. there was a hidden rubber piece glued to the frame that runs all the way around behind the adhesive that you can only get if you buy a frame .. which are no longer available.
Don worked the knife in sections with two hands .. carefully and slowly cutting through the adhesive just under the windshield's aluminized plastic edging. In a few places along the top, towards the outer corners, the windshield popped free, but the rest needed a special glass adhesive cutting tool like this one:
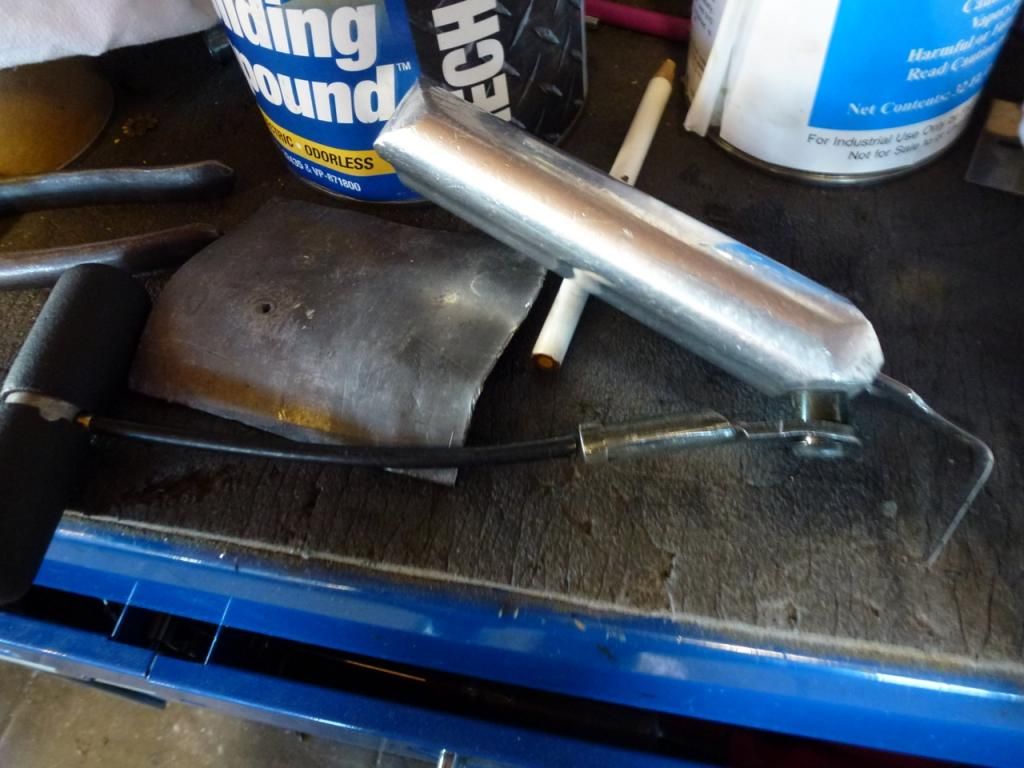
Again, fortunately .. Don was VERY careful about cutting too deep for fear of the unknown .. thank the gods he had previous experience with other types of roadster windshields. The tool he used had a 1" blade, and he was only inserting it half way. Even with the initial cut, it still took two hands and a steady pull to finally break the rest of the seal .. once the old glass was removed, we immediately saw the hidden rubber molding glued to the frame .. it's there as a 'dam' to prevent adhesive from squeezing out into the frame channel where the rubber seal gets pushed in at the back. Some of it pulled away when the glass was lifted out, but easily glued back down with a bit of adhesive. No worries!
After cleaning out most of the remaining adhesive off the frame (Don peels it off with his fingers using a plastic molding tool to dig under it .. then actual cleaning fluid .. like the type clothes cleaners use .. to clean the trough and prepare the surface for bonding) We dry-fit the new glass.
When we got it into the frame ... I heard Don say 'Uh-oh'. That's not a sound you want to hear from your glass installer .. believe me. The windshield was NOT mating to the frame at all in the corners and along the top edge .. like a 1 1/2" gap in some places ... I started to feel queasy. I started pressing the glass and frame together to try and get a feel for any flexibility .. and the glass seemed to start 'relaxing' .. so Don tried his side and then we both just started working along the glass, squeezing the glass and frame together and eventually, amazingly, the glass settled into the frame. I had no idea a windshield could have such malleable properties. Disaster avoided. Once we got the glass perfectly positioned, Don marked alignment points on the glass against the frame with grease pencil to help align the glass when installed with adhesive.
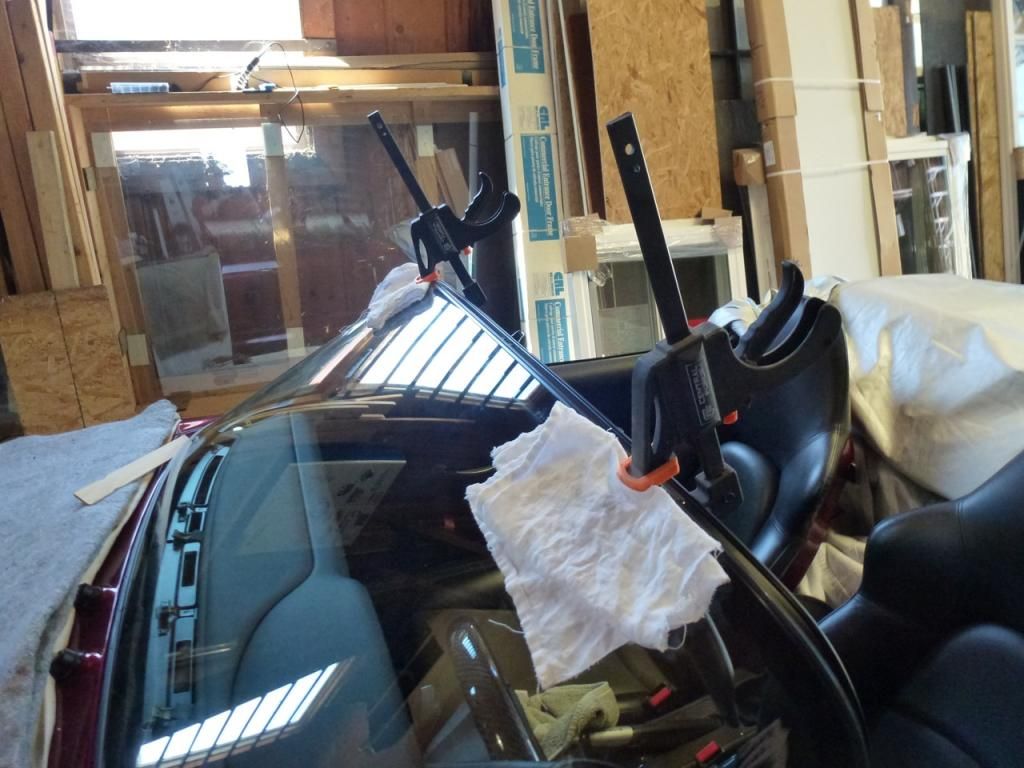
We removed the windshield and Don put a bead of adhesive all around the frame trough and then, using suction cup handles on the glass, we pressed the new windshield into place and I placed my paint stir sticks along the bottom edge for a perfect gap. Don used plastic clamps at very slight pressure to secure the top of the glass to the frame and we let it set up for half an hour:
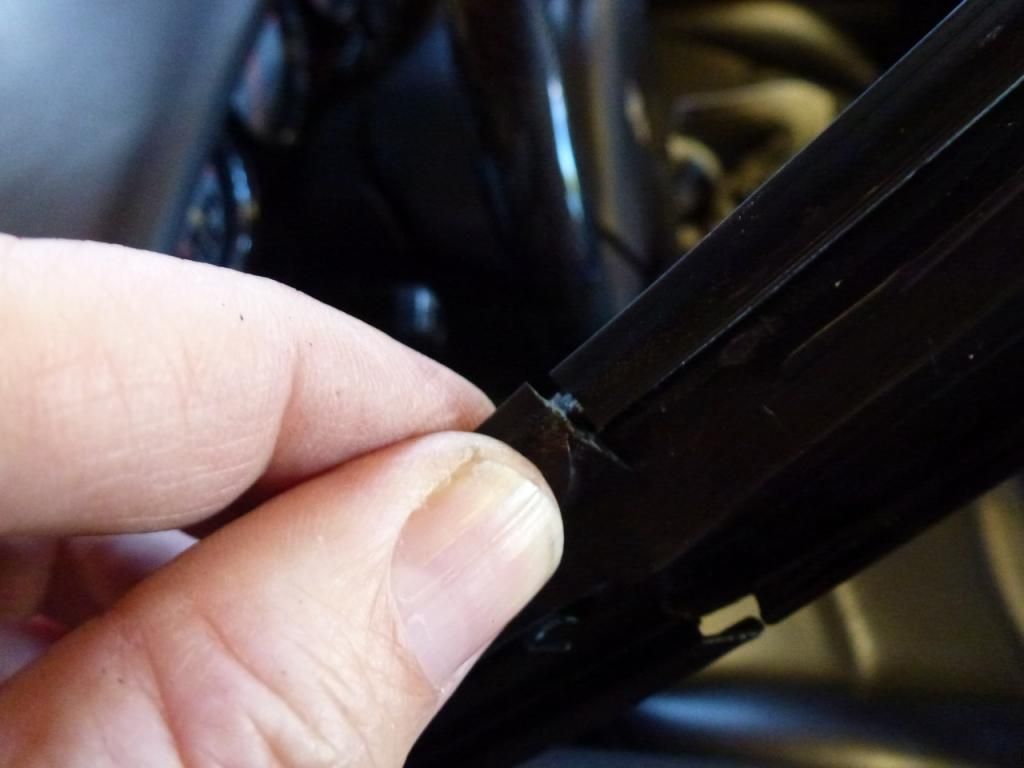
Putting the new rubber gasket in was the reverse of my steps removing it pretty much. But before we started, Don dug into that narrow channel in the aluminized plastic edging on the glass and started yanking out a flexible plastic strip that's a factory protection piece inserted by Porsche so the channel doesn't get crushed together during handling and shipping. Don said it's fairly typical on foreign convertibles. I would have never found it ... good thing I hired a pro Don then used his trim tools flat end and ran it completely around the channel to clear any obstructions.
Armed with knowledge, we pre-lubed the channel on the glass and the side slots and flanges on the frame with a lube used by electricians to pull wire through conduit. You only need about a teaspoon for the entire job, it really goes a loooooong way.
We started on the sides, sliding the rubber molded-in bead and flap on the gasket up into the slot and flange on the frame, then slowly pushed the 'tang' into the channel along the glass edge. You could feel it 'pop' in as you pushed down .. and there were a couple places on the gasket that had extra ragged bits of rubber from the molding process hanging off the 'tang' that had to be cut off before it would set into the channel correctly. It was very apparent when that was needed.
Once the 'tang' was in, we started at the upper corners working toward the middle and rolled the seal bulb into the aft frame channel .. also very apparent when it pops into place properly.
Three hours after we started, the car was back in my garage with a beautiful, pristine, mar-free windshield.
I can't even begin to tell you how relieved I am that this is over .. and grateful for discovering Don and Redwood Glass Co. I think he is probably one of a handful of glass installers that have this working knowledge in the country. When you think about it, very few of these rare cars ever get used enough to even need a new windshield and most people I talked to that I could find that had replaced one just bought the finished assembly from Porsche, and bolted it on the car. I couldn't find anybody in the country that had actually removed and replaced the glass and gasket.
For your resource reference ... a shamefully unabashed plug for Don:
Redwood Glass Company
619 Petaluma Blvd N, Petaluma, CA 94952
(707) 763-2477
Nancy runs the office .. and don't be put off by the 1896 built barn building, the horder stash of rare parts and glass or the array of vintage 'Pin-up' girls adorning the walls of the workshop ... this is the real deal ... a true 'Old Skool' shop run the old school way.
Hope this helps somebody down the road. Happy (and clear ..) motoring!
JP
The parts were used and all came off the same car with 47K miles on it and the windshield glass needed replacement. I couldn't do that during the build for budget reasons, so it's been on my 'to do' list since getting the car back and I finally was able to do it this year. Back in 2011 and up until recently, Porsche had several windshield 'assemblies' on the shelf .. frame, glass and gaskets all put together at the factory ... for $3300 my cost at Sunset and I always figured I'd go that route because the glass was $1700 (back then ..) and the gaskets were almost $600 .. so for another $1000 they threw in the frame and labor and supplies to put it together. About 8 months ago .. I went to order one and was told they were no longer available from Porsche. Period.
However, I could buy the glass for $2300 and the two gaskets for $586+$25 ... so that's what I did finally.I've been looking for a shop or individual in the Bay Area of California since I got the car back in 2011 who had experience replacing the windshield assembly to no avail let alone replacing the glass and gaskets in an existing frame so I started looking for a specialist/craftsman that I could trust and work with to figure out how to do it. Porsche has no information or TSB's on it and the workshop manual just shows how to bolt on an assembly I was on my own.
Fortunately, I met a local glass shop owner (Don/Redwood Glass Co.) when I had some glazing replaced in windows on my home. I chose him because my house was built in 1949 and I wanted to restore the original sashes and glazing .. everyone else wanted to tear out the original redwood (!) and put in aluminum
. When I visited his shop in Petaluma .. only 10 miles south of me
... I noticed several older sports car windshields and frames in the rafters. He told me he did a lot of the local hot rod custom glass work, especially the 'chopped top' stuff where he had to custom cut and shape glass and gaskets and had replaced factory glass in 356 Speedsters and Roadsters, 50's Corvette's and T-birds and lot's of British and Italian sports cars. I brought my car down to him to look at and he said .. 'sure, no problem .. I can do it'. It was the best lead I had .. well it was the ONLY lead I had, so I bought the parts and had them shipped to Don's shop two weeks ago.My install appointment was set for June 24th (yesterday) so last weekend I took to removing all the parts I thought would be in the way .. windshield wipers, defroster vent cover, windshield bolt covers etc. and then I tried to carefully remove the large rubber gasket that goes all the way around the windshield glass. It's really complex when you start looking at it and along the sides and top, it really IS the frame for the most part as it wraps completely around the steel and glass leaving only a bit of metal running along the bottom edge. As far as I could tell from lifting the edges of the gasket, it seemed to only be secured in place by pressure using no adhesives. Looking at the PET cross section picture of the rubber, you can see the single small 'tang' sticking down at the top left .. I thought that might be the only thing securing the gasket between the glass and the frame .. but that was only partially correct.

I wanted to remove the gasket intact with minimal, if any, damage to the rubber because I had no idea if the new gasket would match or even be the same quality .. and of course, if you own one of these cars, you KNOW how hard it is to adjust the top and side windows to the windshield and get them aligned and working properly together to create a good seal ... and mine were perfect. I started by spraying 303 Aerospace rubber protectant under the gasket on both sides to make it more pliable and decrease the possibility of tearing it, and started by unwrapping the top section from the aft edge of the frame peeling it forward, working my way down the side, and that was working well. As I suspected, the front edge of the gasket was secured under the glass edge between the glass and the frame (or so I thought) by the 'tang' so I left that for a second operation. Once I got to the middle of the sides, I encountered more resistance, so I stopped there and tried unwrapping on the lower portion along the cowl but found that the 'tang' was the only thing holding that strip down, so I sprayed more 303 along the 'tang' edge ... and went back to the top and started carefully pulling the 'tang' out. I could see it stretching and I thought I might tear it, but at a point it just started popping out and if I was slow and careful, I found I could 'run' it pulling up and away at a steady pace .. until I got to the sides. They were still VERY stuck (!). After I got the bottom run of gasket free I realized that the 'tang' wasn't squeezed into a void between the glass and the frame, but actually .. the entire windshield had an aluminized plastic edging bonded to it ... and at the outer edges of that piece, there was a very thin and tight channel molded into it's cross section that the 'tang' pressed into to secure the gasket to the glass.
I finally went back to the sides and with a strong light, gave it a good hard look along the inner rubber and frame. There was an aft run of rubber bead that was trapped inside a channel of some sort that was part of the frame itself and when I pulled on the rubber, I could see it would not pop out in that direction, so I grabbed the gasket with both hands and tried pulling up .... no give .. and then down and the gasket slowly slipped down and finally pulled free. Looking at the frame in that area, I could see that there was indeed a 5-6" channel in the frame that flaired at the lower end .. and a parallel flange that was there to capture a 1/8" bead and 1/4" flange of rubber designed into the side runs of the gasket where the side windows seal against the windshield. (sorry about the crappy pictures ...)


Also in that area, there is an internal trough in the gasket that captures water along that edge and that flows into a rubber tube at the bottom that tucks into a void created by a gasket running under the windshield frame and the top of the door seal and forces the water forward and down the forward side of the A pillar and to the ground. Nice German engineering
. I wanted to make sure I had some kind of shims that fit snug along the bottom of the glass, between it and the frame to get the new glass positioned the same and found that wooden paint stirring sticks were the perfect fit. Four went in my tool bag. On Tuesday, I drove the car down to Redwood Glass early in the morning .. and Don rolled up his sleeves and got to work. He said it looked like a typical removal, just breaking the seal on the adhesive holding the window to the frame and carefully pulling it free. These windshields have a built in radio antenna wire that runs to an antenna amplifier mounted inside the frunk, under the cowl, so that had to be dealt with as well. Here's the stock 964 connector on the amp side (picture of a donor car .. R.I.P.) .. windshield comes with the mate on about a 10" or so lead. I removed the closeout cowl panel under the trunk lid and unplugged the connector .. luckily it fished out from under the dash cover fairly easily.

Don started with a sharp razor knife with a long handle .. we didn't know it at the time, but it was fortunate that the blade was set at 1/2" protrusion .. there was a hidden rubber piece glued to the frame that runs all the way around behind the adhesive that you can only get if you buy a frame .. which are no longer available.
Don worked the knife in sections with two hands .. carefully and slowly cutting through the adhesive just under the windshield's aluminized plastic edging. In a few places along the top, towards the outer corners, the windshield popped free, but the rest needed a special glass adhesive cutting tool like this one:

Again, fortunately .. Don was VERY careful about cutting too deep for fear of the unknown .. thank the gods he had previous experience with other types of roadster windshields. The tool he used had a 1" blade, and he was only inserting it half way. Even with the initial cut, it still took two hands and a steady pull to finally break the rest of the seal .. once the old glass was removed, we immediately saw the hidden rubber molding glued to the frame .. it's there as a 'dam' to prevent adhesive from squeezing out into the frame channel where the rubber seal gets pushed in at the back. Some of it pulled away when the glass was lifted out, but easily glued back down with a bit of adhesive. No worries!

After cleaning out most of the remaining adhesive off the frame (Don peels it off with his fingers using a plastic molding tool to dig under it .. then actual cleaning fluid .. like the type clothes cleaners use .. to clean the trough and prepare the surface for bonding) We dry-fit the new glass.
When we got it into the frame ... I heard Don say 'Uh-oh'. That's not a sound you want to hear from your glass installer .. believe me. The windshield was NOT mating to the frame at all in the corners and along the top edge .. like a 1 1/2" gap in some places ... I started to feel queasy. I started pressing the glass and frame together to try and get a feel for any flexibility .. and the glass seemed to start 'relaxing' .. so Don tried his side and then we both just started working along the glass, squeezing the glass and frame together and eventually, amazingly, the glass settled into the frame. I had no idea a windshield could have such malleable properties. Disaster avoided.
Once we got the glass perfectly positioned, Don marked alignment points on the glass against the frame with grease pencil to help align the glass when installed with adhesive.We removed the windshield and Don put a bead of adhesive all around the frame trough and then, using suction cup handles on the glass, we pressed the new windshield into place and I placed my paint stir sticks along the bottom edge for a perfect gap. Don used plastic clamps at very slight pressure to secure the top of the glass to the frame and we let it set up for half an hour:

Putting the new rubber gasket in was the reverse of my steps removing it pretty much. But before we started, Don dug into that narrow channel in the aluminized plastic edging on the glass and started yanking out a flexible plastic strip that's a factory protection piece inserted by Porsche so the channel doesn't get crushed together during handling and shipping. Don said it's fairly typical on foreign convertibles. I would have never found it ... good thing I hired a pro
Don then used his trim tools flat end and ran it completely around the channel to clear any obstructions.Armed with knowledge, we pre-lubed the channel on the glass and the side slots and flanges on the frame with a lube used by electricians to pull wire through conduit. You only need about a teaspoon for the entire job, it really goes a loooooong way.
We started on the sides, sliding the rubber molded-in bead and flap on the gasket up into the slot and flange on the frame, then slowly pushed the 'tang' into the channel along the glass edge. You could feel it 'pop' in as you pushed down .. and there were a couple places on the gasket that had extra ragged bits of rubber from the molding process hanging off the 'tang' that had to be cut off before it would set into the channel correctly. It was very apparent when that was needed.

Once the 'tang' was in, we started at the upper corners working toward the middle and rolled the seal bulb into the aft frame channel .. also very apparent when it pops into place properly.
Three hours after we started, the car was back in my garage with a beautiful, pristine, mar-free windshield.

I can't even begin to tell you how relieved I am that this is over .. and grateful for discovering Don and Redwood Glass Co. I think he is probably one of a handful of glass installers that have this working knowledge in the country. When you think about it, very few of these rare cars ever get used enough to even need a new windshield and most people I talked to that I could find that had replaced one just bought the finished assembly from Porsche, and bolted it on the car. I couldn't find anybody in the country that had actually removed and replaced the glass and gasket.
For your resource reference ... a shamefully unabashed plug for Don:
Redwood Glass Company
619 Petaluma Blvd N, Petaluma, CA 94952
(707) 763-2477
Nancy runs the office .. and don't be put off by the 1896 built barn building, the horder stash of rare parts and glass or the array of vintage 'Pin-up' girls adorning the walls of the workshop ... this is the real deal ... a true 'Old Skool' shop run the old school way.
Hope this helps somebody down the road. Happy (and clear ..) motoring!
JP
Last edited by JPP; 06-25-2014 at 05:19 PM.

 06-25-2014, 02:47 PM
#5
Nordschleife Master
Thread Starter
Don told me he uses paste Turtlewax (!) on his windshields which creates a thin, very slick layer of protection. I guess he's got the original glass in his '65 Skylark vert and no nicks, chips or pitting .. looks almost new. I try to patronize local biz when I can ... it's good karma.
06-25-2014, 04:30 PM
#6
Instructor
Thx a million for your info about the screens and how you may tackle it.
I have a litle star ( stonechip) that I would like to get ride off by changing to a new glass window in my Speedster frame.
But I need to find someone with experiance like you did....... Now I atleast know of the hidden parts that you mentioned.
/ Per
I have a litle star ( stonechip) that I would like to get ride off by changing to a new glass window in my Speedster frame.
But I need to find someone with experiance like you did....... Now I atleast know of the hidden parts that you mentioned.
/ Per
06-25-2014, 05:07 PM
#7
Nordschleife Master
Thread Starter
Thx a million for your info about the screens and how you may tackle it.
I have a litle star ( stonechip) that I would like to get ride off by changing to a new glass window in my Speedster frame.
But I need to find someone with experiance like you did....... Now I atleast know of the hidden parts that you mentioned.
/ Per
I have a litle star ( stonechip) that I would like to get ride off by changing to a new glass window in my Speedster frame.
But I need to find someone with experiance like you did....... Now I atleast know of the hidden parts that you mentioned.
/ Per
Trending Topics
 06-25-2014, 05:48 PM
#9
Nordschleife Master
Thread Starter
06-25-2014, 06:57 PM
#10
Rennlist Member
Join Date: Oct 2010
Location: Naphill
Posts: 985
Likes: 0
Received 0 Likes
on
0 Posts
jpp....if you still have the old glass don't chuck it away as I've been trying to get a old speedster screen for a template to get these re manufactured by plinkington as there getting so hard to get now as I use a plant that deals with old skool glass/custom glass.....thing is I can get you a glass for a 917 but a speedster its a no go....or your guy may be able to get them made up for future stock as they all but disappear from porsche stock at silly money.
Ps....well done at redwood glass it's nice that good guys are still around like don
Ps....well done at redwood glass it's nice that good guys are still around like don
 06-25-2014, 07:19 PM
#13
Nordschleife Master
Thread Starter
 but a great idea for sure. At this point, Porsche is the only source ...
06-25-2014, 08:21 PM
but a great idea for sure. At this point, Porsche is the only source ...
06-25-2014, 08:21 PM
#15
Nordschleife Master
Thread Starter
^^ I just called Redwood Glass .. Don said the glass was broken up last night and put in the recycle bin It was already split in two with ragged edges when we pulled it off the car though, I doubt it would have worked for reverse engineering.
It was already split in two with ragged edges when we pulled it off the car though, I doubt it would have worked for reverse engineering.