Refitting Bonnet Badge/Crest
 06-03-2014, 05:43 PM
#16
Burning Brakes
I replaced mine with the OEM piece from Pelican when I had some paint work done last year. Noticed within the last few months that the black was missing in several spots, and kept getting worse. So, I had to remove the badge, and I put the old one back on for the meantime. I used a small ratchet to tighten it back up, and I think may have over tightened a bit. Moral of the story, dont use anything that gives leverage, just use a driver and hand tighten. Hopefully it won't be too much of a pain to remove when pelican swaps the other one.
Oh, and I'm seriously considering having the new one clear coated before installation.
Oh, and I'm seriously considering having the new one clear coated before installation.
 06-03-2014, 06:01 PM
#17
Burning Brakes
I'll add this here because it fits. Not too long ago I watched a Porsche-produced video w/ Hurley Haywood in it, and in that video he said something like "The Porsche crest not only looks good, but it's a perfect place to put your hand when you're closing the hood." Many have learned (as have I) that this is not correct- the badge will deform if you do this and then won't sit in the gasket correctly. I was able to re-form the arc of the badge and improve the fit, but you can bet I don't push there any more...
06-03-2014, 06:26 PM
#18
My badge is bent of shape, enamel broken in most places - in fact it's a mess. But I like it, I like that it's battered and bruised especially when everything else is nice and new.
What are your views? Replace when it needs it or keep patina?
What are your views? Replace when it needs it or keep patina?
 07-30-2014, 11:06 PM
#22
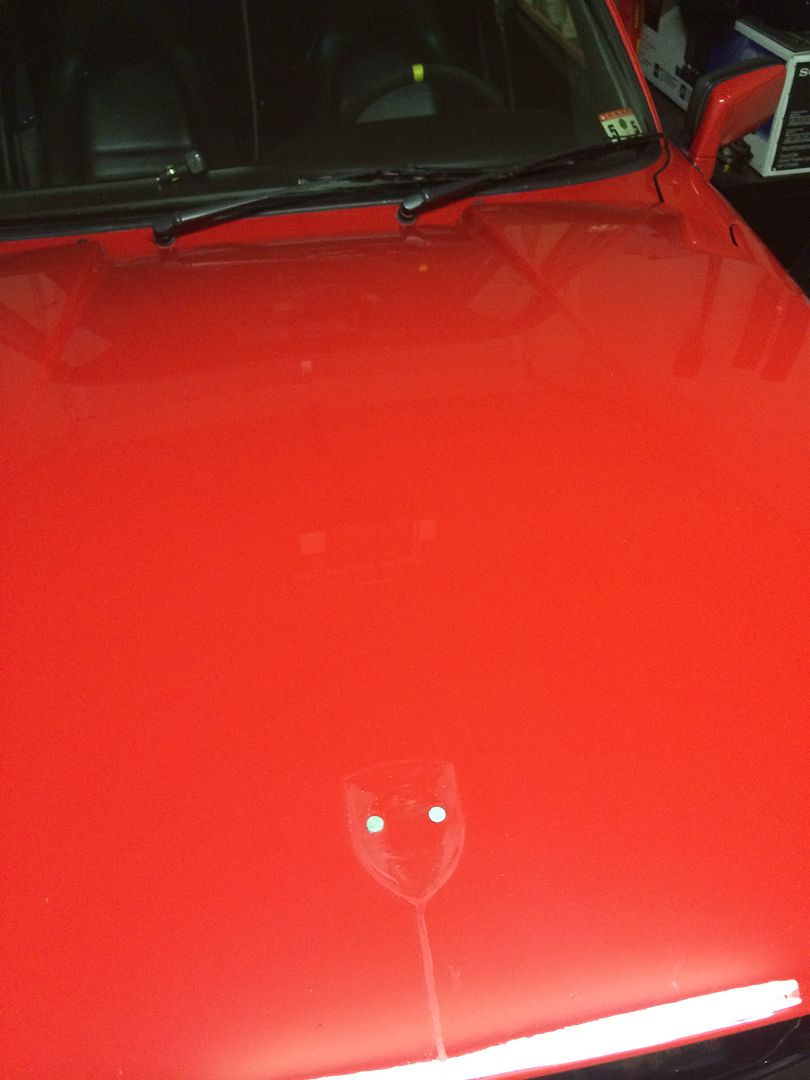
Here's the situation. I ordered a custom badge from a member on here. He customizes the badge to any color combo you are looking for. I got my badge and when I had my cage put in, I gave it to the shop to install. Big mistake. They over tightened the screws holding the badge and now the gasket doesn't sit right. I tried fix the gasket by trying to unscrew the two bolts on the back but they will not loosen at all. I think the threads may have been stripped when the shop over tightened it. What can I do to take off the badge without ruining it? Is there a trick to getting it off?

Last edited by Rey Gunn; 07-30-2014 at 11:08 PM. Reason: added picture

 07-31-2014, 08:52 AM
#25
Burning Brakes
There are no threads, the nuts are "se;lf tapping" Use a long needle nose to hold and twist the nut and carefully lift the badge from the hood (use a credit card) the nuts will back off
Frankly getting the badge on correctly and not ruining the gasket caused me to invent new words!
Soaking the gasket in hot water to soften it helped but still #%$%#%
Frankly getting the badge on correctly and not ruining the gasket caused me to invent new words!
Soaking the gasket in hot water to soften it helped but still #%$%#%
07-31-2014, 09:17 AM
#26
Drifting

Rey - A few years back I used a trim and molding tool on my wife's BMW to remove and replace the roundel. I used the second one from the left in the picture and put it between the badge and the hood to have leverage and lift the badge. You can do the same thing here and by gently lifting the crest off the hood while you "unscrew" the nuts from the backside, it should provide enough resistance/tension for the nuts to catch the posts and then back out. I hope this makes sense.
07-31-2014, 11:42 AM
#27
There are no threads, the nuts are "se;lf tapping" Use a long needle nose to hold and twist the nut and carefully lift the badge from the hood (use a credit card) the nuts will back off
Frankly getting the badge on correctly and not ruining the gasket caused me to invent new words!
Soaking the gasket in hot water to soften it helped but still #%$%#%
Frankly getting the badge on correctly and not ruining the gasket caused me to invent new words!
Soaking the gasket in hot water to soften it helped but still #%$%#%
Rey - A few years back I used a trim and molding tool on my wife's BMW to remove and replace the roundel. I used the second one from the left in the picture and put it between the badge and the hood to have leverage and lift the badge. You can do the same thing here and by gently lifting the crest off the hood while you "unscrew" the nuts from the backside, it should provide enough resistance/tension for the nuts to catch the posts and then back out. I hope this makes sense.
07-31-2014, 03:05 PM
#28
Burning Brakes
There are no threads, the nuts are "se;lf tapping" Use a long needle nose to hold and twist the nut and carefully lift the badge from the hood (use a credit card) the nuts will back off
Frankly getting the badge on correctly and not ruining the gasket caused me to invent new words!
Soaking the gasket in hot water to soften it helped but still #%$%#%
Frankly getting the badge on correctly and not ruining the gasket caused me to invent new words!
Soaking the gasket in hot water to soften it helped but still #%$%#%