Notices
964 Forum 1989-1994
Sponsored by:
Sponsored by:

My new to me 964 C2 and build thread

Thread Tools
 
Search this Thread
 
Old 01-13-2015, 12:46 PM
  #61  
trophy
Race Car
 
trophy's Avatar
 
Join Date: Nov 2005
Location: Calgary...Under my car... :)
Posts: 3,918
Received 9 Likes on 9 Posts
Default

Not sure how I missed this one John... Congrats on your "Upgrade" and the progress of the project so far
Old 01-13-2015, 06:37 PM
  #62  
KruMsz
Track Day
 
KruMsz's Avatar
 
Join Date: Nov 2014
Location: California
Posts: 16
Likes: 0
Received 0 Likes on 0 Posts
Default

Nice vision you have going here Jbig. Subbed to see how this keeps going. Im also in sac maybe i can check out your project one of these days.
Old 01-19-2015, 10:20 AM
  #63  
dangeruss
Track Day
 
dangeruss's Avatar
 
Join Date: Apr 2014
Location: Europe
Posts: 24
Likes: 0
Received 2 Likes on 1 Post
Default

Hi, were you ever able to remove all of the old dried glue from the interior? I removed my interior but I'm having trouble with all of that old adhesive and need some tips on how to remove it. Thank you, Russell.
Old 03-01-2015, 08:32 PM
  #64  
jbigelow
Pro
Thread Starter
 
jbigelow's Avatar
 
Join Date: Feb 2007
Location: Sactown, CA
Posts: 742
Likes: 0
Received 1 Like on 1 Post
Default

Originally Posted by trophy
Not sure how I missed this one John... Congrats on your "Upgrade" and the progress of the project so far
HAHA when you say upgrade. Thanx for your advice thus far. And looking for forward to your project car articles Stephen

Originally Posted by KruMsz
Nice vision you have going here Jbig. Subbed to see how this keeps going. Im also in sac maybe i can check out your project one of these days.
Thanx for the kind words...... We can meet anytime I'm free. And nice to meet you fellow Saramentan

Originally Posted by dangeruss
Hi, were you ever able to remove all of the old dried glue from the interior? I removed my interior but I'm having trouble with all of that old adhesive and need some tips on how to remove it. Thank you, Russell.
Sorry for the late reply, I've been busy. I got most of the glue off, but I've been soo busy i haven't taken some of the HARD glue off. Most of dried soft glue i was able to use duct tape and pull most of it off. some of the glue i use some 3m spray gunk remover.

Good luck
Old 03-12-2015, 04:52 AM
  #65  
jbigelow
Pro
Thread Starter
 
jbigelow's Avatar
 
Join Date: Feb 2007
Location: Sactown, CA
Posts: 742
Likes: 0
Received 1 Like on 1 Post
Default

Sorry I haven't been updating much...... Been a little busy and my baby boy is arriving in a week.

Here is what I have added thus far:

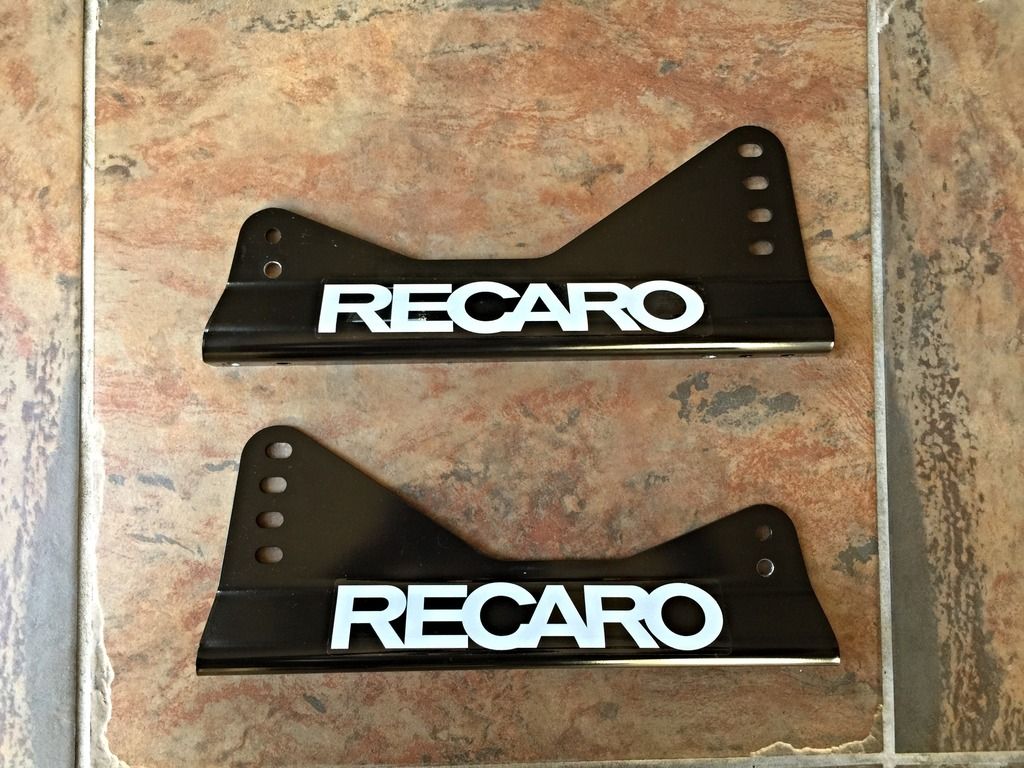
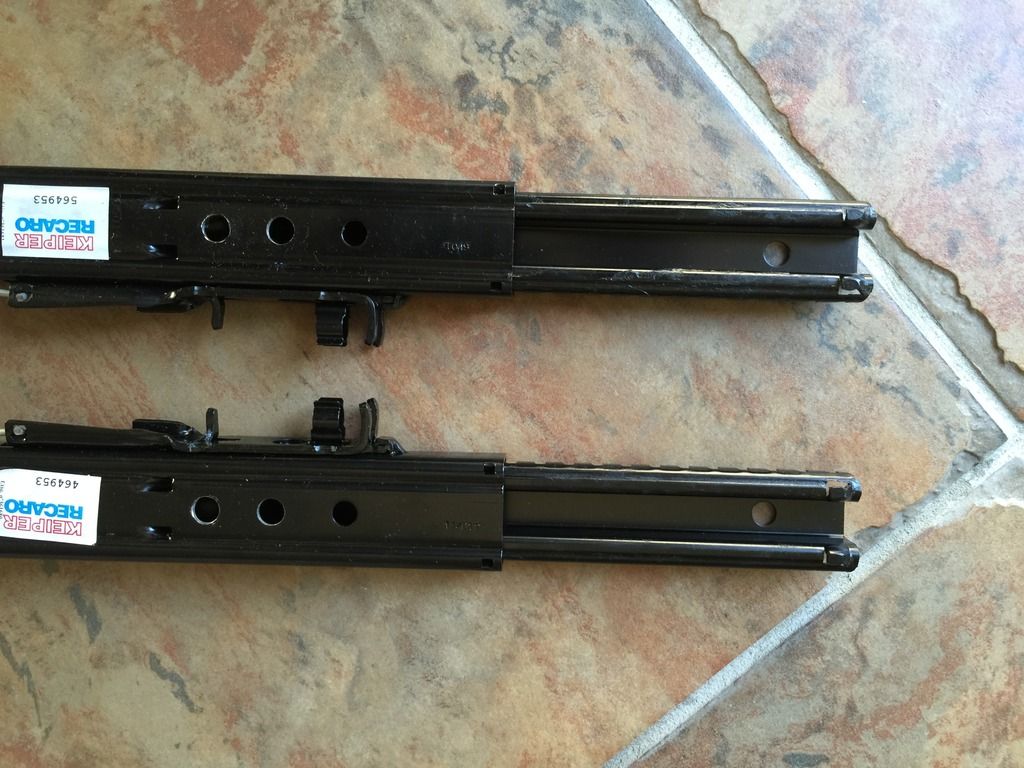
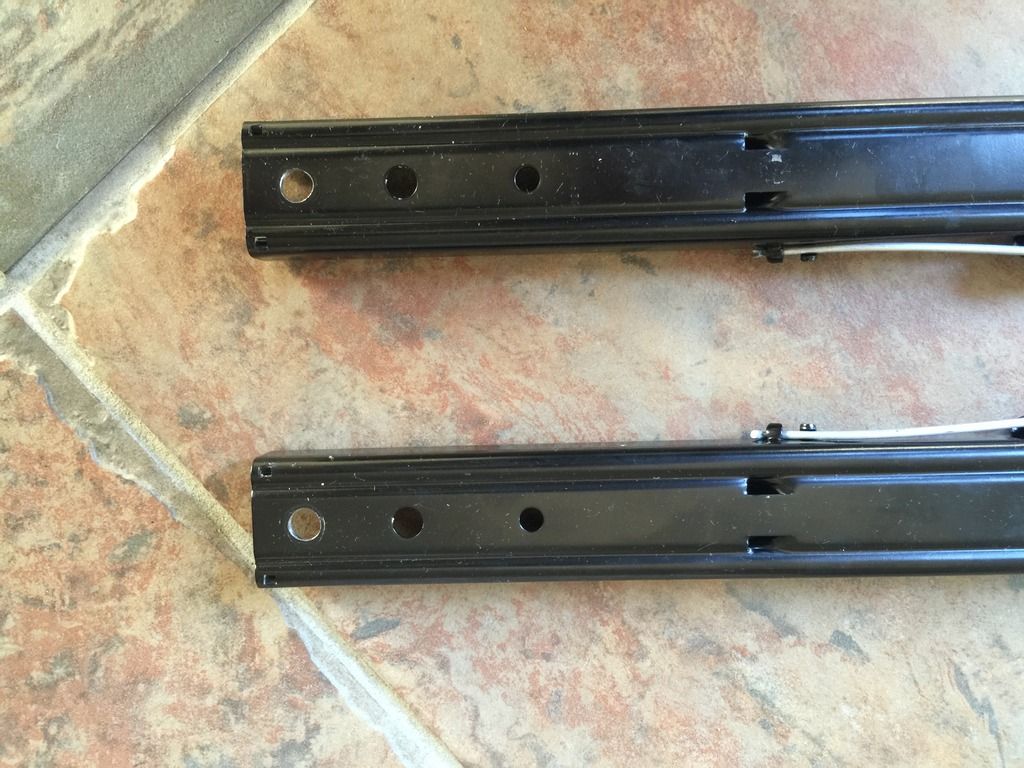
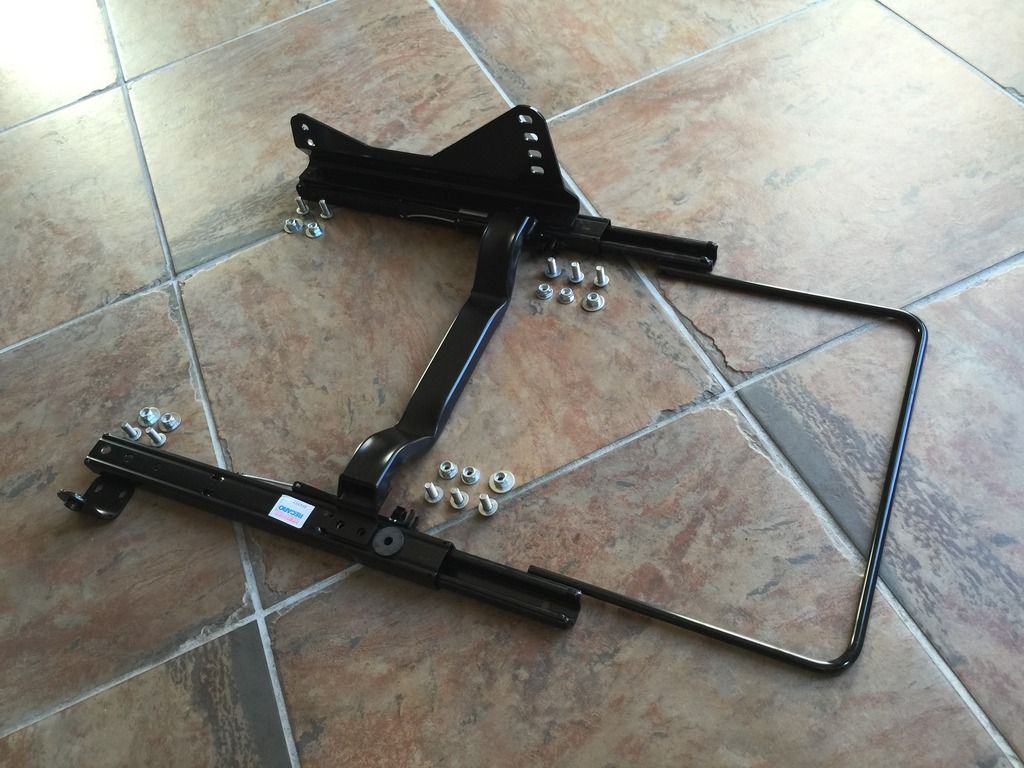
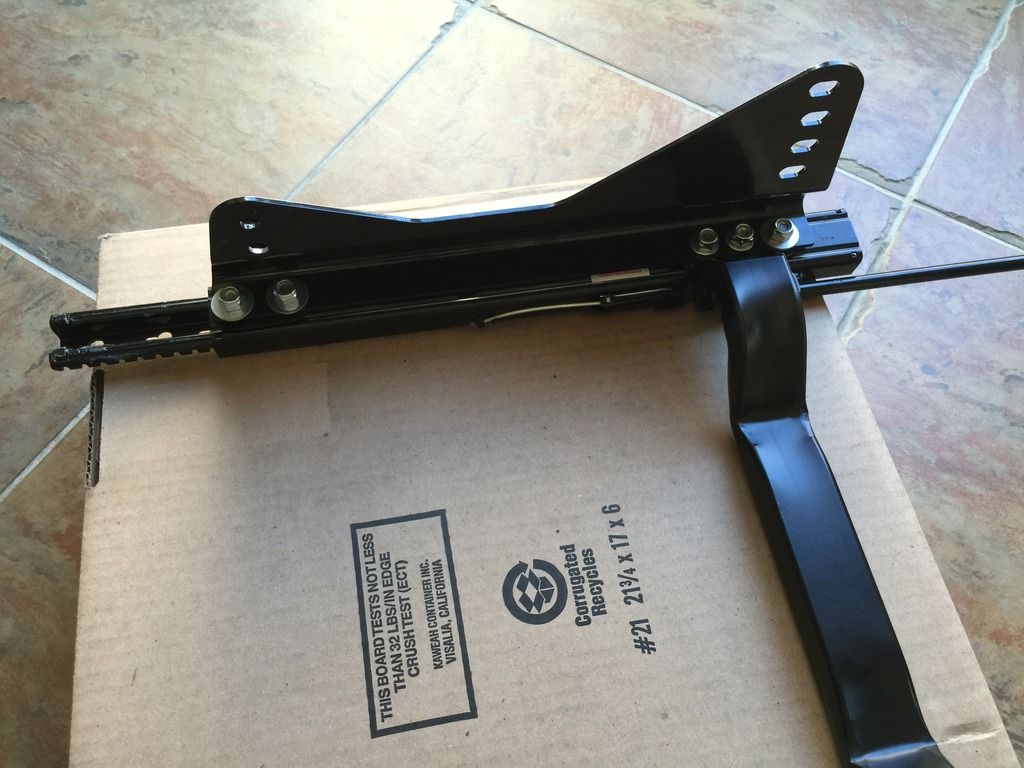
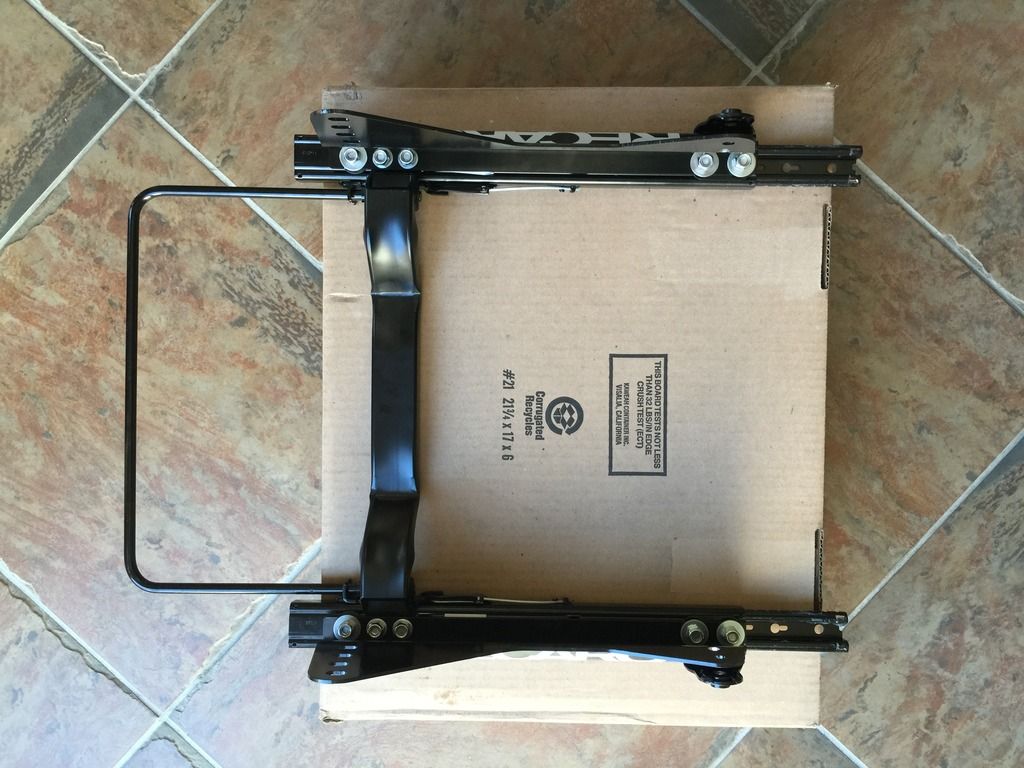
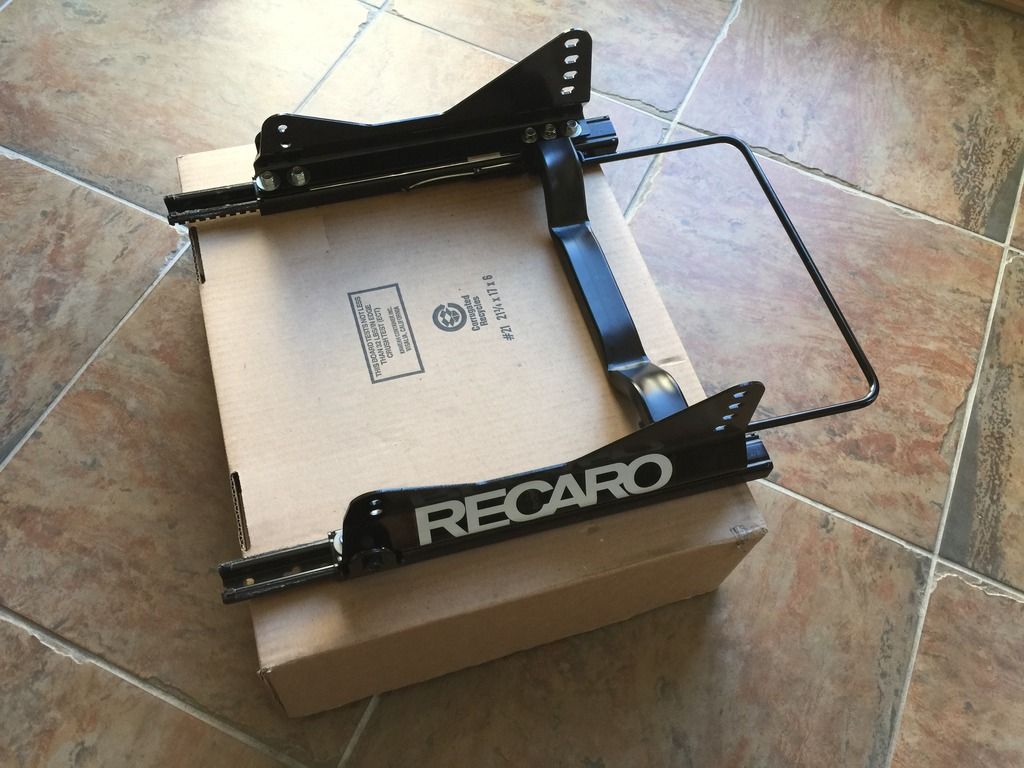
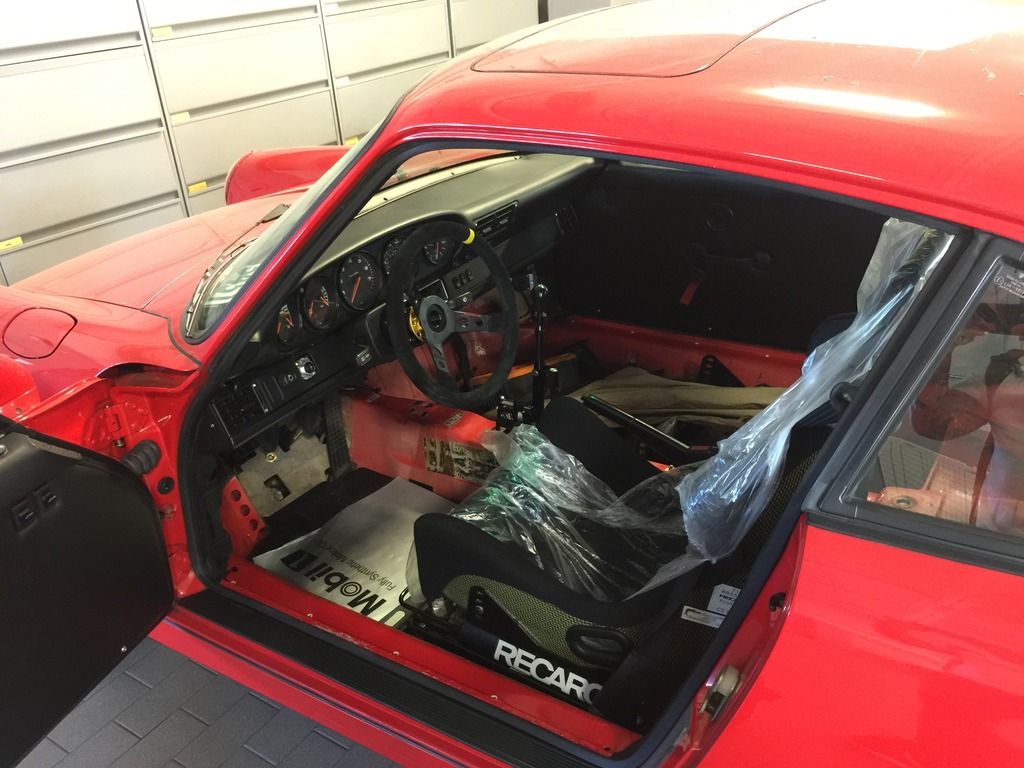
Adding Recaro SPg seats later to the 964 and using recaro sliders and side mounts. As of now I'm using my office chair seat (Recaro SPa) to test fit the sliders and side mounts into the 964. I customized my Recaro brackets and sliders by drilling extra holes to be able to lower the seat more and utilize stock seat belts and a submount bar. Submount bar is the OEM 996 clubsport submount bar.


Last edited by jbigelow; 03-12-2015 at 11:41 AM.
Old 03-12-2015, 05:08 AM
  #66  
jbigelow
Pro
Thread Starter
 
jbigelow's Avatar
 
Join Date: Feb 2007
Location: Sactown, CA
Posts: 742
Likes: 0
Received 1 Like on 1 Post
Default

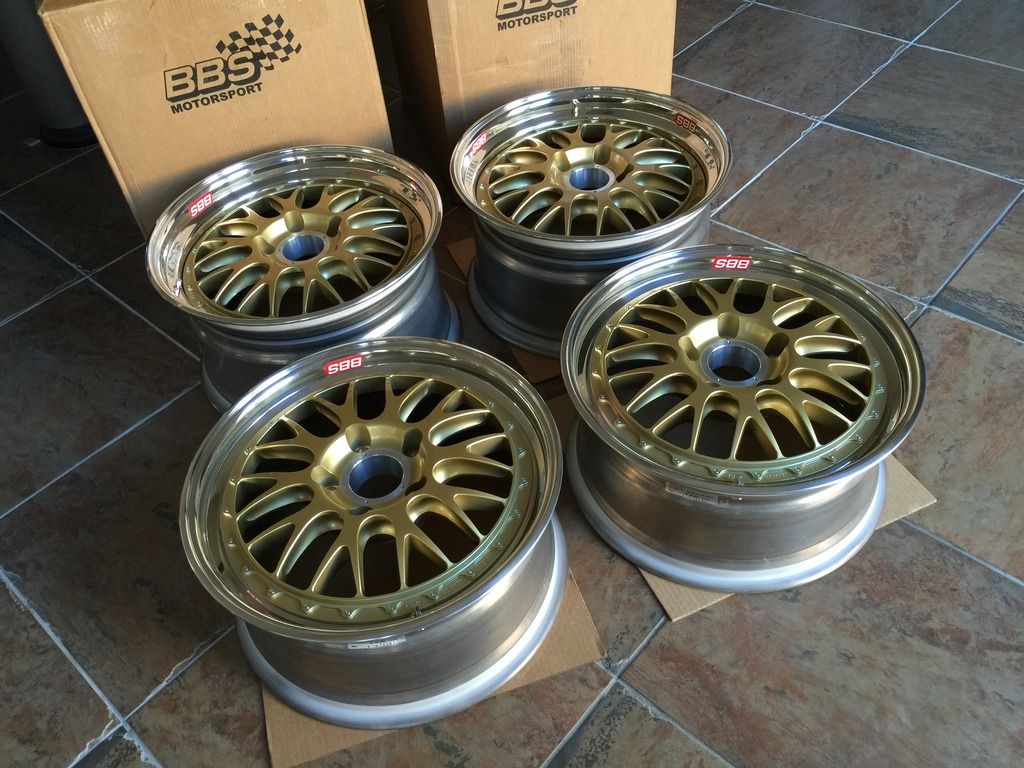
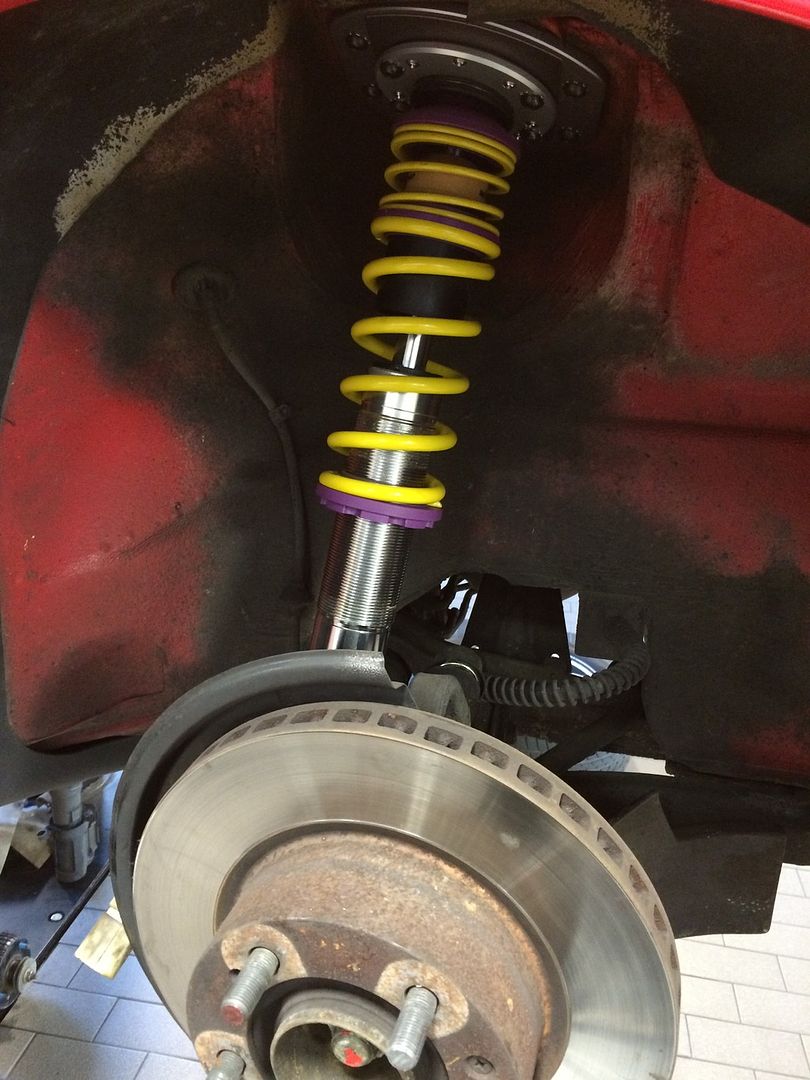
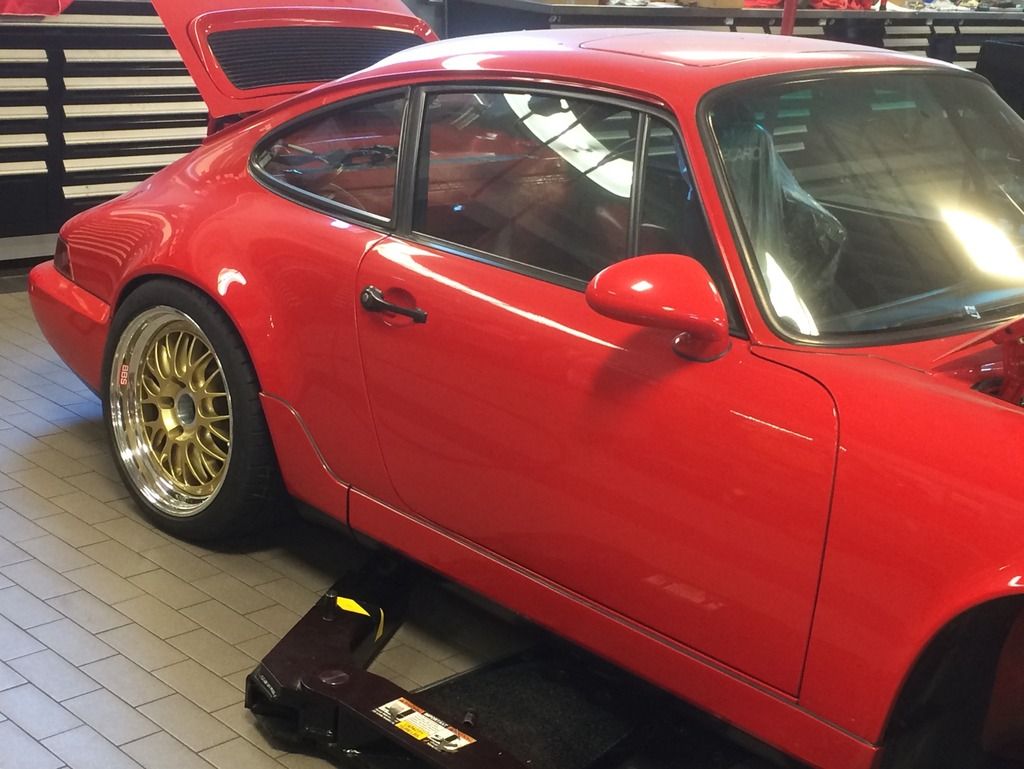
Also added KW clubsports with Rennline camber plates, strut bar, and set of BBS e88s

Wheel dimensions are as follows on the BBS e88 Fronts 18x8.5 +48
Rears 18x10 +43

Michelin Pilot Super Sports Tires
Fronts 225/40 18"
Rears 265/35 18"

Last edited by jbigelow; 03-12-2015 at 11:51 AM.
Old 03-12-2015, 06:06 AM
  #67  
ThomasC2
Drifting
 
ThomasC2's Avatar
 
Join Date: Aug 2002
Location: Stockholm, Sweden
Posts: 2,132
Received 41 Likes on 20 Posts
Default

nice parts!

Thomas
Old 03-12-2015, 09:21 AM
  #68  
breljohn
Burning Brakes
 
breljohn's Avatar
 
Join Date: May 2014
Location: Montreal, Canada
Posts: 776
Received 19 Likes on 14 Posts
Default

Very nice setup
Old 03-12-2015, 09:55 AM
  #69  
boxsey911
Nordschleife Master
 
boxsey911's Avatar
 
Join Date: Feb 2007
Location: Cheshire, UK
Posts: 5,095
Likes: 0
Received 2 Likes on 2 Posts
Default

Nice progress. Looks like you have standard rotors....any plans for changing the brakes?
Old 03-12-2015, 10:55 AM
  #70  
9six4
Rennlist Member
 
9six4's Avatar
 
Join Date: May 2006
Location: Canada
Posts: 307
Received 1 Like on 1 Post
Default

Originally Posted by jbigelow

Michelin Pilot Super Sports Tires
Fronts 265/35
Rears 235/40
Interesting tire size choice!

Those wheels are great and that shifter rocks. I can't wait to hear your feedback on the car.
Old 03-12-2015, 11:48 AM
  #71  
jbigelow
Pro
Thread Starter
 
jbigelow's Avatar
 
Join Date: Feb 2007
Location: Sactown, CA
Posts: 742
Likes: 0
Received 1 Like on 1 Post
Default

Originally Posted by 9six4
Interesting tire size choice! Those wheels are great and that shifter rocks. I can't wait to hear your feedback on the car.
Haha..... Sorry, late night at work at the firehouse

Let me correct my tire size

Fronts 225/40 18"
Rears 265/35 18"

Corrected in original thread also.
Old 03-12-2015, 11:49 AM
  #72  
trophy
Race Car
 
trophy's Avatar
 
Join Date: Nov 2005
Location: Calgary...Under my car... :)
Posts: 3,918
Received 9 Likes on 9 Posts
Default

Looking great.... Any chance you can grab the part numbers off the BBS Centres? and what size lips they ended up using....
Old 03-12-2015, 11:58 AM
  #73  
jbigelow
Pro
Thread Starter
 
jbigelow's Avatar
 
Join Date: Feb 2007
Location: Sactown, CA
Posts: 742
Likes: 0
Received 1 Like on 1 Post
Default

Originally Posted by trophy
Looking great.... Any chance you can grab the pat numbers off the BBS Centres? and what size lips they ended up using....
Hey Stephen,

I knew I should of took pics of the part numbers on the barrels.

Lemme see if I could find my BBS paperwork again with the specs and part numbers.

Hope all is well
Old 03-12-2015, 12:17 PM
  #74  
ThomasC2
Drifting
 
ThomasC2's Avatar
 
Join Date: Aug 2002
Location: Stockholm, Sweden
Posts: 2,132
Received 41 Likes on 20 Posts
Default

you don't need any papers. You have the partnumber stamped at the lip of the centres. It starts with 0288...

you can see it at 6'clock on the rim down to the right in your pic.
Old 03-12-2015, 12:52 PM
  #75  
jbigelow
Pro
Thread Starter
 
jbigelow's Avatar
 
Join Date: Feb 2007
Location: Sactown, CA
Posts: 742
Likes: 0
Received 1 Like on 1 Post
Default

Originally Posted by ThomasC2
you don't need any papers. You have the partnumber stamped at the lip of the centres. It starts with 0288... you can see it at 6'clock on the rim down to the right in your pic.
Hey Thomas,

Yeah I know, but my car is at the shop.

I haven't seen her in 3.5 months. LOL

My mechanic took the last pix with the wheels on the car and of the KW clubsports.

Will try to get the part numbers soon


Quick Reply: My new to me 964 C2 and build thread


All times are GMT -3. The time now is 10:49 AM.