

Respray Time Q. Window seals
 01-17-2013, 05:51 PM
#46
Scary in the wrong hands....
I don't know what's it all about Alfie....
 01-17-2013, 06:00 PM
#47
Cbr786 ,well done on the removal it's easy as that hey!!
That rust don't look to bad to be honest but defo pop the wings off to check....& then&then& then.....your doing a winter rebuild, must be strong man & hold back the wife & kids need to eat!!
That rust don't look to bad to be honest but defo pop the wings off to check....& then&then& then.....your doing a winter rebuild, must be strong man & hold back the wife & kids need to eat!!
01-17-2013, 06:27 PM
#48
yeah winter rebuild lol I already stripped some parts under the bonnet to fix repair the front blowers. Luckily I think I can reuse them as I managed to un-stick them and get them spinning again. The Windscreen was easy because it was not bonded.
All you got to do is use a large flat blade screw driver and carefully sitting in the drivers seat slowly from one top away from corner tuck rubber back and under the metal after a while you can use your thumbs both of them and work the rubber under the metal rim, when you reach corners just be careful and eventually you give a slight push and the screen come away from the surround complete with rubber attached. I had to remove the dash top to unplug the radio booster wire pic enclosed where it plugs into under dash into a square box. I really do not wish to go down the slippery slope! Not sure what repair options to do on the hole lead fill ? or buy repair section.
All you got to do is use a large flat blade screw driver and carefully sitting in the drivers seat slowly from one top away from corner tuck rubber back and under the metal after a while you can use your thumbs both of them and work the rubber under the metal rim, when you reach corners just be careful and eventually you give a slight push and the screen come away from the surround complete with rubber attached. I had to remove the dash top to unplug the radio booster wire pic enclosed where it plugs into under dash into a square box. I really do not wish to go down the slippery slope! Not sure what repair options to do on the hole lead fill ? or buy repair section.
01-31-2013, 05:04 PM
#50
trying to get front wings off really struggling with these bolts under the wing. Looks like they have got sealer on from the factor how do I get to these bolts ? Looks like I might need to break a/c lines as well. At least my sill looks okay.
Last edited by CBR786; 01-23-2015 at 03:54 PM.
01-31-2013, 05:24 PM
#51
Burning Brakes
Join Date: Apr 2011
Location: Perthshire, Scotland
Posts: 838
Likes: 0
Received 0 Likes
on
0 Posts
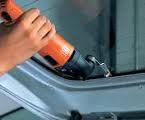
You have to cut the sealer out the way to get to the bolts I used a screwdriver, in relation to the AC pipes you can do it with them in place but its a real pain especially the top 2 easier to remove the pipes out the way I had to remove mine the whole length because they wouldnt split in the middle, this is a picture of mine once removed you can see how much underseal the previous owner cut away to fit the new wings.
01-31-2013, 06:06 PM
#52
Rennlist Member
Join Date: Nov 2011
Location: Stoke Poges, UK
Posts: 1,466
Likes: 0
Received 0 Likes
on
0 Posts
I find it best to heat up the sealer with a blowtorch then simply tap a 10mm socket over the head of the bolt.
With the top bolt it's hard to acess with the fuel filler neck.
Open the the door and use a stud extractor on the back end of the bolt and undo it as far as poss. Then use a spanner for the last few turns.
With the top bolt it's hard to acess with the fuel filler neck.
Open the the door and use a stud extractor on the back end of the bolt and undo it as far as poss. Then use a spanner for the last few turns.
01-31-2013, 07:03 PM
#53
Racer
Thread Starter
Join Date: Nov 2010
Location: North Wales
Posts: 258
Likes: 0
Received 0 Likes
on
0 Posts
Here's my pics of my current progress on the respray, maybe these i ages may help you cbr786? You can see the speed clip that is under the filler cap to the right hand side of the washer hose in my first pic below. Hope that helps?

Stripped and naked!

Rust removed and painted

There was only a small bubble peeping through under the rear window seal so this was more corrosion than i was expecting

And there has been paint on this small section before so not so surprising to find some filler here. Need to dig this out and cut out this part.

And another..

Also just told them to remove the headlight washer jets from bumper and paint for smooth look....Gaz told me to do it....
Stripped and naked!
Rust removed and painted
There was only a small bubble peeping through under the rear window seal so this was more corrosion than i was expecting
And there has been paint on this small section before so not so surprising to find some filler here. Need to dig this out and cut out this part.
And another..
Also just told them to remove the headlight washer jets from bumper and paint for smooth look....Gaz told me to do it....
 01-31-2013, 07:29 PM
#55
looking good time666 my car should be in the shop by mid feb if I manage to get wings off they seem to be stuck solid the sealer is like super glue. I am only removing wings/fenders so this repair panel can slot in. I do not think I will find any rust under the wing at least I hope not.
Last edited by CBR786; 01-23-2015 at 03:54 PM.
02-01-2013, 07:47 AM
#57
Burning Brakes
Join Date: Apr 2011
Location: Perthshire, Scotland
Posts: 838
Likes: 0
Received 0 Likes
on
0 Posts
Here's my pics of my current progress on the respray, maybe these i ages may help you cbr786? You can see the speed clip that is under the filler cap to the right hand side of the washer hose in my first pic below. Hope that helps?
Stripped and naked!
Rust removed and painted
There was only a small bubble peeping through under the rear window seal so this was more corrosion than i was expecting
And there has been paint on this small section before so not so surprising to find some filler here. Need to dig this out and cut out this part.
And another..
Also just told them to remove the headlight washer jets from bumper and paint for smooth look....Gaz told me to do it....
Good man the more smoothies the better
 I`m also removing that big bloody washer bottle from under the wing.
02-01-2013, 09:19 AM
I`m also removing that big bloody washer bottle from under the wing.
02-01-2013, 09:19 AM
#58
time666
did you remove the washer jets along the scuttle panel or did the body shop just mask around them parts do they lift up easily ? also the wiper motors stubs ? I am contemplating if I should pull just the drivers wing (LHD) only and leave the passenger one alone as these wings have never been off. I only wish to remove the one wing so the wing to scuttle trim (the �4 one ) can be removed and a new one fitted so the paint job looks better also so the new metal repair panel can be slotted in. I might not have needed the repair panel as the rust was not so bad but I thought I would so the job that way to make sure the rust does not come back. I was also thinking of putting helicopter tape all around sections of the window frame under the rubber to stop water sitting in that area to eat through the metal.
did you remove the washer jets along the scuttle panel or did the body shop just mask around them parts do they lift up easily ? also the wiper motors stubs ? I am contemplating if I should pull just the drivers wing (LHD) only and leave the passenger one alone as these wings have never been off. I only wish to remove the one wing so the wing to scuttle trim (the �4 one ) can be removed and a new one fitted so the paint job looks better also so the new metal repair panel can be slotted in. I might not have needed the repair panel as the rust was not so bad but I thought I would so the job that way to make sure the rust does not come back. I was also thinking of putting helicopter tape all around sections of the window frame under the rubber to stop water sitting in that area to eat through the metal.
02-02-2013, 05:33 PM
#59
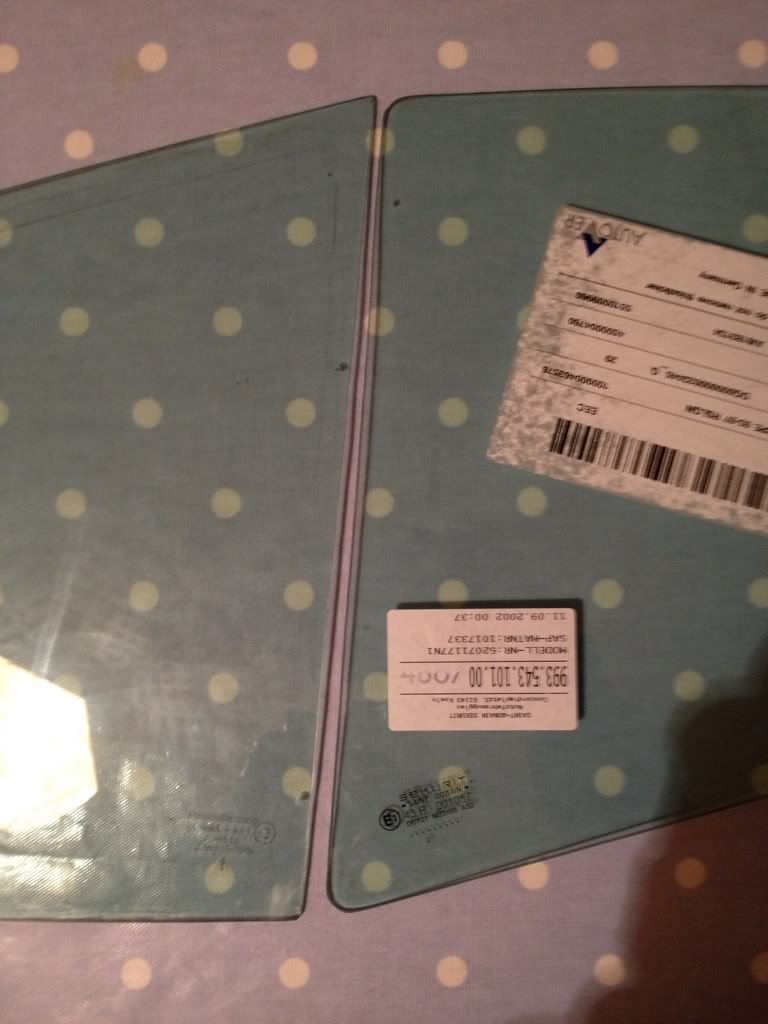
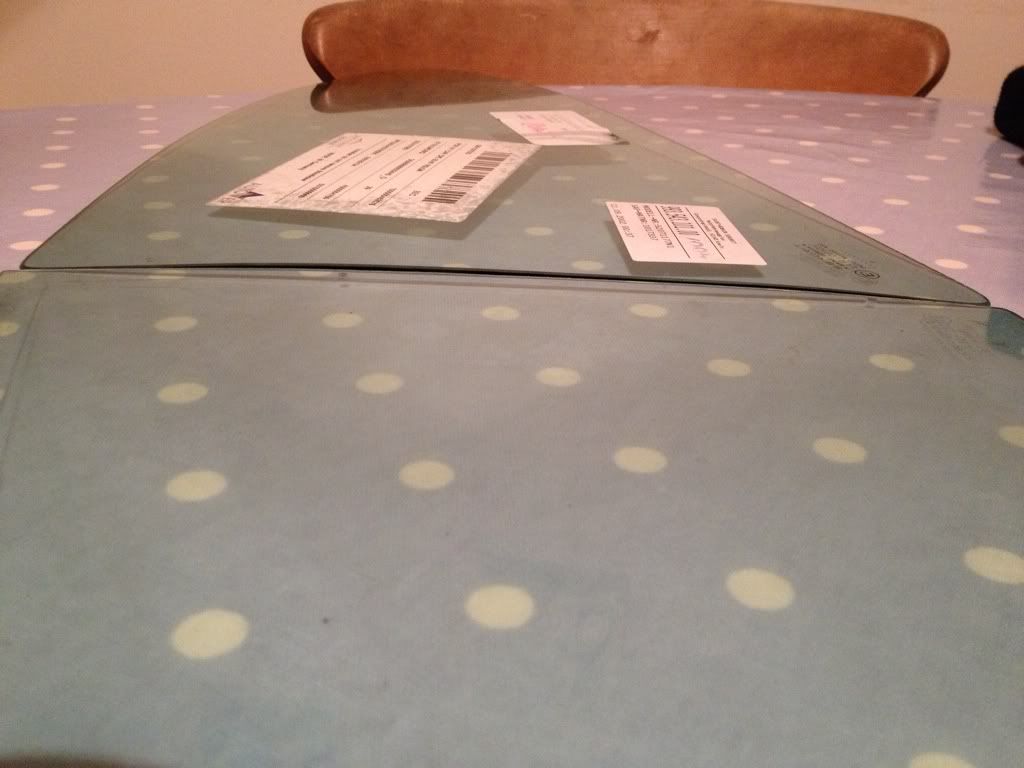
Here we go the 964 window is very slightly smaller and has square corners & the 993 window has round corners and is just a we bit more curvy....they have different part numbers so I thought there must be a reason...but more importantly 964 glass fits so if your watching the budget go for it....
More info than you need but here you go.
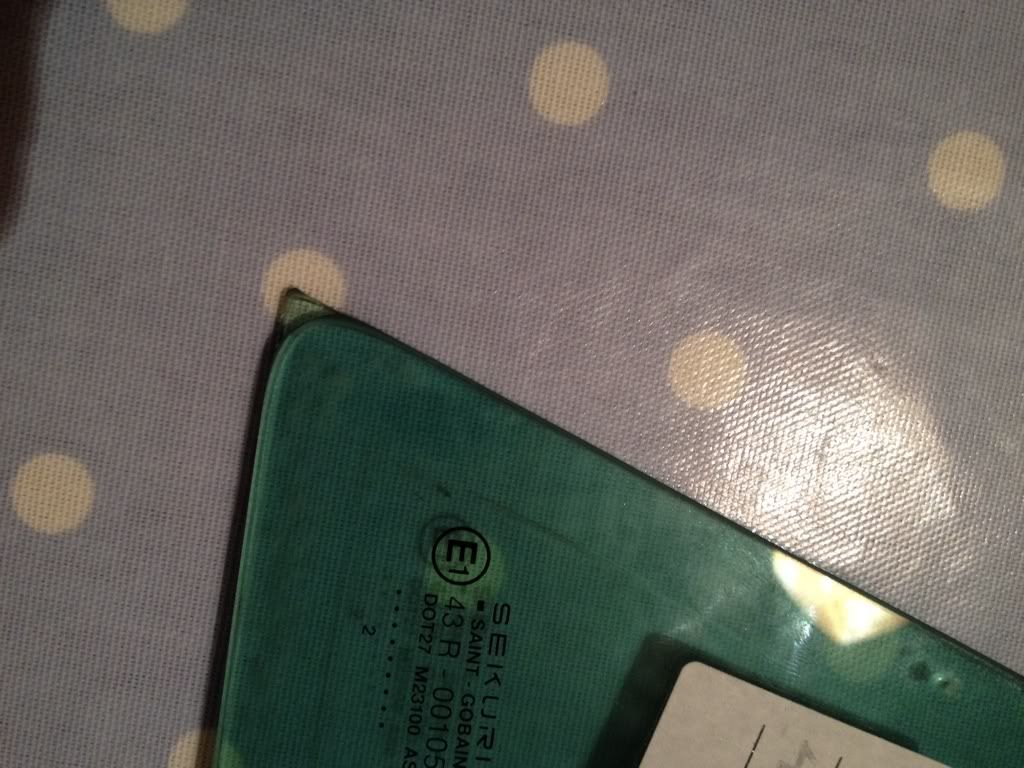
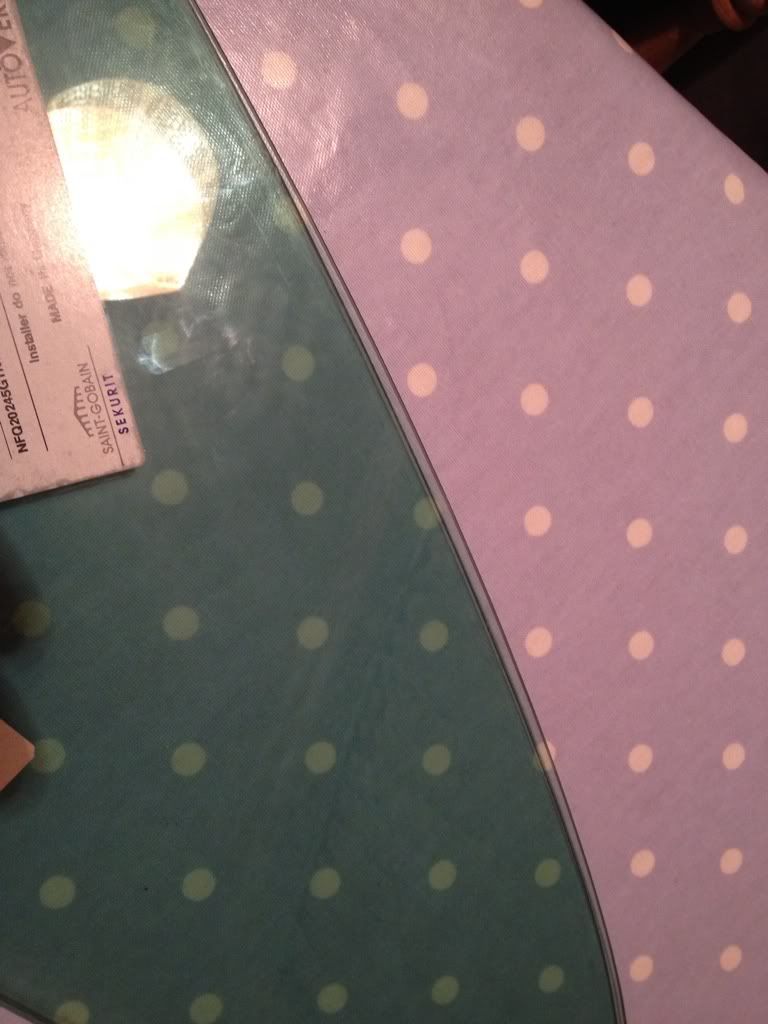
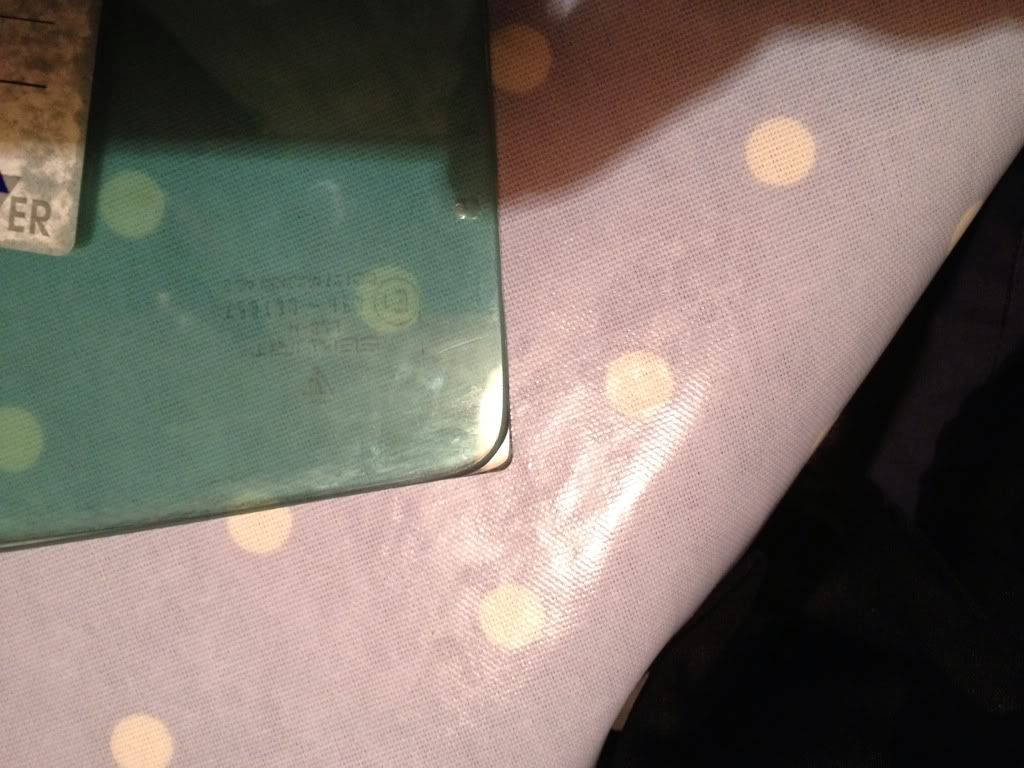
More info than you need but here you go.
03-12-2013, 08:48 PM
#60
Racer
Thread Starter
Join Date: Nov 2010
Location: North Wales
Posts: 258
Likes: 0
Received 0 Likes
on
0 Posts
On with my re-spray project, the end is in site. Not too many surprises and on reflection I feel I have got off lightly.
Thanks Fuch for the info and your time to post the difference between the 964 and the 993 rear 1/4 glass, fully understand the differences now and have replacement 993 rubber seals ready to go.
All penny dents have been pulled out so to limit the use of filler on the car, no rust under the shark fin and seems solid enough. After reading other threads, I got the paint shop to blast out a ton of muck out of the body cavity under the sills area and a load from under the rear wheel just behind the rear light 'pod' and these areas have been wax oiled.
New seals acquired for: all 3 sunroof / door handles / door upper seals / wing mirrors / front & rear lights / rear bumper / front bumper / scuttle panels / sills / drop glass / inner door. I went for a good few as didn't fancy putting the rock hard seals back on my new paint, plus some were screwed.
The small bubbling paint below the rear window glass seal turned into a hole, so 2 sections cut out and will try an get an image of this below. New section plated and welded in plus some filler and this is looking better now too.
Arches rolled on rear and stone guard paint has gone on today and ready for paint tomorrow, after spending a lot of time looking at all different metallics blacks from Toyota / Honda / Jaguar and ending up back at the original flat black as really wanted a deep black and I like washing the car anyway so I know it will look great even if its just for 1 day until dirty again!
anyway cos we like pictures here's a few ok ish from my iphone so not great.


There were the small sections cut out from under the rear window, only a small bubble which has not 'burst through' and turned out to be a hole, easy enough to cut out and repair. 2No Rennspeed RSR 2 splitter to go on later and also took the decision to smooth over the headlight washer jets in the front bumper to get a nice clean front end look. Still debating the brake ducts at the moment. Oh and they broke my aero mirror glass too on one side learning how they come apart, a cheap repair/replacement or so I thought....
Really hoping to get the car back for easter hols.
Thanks Fuch for the info and your time to post the difference between the 964 and the 993 rear 1/4 glass, fully understand the differences now and have replacement 993 rubber seals ready to go.
All penny dents have been pulled out so to limit the use of filler on the car, no rust under the shark fin and seems solid enough. After reading other threads, I got the paint shop to blast out a ton of muck out of the body cavity under the sills area and a load from under the rear wheel just behind the rear light 'pod' and these areas have been wax oiled.
New seals acquired for: all 3 sunroof / door handles / door upper seals / wing mirrors / front & rear lights / rear bumper / front bumper / scuttle panels / sills / drop glass / inner door. I went for a good few as didn't fancy putting the rock hard seals back on my new paint, plus some were screwed.
The small bubbling paint below the rear window glass seal turned into a hole, so 2 sections cut out and will try an get an image of this below. New section plated and welded in plus some filler and this is looking better now too.
Arches rolled on rear and stone guard paint has gone on today and ready for paint tomorrow, after spending a lot of time looking at all different metallics blacks from Toyota / Honda / Jaguar and ending up back at the original flat black as really wanted a deep black and I like washing the car anyway so I know it will look great even if its just for 1 day until dirty again!
anyway cos we like pictures here's a few ok ish from my iphone so not great.
There were the small sections cut out from under the rear window, only a small bubble which has not 'burst through' and turned out to be a hole, easy enough to cut out and repair. 2No Rennspeed RSR 2 splitter to go on later and also took the decision to smooth over the headlight washer jets in the front bumper to get a nice clean front end look. Still debating the brake ducts at the moment. Oh and they broke my aero mirror glass too on one side learning how they come apart, a cheap repair/replacement or so I thought....
Really hoping to get the car back for easter hols.