
DIY a/c Ballast Resistor or "Why Did They Put it...There?"
 07-12-2011, 09:19 AM
#1
Burning Brakes
Thread Starter

One of the items in my PPI was that the a/c condensor fan ballast resistor was busted. I verified it with the troubleshooting tests here, and after doing some searching on this forum it seems that it's just one of those DIY rites of passage that pretty much everyone will have to face at some time  So I guess it's my turn.
First I get the nose of the car up on stands, because at the very least we'll be removing the wheels.
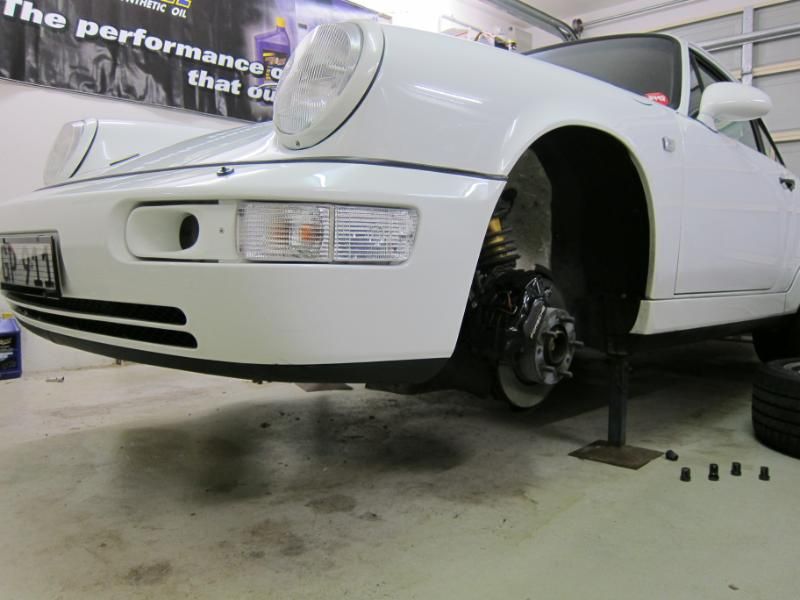
Then you remove the front section of the fender liner, which is just held in by a whole bunch of phillips head screws.
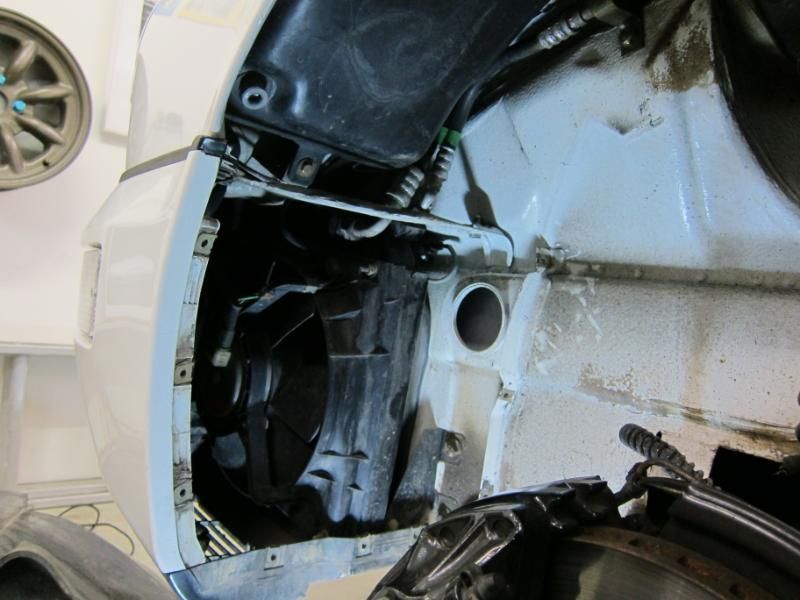
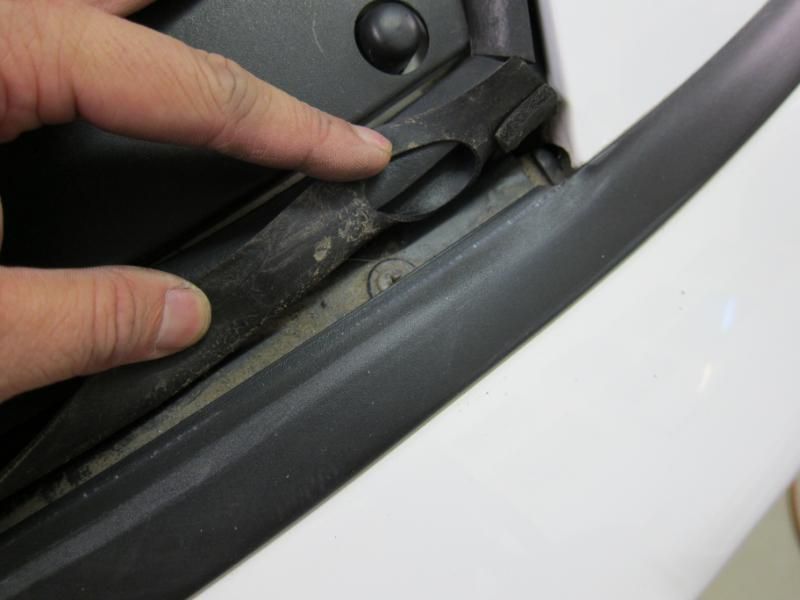
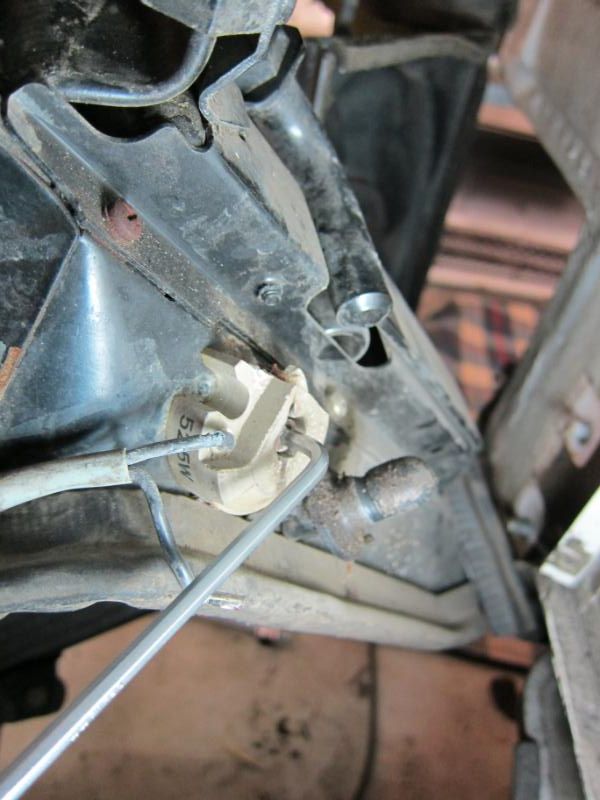
And wedged between the top of the condensor and the tub of the body, is the ceramic ballast resistor, and from here it actually looks okay (appearances deceive...as we shall see).
If you unbolt the fender stay in the foreground of the picture, you will get better access to the ballast resistor, and it's held in by a 4mm allen bolt. The problem is, there is very little room to work with, and there's grit everywhere. I reckon that if the allen bolt doesn't immediately come out easily...if you feel on the first 1/8 turn of the allen key that maybe it's stripping the head of the bolt, just bite the bullet and remove the bumper and do it the long way. \
IMHO you might get lucky, but often you'll spend an hour swearing and hurling spanners across the garage, trying to remove this bolt the dodgy way in that tiny space...and doing it the long way is actually faster. And removing the bumper also makes replacing the oil cooler resistor really easy.
In my case, the allen bolt felt like it wasn't budging and was going to strip, so I stopped right there and began to remove the bumper...which actually didn't take that long.
First you unbolt the bumper from the fender. It's also at this point when you can reach forward and twist/unplug the indicator bulb.
Then you remove a whole bunch of phillips screws that secure the undertray to the tub.

Then if you still have them, remove the foglights.
Now you peel up this rubber flap on the back of the "smile" to reveal 4 more screws. Undo those.
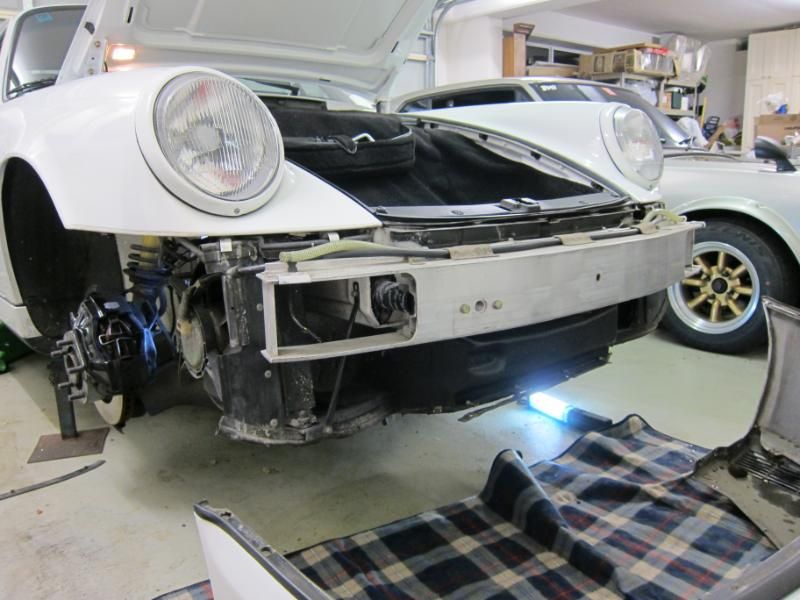
Then grab the bumper through the foglight holes, and give it a firm but polite tug, and it'll pop right off. Like all modern cars (and unlike the impact bumper series) the bumper is actually just a floppy plastic cover for the real bumper, which is this sturdy alloy beam just behind.
Oh, and as you pull the bumper off, keep in mind that there are these hoses for the headlight squirters. They pull off easily by hand though.

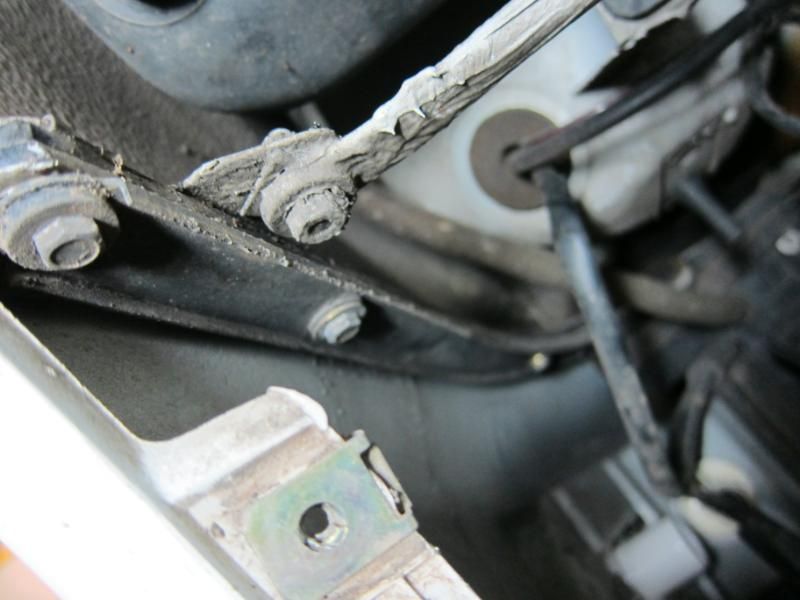
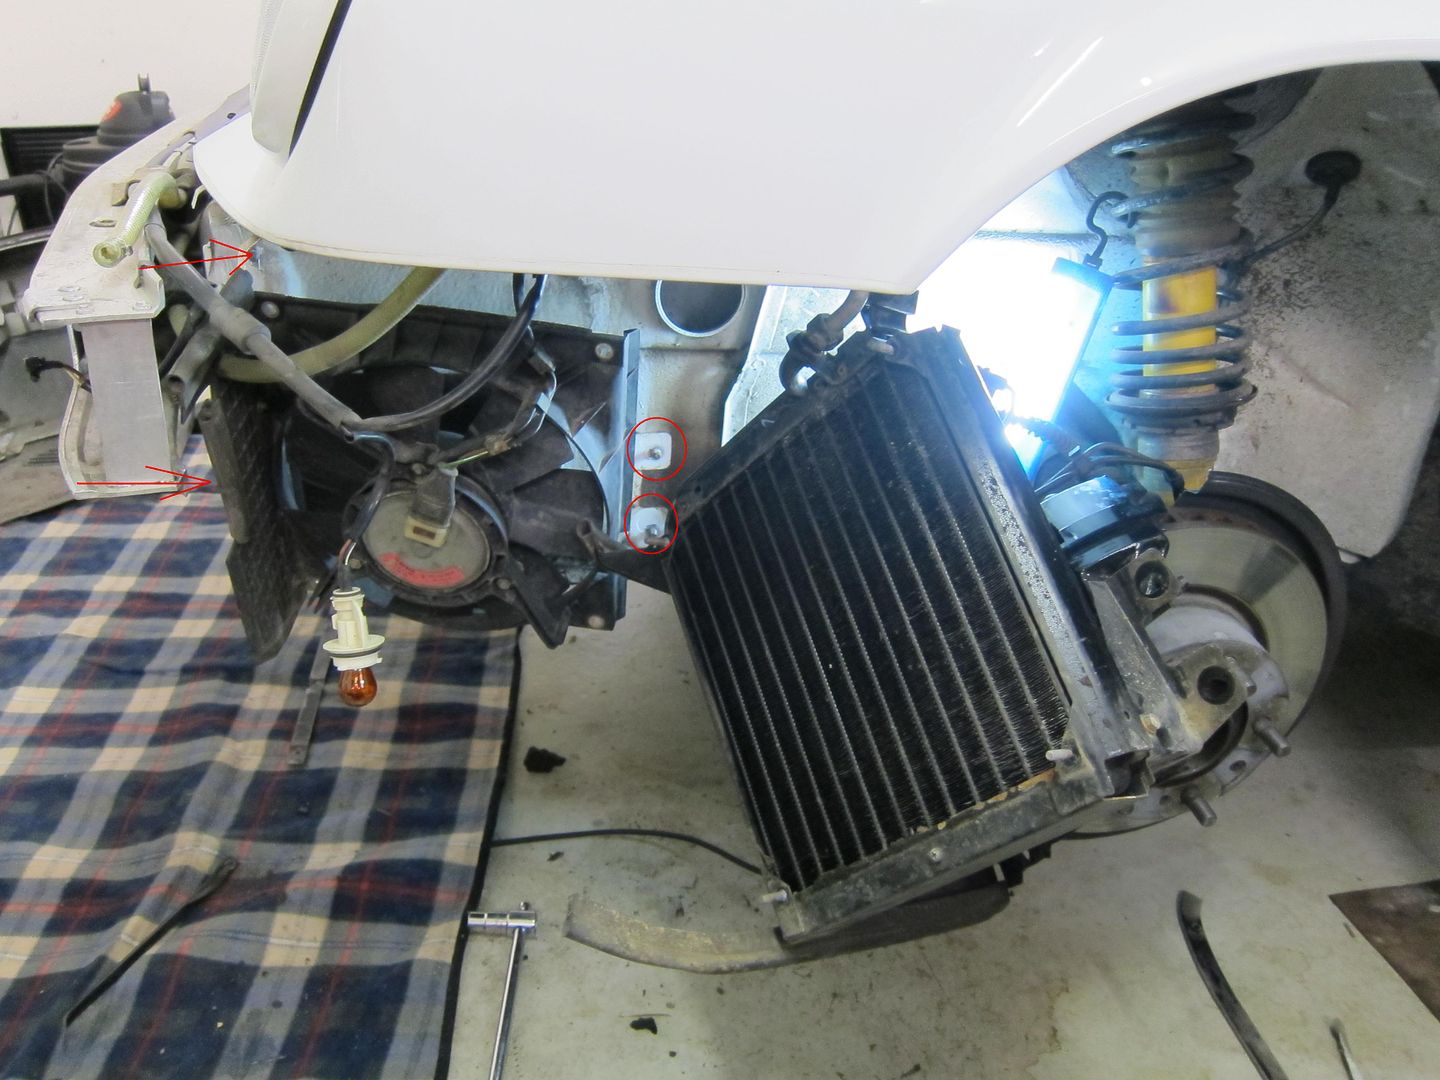
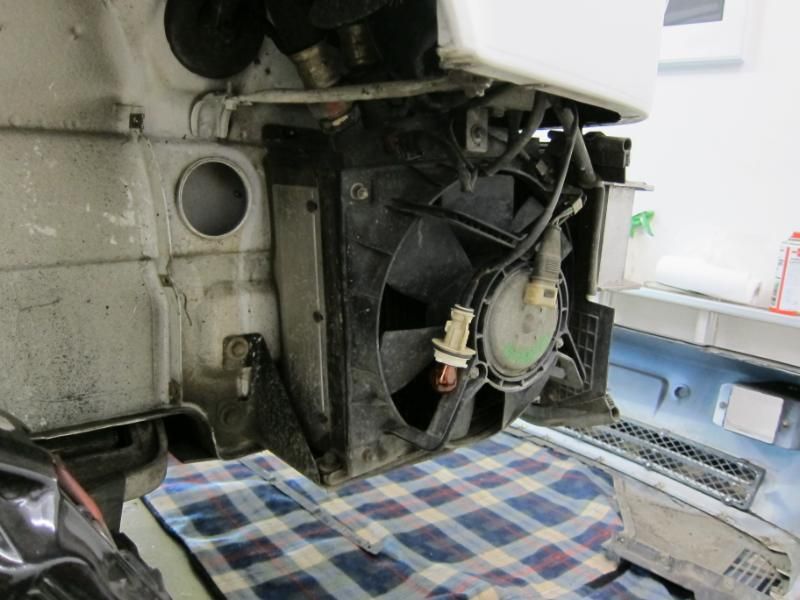
To get better access to the ballast resistor, I drop the condensor. First you have to unbolt the fan, which is secured by 4 nuts at each corner. Then you undo three 12mm nuts (two are circled, and the 3rd is where the lower arrow is pointing), and also remove a rod that acts as a stay for the condensor (top arrow). You can then wiggle the condensor free.
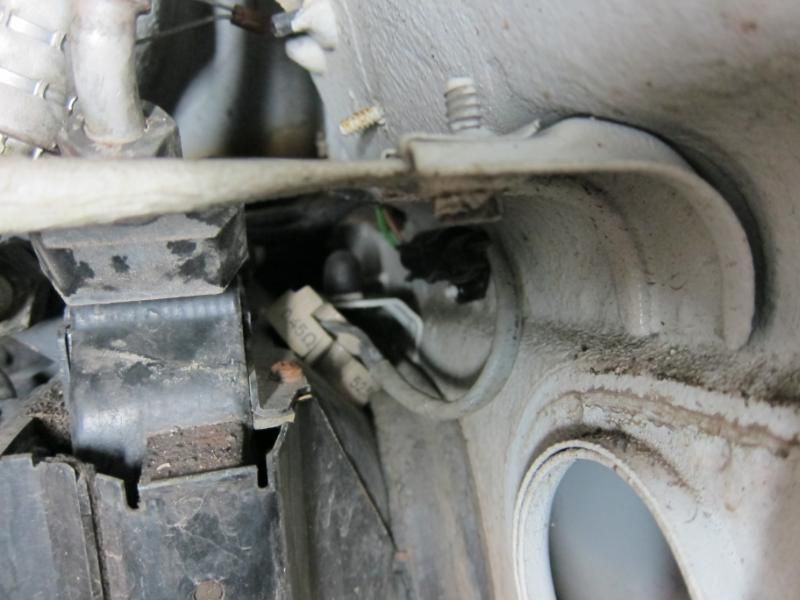
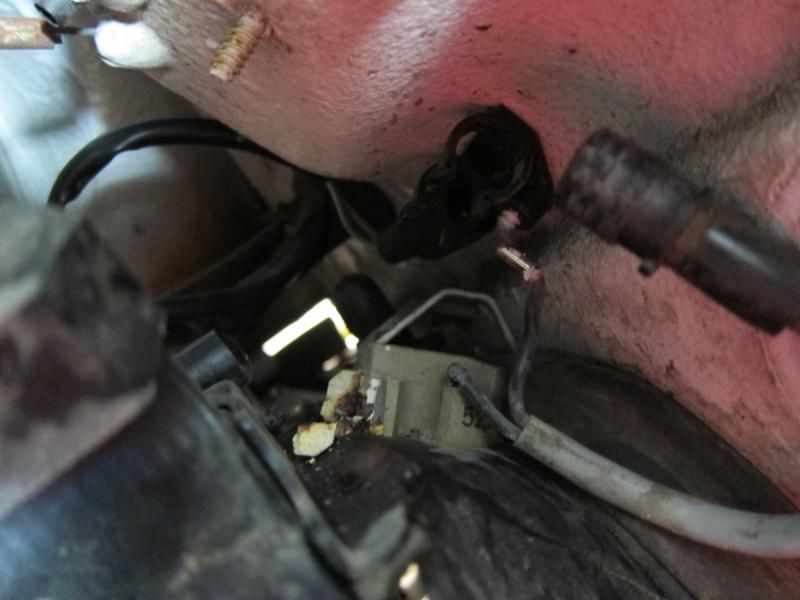
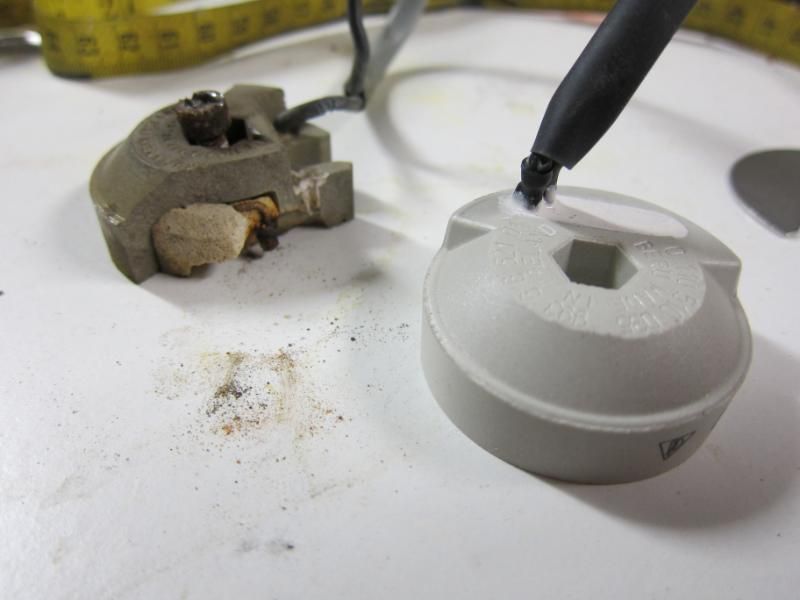
While I was messing around with the allen bolt, the resistor actually crumbled away, revealing that its metal coiled innards were badly corroded.
The other benefit of removing the bumper is that you can access the underside of that pesky allen bolt. Give it a good dousing with your favourite penetrating oil. Luckily, with a better approach angle, and with a firm tap from a hammer to drive the allen key deep into the bolt, the slightly stripped looking bolt could be unscrewed.
If this doesn't work out for you, you'll have to get creative, but I was prepared to dremel a slot into the top of the allen bolt to accept a big screwdriver, and if that failed, Plan B was to hack the remains of the resistor away and try to prise off the bolt with vice grips. But since the condensor is hanging free, you have plenty of space to do any of this.
Old vs new...a good tip when you're replacing the new resistor is to have a new M5 allen bolt handy (since the old one is unlikely to survive the operation) and when you're refitting the new resistor, put a smear of anti-seize on the threads of the new bolt. The next person to do this job will thank you
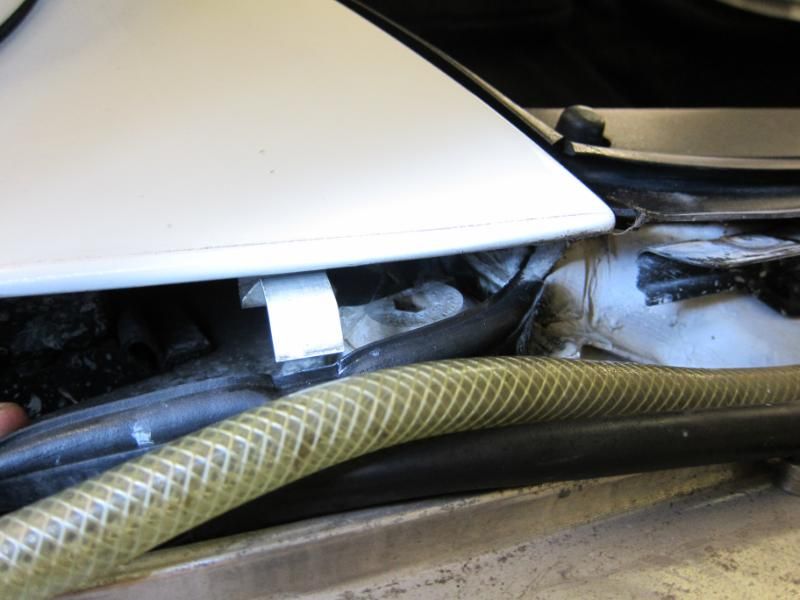
Now, while you got the bumper off, you might as well do the oil cooler one too. Which is in a totally different spot. It's bolted on top of the air duct, near the bumper edge. Oh btw, you see that metal body coloured clip? That is what holds the bumper in place while you do up all the various screws. When you push the bumper back in place, it should clip in place with a satisfying ssssh-tick
The oil cooler ballast isn't held in by an allen bolt though, you just undo a nut underneath, and it'll lift out from the top. To unplug it, you can reach the plug easily enough from the wheel-side.
...and that's it. After that you can bolt it all back together. Make sure you align the rubber smile before clipping the bumper back in place. It might help to have a second person hold the bumper while you refit those squirter tubes, but I found that the bumper balanced easily enough on the alloy beam while I popped the hoses back into place.
And you're done! Oh, and don't do what I did and forget to refit the indicator bulbs until after this pic was taken
So I guess it's my turn.First I get the nose of the car up on stands, because at the very least we'll be removing the wheels.
Then you remove the front section of the fender liner, which is just held in by a whole bunch of phillips head screws.
And wedged between the top of the condensor and the tub of the body, is the ceramic ballast resistor, and from here it actually looks okay (appearances deceive...as we shall see).
If you unbolt the fender stay in the foreground of the picture, you will get better access to the ballast resistor, and it's held in by a 4mm allen bolt. The problem is, there is very little room to work with, and there's grit everywhere. I reckon that if the allen bolt doesn't immediately come out easily...if you feel on the first 1/8 turn of the allen key that maybe it's stripping the head of the bolt, just bite the bullet and remove the bumper and do it the long way. \
IMHO you might get lucky, but often you'll spend an hour swearing and hurling spanners across the garage, trying to remove this bolt the dodgy way in that tiny space...and doing it the long way is actually faster. And removing the bumper also makes replacing the oil cooler resistor really easy.
In my case, the allen bolt felt like it wasn't budging and was going to strip, so I stopped right there and began to remove the bumper...which actually didn't take that long.
First you unbolt the bumper from the fender. It's also at this point when you can reach forward and twist/unplug the indicator bulb.
Then you remove a whole bunch of phillips screws that secure the undertray to the tub.
Then if you still have them, remove the foglights.
Now you peel up this rubber flap on the back of the "smile" to reveal 4 more screws. Undo those.
Then grab the bumper through the foglight holes, and give it a firm but polite tug, and it'll pop right off. Like all modern cars (and unlike the impact bumper series) the bumper is actually just a floppy plastic cover for the real bumper, which is this sturdy alloy beam just behind.
Oh, and as you pull the bumper off, keep in mind that there are these hoses for the headlight squirters. They pull off easily by hand though.
To get better access to the ballast resistor, I drop the condensor. First you have to unbolt the fan, which is secured by 4 nuts at each corner. Then you undo three 12mm nuts (two are circled, and the 3rd is where the lower arrow is pointing), and also remove a rod that acts as a stay for the condensor (top arrow). You can then wiggle the condensor free.
While I was messing around with the allen bolt, the resistor actually crumbled away, revealing that its metal coiled innards were badly corroded.
The other benefit of removing the bumper is that you can access the underside of that pesky allen bolt. Give it a good dousing with your favourite penetrating oil. Luckily, with a better approach angle, and with a firm tap from a hammer to drive the allen key deep into the bolt, the slightly stripped looking bolt could be unscrewed.
If this doesn't work out for you, you'll have to get creative, but I was prepared to dremel a slot into the top of the allen bolt to accept a big screwdriver, and if that failed, Plan B was to hack the remains of the resistor away and try to prise off the bolt with vice grips. But since the condensor is hanging free, you have plenty of space to do any of this.
Old vs new...a good tip when you're replacing the new resistor is to have a new M5 allen bolt handy (since the old one is unlikely to survive the operation) and when you're refitting the new resistor, put a smear of anti-seize on the threads of the new bolt. The next person to do this job will thank you
Now, while you got the bumper off, you might as well do the oil cooler one too. Which is in a totally different spot. It's bolted on top of the air duct, near the bumper edge. Oh btw, you see that metal body coloured clip? That is what holds the bumper in place while you do up all the various screws. When you push the bumper back in place, it should clip in place with a satisfying ssssh-tick
The oil cooler ballast isn't held in by an allen bolt though, you just undo a nut underneath, and it'll lift out from the top. To unplug it, you can reach the plug easily enough from the wheel-side.
...and that's it. After that you can bolt it all back together. Make sure you align the rubber smile before clipping the bumper back in place. It might help to have a second person hold the bumper while you refit those squirter tubes, but I found that the bumper balanced easily enough on the alloy beam while I popped the hoses back into place.
And you're done! Oh, and don't do what I did and forget to refit the indicator bulbs until after this pic was taken
 07-12-2011, 10:21 AM
#3
Drifting
One part of the resistor problem is that the battery ventilation hose exits just above the resistor and drops "battery stuff" on the resistor which finally makes it look like in the pics. So when you replace it, also re-route the battery rubber hose to another direction instead of above the resistor.
Thomas
Thomas
07-12-2011, 10:30 AM
#4
Burning Brakes
Thread Starter
You are very observant, yes it is
That's a good idea...also another thing that occured to me was to maybe mount the resistor on an L-shaped bracket (easy enough to make one out of scrap aluminium) so that the resistor can be unbolted easily
One part of the resistor problem is that the battery ventilation hose exits just above the resistor and drops "battery stuff" on the resistor which finally makes it look like in the pics. So when you replace it, also re-route the battery rubber hose to another direction instead of above the resistor.
Thomas
Thomas
07-12-2011, 12:14 PM
#6
I had to do mine, and the bolt broke off. You can slide the condensor out of the shroud to work on it. I just cut the nut off that is welled on the back side and replaced with a new bolt and lock nut. It wasn't that much additional work to do.
07-12-2011, 04:13 PM
#7
Drifting
Wow! you really went to town tearing it down. I was able to change both without having to remove anything other than the mud guards and two aluminum cowls on the Oil side.
These tools were indispensable at getting the allen out on the A/C side.
The ratchet was $8
The bit kit can be had for less than $15 on ebay.
I believe the resistors were mounted to the A/C & Oil units so they could be easily be installed on the assembly line.
Just the extra connector when the coolers were installed and the resistors are good to go.
I also rerouted the battery vent hose directly out of one of the drain holes about 18" from the battery.
Last edited by Laker; 07-12-2011 at 05:08 PM.