
Project "Amazon" Restoration-Lightweight C4- 2Pack paint soon;-)
 10-19-2010, 04:41 PM
#16
Nordschleife Master

 10-19-2010, 06:16 PM
#17

I have a 1991 coupe, Amazon green. I get compliments on the color every time I take it out. 100% of the general public think it is blue. I think Porsche should have named the color Amazon blue. I think it is a very rich looking color and have no regrets.
10-19-2010, 08:53 PM
#18
Three Wheelin'
Thread Starter
Yes I agree Amazon blue! Very nice combo Amazon green car with a set of E88 BBS Magnesium gold centered rims!hmmmmmmm
10-19-2010, 08:56 PM
#19
Three Wheelin'
Thread Starter
Anyway, whilst the seats were taken out, I couldnt resist in taking the reaar wipers off with the motors! OFF! Easy enough with a few bolts.
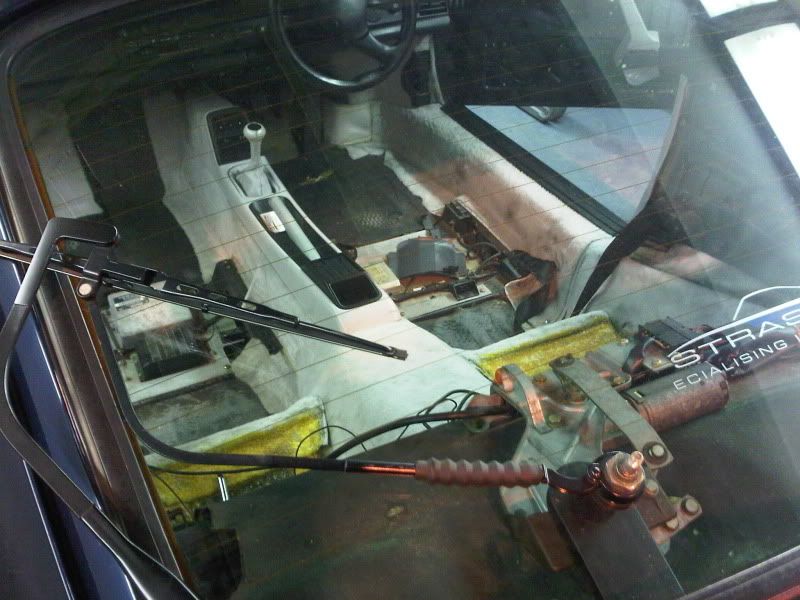
Not planning on need the rear wipers or the screen, as a RS rear screen in replacement if not perspex, depending on budget at the end
Not planning on need the rear wipers or the screen, as a RS rear screen in replacement if not perspex, depending on budget at the end
10-19-2010, 09:05 PM
#20
Three Wheelin'
Thread Starter
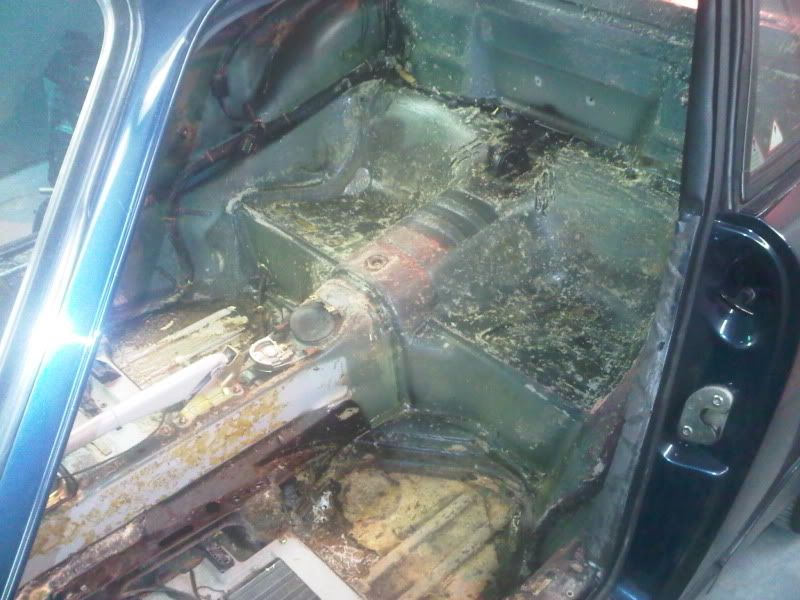
1st step was to take the rear seats out with the parcel shelf back rest, rear seat belts.
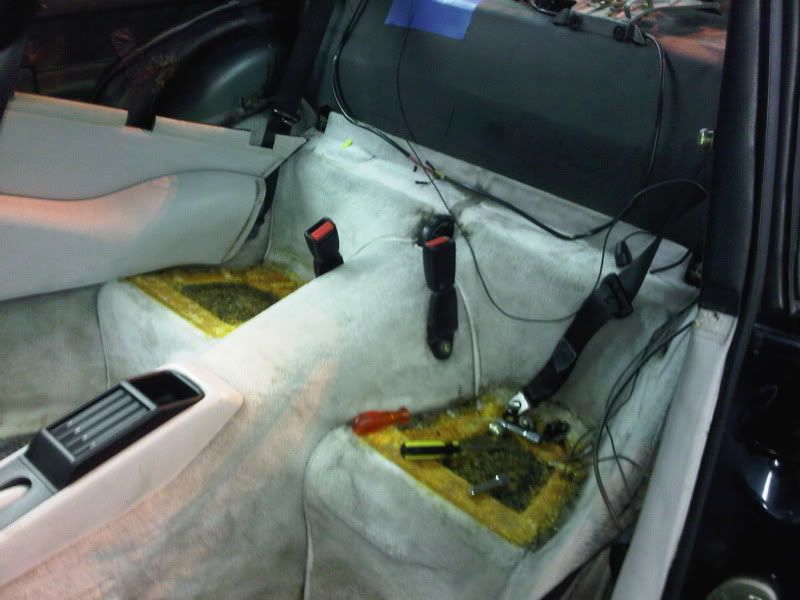
2nd step was to remove the side rear cards,doorcards and the carpet! Boy was the carpet stuck down alright with I presume glue thats crystalised through the 20years!
At this stage this is where the mess starts!
3rd step to remove the center console,then the sound deadening and foam!foam and foam! and discovering THE GLUE!
10-19-2010, 09:16 PM
#21
Three Wheelin'
Thread Starter
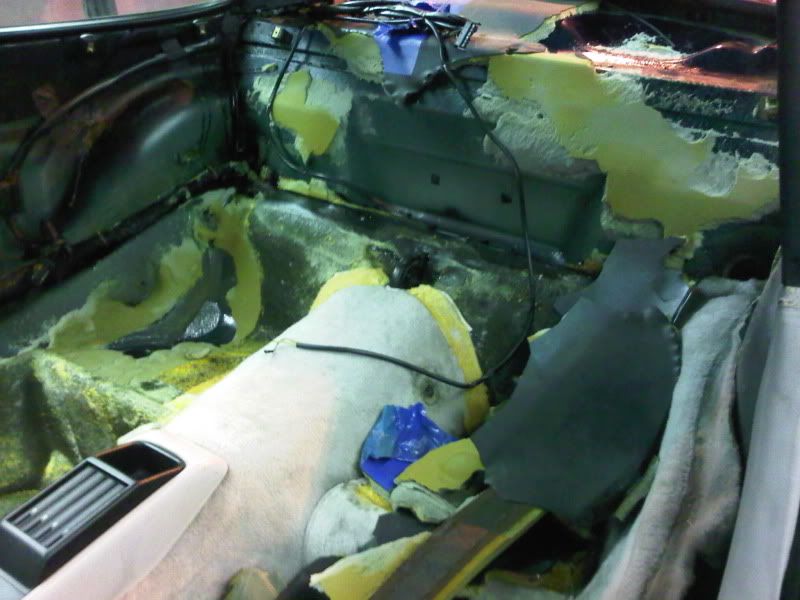
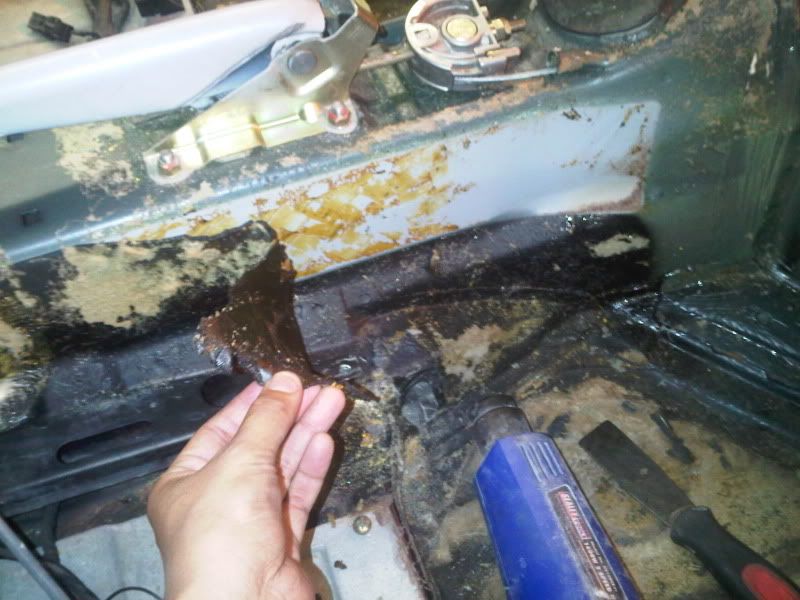
At this point, i guess this is where you start pulling your hair out and saying to yourself .....WHY? anyway get cleaning the foam and GLUE off! CLEAN!CLEAN! CLEAN!
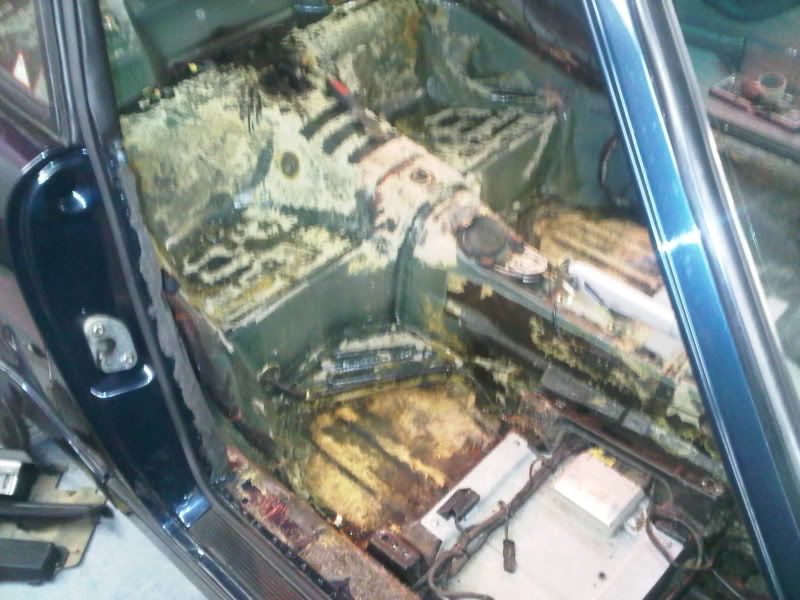
The drivers footwell wooden flooring was removed and if you look closely, on the side tunnel theres strips of tart-bitumen like sound deadening, which was removed with a heatgun!
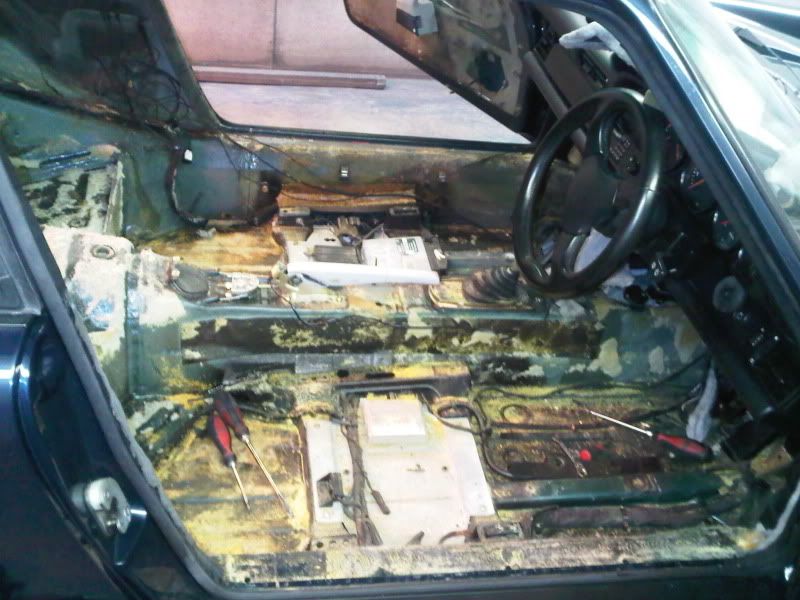
So messy!
The drivers footwell wooden flooring was removed and if you look closely, on the side tunnel theres strips of tart-bitumen like sound deadening, which was removed with a heatgun!
So messy!
Last edited by Nski; 10-19-2010 at 10:07 PM.
10-19-2010, 09:22 PM
#22
Three Wheelin'
Thread Starter
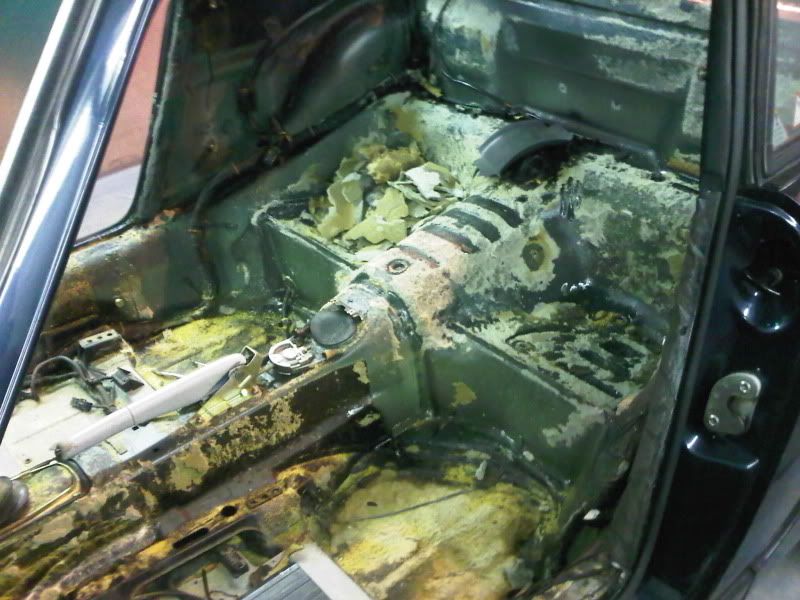
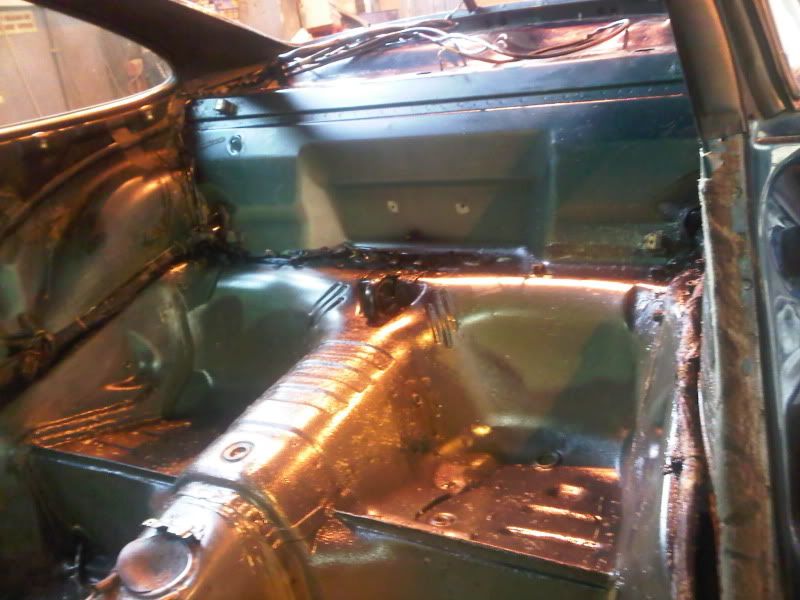
The back of the seat footwell was covered in this bitumen, but if not careful the sound-deadening underseal can be stripped if too hot! Of course scraping and heating it up with the heatgun,an absolute horrible job.........i can even smell the heating and burning of glue+bitumen!
10-19-2010, 09:35 PM
#23
Three Wheelin'
Thread Starter
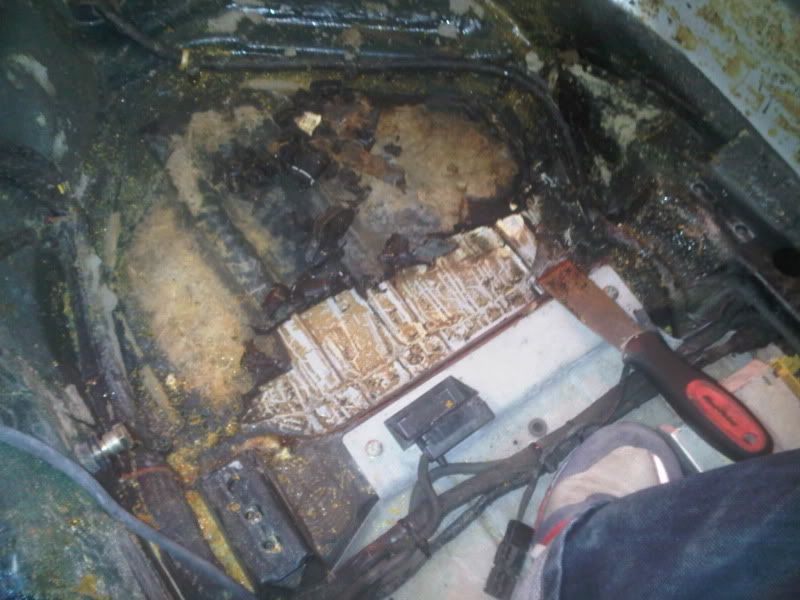
Whilst taking out the seats, carpet, foam, sound deadening,trim, glue and bitumen. I was surprised how much weight had been taken out!
After all the hard layers of glue was heated and scrapped as much as I could get off. It was time for some chemical stripper-remover was used. Not thinners as I thought it be too harsh and would remove the paint, was thinking of using petrol, but decided to use a glue remover by Autosmart.
P.S I was warned not to use the heat gun and the thinners-petrol at same time!ha
10-19-2010, 09:48 PM
#24
Three Wheelin'
Thread Starter
Hours and hours of scrubbing, high on fumes I just wished I could go down the route of dipping and E-coating the bloody thing! But hey......ive started.....now I got to finish!
Here she is!! Clean paint surface appearing!
Here she is!! Clean paint surface appearing!
10-19-2010, 09:55 PM
#25
Three Wheelin'
Thread Starter
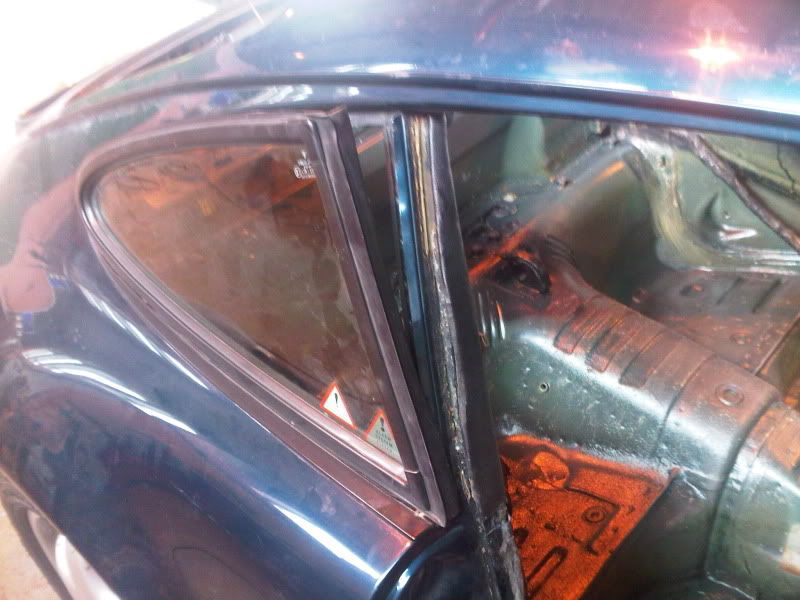
Whilst poor me is getting rather fed-up of cleaning the glue off every nook and cranny! I decided to take my mind off it, and began to take the glass out. Rather easy when these 964 arent bonded like these 993s!
Reverse the rubber from inside using 2 screw drivers (carefully not cut,rip or mark the rubber) reminds me of taking a tire off a bicycle rim!
Pop comes the side window! Easy!
Reverse the rubber from inside using 2 screw drivers (carefully not cut,rip or mark the rubber) reminds me of taking a tire off a bicycle rim!
Pop comes the side window! Easy!
10-19-2010, 10:03 PM
#26
Three Wheelin'
Thread Starter
Voila!

Once you get the hang of this, try the rear screen but remember before taking the rear screen out, to disconnect the wires for the rear window heating element. As for the front screen you need to take the clock out by pushing it out of the dash(some can be easier than others depending if they've been taken out before) to disconnect the aerial.

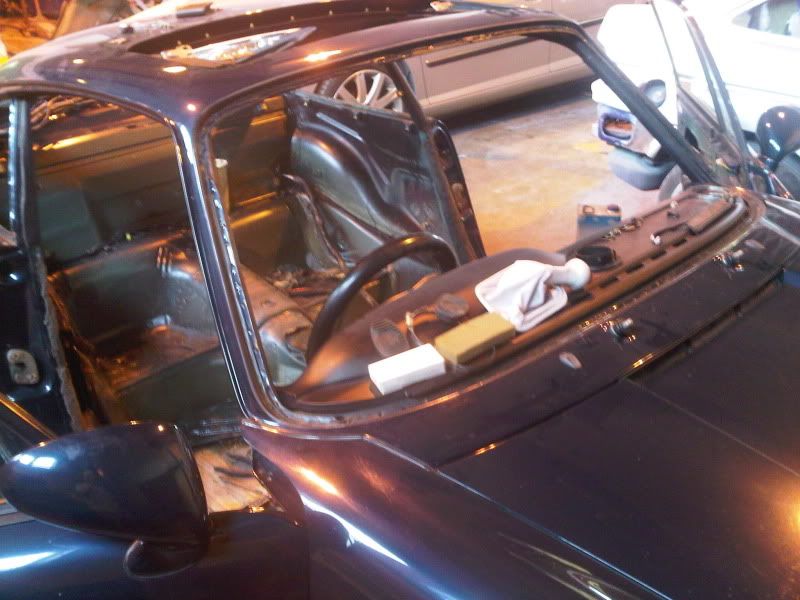
Looking carefully around the screen, it looks like its been out and sealer has been put around the seams for extra seal from any leaks, but no rust under the screen....fewwwwwwwwww
Once you get the hang of this, try the rear screen but remember before taking the rear screen out, to disconnect the wires for the rear window heating element. As for the front screen you need to take the clock out by pushing it out of the dash(some can be easier than others depending if they've been taken out before) to disconnect the aerial.
Looking carefully around the screen, it looks like its been out and sealer has been put around the seams for extra seal from any leaks, but no rust under the screen....fewwwwwwwwww
 10-19-2010, 10:29 PM
#28
Three Wheelin'
Thread Starter
 This is all I used.
You can use petrol, or thinners (thinners can be a bit harsher and can take the paint off) but with solvents that are flamable, REMEMBER DO NOT USE THE HEAT GUN AND SOLVENTS TOGETHER!!!
When you apply it once, it will remove some of the easy bits but the thicker and more stubborn bits will seem harder if you havent removed most of the thick glue with the heat gun at stage one, but if you soak it and re-apply a few times, it should come off. It may not seem it, but the clear oily glue remover becomes a thick dark substance, showing the glue is been thinned down apply a bit of elbow grease to remove it better!Make sure you wipe it down with a ragg to remove it entirely.
Hope i explained that well
 10-20-2010, 12:13 AM
#30
Looks like it is coming along nicely.
If you get a chance, it would be make for a very useful data point if you could stuff the removed sound deadener/glue etc in a bin bag & weigh it all.
Cheers ~
If you get a chance, it would be make for a very useful data point if you could stuff the removed sound deadener/glue etc in a bin bag & weigh it all.
Cheers ~