
RS fan hub instl photos
 06-23-2010, 05:36 PM
#1
Nordschleife Master
Thread Starter
This is a pictorial adjunct to MrRisky's infamous RS hub installation video.
His was a "how to" for when your fan bearing has crapped out.
Mine are of an RS fan hub installation when the fan bearing is still intact.
First, the Bad Bearing way to do things:
http://www.youtube.com/watch?v=pxAuGnDtKAs
Alternately, here's the Good Bearing way...
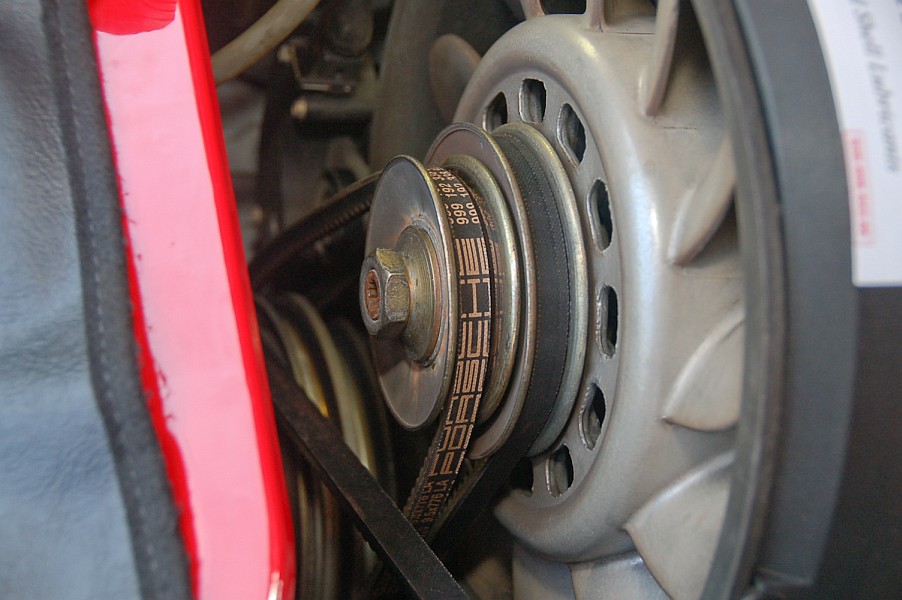
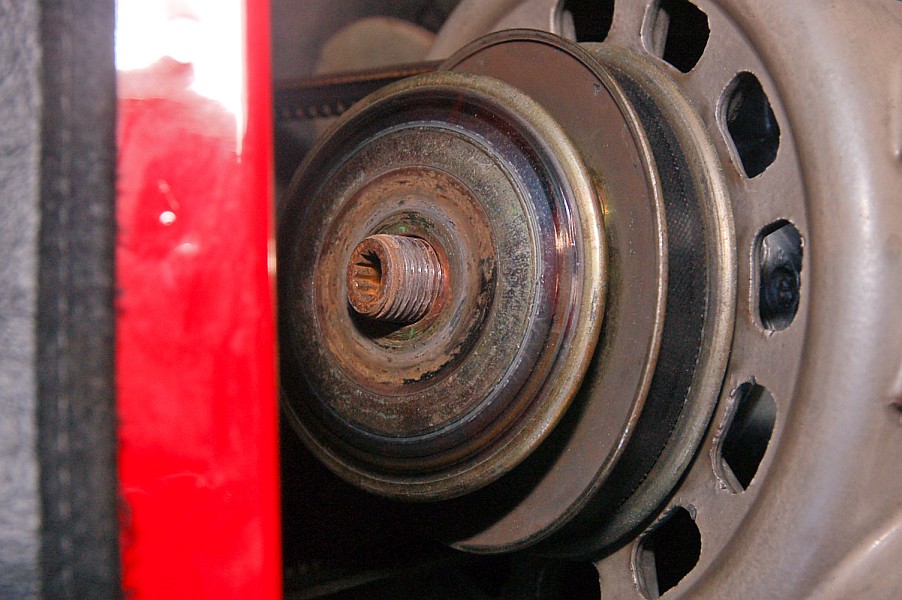
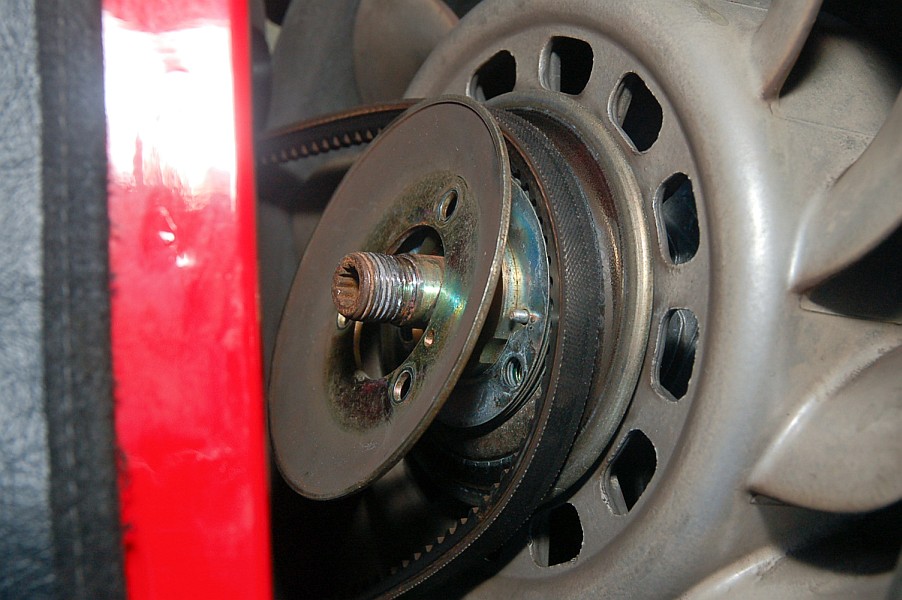
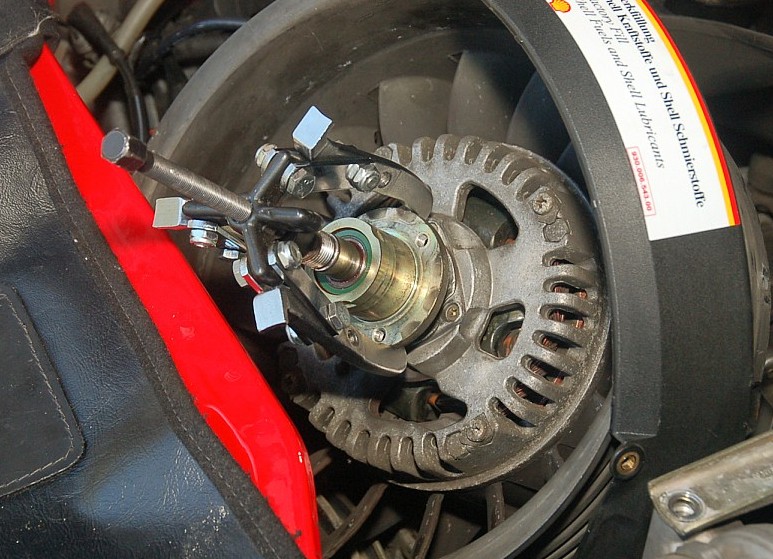
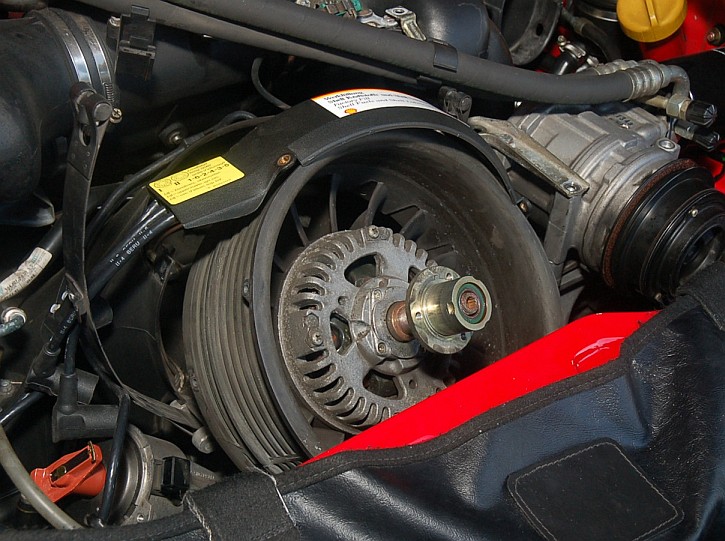
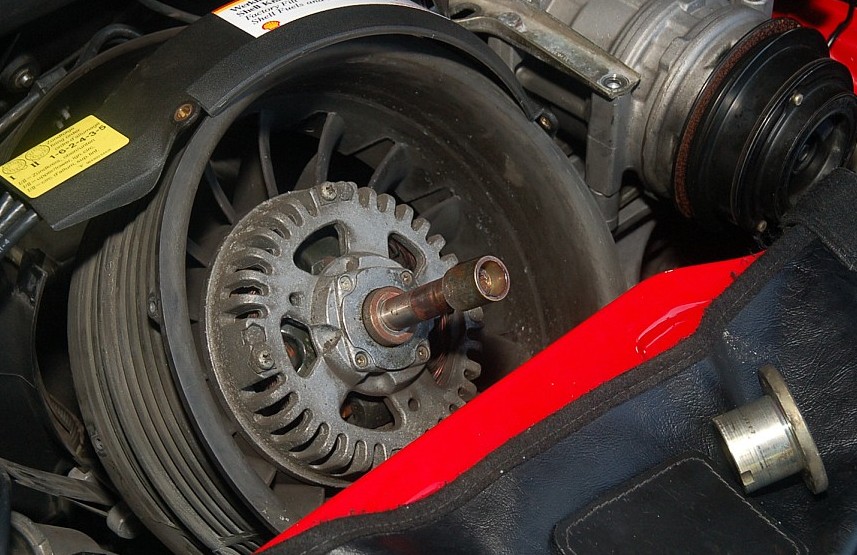
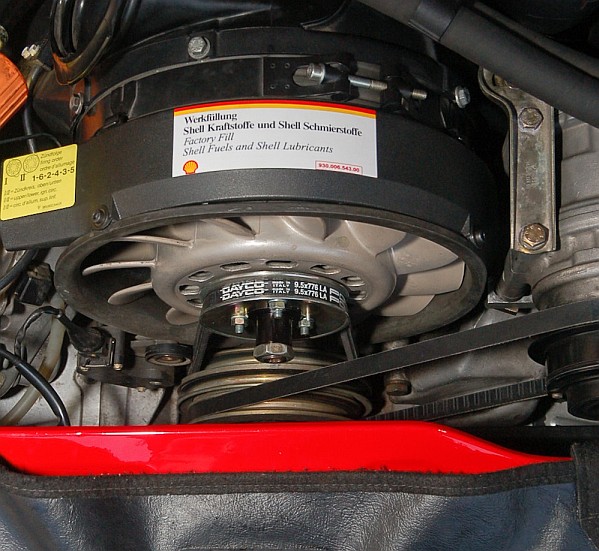
The two belt system: aft-most pulley runs the alternator, forward-most runs the fan.
Tools that worked for me.
The special one at top is a 12-pt (or "3-square") 10mm bit. (They're not that expensive - just peculiar enough to be awkward to find).
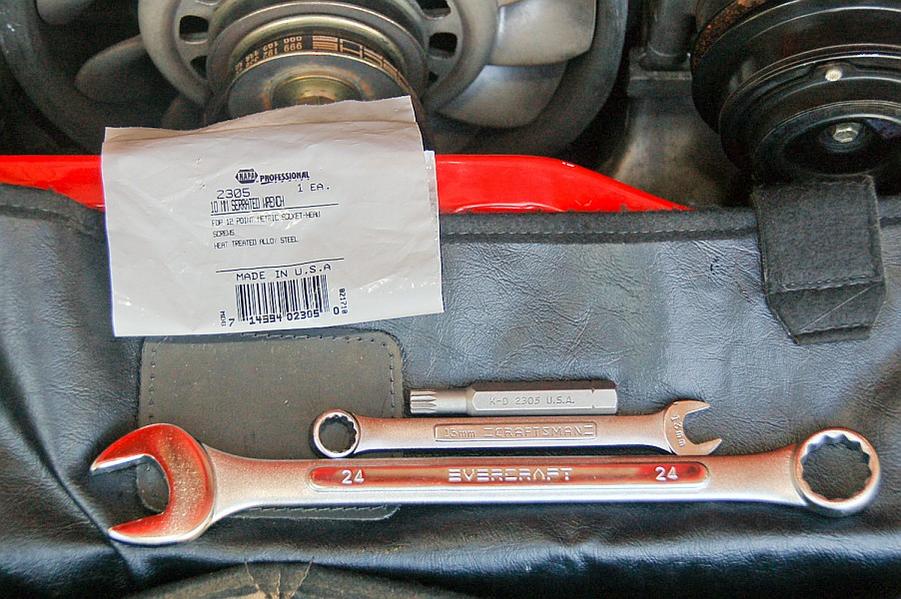
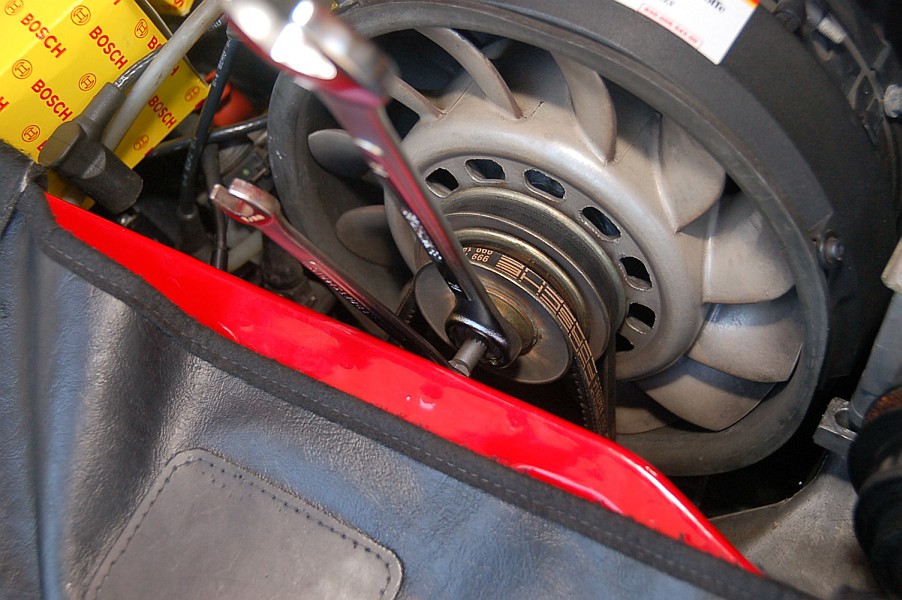
To loosen, turn the 24mm nut CCW and the 10mm 12-pt CW.
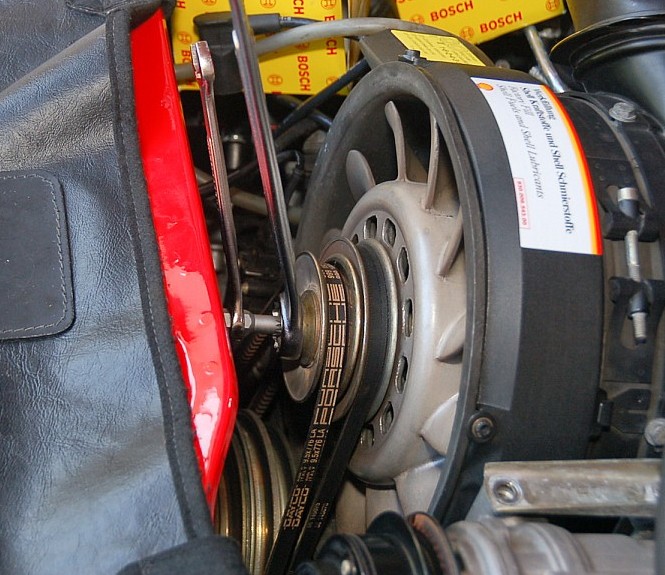
Nut off. (Thick) Alternator washer is next.
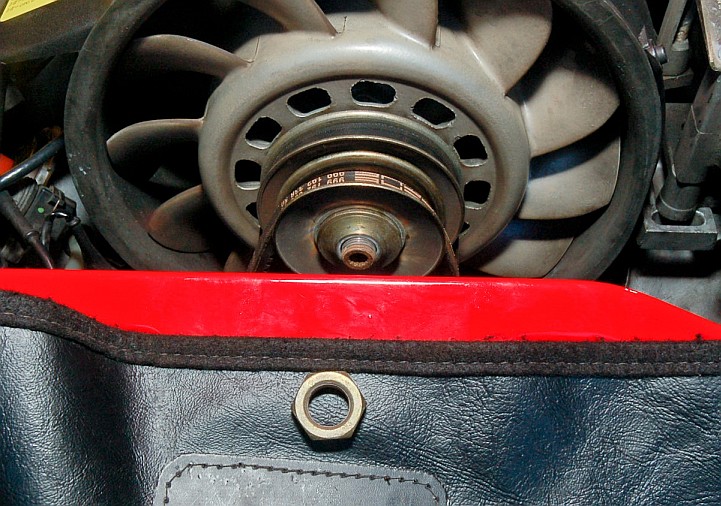
excess spacers go between the washer and outer pulley half

Remove outer pulley half, the belt, inner pulley half, and the spacers between them...
His was a "how to" for when your fan bearing has crapped out.
Mine are of an RS fan hub installation when the fan bearing is still intact.
First, the Bad Bearing way to do things:
http://www.youtube.com/watch?v=pxAuGnDtKAs
Alternately, here's the Good Bearing way...
The two belt system: aft-most pulley runs the alternator, forward-most runs the fan.
Tools that worked for me.
The special one at top is a 12-pt (or "3-square") 10mm bit. (They're not that expensive - just peculiar enough to be awkward to find).
To loosen, turn the 24mm nut CCW and the 10mm 12-pt CW.
Nut off. (Thick) Alternator washer is next.
excess spacers go between the washer and outer pulley half
Remove outer pulley half, the belt, inner pulley half, and the spacers between them...
 06-23-2010, 05:54 PM
#2
Nordschleife Master
Thread Starter
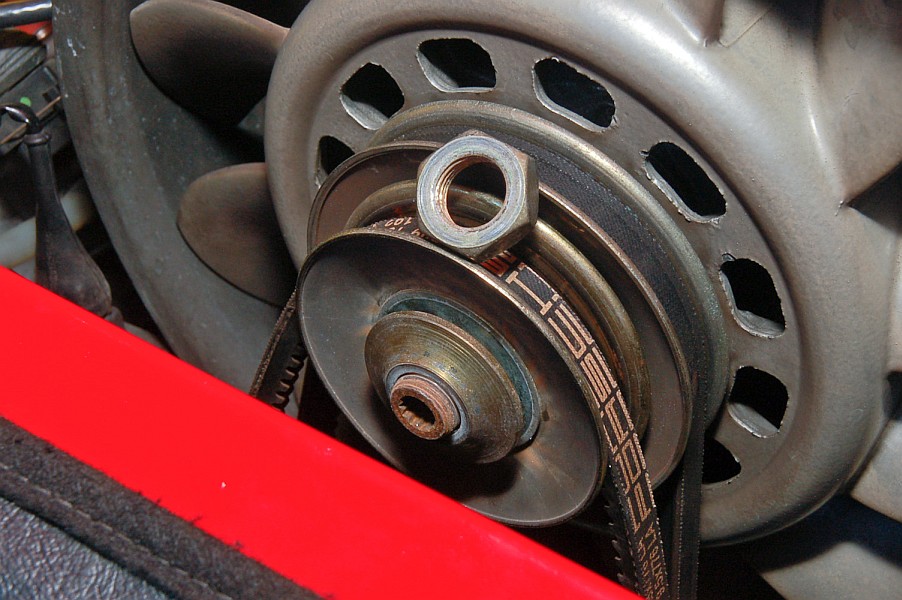
Another thick washer is between the alternator and fan pulleys.
(These washers' bigger diameters rest against the alternator pulley halves.)
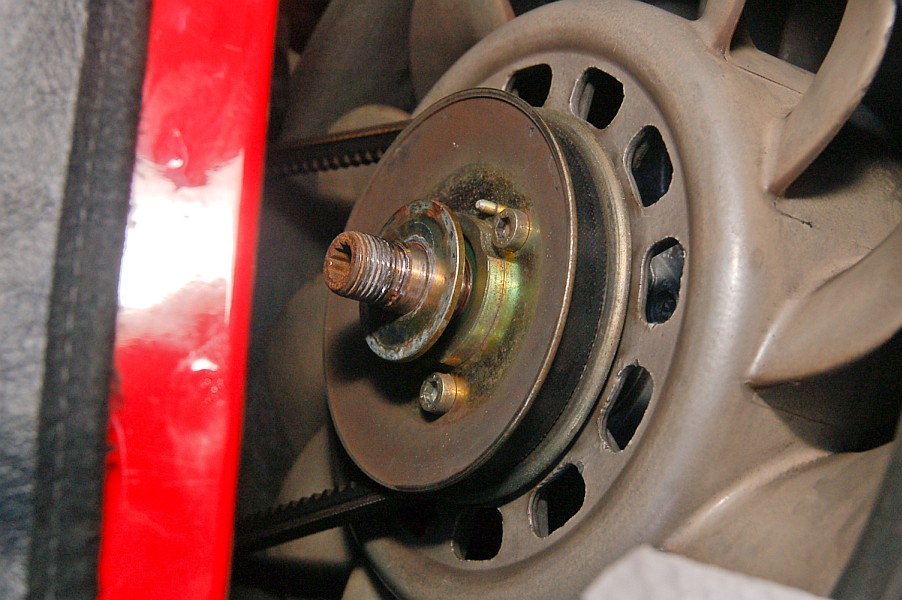
After removing those three socket head cap screws with a 5mm hex drive, off comes the fan pulley's outer half...
...and so does the belt, spacers, and inner fan pulley half.

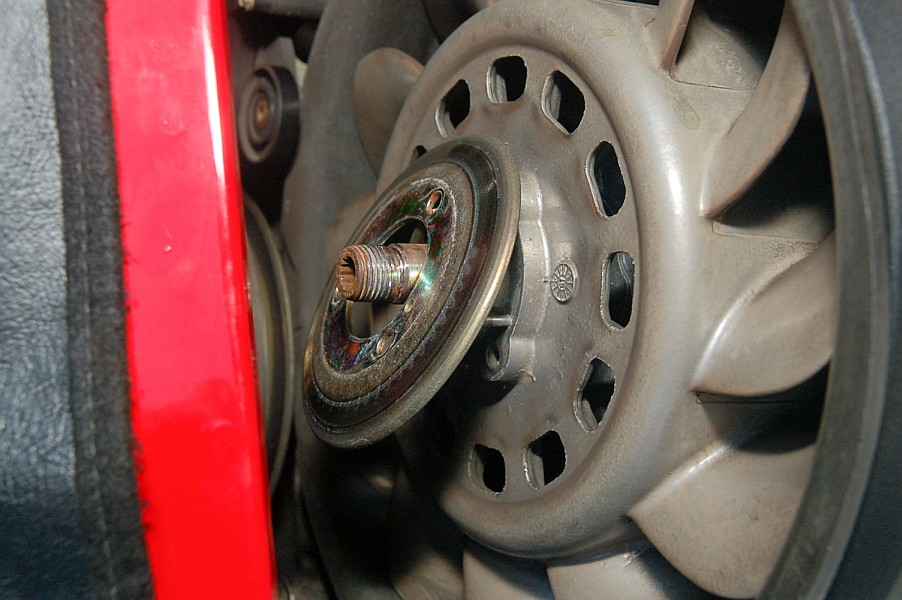
So, now you are down to the fan hub.
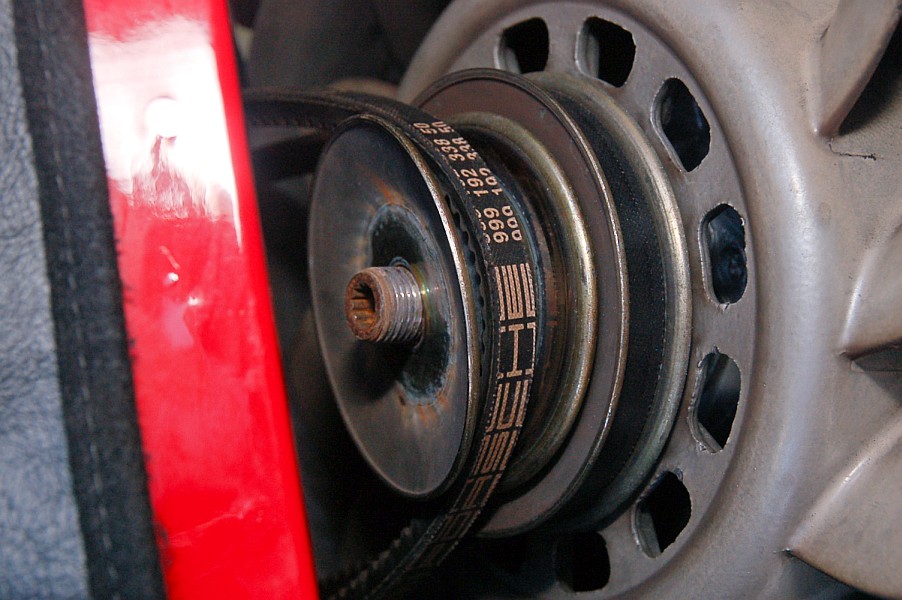
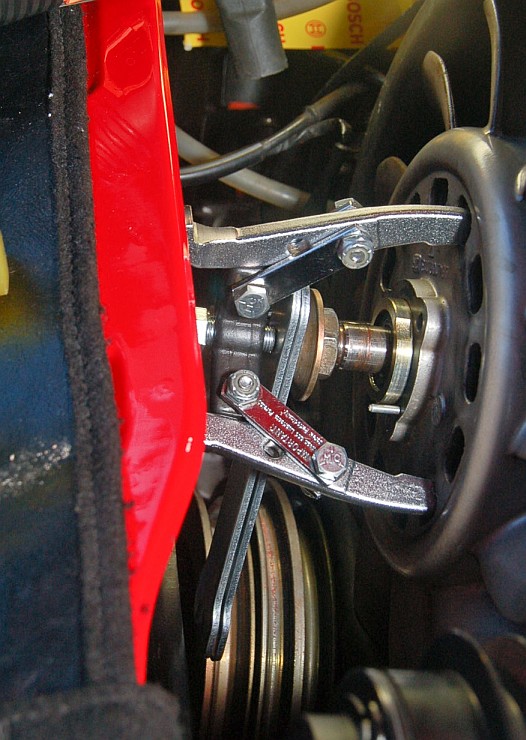
Pull the press-fit fan hub off the bearing's outer sleeve (with a 3-arm puller, as shown, next)
I tried doing this all without unclamping/moving the fan housing, but eventually ran out of room.
I unclamped and canted the fan housing just enough to remove the fan, but not enough to warrant disconnecting electrical leads going to the alternator.
Use the alternator nut as a counterpoint for the 3-arm puller to push against. (This, to prevent damaging the alternator shaft's end.)
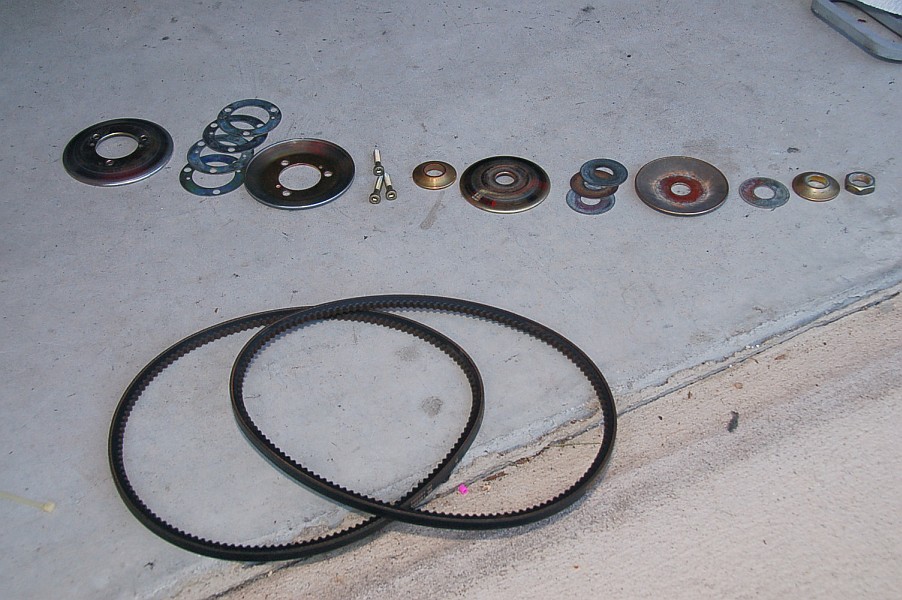
Here's the pulley components laid out in order of assembly.
(These washers' bigger diameters rest against the alternator pulley halves.)
After removing those three socket head cap screws with a 5mm hex drive, off comes the fan pulley's outer half...
...and so does the belt, spacers, and inner fan pulley half.
So, now you are down to the fan hub.
Pull the press-fit fan hub off the bearing's outer sleeve (with a 3-arm puller, as shown, next)
I tried doing this all without unclamping/moving the fan housing, but eventually ran out of room.
I unclamped and canted the fan housing just enough to remove the fan, but not enough to warrant disconnecting electrical leads going to the alternator.
Use the alternator nut as a counterpoint for the 3-arm puller to push against. (This, to prevent damaging the alternator shaft's end.)
Here's the pulley components laid out in order of assembly.
Last edited by elbeee964; 06-30-2010 at 01:51 PM.
06-23-2010, 06:18 PM
#3
Nordschleife Master
Thread Starter
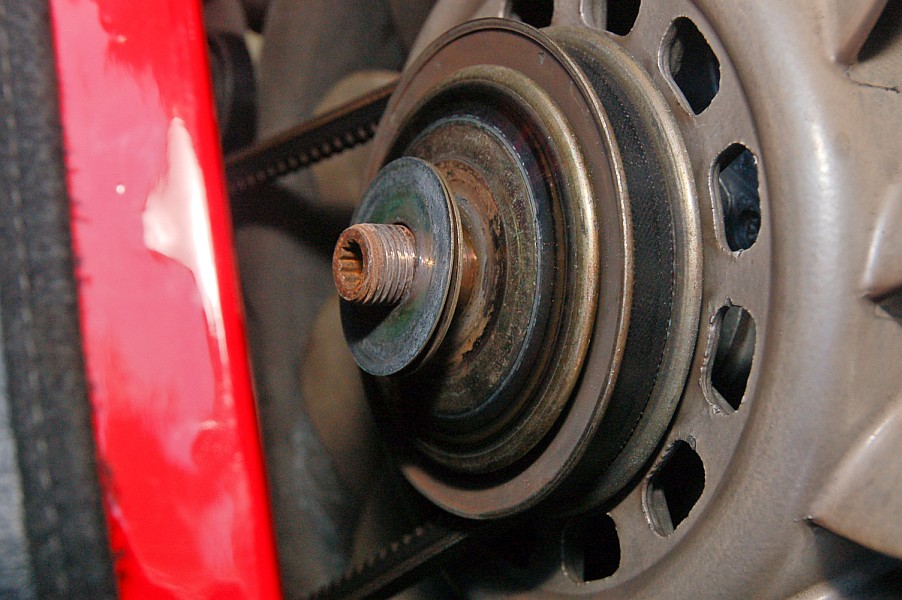
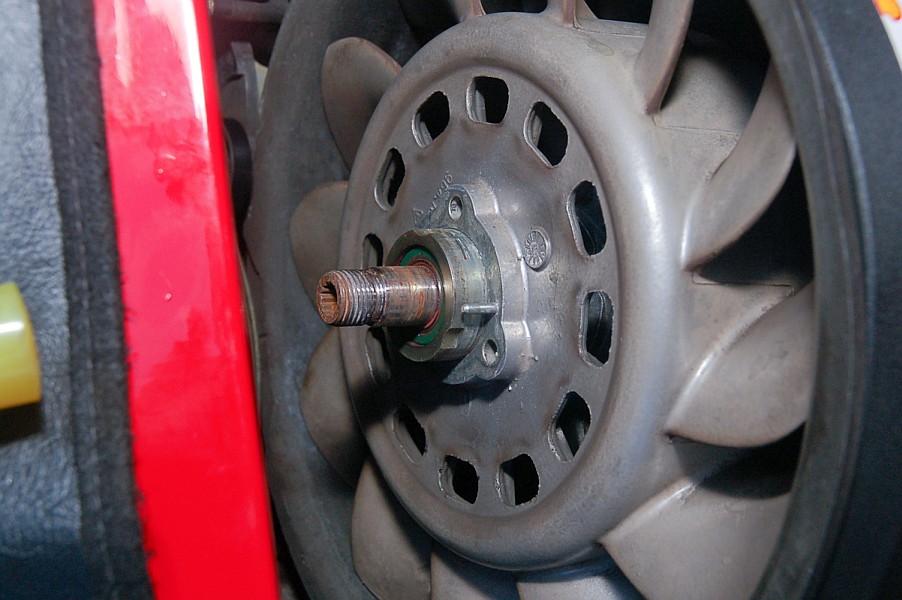
Pulling off the fan reveals the fan bearing, which is also press fit (onto the alternator shaft).
Pull the bearing off the shaft. Here, again, with the 3-arm puller.
Bearing's loose, now remove the cylinder-spacer/sleeve behind it.
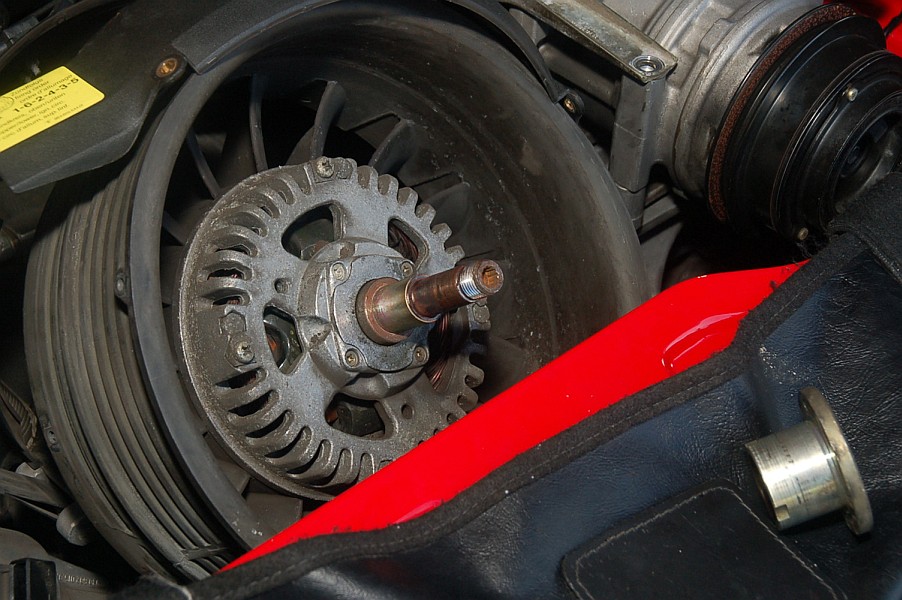
My fan was only superficially dirty.
A little elbow grease cleaned it up nicely.
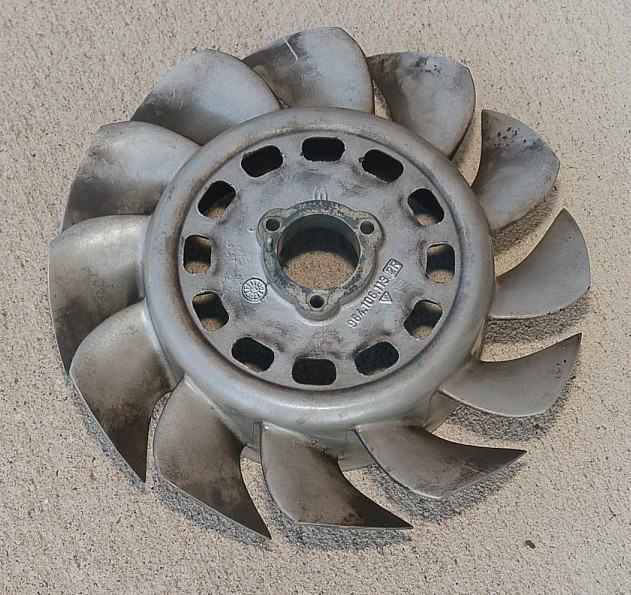
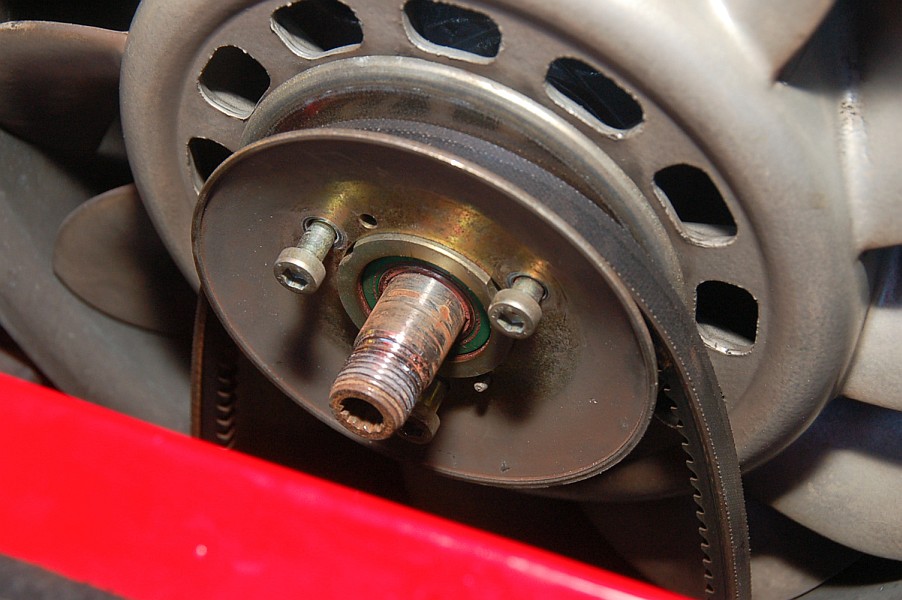
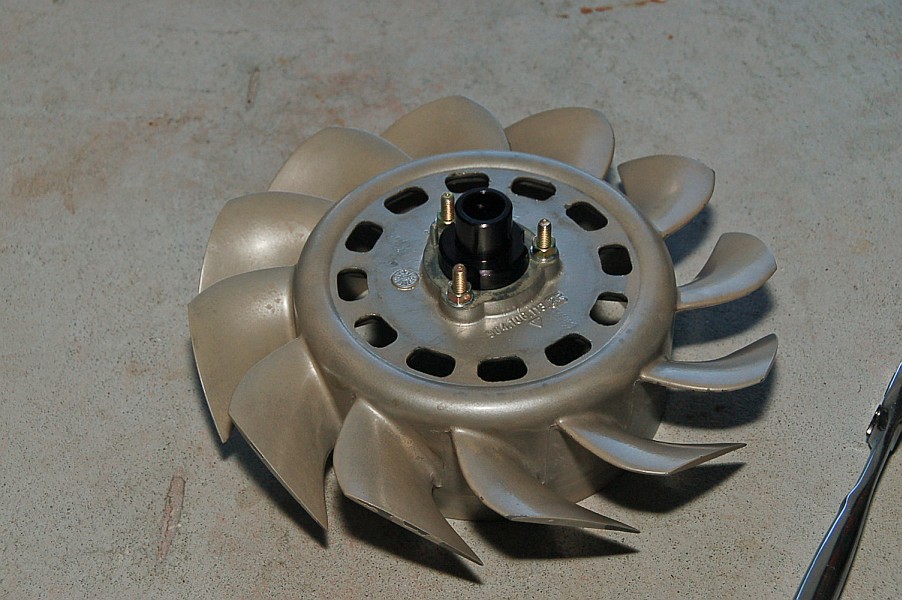
The RS hub (from my source) is a press-fit into the fan's hole.
I stuck the RS hub in the freezer for an hour, or so, then put it into the (room temperature) fan's hole - then quickly gave it a few persuasion bonks from a rubber mallet to help it go in a little further.
This stuck out the three RS hub studs just far enough out of the fan to continue the press installation via screwing down (M6-1) nuts on the three studs.
This snugged the hub into the fan, nicely.
The RS hub was just a slip-on fit onto the alternator shaft, so I "reassembled in reverse order to disassembly" while LocTite'ing nuts on my way out.
Works gute.
Pull the bearing off the shaft. Here, again, with the 3-arm puller.
Bearing's loose, now remove the cylinder-spacer/sleeve behind it.
My fan was only superficially dirty.
A little elbow grease cleaned it up nicely.
The RS hub (from my source) is a press-fit into the fan's hole.
I stuck the RS hub in the freezer for an hour, or so, then put it into the (room temperature) fan's hole - then quickly gave it a few persuasion bonks from a rubber mallet to help it go in a little further.
This stuck out the three RS hub studs just far enough out of the fan to continue the press installation via screwing down (M6-1) nuts on the three studs.
This snugged the hub into the fan, nicely.
The RS hub was just a slip-on fit onto the alternator shaft, so I "reassembled in reverse order to disassembly" while LocTite'ing nuts on my way out.
Works gute.
Last edited by elbeee964; 06-30-2010 at 01:53 PM.
06-24-2010, 12:58 AM
#4
Advanced
http://current.com/http://www.fuelto...nge-a-fan-belt
Just for fun!
Good job on the documentation Lonnie.
Just for fun!
Good job on the documentation Lonnie.
06-24-2010, 11:46 AM
#5
Agent Orange
Rennlist Member
Rennlist Member
Excellent write-up Lonnie, thank you! Did you experience any issues removing the 5mm hex bolts from the fan pulley? Those seem a bit difficult to take off to some people. Porsche has superseded the original ones with black anodized bolts. Not that you care anymore, but I just wanted to see if removal was a problem.
06-24-2010, 12:36 PM
#6
Nordschleife Master
Thread Starter
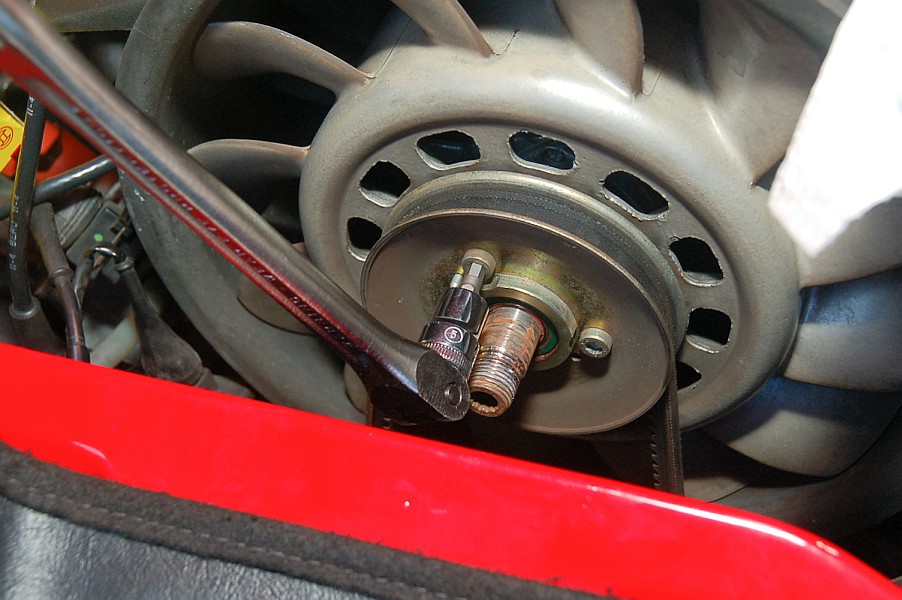
Ilko, I'd heard those three cap screws could round out - they're not full depth socket/height cap screws, and they're made of soft clay-metal - so I went after them with a proper, stiff 5mm hex drive and breaker bar (see photo).
They all broke loose cleanly. Nice.
I would NOT want to try breaking them loose with a dinky hex key. That small socket depth is just waiting for the key to slip from operator 'off square' loading.
Worst comes to worse, though - and you rounded out the socket?
You could always clamp down on those socket heads with ViseGrips and give it a twist...
...Or, go nuclear, and high-speed grind/cut off the fastener heads - with Dremmel, or cold chisel.
Hey - you aren't needing them ever, again, with an RS hub - right? So, what the Hell!
(Still... The Dremmel would cause nuclear-levels of fall-out dust, so cover off all sensitive bits like the alternator. And the shock waves off those three nuclear cold chisel strikes might be upsetting to the alternator's bearings.)
Trending Topics
06-30-2010, 03:16 PM
#9
Burgled
Rennlist Member
Rennlist Member
I dremeled a grove in my rounded off head and put a screw driver at an angle in the grove and hit down on it a few times with a hammer which broke it lose. I then was able to easly take it out. I used a little anti seze when I replaced them.
01-12-2012, 02:36 AM
#11
Instructor
Just to add to an already good DIY, if you bake the fan in the oven for a few minutes along with sticking the hub in the freezer for a few, the hub will literally just slide in the fan with no pressure. Did it a few moments ago and just had to yell out Hazzah!
01-12-2012, 10:57 AM
#12
Nordschleife Master

That's a good tip! I'm in the process of replacing my cooling fan (used a puller to remove) and was wondering how I was going to get the replacement fan onto the bearing (no RS hub for me).
I guess I'll put the whole alternator into the freezer since the bearing is pressed onto the shaft.
I guess I'll put the whole alternator into the freezer since the bearing is pressed onto the shaft.
01-12-2012, 12:39 PM
#13
Racer
Join Date: Feb 2011
Location: Chester County, PA
Posts: 434
Likes: 0
Received 0 Likes
on
0 Posts
Forgive me for my ignorance, but is the intent of the RS bearing single belt to run both the fan and the alternator from the same pulley/belt?
Is there a difference in rpm or idling after this mod?
Would this be suitable also with the LWFW mod, or would the engine rpm drop to abruptly when slowing down?
Thanks for any info you can provide.
01-12-2012, 12:48 PM
#14
Nordschleife Master
I think the RS setup will underdrive the alternator since the pulley it runs off of becomes slightly larger (think bicycle gear ratios). This doesn't create a charging issue for a car that sees lots of RPMs and/or has little electronic accessories, but if you spend lots of time near idle (e.g. slow traffic) and/or run lots of accessories (e.g. headlights, a/c blower, stereo, etc., the underdriven alternator may not charge enough to keep the battery juiced.
01-29-2012, 01:14 AM
#15
Rennlist Member

I thought the aft most pulley runs the alternator, from the pic it looks like the fan pulley is eliminated, not the alternator pulley. I'm interested in doing this also while replacing the fan. What are the benefits? Is it worth it? Any problems later or risks?