

Flappy paddles for 964 Tiptronic.
 05-26-2010, 03:44 PM
#1
Racer
Thread Starter
Join Date: Oct 2009
Posts: 430
Likes: 0
Received 0 Likes
on
0 Posts
Hi Guys.
Do you know if someone sell flappy paddles to screew in a normal steering wheel?.
And, Could I install a 993 Tiptronic steering wheel and leave it the steering wheel flappy paddles working?
Regards!.
Do you know if someone sell flappy paddles to screew in a normal steering wheel?.
And, Could I install a 993 Tiptronic steering wheel and leave it the steering wheel flappy paddles working?
Regards!.
 05-26-2010, 04:45 PM
#2
Rennlist Member
Here's a link to wher a 993 tip steering wheel was modded to work a radio.
http://p-car.com/diy/steeringradio/
It might work as a shifter, because I believe it's all electrical interface once you're in manual.
http://p-car.com/diy/steeringradio/
It might work as a shifter, because I believe it's all electrical interface once you're in manual.
05-28-2010, 02:35 AM
#5

Here's another (pricey) option if you can't find paddles to retrofit to the OEM steering wheel:
http://www.fvd.de/de/en/Porsche-0/-/...cl.-AB%29.html
http://www.fvd.de/de/en/Porsche-0/-/...cl.-AB%29.html
05-28-2010, 01:13 PM
#6
Nordschleife Master
A chap over our way who had a 993 speedster built from the ground up by using a 993 tip cab as a doner, has flappy paddles. All work done by Marc and Colin at Ninemeister:
05-29-2010, 01:21 AM
#7
Addict
Lifetime Rennlist
Member
Lifetime Rennlist
Member
McQueen-- Similar to the above FVD reference, this is advertised by carAdventure.de as $2,580...

Here's design911.co.uk's Raid Daytona GT Steering Wheel, $1,500:
Here's a wireless system that might just possibly do the trick for ya: twistMachine.com's "Shrifter" -- a bolt-on paddle shifter, but only intended for pre-airbag cars. Starts at $540 USD. Good luck!


Here's design911.co.uk's Raid Daytona GT Steering Wheel, $1,500:
Here's a wireless system that might just possibly do the trick for ya: twistMachine.com's "Shrifter" -- a bolt-on paddle shifter, but only intended for pre-airbag cars. Starts at $540 USD. Good luck!
Trending Topics
12-17-2011, 02:26 PM
#8
Advanced
Join Date: Sep 2011
Location: South Wales, UK
Posts: 90
Likes: 0
Received 0 Likes
on
0 Posts
Sorry to drag up an old thread but might as well add some info, I've got the works bell kit sitting in my bedroom, to be wired in over the winter... Only cost �199 for some lovely carbon paddles!
http://www.plays-kool.co.uk/acatalog/WorksBell.html
http://www.plays-kool.co.uk/acatalog/WorksBell.html
01-07-2012, 01:17 PM
#9
Advanced
Join Date: Sep 2011
Location: South Wales, UK
Posts: 90
Likes: 0
Received 0 Likes
on
0 Posts
Just to complete the story for anyone interested, I have finished installing my works bell paddle shift. I used the universal kit and just wired the paddles in parallel with the micro switches in the gearbox. Surprisingly easy job... Ignore the loose cable at the moment, it will be replaced with a tangle free spiral cable in time.


01-07-2012, 01:33 PM
#10
Rennlist Member
Very cool
01-08-2012, 02:36 AM
#13
Rennlist Member
+1 on in depth install details as well as Nardi wheel type
01-08-2012, 08:46 AM
#14
Advanced
Join Date: Sep 2011
Location: South Wales, UK
Posts: 90
Likes: 0
Received 0 Likes
on
0 Posts
No idea what Nardi wheel it is, I got it off eBay but I'm guessing it's pretty rare as I've not seen another for sale. The works bell paddle shifter came from Luke at plays kool, who I can't fault, his help/service is second to none.
http://www.plays-kool.co.uk/acatalog/WorksBell.html
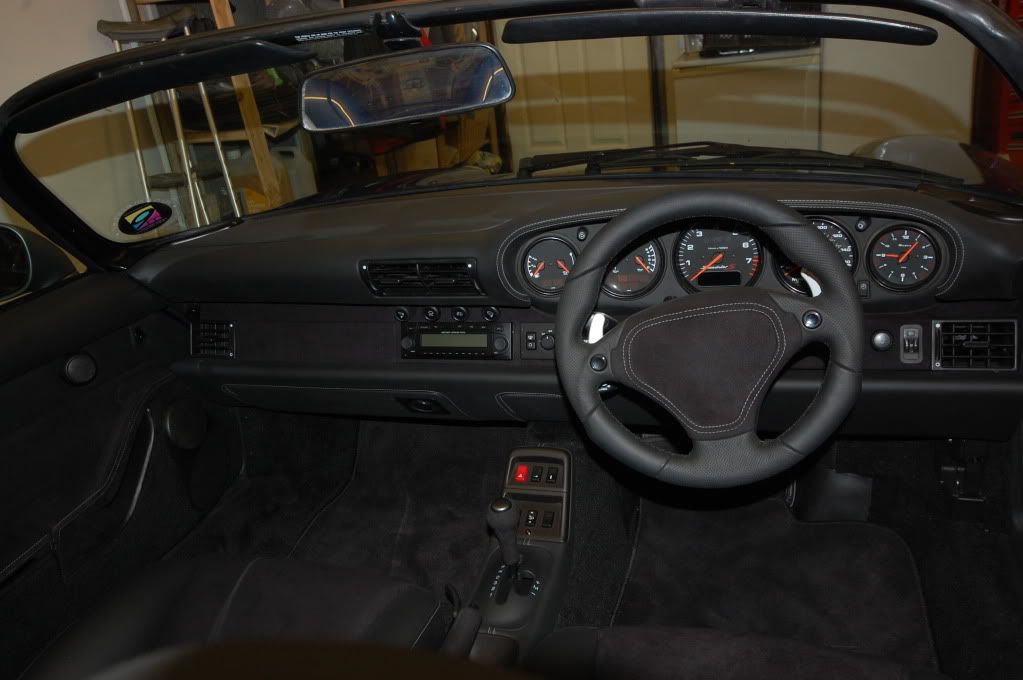
As for the install, I started with a non airbag steering wheel so started by pulling off the horn pad on the wheel pictured below:

It's held on by 3 clips so just pull it towards yourself whilst sat in the drivers seat using one hand either side of the horn pad being careful not to damage it.
Once the horn pad is off, remove the 15/16 nut securing the wheel, mark top dead centre and remove the wheel.
Fit the steering boss, in my case a momo boss with a driftworks adapter fitted to it to accommodate my nardi wheel's bolt pattern. The works bell shifter (pictured below) fits behind the steering wheel using the longer bolts supplied with the paddle shifter.

With the steering wheel fitted I set out removing the centre console.
You need to remove the two front switch panels at the top.
Underneath them are 2 Philips head screws. At the back of the console there
is a little pad which pulls out. There are then two screws to be removed
from there. There is then one screw underneath the handbrake. This shall
then release the plastic cover which is removed by pulling along the
handbrake. Then there are two screws at the back of the centre console two
in the middle. There is also a bar which goes across beneath the handbrake
again this needs unscrewing. Finally on the gear lever the push button needs
unscrewing just by hand and the gear lever then just pulls off. Then centre
console should then just pull straight up and off.

Once the centre console is removed you can see the microswitches for the gearbox.

I decided to stay away from the switches and instead wired into the connector further down the loom...

The wiring for the shifter is simple. You have 2 cables for each paddle on the works bell shifter, one is an earth/common and the other is the switch signal, it doesn't matter which is which but choose 1 from each paddle to be the earth, these need to be spliced together to give 1 cable for the earth path. You need to extend the switch cables and earth cable from the paddles with enough cable to reach the gear shifter. This leaves you with a loom of 3 cables to be routed through the dash to the gear shifter where you need to splice the following cables:
Brown - earth
Brown red - downshift
Brown yellow - up shift
Once connected, test the paddles (they only work with the box in manual mode) and refit the centre console.
Et viola
http://www.plays-kool.co.uk/acatalog/WorksBell.html
As for the install, I started with a non airbag steering wheel so started by pulling off the horn pad on the wheel pictured below:
It's held on by 3 clips so just pull it towards yourself whilst sat in the drivers seat using one hand either side of the horn pad being careful not to damage it.
Once the horn pad is off, remove the 15/16 nut securing the wheel, mark top dead centre and remove the wheel.
Fit the steering boss, in my case a momo boss with a driftworks adapter fitted to it to accommodate my nardi wheel's bolt pattern. The works bell shifter (pictured below) fits behind the steering wheel using the longer bolts supplied with the paddle shifter.
With the steering wheel fitted I set out removing the centre console.
You need to remove the two front switch panels at the top.
Underneath them are 2 Philips head screws. At the back of the console there
is a little pad which pulls out. There are then two screws to be removed
from there. There is then one screw underneath the handbrake. This shall
then release the plastic cover which is removed by pulling along the
handbrake. Then there are two screws at the back of the centre console two
in the middle. There is also a bar which goes across beneath the handbrake
again this needs unscrewing. Finally on the gear lever the push button needs
unscrewing just by hand and the gear lever then just pulls off. Then centre
console should then just pull straight up and off.
Once the centre console is removed you can see the microswitches for the gearbox.
I decided to stay away from the switches and instead wired into the connector further down the loom...
The wiring for the shifter is simple. You have 2 cables for each paddle on the works bell shifter, one is an earth/common and the other is the switch signal, it doesn't matter which is which but choose 1 from each paddle to be the earth, these need to be spliced together to give 1 cable for the earth path. You need to extend the switch cables and earth cable from the paddles with enough cable to reach the gear shifter. This leaves you with a loom of 3 cables to be routed through the dash to the gear shifter where you need to splice the following cables:
Brown - earth
Brown red - downshift
Brown yellow - up shift
Once connected, test the paddles (they only work with the box in manual mode) and refit the centre console.
Et viola
01-09-2012, 03:07 AM
#15
Rennlist Member
Join Date: Oct 2005
Location: Auckland, New Zealand
Posts: 429
Likes: 0
Received 45 Likes
on
24 Posts
Those flappy paddles look great!
But, I have a few questions…………………..
Presumably the thickness of the paddle “ring” is about 20mm and therefore puts the steering wheel that much closer to your chest?
Do the indicators still self-cancel? As it seems that the thickness of the flappy paddle moves the part of the wheel that turns the indicators off further away.
When driving is there any difference is speed/smoothness/ease when changing gear compared to normal tiptronic gearshifts?
TIA