
Transmission oil change DIY
 05-01-2009, 10:06 AM
#1
Nordschleife Master
Thread Starter
Transmission oil change
Quick facts
Req. Change Frequency: every 48,000 miles (min)
Oil (qty): 75 W 90 gear oil (3.8 qts)
Fill and Drain plug Torques: 22 ft-lbs.
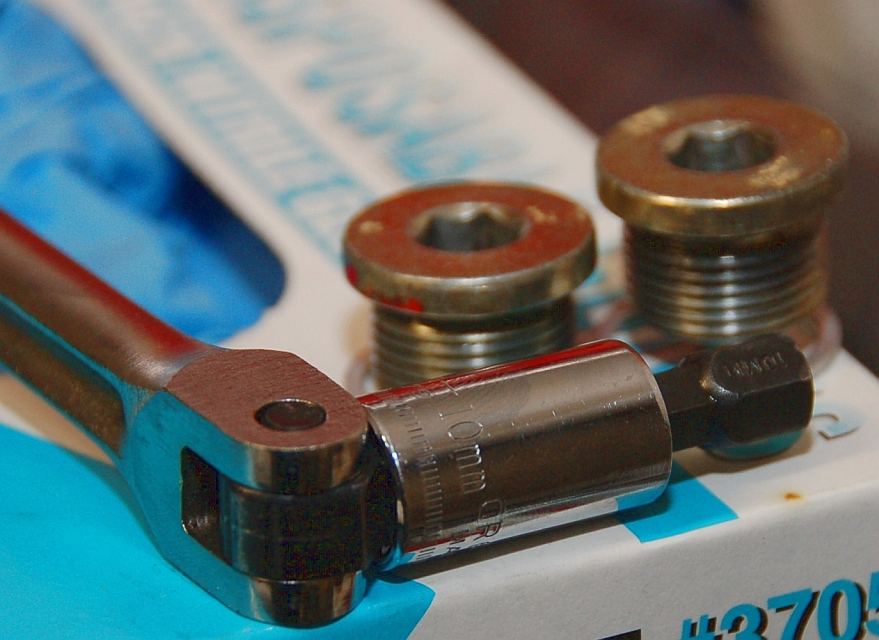
Fill and Drain Plug Hex wrench size: 10mm.
Replacement parts: 2 aluminum seals (Porsche p/n 900-123-011-30; “Sealing ring A 22 x 27”, Pelican p/n 900-123-118-30-M131)
Tip: This is the same seal used on both engine oil drain plugs. Since they’re inexpensive [@ $0.50], it’s convenient to buy extras for upcoming oil changes, as well.
Steps:
1. Driving car just prior to this procedure to thoroughly mix the transmission’s oil is preferred.
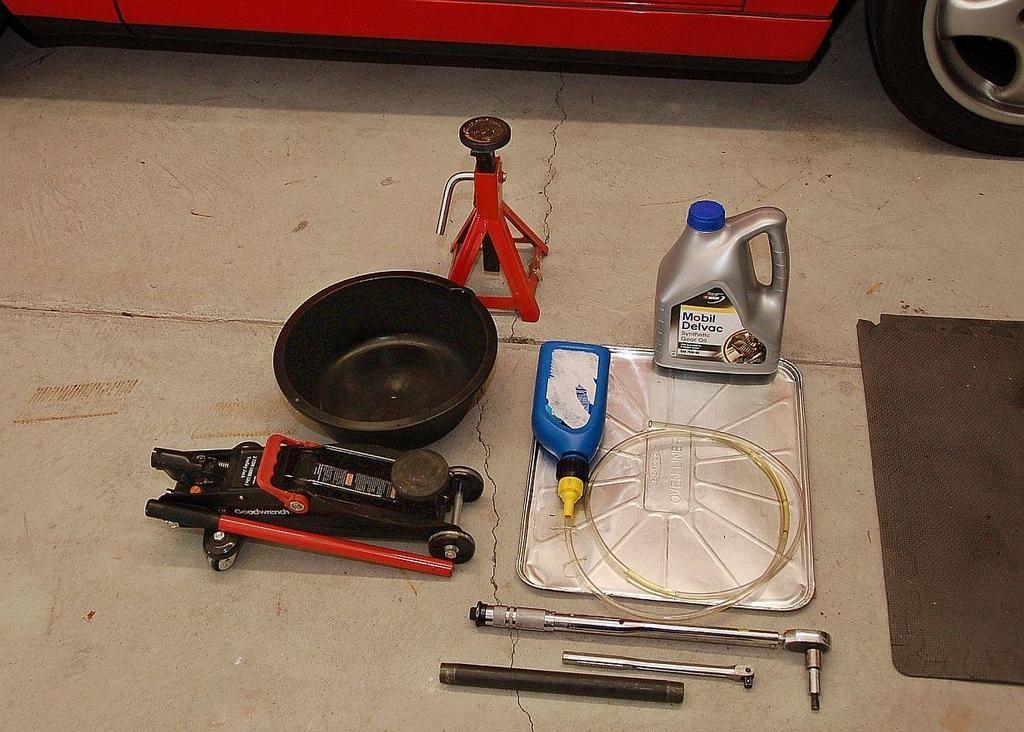
Overview of procedure items to be used: Fig 11.
[The short piece of plumbing pipe shown was needed in my case to help break loose a (previous) overzealously torqued plug.]
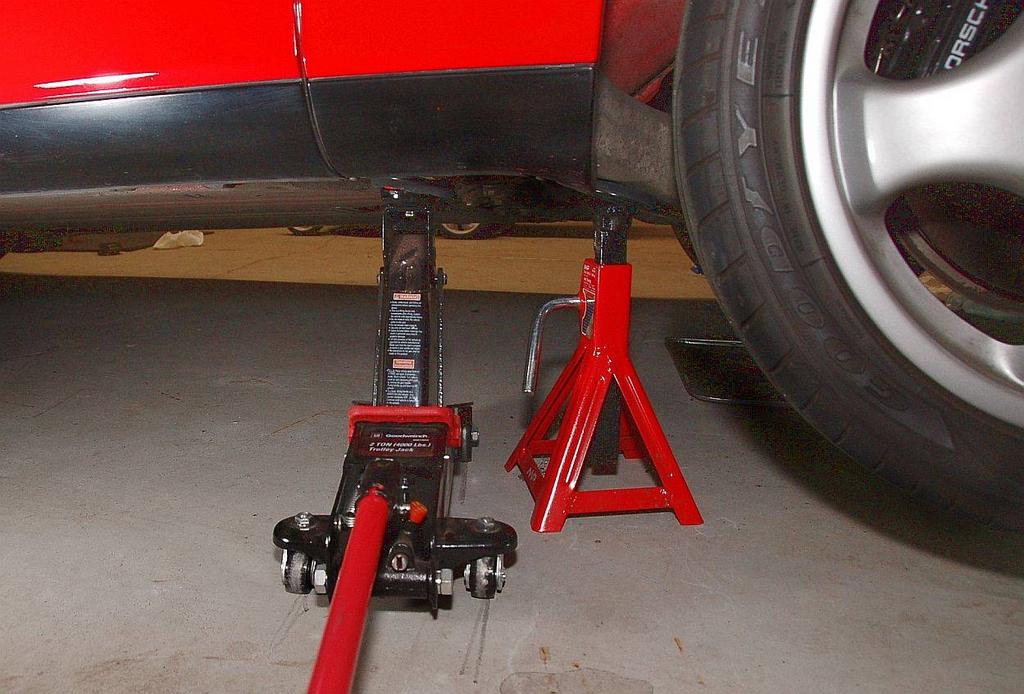
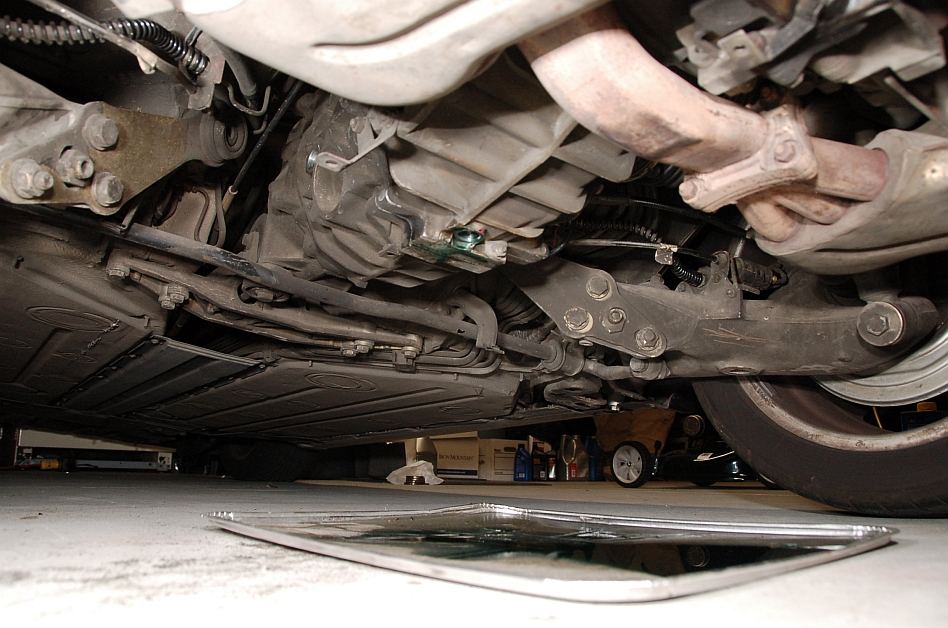
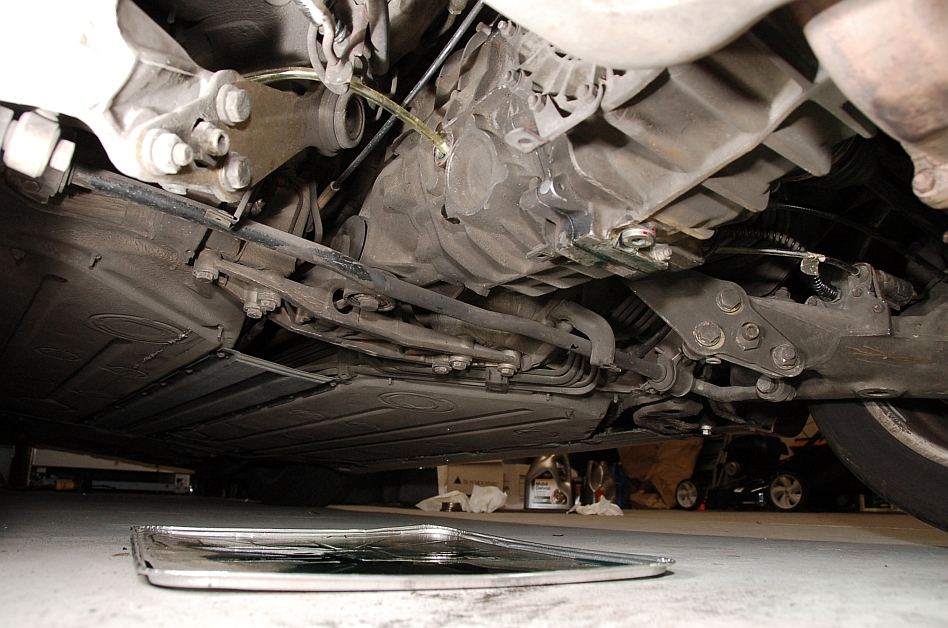
2. Jack up car at the left/driver’s side, rear jacking point. [Fig 1] Remove left rear wheel.
3. Place catch pan under transmission drain plug. (Expect 1 gallon of fluid to drain fast.)
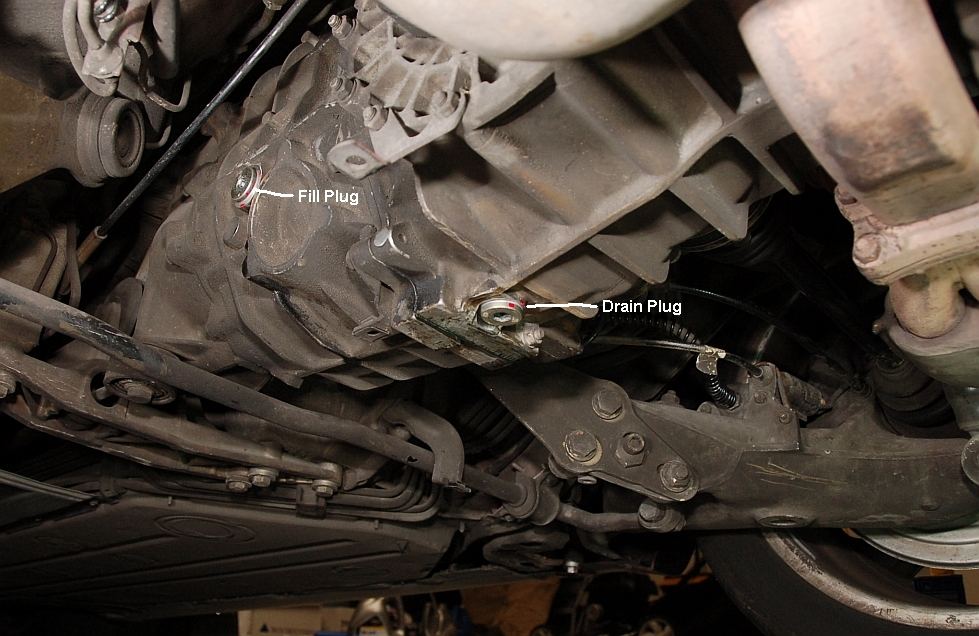
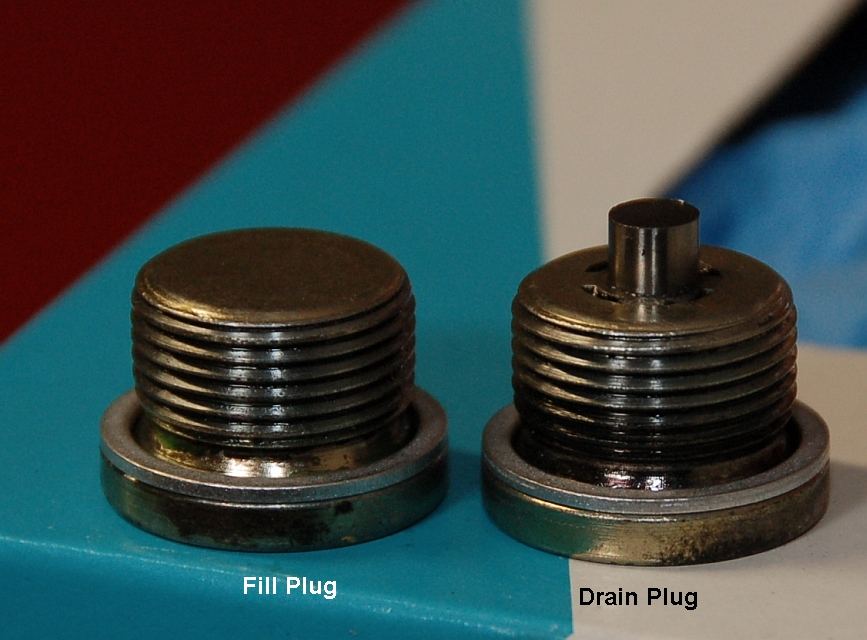
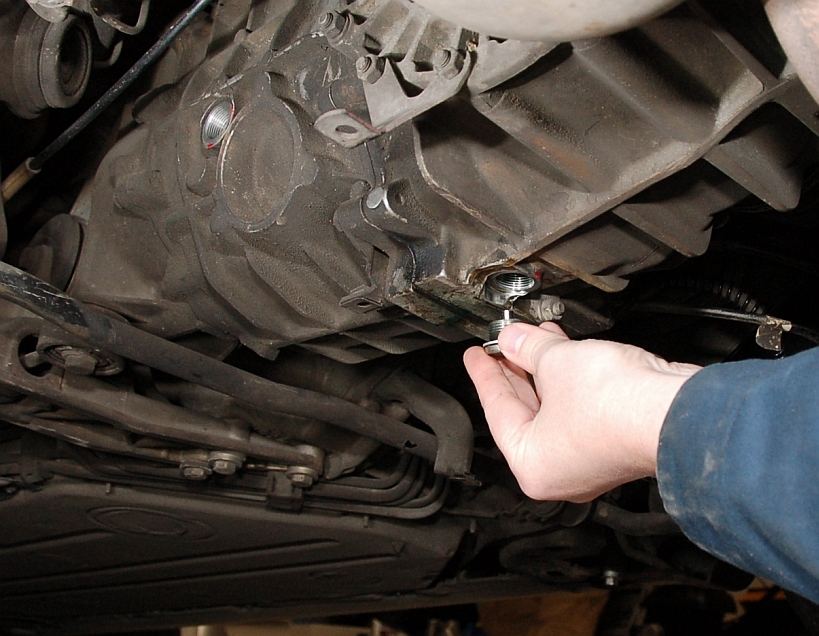
4. Remove transmission fill and drain plugs w/ 10mm hex. [Fig 2]
Note: Jaime reminds me of his frustration of removing the drain plug 1st, only to find the fill plug impossibly torqued tight.
(How would you refill that scenario?)
Lesson learned: Remove the fill plug 1st, for sanity's sake.
5. Lower car to (level to) complete transmission draining.
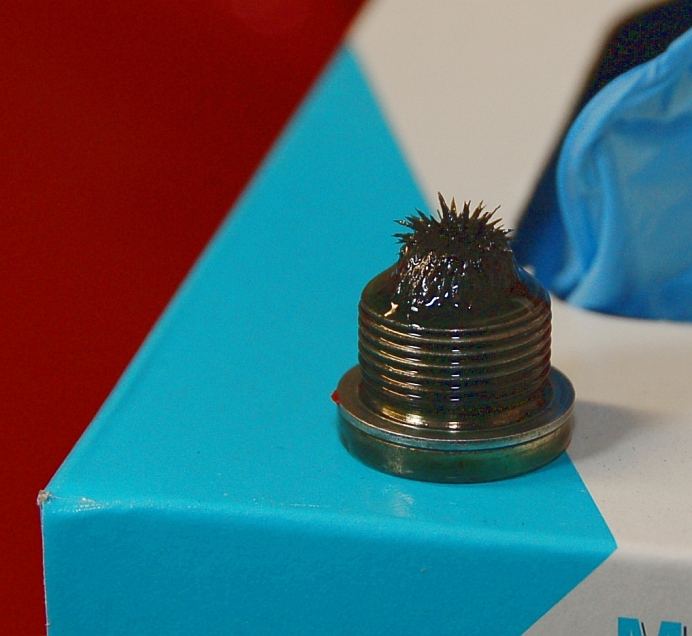
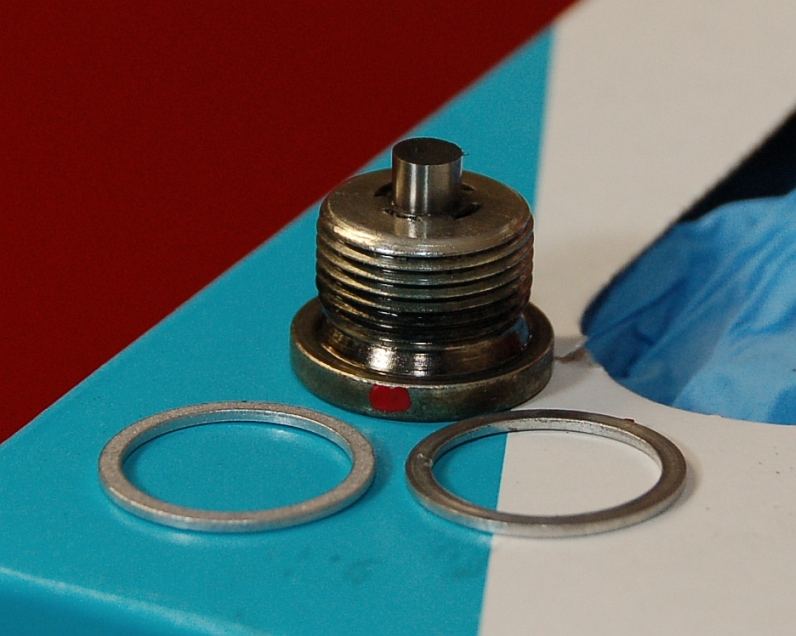
6. Inspect and remove metal debris from drain plug magnet. [Fig 3, 4, 5, 6]
Note: Metal shavings shown in Fig 3 are normal. If metal chunks are present, seek professional review of your transmission.
7. Jack up car at the left/driver’s side, rear jacking point.
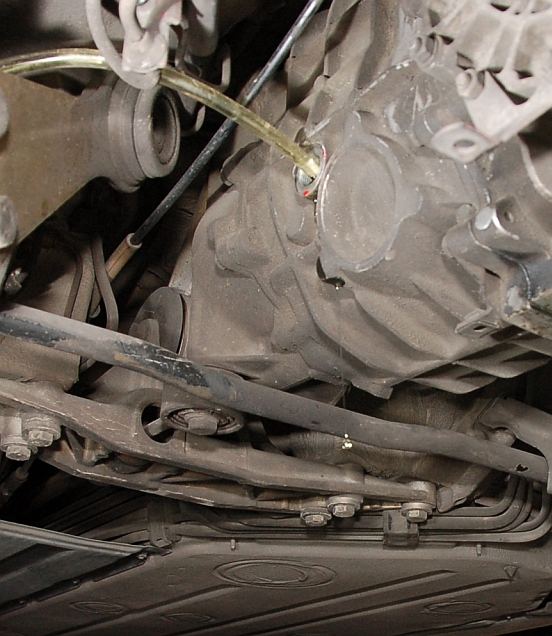
8. Reinstall cleaned drain plug to 22 ft-lbs. [Fig 7, 8]
9. Fill new transmission oil into the transmission fill port until fill port overflows. [Fig 9, 10]
Note: I used a gravity feed to fill the tranny by holding the oil bottle shown above the transmission's level (and punching a hole in the oil bottle) the oil will flow into the tranny. Sure, it's a little slow, but it's a 'no' pressure, works-every-time method I found convenient. There are other oil pumping devices you may choose to use. Many ways 'to skin this cat.'
10. Lower car to (level to) allow further overflow of transmission oil. When flow has decreased, jack the car back up.
11. Reinstall cleaned fill plug to 22 ft-lbs.
Transmission oil change complete
Quick facts
Req. Change Frequency: every 48,000 miles (min)
Oil (qty): 75 W 90 gear oil (3.8 qts)
Fill and Drain plug Torques: 22 ft-lbs.
Fill and Drain Plug Hex wrench size: 10mm.
Replacement parts: 2 aluminum seals (Porsche p/n 900-123-011-30; “Sealing ring A 22 x 27”, Pelican p/n 900-123-118-30-M131)
Tip: This is the same seal used on both engine oil drain plugs. Since they’re inexpensive [@ $0.50], it’s convenient to buy extras for upcoming oil changes, as well.
Steps:
1. Driving car just prior to this procedure to thoroughly mix the transmission’s oil is preferred.
Overview of procedure items to be used: Fig 11.
[The short piece of plumbing pipe shown was needed in my case to help break loose a (previous) overzealously torqued plug.]
2. Jack up car at the left/driver’s side, rear jacking point. [Fig 1] Remove left rear wheel.
3. Place catch pan under transmission drain plug. (Expect 1 gallon of fluid to drain fast.)
4. Remove transmission fill and drain plugs w/ 10mm hex. [Fig 2]
Note: Jaime reminds me of his frustration of removing the drain plug 1st, only to find the fill plug impossibly torqued tight.
(How would you refill that scenario?)
Lesson learned: Remove the fill plug 1st, for sanity's sake.
5. Lower car to (level to) complete transmission draining.
6. Inspect and remove metal debris from drain plug magnet. [Fig 3, 4, 5, 6]
Note: Metal shavings shown in Fig 3 are normal. If metal chunks are present, seek professional review of your transmission.
7. Jack up car at the left/driver’s side, rear jacking point.
8. Reinstall cleaned drain plug to 22 ft-lbs. [Fig 7, 8]
9. Fill new transmission oil into the transmission fill port until fill port overflows. [Fig 9, 10]
Note: I used a gravity feed to fill the tranny by holding the oil bottle shown above the transmission's level (and punching a hole in the oil bottle) the oil will flow into the tranny. Sure, it's a little slow, but it's a 'no' pressure, works-every-time method I found convenient. There are other oil pumping devices you may choose to use. Many ways 'to skin this cat.'
10. Lower car to (level to) allow further overflow of transmission oil. When flow has decreased, jack the car back up.
11. Reinstall cleaned fill plug to 22 ft-lbs.
Transmission oil change complete
Last edited by elbeee964; 05-01-2009 at 03:15 PM.
 05-01-2009, 10:48 AM
#2
Professor of Pending Projects
Rennlist Member
Rennlist Member
This is grea! Thank you!
The only thing I would add is
MAKE SURE YOU CAN REMOVE THE FILL PLUG BEFORE YOU REMOVE THE DRAIN PLUG...
There was this time, with my 951... anyway... you get the idea...
The only thing I would add is
MAKE SURE YOU CAN REMOVE THE FILL PLUG BEFORE YOU REMOVE THE DRAIN PLUG...
There was this time, with my 951... anyway... you get the idea...
05-01-2009, 10:56 AM
#3
Nordschleife Master
Thread Starter
GLUUUUG..... GLUUUUG.... GLUUUUG...
or,
[quiet drain]
No biggee that I could see.
05-01-2009, 11:10 AM
#4
Professor of Pending Projects
Rennlist Member
Rennlist Member
 Unless you have a way to fill via the drain plug
  05-01-2009, 11:29 AM
#5
Three Wheelin'
Fantastic Lonnie. Thank you. Consider it subscribed. This should go in the DIY section.
Is the location of your jack stand adequate to hold the car up in the air or did you just place it there for additional safety for this job? I know Ilko's got some pictures on his site about alternate spots for jack stands but I can't get the right spot.
Is the location of your jack stand adequate to hold the car up in the air or did you just place it there for additional safety for this job? I know Ilko's got some pictures on his site about alternate spots for jack stands but I can't get the right spot.
05-01-2009, 11:44 AM
#6
Nordschleife Master
Thread Starter
By practice, I put a hockey puck between every jacking point and jack/support on my car...
So I don't sweat the stress concentrations as much that way.
Trending Topics
05-01-2009, 03:26 PM
#8
Nordschleife Master
Nice one LB 
I really must get myself some of those hockey pucks sometime....trouble is it's not a very popular game over so not many pucks 'R' us shops about
I really must get myself some of those hockey pucks sometime....trouble is it's not a very popular game over so not many pucks 'R' us shops about
05-01-2009, 04:09 PM
#9
Nordschleife Master
Thread Starter
Tell me about it, Steve! Hockey puck scarcity -- who knew?!
I picked up mine in... [wait for it].... San Diego, CA.
(Certainly one of the darker corners in hockey's universe.)
And mine were found in the discount section, as priced-down NHL Championship memoribilia. (Some NHL team name was painted on them.) Normally the sports shop didn't carry anything hockey-related.
Now?... I'd go look on eBay, or some other internet source.
Hockey puck scarcity -- who knew?!I picked up mine in... [wait for it].... San Diego, CA.
(Certainly one of the darker corners in hockey's universe.)
And mine were found in the discount section, as priced-down NHL Championship memoribilia. (Some NHL team name was painted on them.) Normally the sports shop didn't carry anything hockey-related.
Now?... I'd go look on eBay, or some other internet source.
05-01-2009, 04:59 PM
#10
Nordschleife Master
I already did buddy....do you think this guy is tough enough to hold up a 964 and keep smiling?
Jean-sesbastien Giguere's face on a puck
Jean-sesbastien Giguere's face on a puck
05-01-2009, 08:02 PM
#11
If hockey pucks are scarce, I use a baseball bat weight, made in steel, coated in a rubberized product. This has worked very well to transfer the load, and can be sourced at most sporting goods stores.
I like the puck idea better though, as it's solid, and grippy. Cool.
As for the O.P. Thanks for this Elbee. I was getting ready to get this done. Nicely done!!!
I take it that the Mobil Delvac is the preffered choice here, 75/90?
I like the puck idea better though, as it's solid, and grippy. Cool.
As for the O.P. Thanks for this Elbee. I was getting ready to get this done. Nicely done!!!
I take it that the Mobil Delvac is the preffered choice here, 75/90?
Last edited by christallon; 05-01-2009 at 08:05 PM. Reason: Changed description
05-02-2009, 07:57 AM
#12
Nordschleife Master
Thread Starter
The Delvac was the concensus pick a year ago.
Formulations, new arrivals, and worthy concensus opines may have changed since. I don't know.
I DO know the stuff wasn't easy to find.
Finally found a source, nearby, at Lufteknic in Richmond, VA. (no affiliation)
Formulations, new arrivals, and worthy concensus opines may have changed since. I don't know.
I DO know the stuff wasn't easy to find.
Finally found a source, nearby, at Lufteknic in Richmond, VA. (no affiliation)
 05-03-2009, 08:51 AM
#14
Rennlist Member
Join Date: Dec 2003
Location: Santa Rosa Beach, Florida
Posts: 251
Likes: 0
Received 2 Likes
on
2 Posts
Nice.
I'll take some pics of the C4 this afternoon to add to your post.
I've learned this the hard way, but I now have a few prep steps:
* Make sure the wife is out of the house before taking this on (gear oil smells that bad!)
* Don't plan on wearing clothes you ever plan to wear again!
tom
I'll take some pics of the C4 this afternoon to add to your post.
I've learned this the hard way, but I now have a few prep steps:
* Make sure the wife is out of the house before taking this on (gear oil smells that bad!)
* Don't plan on wearing clothes you ever plan to wear again!
tom
05-03-2009, 09:46 AM
#15
Nice work Lonnie. If you have access to a lift you don't even need to remove the wheel. Being impatient, the most difficult part of this DIY is waiting for gravity to transfer your transmission fluid from the bottle to the transmission itself. Next time I do this I'm going to use 3/4 inch hose or greater. Many have stated that the filler plug can be a real bear to remove and I did follow the advise of removing it prior to the drain plug. As a person who tends to over-tighten just about everything, the use of a torque wrench will probably save me a lot of time the next time I do this. As long as you can gain access to the two plugs this DIY can be done by anybody (I'm proof to this)!
Servicing the front diff was not any more difficult, however removing the underpan while the car is on jack stands could prove to be a pain in the rear. Also absolutely agree with TGAGE and his prep steps above.
Servicing the front diff was not any more difficult, however removing the underpan while the car is on jack stands could prove to be a pain in the rear. Also absolutely agree with TGAGE and his prep steps above.