When you click on links to various merchants on this site and make a purchase, this can result in this site earning a commission. Affiliate programs and affiliations include, but are not limited to, the eBay Partner Network.
I downloaded your 964 Oil Change DIY last year, and finally decided to attack that project this afternoon. Your DIY instructions were excellent, and made the entire process virtually pain free. Thanks!
I did want to point out a few issues which I ran into, and ask this board for advice...
1) I have a Bend-Pak scissor lift, and the oil tank drain in front of the right rear tire is unfortunately located exactly above the lift's support arm. This made it impossible to lift the car and then drain the oil from that outlet. I chose to leave the car on the ground and purchase a flatter pan to fit under the car. That worked - no drips. Am I missing something?
2) My only spill occured when I removed the plug from the engine crankcase. I did not expect the 2-3 quarts to shoot out to the left QUICKLY. My remedy will be a larger opening for my second drain pan to accomodate all flow rates (from the initial drip through the horizontal fountain effect).
3) When I went to clean both plugs (from the oil tank and the engine drain), I noticed that they were different. The one for the engine drain had a protrusion inside the threads with what appeared to be a square magent at the top. The plug for the oil tank was void of any protrusion, and I could not locate the magnet. Does this sound right? I'll check with the dealer tomorrow...
4) I have a 1/4" torque wrench. This worked well for the oil tank plug, but I was not able to get it onto the engine tank plug unless I removed the mufflers. What is the trick?
All in all, the process took me 2 hours - but I am now the wiser and look forward to the next DIY adventure! And FWIW, the car only needed 10 quarts of oil...
Your crankcase magnet-plug / oil tank plain-plug are correct.
Don't sweat the torque too much for these two plugs. snug+umph is a good enough for their tightening.
Replacing those 50-cent aluminum crush seals everytime is worthwhile for sanity's sake. But the only 'loads' those plugs are seeing are the differential thermal expansion/contraction with the aluminum crankcase.
For the oil tank, there is no differential -- both are steel.
And they're holding back less than a couple psi of standing fluid pressure. That's nothing for them.
Snug+umph works for me. (Frankly, that oil filter seal being hand tightened has always worried me more...)
1) I have a Bend-Pak scissor lift, and the oil tank drain in front of the right rear tire is unfortunately located exactly above the lift's support arm. This made it impossible to lift the car and then drain the oil from that outlet. I chose to leave the car on the ground and purchase a flatter pan to fit under the car. That worked - no drips. Am I missing something?
Nope.
2) My only spill occured when I removed the plug from the engine crankcase. I did not expect the 2-3 quarts to shoot out to the left QUICKLY. My remedy will be a larger opening for my second drain pan to accomodate all flow rates (from the initial drip through the horizontal fountain effect).
I used my open pan for the engine crankcase, then dumped it into the larger enclosed pan.
3) When I went to clean both plugs (from the oil tank and the engine drain), I noticed that they were different. The one for the engine drain had a protrusion inside the threads with what appeared to be a square magent at the top. The plug for the oil tank was void of any protrusion, and I could not locate the magnet. Does this sound right? I'll check with the dealer tomorrow...
See post above.
4) I have a 1/4" torque wrench. This worked well for the oil tank plug, but I was not able to get it onto the engine tank plug unless I removed the mufflers. What is the trick?
I follow Lonnie's school of thought.... snug then umph.
FYI. I reused my washers twice now and no issues. Will probably replace the next time (have them on the shelf now).
Thanks guys for answering those lingering questions!
I really enjoyed my afternoon/evening in the garage yesterday. I was also able to replace my front pads on the GT3 as well as bleed the brakes (both firsts)....
This is fun. I am definitely a Porsche addict. Looking forward to driving the Speedster this weekend after a bath....
what I do with my lift is raise it about 8" , put 6" wood block under rear wheels and lower it back down. Move the arm out of the way and drain oil. Tis only takes a minute or so to do.
I just did an oil change on my Bend-Pak scissor lift and just angled the arm at an acute angle forwards so the pad is out of the way of the drain hole and lifted the car -- no problem.
If it does not make sense, let me know and I'll snap a picture as the car is still up on the lift.
Marc
Last edited by Marc Shaw; 07-18-2008 at 05:44 PM.
Reason: typo
Thanks you guys ! I had not followed this and had some oil flowing out of the filter attachment and into the engine bay. It is really under pressure if its not done right.
Thanks you guys ! I had not followed this and had some oil flowing out of the filter attachment and into the engine bay. It is really under pressure if its not done right.
I get a philips screwdriver and a hammer then puncture a hole in the filter. That lets air in to allow the oil to drain. Put tape over the hole before removing the filter. The alternative is to loosen the bolt in the wheel well. I don�t like that idea with dirt etc in that area.
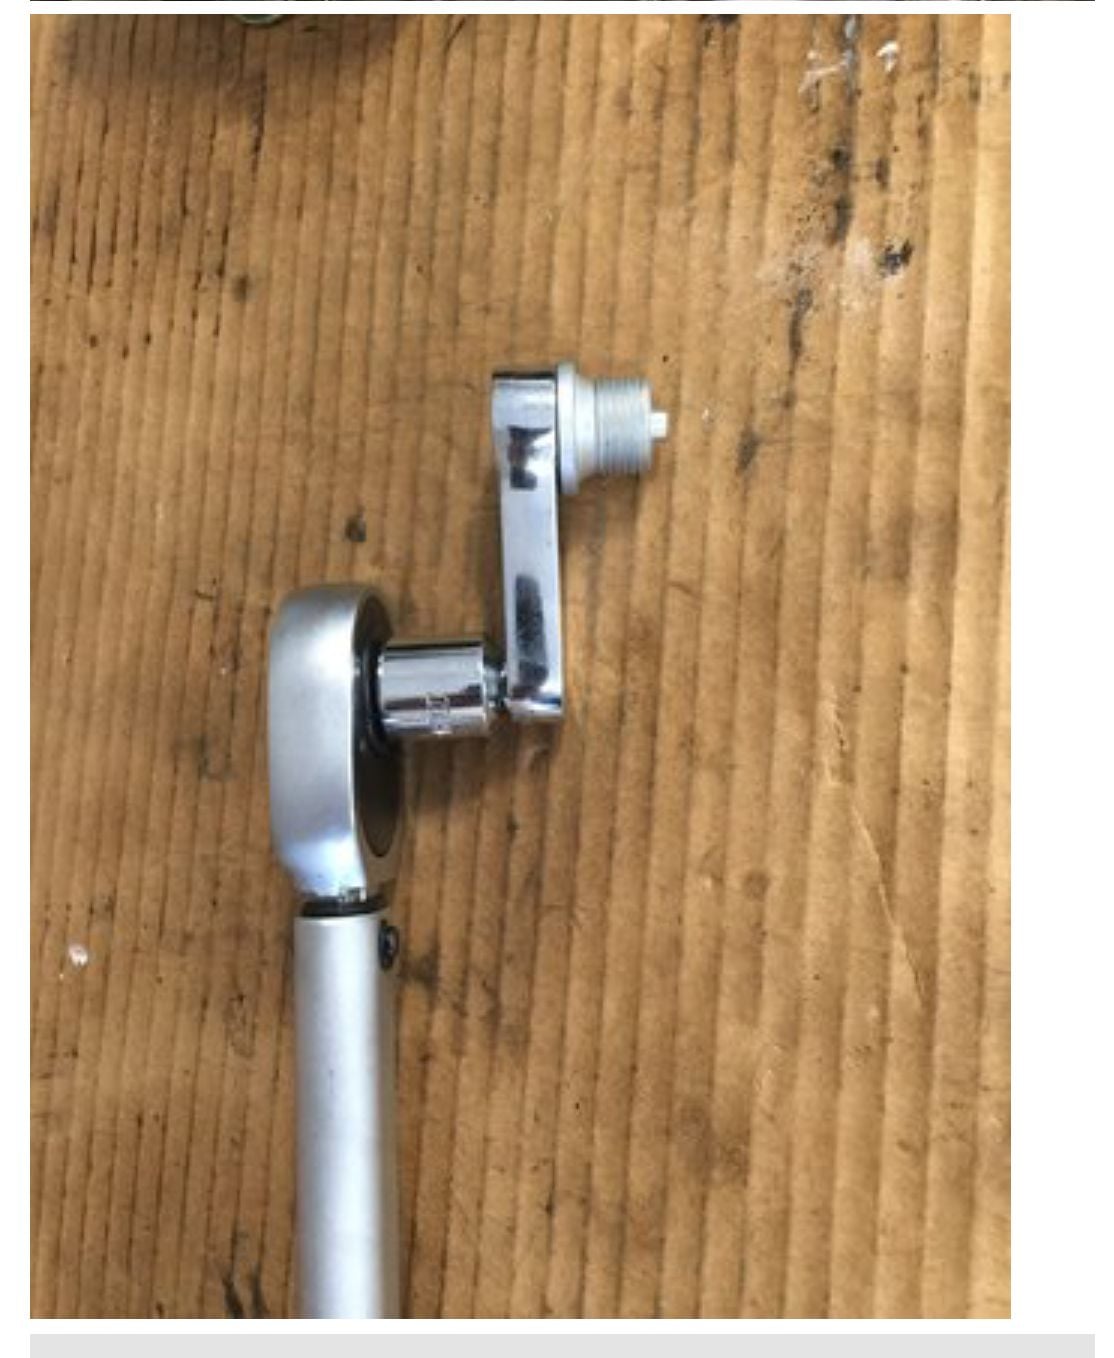
Another point with the above. Jason Andreas put me onto a tool that allows the engine crankcase drain to be correctly torqued
This tool falls into the 'as soon as you know it exists you must have it' category. I just ordered that tool based on this thread. I know it will make my next oil change a bit easier.
This tool falls into the 'as soon as you know it exists you must have it' category. I just ordered that tool based on this thread. I know it will make my next oil change a bit easier.
True, I never knew such a thing existed until Jason mentioned it. Not cheap, but neither is the engine we’re trying to keep full of oil. In reality I think many would overtighten in the absence of a torque wrench.
Just be be aware that with the dog bone extension positioned as shown in the picture the torque will be more than your torque wrench is set at. If possible always try to keep the dog bone extension at a 90 degree angle to the torque wrench. On the oil plug it really shouldn�t matter to much. On more critical nuts and bolts it could.
Once I saw John Mc's Torque Adaptor, I had to have one too. And JohnK964 your formula is spot on, but even better is the free App: NorBar Torque Wrench Extension Calculator (no affil).
Once I saw John Mc's Torque Adaptor, I had to have one too. And JohnK964 your formula is spot on, but even better is the free App: NorBar Torque Wrench Extension Calculator (no affil).
😁 didn�t know they had an app found the formula on their web site 👍

 07-16-2008, 02:43 AM