
Euro Turn Indicator
 03-05-2007, 01:49 PM
#1
Man of Way Too Many Avatars
Rennlist Member
Rennlist Member
Thread Starter

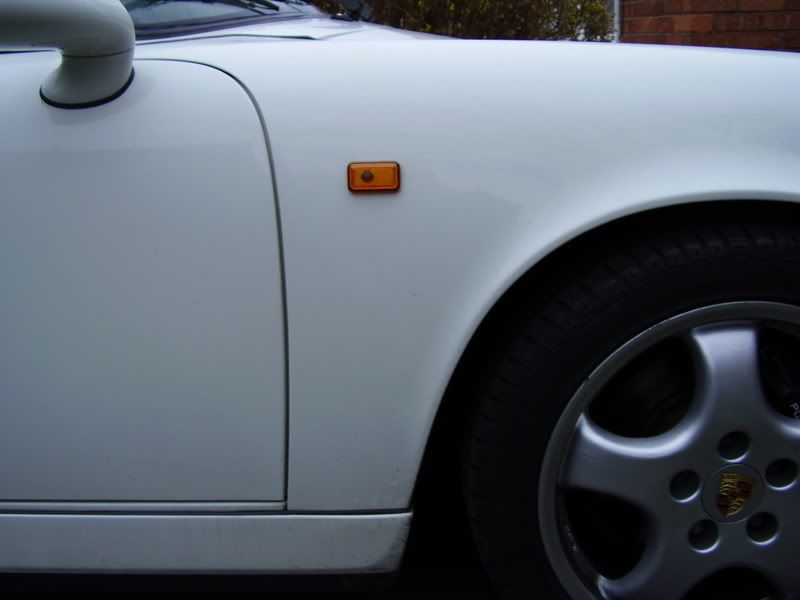
How hard is it to install the side Euro turn indicators? I have searched and searched but all I found is the guy on EBAY selling the lights that says all you have to do is drill holes and Porsche left the wiring there on non Euro cars. ") Anybody know a DIY or has anyone done this themselves?
Anybody know a DIY or has anyone done this themselves? 
Thanks
Kenny
Anybody know a DIY or has anyone done this themselves? Thanks
Kenny
 03-05-2007, 02:19 PM
#2
Rennlist Member

I am working on it. There are connectors inside the luggage compartment. Then you need to get the pin connectors and plastic connector holder. The plastic holder is from Porsche, but you need to get the electrical wire with pins from Audi. I could not find the correct pin in PET, but the AUDI guy had a box of pin connectors with wires already attached that I could choose from. So I now have the wires all run to the location inside the fender.
Now you heed a competent body shop that has a Euro fender to make a tempalet of the hole(s) from. Or someone in Europe to remove his light and take accurate dimensions for us.
Now you heed a competent body shop that has a Euro fender to make a tempalet of the hole(s) from. Or someone in Europe to remove his light and take accurate dimensions for us.
03-05-2007, 03:37 PM
#3
Man of Way Too Many Avatars
Rennlist Member
Rennlist Member
Thread Starter
Thanks Stevepaa!!! So the EBAY was right the wiring is there for the most part. Imagine that. Please keep me in the loop. I bet someone around here will help with the dimensions. Hint Hint. Do you have part numbers for the connectors and wiring?
Thanks
Kenny
Do you have part numbers for the connectors and wiring?Thanks
Kenny
03-05-2007, 04:05 PM
#4
Rennlist Member
I'll look tonight for any p/n I can find. Here are the connectors, left and right.
Also in my car, the right side marker harness connector was mistakenly connected to the right side heated window washer sprayer jet connector.
So the sprayer jet would only get electricity to heat the washer fluid when the right turn signal was on.
Also in my car, the right side marker harness connector was mistakenly connected to the right side heated window washer sprayer jet connector.
So the sprayer jet would only get electricity to heat the washer fluid when the right turn signal was on.
Last edited by stevepaa; 03-04-2013 at 12:50 AM.
03-05-2007, 06:02 PM
#5
Nordschleife Master
Originally Posted by stevepaa
Now you heed a competent body shop that has a Euro fender to make a tempalet of the hole(s) from. Or someone in Europe to remove his light and take accurate dimensions for us.
I'll see if I can pop mine out this weekend and take some photos.
03-05-2007, 07:06 PM
#7
Nordschleife Master
Originally Posted by stevepaa
Thanks.
We would need a picture, and accurate dimensions of the hole(s). Also, the distance from the door gap to the hole and from black sill line.
We would need a picture, and accurate dimensions of the hole(s). Also, the distance from the door gap to the hole and from black sill line.
).
Trending Topics
03-11-2007, 04:22 PM
#8
Nordschleife Master
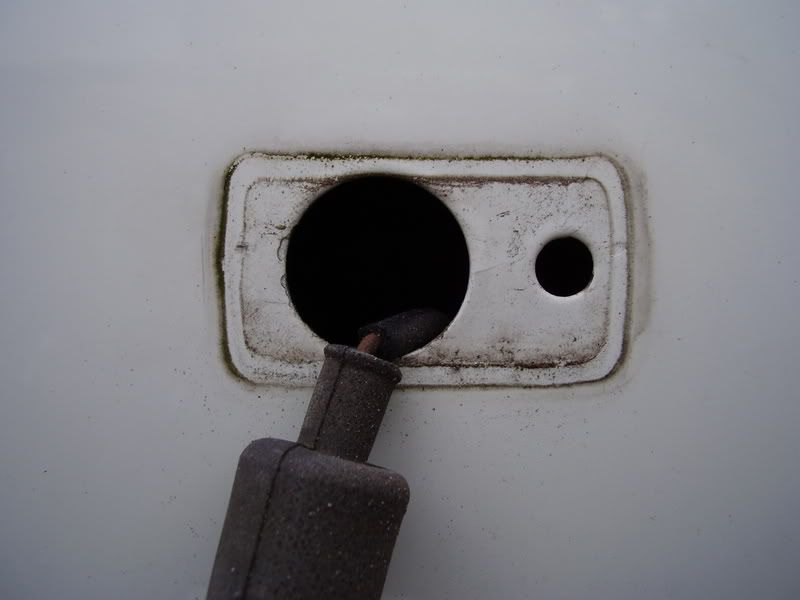
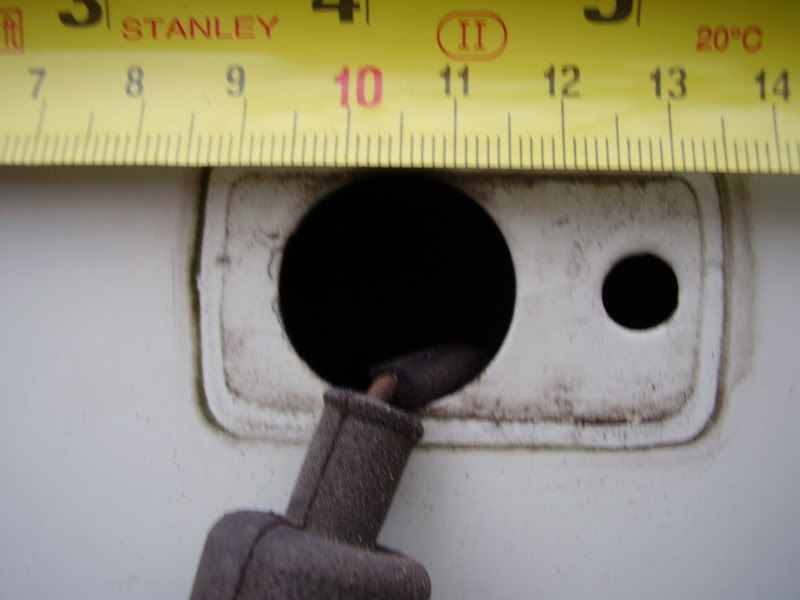
Guys, Here are the pictures I promised. To my surprise there are just two holes behind the side lens (large for the bulb assembly and small for the plastic retaining lug. Measurements were made to the centre of each hole. The pics should be self explanatory but just incase:
Door line to centre of large hole = 10.5 cm
Door line to centre of small hole = 12.7 cm
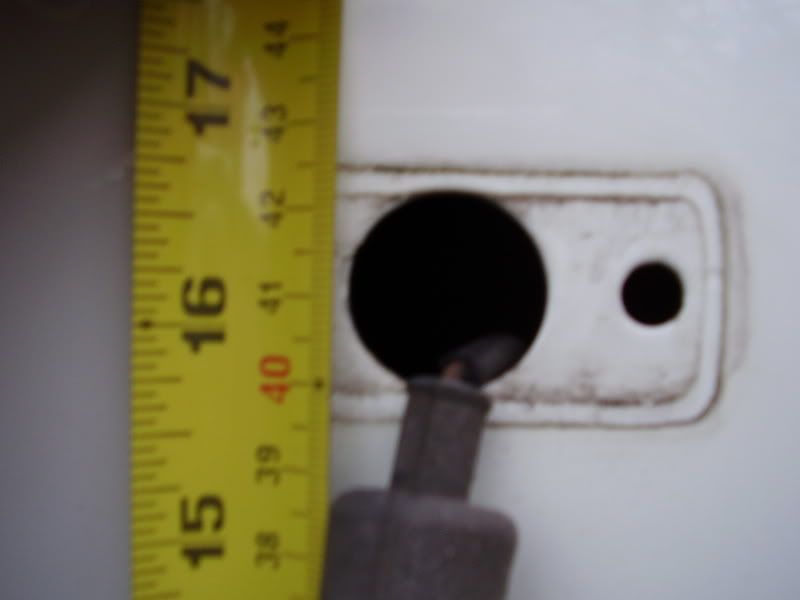
Bottom of fender to centres of both holes = 41.0 cm
The rectangular outline is just dirt!
Door line to centre of large hole = 10.5 cm
Door line to centre of small hole = 12.7 cm
Bottom of fender to centres of both holes = 41.0 cm
The rectangular outline is just dirt!
 03-11-2007, 09:05 PM
#11
Instructor
Join Date: May 2006
Location: Enumclaw, Washington
Posts: 147
Likes: 0
Received 0 Likes
on
0 Posts
Yeah thanks for the pictures. I recently ordered some signals.. hopefully i can get the courage to drill the holes though.. I have second thoughts about drilling..
03-11-2007, 09:17 PM
#12
Nordschleife Master
Originally Posted by kristianw
Yeah thanks for the pictures. I recently ordered some signals.. hopefully i can get the courage to drill the holes though.. I have second thoughts about drilling..
If I were in your shoes I would start with the large hole and then place the assembly next to it to check that you've got the right spacing for the second hole. It's the latter that is most critical as it is that one that houses the plastic retaining lug that makes it 'snap' into the fender.
Good luck Chaps!
 03-12-2007, 11:49 AM
#14
Poseur
Rennlist Member
Rennlist Member
I did this to my 1981 911SC-Turbo and used a pneumatic drill (let my body man do that drilling). I made up my own wiring harnesses. Don't forget to paint the edges of the cut and let it dry thoroughly.
03-12-2007, 03:09 PM
#15
Nordschleife Master
Originally Posted by stevepaa
Thanks. the holes look like 20 mm and 7 mm in diameter. Is that your measurement, also?
The hole dimensions from inside edge to inside edge are:
Large hole diameter = 24 mm
Small hole diameter = 7.5 mm
left edge of large hole to right edge of small hole = 40 mm
From this you can calculate that the two centres of each hole are separated by 24.25 mm.
Sorry I don't have anything more sophisticated than a rule to make the measurements (but I did check these extra measurements with two different makes of rule).