When you click on links to various merchants on this site and make a purchase, this can result in this site earning a commission. Affiliate programs and affiliations include, but are not limited to, the eBay Partner Network.
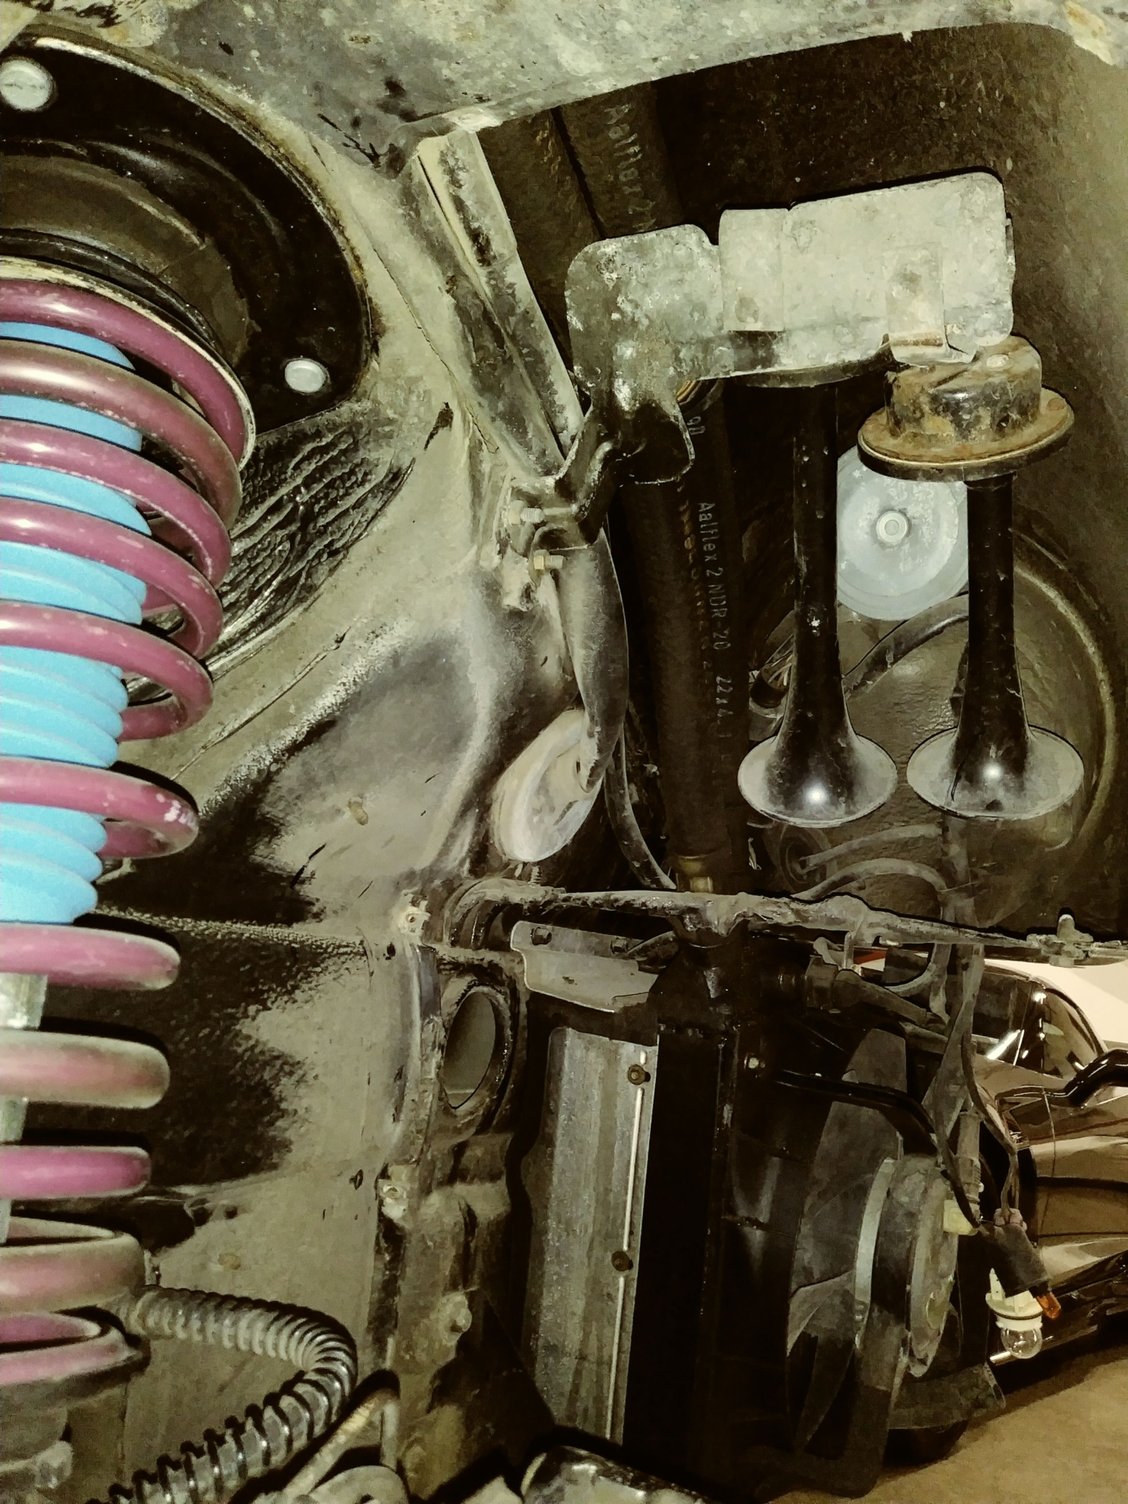
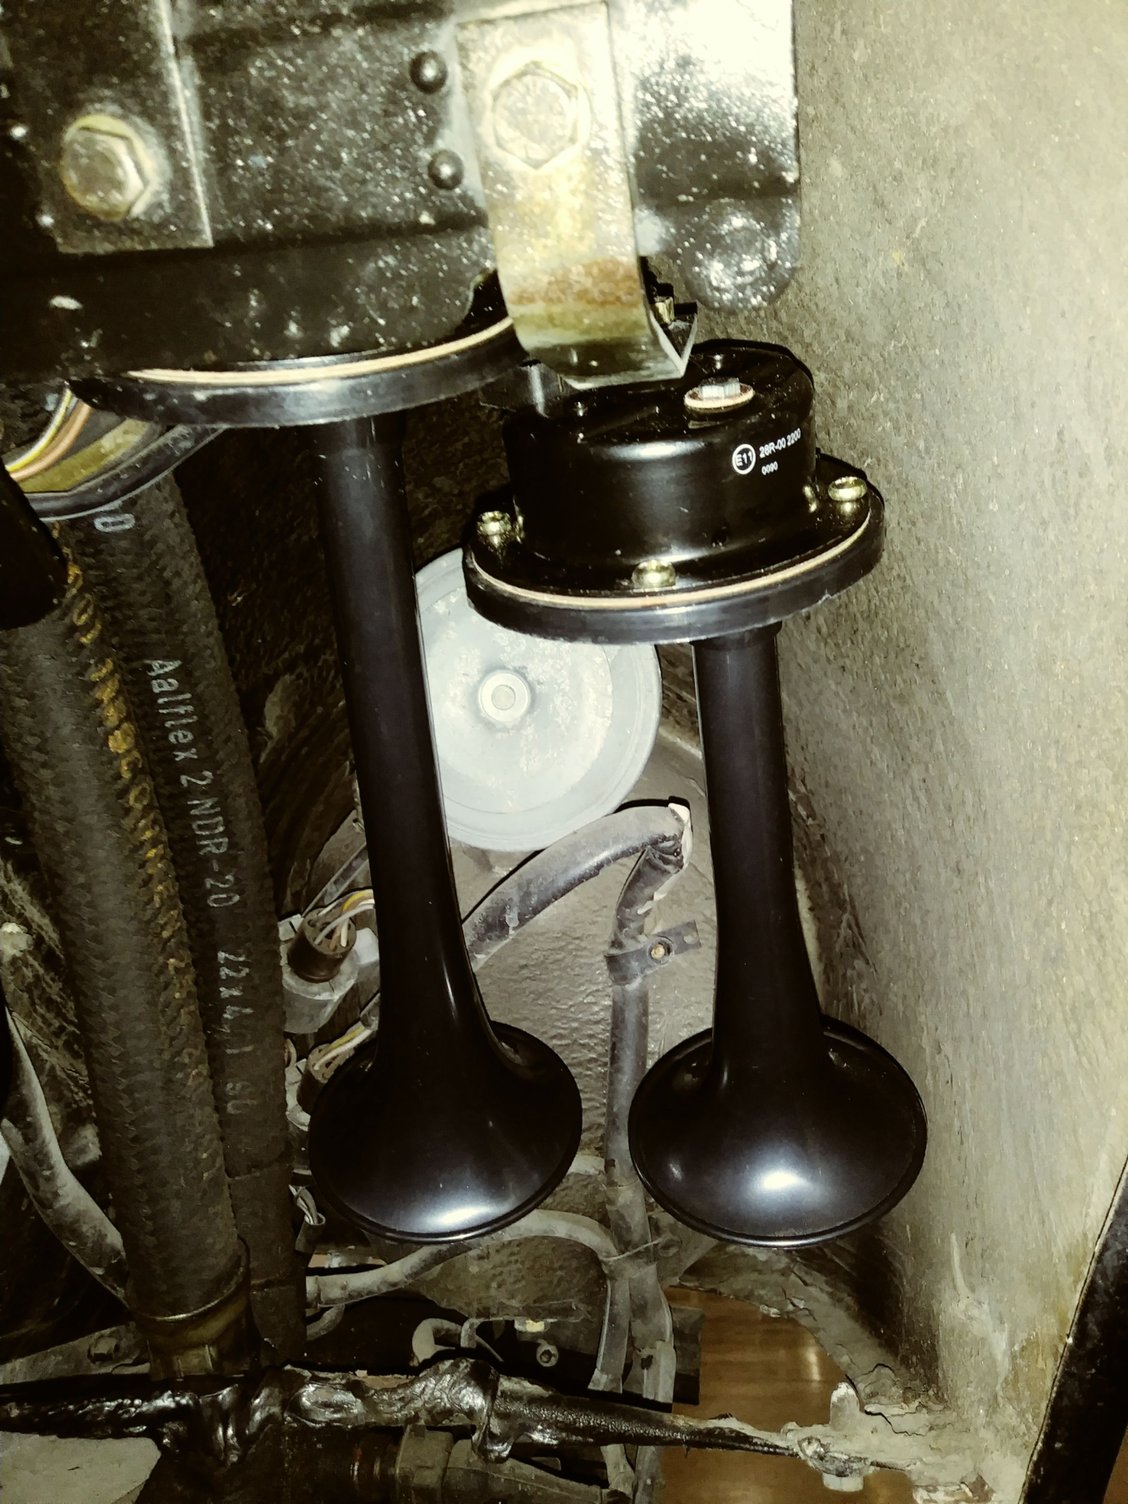
SOOooo, while my front bumper was off the car I thought it was a good idea to check the horns. BIG MISTAKE - I should have just REPLACED THE HORNS!!!! Instead - I checked the horns and they worked perfectly BUT they are still 30 year old horns. The bumper went back on the car and the horns worked for a few days before one of the horn elements went out . Lesson learned - I bought both horn elements and replaced them. It takes more time to get to them than it does to replace them. Hints: before disconnecting the wires from the old horns I marked on the NEW horns which color wire would go on the terminal on the right (you could mark the left). That way you know which wire goes where when it goes back together. Hint 2: pay attention to the position of the horns on the mounting brackets. The horns can be turned 360 degrees on the bracket but in some positions the horn wires won't reach and/or the horns won't line up when reinstalled. I started to remove the bracket that holds both horns. It is easier to remove the individual horns from the bracket.
What is it that makes you want to clean stuff when it's out of the car? Everything in this picture will be covered by the fender liner and yet I found myself cleaning these soon to be obscured items.
So looking back at post #11 - I indicated my goal was to get the car presentable for $25,000. Today I tallied the receipts at $25,093.18. I may regret this some day if I sell the car because there will be a permanent record of my expenses/investment in the car. That won't include my time on my back, knees, side, and feet working on it. What it does include is the cost of the car, the repair and storage bill against the car, towing, battery, front and rear interior parts, engine rebuild with upgrade to post '91 cylinders, rebuilt heads, distributor rebuild, shocks, springs, refinished factory Cup 1 wheels, new tires, fuel pump, muffler bypass, fuel injectors, fuel lines, oil tank hoses, odometer rebuild (broke the second time I drove the car after rebuild), wheel studs, wheel spacers, paint correction and respray of hood, bumpers, cowl and window frame (lucked out with no rust), windshield gasket, horns, engine bay liner, hood shocks, and hundreds of small bits and pieces that go along with the upfixing der Porsche. From that I can subtract $300 for the D 90 wheels and other bits I sold to bring the net so far to $24,793.19. I'm going to call this mission accomplished - even though I'm not saying there's nothing left to do.
I'll post some pictures of the Stage 1 "finished" car when I get the front bumper back on. Then I have a hit list of about 17 things to start working on that I'll call the start of Stage 2 - with a target budget of $5000. At least this time I'm starting with a running car. It's been great so far. Thanks for following along and encouraging my humble efforts.
@jpoint Congrats on hitting your budget milestone. I would opine to the contrary. This restoration thread has provided immeasurable added value to your car. If/when you decide to sell, despite what your final investment cost was, you can ask easily appropriate market value for it.
One suggestion is try and get the targa top restored if not already done so. That is one of the first things that potential buyers ask about these cars.
It�s been very entertaining and educational to follow this thread so please keep the updates coming.
Marine Blue and JAB12 - thanks. Stage 2 is all the little things that come up as you drive a 30+ year old car plus installing some of the parts I acquired during Stage 1 plus addressing some of the things I designated to "later" while trying to stay within Stage 1 budget. Top of the list are brakes - I have a set of 993 calipers/rotors for the car and new brake lines, etc. Another - as noted by JAB12 - is the Targa top. It was restored before I got the car and is in good shape but needs tuning. I learned when I rebuilt a couple targa tops on prior cars that fitting the top to the car is a borderline art form. There are many places where the top and the car can be adjusted to improve the fit but finding the right combination requires fine tuning the top and the car at the targa opening. Also the AC - which I got working initially but then had a seal fail in the compressor - which I'll replace. Front floor carpeting could use attention. I've seen some nice carpet options but might stick with stock look (see reference to steering wheel and door cards). I have a seat belt warning light to chase down, The door cards were altered for the stupid '90s vintage super stereo (now removed) so that's a detail to address (stock or ?). The car drives/rides pretty well but I'm going to review sway bar bushings, etc. I have a 993 front sway bar but I don't know if that is an improvement or even an option. There are some scuffs on the bottom of the driver's side rocker cover that could use attention. I'm considering improving the headlights to LED. The dome light (which provides very little when it's working) isn't working. There is still some left over Monster cable from the stereo that needs to come out and then I have to decide if I'll install a stereo or do a delete panel (I imagine the super stupid stereo that was once in the car was a prior owner's effort to overcome the sound of wind and engine that are the natural symphony of Targa driving). I have a Momo steering wheel and hub but need to decide whether it's a good look in a stock interior (suggestions and pictures welcome). At 1500 miles I'll have the valve adjustment and final tuning if needed (idle is just a touch low). I'm continuing to clean corners and crevices whenever I dig into a new area of the car and - as I said - you find things to do as you drive. The important part of Stage 2 is the "as you drive" part.
The $5000 budget is intended to keep me away from the slippery slope of going overboard but there is always that "while we're in here" factor to consider - especially when you find something mechanical to address. My close up look at various parts of the car have me convinced that the 62,000 miles are legitimate. In addition - the Carfax indicates the car wasn't registered from 2000 until I plated it in 2020. On one hand - that means I don't have 150,000 mile wear items to replace. Simultaneously - I likely have mechanical parts that are 30 years old notwithstanding the mechanical work already performed on the car. Things will break. I don't really lump the repair and maintenance items from driving into the original budget or the Stage 2 budget. Even a new car needs an oil change in time. That said - this is going to be more an event car than a daily driver. Finally - I have my '71 240 Z that probably hasn't been driven 100 miles in 20 years. That's on the project list - though you'll not be reading about it here (I guess I'll need to find a Datsun forum).
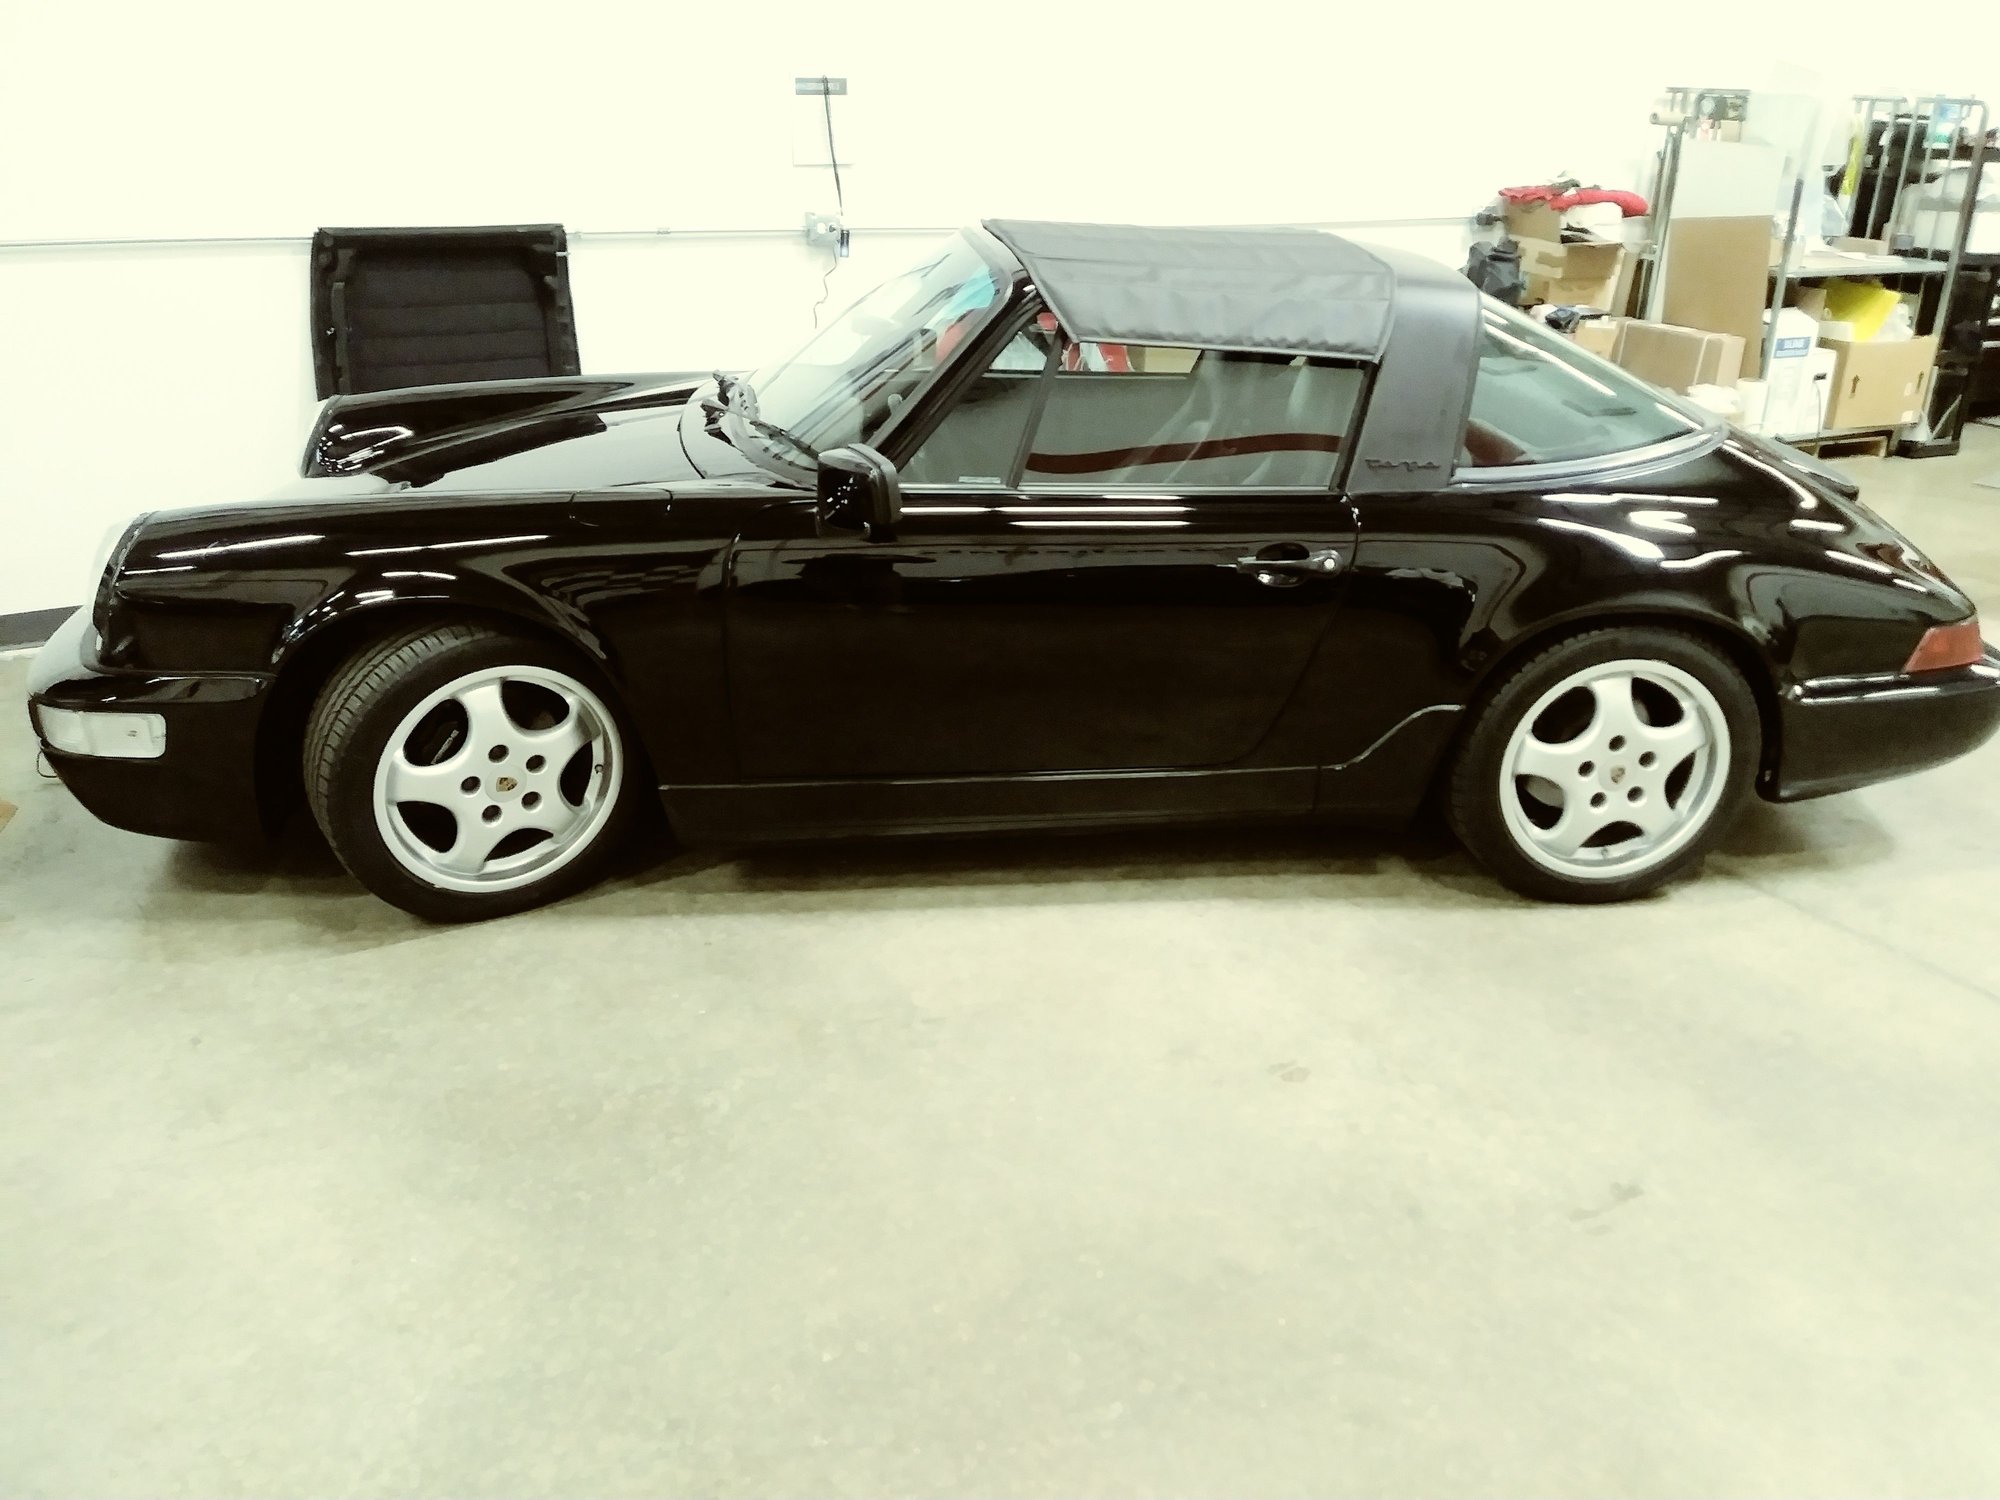
Here's a shot of the Targa at the end of Stage 1 and net $24,793.19 total spent including acquisition costs for the car. The guys at Batavia Body Werx cleaned up the rest of the body and it looks much better. My early pictures may not show it but the car had lots of contamination from sitting in the parking lot. The old paint still has flaws, scratches and chips so you can see the difference between the new paint and the 30 year old paint in some types of light. However, the work done on the body came in at a price that kept me under net budget and eliminated the obvious paint flaws. The car looks really nice, runs great, and is loads of fun to drive.
Here's a reminder of the starting point. It shows the paint flaws in the rear bumper but not the front, the chips in the Targa bar, and the hazy reflection of the contaminated paint. This was also a Flintstone mobile in that it would only move under push power.
You can't even see the wheel wells with the wheels on but I was holding the fender liners in my hands and the first thing you know - I'm elbows in. A rag dampened with old gas from years ago (removed from the fuel tank) did a good job on the dirty cosmoline. Rinse, clean with Super Clean, rinse, wipe, wax, replace wheels and hide all of this Before shot: When I did the shocks I did not take time to attack the years of grit in the wheel wells. I was just wanting to have the car ready for the engine to go back in.
So I was going to cheat a little at this point. I bought an accessory temporary top for the Targa for $249. I was thinking of not adding that to the total cost tab because it isn't needed. I just wanted one. On the other hand - most of the stuff that gets done on big budget builds is for stuff that isn't "needed" - it's all about wanting something more special. Temp Targa tops aren't pretty but they are really convenient. Much more convenient than I would have thought had I not had one for my first 3 Targas. I just bought this one from Sonderwerks and described it in detail in the Ultimate Targa Thread.
SOOooo, while my front bumper was off the car I thought it was a good idea to check the horns. BIG MISTAKE - I should have just REPLACED THE HORNS!!!! Instead - I checked the horns and they worked perfectly BUT they are still 30 year old horns. The bumper went back on the car and the horns worked for a few days before one of the horn elements went out . Lesson learned - I bought both horn elements and replaced them. It takes more time to get to them than it does to replace them. Hints: before disconnecting the wires from the old horns I marked on the NEW horns which color wire would go on the terminal on the right (you could mark the left). That way you know which wire goes where when it goes back together. Hint 2: pay attention to the position of the horns on the mounting brackets. The horns can be turned 360 degrees on the bracket but in some positions the horn wires won't reach and/or the horns won't line up when reinstalled. I started to remove the bracket that holds both horns. It is easier to remove the individual horns from the bracket.
What is it that makes you want to clean stuff when it's out of the car? Everything in this picture will be covered by the fender liner and yet I found myself cleaning these soon to be obscured items.
So I replaced my horns and encountered an unusual issue. The horns work great when the car is cold but sound weak and distorted when the car gets to operating temperature. Initial thought - defective horn elements. A pain in the butt to replace but not a big deal. The problem emerges - if I return the new horns to the Porsche dealer where I bought them they will work fine if bench tested. Solution (I thought) - take the car to the dealer and let the parts guy hear the bad horns while they are in the car. Well - now I encounter the pretzel logic of the year. The parts guy talks to a tech and they tell me that to warranty the horns I need to bring the car in and have service check the horns to eliminate "other" issues that might be causing the horn to malfunction. I explain that one of the old horns worked fine under all operating conditions and I just replaced both because I figured why go through the work of installing twice. Just replace both 30 year old horns at the same time. The explanation had no impact. So I ask - "so I'm supposed to spend $400+ for service to determine whether parts will warranty $130 worth of replacement horns?" The short answer was "yes - that's the program". I've owned 8 Porsches since I've been in the area of this dealership and bought 2 Porsches from Porsche dealers - just not this one. I guess I'm going to have to take them off the list as a source of parts too.
Got caught up on your thread--beautiful work John (as always). It's hard to believe you're only in your targa $25k.
As per your last entry--only a new car dealership can accept as logical a $400 expense--on your part, I might add--to warrant a $130 part. Sounds like Congress, easily spending someone else's money.
Re that dealer wanting to charge you to diagnose parts sold over-the-counter and in need of replacement under the states warranty: a call to Porsche Consumer Affairs would likely refute that. Not kosher.


 04-08-2021, 01:09 PM


 . Lesson learned - I bought both horn elements and replaced them. It takes more time to get to them than it does to replace them. Hints: before disconnecting the wires from the old horns I marked on the NEW horns which color wire would go on the terminal on the right (you could mark the left). That way you know which wire goes where when it goes back together. Hint 2: pay attention to the position of the horns on the mounting brackets. The horns can be turned 360 degrees on the bracket but in some positions the horn wires won't reach and/or the horns won't line up when reinstalled.