When you click on links to various merchants on this site and make a purchase, this can result in this site earning a commission. Affiliate programs and affiliations include, but are not limited to, the eBay Partner Network.
I have a ‘91 C4 that has a small oil leak in the right rear corner. I haven’t gotten the belly pan off to check the engine but I did get behind the rear bumper today to look at the oil filter housing. It has obviously been leaking but I have one question.
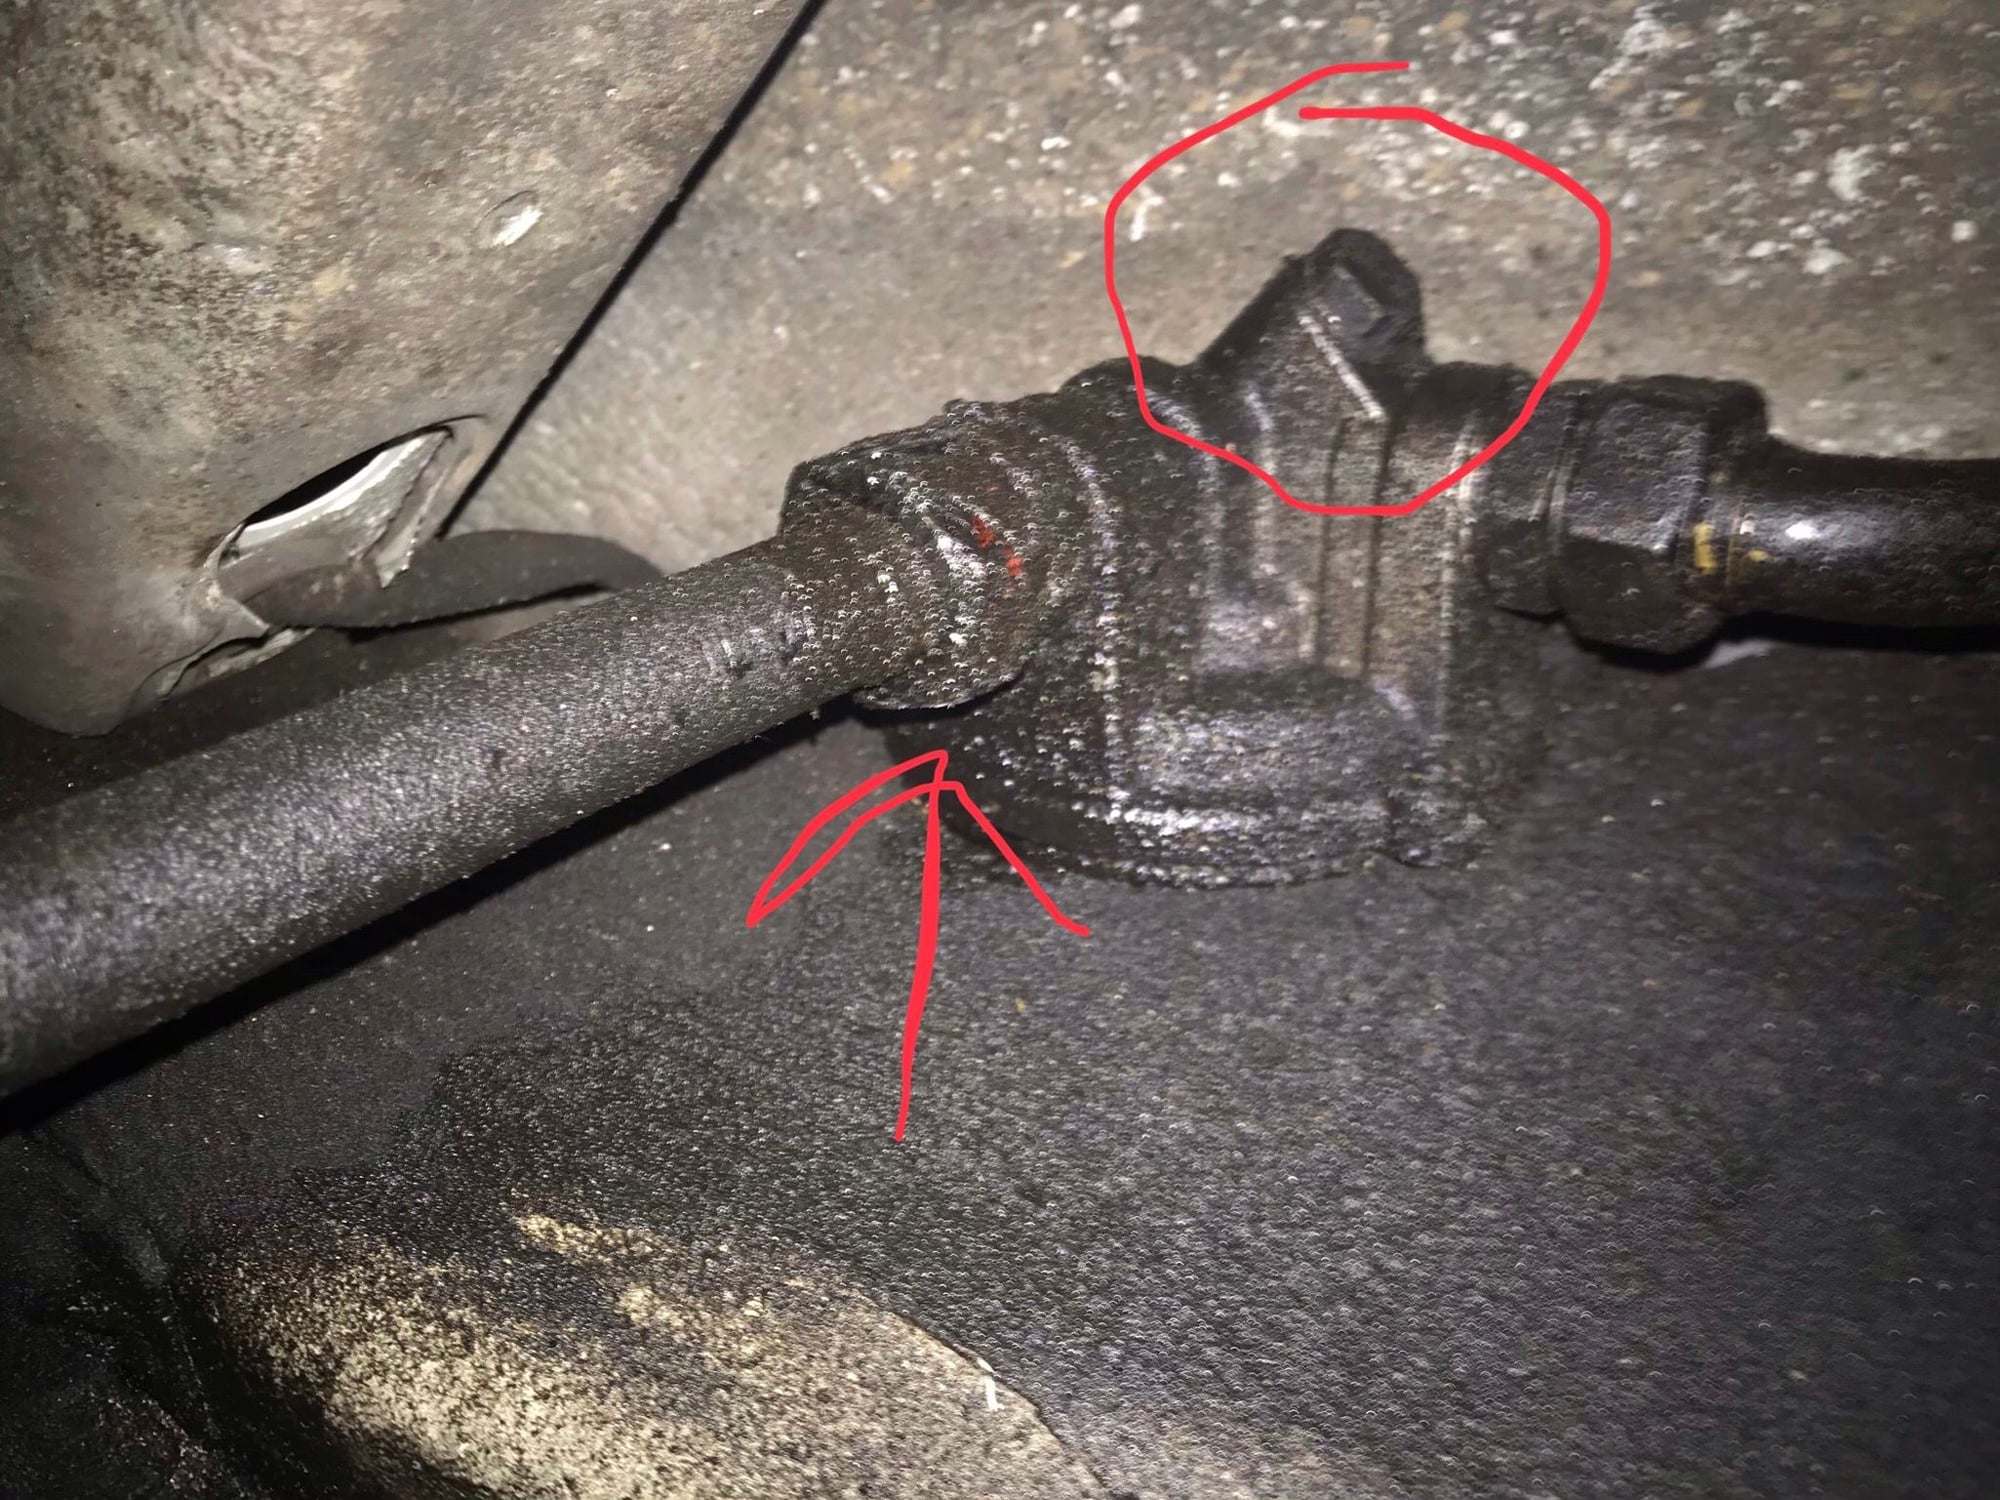
I sas was able to tighten the nut (circled) about 1/2 turn. I don’t have a wrench big enough to get on the connection (arrow). Would tightening the top nut stop this leak or could it be coming out of the top of that pipe as well? Thanks!
This is a pretty common area for a leak. Unfortunately oil easily gets blown around so it is not always immediately obvious where the leak is. So yes, as mentioned above clean really well first. You want to do that anyway. The small bolt you circled is used to allow air into the oil filter during an oil change so it does get used and could be the leak. Btw, some of us just punch a hole in the oil filter which has the same effect and you don't have to mess with that bolt. Also, make sure you don't over-tighten the bolts.
There is a special tool for the larger nut your arrow points to.
Not sure of the size off hand maybe 32 mm but he circled fitting can be done with an open end wrench you only can get about one flat of progress at a time
This is a pretty common area for a leak. Unfortunately oil easily gets blown around so it is not always immediately obvious where the leak is. So yes, as mentioned above clean really well first. You want to do that anyway. The small bolt you circled is used to allow air into the oil filter during an oil change so it does get used and could be the leak. Btw, some of us just punch a hole in the oil filter which has the same effect and you don't have to mess with that bolt. Also, make sure you don't over-tighten the bolts.
There is a special tool for the larger nut your arrow points to.
Good luck.
Exactly same issue couple of years back - leaking oil from the housing finding its way down the oil pipe and on to the secondary muffler. Removed the pipes and housing and made good (pic below). The filter bleed screw I replaced with new washer but as you say, it's hardly ever used (I find I don't need it once I've allowed enough time for the system to drain). New sealing washers too for the main pipes. Adjustable wrench worked for the large unions. Hope a simple nut tightening is all you require Duane.
Wow, that shiny new part makes mine look terrible. I have a large adjustable wrench but it seemed to be ~1 mm shy of fitting on the nut. I will try to clean as much as I can out of there and see if I can get that wrench to work. I appreciate everyone's feedback. Thanks
Mine was certainly bad with oil sludge and dirt. Seemed an opportunity when doing the oil change to whip it out and take the time to sort it out, clean up with brake cleaner, dry off then spray with Al paint. Makes it much easier to keep an eye on it now for any future leaks. Good luck.
I had a similar issue with my filter housing and I had to replace an oil line. I used the special oil line wrenches that pelican sells. Not sure if they are needed but they worked.
I had a similar issue with my filter housing and I had to replace an oil line. I used the special oil line wrenches that pelican sells. Not sure if they are needed but they worked.
That would work but as I stated the regular 36 mm will work it is slow about a flat each turn
Thank you.
I have the same area leaking on my car and will need to replace at least one of the lines soon as it’s dripping directly onto the exhaust. I took a look yesterday and it’s a complete mess with oil caked everywhere. Guess I’ll need to clean it up first so I can see exactly which fitting/line is leaking. I found the above diagram online and I have a good feeling the leaking part is number 54.
I have a new OE factory part #54 never used if you find it hard to come by.
BTW the only easy way to do it is to drop the left exhaust.
I have a new OE factory part #54 never used if you find it hard to come by.
BTW the only easy way to do it is to drop the left exhaust.
I appreciate that, thank you.
I wasn’t aware the left side exhaust had to come off 😳
I’m sure I could do it, but not if an exhaust stud were to break which I hear is very common...silly me for thinking this would be an easy fix 😂

 03-10-2019, 11:14 AM