When you click on links to various merchants on this site and make a purchase, this can result in this site earning a commission. Affiliate programs and affiliations include, but are not limited to, the eBay Partner Network.
You will absolutely have to bleed the entire system when you do those seals.
It's easy to do, and can be done during a full bleed. So you start w the seals, get those done and reinstalled (takes an hour if you are going slow) and then just run through the bleed.
Full bleed takes me an hour and a half if the car has been bleed in the recent past. (I take longer if it's 10 year old fluid)...
Oh - and when other people are in the garage, even longer cuz we always get sidetracked...lol.
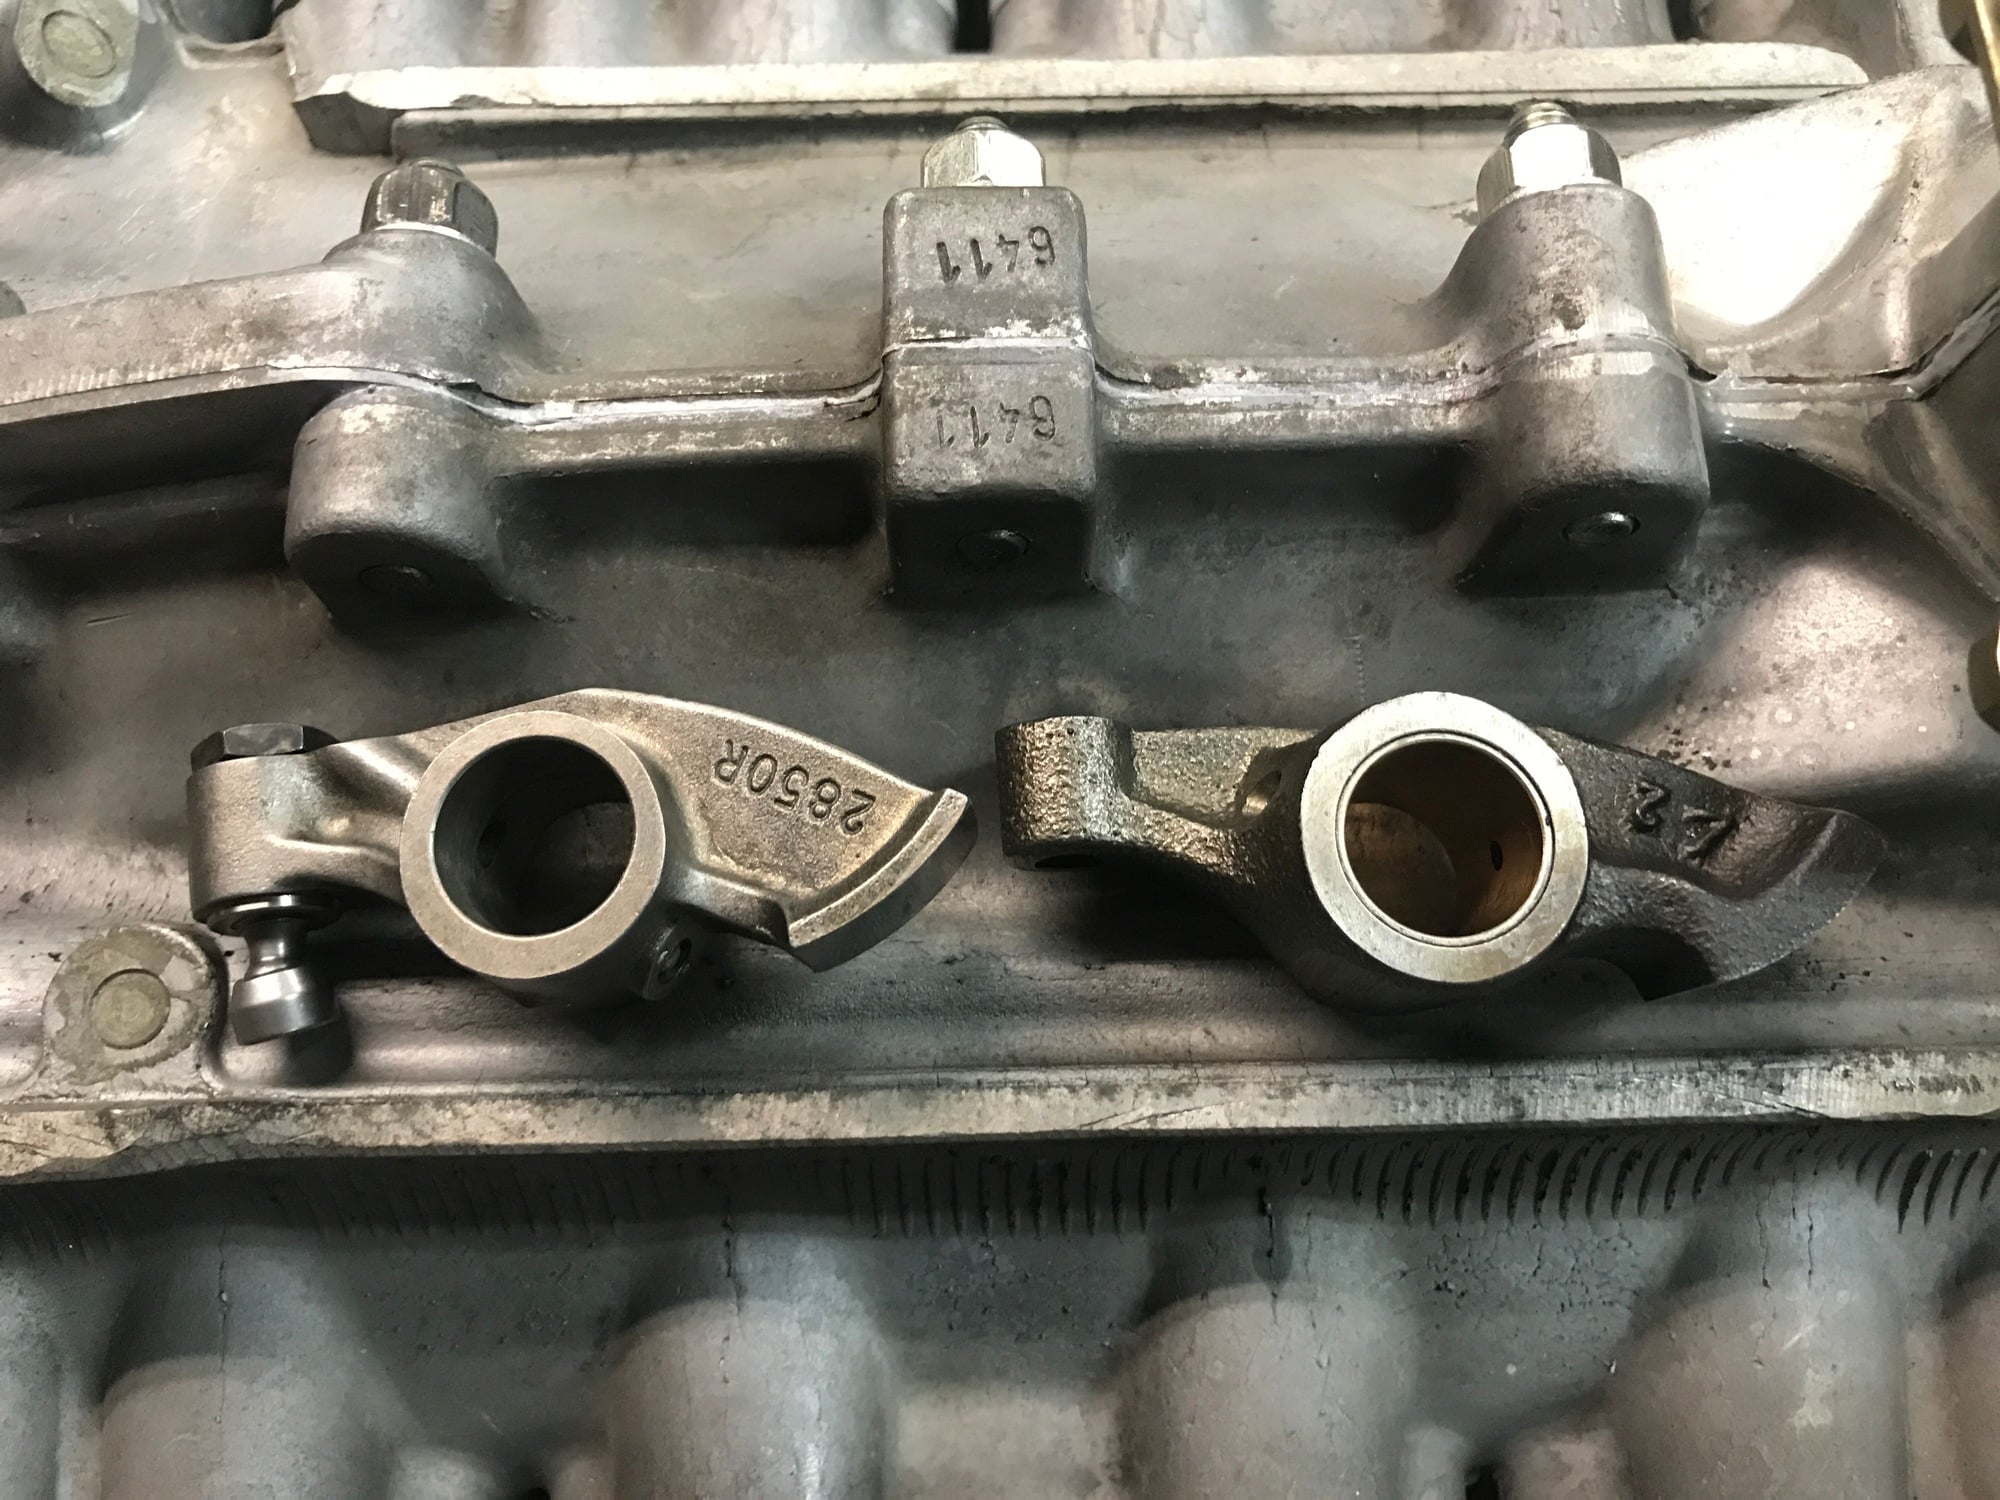
So I have my modified 993 rockers finally. These were 993 rockers with hydraulic lifters i had modified to 993 RS spec replacing the hydraulics with mechanical. The 993 units are forged instead of cast and save .75 pounds over the cast iron style.
You will absolutely have to bleed the entire system when you do those seals. It's easy to do, and can be done during a full bleed.
Thanks. Might mean when done I take it to my local guys for a hammer bleed (otherwise I think you can achieve the same by operation the cabin diff lock switch a number of time when bleeding).
Get two m6 stainless steel speed bleeders and install those. The only thing you need the hammer for is the diff lock bleed.
With the speed bleeders, you crack one open, work the switch for a while in the cabin, and every time you turn on and off the switch, a little squirts out. It's slow, but you can bleed them this way w the speed bleeders without the hassle of having someone work the switch while you open and close the bleeders...so no hammer needed this way.
We can thank nik for that little trick...thanks nik!
Ah yes, had these bleeder bookmarked. Good to know that for the C4 the hammer is only used for diff lock bleeding - wasn't sure (with the C4 combined brake, pre-pressurised, ABS, diff lock system circuit etc) if the hammer was required to activate these system components too.
Funny thing is when I had been using the car at least weekly for many months up to about 5-6 weeks ago the fluid level was fine (but kept an eye on it before each use, despite no cabin warning light). However, been left for 6 weeks in the garage and when I took it out this afternoon and checked before setting off the level was now a tad below the min line. Seems the more I use it the less it leaks!
Hat off to those who are rebuilding themselves their engine .
Lots to do there, to get things done properly in France it is difficult and a very long process,
mys short list is (done at the moment);
Paint the back of the car, roof, wings lid and bumper
Refit properly plexi rear window flush to body
993 1/4 window seals
remove more insulating mats under my RS carpets
Fit carbon rear lid and RS spoiler, custom made by Getty Design
Trying to remove some of the unused wires form the harness.
remove steering pump and all piping, fit Mercs electric pump in the front trunk.
Drill rear beam, remove all heat shields from the rear, cut holes to the rear bumper, fit grills for venting.
Remove engine cooling tin work and fit FRP one
Possibly fit a Wiecher rear rool bar with Schroth harness profit II (witch I have for many years)
still thinking on removing AC.
Next year , FRP front fenders ( I already have) and carbon kevlar doors with plexi windows and Vitaloni mirrors.
Interesting - tell me more! looks like one of them us bushed and the other is not? I have a great machinist - where does one source the adjuster section for this?
Haven�t been able to drive for a week because RE71Rs don�t mix with snow, and it�s not looking better any time soon, so decided to address some little projects.
Several weeks ago, I replaced the steering column lever assembly because one of the previous owners cut down the wiper stalk to a nub. Apparently claimed they would hit it on the track and wanted it out of the way, and this seemed like the best option? Still not sure how it was possible to hit considering it has a dished Momo as well. Anyway, took the old one off and put the new one on, put the wheel back on and went for a drive. Came back, took the wheel off because it was off by a spline, put back on and realized the horn wouldn�t work. Searched rennlist, took a look at the old one and realized I didn�t swap over the horn contact switch needed for aftermarket wheels. Took the wheel off, inserted contact, put wheel back on, horn still didn�t work. Said F it and left it.
Today, decided to fix it so I took the wheel off, bent the copper contact even more than it was and tested it before putting the wheel all the way on. Beep, Beep! Tested it after every step of putting the wheel back on and now the horn works again. Yay! Now I can make noise at people who keep pulling out in front of me lately.
Next, I wanted to replace the battery in the key since I�ve been driving at night and can�t see the ignition switch because I have the interior lights turned off because I thought they were broken (always staying on). Replacing the battery didn�t work, so I ordered a new key head and decided to see why the lights stayed on. Search rennlist and see an aside post that the lights turn off after 20 seconds. Nahhh, it couldn�t be that simple? Turned the lights on, shut the door, didn�t turn off after 20 seconds. Search some more and see references the hood is tied to the lights. My hood is open to keep the battery on a tender, so I looked on how to trigger the switch. Everyone kept mentioning a switch by the hinges but I couldn�t find anything by the hinges. Look for switch, search rennlist, look more...
Finally found a post by someone who said the switch was by the latch on their car. Looked down there and finally found it underneath the latch. Figured out how it grounded to the latch and wedged something in to open the connection. Turned on the interior light, shut the door, and waited. 20 seconds later, click, lights went out... So problem was me not knowing enough about the car, but it�s still new to me.
Did some other minor things (airbag bridge connection), learned more about the car, and feel super happy about where the car is at.
Next I need to figure out why fumes are coming into the cabin when the heater is on and I let off the gas. Crack in headers? Oil on heater tube rubber? Normal with no cats?

 12-20-2018, 02:23 PM


 looks like one of them us bushed and the other is not? I have a great machinist - where does one source the adjuster section for this?


