Changing Spark Plug Cables
 02-13-2004, 11:38 PM
#1
Professor of Pending Projects
Rennlist Member
Rennlist Member
Thread Starter
Changing Spark Plug Cables
To eradicate the Xmas effect in my car. After replacing the starter and the positive cable connector at the starter bolt, I decided to replace the plug cables. Old ones were showing sings of wear and sparks were all around (you could see the sparks at night and all lights off� what a light show that was). Afraid this would cause more serious problems with the DME I order a set of cables. Buying this directly from Porsche was prohibited (in the upper US$800.00 for the set) so I got them from another vendor.
Distributor caps (2), rotors (2), oil filter, fuel filter, air filter, 12 Spark plugs � US$500.00. I also ordered a spare DME relay to keep it in the glove box and decided to order to new coils (seldom do they fail� but since it is a 13 year old car� what the heck!). Since the headliner in my top is torn I also sent for one (I already have new elastic straps to replace the old ones) - Total of the order with shipping - US$790.61
Parts came in today so I started taking out the stuff that is in the way to gain access to the cables�first time I do this in this car. Those that want to do it � seems complicated at first, but it is really easy� it just takes a lot of time since the cables are held in place in many points and reaching the bolts that hold them in place is kind of difficult�
I started by removing the covers on the sides of the engine (since I do not have the tray installed reaching these covers is fast and easy).
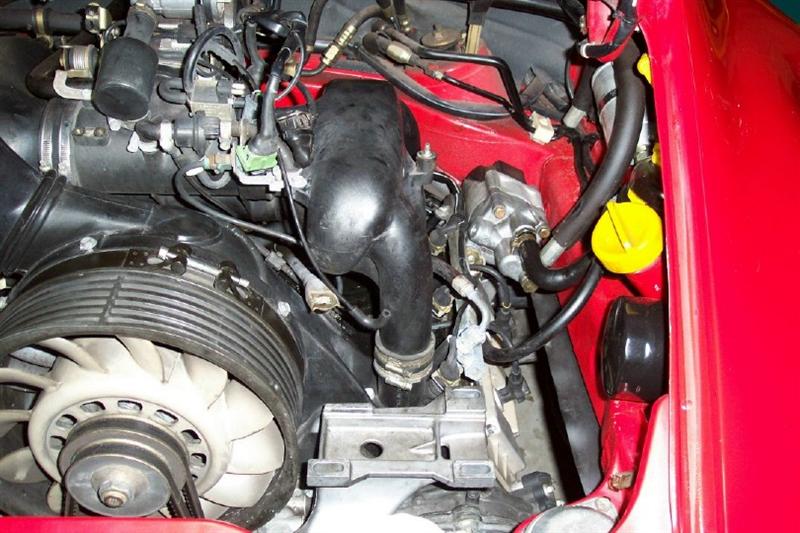
Then I removed the two bolts holding the cables that go over the fan housing. Inside this plastic curved cover you will find three smaller covers holding cable 4,5,6 in place. They snap off easy releasing all three cables.
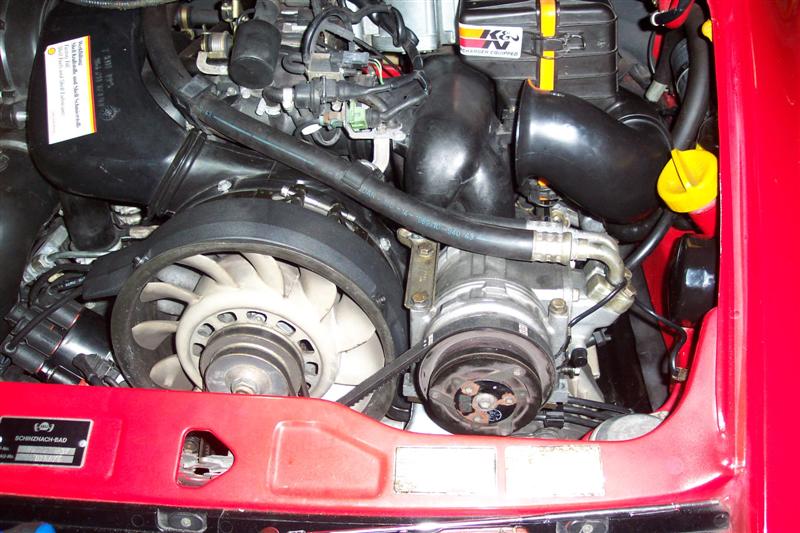
I removed the a/c compressor to gain better access (the cables run under the A/C bracket so getting to them with the compressor in place is a pita) and also removed the airflow meter with the air filter housing. This will make it a lot better to get to the upper row of plug cables and the bolts holding them in place.
I will try to post photos along the way...

To eradicate the Xmas effect in my car. After replacing the starter and the positive cable connector at the starter bolt, I decided to replace the plug cables. Old ones were showing sings of wear and sparks were all around (you could see the sparks at night and all lights off� what a light show that was). Afraid this would cause more serious problems with the DME I order a set of cables. Buying this directly from Porsche was prohibited (in the upper US$800.00 for the set) so I got them from another vendor.
Distributor caps (2), rotors (2), oil filter, fuel filter, air filter, 12 Spark plugs � US$500.00. I also ordered a spare DME relay to keep it in the glove box and decided to order to new coils (seldom do they fail� but since it is a 13 year old car� what the heck!). Since the headliner in my top is torn I also sent for one (I already have new elastic straps to replace the old ones) - Total of the order with shipping - US$790.61
Parts came in today so I started taking out the stuff that is in the way to gain access to the cables�first time I do this in this car. Those that want to do it � seems complicated at first, but it is really easy� it just takes a lot of time since the cables are held in place in many points and reaching the bolts that hold them in place is kind of difficult�
I started by removing the covers on the sides of the engine (since I do not have the tray installed reaching these covers is fast and easy).
Then I removed the two bolts holding the cables that go over the fan housing. Inside this plastic curved cover you will find three smaller covers holding cable 4,5,6 in place. They snap off easy releasing all three cables.
I removed the a/c compressor to gain better access (the cables run under the A/C bracket so getting to them with the compressor in place is a pita) and also removed the airflow meter with the air filter housing. This will make it a lot better to get to the upper row of plug cables and the bolts holding them in place.
I will try to post photos along the way...
 02-13-2004, 11:42 PM
#2
Professor of Pending Projects
Rennlist Member
Rennlist Member
Thread Starter
A few photos:
A/C Compressor out of the way... also notice the curved plastic over the fan housing already removed... along with cables 4,5,6

Another shot:
A/C Compressor out of the way... also notice the curved plastic over the fan housing already removed... along with cables 4,5,6
Another shot:
02-14-2004, 12:10 AM
#3
Professor of Pending Projects
Rennlist Member
Rennlist Member
Thread Starter
ahhh crap!  they sent me the wrong cables... I got cables for a 993 instead of the cables for a 964
Project halted for tonight.
Different rubber grommets:

Different coil cable lenghts:

and different plug cables lenght:

time for a drink and to surf the net
they sent me the wrong cables... I got cables for a 993 instead of the cables for a 964 Project halted for tonight.
Different rubber grommets:
Different coil cable lenghts:
and different plug cables lenght:
time for a drink and to surf the net
02-14-2004, 12:16 AM
#4
Professor of Pending Projects
Rennlist Member
Rennlist Member
Thread Starter
A good thing that came from all this is that I found the source of an oil leak... I thought it was motor oil but turned out to be from steering fluid from the low-pressure hose that goes from the power steering pump to the reservoir.

 02-14-2004, 02:33 AM
#6
Professor of Pending Projects
Rennlist Member
Rennlist Member
Thread Starter
Originally posted by garrett376
...And did you finally fix that starter problem???
...And did you finally fix that starter problem???
The first time that happened was when I initially bought the car. At that time it was a weak battery and a trip to Sears resolved it. Thinking it was the same problem I went and bought one of those optima red top battery. After fixing the starter (well... you know) and the clutch slave cylinder (since I had a weird noise when releasing the clutch and the whole clutch has less than 15,000miles, I found here that sometimes the slave is the culprit... sure enough) I took the car for a drive that night and the warning lights came back on... quick search here led me to the ignition/spark plug cables. Did the test at night to double check...sprayed some water mist over the cables and distributor caps and the light show was impressive...
and here we are...
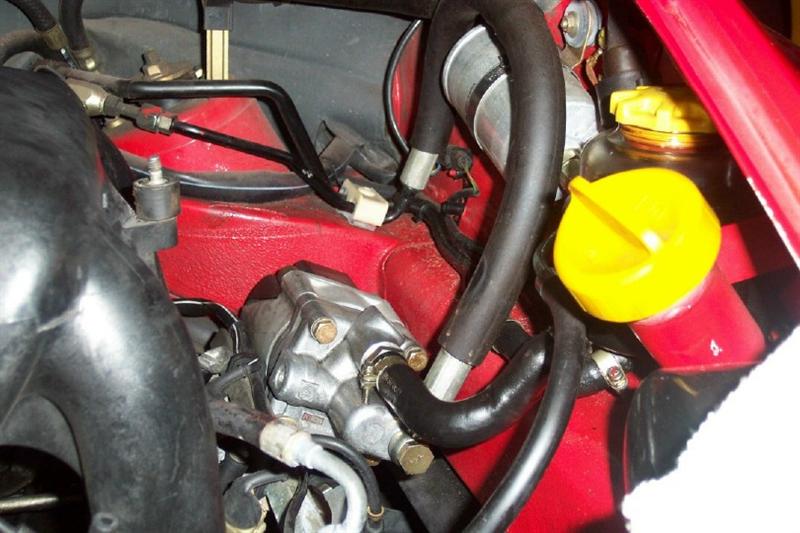
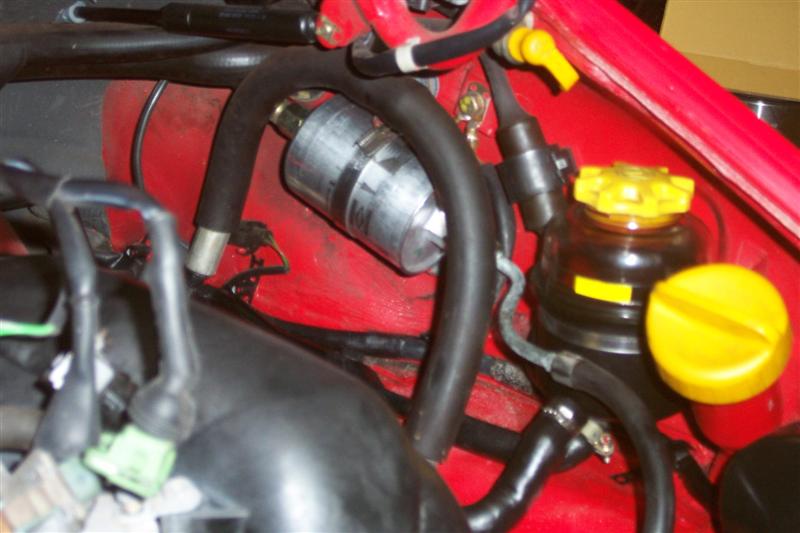
With all this stuff out of the way I am taking the time to check for any oil leaks... when I had the dealer repair the broken head stud, they replaced all seals in the car. I need to check the invoice but I am almost positive that I also asked them to change the oil pressure sender unit. With the steering fluid leak I am not sure if the oil I found was all from there or what... I will have to continue looking once I replace the leaking hose.
02-19-2004, 05:30 PM
#7
Professor of Pending Projects
Rennlist Member
Rennlist Member
Thread Starter
All right!!! Wife called me saying that the cables arrived... trying to get out of work early to finish this. Will be taking a few more photos and posting them here. Let me know if there is a specific area/photo anyone here needs.
Trending Topics
02-19-2004, 05:36 PM
#8
Addict
Rennlist Member
Rennlist Member
Jaime,
Could you please photograph (before or after, doesn't matter to me) where the wires are clipped to the valve cover on the bottom, passenger side? My car has broken clips on the valve cover, and it's not clear how the wires are routed.
Thanks.
-Eric
90 C2
NER/PCA
Could you please photograph (before or after, doesn't matter to me) where the wires are clipped to the valve cover on the bottom, passenger side? My car has broken clips on the valve cover, and it's not clear how the wires are routed.
Thanks.
-Eric
90 C2
NER/PCA
02-20-2004, 12:34 AM
#9
Professor of Pending Projects
Rennlist Member
Rennlist Member
Thread Starter
Originally posted by Eric Kessel
Jaime,
Could you please photograph (before or after, doesn't matter to me) where the wires are clipped to the valve cover on the bottom, passenger side? My car has broken clips on the valve cover, and it's not clear how the wires are routed.
Thanks.
-Eric
90 C2
NER/PCA
Jaime,
Could you please photograph (before or after, doesn't matter to me) where the wires are clipped to the valve cover on the bottom, passenger side? My car has broken clips on the valve cover, and it's not clear how the wires are routed.
Thanks.
-Eric
90 C2
NER/PCA

and one more:
 02-20-2004, 12:42 AM
#10
Professor of Pending Projects
Rennlist Member
Rennlist Member
Thread Starter
A few photos:

OK, right side is done.
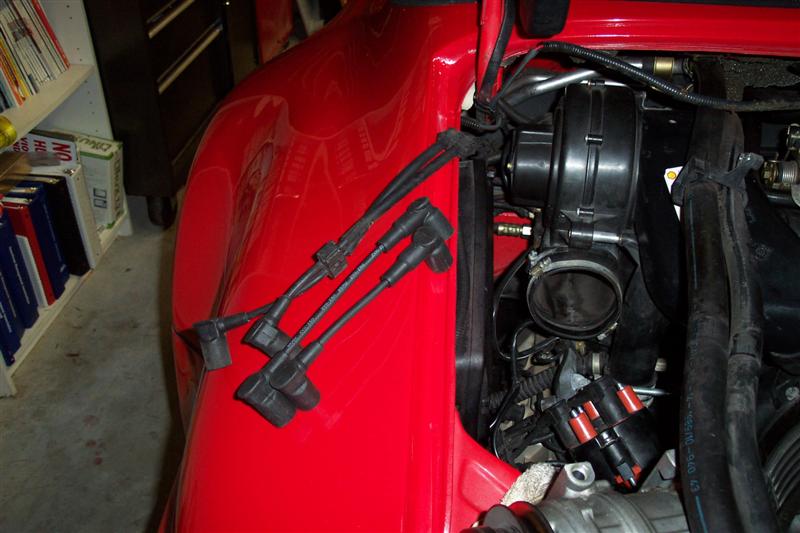
Here is a photo of the new right side cables (the right one this time). They come with the plastic cover that goes over the fan housing, numbered, Beru...
I also took the opportunity to change the spark plugs (last time I could not find the Beru or Bosch and used some Champions... good thing it was only for 400 miles... could not sleep at night thinking the tip of the Champions would break. Got an additional 12 to keep them for the next 15k service).
and also changed the fuel filter... easy task with all that stuff out of the way.
That is all for now... will tackel the left side tomorrow.
OK, right side is done.
Here is a photo of the new right side cables (the right one this time). They come with the plastic cover that goes over the fan housing, numbered, Beru...
I also took the opportunity to change the spark plugs (last time I could not find the Beru or Bosch and used some Champions... good thing it was only for 400 miles... could not sleep at night thinking the tip of the Champions would break. Got an additional 12 to keep them for the next 15k service).
and also changed the fuel filter... easy task with all that stuff out of the way.
That is all for now... will tackel the left side tomorrow.
02-21-2004, 11:52 PM
#11
Professor of Pending Projects
Rennlist Member
Rennlist Member
Thread Starter
Well... I worked on the car last night and finished around 2:45am today. Took the car at that time for a test drive and I am not sure if it was the time, the empty roads, whatever it was it felt smoother and faster.
Here are some photos of last night. I started by finishing the right side (filter housing, A/C compressor, etc):

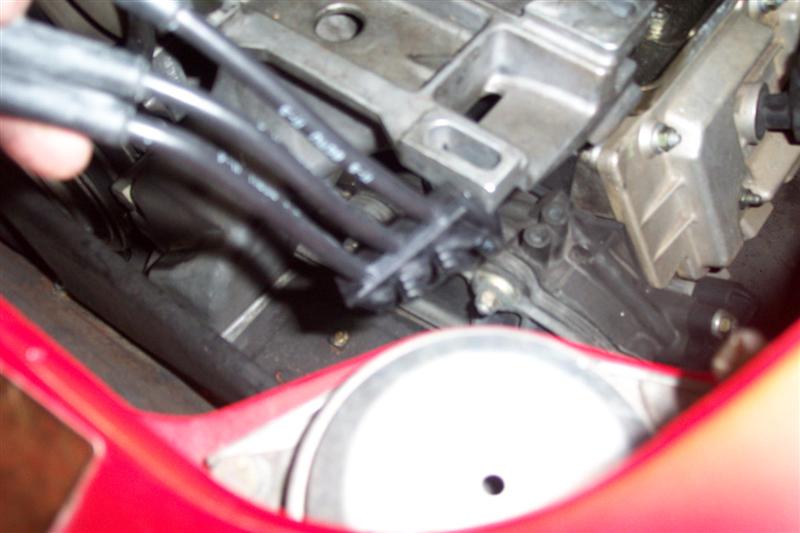
Then I started to work on the driver side. Changed cables and replaced the spark plus for the Beru I bought. Pretty much usual maintenance...
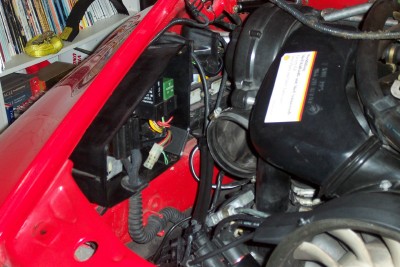
Then came time to take the coils (I had purchased these as a preventive measure, good thing I did). To have better access to that area I removed the plastic housing/box that hold the fuses and relays...
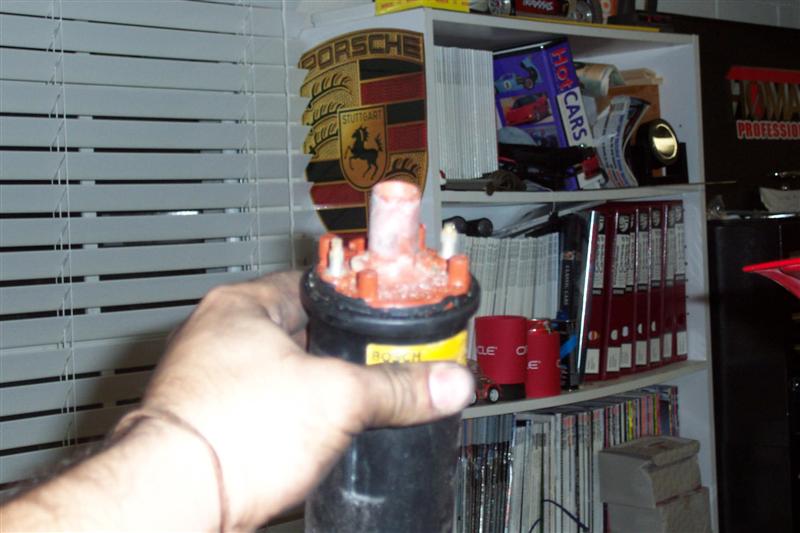
As you can tell one of the coils did not look good at all:

I had to remove the heat sink to get to the second coil...

Here are some photos of last night. I started by finishing the right side (filter housing, A/C compressor, etc):
Then I started to work on the driver side. Changed cables and replaced the spark plus for the Beru I bought. Pretty much usual maintenance...
Then came time to take the coils (I had purchased these as a preventive measure, good thing I did). To have better access to that area I removed the plastic housing/box that hold the fuses and relays...
As you can tell one of the coils did not look good at all:
I had to remove the heat sink to get to the second coil...
02-22-2004, 12:02 AM
#12
Professor of Pending Projects
Rennlist Member
Rennlist Member
Thread Starter
Here are the two coils in place and with the covers:

I installed the fuse box... make sure the rubber grommets are correctly installed. I had to undo the metal plate twice because of this...
All done:
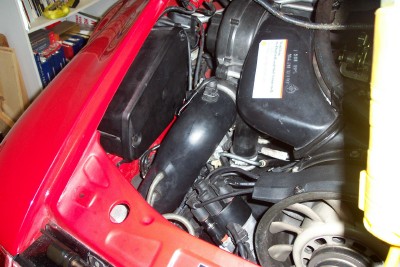
I went over the whole thing making sure the oxygen sensor, the resistor cables, the breather hose for the distributor were connected... just making sure all plugs had their mate.
Reconnected the battery, and voila! no more gremlins. Took the car for a spin to heat up the oil and make sure all was in order. Turned on all electronic devices, high beams, etc, to increase the load and to check that indeed the Xmas effect was eradicated. Well, even the light that the top was open did not come on. Sweet!!!
So, I can safely say that this project is over. On to the next one. Change the A/C from R12 to R134a and replace the evaporator (old one is leaking) and expansion valve. Since the gas tank has to come out (although I read somewhere here that it can be done without removing the tank...) I will tackle the gas smell as well (I ordered the gas cap gasket to validate is not a US$4.00 problem and avoid having to change the fuel filler neck without the need... did you know that they change the part number for the filler neck 5 times!!!).
I installed the fuse box... make sure the rubber grommets are correctly installed. I had to undo the metal plate twice because of this...
All done:
I went over the whole thing making sure the oxygen sensor, the resistor cables, the breather hose for the distributor were connected... just making sure all plugs had their mate.
Reconnected the battery, and voila! no more gremlins. Took the car for a spin to heat up the oil and make sure all was in order. Turned on all electronic devices, high beams, etc, to increase the load and to check that indeed the Xmas effect was eradicated. Well, even the light that the top was open did not come on. Sweet!!!
So, I can safely say that this project is over. On to the next one. Change the A/C from R12 to R134a and replace the evaporator (old one is leaking) and expansion valve. Since the gas tank has to come out (although I read somewhere here that it can be done without removing the tank...) I will tackle the gas smell as well (I ordered the gas cap gasket to validate is not a US$4.00 problem and avoid having to change the fuel filler neck without the need... did you know that they change the part number for the filler neck 5 times!!!).
02-22-2004, 12:08 AM
#13
Professor of Pending Projects
Rennlist Member
Rennlist Member
Thread Starter
All in all not a difficult job. Only time consuming since a lot of stuff has to be removed to get to the bolts that hold the ignition cables in place and if you have an A/C the compressor needs to be moved to route the cables since they run right behind/underneath the A/C bracket.
Good night!!
Good night!!
07-19-2008, 01:00 PM
#15
Nordschleife Master
I'm updating Jaime's DIY on spark plug wires because I get flustered with the yellow 'distributor connections' decal's "I/II -- upper/lower". 
Last edited by Marc Shaw; 07-22-2008 at 01:43 AM. Reason: removed URL