Front Spoiler Addition
 04-20-2005, 11:27 PM
#1
Three Wheelin'
Thread Starter
Join Date: Oct 2002
Location: Pasadena, MD - Land of Taxes
Posts: 1,879
Likes: 0
Received 3 Likes
on
3 Posts
Hi all... I just installed my front spoiler today. MAN it looks nice... And it's greatly increased the stability of my front end at speed. For anyone that is interested in doing this... It's actually a very easy job!  No need to pay a body shop to do it. Simple tools and some jack stands and you're in business! I think it makes more sense to fit the part first and then paint it... There is less chance you'll scratch it! I'd also like to thank Jeff Curtis for his help!
Here's how we start...
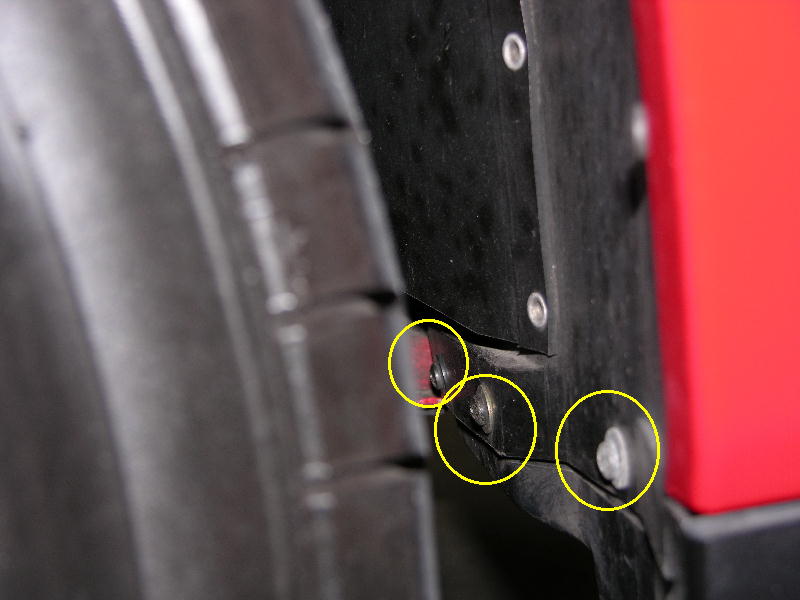
First you need to unscrew all the screws holding your lower bumper piece in place. There are approximately 30 screws to take out. Three on both sides in the fender well...
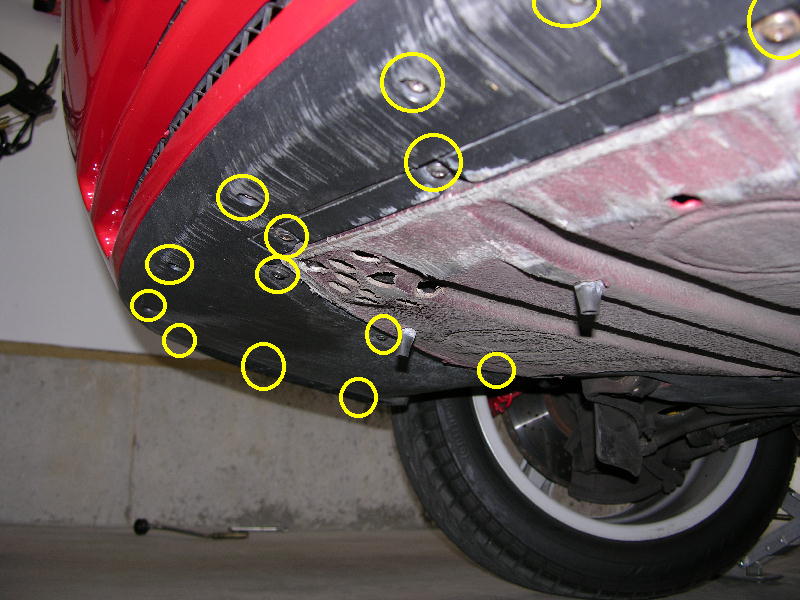
And a lot more below...
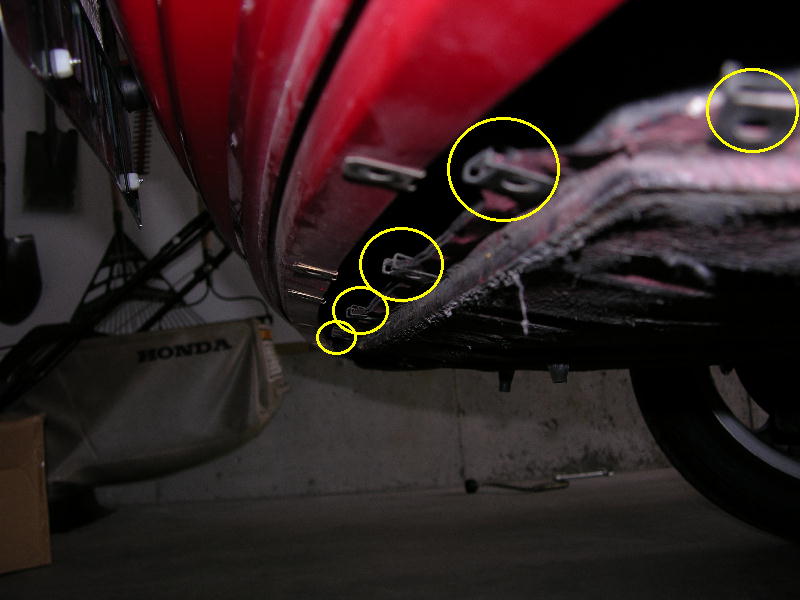
If you want to "straighten your smile"... These are the tabs that you need to bend down a little bit. Over time and hitting curbs, speed bumps and those stupid concrete stoppers...
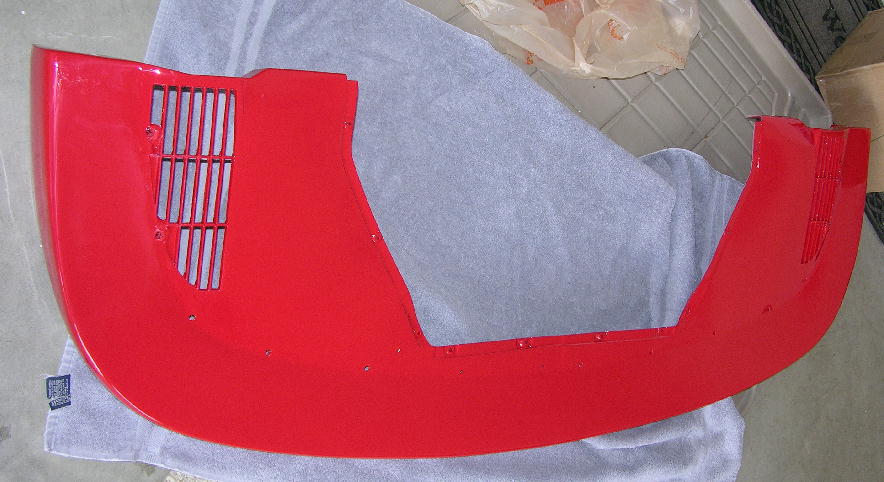
Here is the spoiler compared to what you are removing...
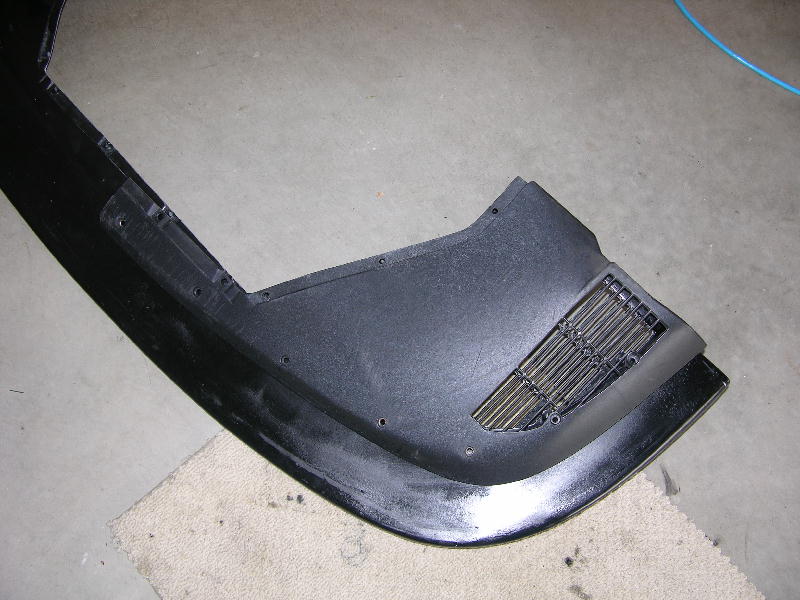
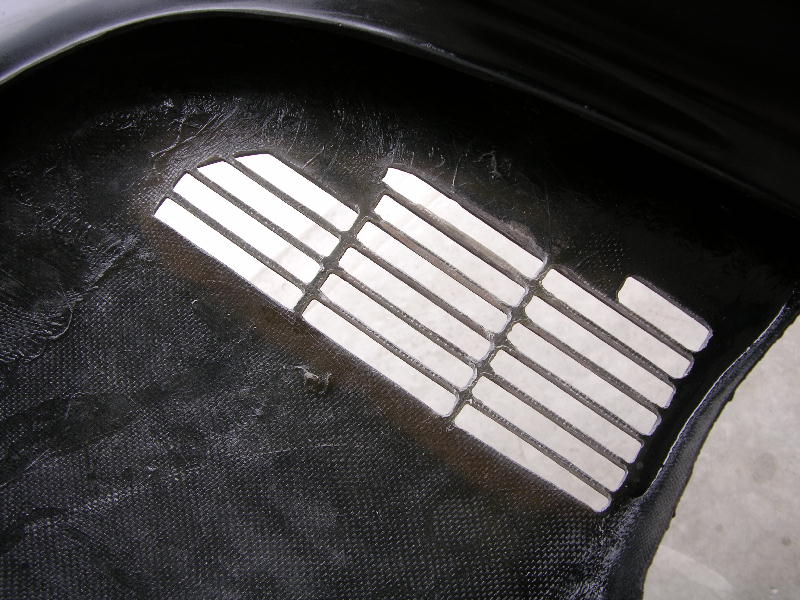
There are a few ways to handle the grill opening. Some just cut it out entirely... Some cut out the whole thing and screen it in... I decided to take my time and cut out each of the grill openings with my Dremel tool. Yes.. It took a a while... But I think the results were worth the effort. I used a saw blade and then finished up with a small cutter in the Dremel.
No need to pay a body shop to do it. Simple tools and some jack stands and you're in business! I think it makes more sense to fit the part first and then paint it... There is less chance you'll scratch it! I'd also like to thank Jeff Curtis for his help!Here's how we start...
First you need to unscrew all the screws holding your lower bumper piece in place. There are approximately 30 screws to take out. Three on both sides in the fender well...
And a lot more below...
If you want to "straighten your smile"... These are the tabs that you need to bend down a little bit. Over time and hitting curbs, speed bumps and those stupid concrete stoppers...
Here is the spoiler compared to what you are removing...
There are a few ways to handle the grill opening. Some just cut it out entirely... Some cut out the whole thing and screen it in... I decided to take my time and cut out each of the grill openings with my Dremel tool. Yes.. It took a a while... But I think the results were worth the effort. I used a saw blade and then finished up with a small cutter in the Dremel.
Last edited by Smokin; 09-18-2005 at 12:11 PM.
 04-20-2005, 11:27 PM
#2
Three Wheelin'
Thread Starter
Join Date: Oct 2002
Location: Pasadena, MD - Land of Taxes
Posts: 1,879
Likes: 0
Received 3 Likes
on
3 Posts
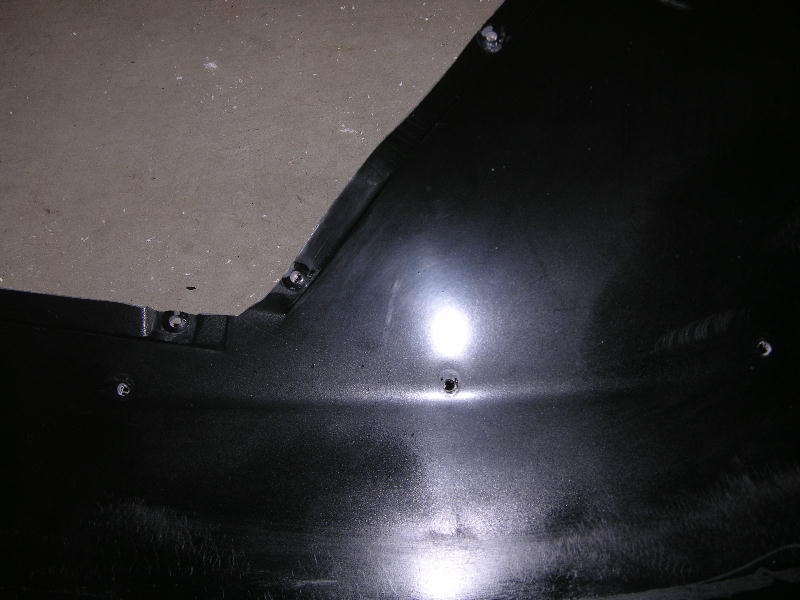
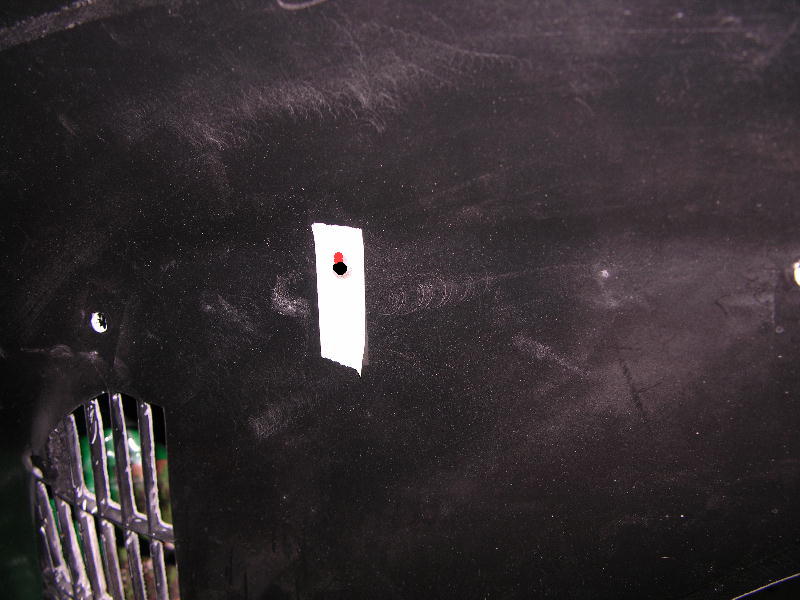
I purchased this from www.rennspd.com (No affiliation, etc.) and I must say I was impressed with the fit. None of the holes are pre-drilled but the casting marks are there pretty much showing you where you need to drill. I could have just drilled where the marks were and been very close... But I lined it up with the pans I took off. In this picture you can see where I drilled but also (hopefully) you can see the casting mark.
On the ends you will need to swap out the speed nuts off the old part. You will need to Dremel down the casting bumps in order to fit the speed nuts over the fiberglass.
The trial fit...
I found that the key to keeping the hole size small was to drill a hole only large enough to fit the screw through. There were a few that I had to enlarge. What I did was to put a piece of masking tape over the hole and then mark in red which direction the hole had to be enlarged so the screw would line up with the speed nut. Make sense?
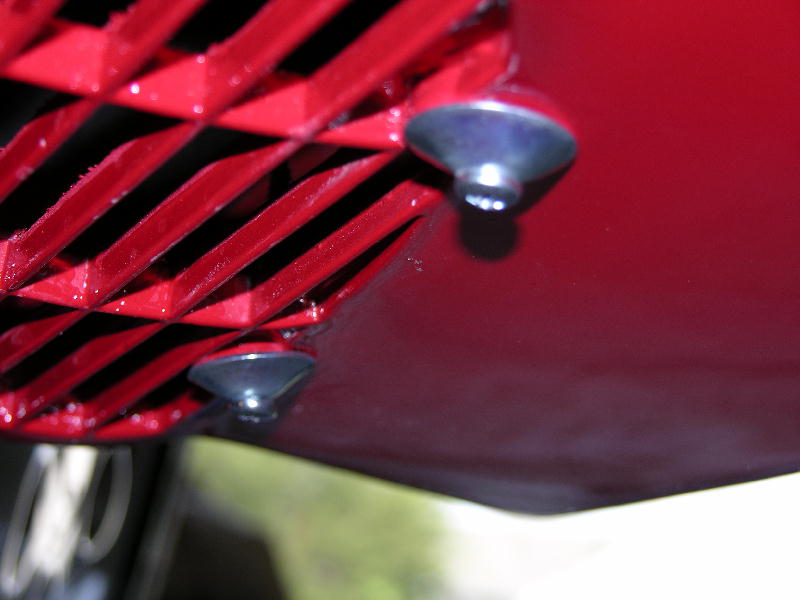
The holes next to the grill opening, I felt it needed extra support. I didn't grind down the "nub" castings and I didn't want a flat washer to stick out so I "pressed" my own washers (4... 2 for each side.) using an old socket and extension. The picture is self explanatory as to how it is done. I figured these would cup the casting and hold the spoiler in place better. The washers are actually a little too large. I'll buy some smaller ones next time I'm at the hardware store and swap them out.

On the ends you will need to swap out the speed nuts off the old part. You will need to Dremel down the casting bumps in order to fit the speed nuts over the fiberglass.
The trial fit...
I found that the key to keeping the hole size small was to drill a hole only large enough to fit the screw through. There were a few that I had to enlarge. What I did was to put a piece of masking tape over the hole and then mark in red which direction the hole had to be enlarged so the screw would line up with the speed nut. Make sense?
The holes next to the grill opening, I felt it needed extra support. I didn't grind down the "nub" castings and I didn't want a flat washer to stick out so I "pressed" my own washers (4... 2 for each side.) using an old socket and extension. The picture is self explanatory as to how it is done. I figured these would cup the casting and hold the spoiler in place better. The washers are actually a little too large. I'll buy some smaller ones next time I'm at the hardware store and swap them out.
04-20-2005, 11:28 PM
#3
Three Wheelin'
Thread Starter
Join Date: Oct 2002
Location: Pasadena, MD - Land of Taxes
Posts: 1,879
Likes: 0
Received 3 Likes
on
3 Posts
The painted spoiler! I wasn't really happy with the paint job... But the glitches are underneath and can't be seen... But I still know they are there.
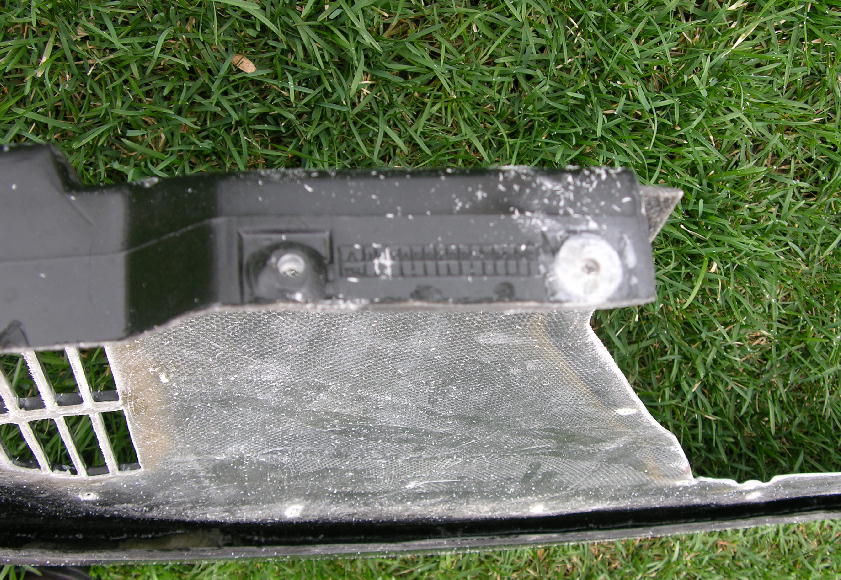
Here is a close up of how I re-used part of the hardware. I ended up using almost all of the original hardware. I substituted 6 screws where longer screws were needed.

Here's a close-up of my "cupped" washers next to the grill.
And a shot across showing some of the other screws holding the spoiler on...
Here is a close up of how I re-used part of the hardware. I ended up using almost all of the original hardware. I substituted 6 screws where longer screws were needed.
Here's a close-up of my "cupped" washers next to the grill.
And a shot across showing some of the other screws holding the spoiler on...
Last edited by Smokin; 04-22-2005 at 10:13 AM.
04-20-2005, 11:28 PM
#4
Three Wheelin'
Thread Starter
Join Date: Oct 2002
Location: Pasadena, MD - Land of Taxes
Posts: 1,879
Likes: 0
Received 3 Likes
on
3 Posts
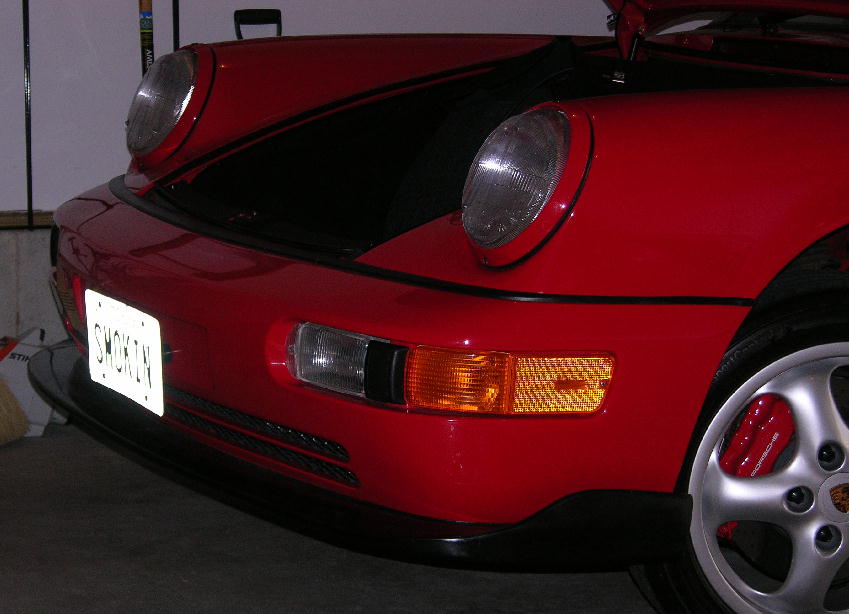
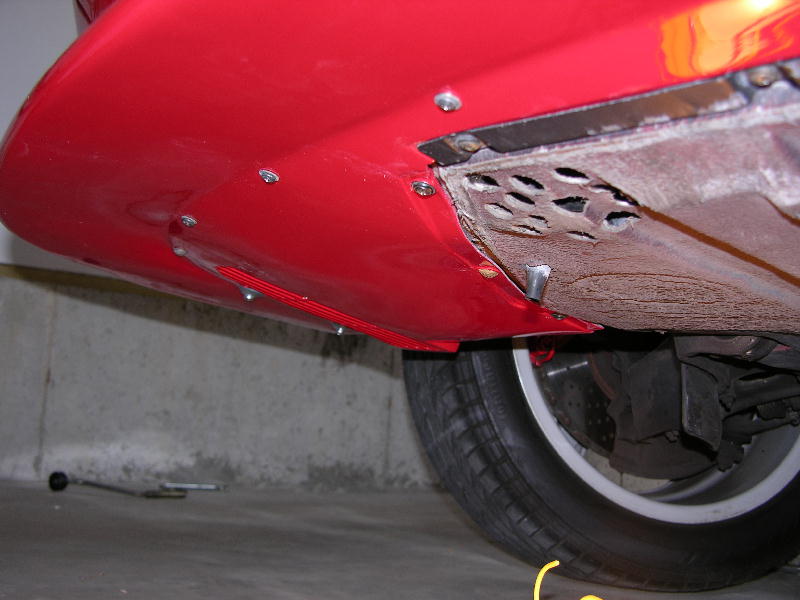
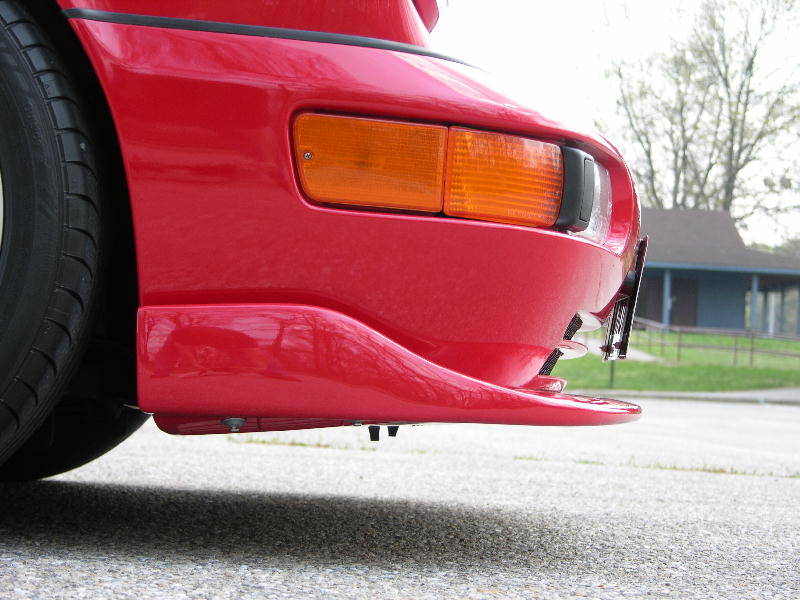
And a few shots of what it looks like on the car!
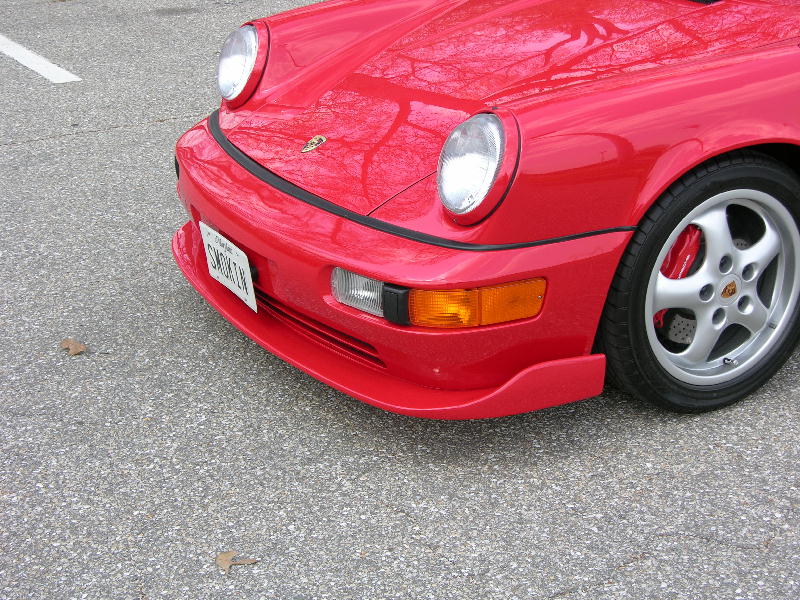
The side angle...
And straight on...
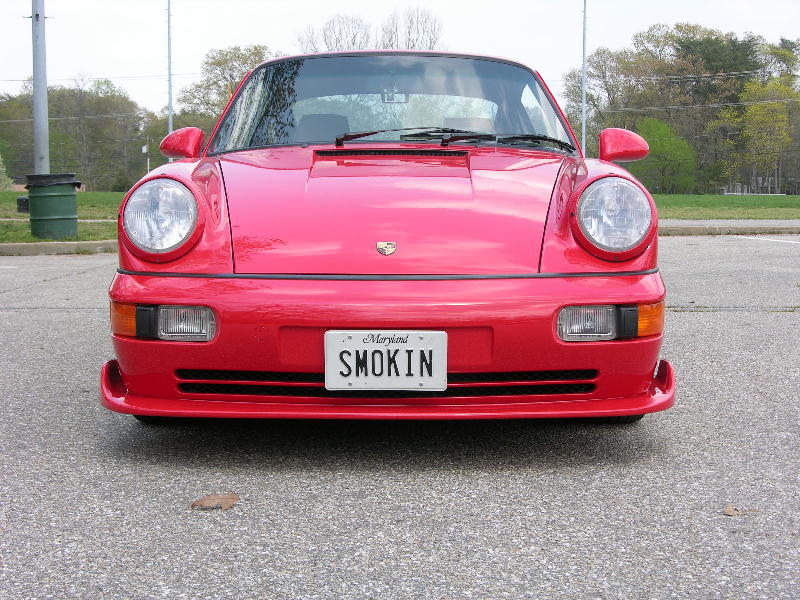
This will clear speed bumps and curbs going into a driveway. (I approach mine at an angle anyway.) But I'll have to be careful... The other bumper pans had a few light scratches.. Mostly from the PO... But I'm sure I put a few on there too.
So go ahead and order that spoiler!
The side angle...
And straight on...
This will clear speed bumps and curbs going into a driveway. (I approach mine at an angle anyway.) But I'll have to be careful... The other bumper pans had a few light scratches.. Mostly from the PO... But I'm sure I put a few on there too.
So go ahead and order that spoiler!