
Pauly's go quicker project. (Data Logs!)
 08-11-2011, 04:38 AM
#76
Professional Hoon
Rennlist Member
Rennlist Member
Thread Starter
Join Date: Jan 2010
Location: Melbourne, Australia
Posts: 7,090
Likes: 0
Received 4 Likes
on
4 Posts
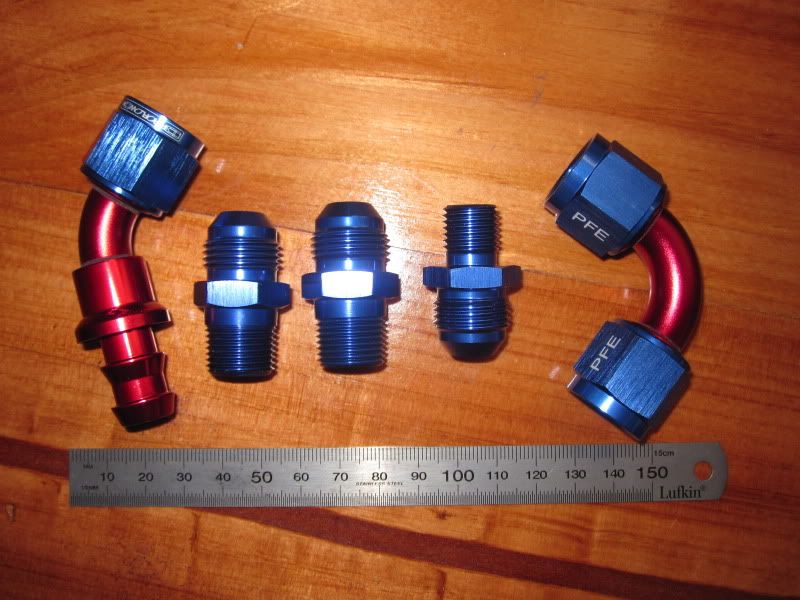
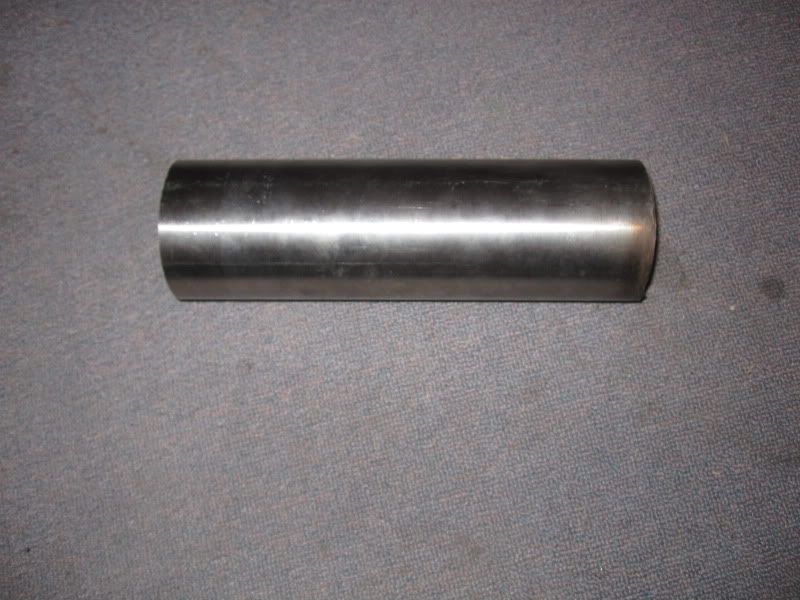
i picked up the proflow bits, slighty "bling". Made most of the shim but will post pictures of it when it finished.
Theres a slight mistake. there should be 2x 14mm to -8 AN fitting but instead i got 2x 3/8 to -8AN which i only needed 1. That problem got solved and the other fitting is on order and will do a direct swap when it arives.
Theres a slight mistake. there should be 2x 14mm to -8 AN fitting but instead i got 2x 3/8 to -8AN which i only needed 1. That problem got solved and the other fitting is on order and will do a direct swap when it arives.
 08-11-2011, 09:07 AM
#77
Is this directly off your fuel pump?
Looking like your plumbing into the rubber line off your fuel tank yes???
Just curious I went -8AN from the fuel pump to rail. The fitting off my pump was a stainless piece that I drilled out larger and the rest is Russel, Earls, and Canton.
My stainless fitting was hard to find for the Bosch HV pump but I found it at Pegasus Auto Racing.
Jason
08-11-2011, 09:14 AM
#78
Professional Hoon
Rennlist Member
Rennlist Member
Thread Starter
Join Date: Jan 2010
Location: Melbourne, Australia
Posts: 7,090
Likes: 0
Received 4 Likes
on
4 Posts
Is this directly off your fuel pump?
Looking like your plumbing into the rubber line off your fuel tank yes???
Just curious I went -8AN from the fuel pump to rail. The fitting off my pump was a stainless piece that I drilled out larger and the rest is Russel, Earls, and Canton.
My stainless fitting was hard to find for the Bosch HV pump but I found it at Pegasus Auto Racing.
Jason
Looking like your plumbing into the rubber line off your fuel tank yes???
Just curious I went -8AN from the fuel pump to rail. The fitting off my pump was a stainless piece that I drilled out larger and the rest is Russel, Earls, and Canton.
My stainless fitting was hard to find for the Bosch HV pump but I found it at Pegasus Auto Racing.
Jason
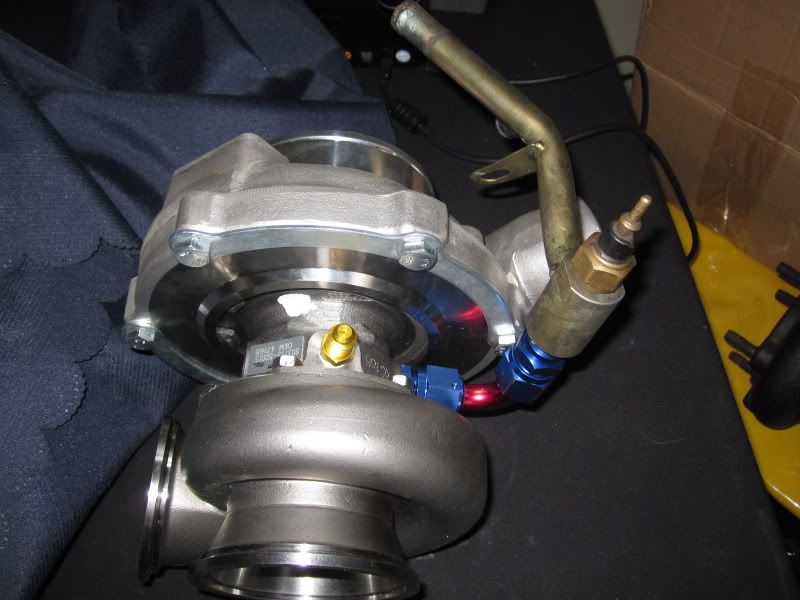
Jason,
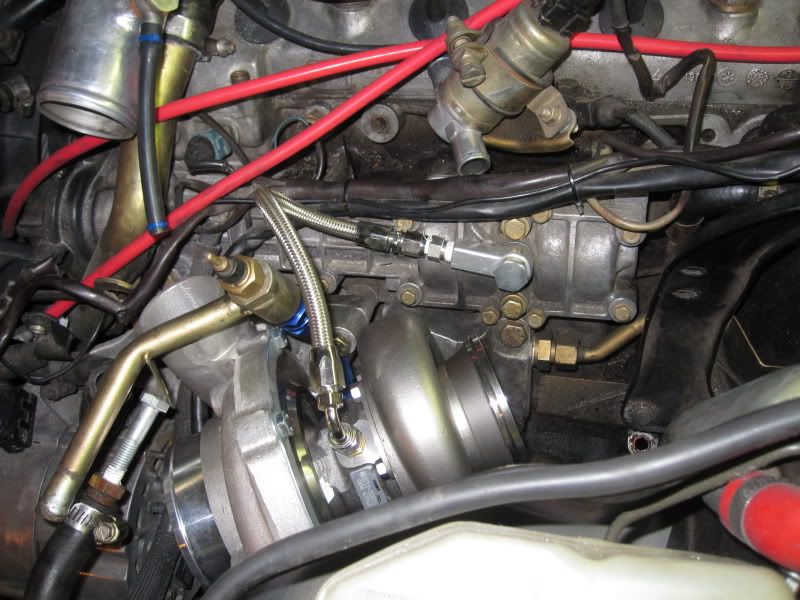
Yes these are fuel fittings, but I'm using them to for the turbo water lines since they where the easy to get ahold of
Changing to a bosch 044 pump in the future though, next year maybe and will be doing all the fuel lines at the same time.
08-16-2011, 07:16 AM
#79
Professional Hoon
Rennlist Member
Rennlist Member
Thread Starter
Join Date: Jan 2010
Location: Melbourne, Australia
Posts: 7,090
Likes: 0
Received 4 Likes
on
4 Posts
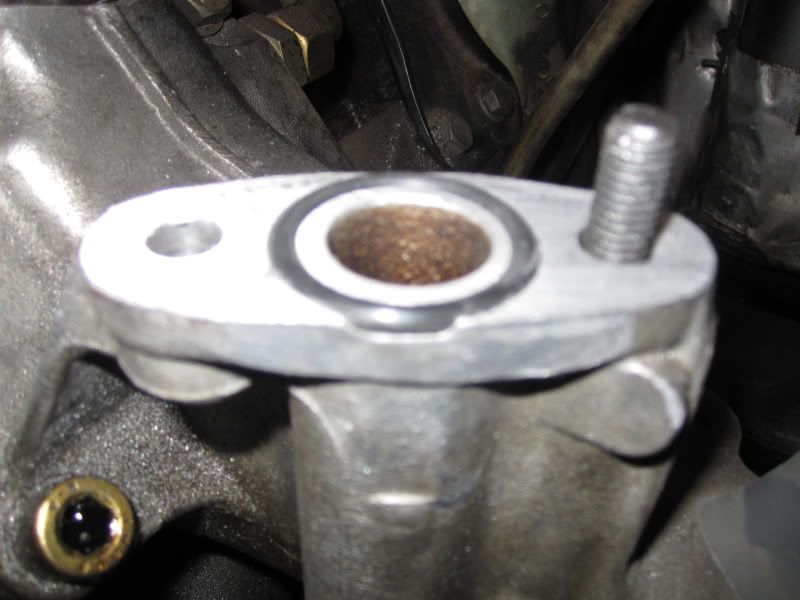
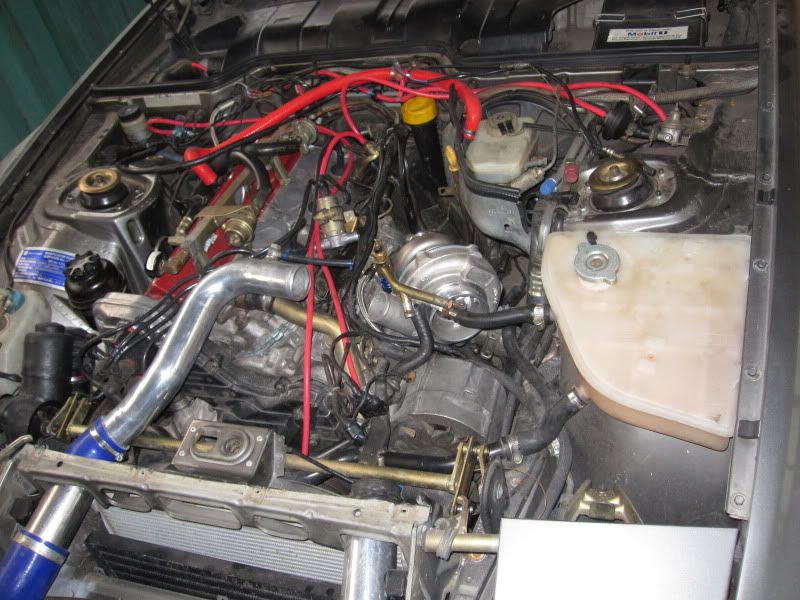
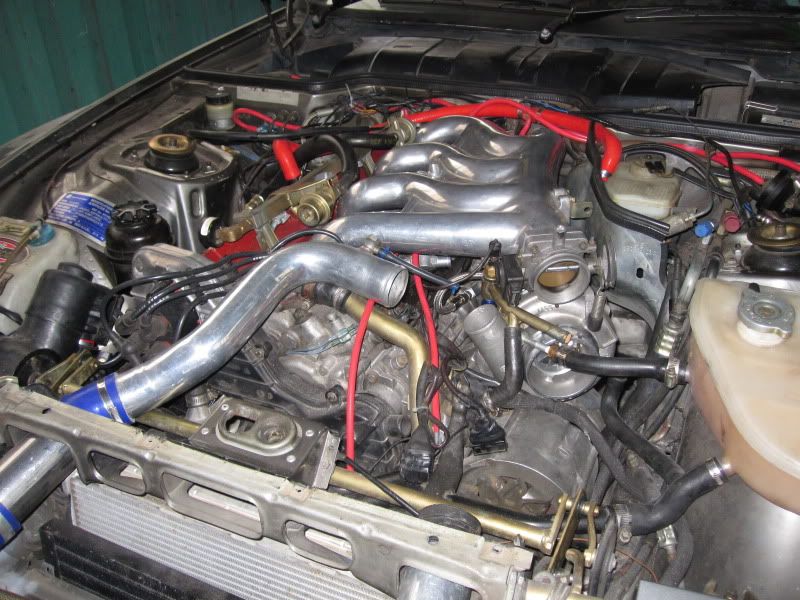
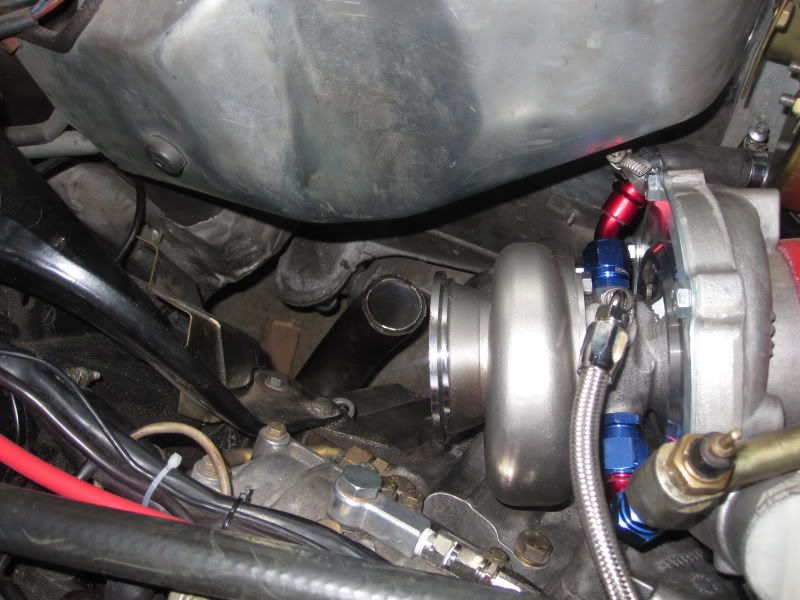
Update: So today i got a few things done, i finished the shim for between the oil drain mount and the turbos t3/t4 adapter, i put the water fittings to the turbo and mounted the turbo.


08-16-2011, 01:33 PM
#81
Professional Hoon
Rennlist Member
Rennlist Member
Thread Starter
Join Date: Jan 2010
Location: Melbourne, Australia
Posts: 7,090
Likes: 0
Received 4 Likes
on
4 Posts
Thanks mate 
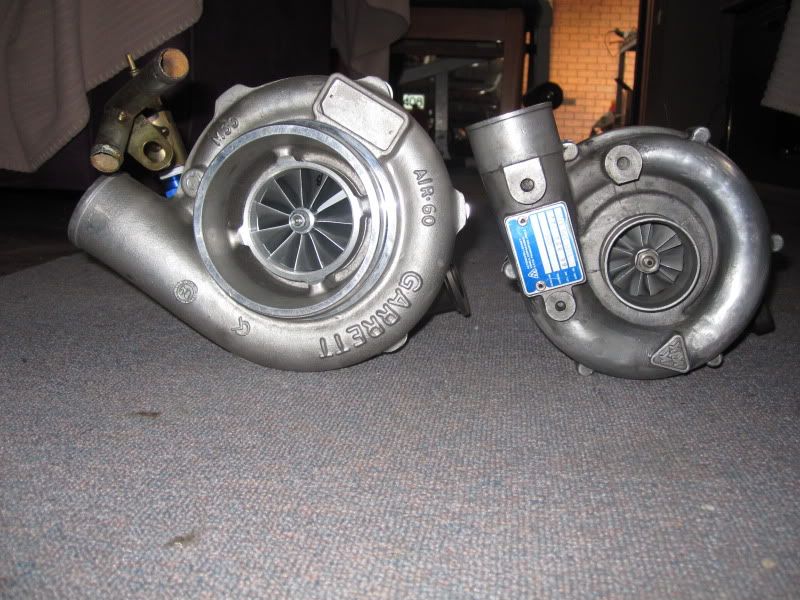
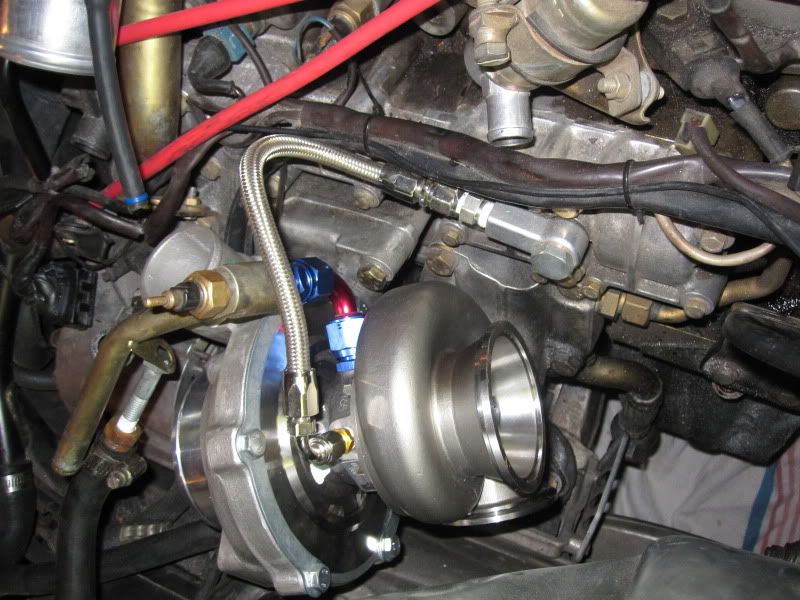
i would of went with the 3" inlet since i wouldn't get anywhere close to the compressor surge line but the GTX series come standard with the 4" ported shroud housing. You need to modify the standard gt30 compressor cover to fit with the GTX30 blades since they're slightly larger.
i would of went with the 3" inlet since i wouldn't get anywhere close to the compressor surge line but the GTX series come standard with the 4" ported shroud housing. You need to modify the standard gt30 compressor cover to fit with the GTX30 blades since they're slightly larger.
 08-17-2011, 09:04 AM
#84
Professional Hoon
Rennlist Member
Rennlist Member
Thread Starter
Join Date: Jan 2010
Location: Melbourne, Australia
Posts: 7,090
Likes: 0
Received 4 Likes
on
4 Posts
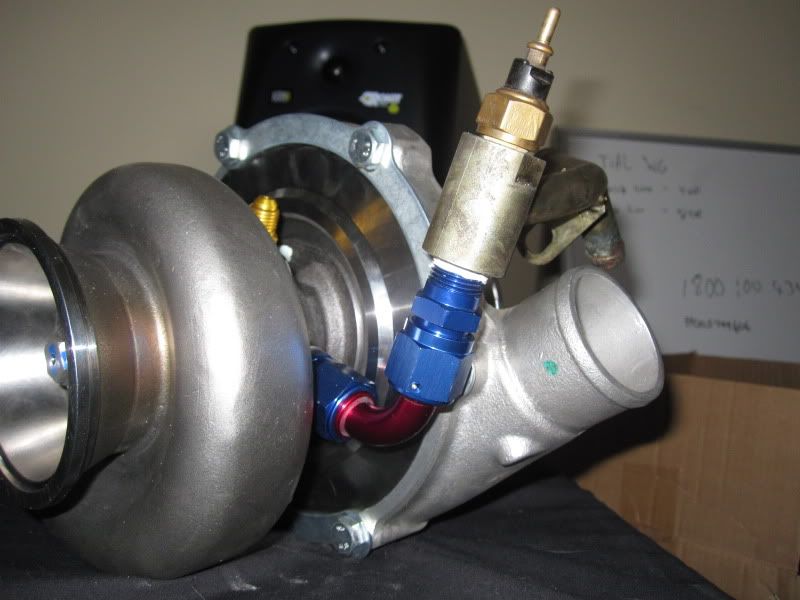
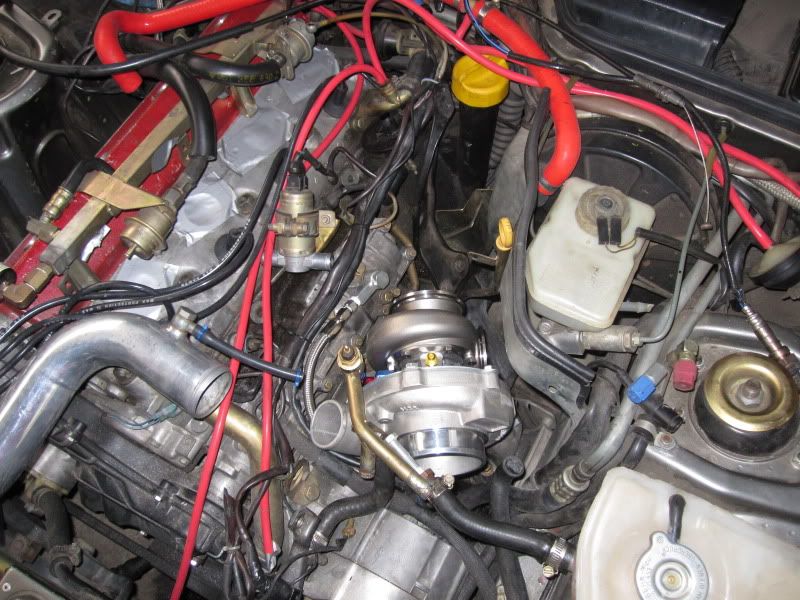
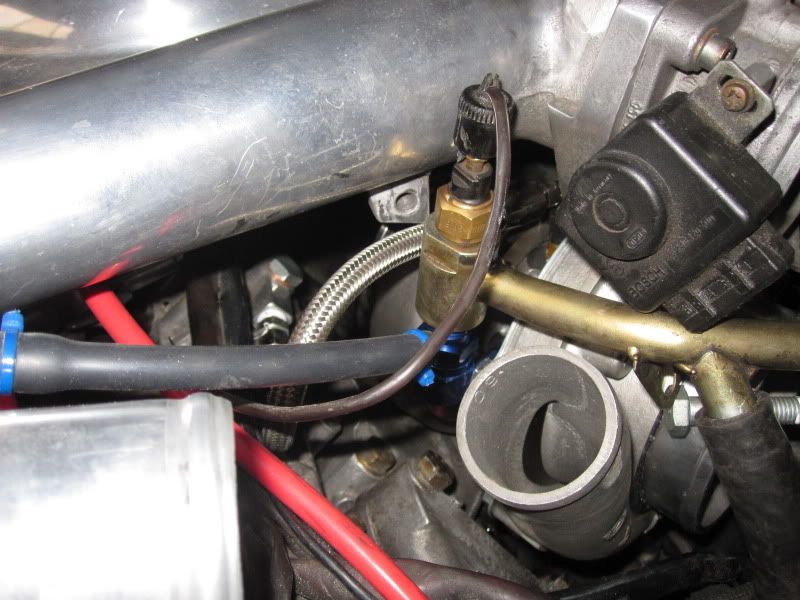
just to clarify, The temp sensor dosn't get in the way of anything nor does anything get in its way.
So there you go an easy way of adapting the temp sensor.
you need:
1x 14mm to -8 AN
1x 3/8 NTP to -8 AN
1x 90 degree elbo -8 AN
all you need to do is cut the bango off, Tap it 3/8 NTP, screw it in with some teflon tape and that's it.
So there you go an easy way of adapting the temp sensor.
you need:
1x 14mm to -8 AN
1x 3/8 NTP to -8 AN
1x 90 degree elbo -8 AN
all you need to do is cut the bango off, Tap it 3/8 NTP, screw it in with some teflon tape and that's it.
The following users liked this post:
951dream (03-15-2022)
08-24-2011, 05:53 AM
#85
Professional Hoon
Rennlist Member
Rennlist Member
Thread Starter
Join Date: Jan 2010
Location: Melbourne, Australia
Posts: 7,090
Likes: 0
Received 4 Likes
on
4 Posts
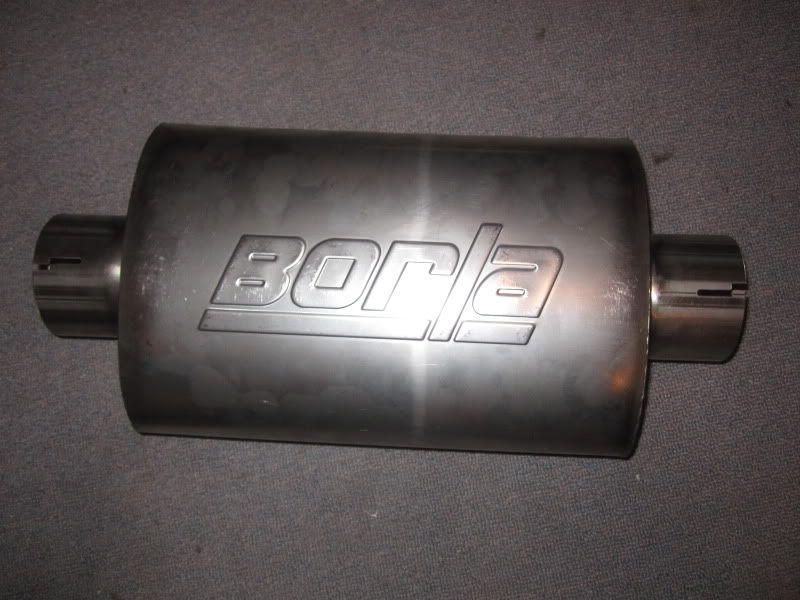
Not much to update on. i've got the rest of by pipe bends to complete the exhaust and up pipe, Borla muffler and 3 bar FPR on order.
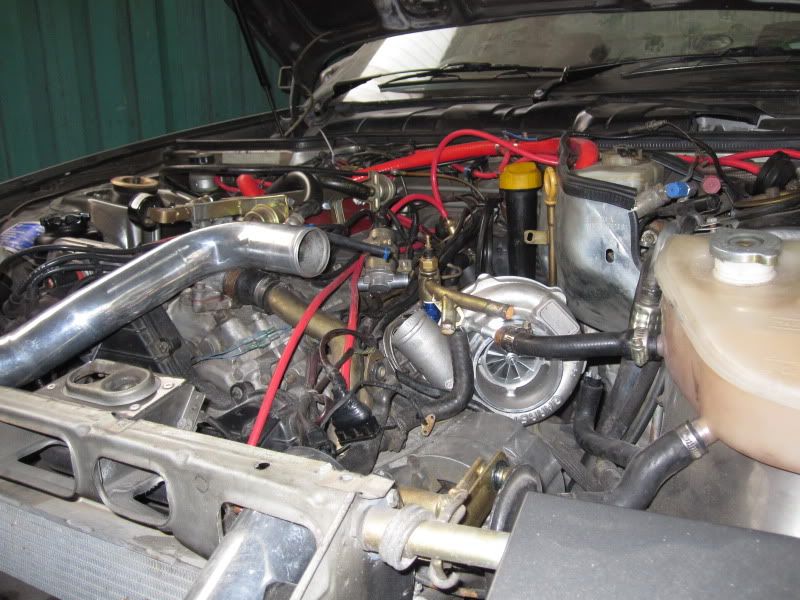
So i decided my engine bay needed a tidy up. most of the zipties on the firewall are broken so i did what i could do make it look nicer
From this
To this

So i decided my engine bay needed a tidy up. most of the zipties on the firewall are broken
so i did what i could do make it look nicerFrom this
To this
 08-30-2011, 07:08 AM
#87
Drifting
Your doing a good job there Pauly. as everyone knows it not the easiest thing to get a turbo off one of these, not to mention in your own garage, and modding for a different setup. im impressed
08-30-2011, 07:36 AM
#88
Professional Hoon
Rennlist Member
Rennlist Member
Thread Starter
Join Date: Jan 2010
Location: Melbourne, Australia
Posts: 7,090
Likes: 0
Received 4 Likes
on
4 Posts
i guess it was good that dad (a fitter and turner) use to take me to his work (family business) to get me to help him out on school holidays when i was in 10 years old. the older i got the more things i would do. I learnt how to use pretty much all the power tools, i got tought how to stick weld when i was 13 and when dad bought his MIG and TIG he tought me how to use them when i was 16. also in those years he tought me how to use a lathe and the milling machines.
Though out the build, i've done everything my self except the exhaust i've gotten dad to give me a hand with that which was great and heaps appreciated
09-04-2011, 06:03 AM
#89
Professional Hoon
Rennlist Member
Rennlist Member
Thread Starter
Join Date: Jan 2010
Location: Melbourne, Australia
Posts: 7,090
Likes: 0
Received 4 Likes
on
4 Posts
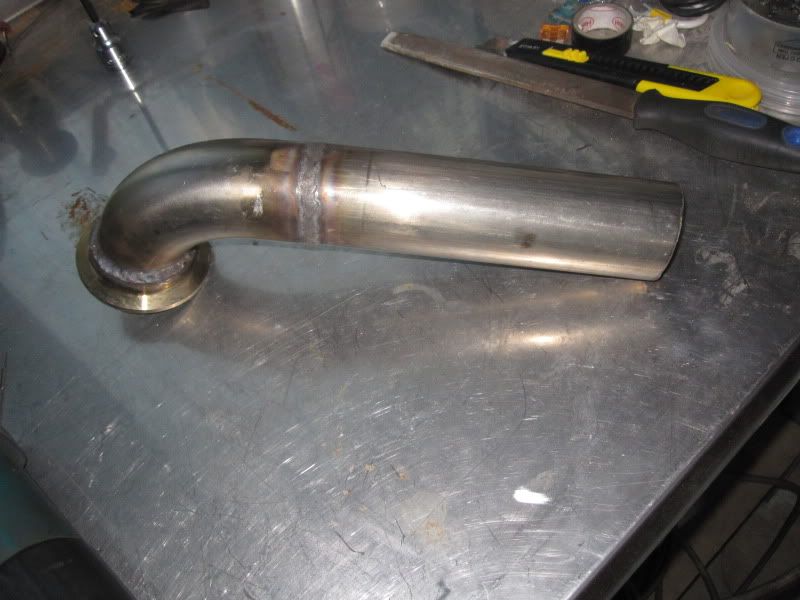
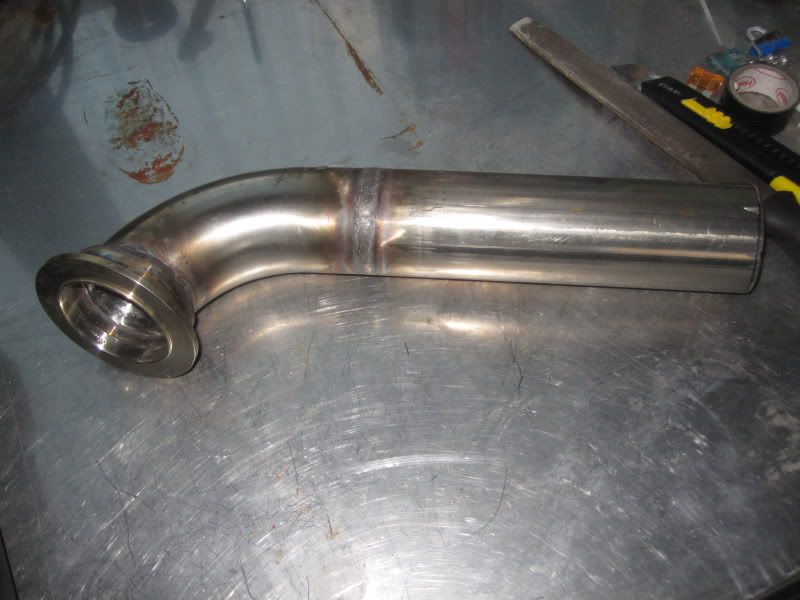
Today.. Fathers day... or Father helps son day 
we modified the up pipe, and made the extention to go to the turbo. This looks easy but i assure you it's not as easy as it looks. it would be alot easer if the engine was out of the car but in my case it wasn't. it took alot of cutting and lets try this. now all we need to do is weld it onto the original x-over pipe and it'll be finished. hopfully druing the week.
We also started on the down pipe, no pictures of that unless you love pictures of pipes on a table

