
Clutch replacement pictorial
 06-22-2009, 06:05 PM
#16
Nordschleife Master
Thread Starter
So the total time for this job was 23hrs. I would estimate 3-4 hours was spent with stupid problems such as the speed reference sensors, ground strap on bell housing (more on that later), RMS removal and the learning curve with figuring out how to get the transmission back in the car. Now that i know all the little tricks, i think 18hrs would be a reasonable estimate if i had to do it again.
Here are some more pictures from the reassembly phase.
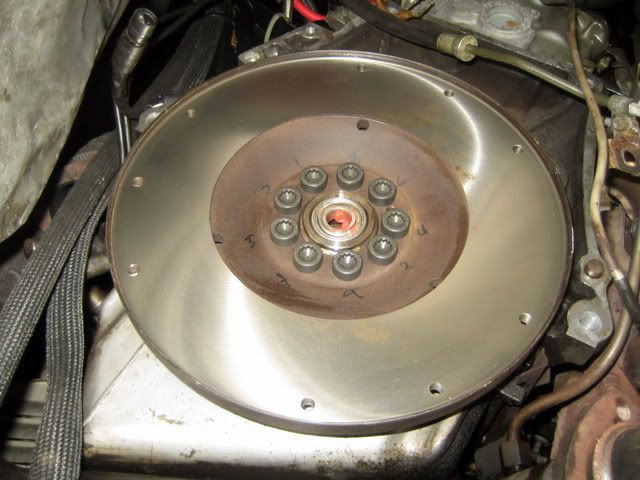
Lightened stock flywheel bolted up to the crank. As you can see i marked the flywheel with a typical cross torque sequence.
Here is the old guide sleeve with roughly 40k miles.

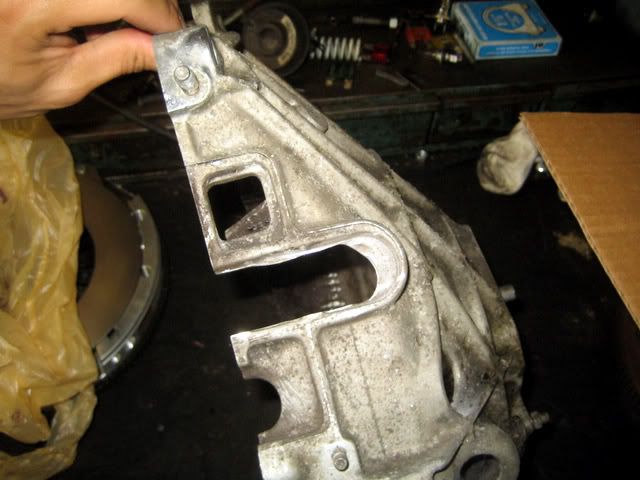
Notched bellhousing to allow removal and reinstallation of bellhousing without need to touch the sensors. This alone should knock a solid 1-2 hours off the reassembly and disassembly stage.
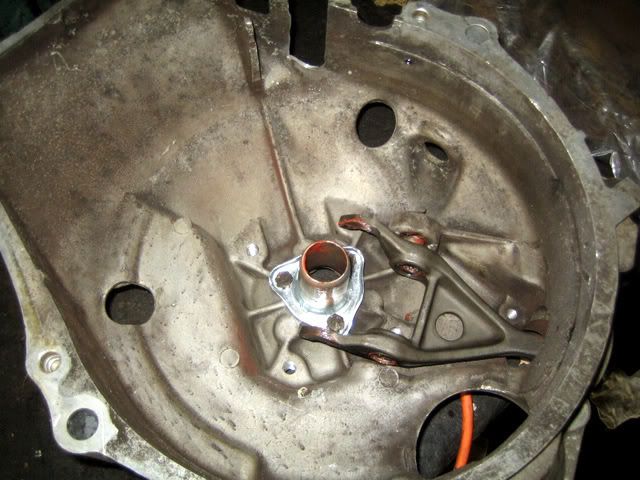
Bell housing ready to go with the new clutch fork and guide tube.
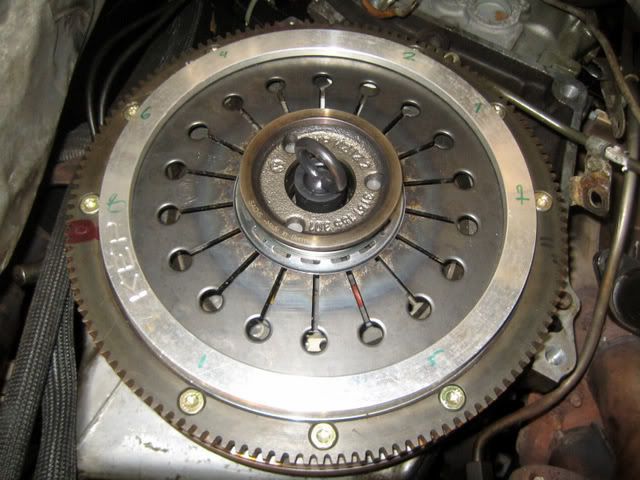
KEP pressure plate bolted up with the clutch alignment tool.
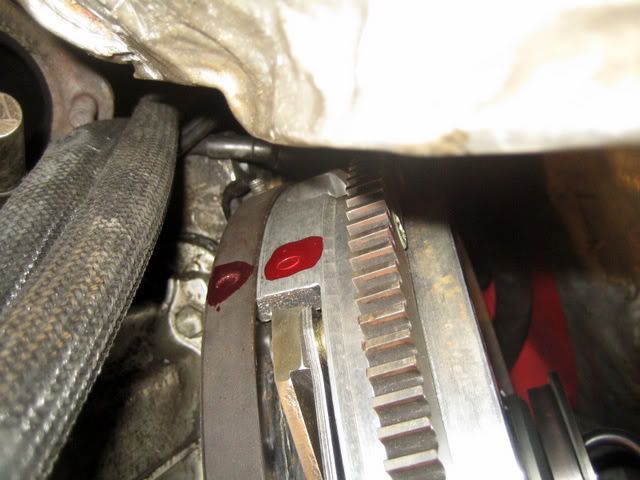
Also here are the alignment marks for the flywheel / pressure plate from the balancing that the machine shop did. I am very happy with the work they did.. very reasonable cost also.
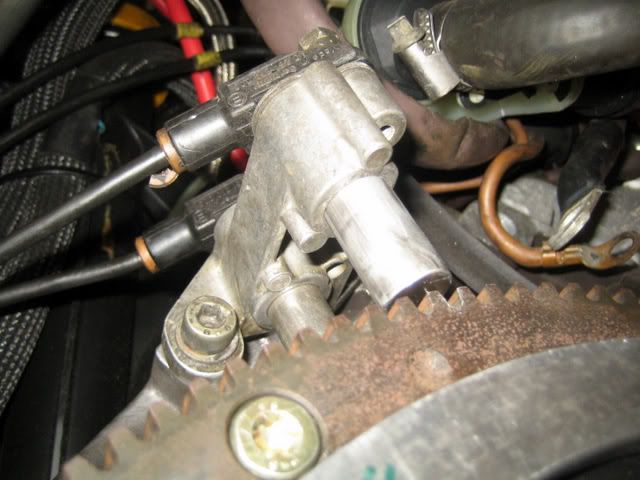
With the notched bellhousing, i was able to reset the sensor gap with the bellhousing off. I used Sharkys sensor gap tool..made things easy as pie.
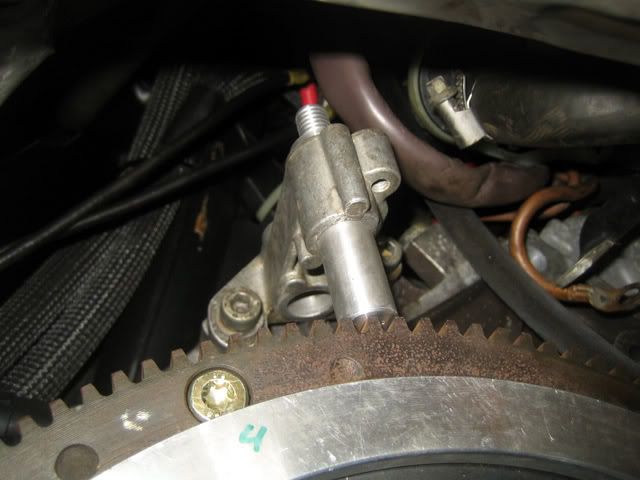
And with the sensors hooked up. I broke one of the sensor connectors on the bracket that attaches to the intake manifold. Its currently being held together with a ziptie..so need to replace those .
.
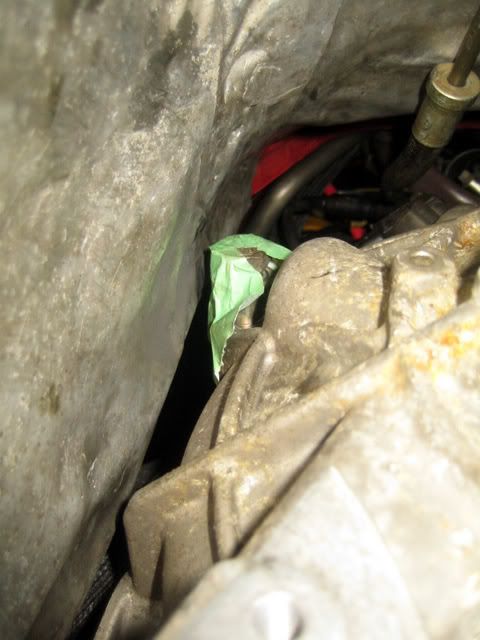
Now was time to get the bellhousing back on. This was a bit of a pain because its one of those things that fits in one way.. so it took about 15 minutes of me messing around with it to get it to fit. Once i had it angled right it literally went right on! Remember to put one of the shorter bellhousing bolts in the bell housing during installation as there is no room to fit the bolt in after its already mounted. I simply taped the bolt loosely to the bell housing so it wouldnt keep falling out.
The rest of the documentation from here gets a little shoddy as i was getting tired and just wanted to get the damn car done.
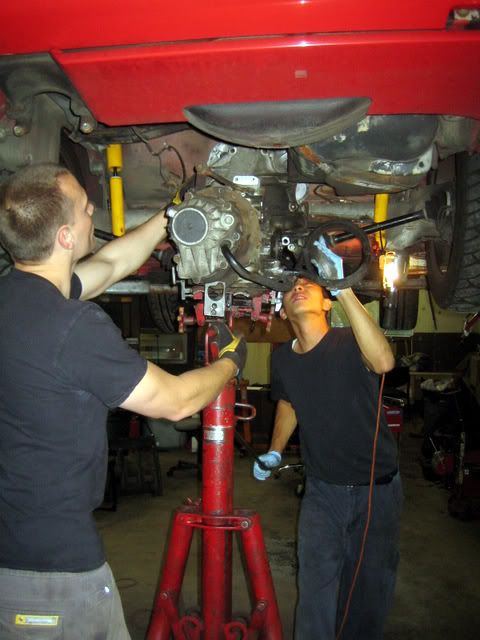
Reinstalling the tranny was a little troublesome, mostly because it was my first time doing it and it was a pain to get everything lined up. The tranny cooler did not help things either! That is me on the right and my good friend Bruce on the left. I owe him big, not only for letting me use one of the lifts at his shop but also staying with me the entire 23 hrs to help with those 2 person jobs. Then again i guess we are sorta even.. i did help him remove, rebuild and reinstall his engine over a 3 day period... TWICE!
Here are some more pictures from the reassembly phase.
Lightened stock flywheel bolted up to the crank. As you can see i marked the flywheel with a typical cross torque sequence.
Here is the old guide sleeve with roughly 40k miles.
Notched bellhousing to allow removal and reinstallation of bellhousing without need to touch the sensors. This alone should knock a solid 1-2 hours off the reassembly and disassembly stage.
Bell housing ready to go with the new clutch fork and guide tube.
KEP pressure plate bolted up with the clutch alignment tool.
Also here are the alignment marks for the flywheel / pressure plate from the balancing that the machine shop did. I am very happy with the work they did.. very reasonable cost also.
With the notched bellhousing, i was able to reset the sensor gap with the bellhousing off. I used Sharkys sensor gap tool..made things easy as pie.
And with the sensors hooked up. I broke one of the sensor connectors on the bracket that attaches to the intake manifold. Its currently being held together with a ziptie..so need to replace those
.Now was time to get the bellhousing back on. This was a bit of a pain because its one of those things that fits in one way.. so it took about 15 minutes of me messing around with it to get it to fit. Once i had it angled right it literally went right on! Remember to put one of the shorter bellhousing bolts in the bell housing during installation as there is no room to fit the bolt in after its already mounted. I simply taped the bolt loosely to the bell housing so it wouldnt keep falling out.
The rest of the documentation from here gets a little shoddy as i was getting tired and just wanted to get the damn car done
.Reinstalling the tranny was a little troublesome, mostly because it was my first time doing it and it was a pain to get everything lined up. The tranny cooler did not help things either! That is me on the right and my good friend Bruce on the left. I owe him big, not only for letting me use one of the lifts at his shop but also staying with me the entire 23 hrs to help with those 2 person jobs
. Then again i guess we are sorta even.. i did help him remove, rebuild and reinstall his engine over a 3 day period... TWICE!
 06-22-2009, 06:28 PM
#17
Nordschleife Master
Thread Starter
Now for some closing statements about this daunting task.
To be quite honest this job is really not all that bad. I think what makes it a hellish experience is trying to get everything done in one shot. This was broken up over 2 days (10hrs and 13hrs) and that was a stretch in terms of physical and mental endurance. I am lucky to have access to a lift for the job.. if doing this on jackstands i think the car would still be in pieces right now.
Here are some notes about things that i think are worth mentioning and also what to be prepared for.
1. A 2nd person i think is almost required in a few steps of this job. Mainly removal and reinstallation of the transmission. The reinstall was very troublesome, but finally everything lined up after my friend literally picked the transaxle of the jack over his shoulder to help line it up.
Sliding the torque tube back and forward again also was helpful to have another hand. One at the back and one at the front. Hard to move that sucker and rotate it 180 degrees at the same time by yourself.
2. Consider buying a new transmount as part of the parts list. Mine has 120k miles on it and is totally shot. My friends and i actually laughed at how complete pathetic it is in regards to how much movement it allows. I am going to by the LR semi-solid mount as a replacement.
3. When you are ready to slide the torque tube forward again, we had some issues with it not seating the rest of the 3/4 of an inch about. No amount of rocking the engine and torque tube would make it go in the rest of the way. I read up on RL that pushing the clutch pedal in slowly will let it go in. This worked perfectly for us, i very slowly pushed on the clutch while my friend pushed the torque tube in. After the clutch moved in about half way, the tube slide right in no problem.
4. Save yourself the trouble and buy a seal puller for the RMS!
5. Getting the ground strap back on the bell housing was a major pain in the ***. This took me over 2 hours to do as there is just no space to get a socket or ratchet in there. I really have to blame the wideband controller and stainless braided oil feed like for this... I was also trying everything to avoid removing the intake manifold. But in hind right, removal of the intake i can do in less than 30 minutes..so that probably would have been the better method.
6. I used a special arbor press specifically for RMS installation and it worked great. I coated the RMS in hylomar sealant and used oil along the inner lip. Using the press, the seal went right in without any issues. I will take some pictures of the tool and post later tonight. I unfortunately have no pictures of the install and the press mounted to the crank because i was tired as heck and just wanted to go home...
I have a total of 15 miles on the clutch so far and everything feels great. I still have to fix the catback which is rattling one of the center tunnel supports. The clutch grabs right at the bottom of the travel which is strange for me because it used to catch right at the top. It also catches much more affirmative, which i guess is a combo of a stronger pressure plate and no more warped flywheel and glazed clutch disc.
Pedal effort with the KEP is slightly more than stock, but still very manageable. The stock pressure plate was very very light i felt like. Now it feels about on par with my friends stock WRX clutch.
The lightened flywheel is great so far also. The car revs a little quicker and is much easier to heel toe as a result. I have had no issues with stalling the car or anything, even starting up hills. I think the 6lb Fidanza might have been a little extreme.. i am very happy with my 8.5-9lb lightened stock.
To be quite honest this job is really not all that bad. I think what makes it a hellish experience is trying to get everything done in one shot. This was broken up over 2 days (10hrs and 13hrs) and that was a stretch in terms of physical and mental endurance. I am lucky to have access to a lift for the job.. if doing this on jackstands i think the car would still be in pieces right now.
Here are some notes about things that i think are worth mentioning and also what to be prepared for.
1. A 2nd person i think is almost required in a few steps of this job. Mainly removal and reinstallation of the transmission. The reinstall was very troublesome, but finally everything lined up after my friend literally picked the transaxle of the jack over his shoulder to help line it up
.Sliding the torque tube back and forward again also was helpful to have another hand. One at the back and one at the front. Hard to move that sucker and rotate it 180 degrees at the same time by yourself.
2. Consider buying a new transmount as part of the parts list. Mine has 120k miles on it and is totally shot. My friends and i actually laughed at how complete pathetic it is in regards to how much movement it allows. I am going to by the LR semi-solid mount as a replacement.
3. When you are ready to slide the torque tube forward again, we had some issues with it not seating the rest of the 3/4 of an inch about. No amount of rocking the engine and torque tube would make it go in the rest of the way. I read up on RL that pushing the clutch pedal in slowly will let it go in. This worked perfectly for us, i very slowly pushed on the clutch while my friend pushed the torque tube in. After the clutch moved in about half way, the tube slide right in no problem.
4. Save yourself the trouble and buy a seal puller for the RMS!
5. Getting the ground strap back on the bell housing was a major pain in the ***. This took me over 2 hours to do as there is just no space to get a socket or ratchet in there. I really have to blame the wideband controller and stainless braided oil feed like for this..
. I was also trying everything to avoid removing the intake manifold. But in hind right, removal of the intake i can do in less than 30 minutes..so that probably would have been the better method.6. I used a special arbor press specifically for RMS installation and it worked great. I coated the RMS in hylomar sealant and used oil along the inner lip. Using the press, the seal went right in without any issues. I will take some pictures of the tool and post later tonight. I unfortunately have no pictures of the install and the press mounted to the crank because i was tired as heck and just wanted to go home..
.I have a total of 15 miles on the clutch so far and everything feels great. I still have to fix the catback which is rattling one of the center tunnel supports. The clutch grabs right at the bottom of the travel which is strange for me because it used to catch right at the top. It also catches much more affirmative, which i guess is a combo of a stronger pressure plate and no more warped flywheel and glazed clutch disc.
Pedal effort with the KEP is slightly more than stock, but still very manageable. The stock pressure plate was very very light i felt like. Now it feels about on par with my friends stock WRX clutch.
The lightened flywheel is great so far also. The car revs a little quicker and is much easier to heel toe as a result. I have had no issues with stalling the car or anything, even starting up hills. I think the 6lb Fidanza might have been a little extreme.. i am very happy with my 8.5-9lb lightened stock.
06-22-2009, 11:08 PM
#19
Nordschleife Master
Thread Starter
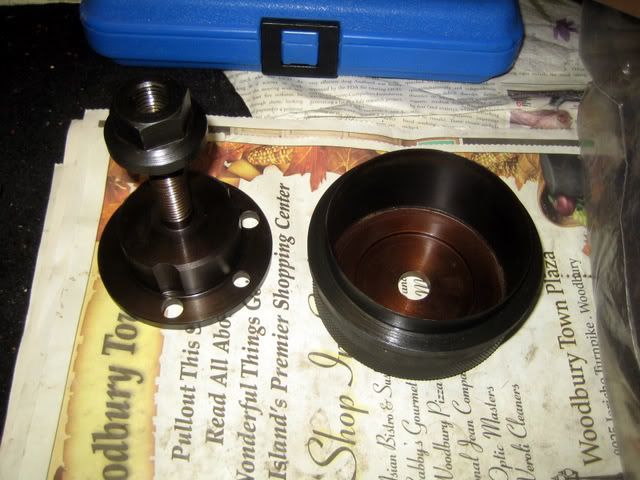
Here is the press i borrowed from mtnman82, a big thanks to him again. I coated the seal with hylomar on the outter surface and oil along the inner lip.
The press mounts directly onto the crank and presses the seal in evenly. Sorry no pictures of this step.
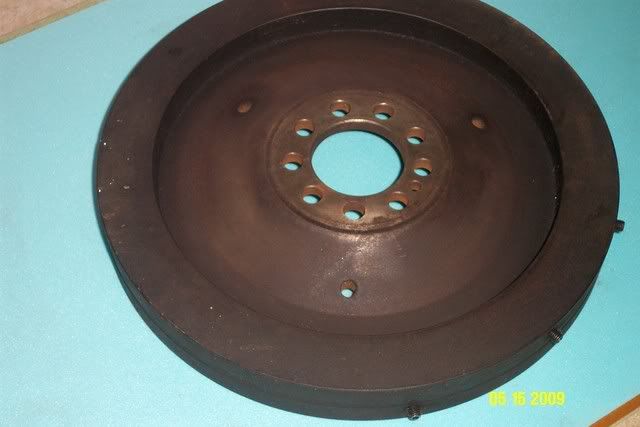
And a few shots of the clutch disc on the flywheel side. About 40k miles on it, glazed in a few spots but plenty of friction material left..
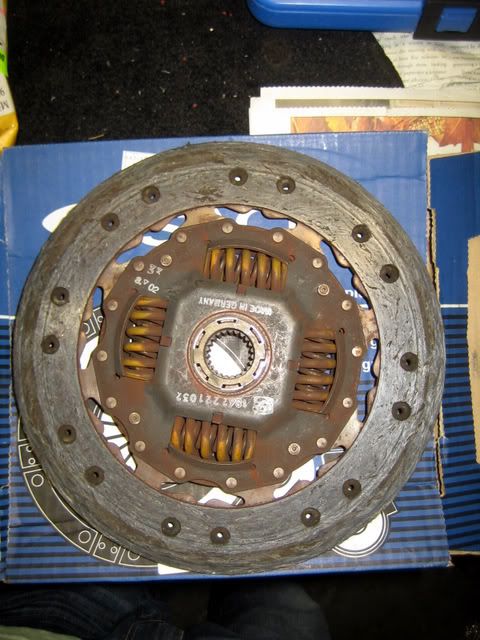
Pressure plate side looks fine..

The press mounts directly onto the crank and presses the seal in evenly. Sorry no pictures of this step.
And a few shots of the clutch disc on the flywheel side. About 40k miles on it, glazed in a few spots but plenty of friction material left..
Pressure plate side looks fine..
06-23-2009, 10:38 AM
#20
Nordschleife Master
Basically, if I got this done at a machine shop what questions should I ask and how do I know if they did a good job?
Thanks
06-23-2009, 01:31 PM
#21
Nordschleife Master
Thread Starter
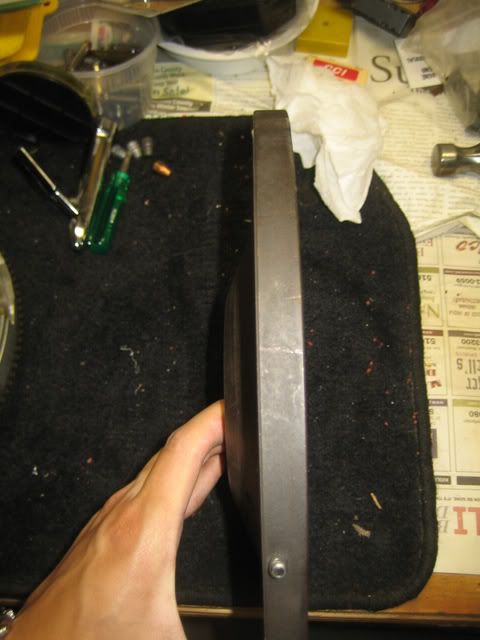
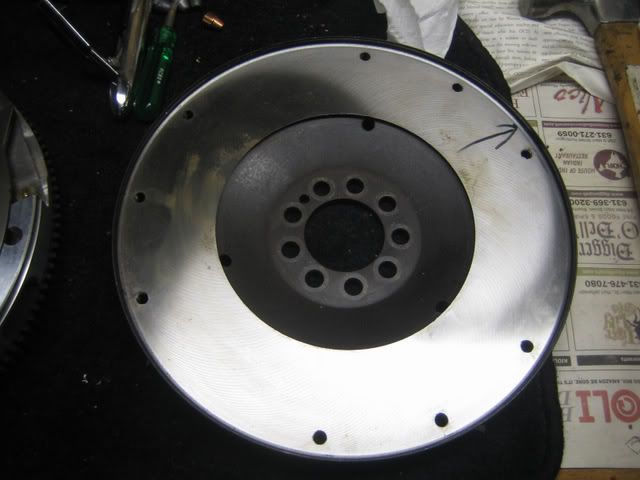
MAG, here is a picture of what the stock flywheel looks like.
Basically the outter circumference on the engine side of the flywheel is machined down. This section comes in at about 5lbs or so roughly. There are 2 crank triggers used for the TDC sensor which are no longer needed on this portion of the flywheel. I just told the guy to take the entire thing down so it was flush with the rest of the flywheel. He told me it was no problem and that he did it all the time for the Honda guys. Total cost was $200 for the lightening, resurface and balancing the flywheel and pressure plate together.
The flywheel must be balanced afterwards, you can see the drill marks he left on the engine side of the flywheel. No adjustment on the clutch needed as its the same dimensions as a stock flywheel, just with the extra weight on the backside removed. Ive heard the Fidanza flywheel is slightly thicker and when paired with the KEP pressure plate and 930 disc that causes problems (951 Cup disc must be used).

Basically the outter circumference on the engine side of the flywheel is machined down. This section comes in at about 5lbs or so roughly. There are 2 crank triggers used for the TDC sensor which are no longer needed on this portion of the flywheel. I just told the guy to take the entire thing down so it was flush with the rest of the flywheel. He told me it was no problem and that he did it all the time for the Honda guys
. Total cost was $200 for the lightening, resurface and balancing the flywheel and pressure plate together.The flywheel must be balanced afterwards, you can see the drill marks he left on the engine side of the flywheel. No adjustment on the clutch needed as its the same dimensions as a stock flywheel, just with the extra weight on the backside removed. Ive heard the Fidanza flywheel is slightly thicker and when paired with the KEP pressure plate and 930 disc that causes problems (951 Cup disc must be used).
06-24-2009, 08:38 PM
#23
Racer
Join Date: Apr 2004
Location: Eden, UT
Posts: 398
Likes: 0
Received 0 Likes
on
0 Posts
Jon, I've been off since last Friday, I could have helped you. My feeling is a tranny or engine removal
always goes better with a helper. Great job though, I knew you could do this, almost 24 hours though Ugh.
Can't imagine that in 2 days. I'm glad you didn't do this on the driveway, no snow this time though, just
rain every friggin day. I don't know why the ground on the bell housing was such a hassle.
06-24-2009, 09:40 PM
#24
Nordschleife Master
Thread Starter
Dont sweat it Gary, had a entire crew of people hanging out at the shop during all hours both days. Plenty of beers, coffees, Wendy's and donuts consumed by all.
The ground strap was just a pain because i have so much crap hanging right over that area. Braided oil feed line, heater control valve, wideband controller, steam vent line...etc. Just no place to squeeze anything in there.
I spent 4 hours today replacing the speed / ref sensor bracket with the correct shielded one. A good portion of that was spent out in the rain. Hardcore or just stupid.. you be the judge. I took the intake manifold off because frankly i cannot see doing it with that still on. The lower bolt for the bracket is a pain to get to. I ended up draining the coolant partially (i hate draining it) so i could move the heater control valve out of the way. Mind you i am very stubborn and will do everything possible to avoid draining the coolant..so if i drained it, clearly it was just not possible to do it without  .
.
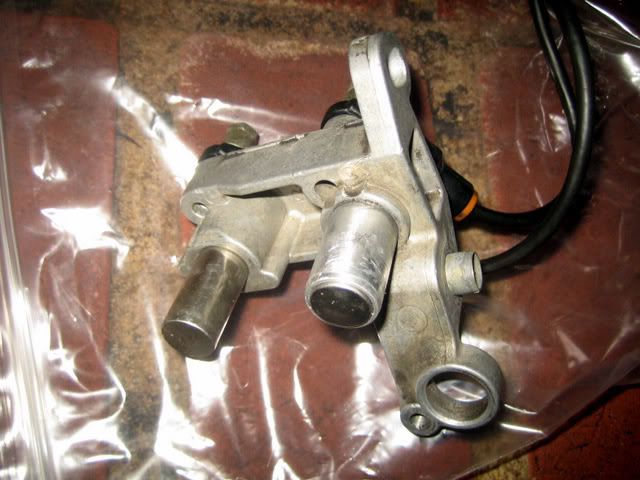
Here is the correct shielded bracket. The difference between this and a early style bracket is a slightly larger hole for the forward most sensor to accommodate an aluminum shielding sleeve. What boggles my mind is this aluminum sleeve is $60+ new from Porsche! Anyhow have started the car twice now and the annoying hiccup on starts is gone..thank gosh. BTW, i did consider wrapping my entire starter in aluminum foil to try and stop the EMF issues..but i couldnt bring myself to do something that ghetto on this car.
Just waiting for the car to cool off so i can verify coolant level, then i can finally go for a ride. Atleast it stopped raining..
The ground strap was just a pain because i have so much crap hanging right over that area. Braided oil feed line, heater control valve, wideband controller, steam vent line...etc. Just no place to squeeze anything in there.
I spent 4 hours today replacing the speed / ref sensor bracket with the correct shielded one. A good portion of that was spent out in the rain. Hardcore or just stupid.. you be the judge
. I took the intake manifold off because frankly i cannot see doing it with that still on. The lower bolt for the bracket is a pain to get to. I ended up draining the coolant partially (i hate draining it) so i could move the heater control valve out of the way. Mind you i am very stubborn and will do everything possible to avoid draining the coolant..so if i drained it, clearly it was just not possible to do it without .Here is the correct shielded bracket. The difference between this and a early style bracket is a slightly larger hole for the forward most sensor to accommodate an aluminum shielding sleeve. What boggles my mind is this aluminum sleeve is $60+ new from Porsche! Anyhow have started the car twice now and the annoying hiccup on starts is gone..thank gosh. BTW, i did consider wrapping my entire starter in aluminum foil to try and stop the EMF issues..but i couldnt bring myself to do something that ghetto on this car
.Just waiting for the car to cool off so i can verify coolant level, then i can finally go for a ride
. Atleast it stopped raining..
08-19-2009, 02:10 PM
#25
I have a question on this set up. Looks to me that the flywheel has been resurfaced flat, with no step?! (EDIT: looks like I may have read about the 944 flywheel, not the 951) So you can ignore this.
With the KEP PP and 930 disk does it release all the way for smooth shifts and sitting at traffic lights?
The flywheel I just took out of my car looks just like yours and I want to make sure I can use a CUP clutch and KEP PP on it.
08-19-2009, 03:13 PM
#26
Nordschleife Master
Thread Starter
Cole, it releases completley as it should. No issues at all. Infact I think it shifts even better now with the lightned assemby.. The flywheel is about 5lbs under and I think I read the KEP is 3lbs under stock. Everything as a result shifts smoother due to the rotating assemby reacting quicker.
08-19-2009, 04:39 PM
#28
Three Wheelin'
Join Date: Sep 2005
Location: Tulsa Oklahoma
Posts: 1,965
Likes: 0
Received 0 Likes
on
0 Posts
This is very useful information. Thanks for the pictures! I think the only thing preventing me from doing this myself at the moment, is lack of access to a lift. I simply MUST find a place for that. However, I may just take a few days off, get the car to a specialist and just spend my days off helping him and watching the replacement and work.
02-26-2010, 01:29 AM
#30
Rennlist Member
Join Date: Jul 2001
Location: Brisbane, Australia (Formerly: Sunnyvale, CA)
Posts: 2,120
Likes: 0
Received 3 Likes
on
3 Posts
Another PITA was getting the pilot bearing out. Not much room to fit anything up there and none of the pullers were small enough to fit that pilot bearing. I used the old trick of a bolt, with washer, vise grips and a hammer. After about 15 minutes of messing around with it i finally got it out. I used the long turbo mounting bolt for the turbo which i just so happened to have in my tool box.. .
.Could you describe the technique in a bit more detail?