When you click on links to various merchants on this site and make a purchase, this can result in this site earning a commission. Affiliate programs and affiliations include, but are not limited to, the eBay Partner Network.
Replacing the cycling valve WITHOUT pulling the intake manifold
Maybe this will help someone...
A couple of days ago I posted a question on another site whether it was possible to replace the turbo cycling valve WITHOUT removing the intake manifold. Most people said no, or well, maybe, but just pull the intake manifold... well, the answer is YES YOU CAN do it without removing the manifold. My thinking with a car this old is, the more parts you take off, the more likely you are to either break something that wasn't already broken, or drop some small part into an orifice that shouldn't have parts dropped in it and end up with a much bigger problem.
So the pictures below may help someone do the same job.
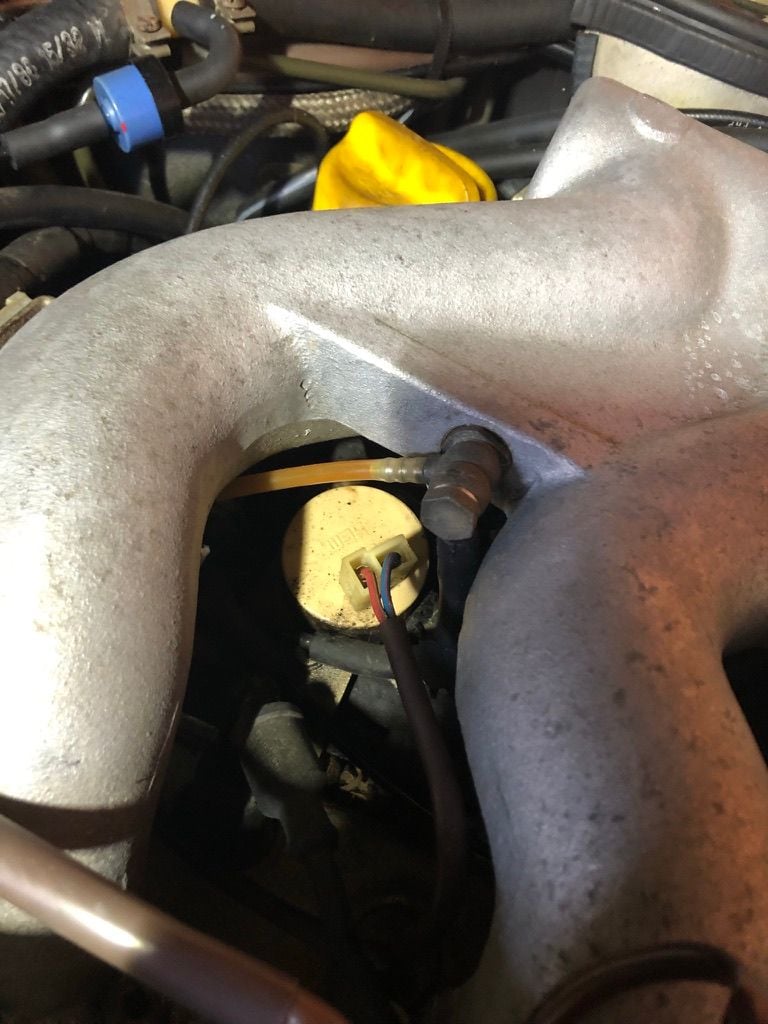
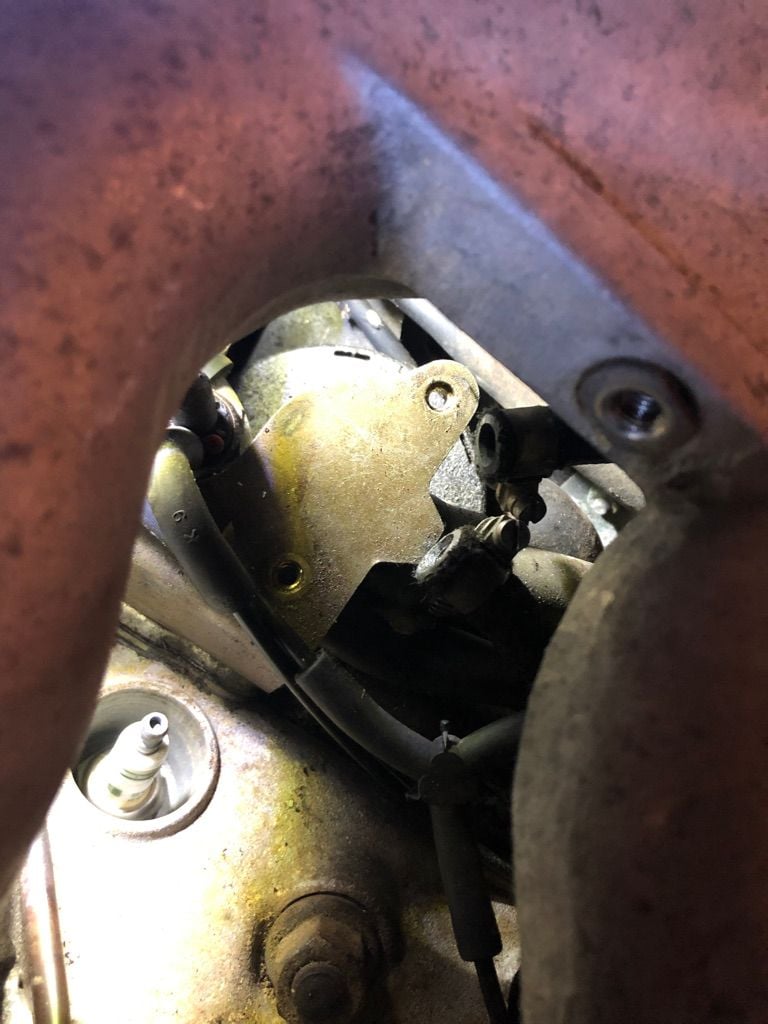
Picture#1 is the location of the cycling valve - it's visible between the intake for #4 and #3 cylinders. If Porsche had located the valve 0.5" further down (in this picture's orientation) then this job would have been easy.
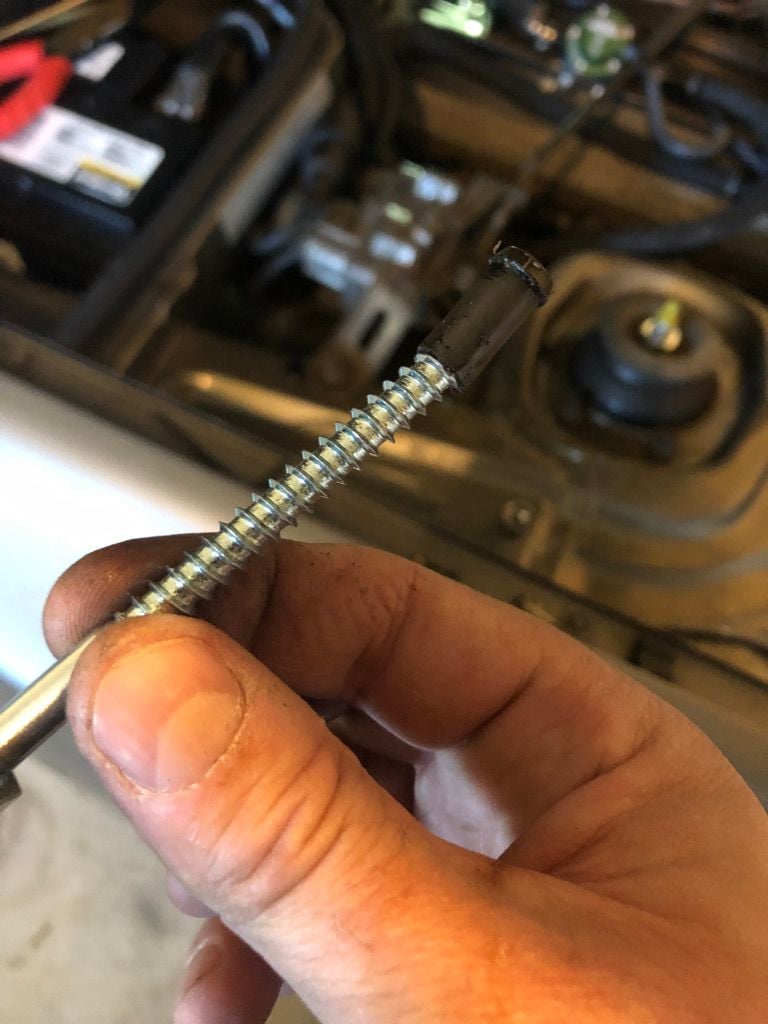
Picture#2 shows what I took off to get access - the banjo bolt above the valve - be CAREFUL here - there is a washer on the BACK of the bolt (closest to the manifold) that you could easily lose, if you aren't paying attention. I also removed the oil filler cap to give access from the other side, and I removed the plug lead. Obviously the electrical connection to the valve needs to be disconnected from the top of the valve. You can see the left most hose and clamp was easily visible, and once the clamp was loosened , I was able to release that hose by pulling from the other side of the car. The other two connections to the valve were broken off already!!!!
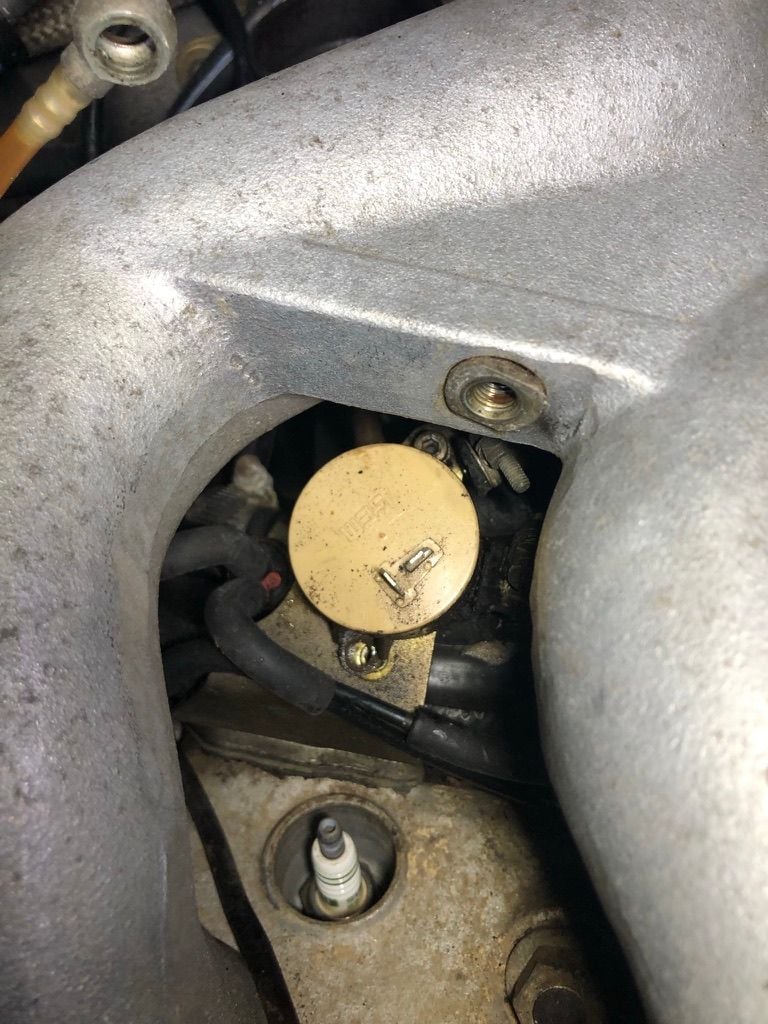
Picture#3 shows the first securing hex-headed bolt removed. The hex head is 4mm.
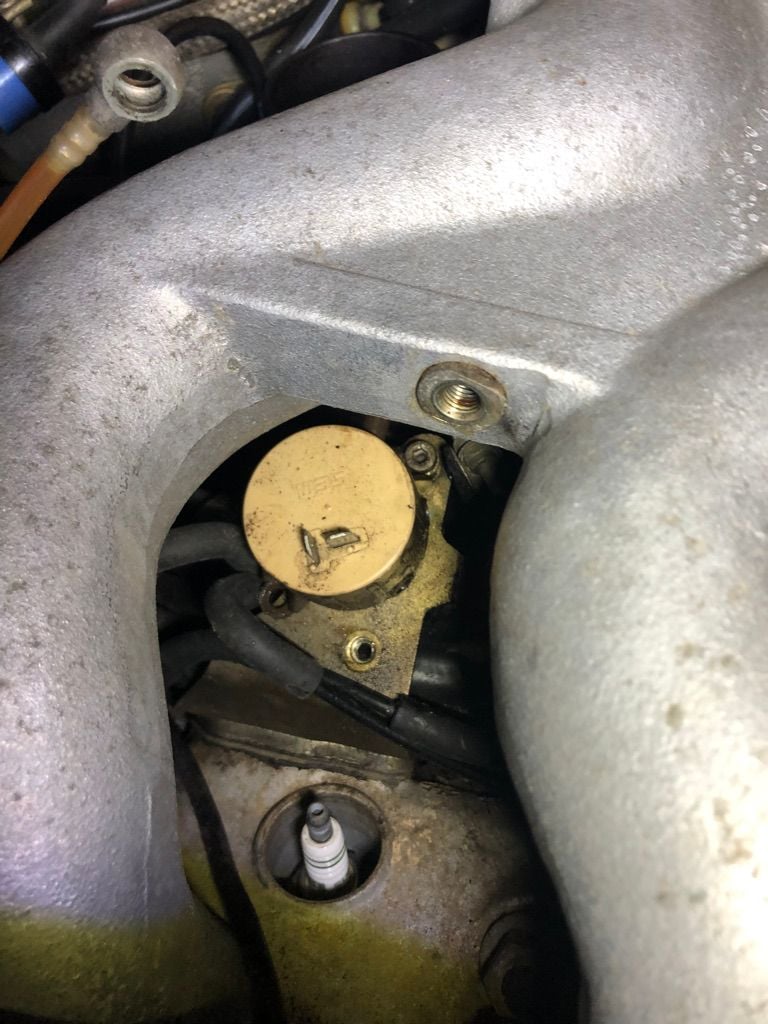
Picture#4 now I was able to rotate the valve toward the firewall to give better access to the other hex bolt that secures the valve to the bracket. I was able to get a long hex key onto the bolt quite easily. I was very careful once the bolt was loose, since there is a washer on the bottom of the bolt. I took the valve out with the bolt to avoid loosing anything.
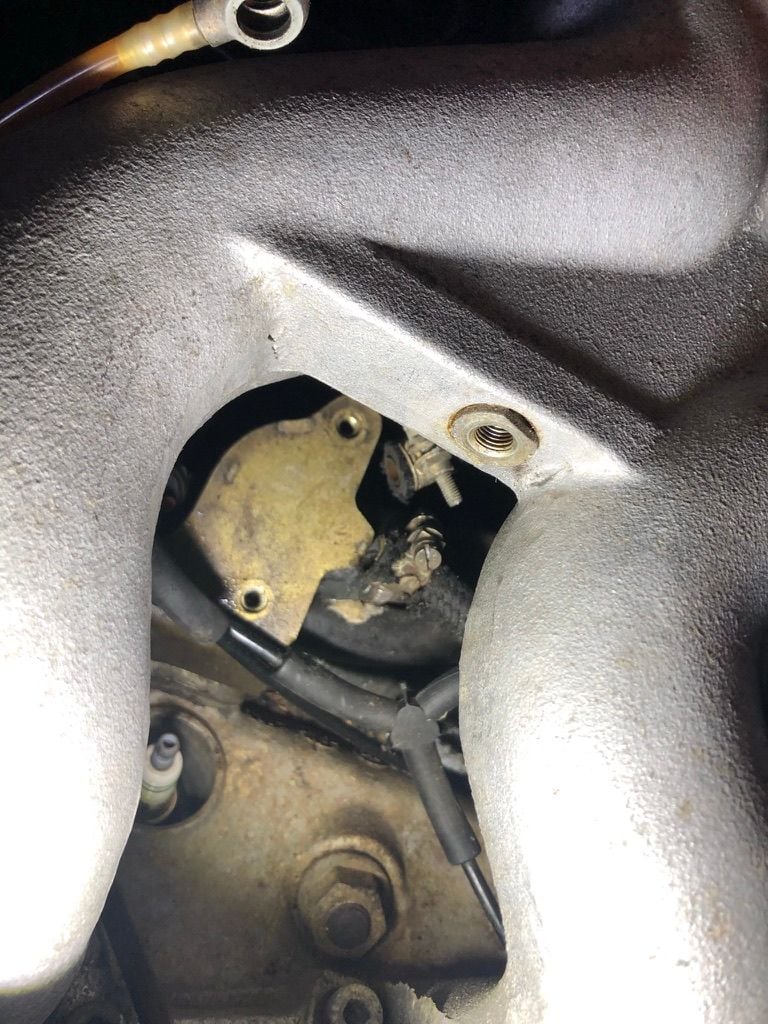
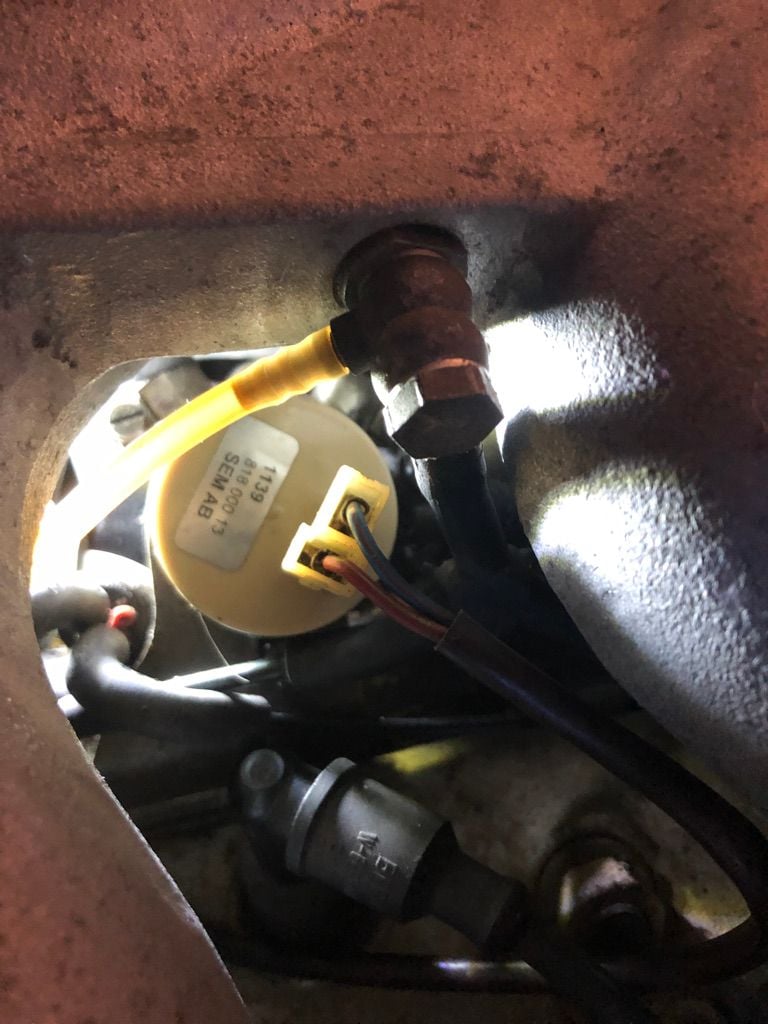
Picture#5 now you can see the two hoses that had snapped off. The nipple for each was stuck inside the hose.
Picture#6 to remove the old broken off nipple I found a hex headed screw that was just larger than the nipple diameter, and used my grinding wheel to shape the end into more of a point. I then firstly tightened the clamps on the hose to ensure the nipple wouldn't rotate and screwed my hex headed extractor into the nipple. Then I released the hose clamps and pulled the nipple from each hose using some long nose pliers. This worked a treat!
Picture#7 all hoses are now ready for the new valve. I connected all hoses BEFORE fixing the valve in place with the hex bolts. It is useful to be able to move the valve around while reattaching the hoses.
Picture#8 for the left most hose I worked from the drivers side of the car. I found a little lithium grease helped the hoses slide onto the new valve. I made sure to ensure the clamps for all hoses were easily accessible in the future.
Picture#9 I was able to work both remaining hoses onto the valve again using a little lithium grease. Reattaching the hex bolt at the top of the valve took a bit of effort - I used a long torx driver of the right size which allowed just enough of an angle to reach the bolt and tightened it down. The lower hex bolt was easy! The rest was just putting back the plug wire, connect the electrical connection to the top of the valve and put the banjo connection back on the manifold. Done!
Last edited by GarageYears; 02-20-2022 at 10:33 PM.
Mine just floats free with a little thermal padding around it.
(Edit) It use to float free before the manual controller, but I'm considering going back to it.

 02-20-2022, 10:31 PM