When you click on links to various merchants on this site and make a purchase, this can result in this site earning a commission. Affiliate programs and affiliations include, but are not limited to, the eBay Partner Network.
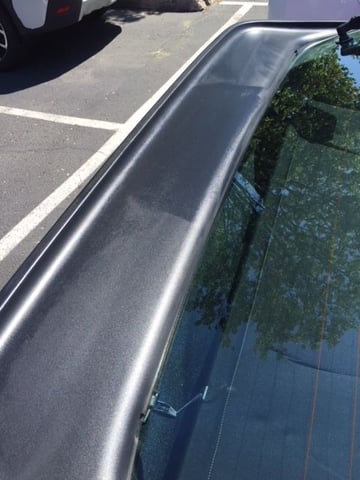
thanks for continuing to update your progress, I do not mean to co-opt a "freebie" consultation, feel free to ignore this post. my question ( and I understand in the scheme of things it's minor) is what is the condition (cosmetically) of the car's rear wing, see mine below, uneven discoloration, does your body/paint guy have a recommendation? and again, thanks.
thanks for continuing to update your progress, I do not mean to co-opt a "freebie" consultation, feel free to ignore this post. my question ( and I understand in the scheme of things it's minor) is what is the condition (cosmetically) of the car's rear wing, see mine below, uneven discoloration, does your body/paint guy have a recommendation? and again, thanks.
Hm. I'm not sure what would have caused the discoloration on your rear wing. When I purchased the car the rubber was faded and dry but the product below really soaked into it and provided a nice rich (matte) finish - the rubber looked healthy. If I were in your shoes, I'd thoroughly clean the wing with a safe soap and once it dried out, I'd apply something similar to what I use below. l apply about once a year and it stays a deep black for some time. Good Luck!
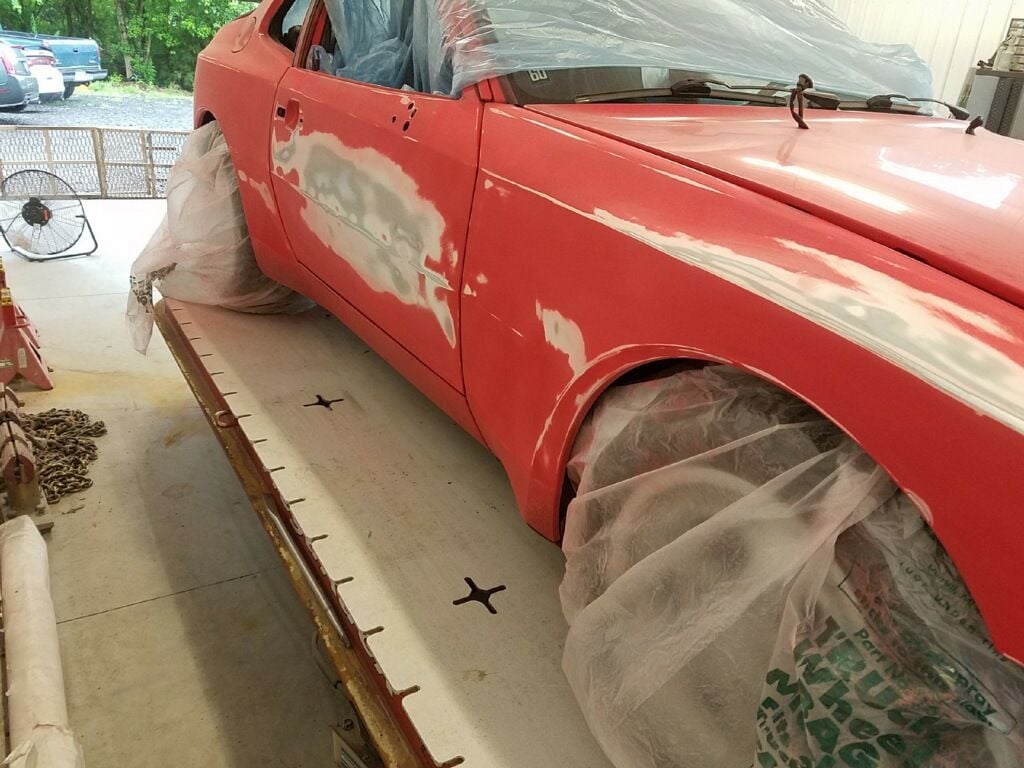
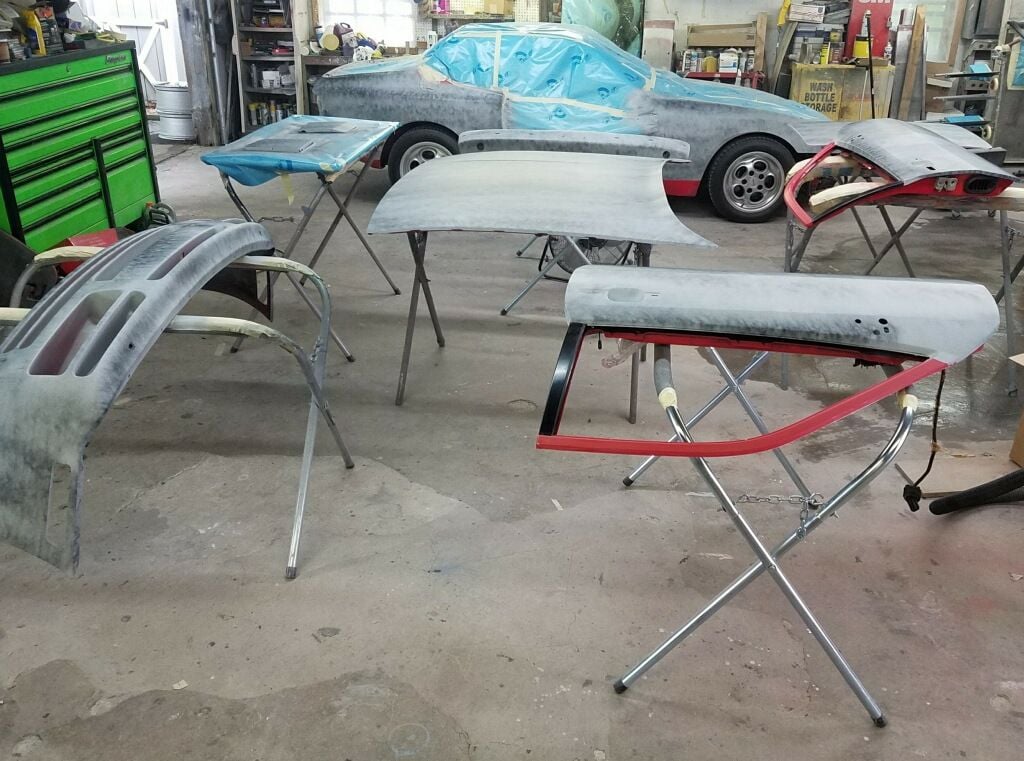
Work continues on the car. Additional body work should be complete today prior to primer being applied (hopefully tomorrow). My body guy tells me that we should be ready for paint by the end of next week.
*One note here, I wasn't particularly happy with the protective measures taken to stop dust from entering the interior. He assured me the shots were taken once the protective (bags) were removed. And as for the question regarding pricing - the body shop and I went back and forth for all of the work listed below and agreed on a flat number including parts listed.
Block entire car/fix dents/re-align panels as needed - paint (confirmed - no rust was found)
Re-apply stonechip to rocker panels
Paint and apply front bumper wiper caps (remove existing sprayers)
Remove metal crest and apply Porsche OEM decal (clear over)
Hm. I'm not sure what would have caused the discoloration on your rear wing. When I purchased the car the rubber was faded and dry but the product below really soaked into it and provided a nice rich (matte) finish - the rubber looked healthy. If I were in your shoes, I'd thoroughly clean the wing with a safe soap and once it dried out, I'd apply something similar to what I use below. l apply about once a year and it stays a deep black for some time. Good Luck!
Your original messages to this thread described taking finish down to original primer/sealer, is that not correct...?
Because that's not what you are getting here.
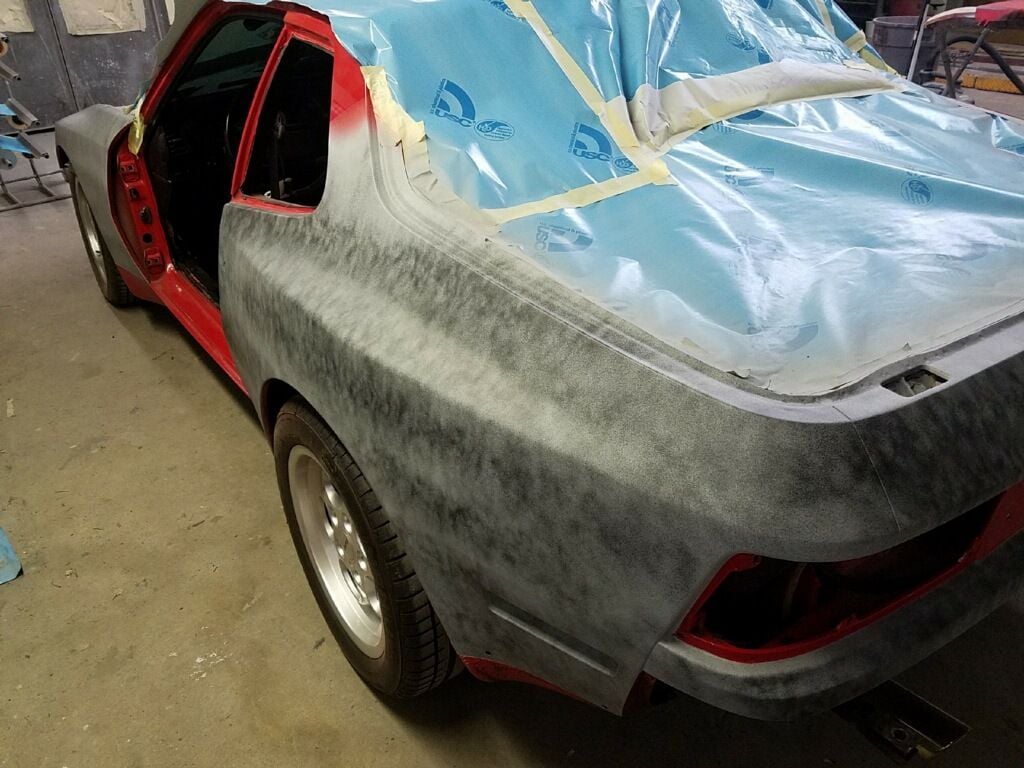
In the 1st set of pics after they started, they had masking tape around even the window gasket which is a good precaution that sanded paint dust doesn't make it inside a door which can be very costly to them if it blows out while spraying. I take mine off so I wash them out with soap and water. They look to be doing a good job of respecting your car and interior. I only mask wheels when spraying material, they even had masked your wheels during sanding.
I would say it's fine to prime over the factory guards single stage paint that's left on the body @80-180 grit but who knows what is factory and what is not.
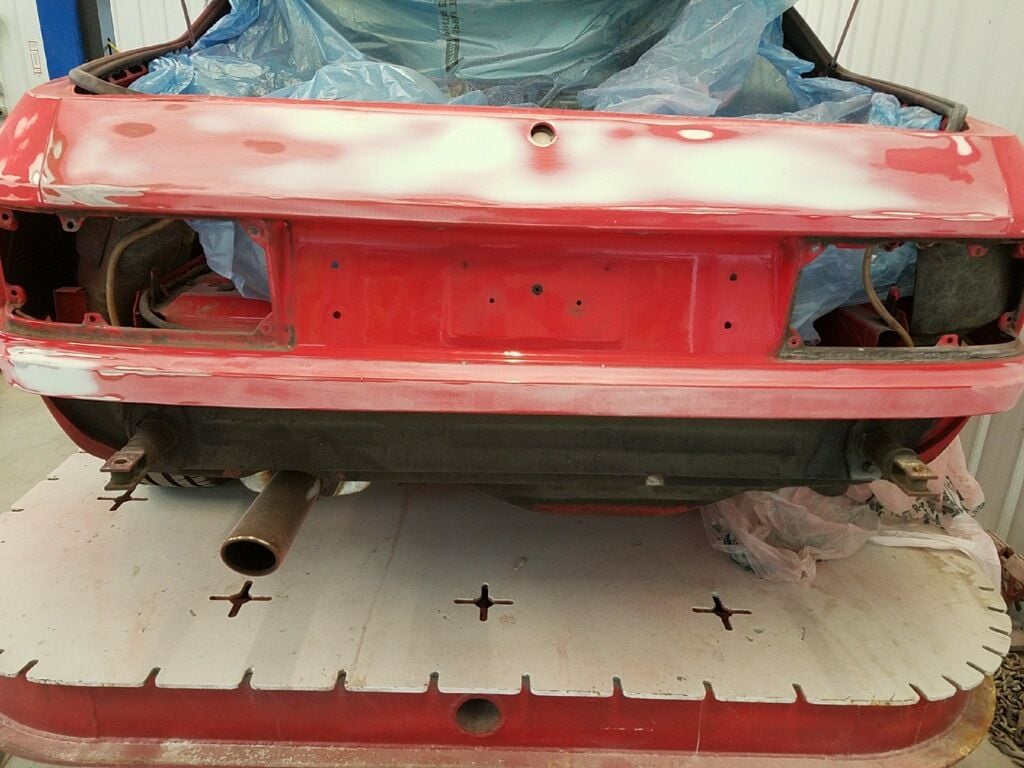
In the pic of the rear right before the pic of the sun roof panel, that weird shaped feather spot looks like a clearcoat remnant, not even original factory paint.
Cannot tell because the area that may have needed that much filler (?) on the sunroof is already spread but for mechanical adhesion, fillers need 80-180 grit scratches unless it's in the fine-fill category like finishing putty/glaze or icing. Judging by the amount that's on there (LOL), I'm gonna have to assume that's just rough filler, not a fine sanding finishing putty pass.
Some parts of the sunroof are still shining, which worries me but, since we can't see the prep, it's just as easy to assume the sanded the area where the filler is was roughed before applying it.
T
Last edited by 951and944S; 05-24-2018 at 10:57 PM.
Your original messages to this thread described taking finish down to original primer/sealer, is that not correct...?
Because that's not what you are getting here.
In the 1st set of pics after they started, they had masking tape around even the window gasket which is a good precaution that sanded paint dust doesn't make it inside a door which can be very costly to them if it blows out while spraying. I take mine off so I wash them out with soap and water. They look to be doing a good job of respecting your car and interior. I only mask wheels when spraying material, they even had masked your wheels during sanding.
I would say it's fine to prime over the factory guards single stage paint that's left on the body @80-180 grit but who knows what is factory and what is not.
In the pic of the rear right before the pic of the sun roof panel, that weird shaped feather spot looks like a clearcoat remnant, not even original factory paint.
Cannot tell because the area that may have needed that much filler (?) on the sunroof is already spread but for mechanical adhesion, fillers need 80-180 grit scratches unless it's in the fine-fill category like finishing putty/glaze or icing. Judging by the amount that's on there (LOL), I'm gonna have to assume that's just rough filler, not a fine sanding finishing putty pass.
Some parts of the sunroof are still shining, which worries me but, since we can't see the prep, it's just as easy to assume the sanded the area where the filler is was roughed before applying it.
T
Thanks for the additional notes and insight. When I last spoke to him he mentioned that the car was taken down to the factory paint (to your point not sure how he can tell when he got there). I also agree that some areas seem to have a lot more filler than others judging by the white material. He mentioned that they weren't quite ready for primer yet so hopefully there's more work to be done. Knowing my attention to detail and general OCD for a perfect final product it's definitely tough to get progress shots and not be exactly sure what the process is. At the same time, I don't want to question his every move and have him pissed off ha. Sounds like the next update will be coming on Tuesday.
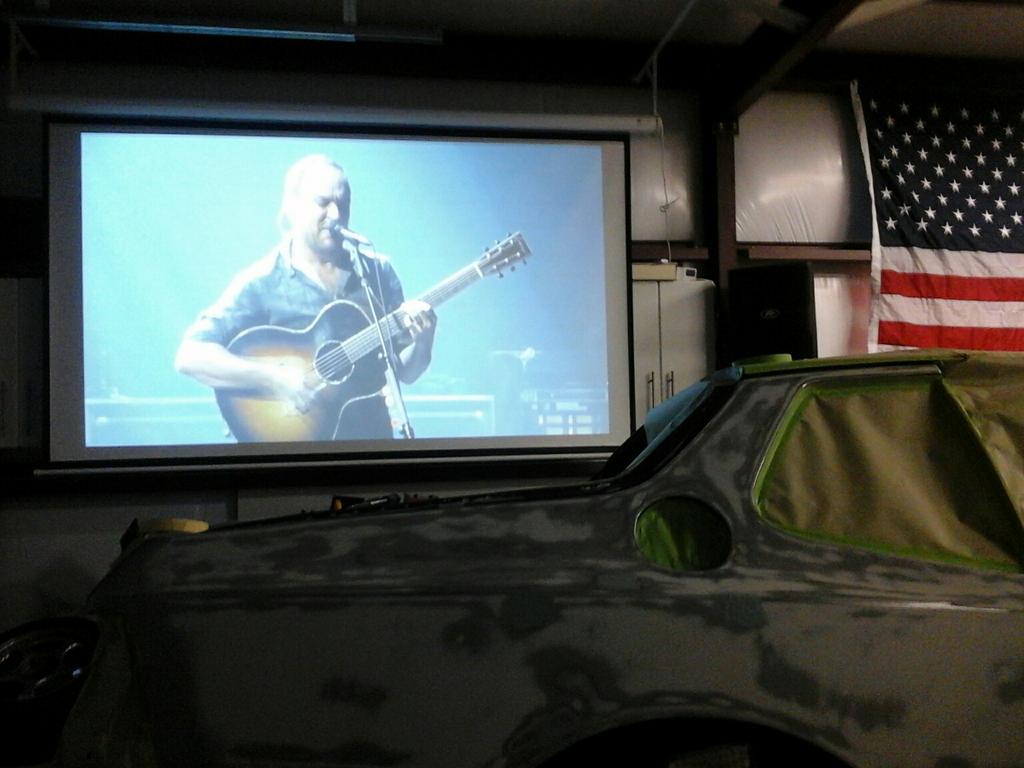
I remember there being a lot of blistering on the sunroof edges which show white in the pictures. I assume a decent amount had to be sanded off here before filling back in.
10-4, I wouldn't want to be second guessed either.
Point is, you can use the paint/primer that's already on the car to your advantage when sanding because it already has a mil thickness value.
IOW, there may be a shallow ding that you remember that could have been totally leveled just by block sanding the material that was already on the car.
All in all, they look to be doing a good job.
T
Well, I certainly appreciate the input and definitely welcome any feedback/questions that come up. Definitely a relief to know that knowledgable folks are weighing in.
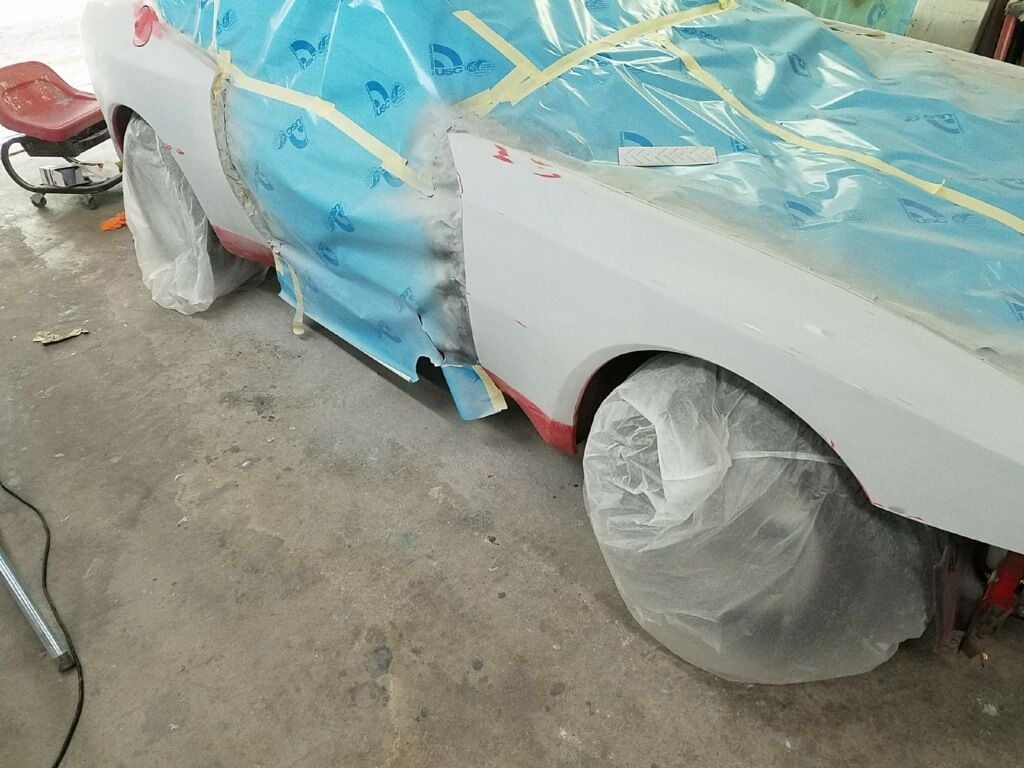
Hm. Interesting update today. I received the pictures below and was told that the car was in "partial" priming stage... and I have a number of questions. Let me know if I should be asking anything additional.
Shouldn't the black trim on the door be removed?
Shouldn't the gas cap be removed?
Was the primer applied in a booth (almost looks like it was from a can - maybe I'm wrong here?)
Will the wheel wells be primed/painted?

 05-22-2018, 07:26 PM